Mini Chocolate Raspberry Cake
Hi, all! How are you doing? Hanging in there? I know we’ve been missing seeing our friends and family and have been missing out on lots of fun times together. However, we can continue to make the best of our situation! My sister’s birthday was yesterday and we obviously couldn’t have an in-person party, so I decided to surprise her with a mini chocolate raspberry cake and drop it off at her house. It was a fun use of time for me, was a nice surprise for her, and yielded some delicious cake- and the best part is, this recipe makes two mini layer cakes so my husband and I got one too! Here’s how you do it!
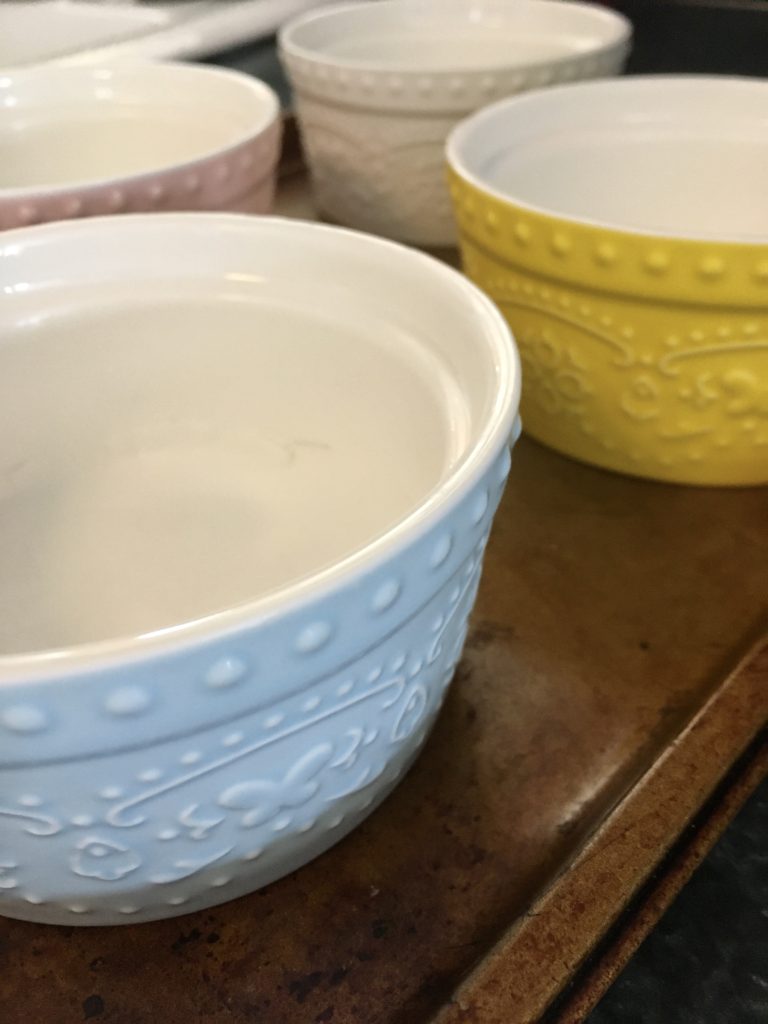
First, grease four 4″ or 7oz ramekins and line the bottoms with parchment paper. Then put the ramekins on a baking sheet so that you’ll be able to move them in and out of the oven easier.
Then, mix up a chocolate cake batter- you can either use a cake mix, or you can make one from scratch (which is what I did). Here’s my recipe for a dark chocolate cake:
Ingredients:
- 1/2 cup granulated sugar
- 1/2 cup all-purpose flour
- 1/4 cup cocoa powder
- 1/2 tsp baking powder
- 1/4 tsp baking soda
- 1/8 tsp salt
- 1 large egg
- 3 tbsp milk
- 2 tbsp vegetable oil
- 1/2 tsp vanilla extract (or extract of your choice- see note below)
- 1/4 cup boiling water
Note: You could also use another flavored extract if you prefer, such as almond or mint. Use the same amount as you would the vanilla.
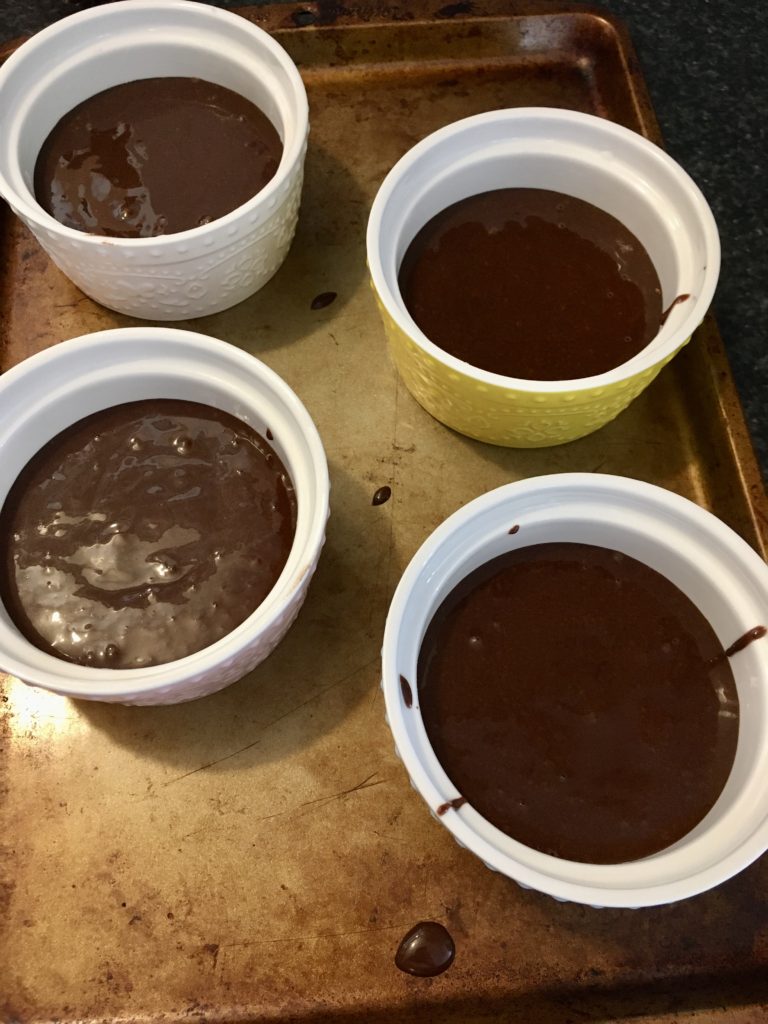
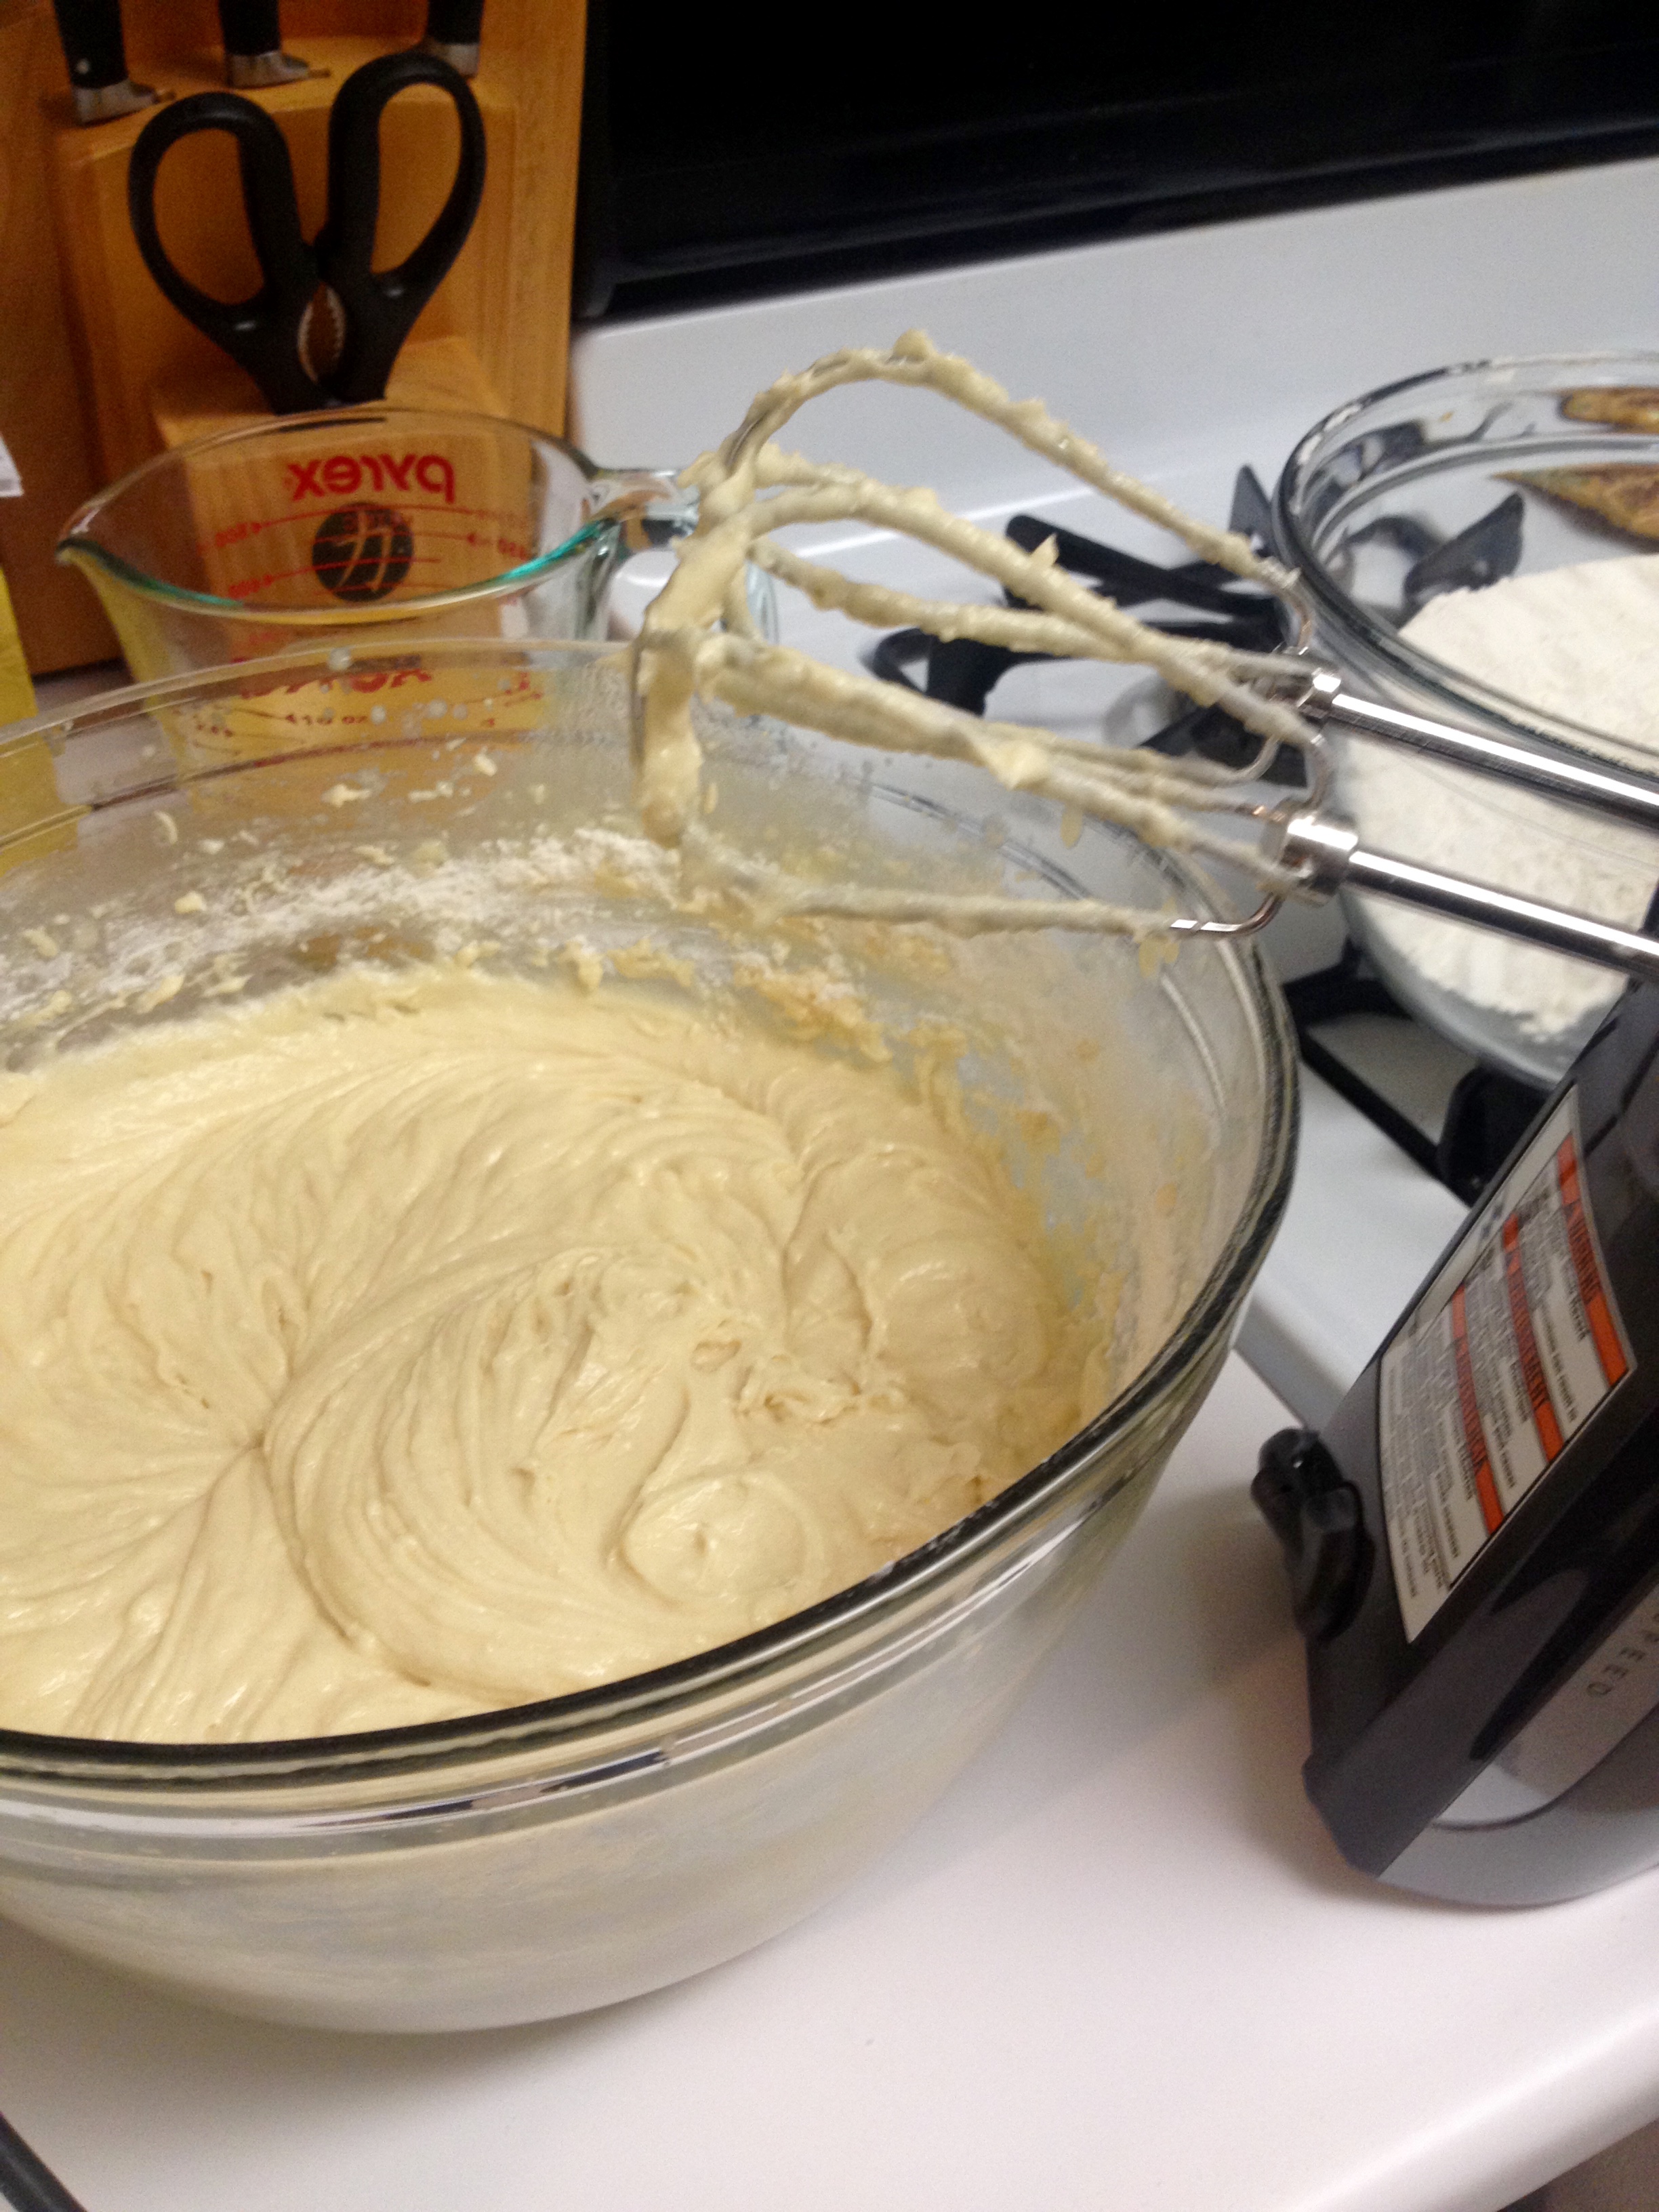
In a stand mixer or with a hand mixer, combine the sugar, flour, cocoa, baking powder, baking soda, and salt. Add the egg, milk, oil, and vanilla and stir to combine. Then increase speed on the mixer to medium and beat for 2 minutes. Then, add the boiling water and beat until fully mixed, about 30 seconds.
Divide the cake batter evenly between the ramekins and bake at 350F for about 20-22 minutes, or until a toothpick inserted in the middle comes out clean. If you’re using a cake mix, preheat the oven to the temperature instructed on the box and then bake for about half the prescribed time, and then check it every couple of minutes until it’s baked.
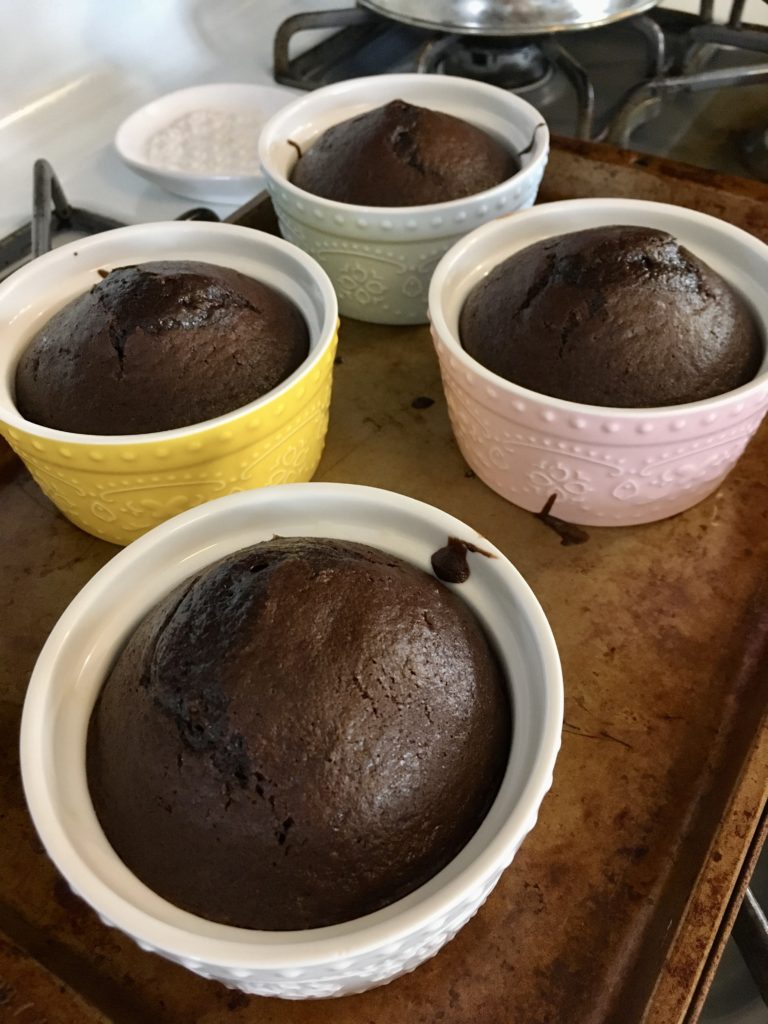
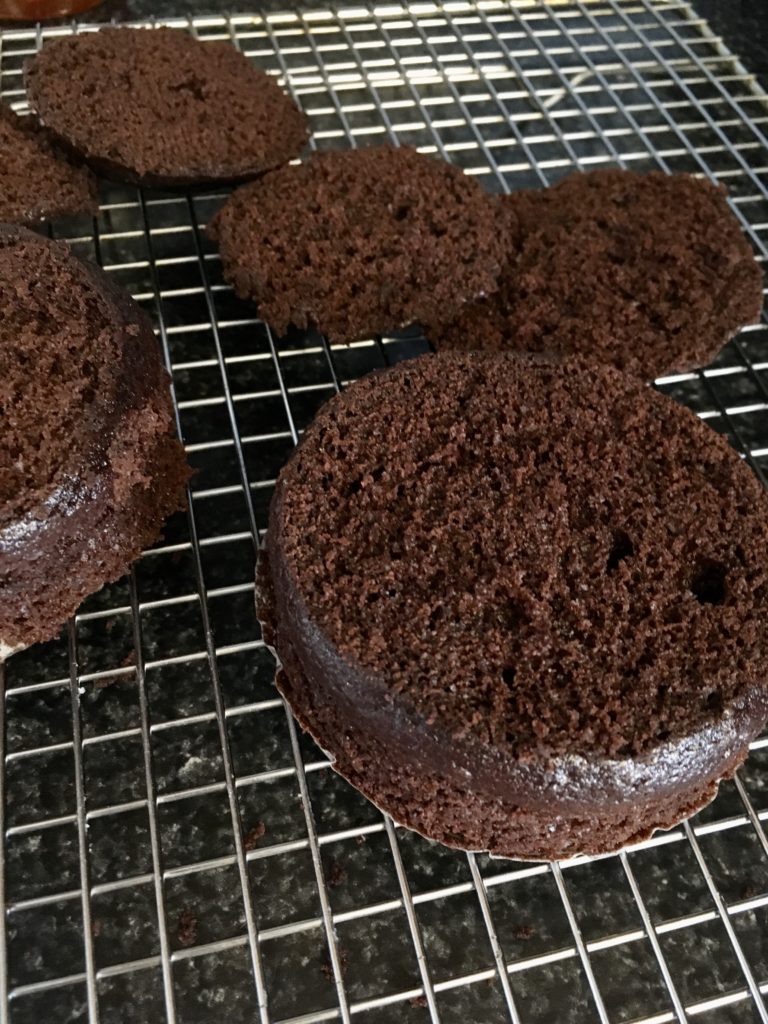
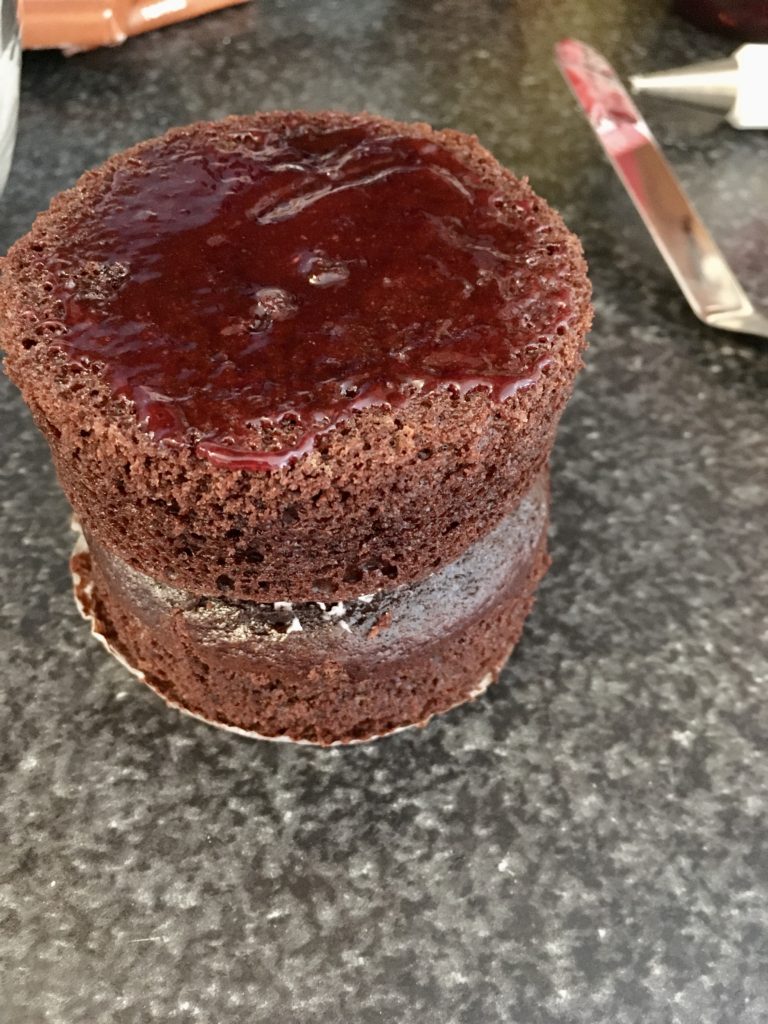
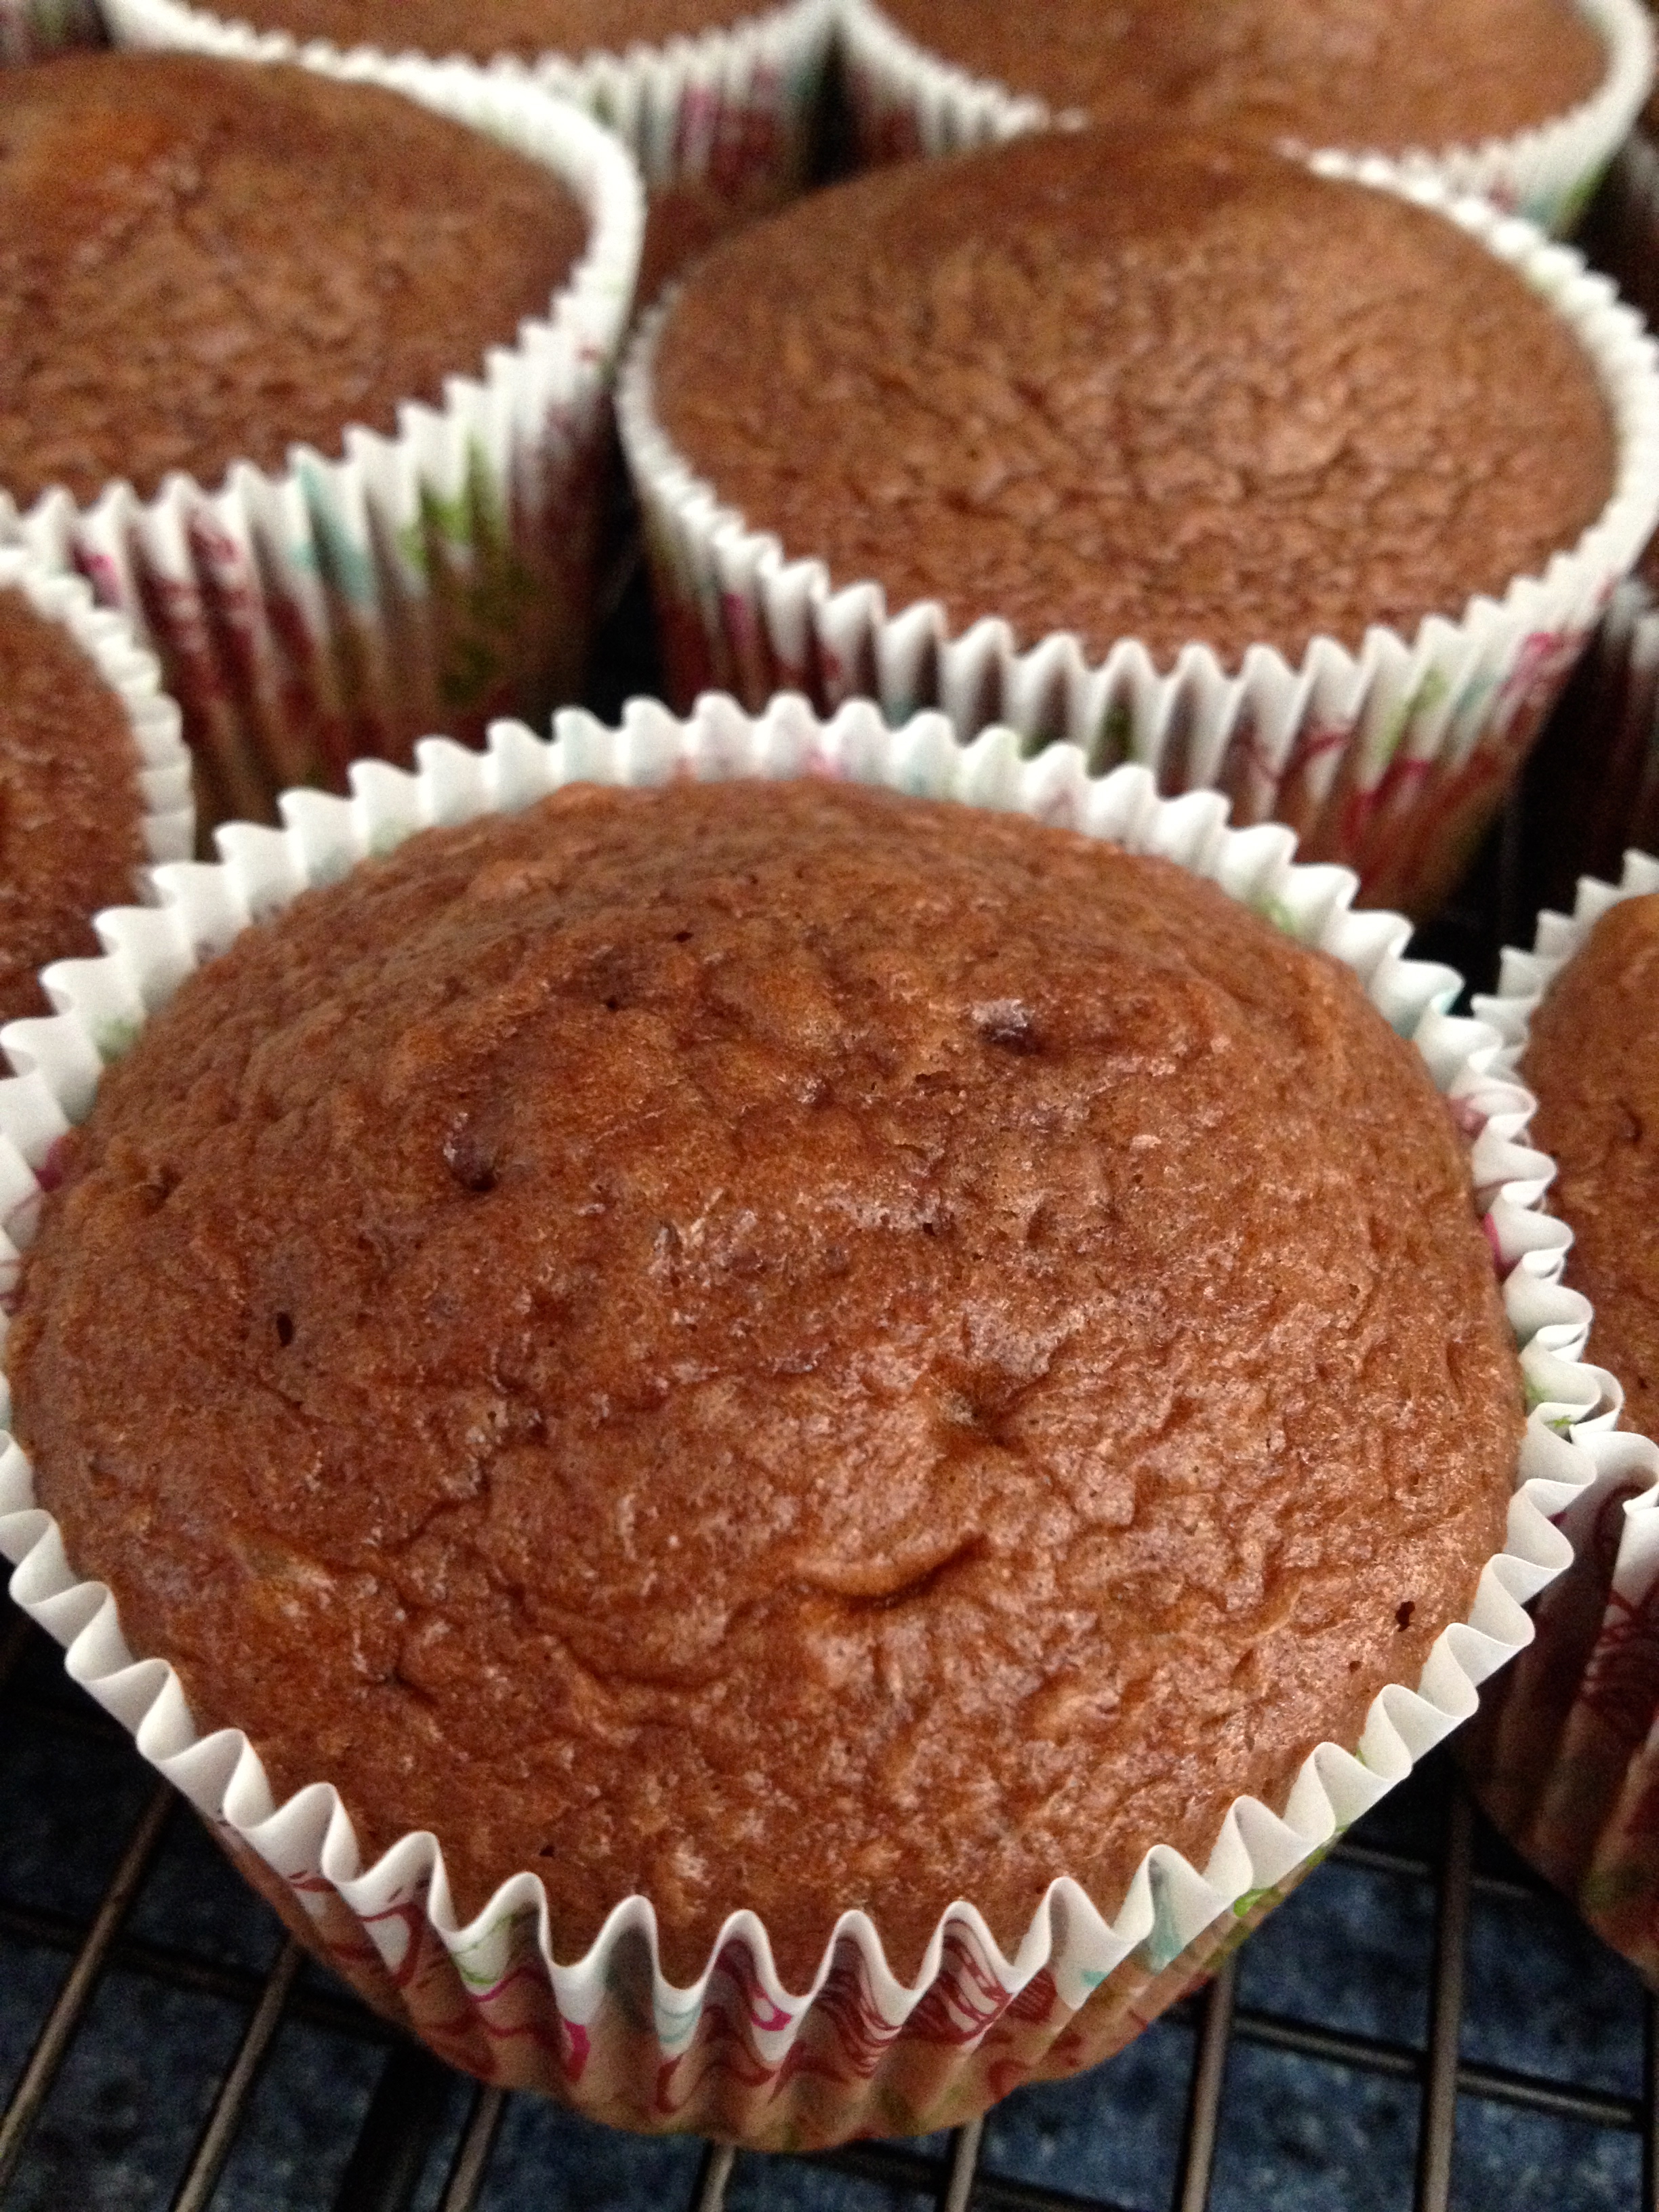
Transfer the ramekins to a wire rack to cool. Once the cakes are cooled, remove from the ramekins and remove the parchment paper. Using a serrated knife, cut the domes off the top of the cakes to create a level, flat surface. Go ahead and eat those yummy cake scraps that you cut off- pro tip, spread a little raspberry jam or peanut butter over them first and make yourself a little cake top sandwich!
Now it’s time to frost. You can either use a canned frosting or one from scratch. Here’s the recipe I used:
Ingredients:
- 3/4 cup powdered sugar
- 3 tbsp softened butter
- 1/2 tsp vanilla (again, could change the extract flavor if desired)
- 2-3 tsp milk
Note: you will also need about 6 tbsp of raspberry jam (about 3 tbsp per layer cake), or other fruit jam/sauce of your choice.
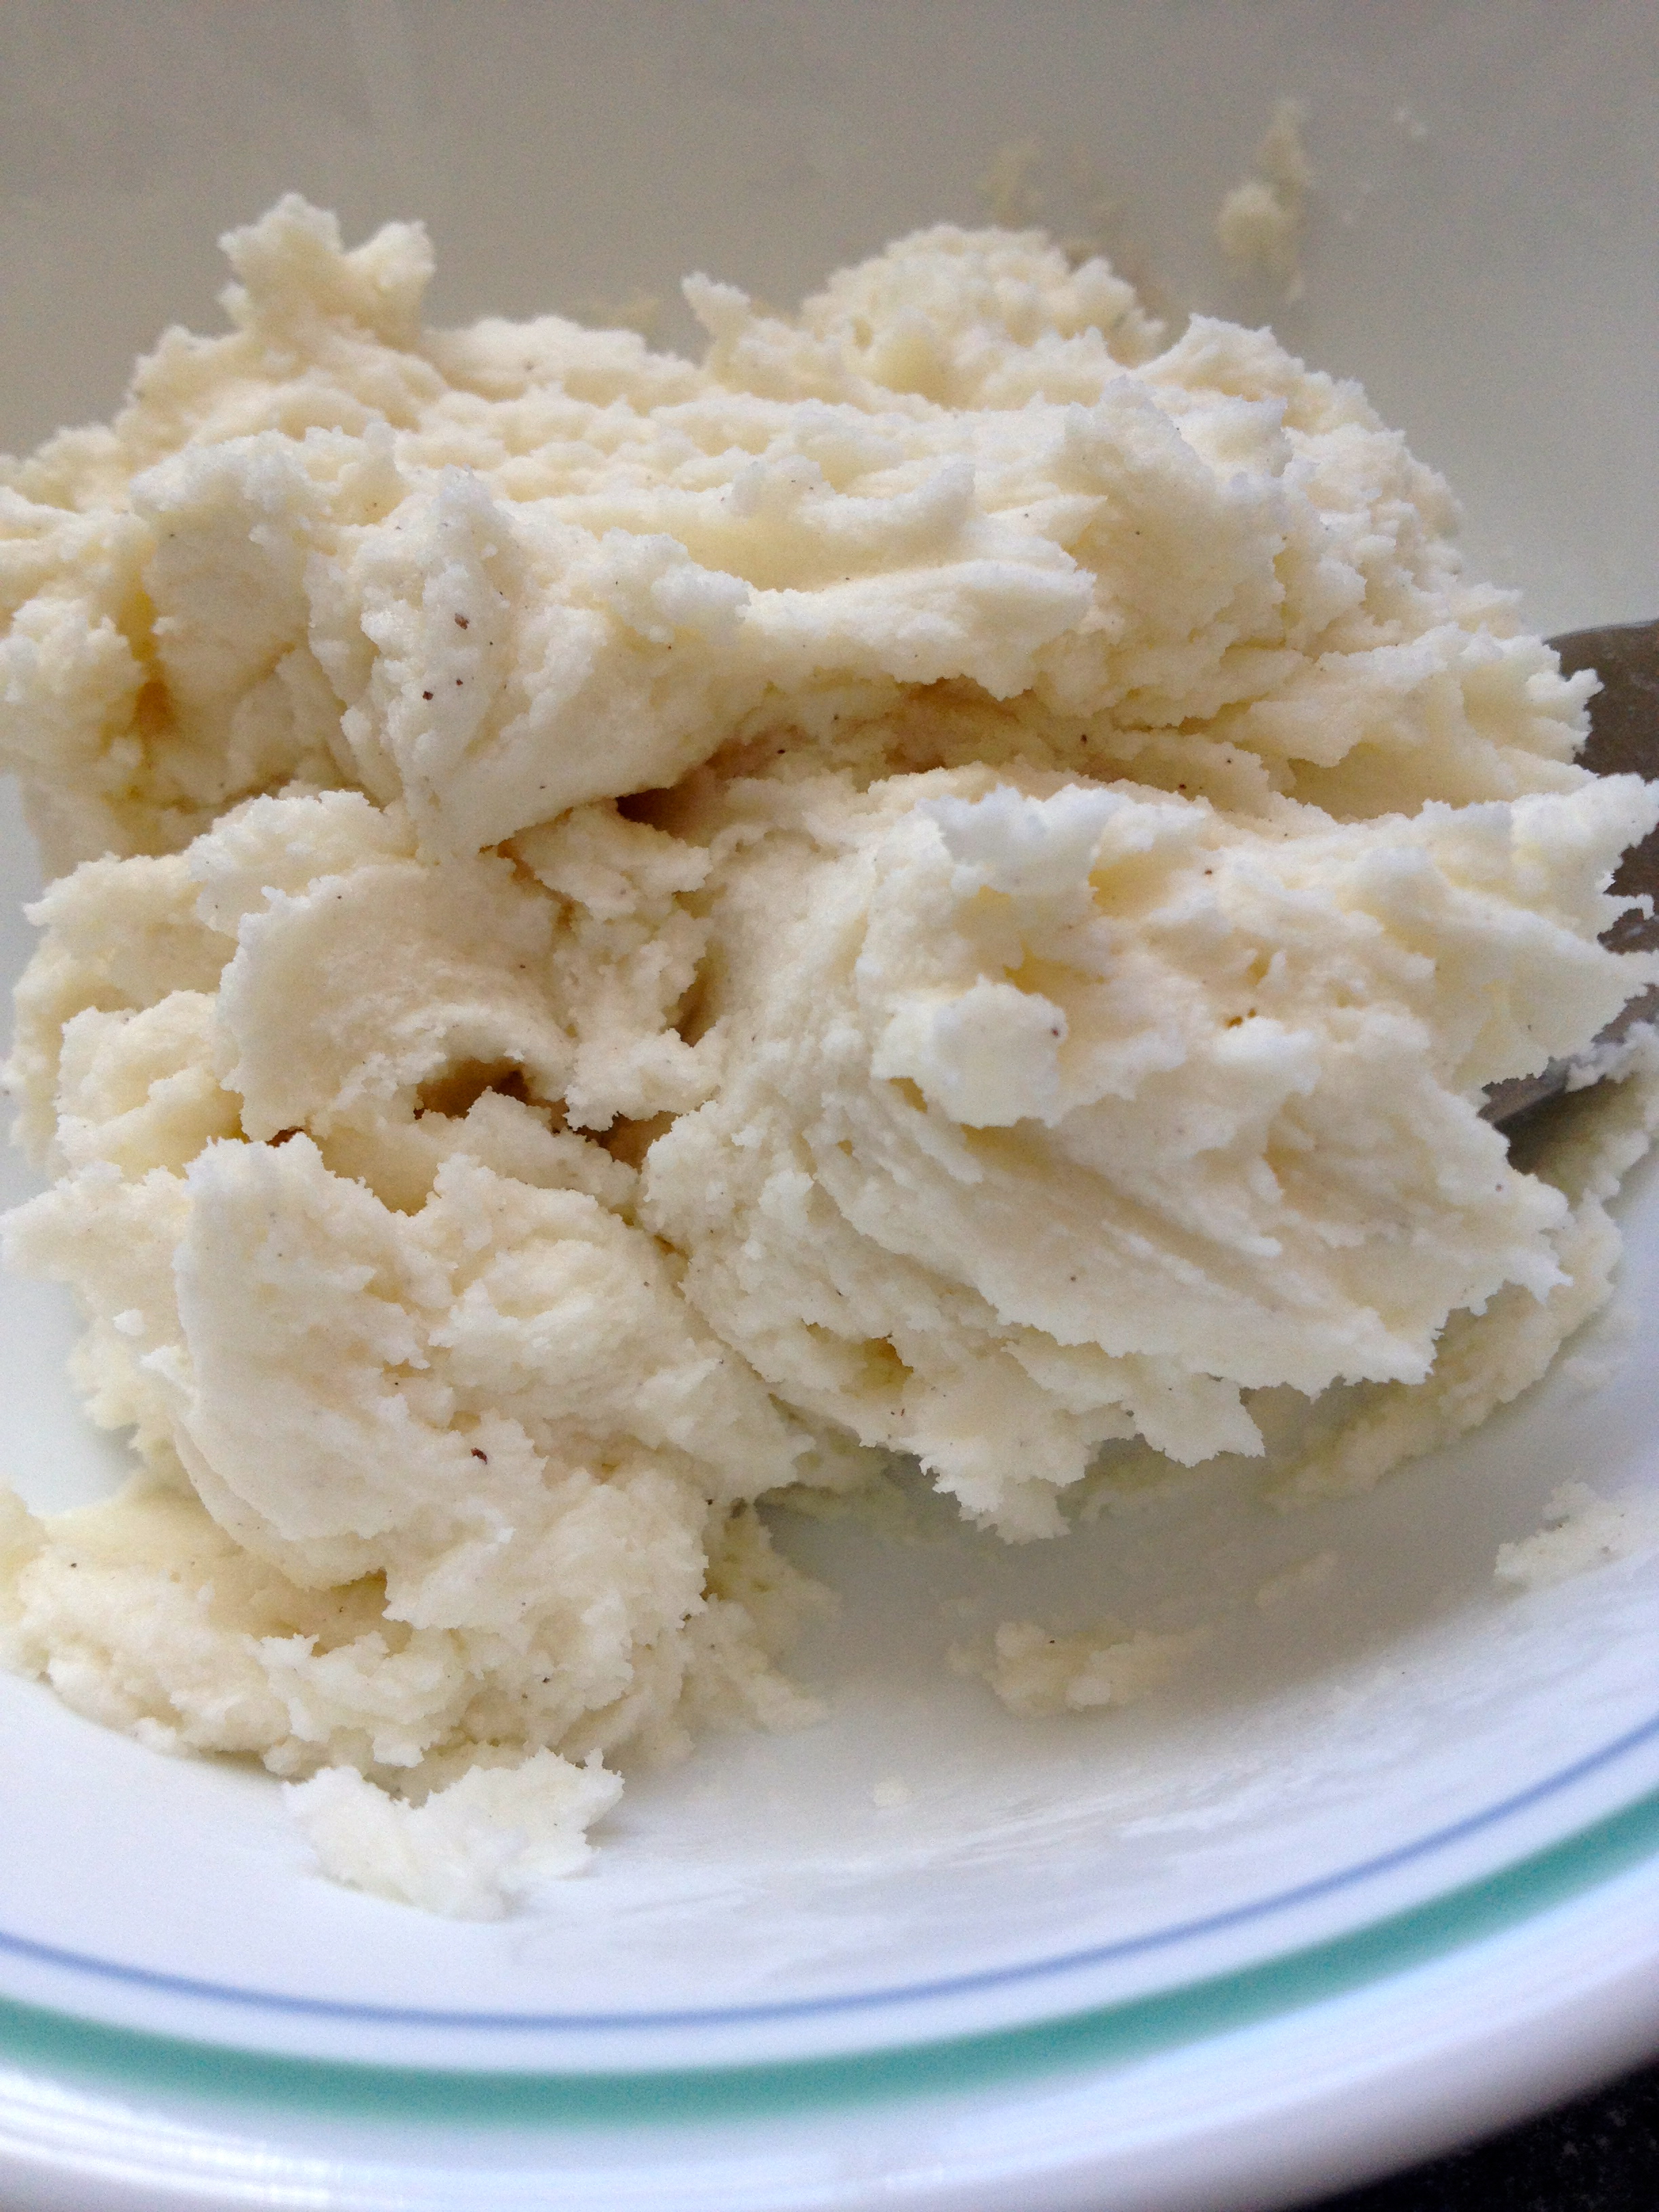
Using a hand mixer or stand mixer, beat the butter, vanilla and powdered sugar together until they are coming together in small clumps. Then add in the milk, a little at a time, and continue to beat until you’ve reached the frosting consistency you want. If you want stiffer frosting, add less milk; if it’s too stiff, add more milk.

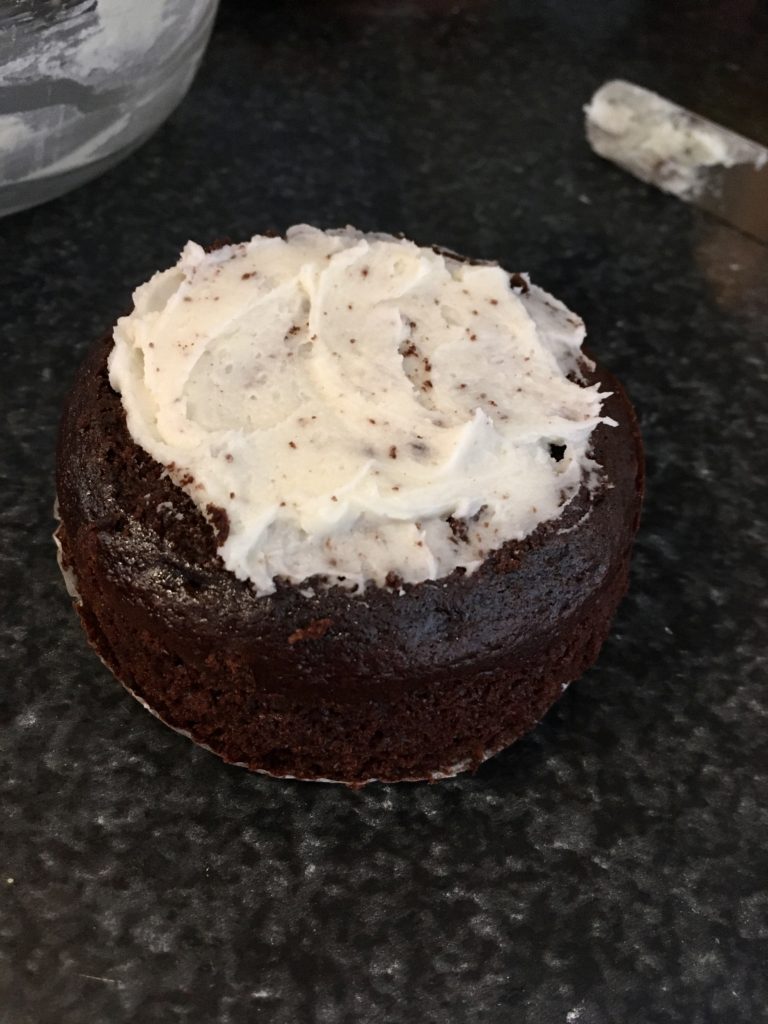
To frost the cakes, you can either use a knife or a piping bag. I wanted to make this cake look a little fancier, so I used a piping bag. To make the cakes easier to frost, freeze them for a few minutes to get them stiff. Otherwise they may crumble a bit when you try to spread the frosting.
First, put about 2 tbsp of the frosting on top of one cake. Dip a knife into water and spread the frosting over the top of the cake just to make an even layer (the wet knife helps prevent the frosting from sticking too much to the knife).
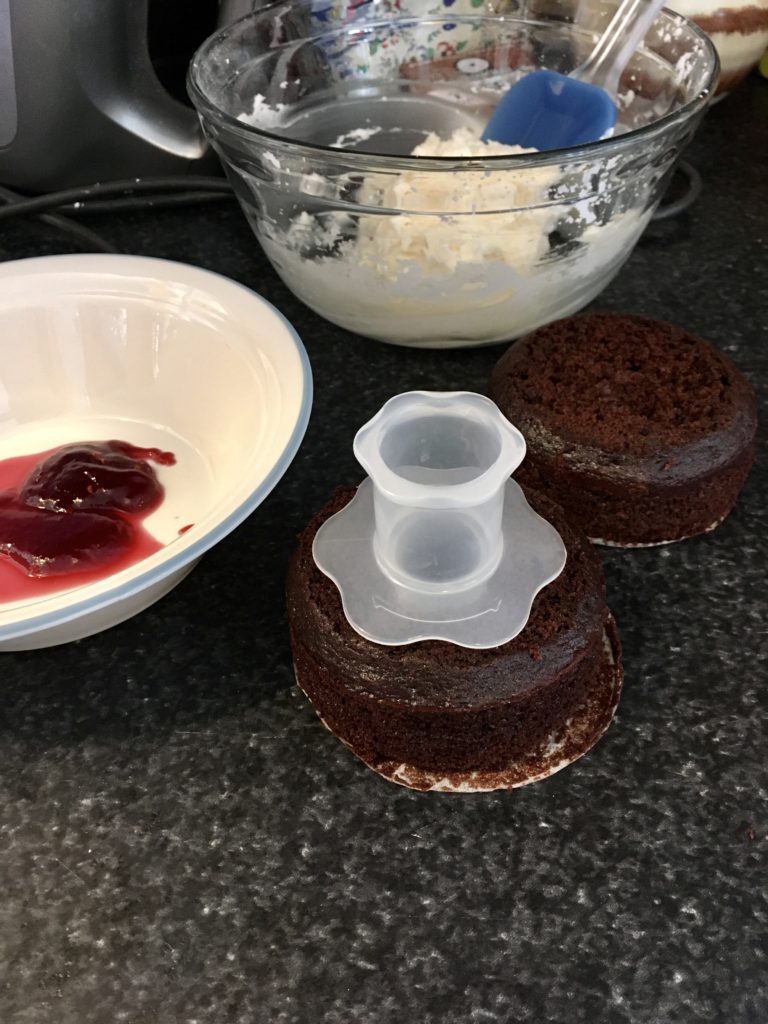
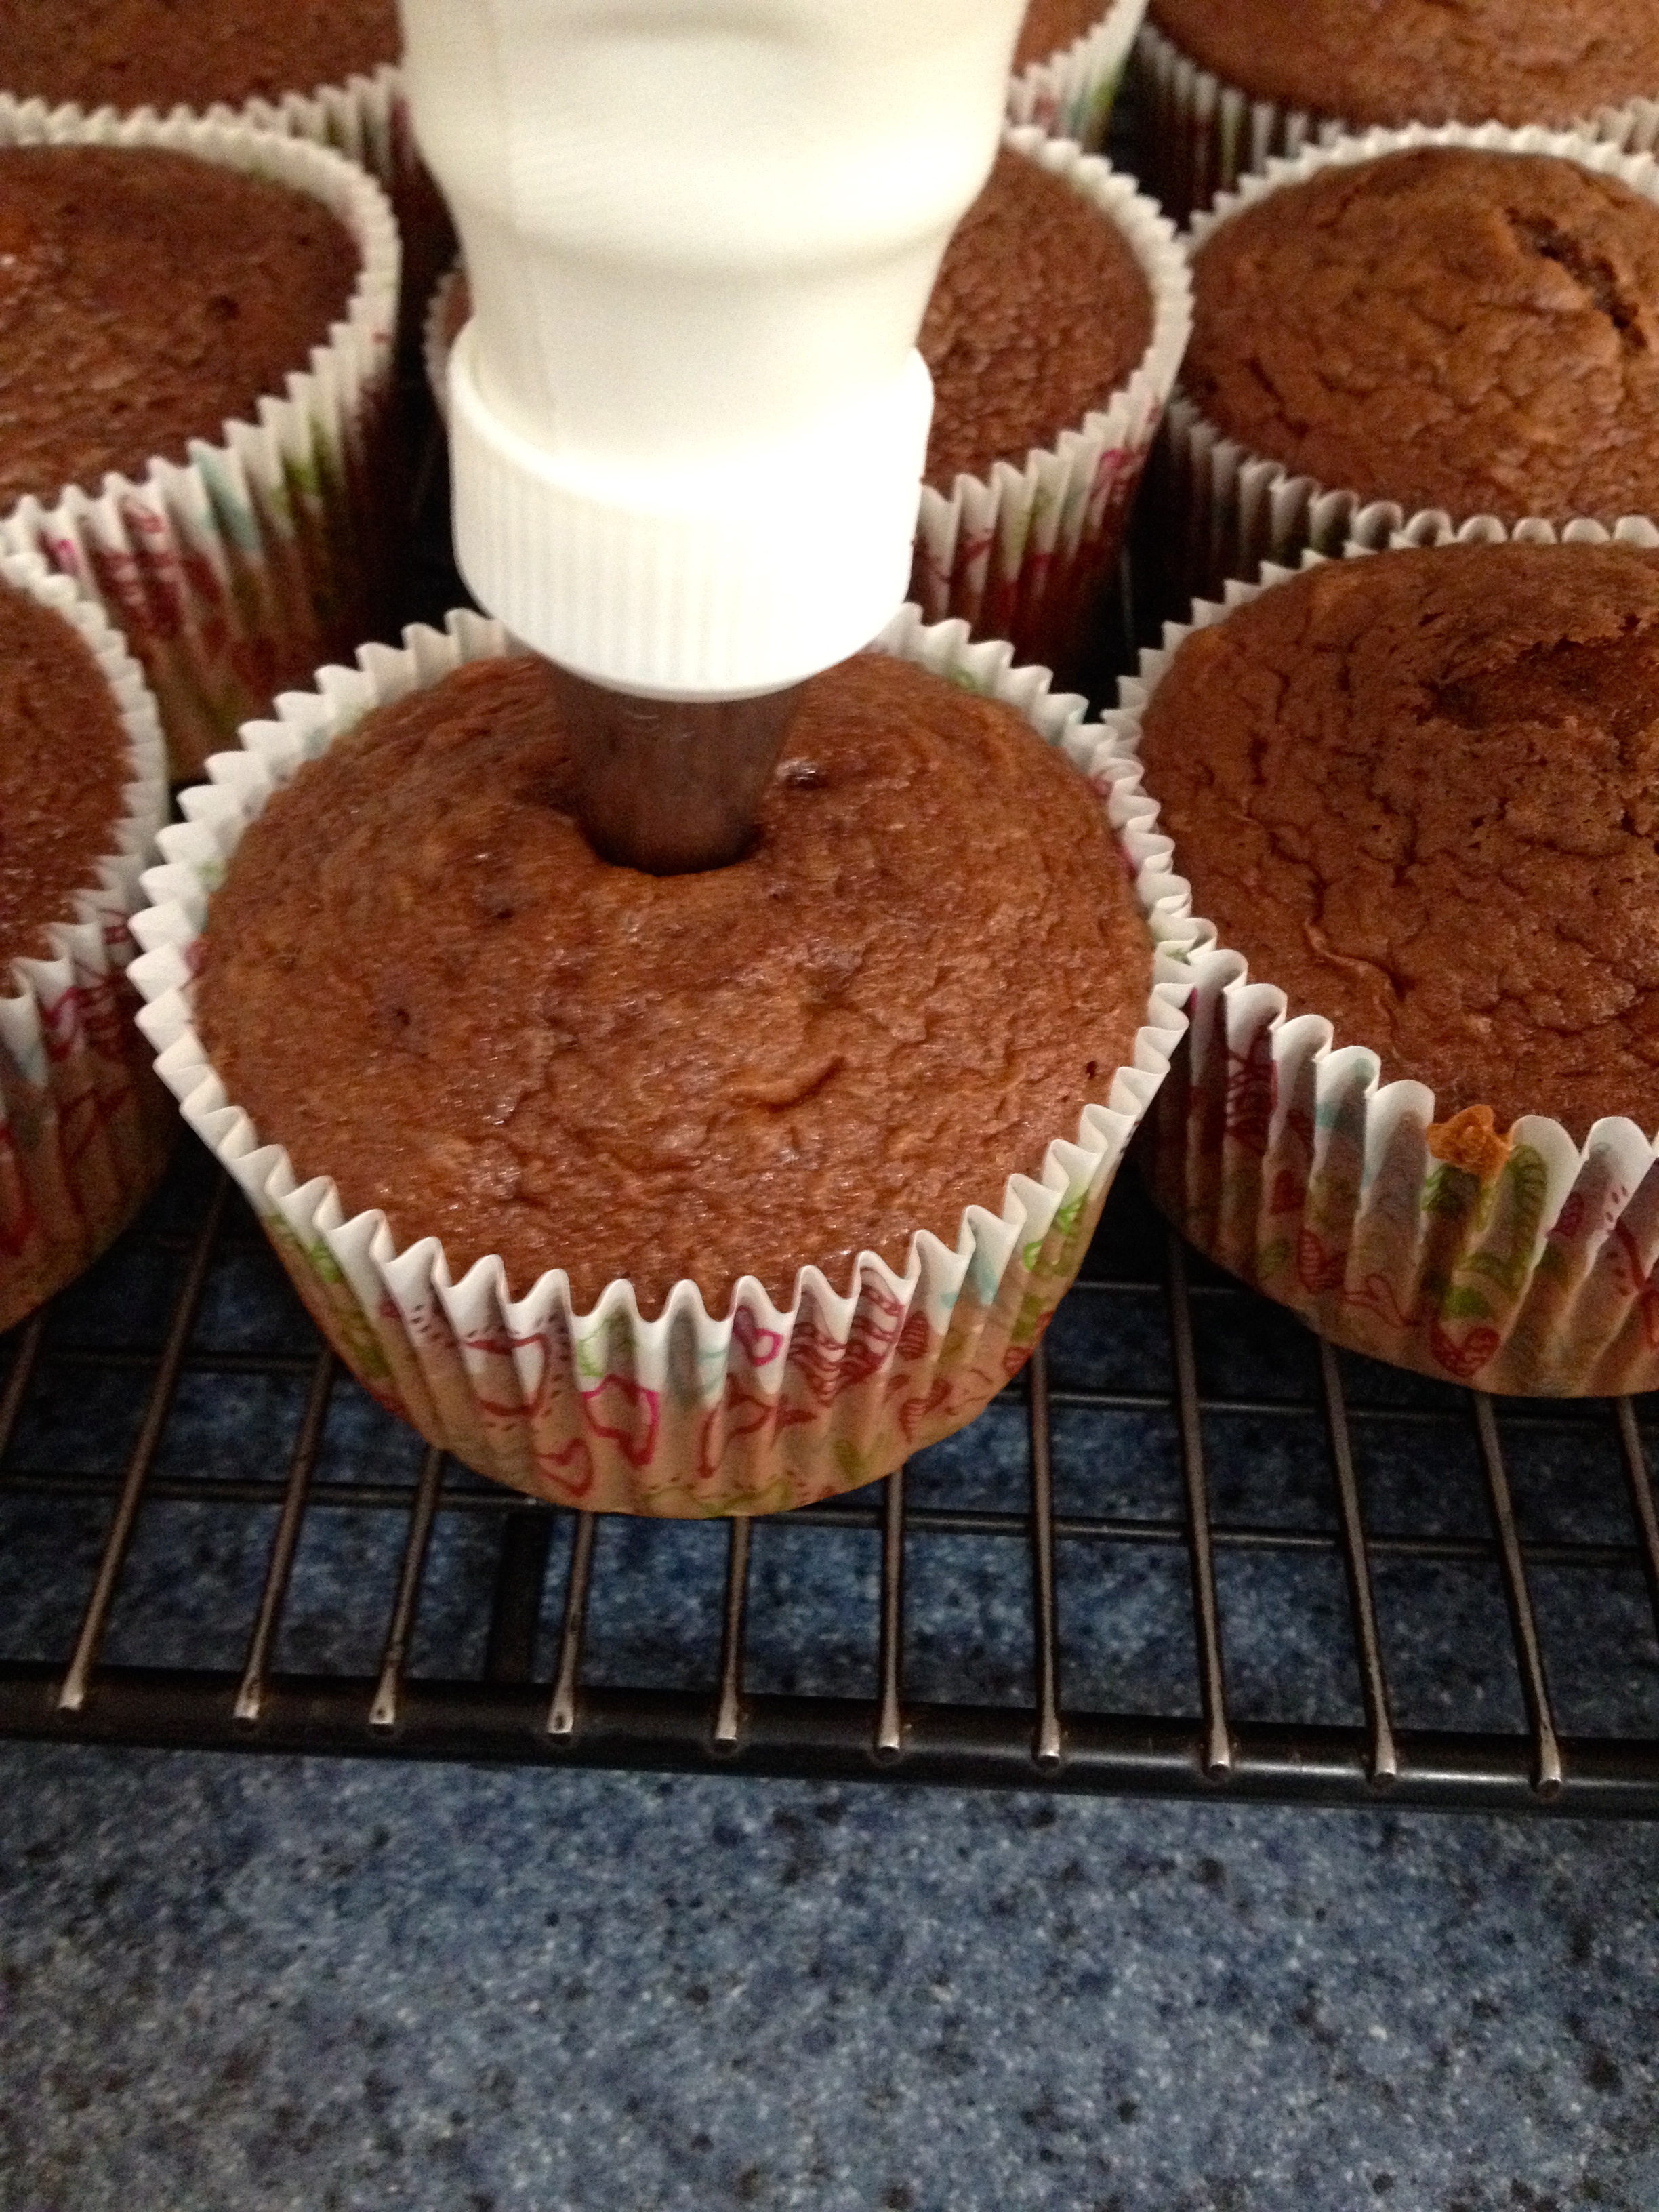
Now take a second cake and cut out a small hole in the middle. You can use a cake corer, a small round cookie cutter, or even an apple corer.
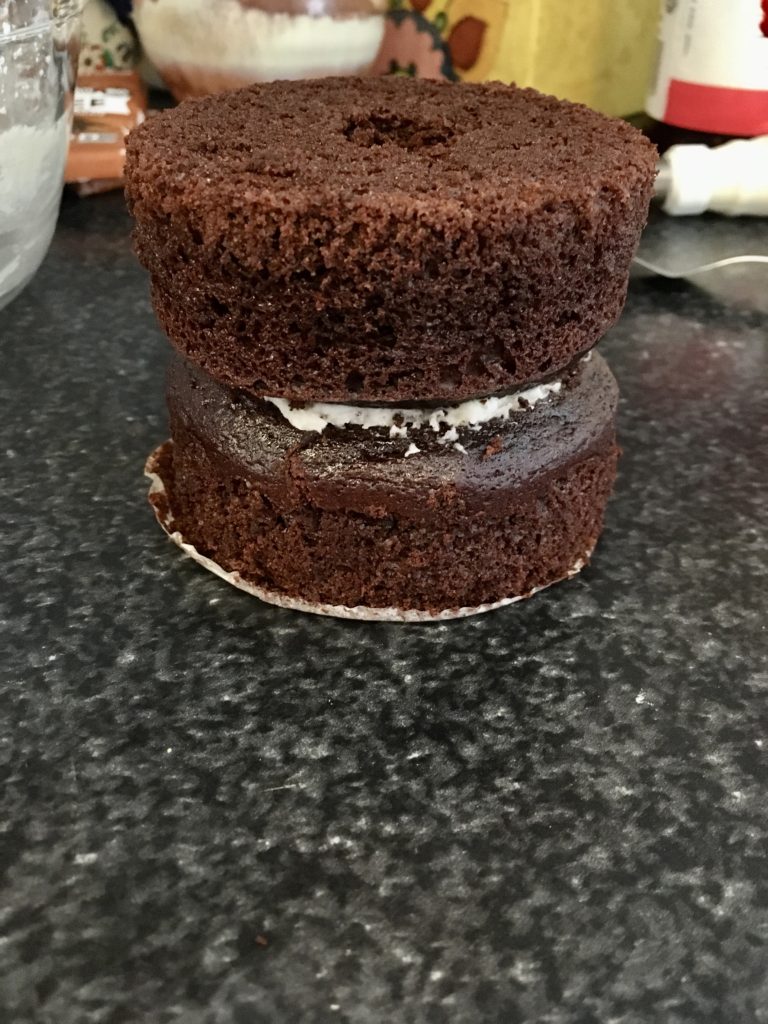
Put the cored cake, cut side down, on top of the first. Putting it cut side down will provide you with a nice flat surface to frost on the top of the cake.
Fill the hole in the top layer with your raspberry jam. I pushed the jam through a fine mesh sieve so that it became seedless, but you can definitely leave it as it is if you’d like! After you’ve filled the hole in the middle, spread a thin layer of the jam over the top of the cake as well. This helps give it a nice glaze and will also help keep the cake moist.
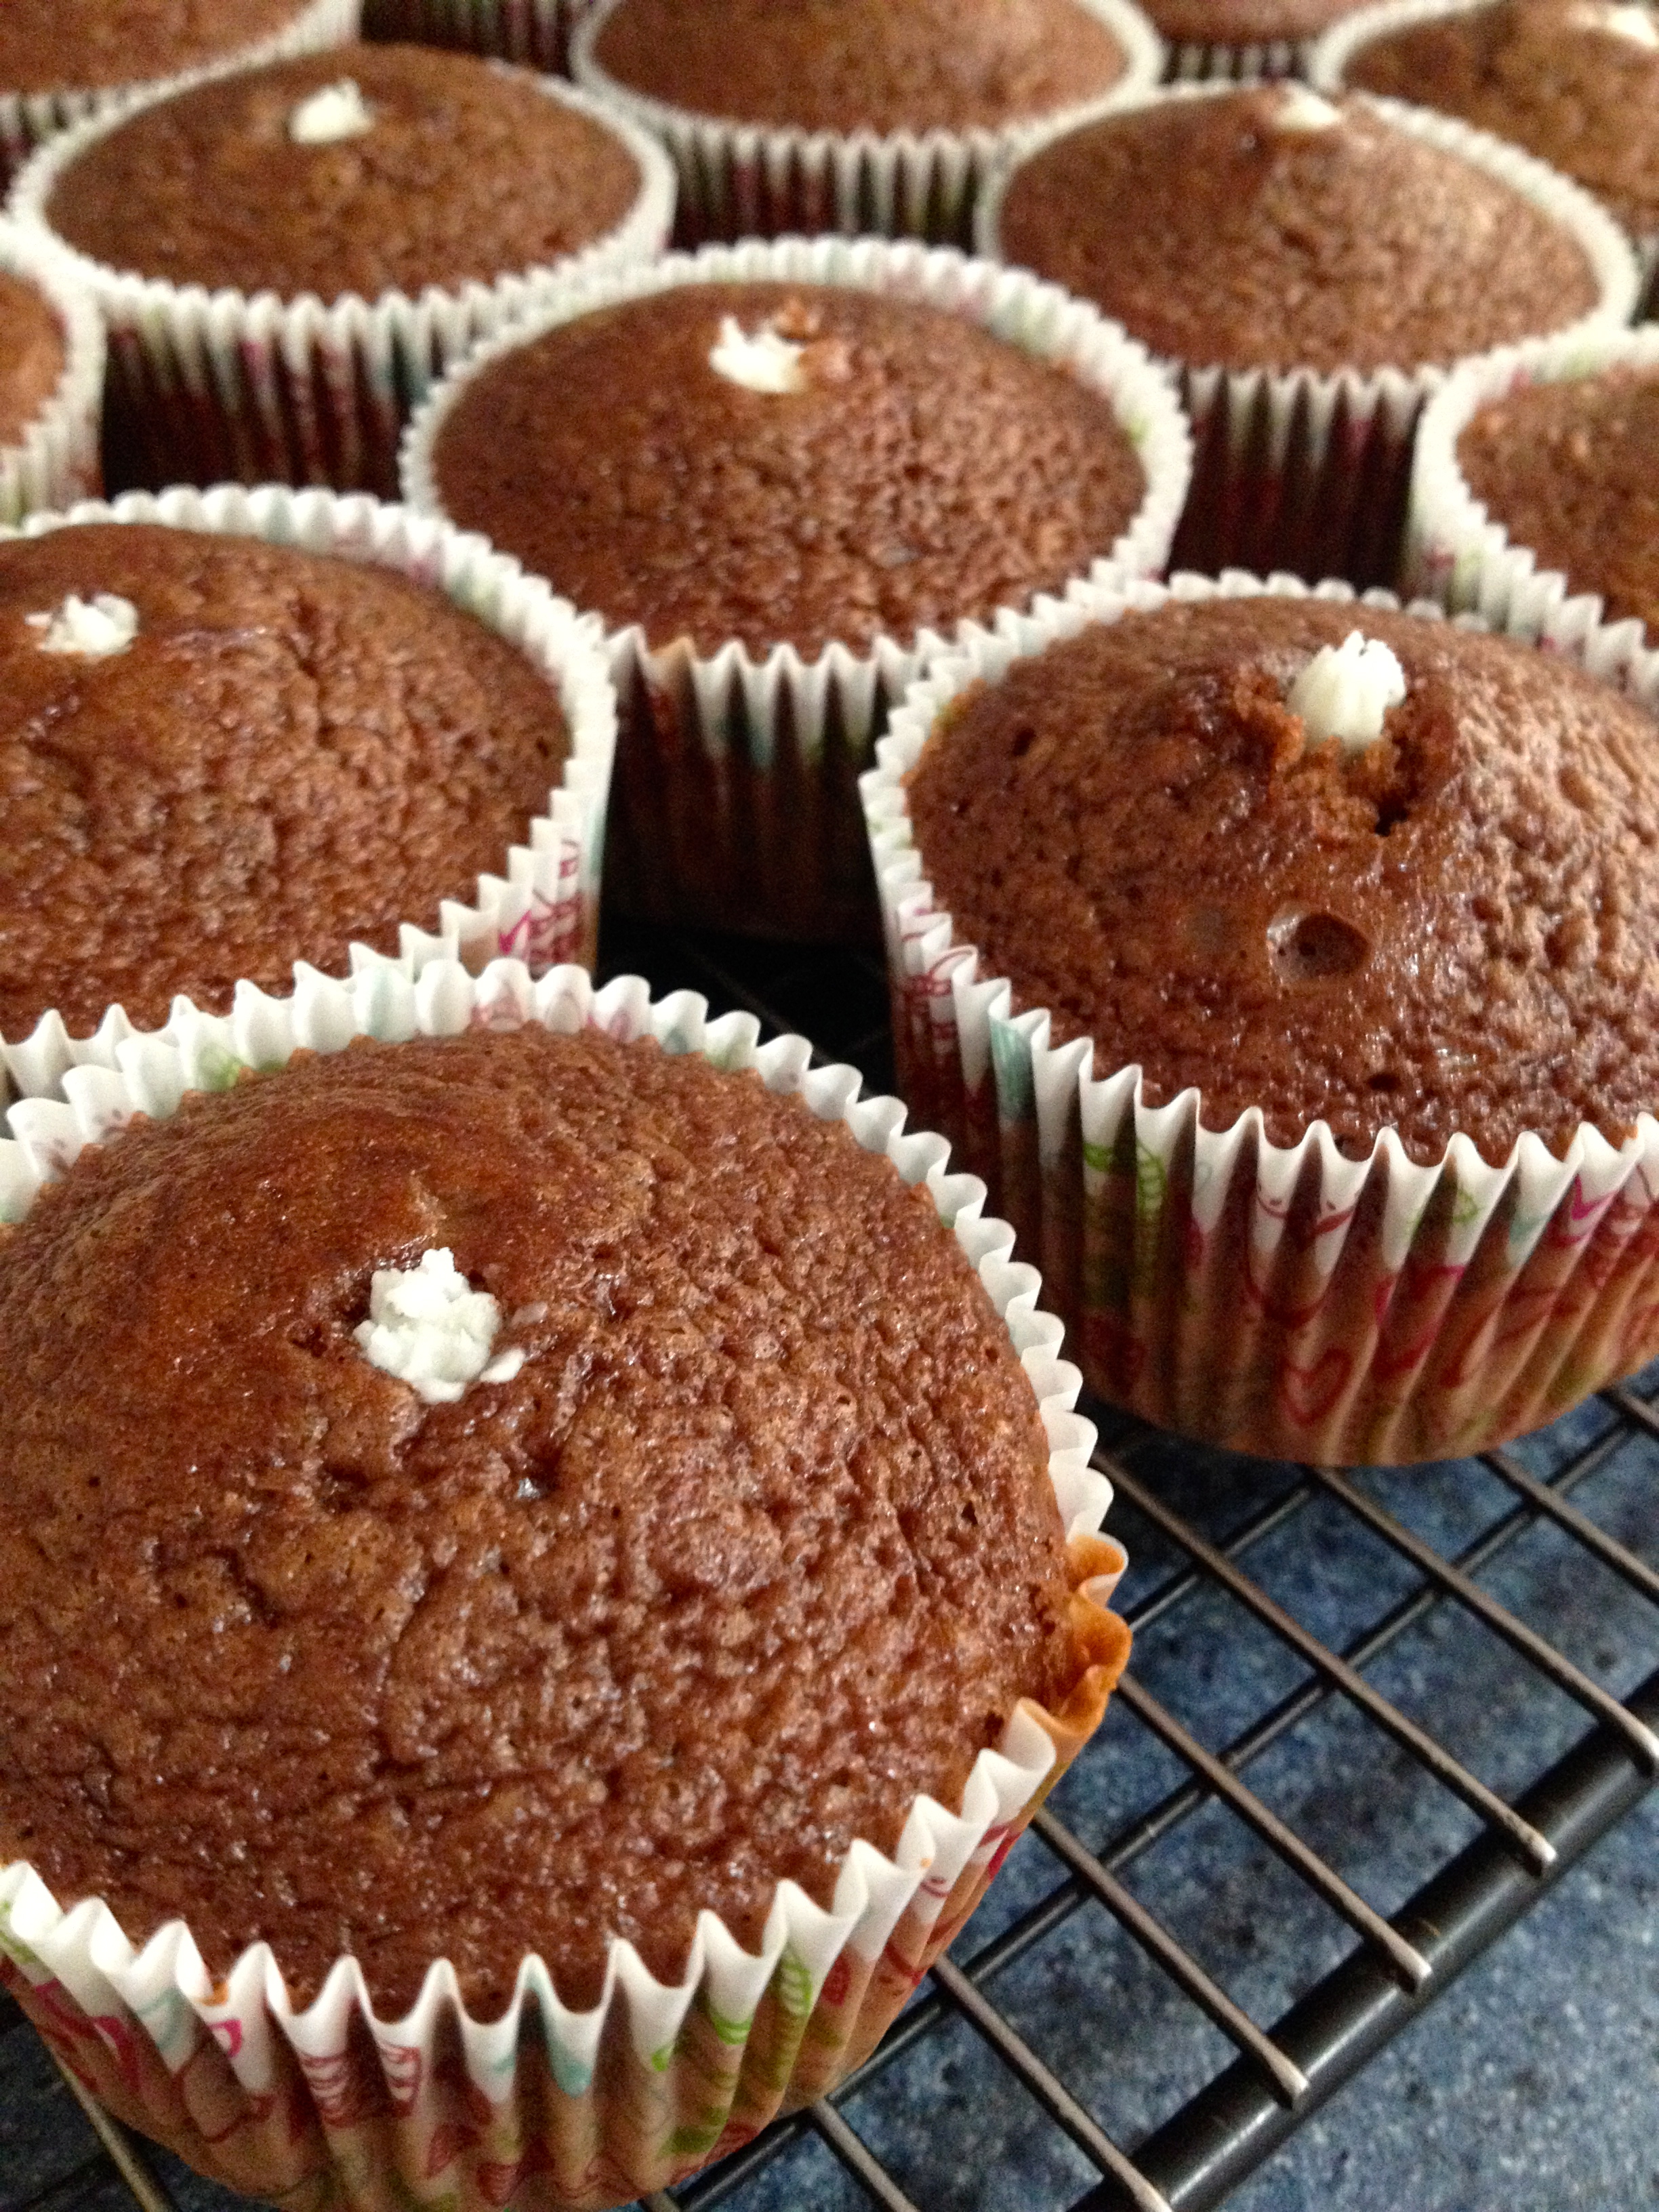
Now you can finish frosting. If you’re using a piping bag, pipe little rosettes around the middle where the two layers meet and also on top of the cake, and finish with a raspberry in the middle or whatever nice garnish you’d like. If you’re using a knife, spread another 2-3 tbsp of frosting on top of the cake and garnish.
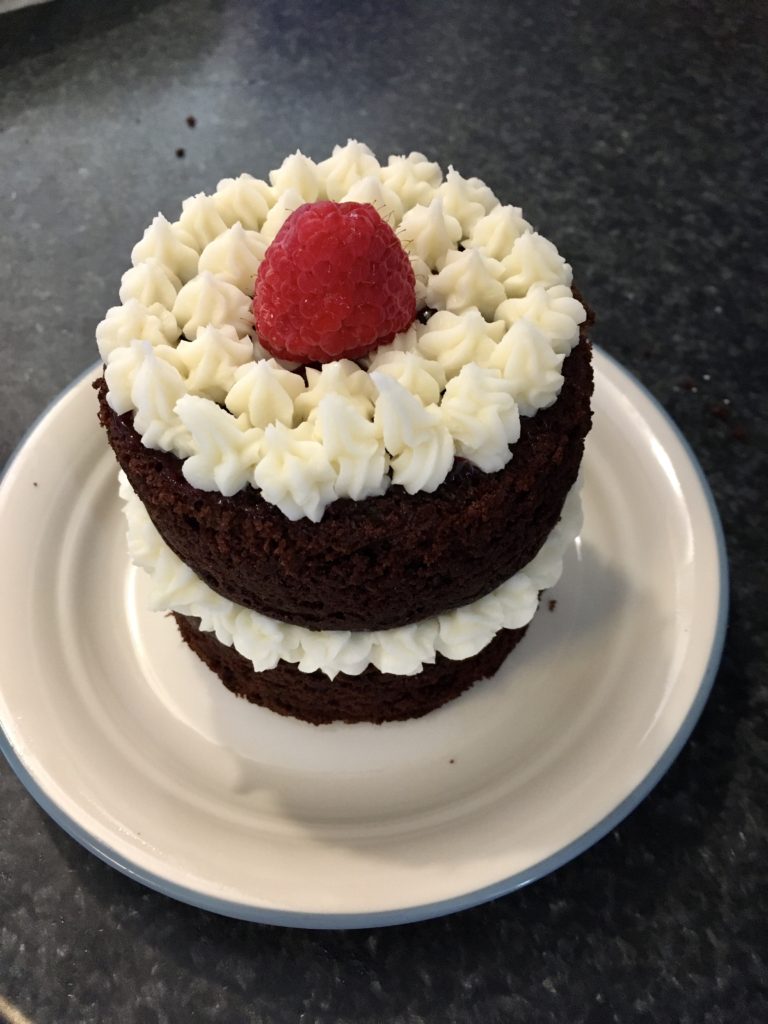
Repeat with the other two cakes that are left, to create two mini layer cakes.
And that’s it! Super yummy, and it looks and tastes really elegant, but it’s not very difficult. You could also change the flavors to whatever you like- you could fill it with peanut butter or caramel instead of jam, you could frost it with chocolate or peanut butter frosting, or you could even do a peanut butter flavored cake filled and topped with marshmallow fluff and crushed peanut butter candies! The choices are endless, but all delicious!
Happy baking!
Mini Apple Cupcakes
Hi, all! It’s my first post since being off social media for Lent and it’s good to be back with you all! I hope you all had a wonderful Easter and enjoyed some time over the past couple months with friends and family.
My mom and I recently went to a spring tea party with my cousins and we were asked to make a mini dessert to share. We decided to make mini apple cupcakes with a cream cheese frosting. I made the cupcakes, she made the frosting, and they tasted sooo good- so good that I was asked for the recipe and was asked to make them again for Easter! I figure if they were that good, they’re worth sharing to the blog. Here’s the recipe:
Ingredients:
- 1+3/4 cups all purpose flour
- 1 tsp baking soda
- 1 tsp cinnamon
- 1/2 tsp salt
- 1 cup unsweetened applesauce
- 3/4 cup granulated sugar
- 1/2 cup vegetable oil
- 1 egg
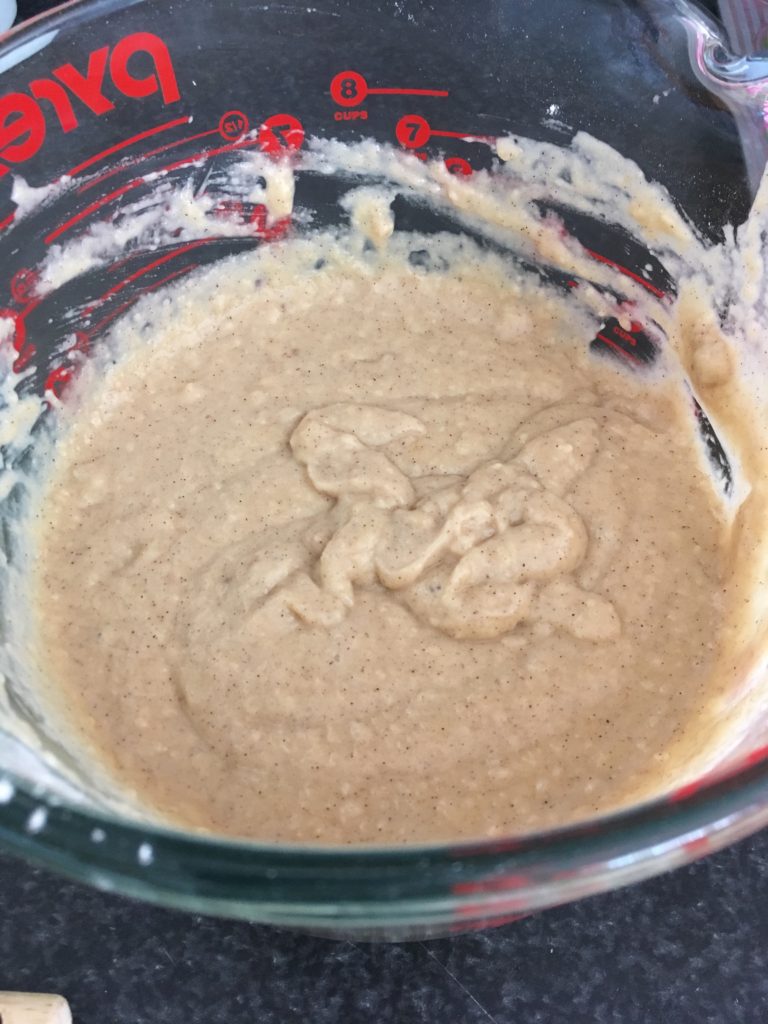
Preheat oven to 350. Line mini muffin cups with baking papers or spray with nonstick cooking spray. Whisk flour, baking soda, cinnamon, and salt together in a bowl. In a large separate mixing bowl, mix applesauce, sugar, oil, and egg together. Sift flour mixture into egg mixture and mix well.
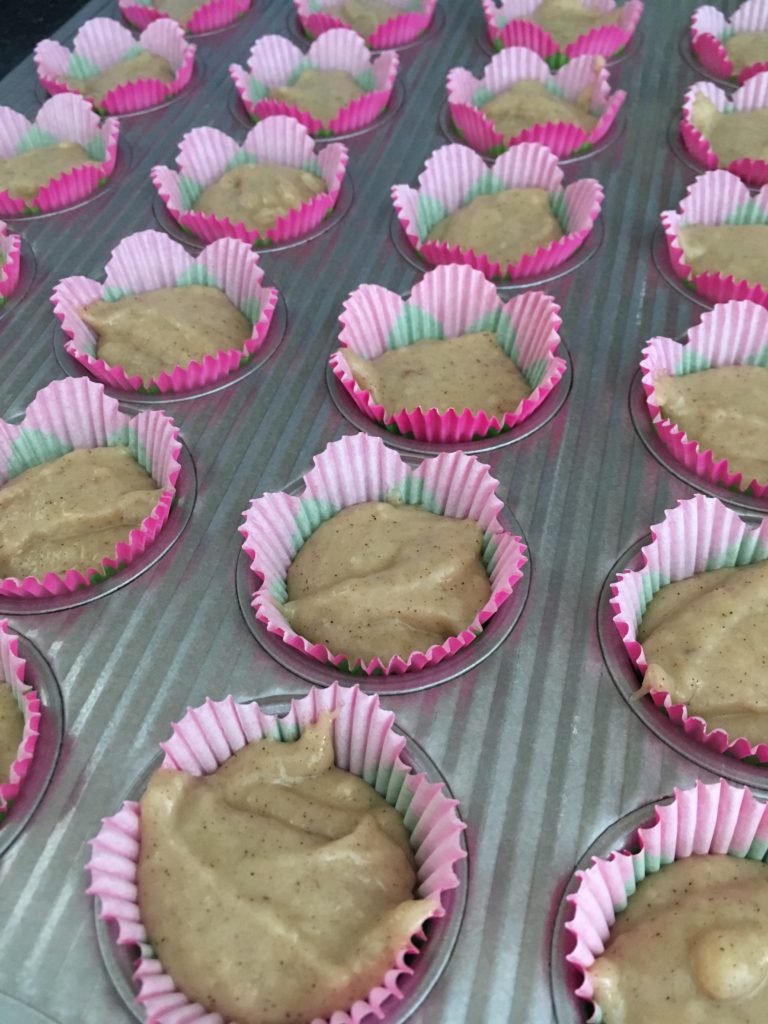
Spoon batter into muffin cups, filling 3/4 full. Bake 15 minutes or until toothpick inserted in the middle comes out clean.
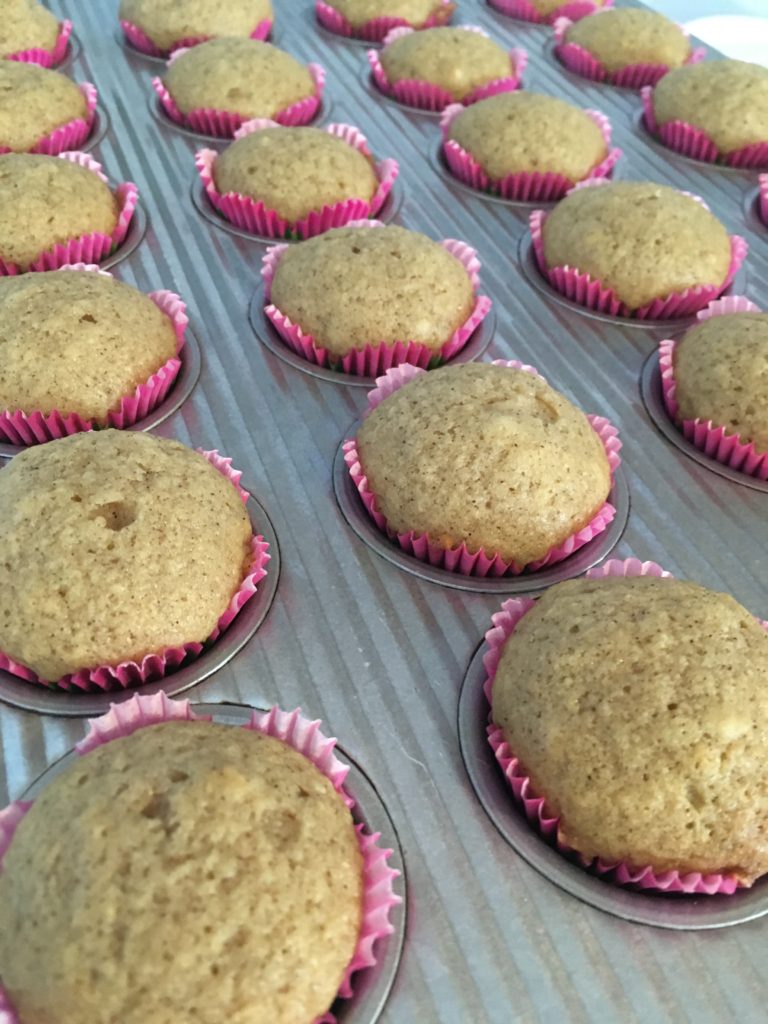
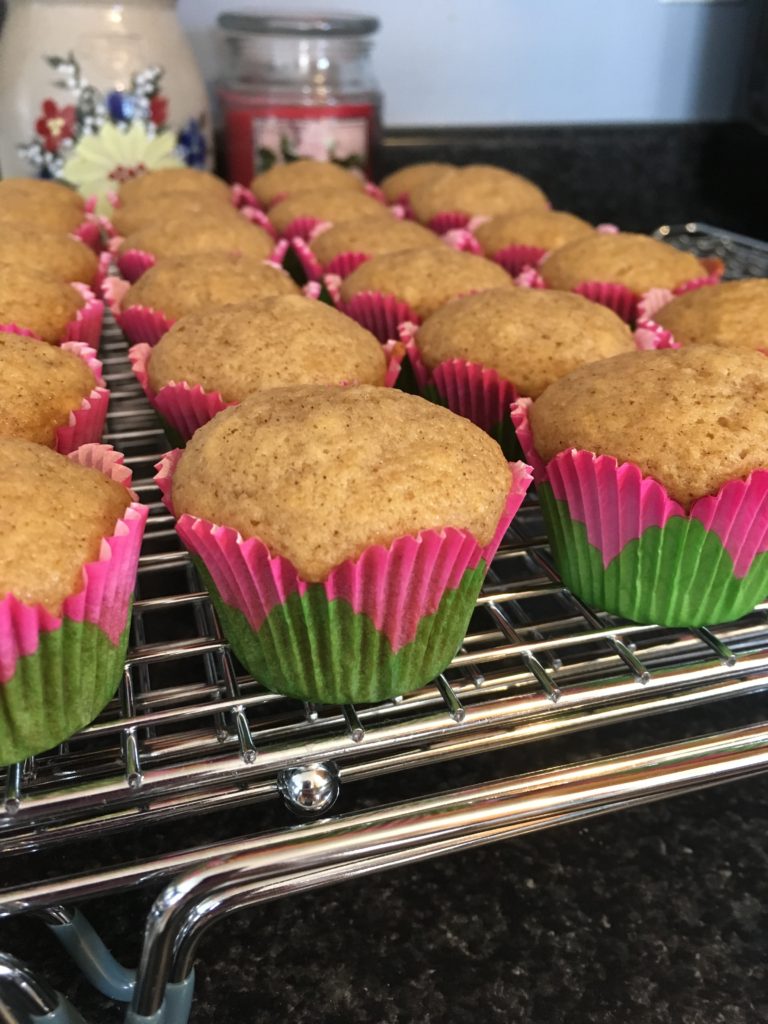
Cool on wire rack before frosting.
Frosting Ingredients:
- 4 oz unsalted butter, softened
- 4 oz cream cheese, softened
- 2 cups powdered sugar
- 1 tsp vanilla extract
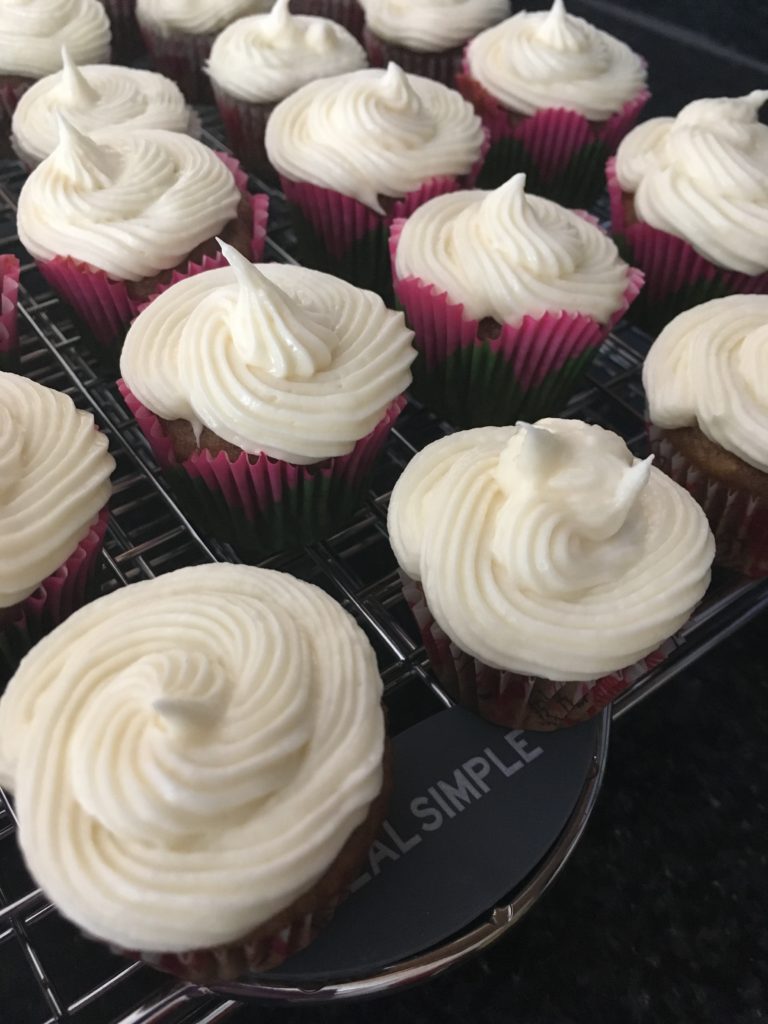
Using an electric hand mixer, combine butter and powdered sugar until well mixed. Add powdered sugar in, one cup at a time, until fully mixed. Add vanilla and mix well (I usually turn the mixer speed to high for several seconds so that the mixture gets really whipped and airy). Pipe or spread the frosting onto the cupcakes.
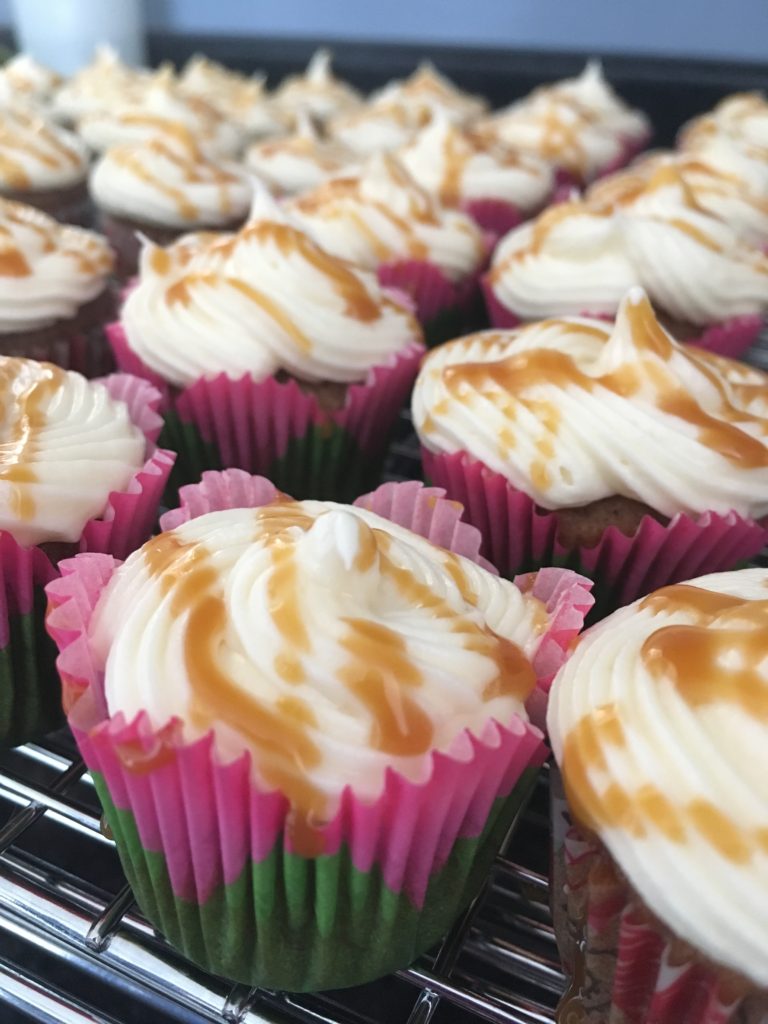
I also bought some caramel sauce at the store and drizzled it over the top, just because I love caramel and it goes so well with apple things! You can of course make your own caramel sauce (I have a simple recipe here) but I was pinched for time so I went with the store-bought stuff.
And that’s it! These don’t take very long at all to make, but they are SO yummy, and since they’re mini you don’t feel bad having more than one! Happy baking!
Easiest Cheesecake Ever
Hi, all! Happy holidays! I’m sure you’re all gearing up for a week of prepping and cooking food for Thanksgiving- and then it’s time to do Christmas shopping! This year, I decided to give some of our family members homemade food and recipes, including raspberry sauce to drizzle over their favorite desserts or ice cream. Of course, before I can give these foods as gifts, I need to try them out!
This past week presented the perfect opportunity for me to test the raspberry sauce recipe- I was invited to dinner with friends and was in charge of dessert. My sister gave me a springform pan for my birthday, so I decided to try my hand at making cheesecake with the raspberry sauce for topping.
I have to give credit to KingArthurFlour.com and Allrecipes.com for the recipes- if you’re in need of recipes, these two websites are great resources. While I don’t normally blog about food if I didn’t come up with the recipe, the cheesecake and sauce were WAY too good not to share with you all. Here are the ingredients:
Cheesecake Crust:
- 1 1/2 cups graham cracker crumbs (I ended up using 1 3/4 cups)
- 1/4 cup confectioner’s sugar
- 1/3 cup melted butter (I used an extra tablespoon)
- 1/8 tsp salt
Cheesecake Filling
- 2, 8-oz packages of cream cheese, softened at room temperature
- 2 large eggs
- 2/3 cup sugar
- 1 tsp vanilla extract
Raspberry Sauce
- 12-oz package of fresh or frozen raspberries (I used frozen and it worked great)
- 1/8 cup granulated sugar
- 1 tsp lemon juice
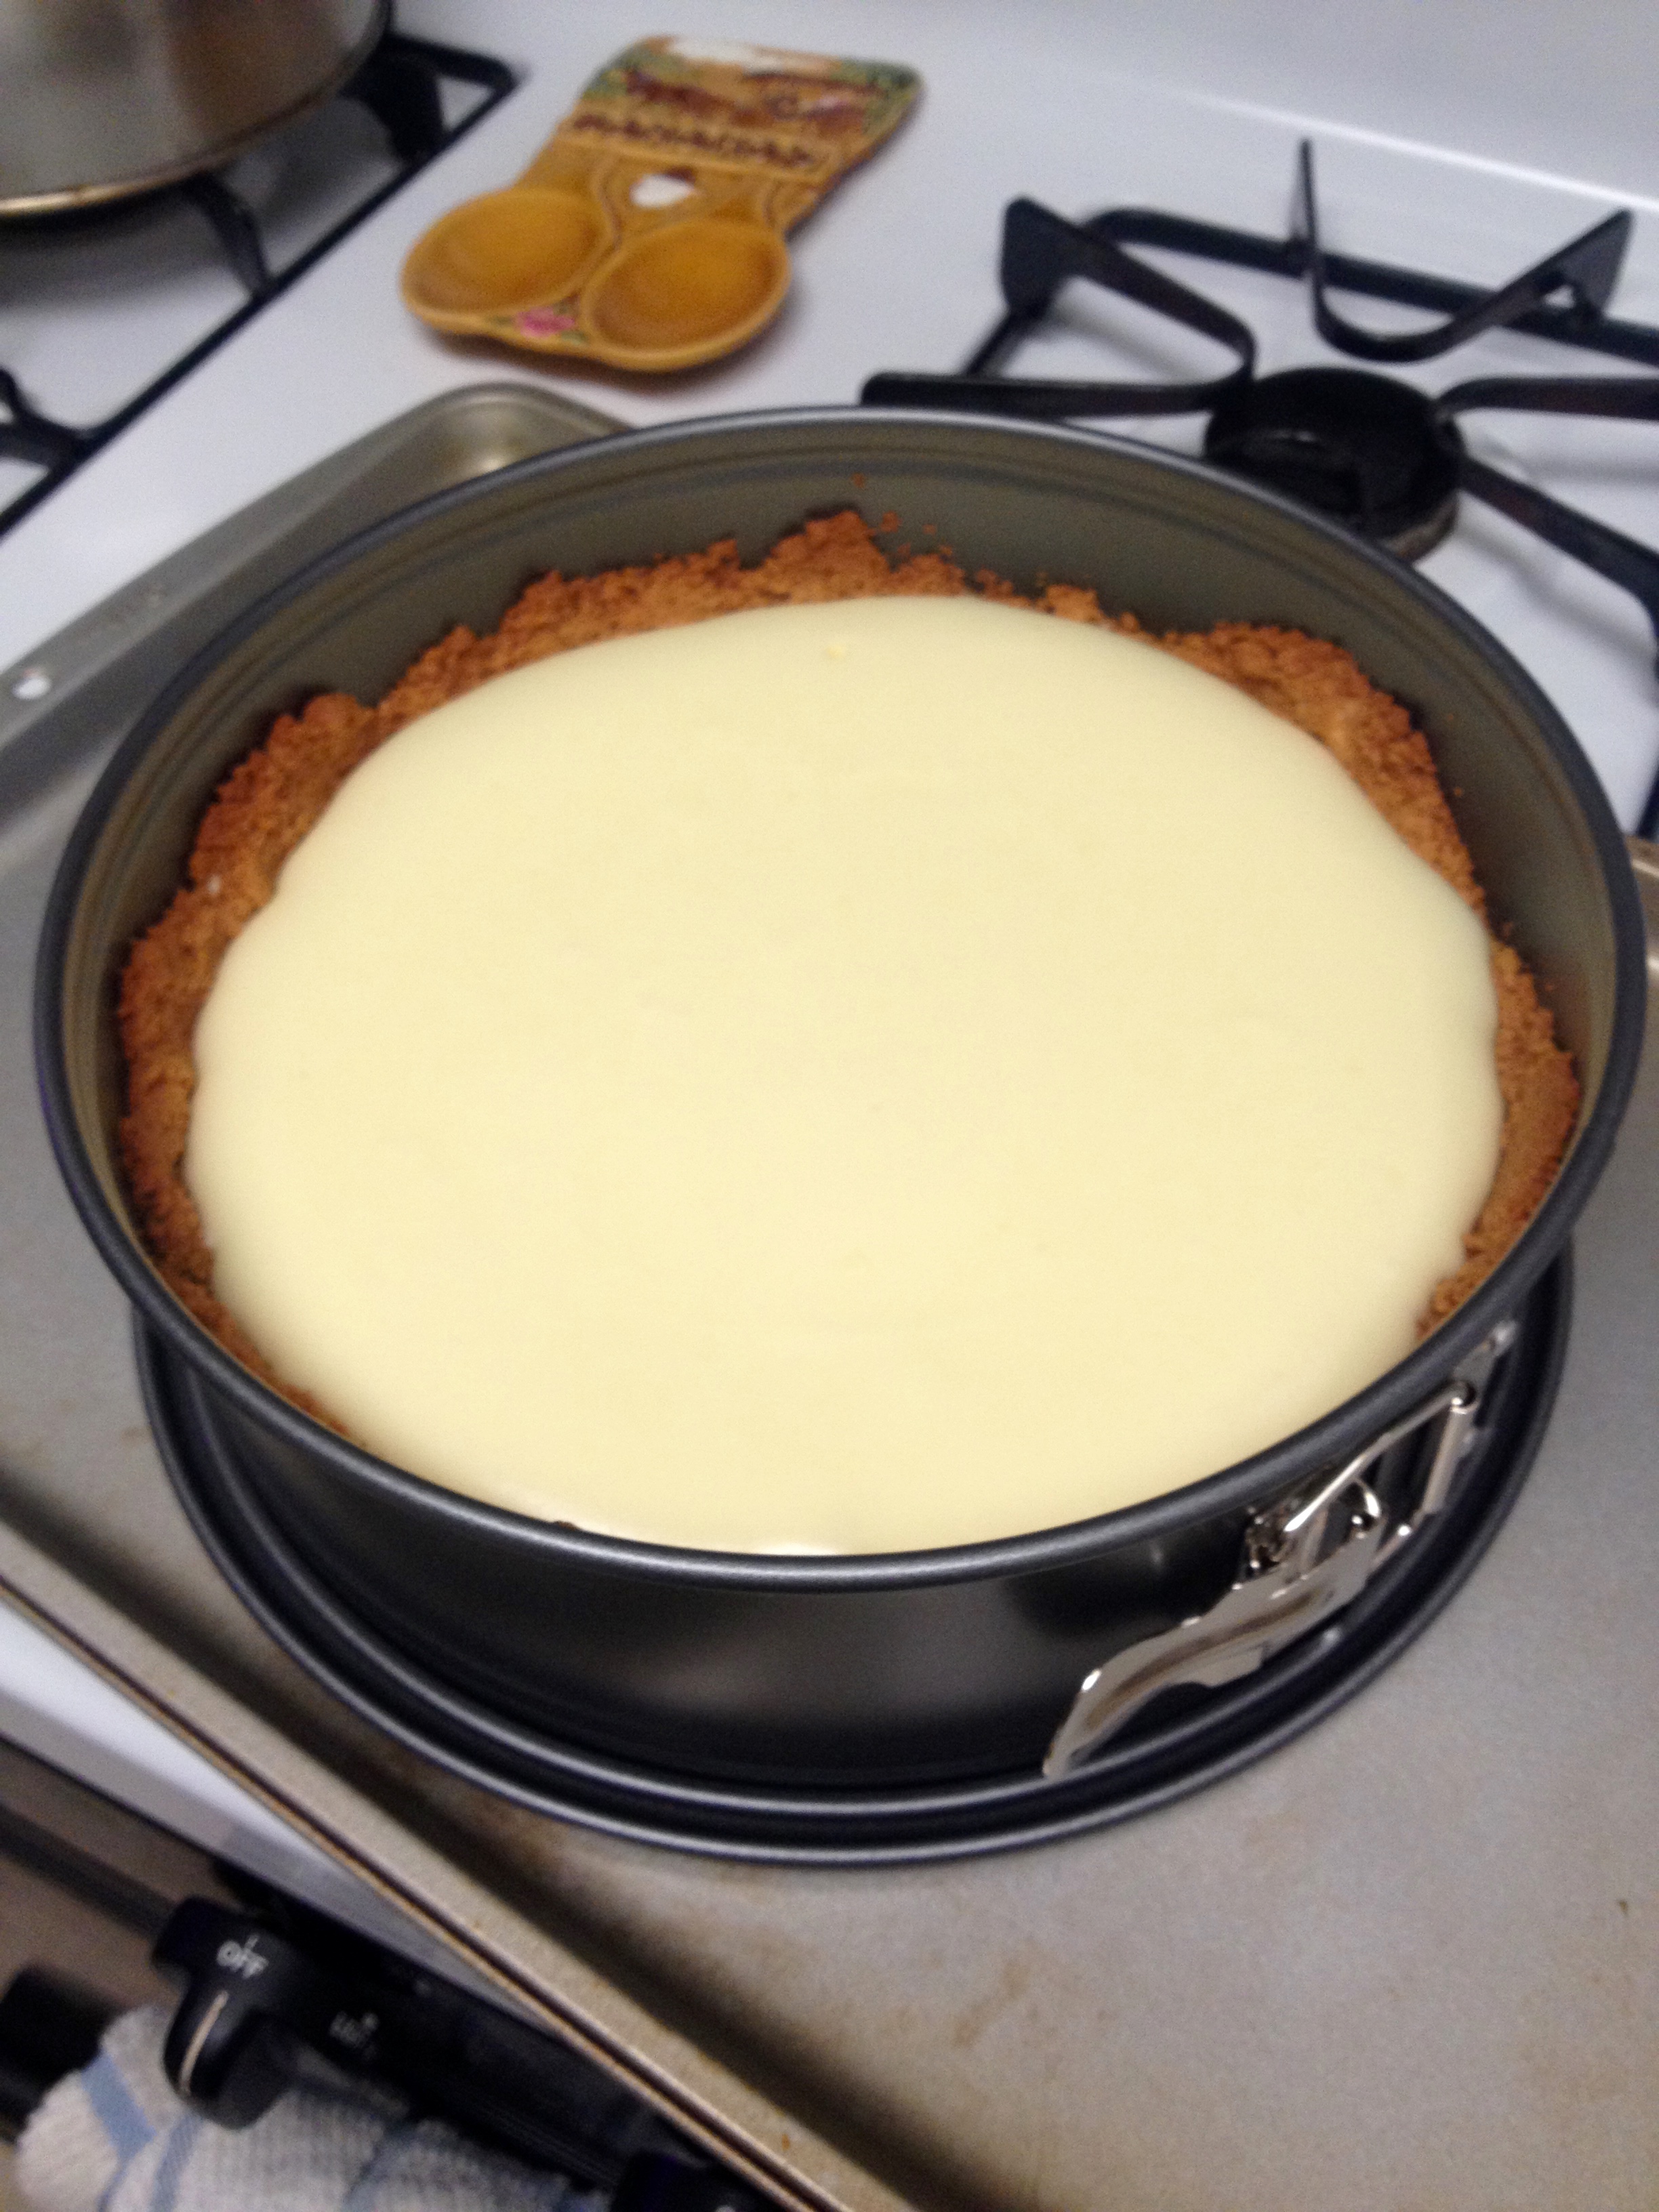
First, the cheesecake. Preheat the oven to 350°F. Mix the graham cracker crumbs, sugar, butter, and salt together until everything is well combined. Side note: Honey Maid started making boxes of graham cracker crumbs, so it saves a ton of time with crushing the graham crackers and in clean-up!!
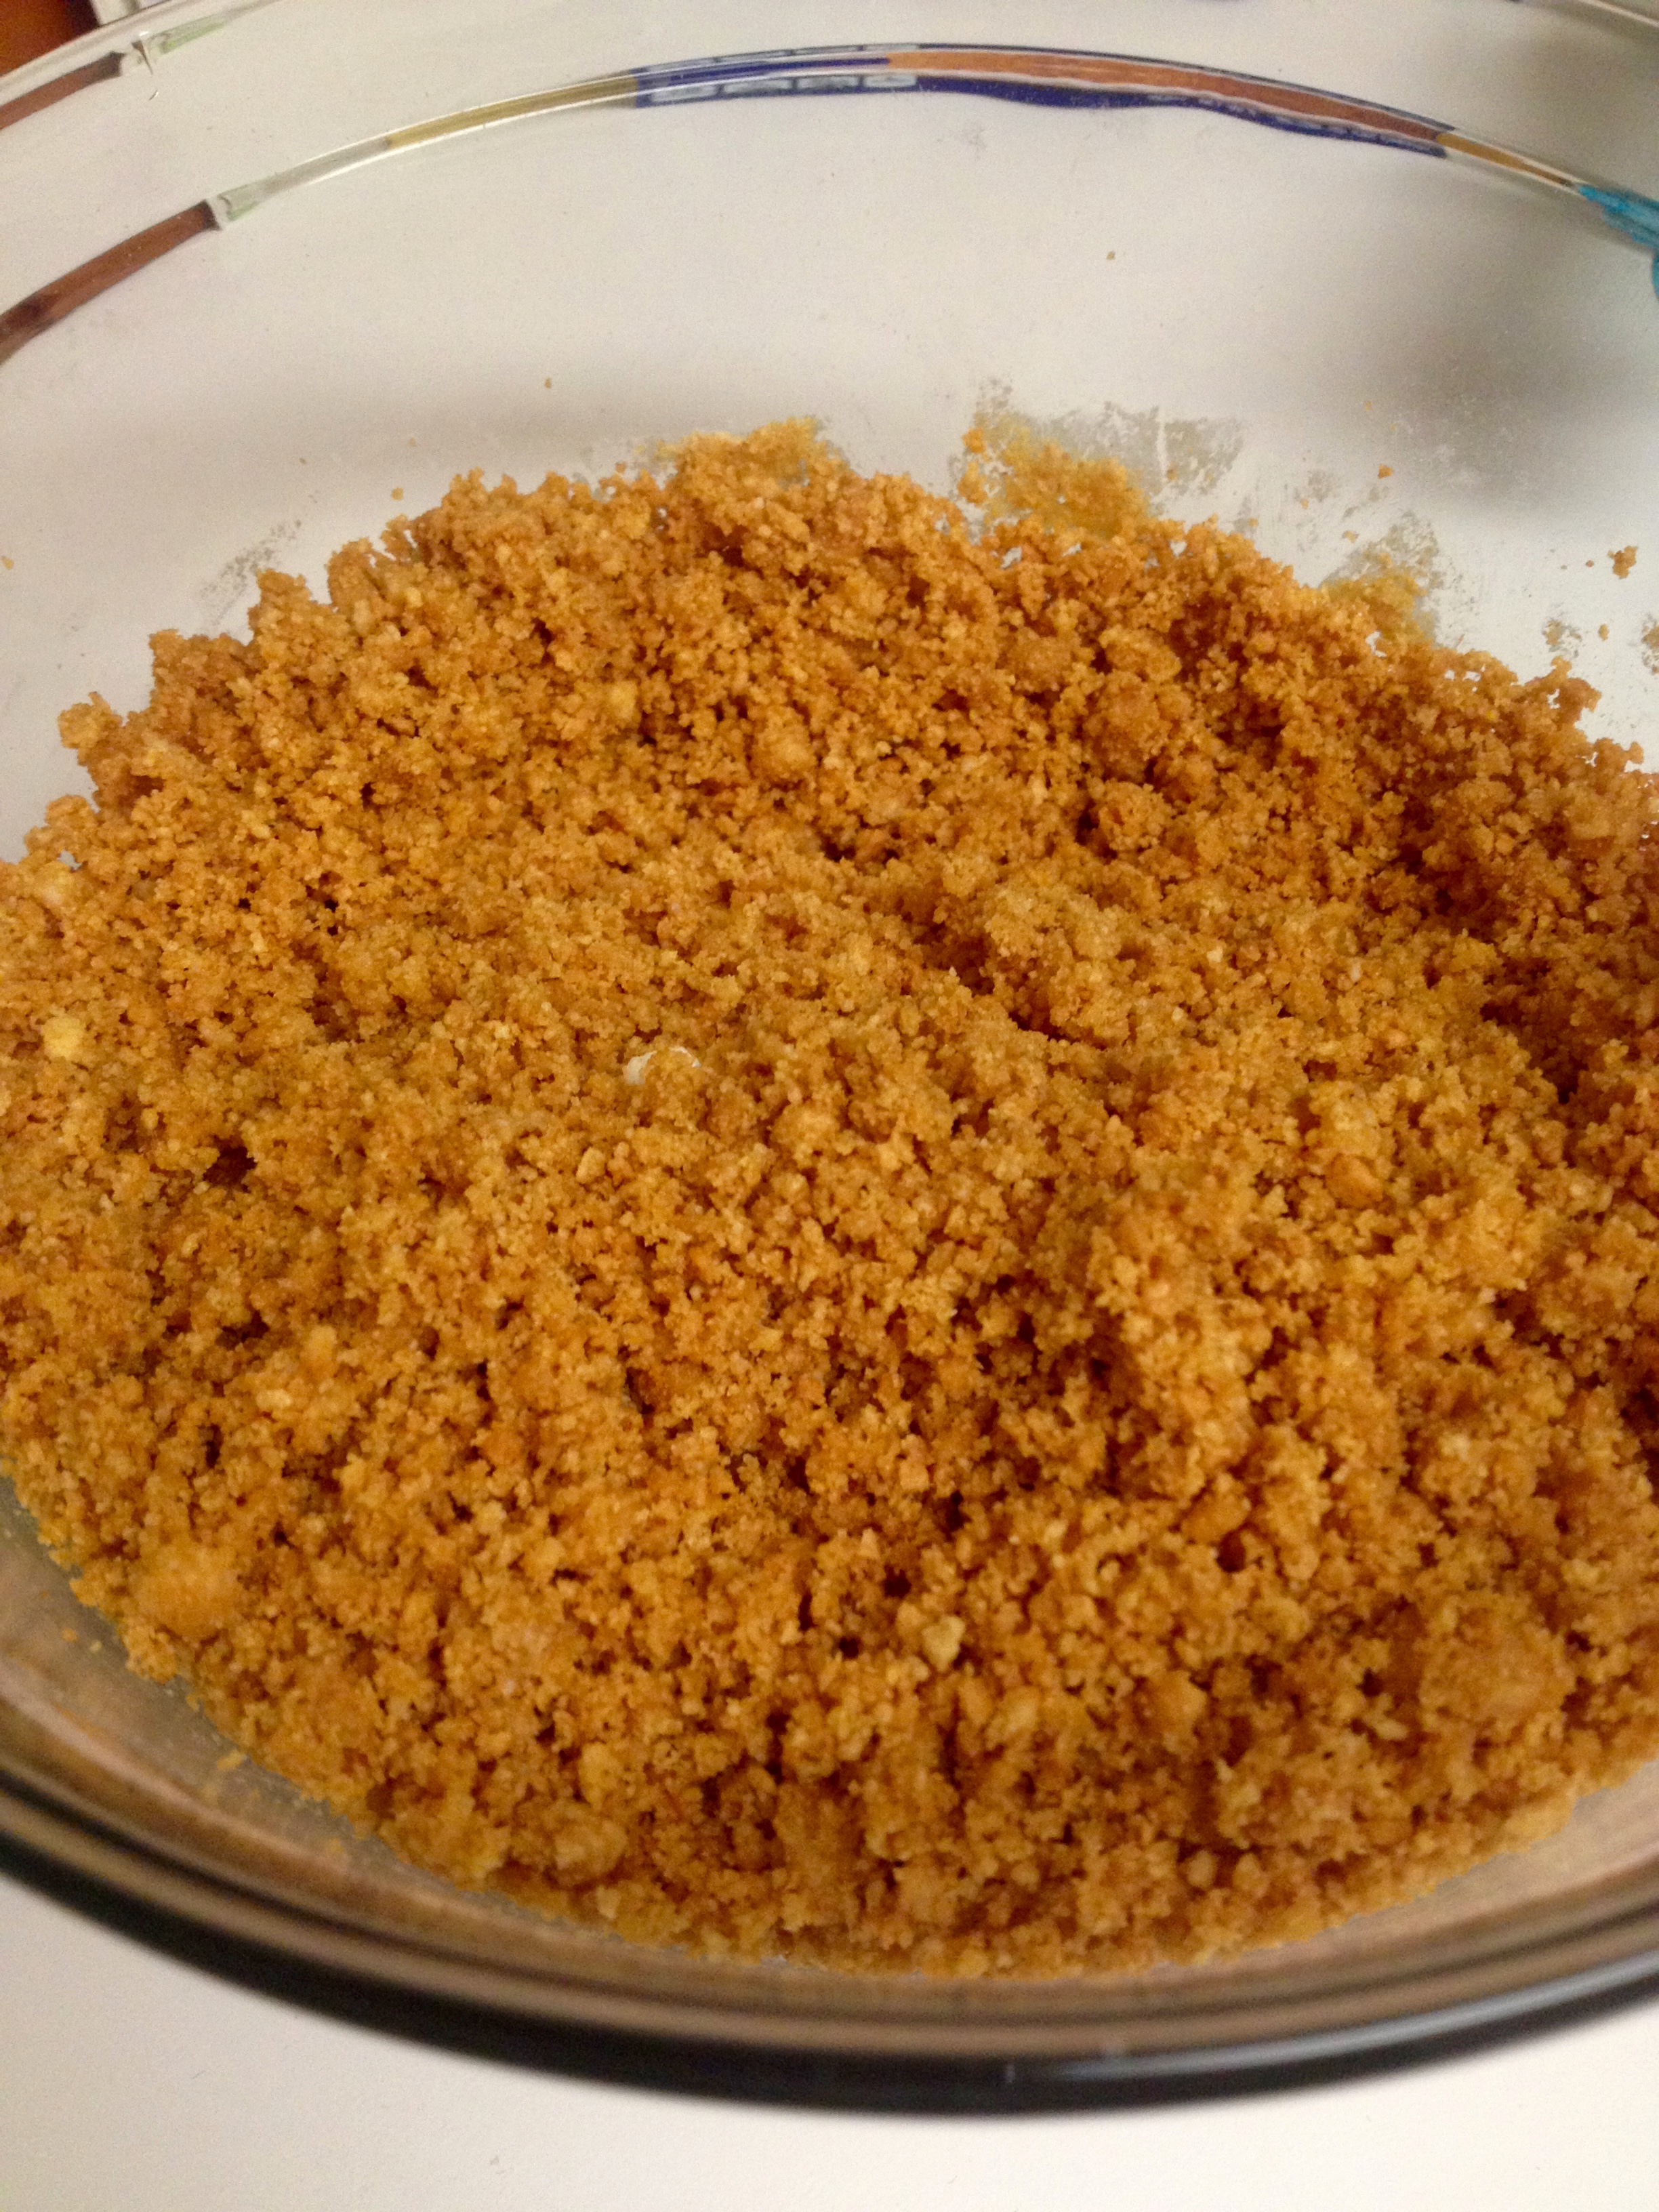
Now, here’s the only tough part of the whole process: forming the crust. Press the crust down in a 9″ pie pan (must have sides at least 1 1/4″ high) or a springform pan, covering the bottom and sides of the pan. Try to make the crust on the bottom thicker than the crust on the sides. Shameless tip here: I spent a few minutes trying to do this and decided it wasn’t worth the trouble, so I combined another 1/4 cup graham cracker crumbs and 1 tbsp melted butter and added it to the pan for extra crust everywhere. I’ve never met anyone who gets tired of graham cracker crust, and it saved me a lot of annoyance!

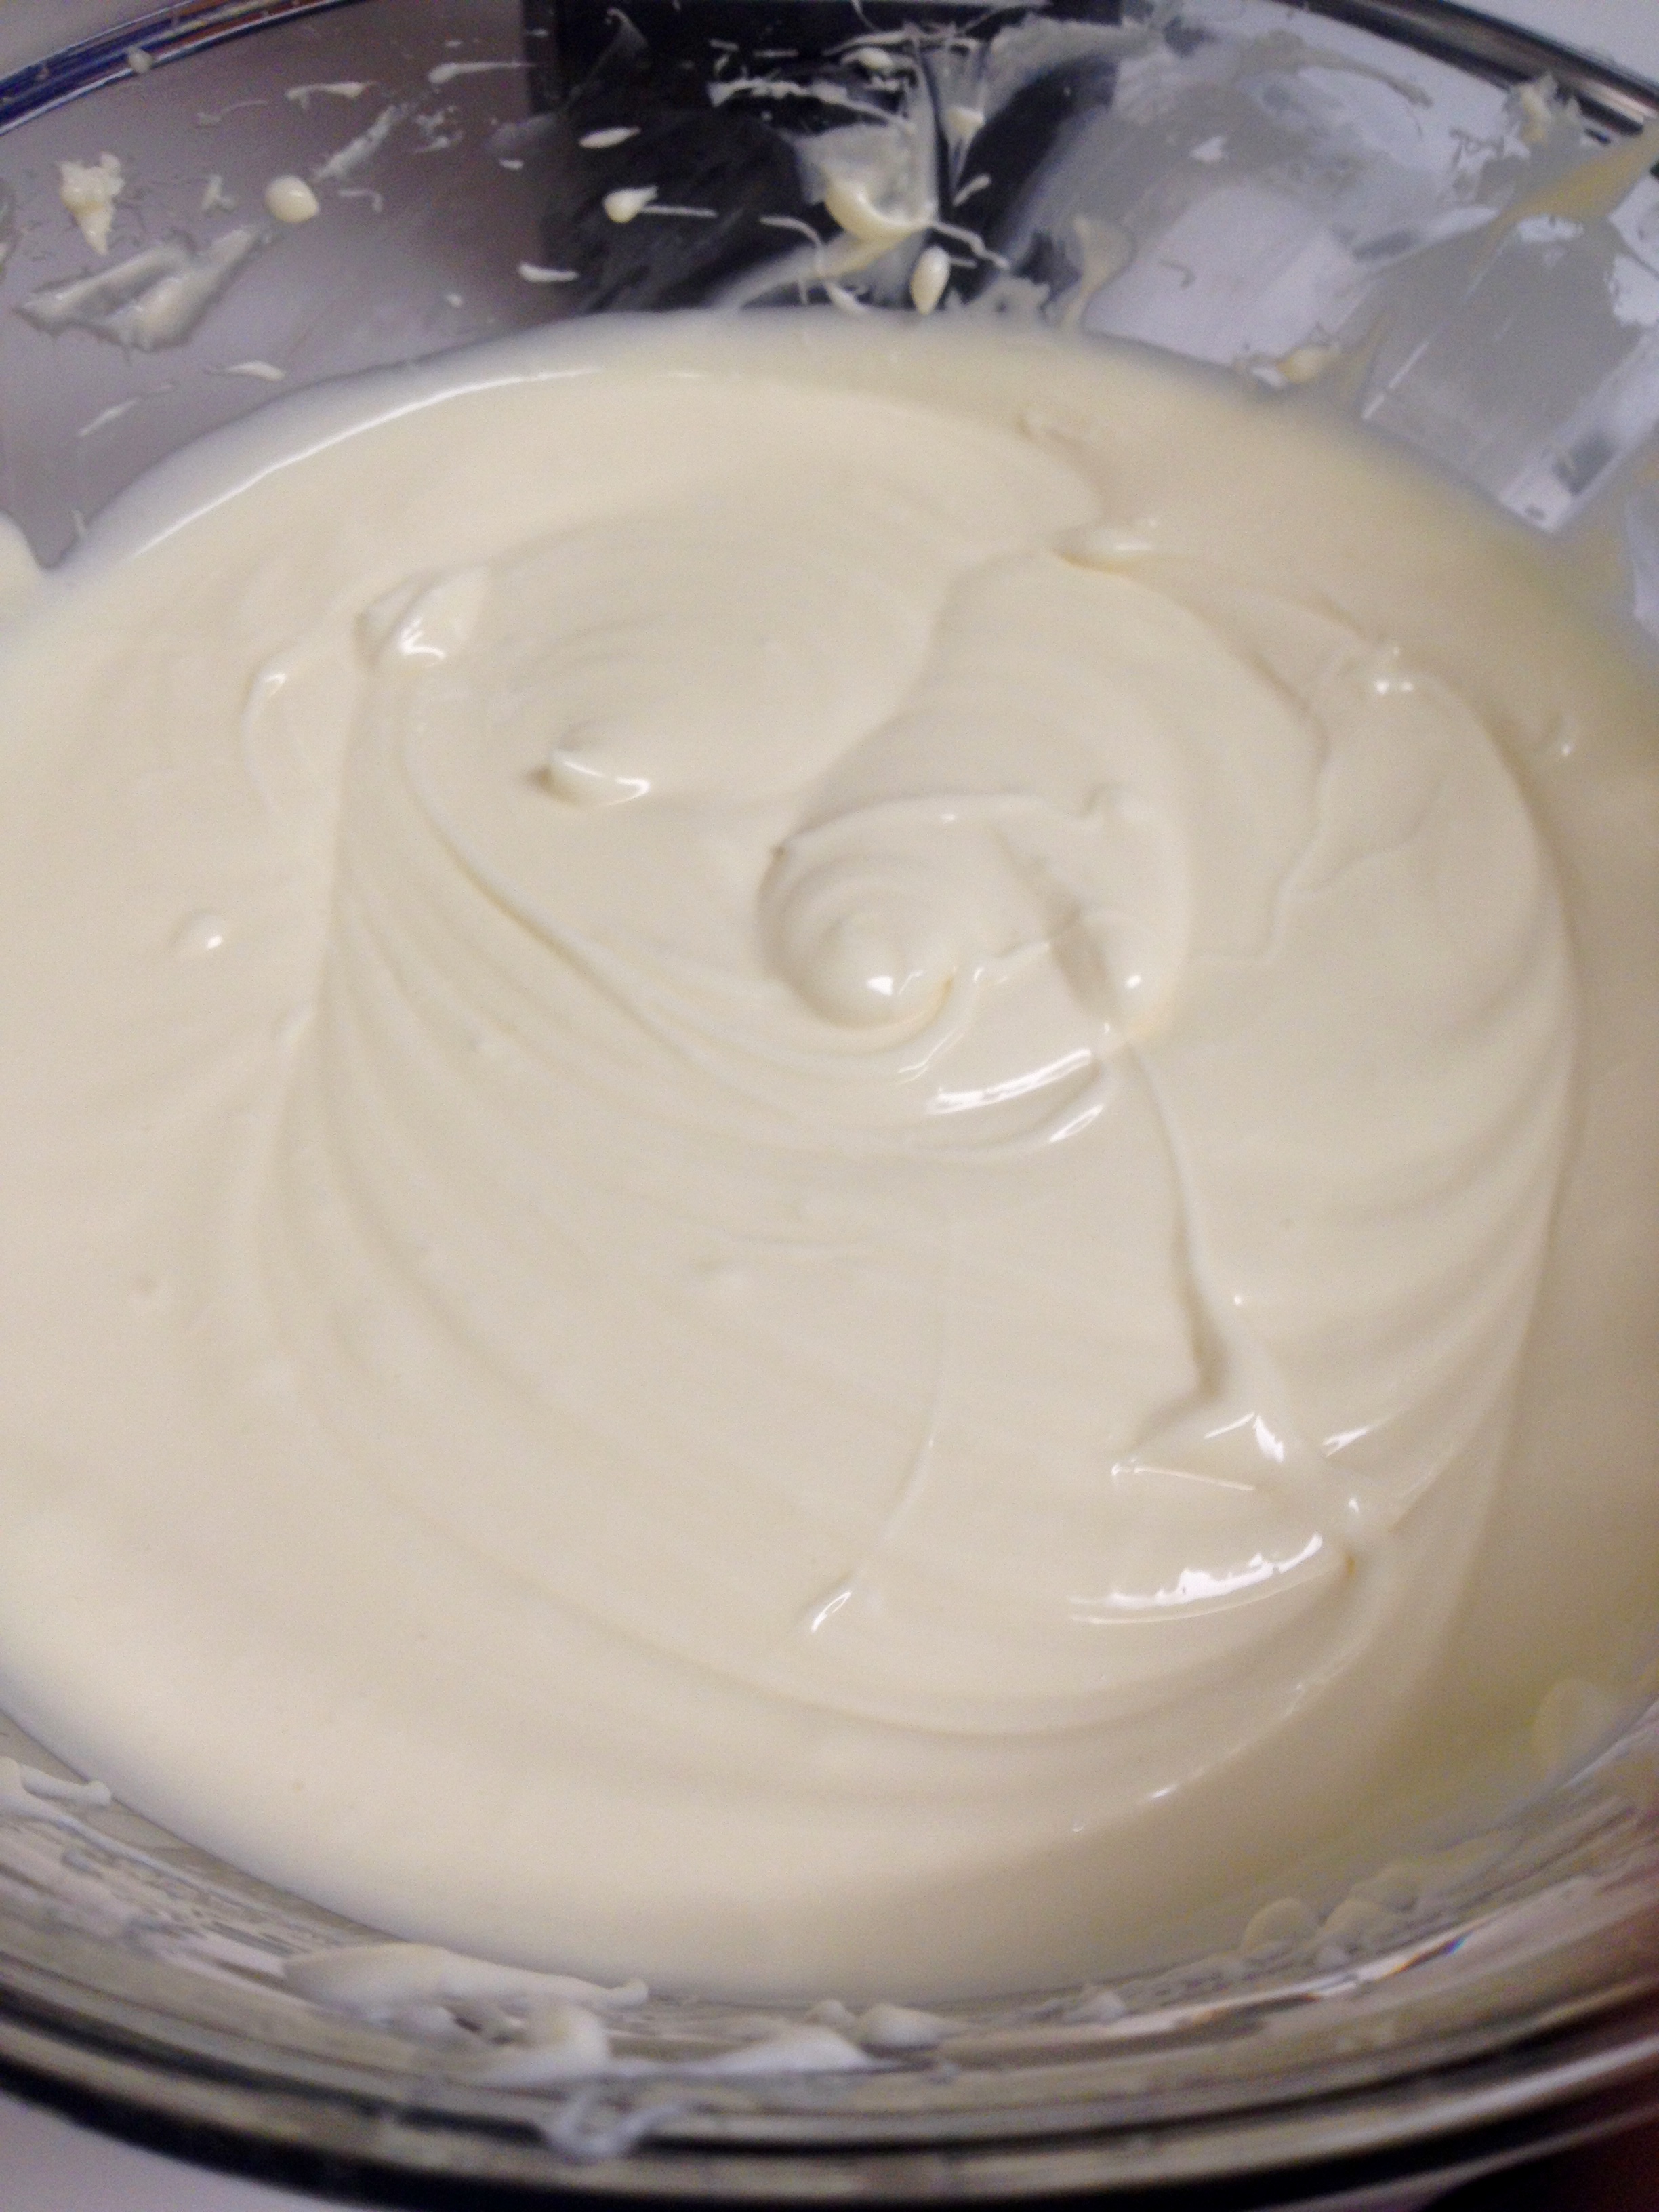
Next, combine the softened cream cheese with the granulated sugar. Mix with a hand mixer on medium speed until it is completely mixed and smooth. If you have any lumps in your mixture, it’ll make for an unpleasant texture to the cheesecake. When in doubt, mix a little longer!
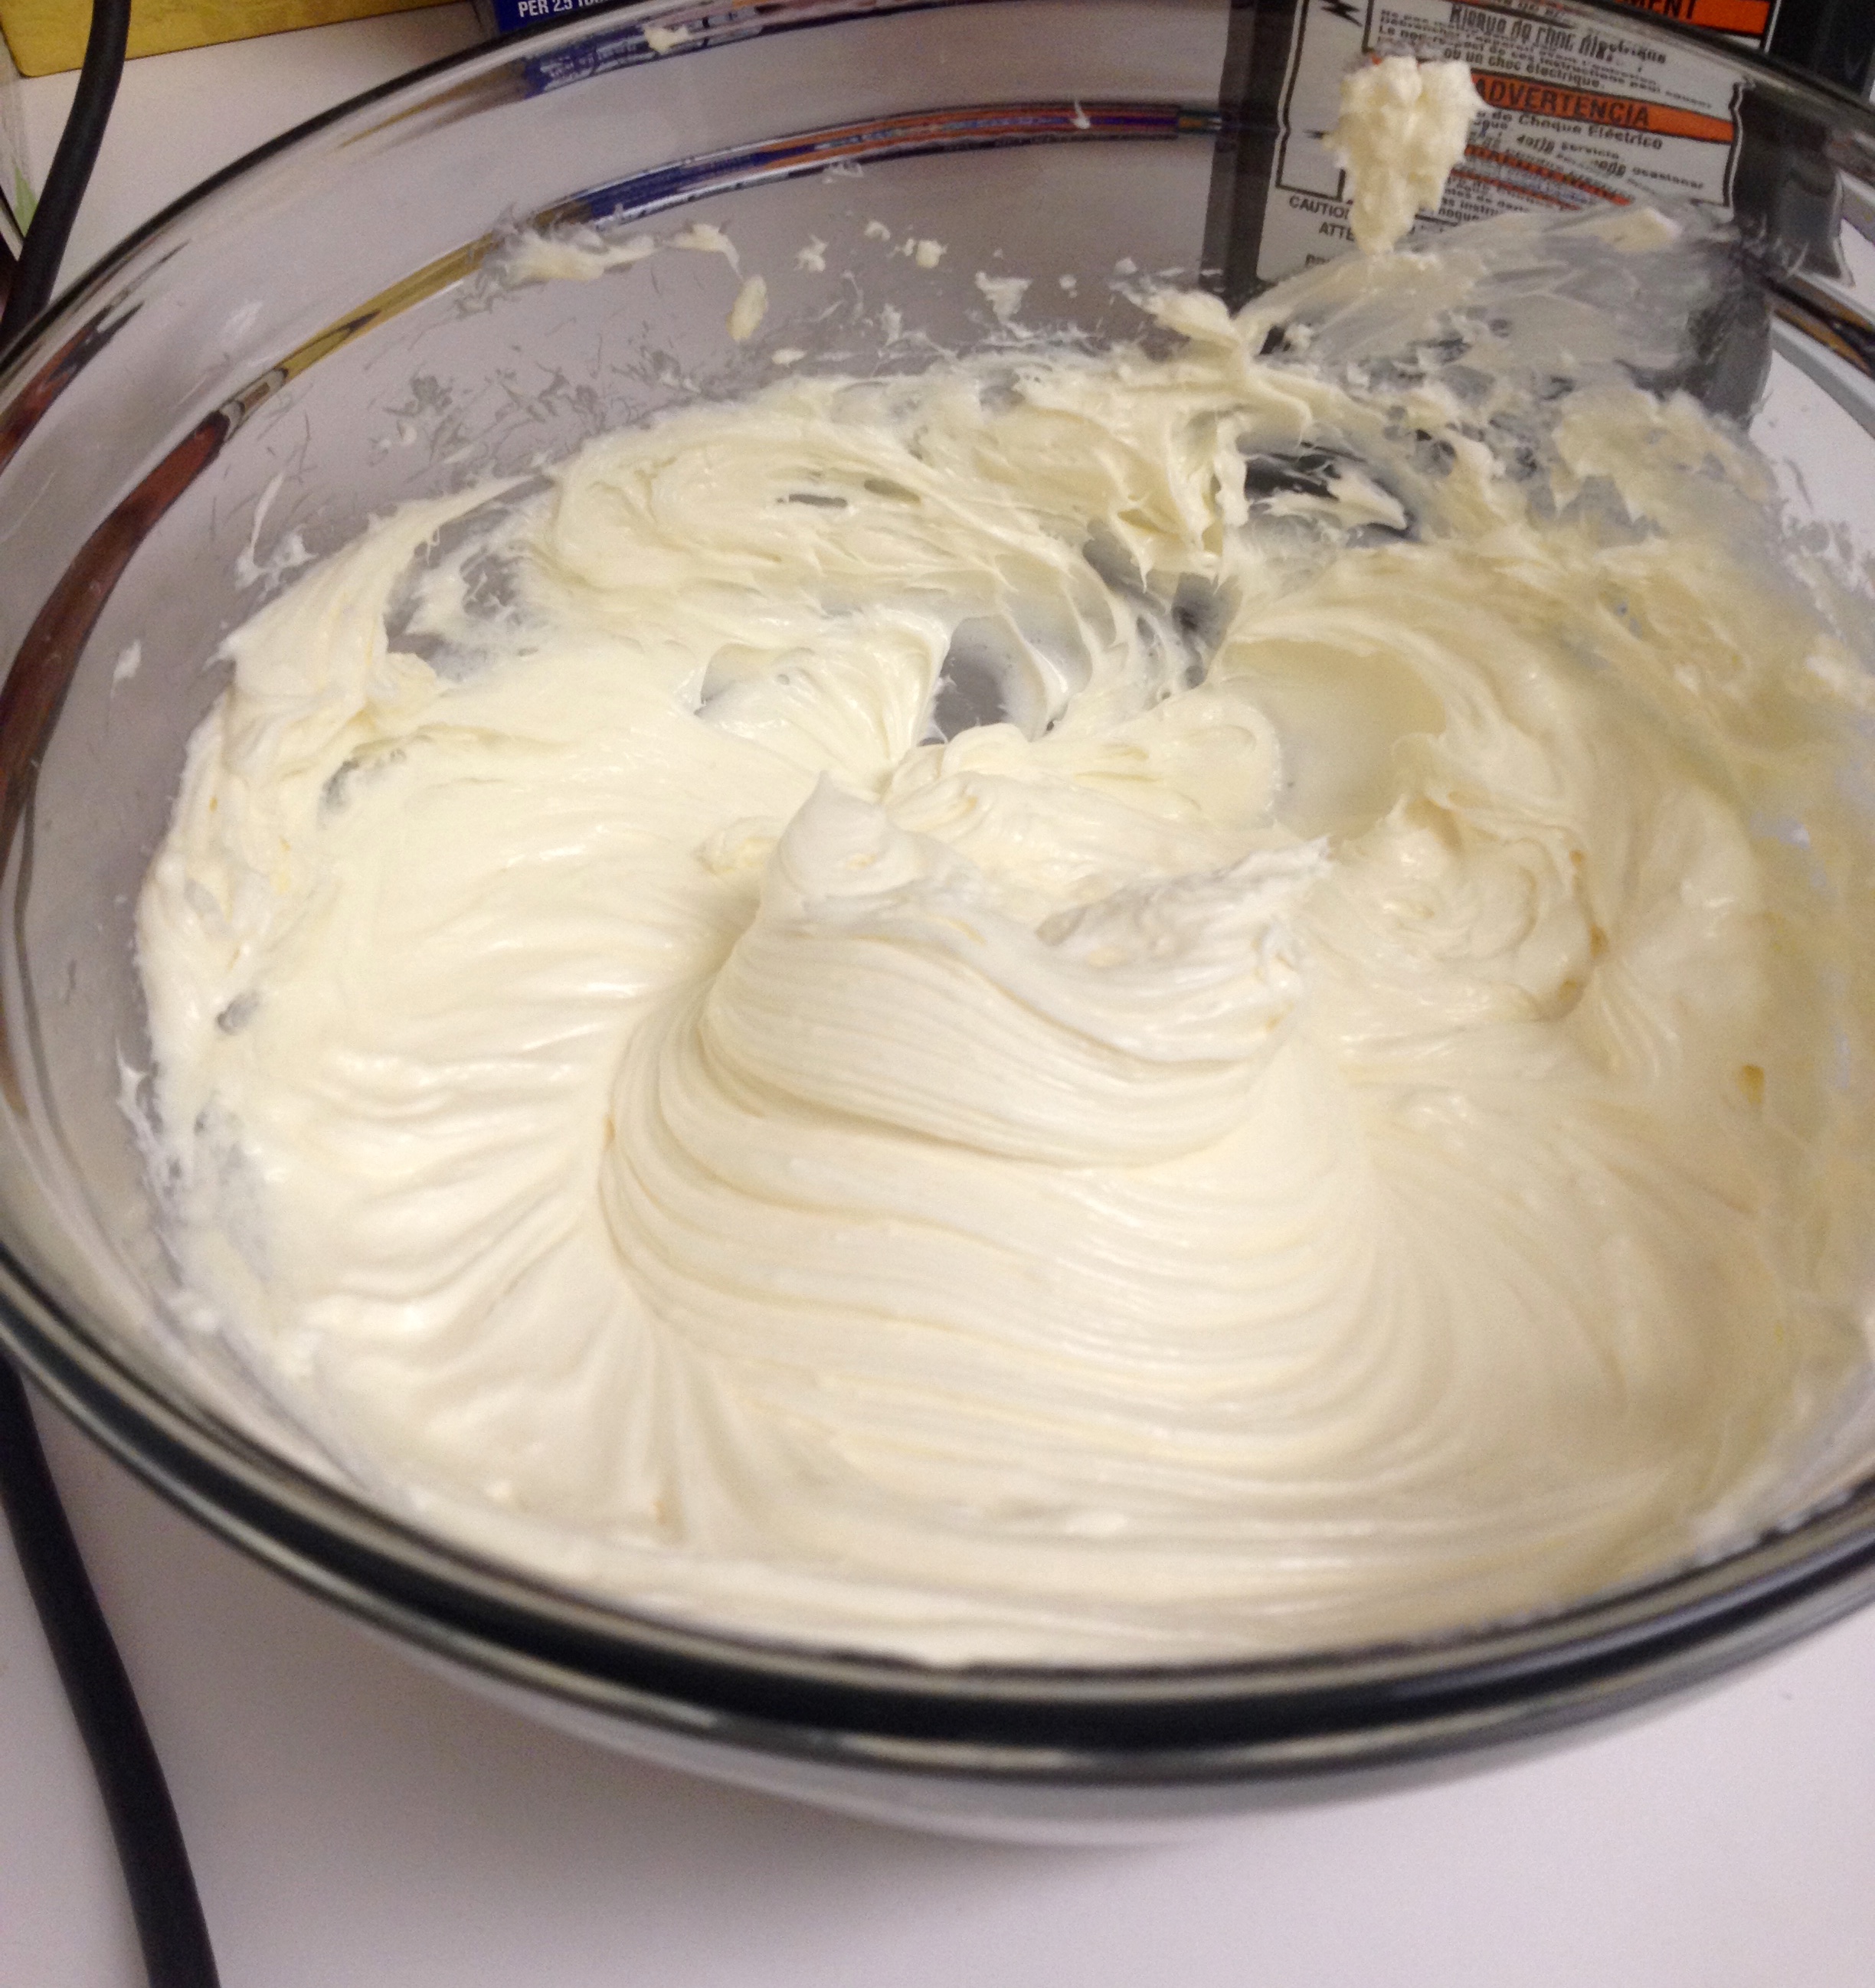
When that’s fully mixed, add in the eggs and vanilla and mix on medium speed. Again, mix until it is completely smooth!!
Pour the filling into the crust and bake for 20 minutes at 350°F. It’s helpful to put the pan on a baking sheet for ease of transferring in and out of the oven.
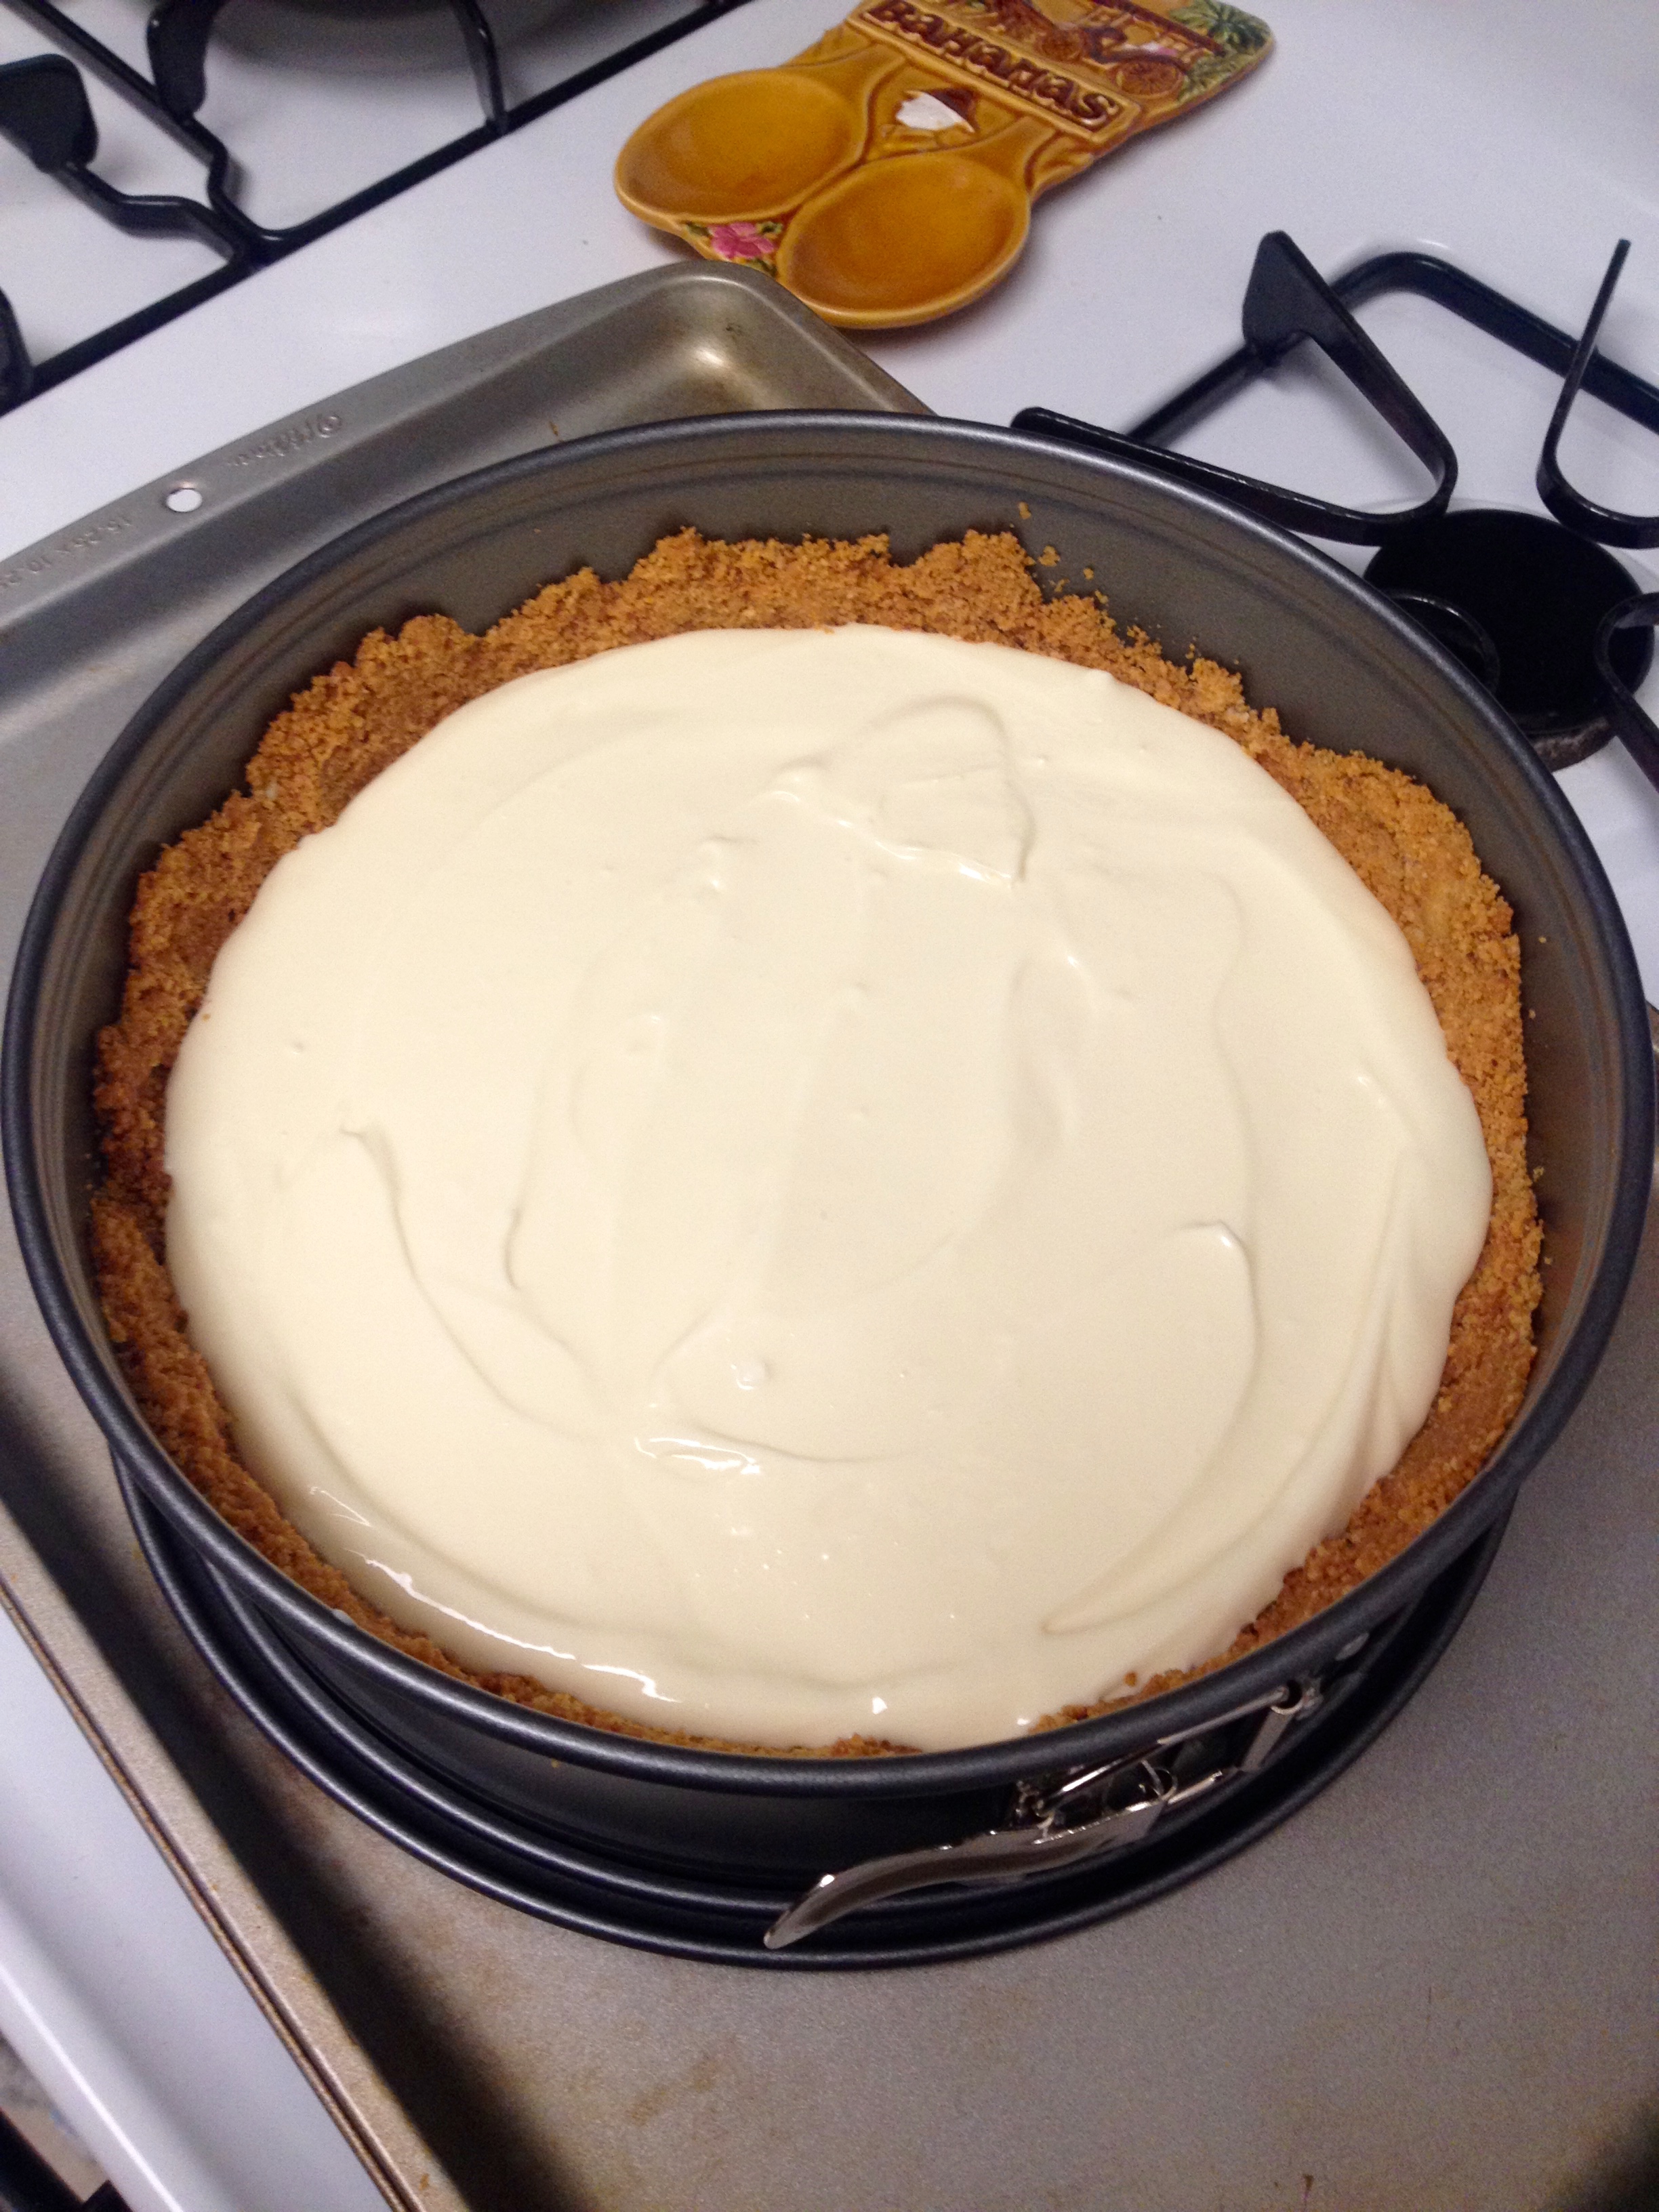
After 20 minutes, put a crust shield around the edge of the pan, or cover the edges with aluminum foil. This will prevent the crust from burning while the cheesecake continues to cook.
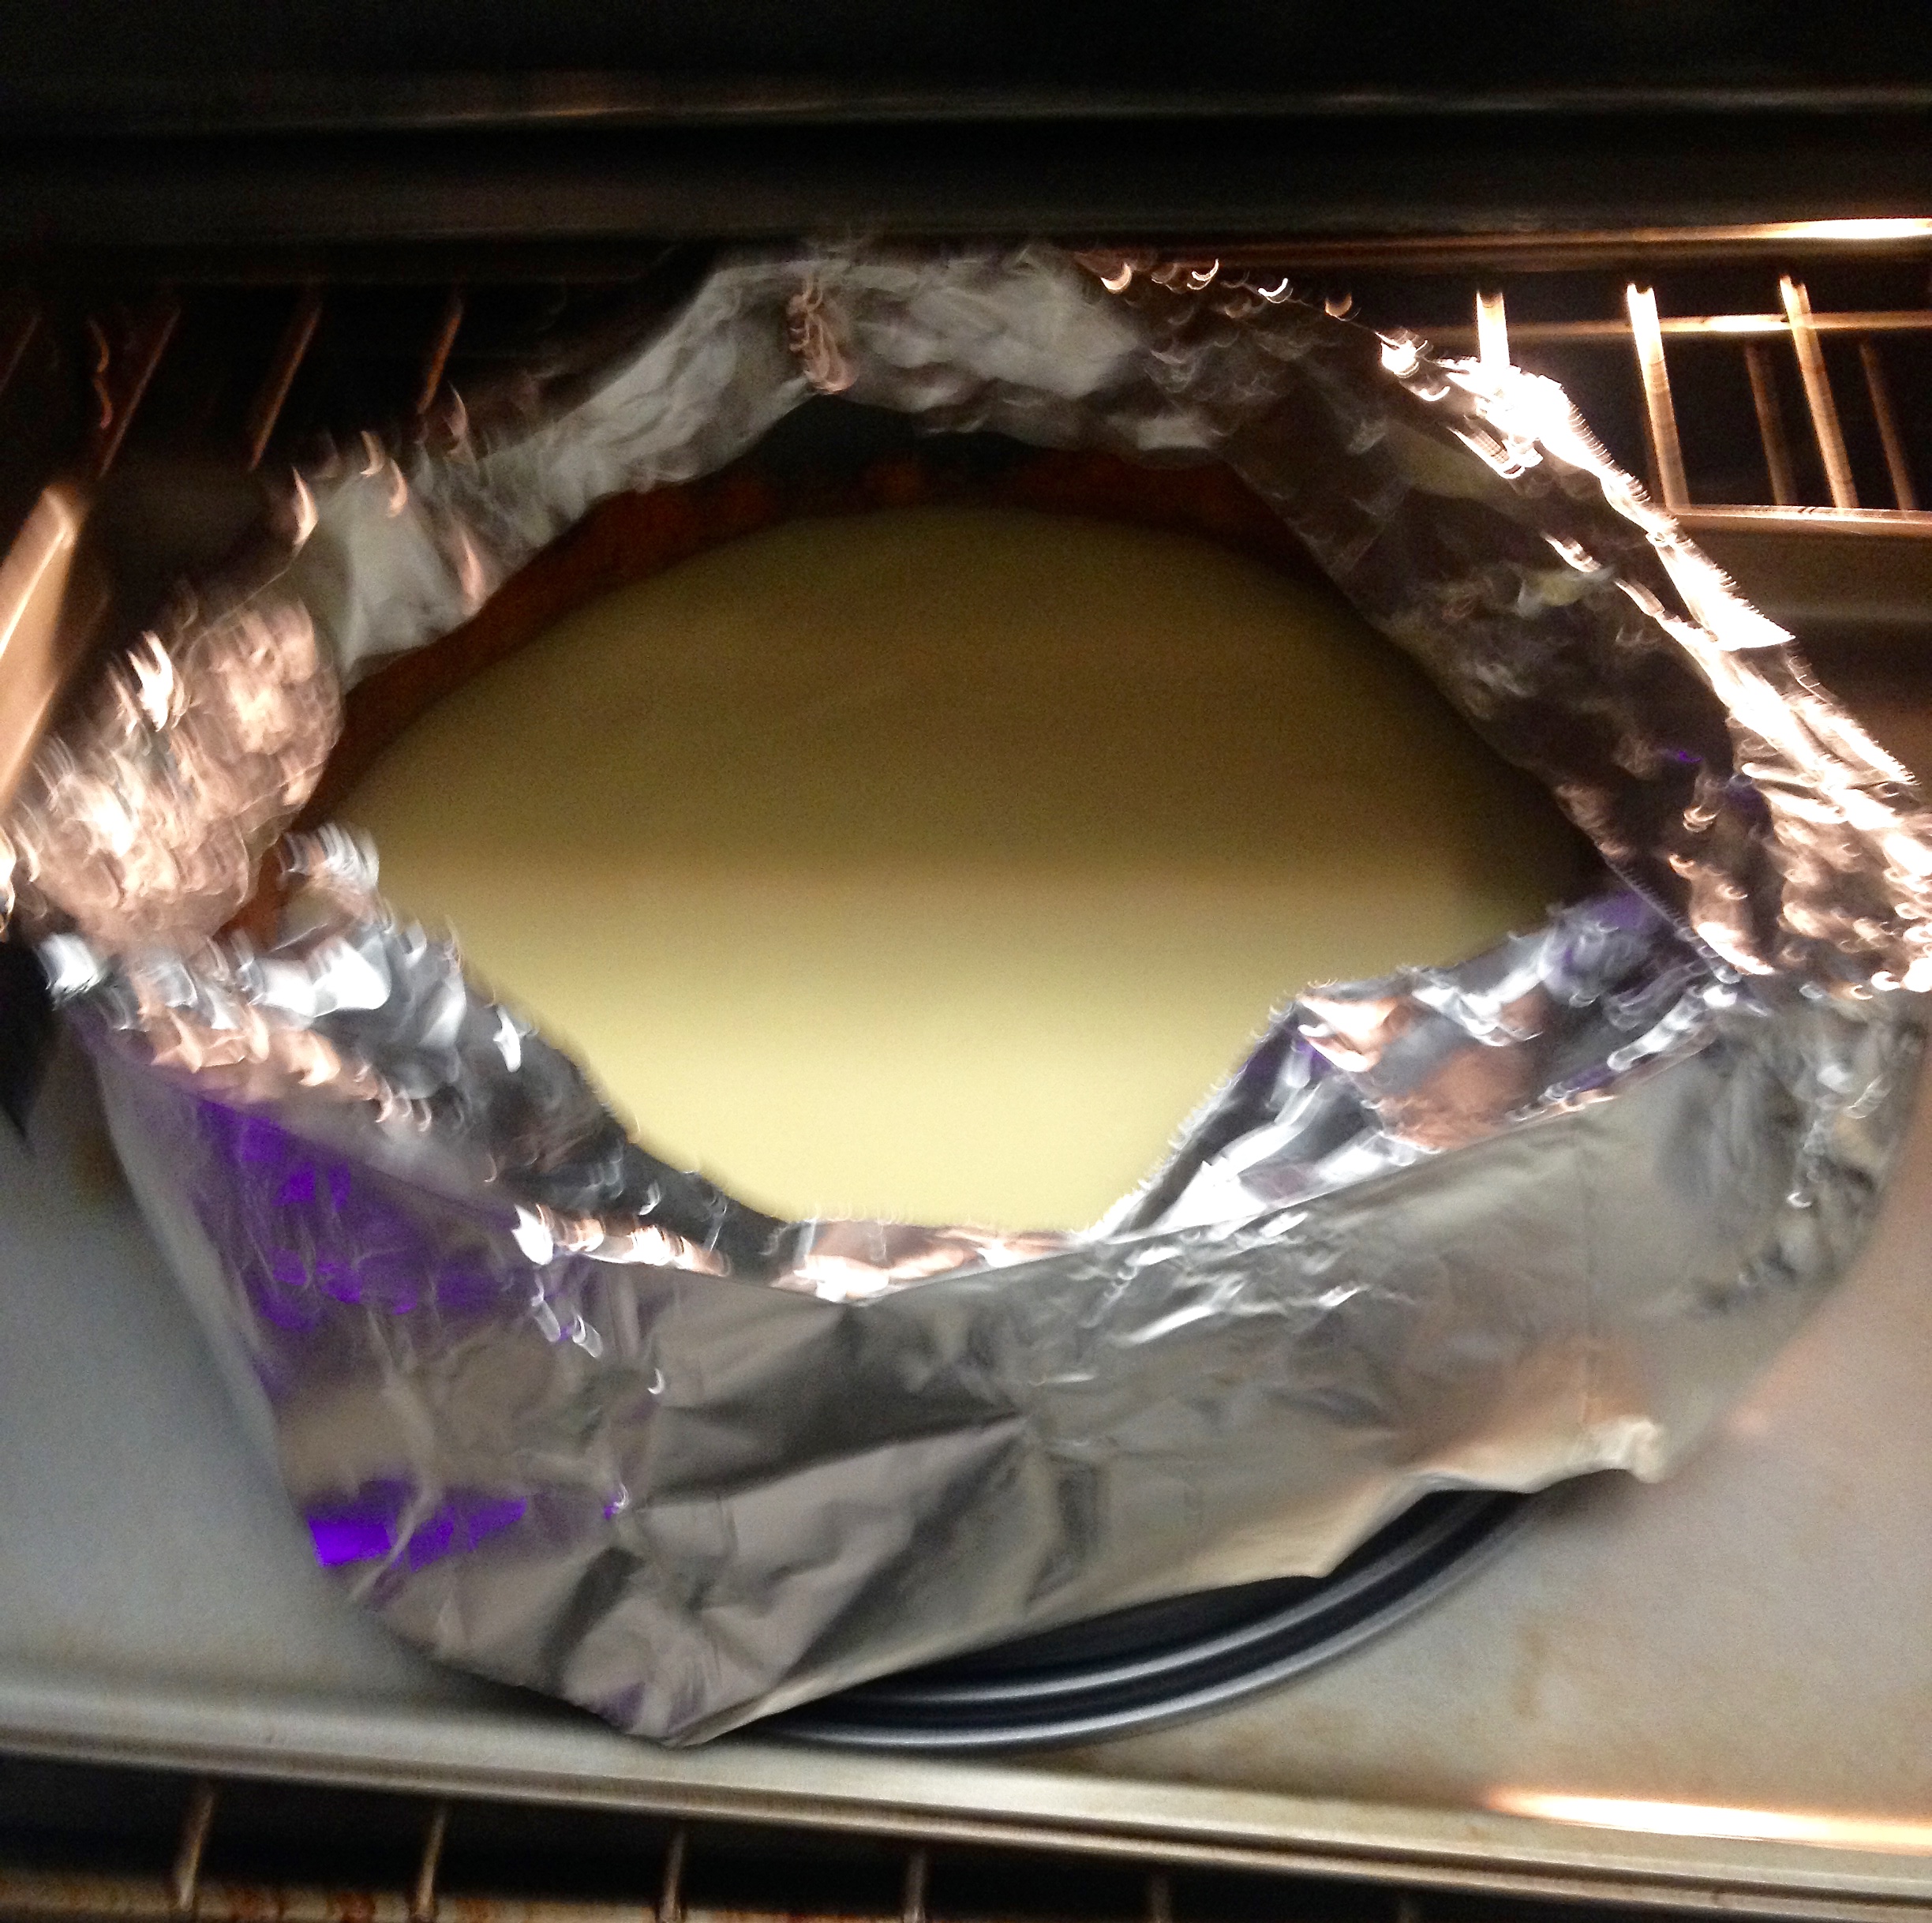
Continue baking the cheesecake for 10 more minutes. When it’s done, a thermometer inserted about 1″ from the crust should read 165-170°F. The filling won’t look totally set in the middle.
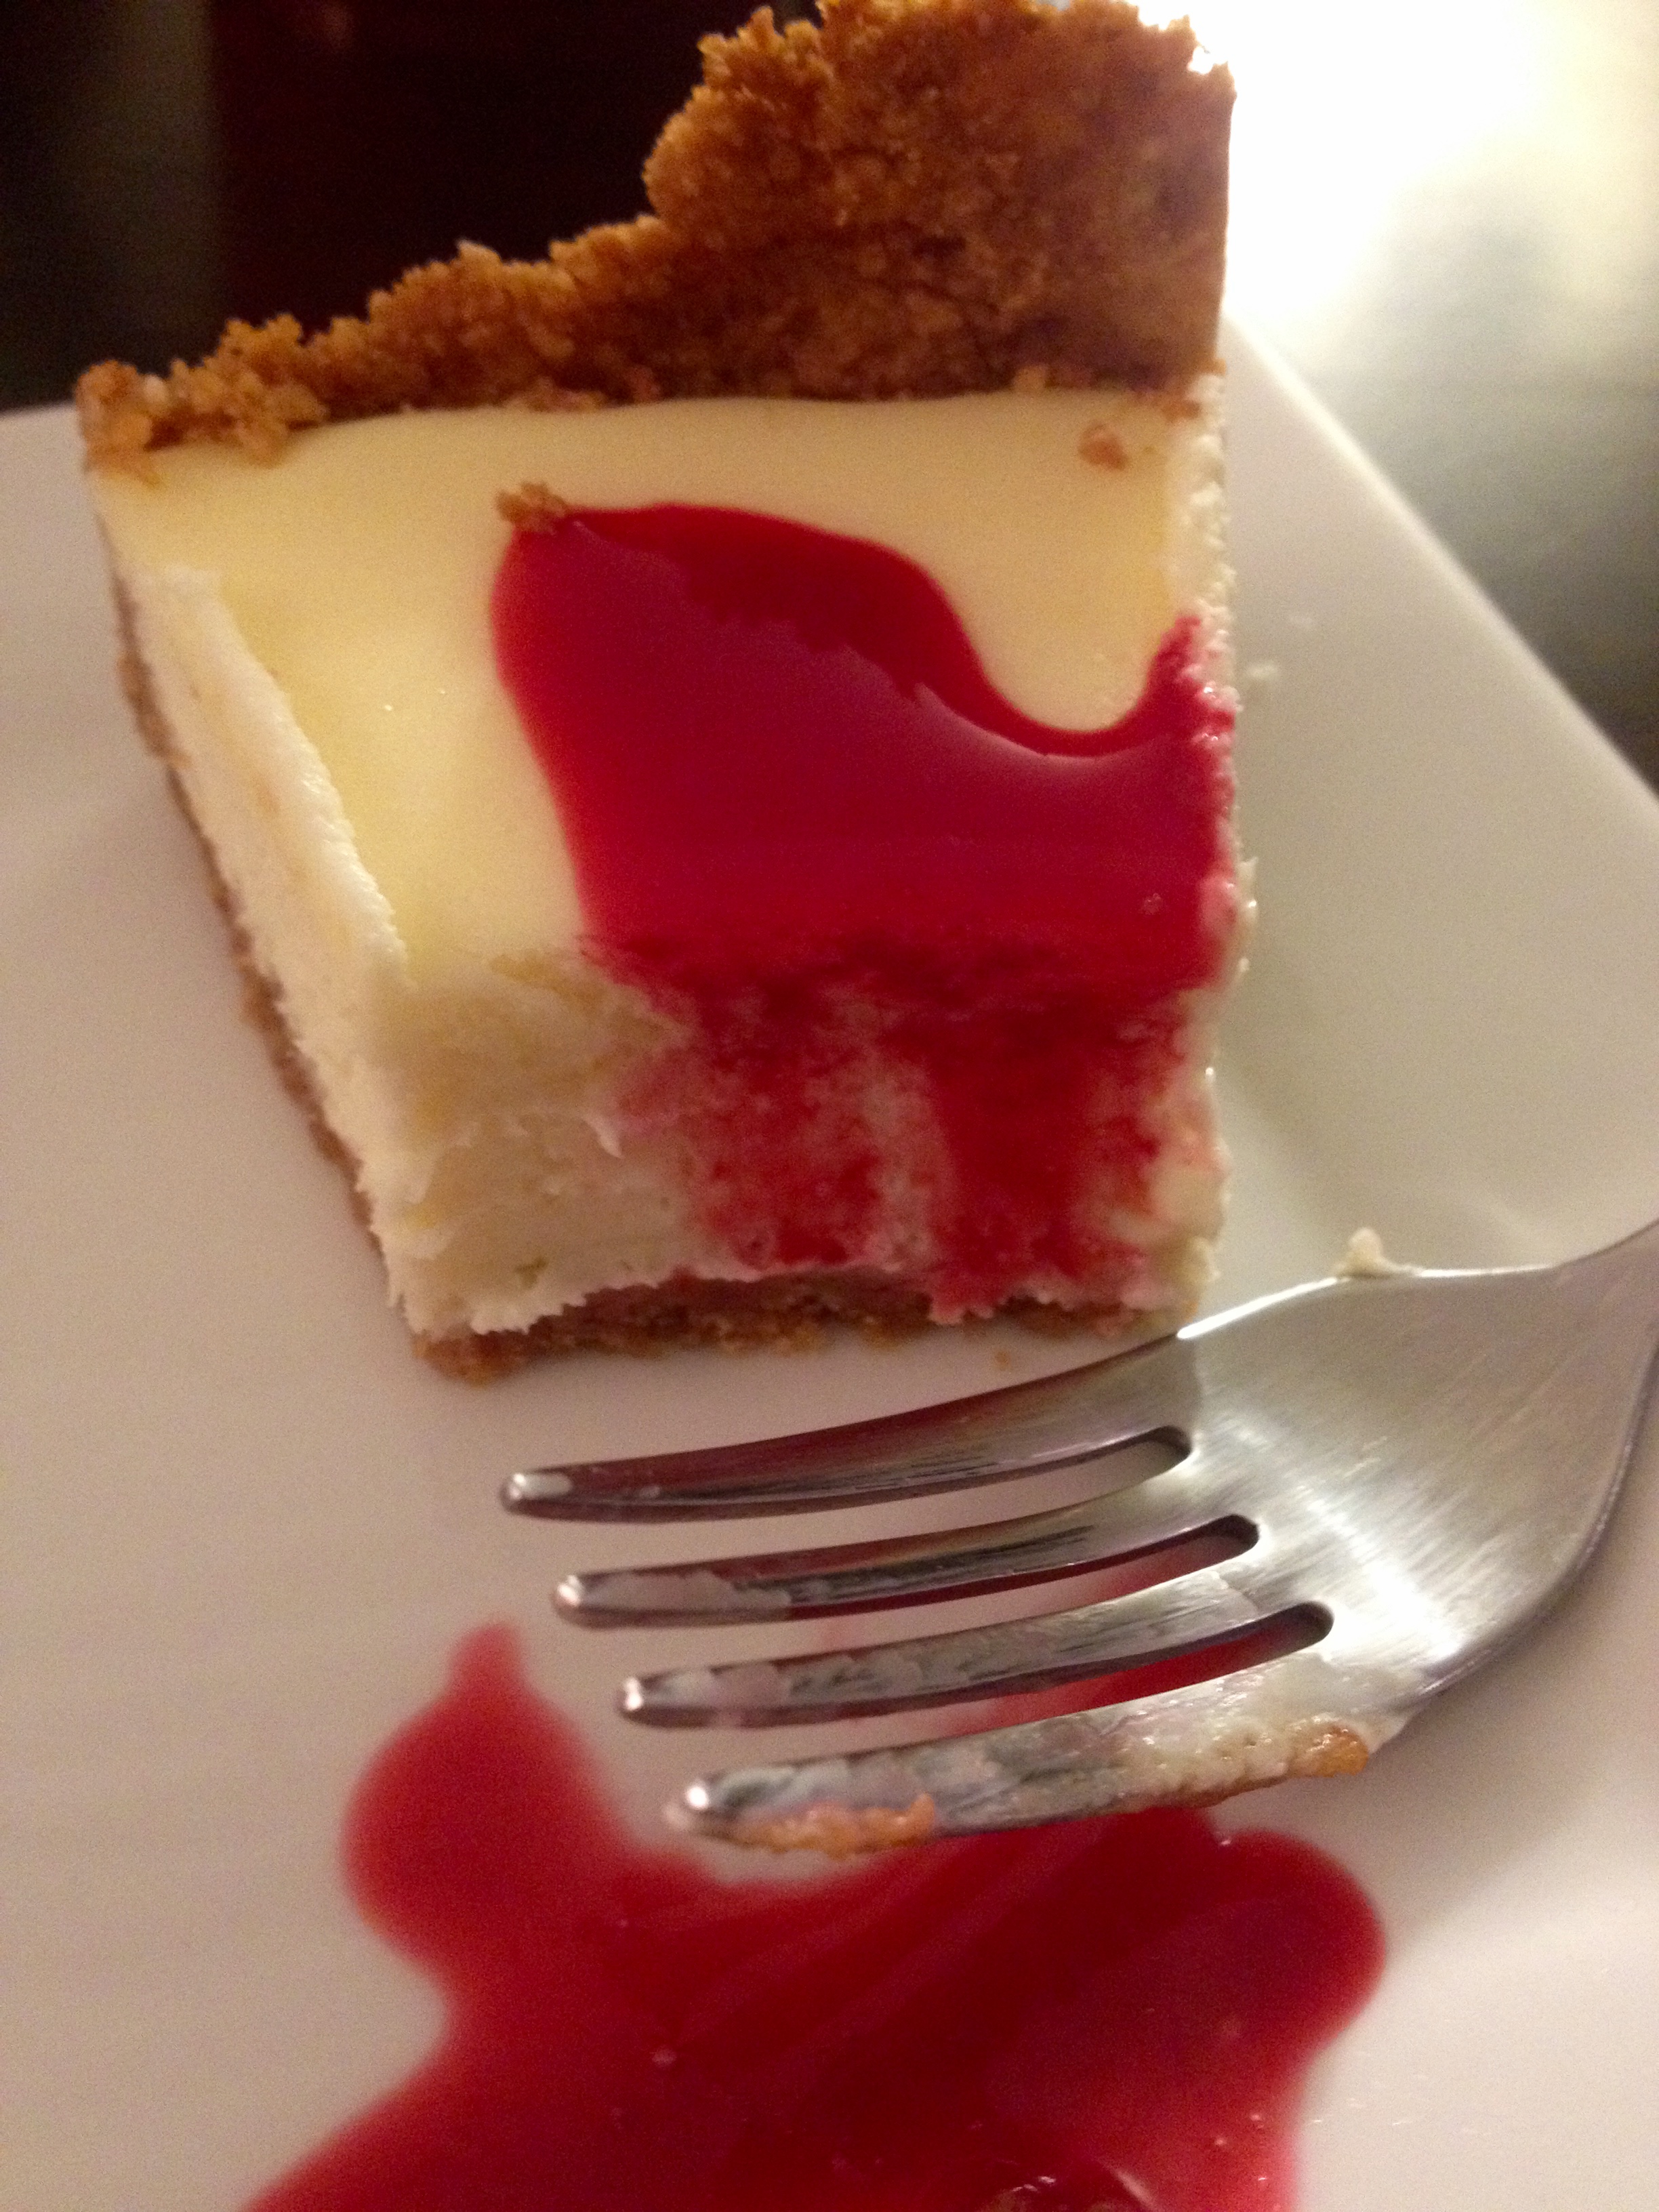
Set the pan on a cooling rack until the cheesecake is completely cooled. Then, refrigerate until you’re ready to serve it.
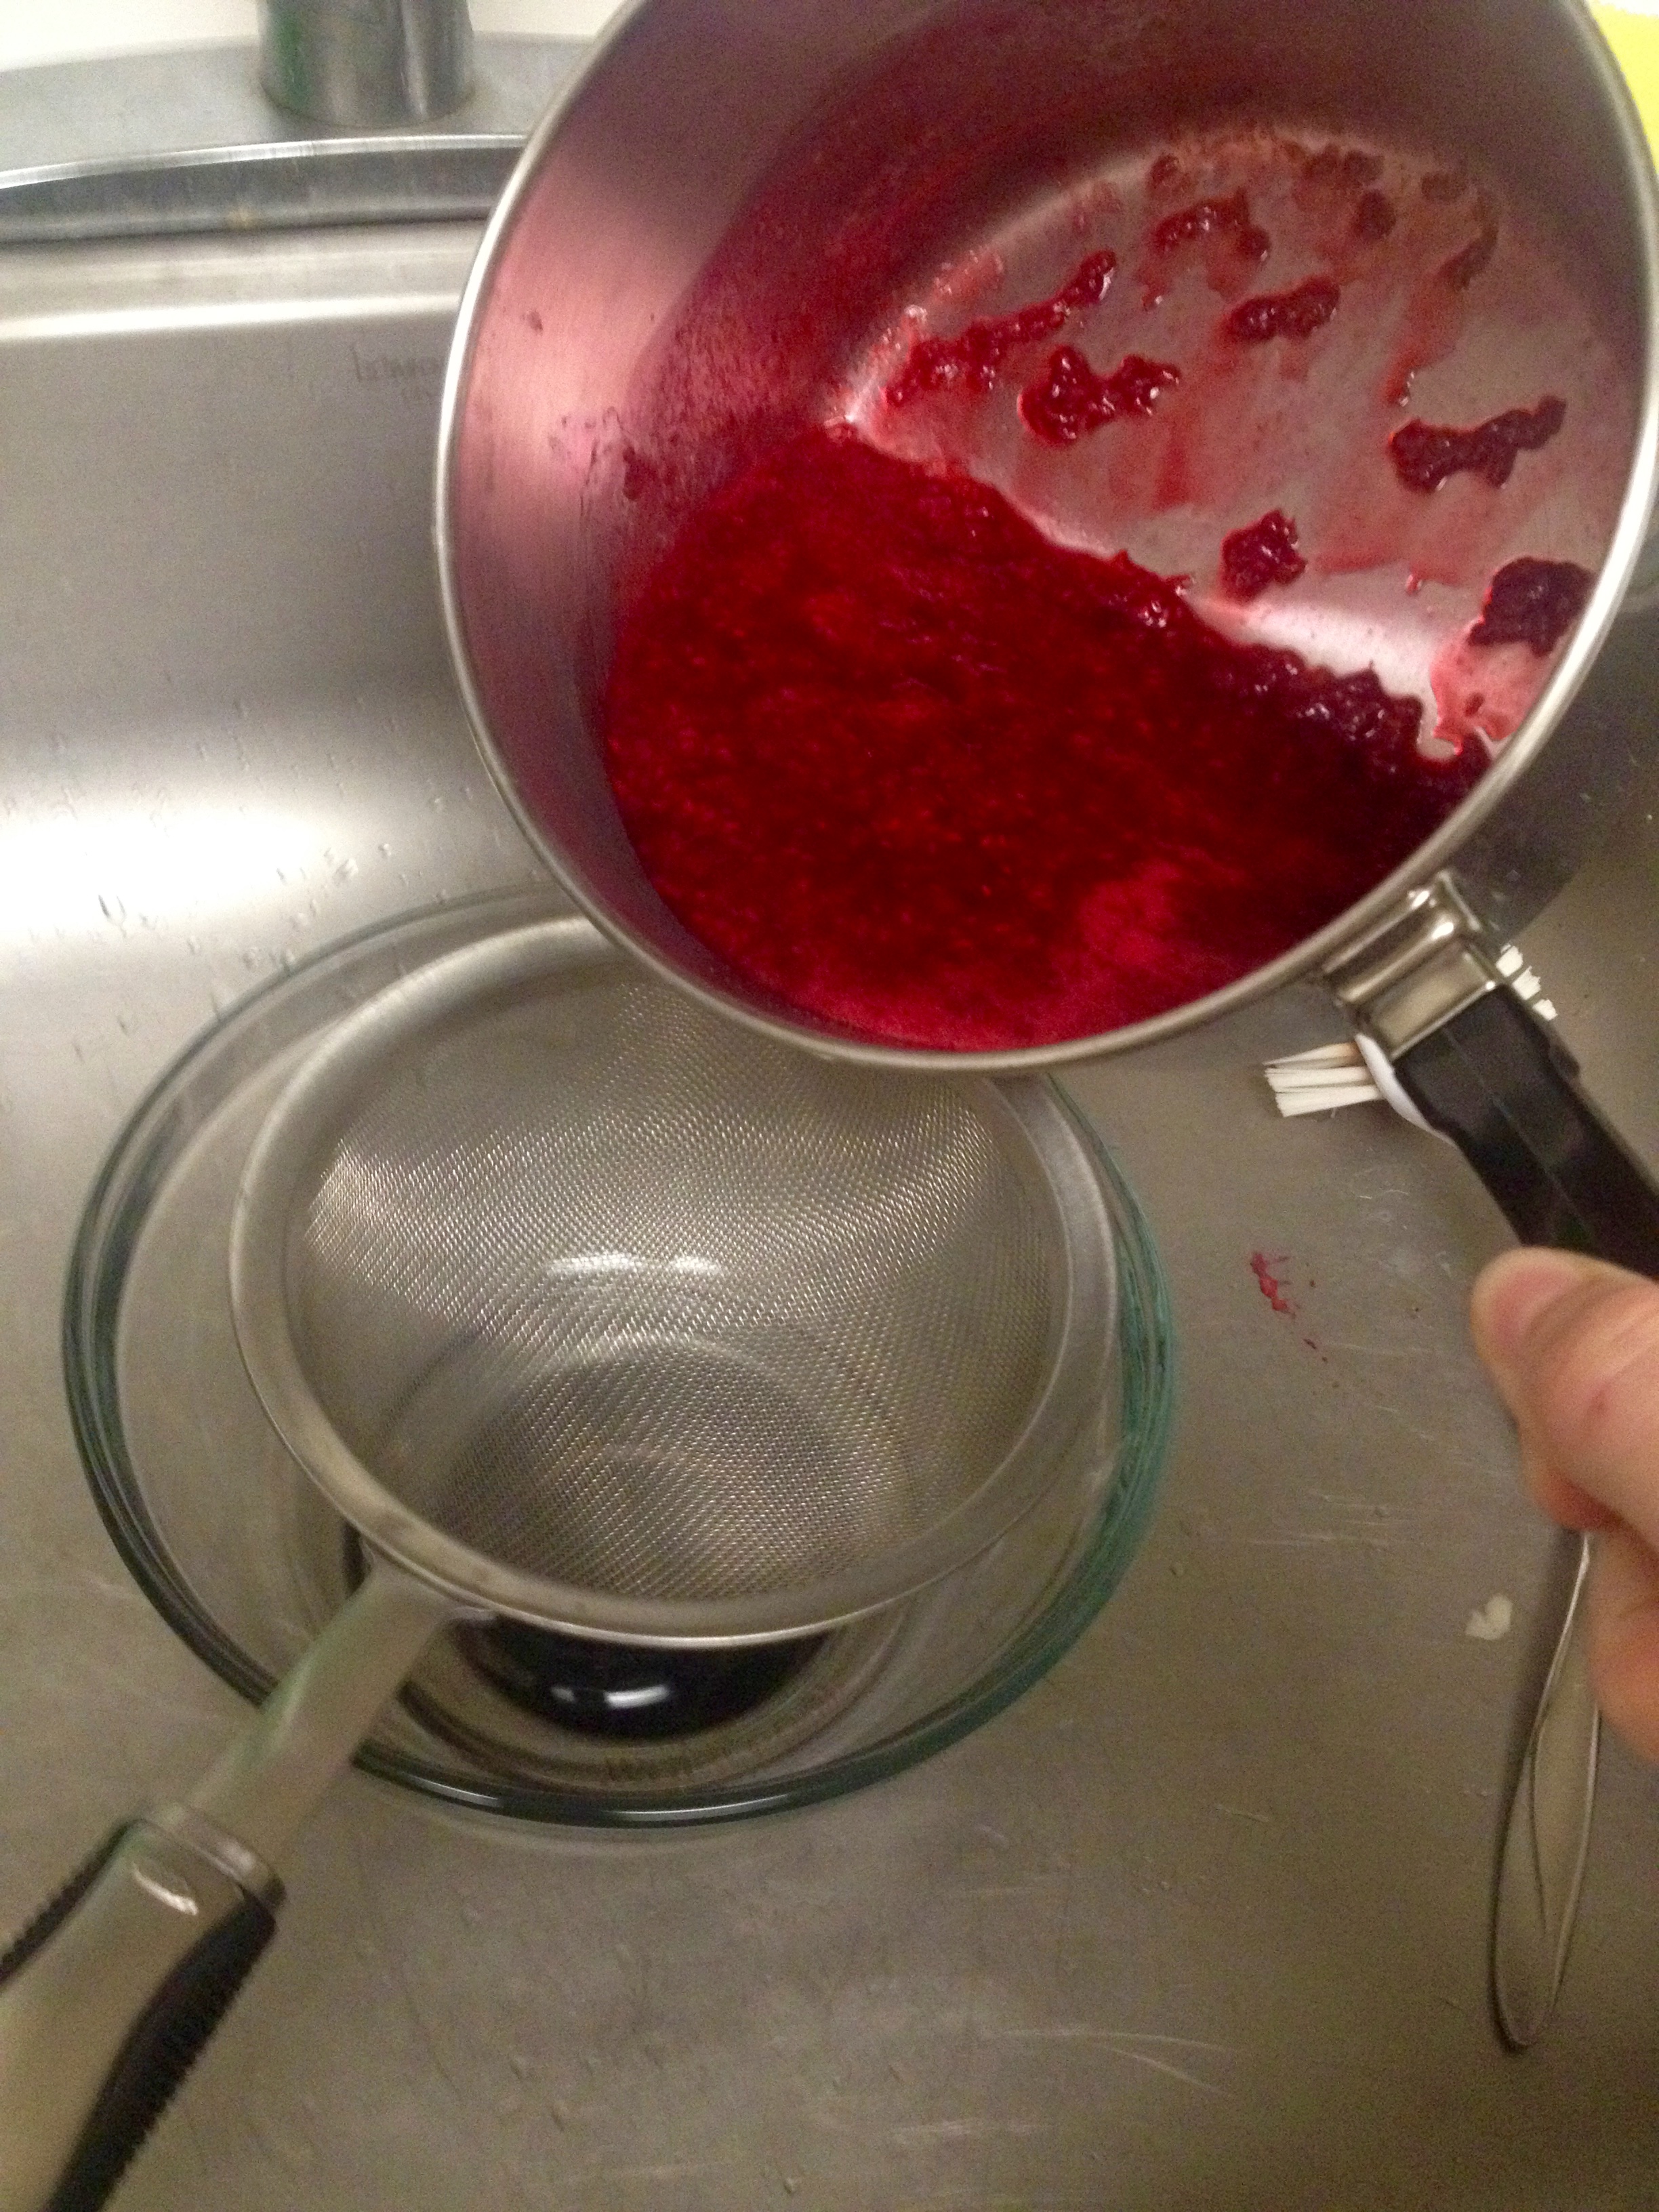
And now we’re on to the raspberry sauce! Easiest sauce ever, seriously. Put all the ingredients in a saucepan over medium heat and stir occasionally until the raspberries break down and the sugar dissolves, and the sauce thickens slightly. You can test the thickness by dipping a spoon in the sauce- if the liquid runs quickly off the spoon, it’s too thin; if it drips slowly off the spoon, you’re in business.
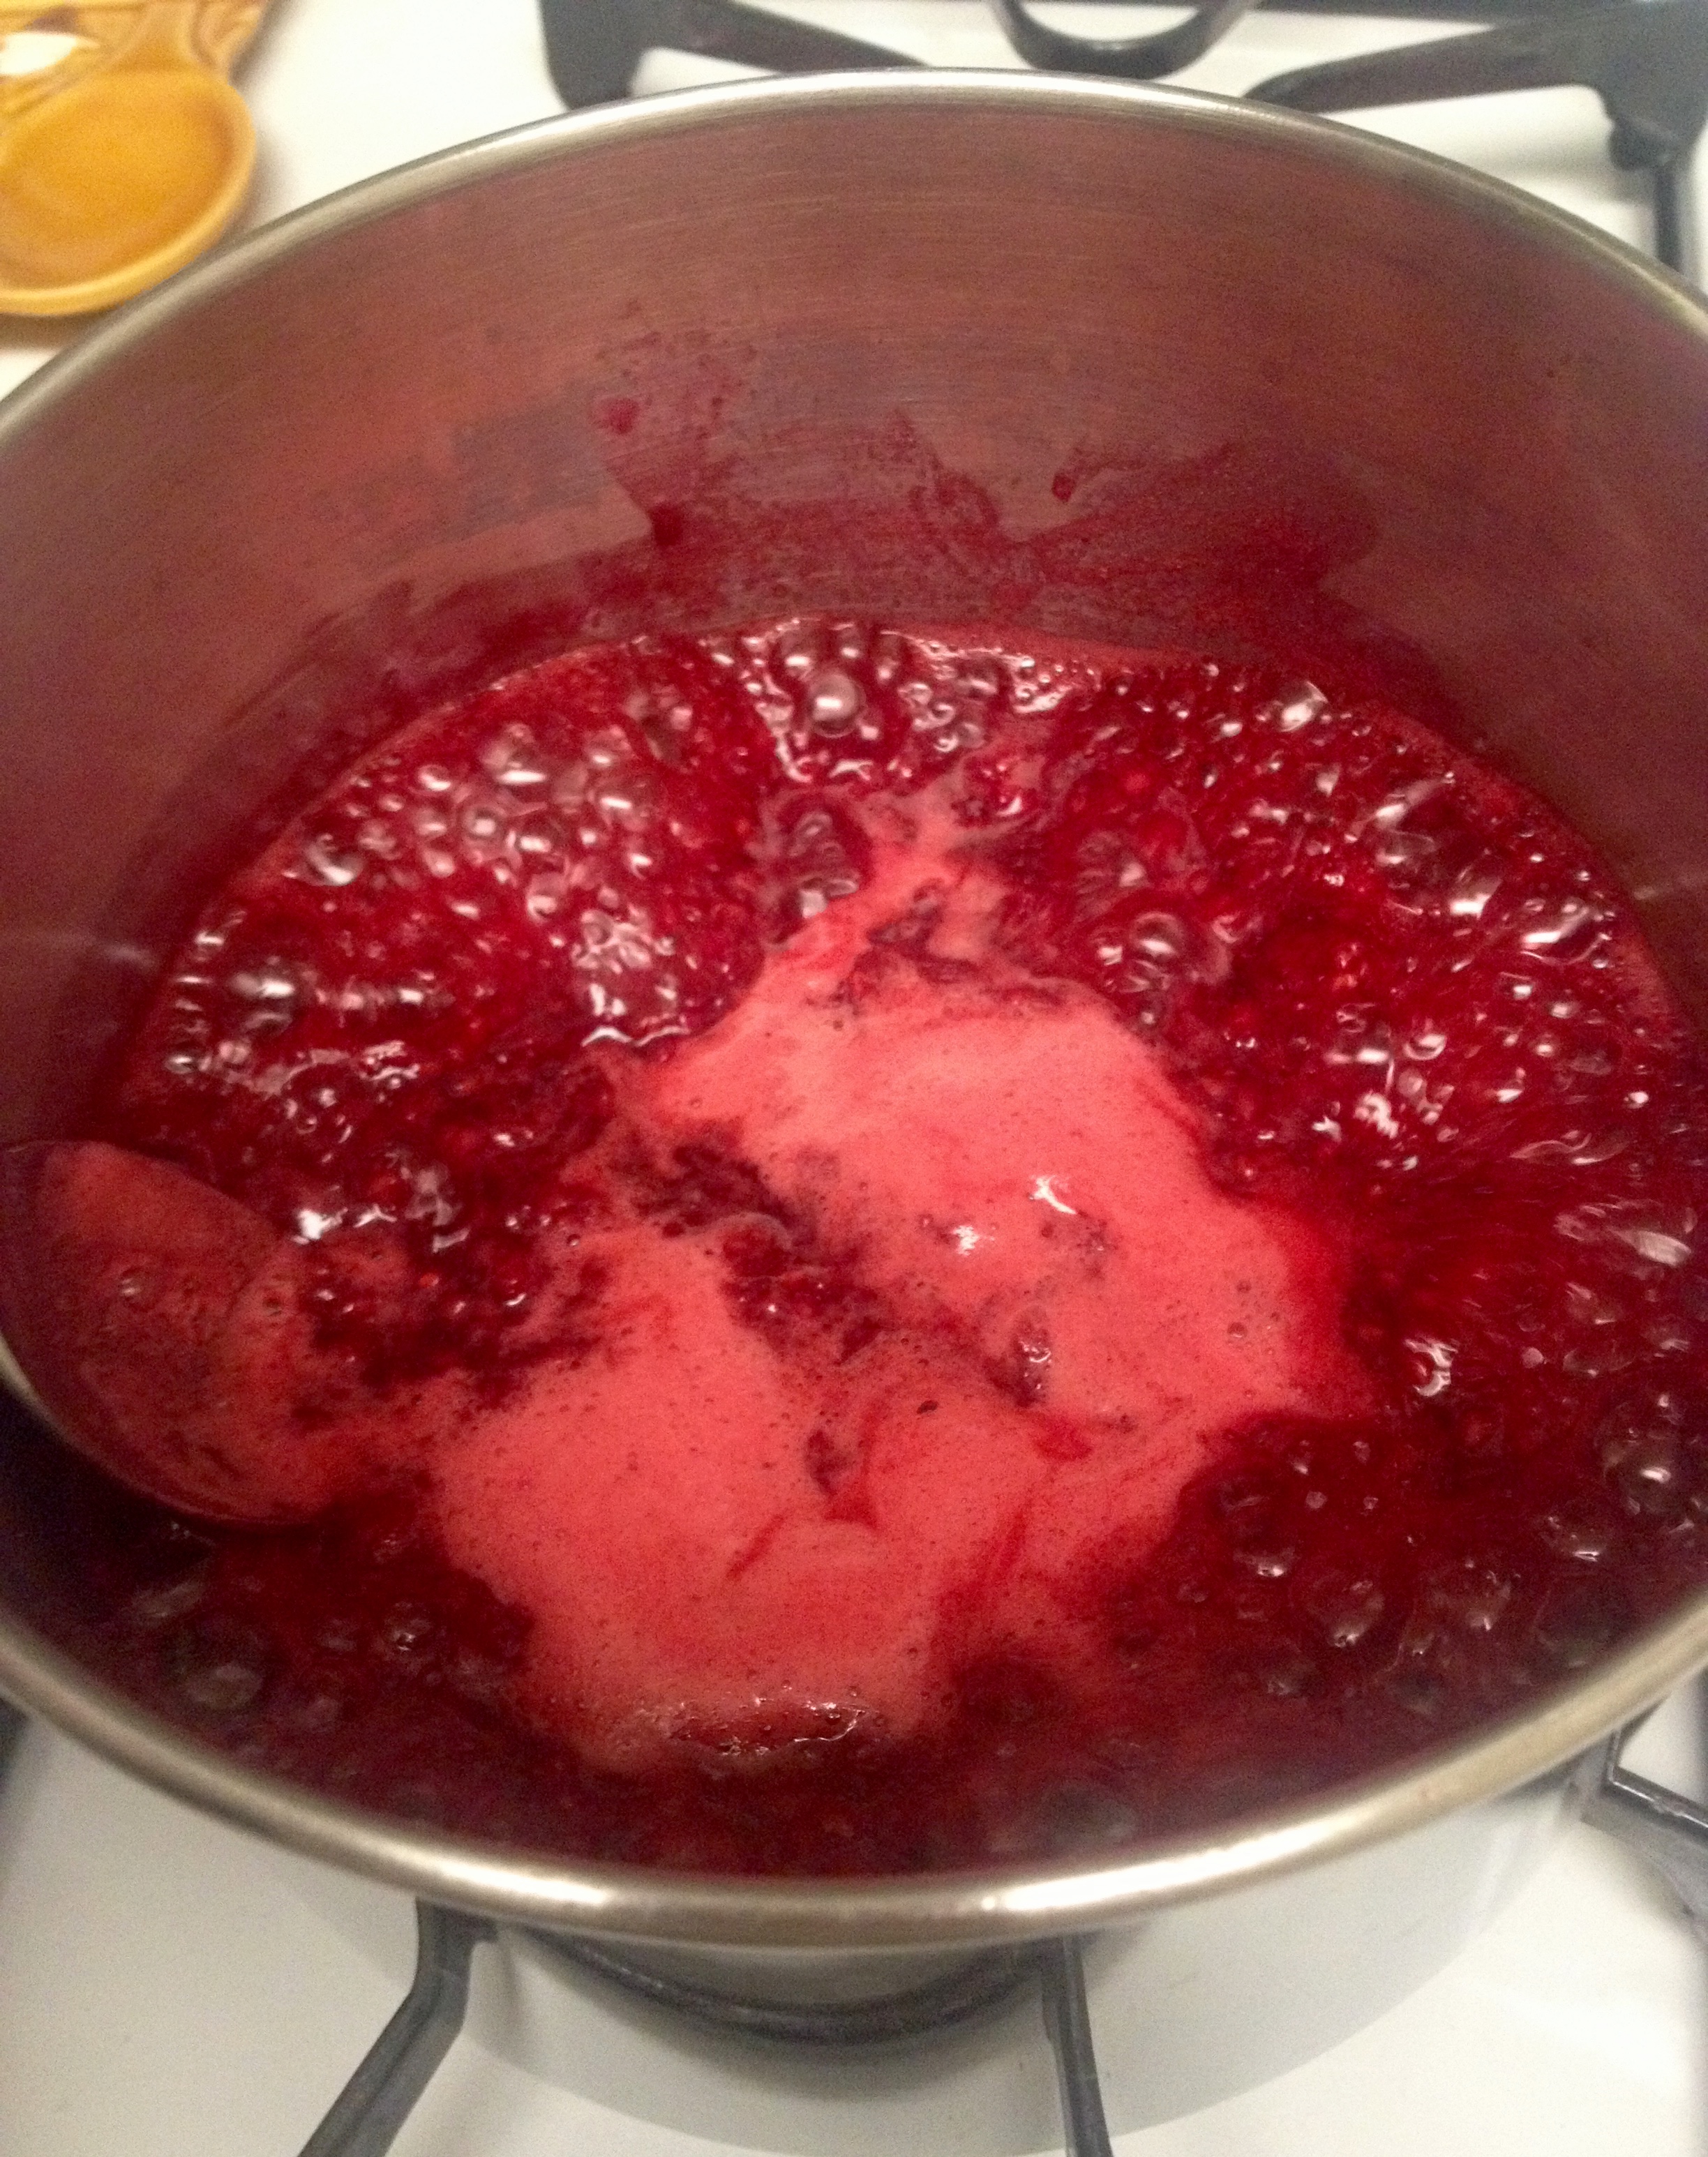
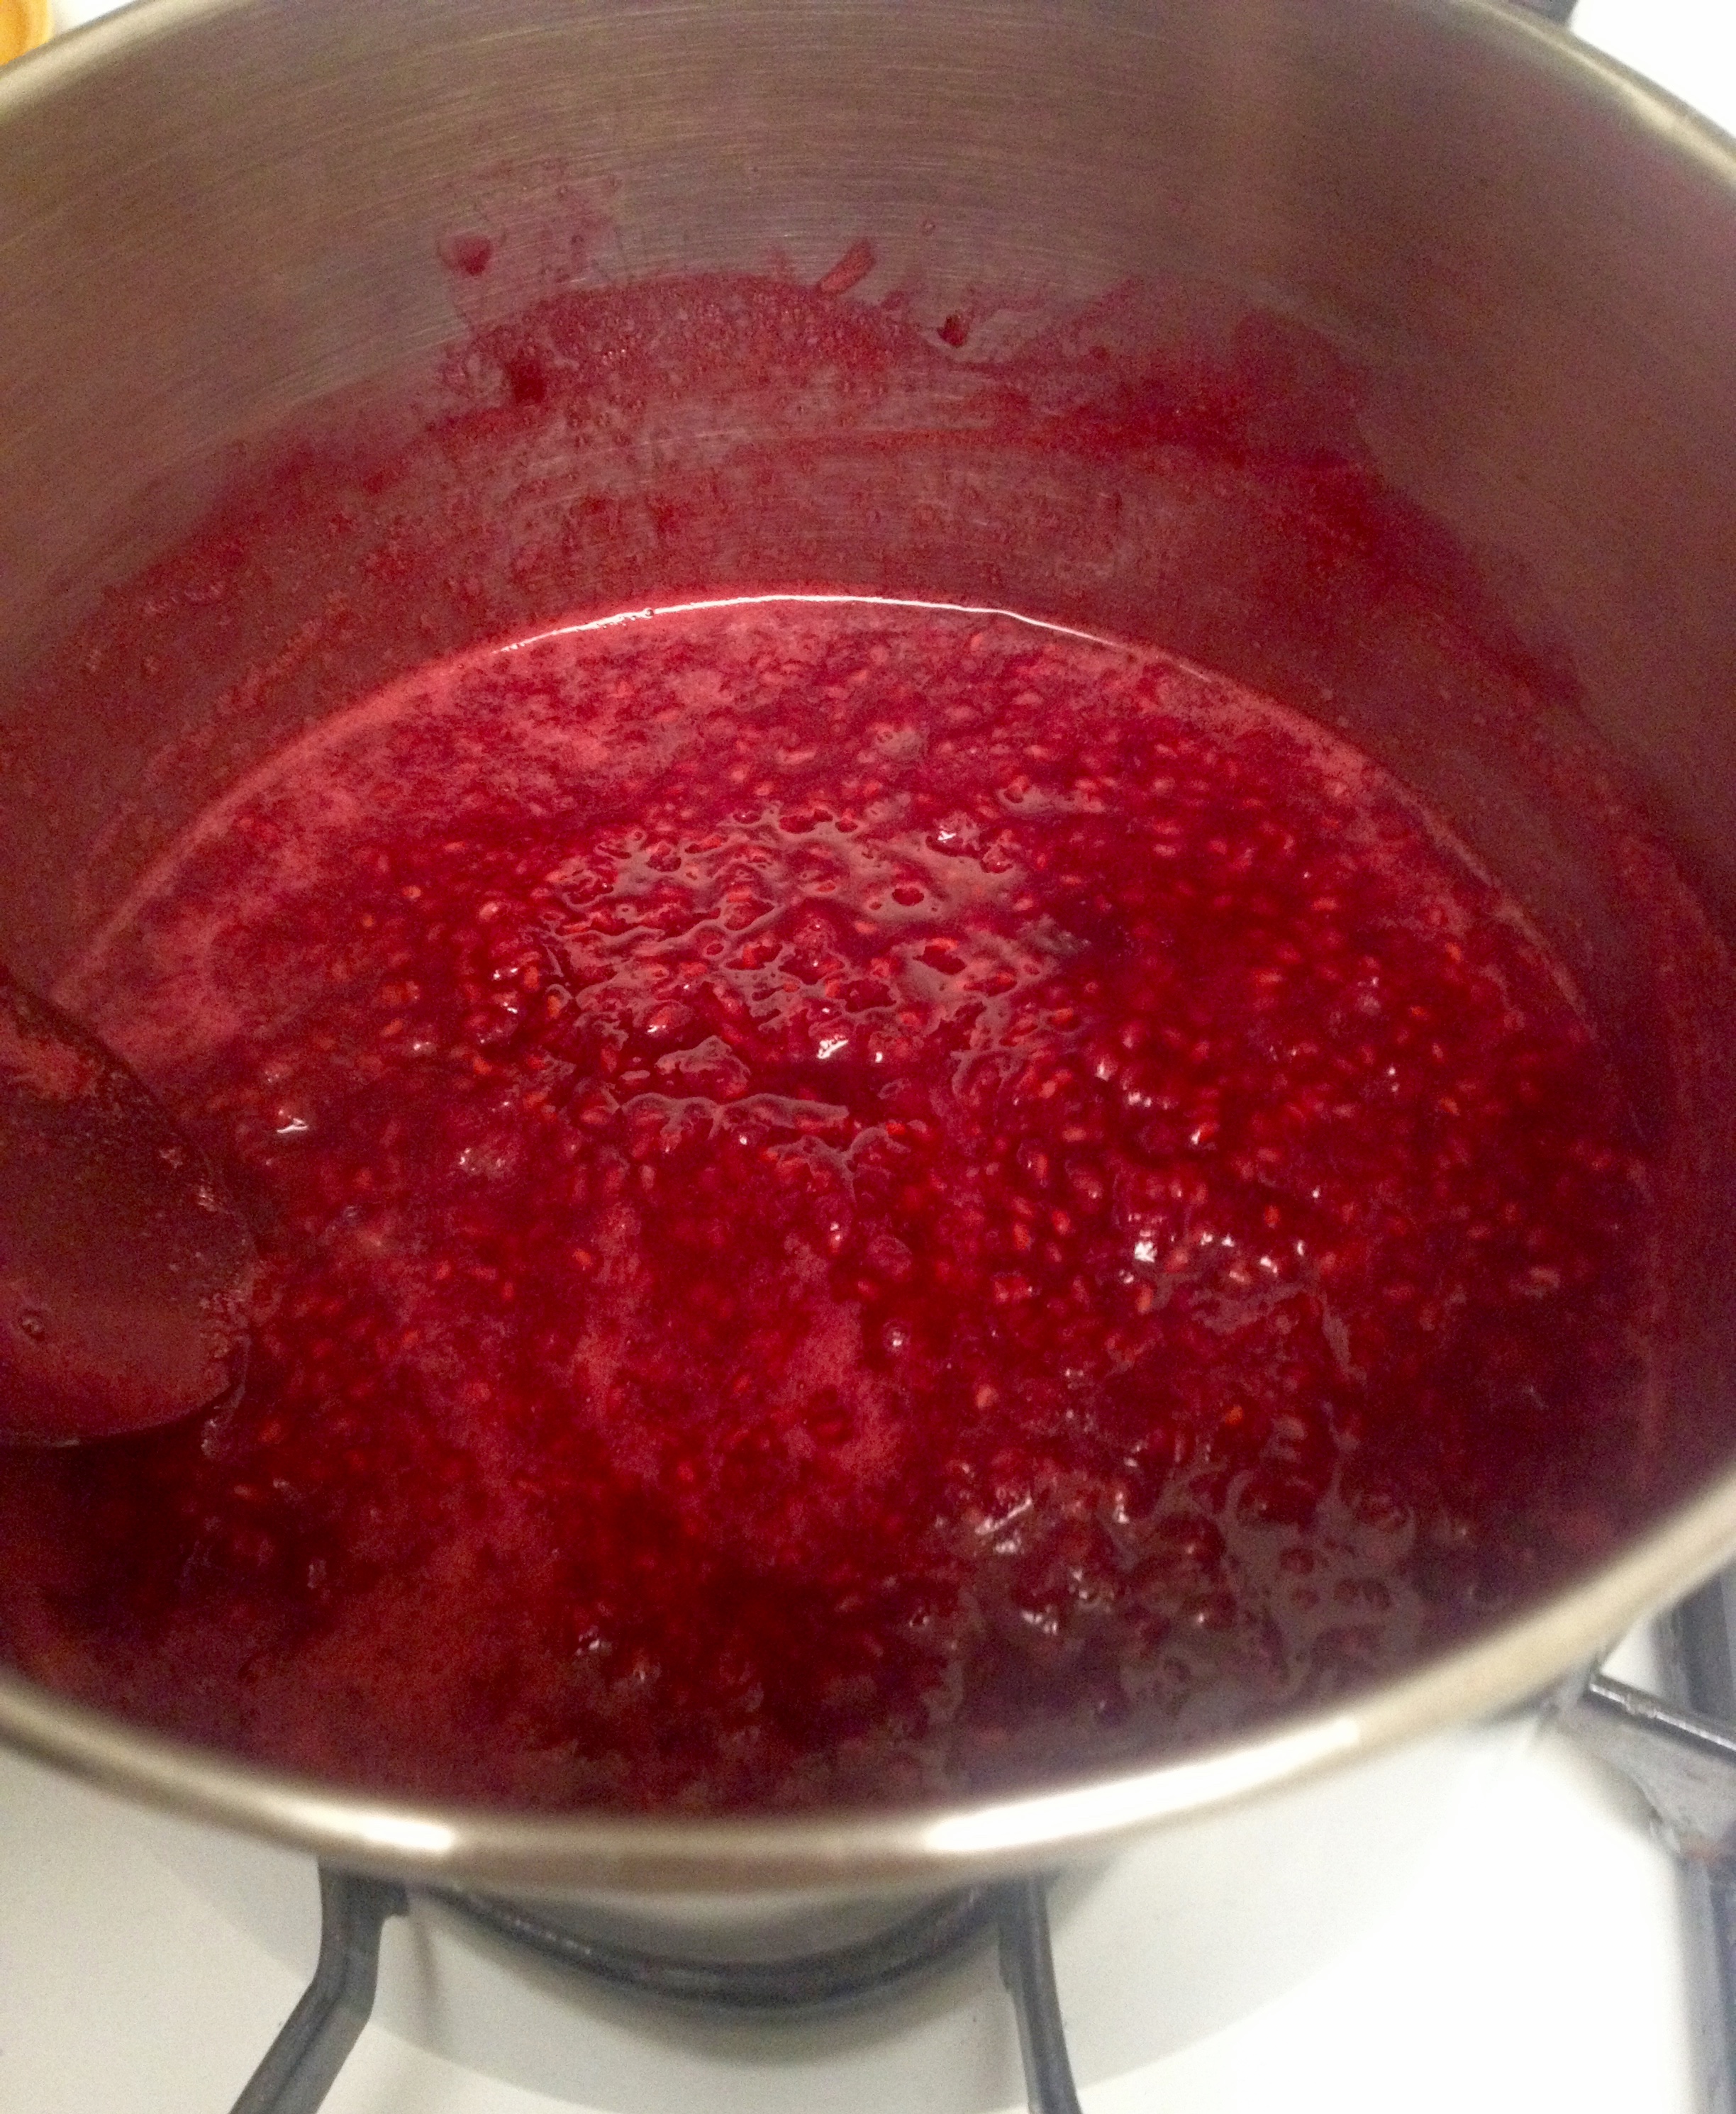
Then, pour the sauce into a bowl through a fine mesh strainer to get rid of the raspberry seeds.
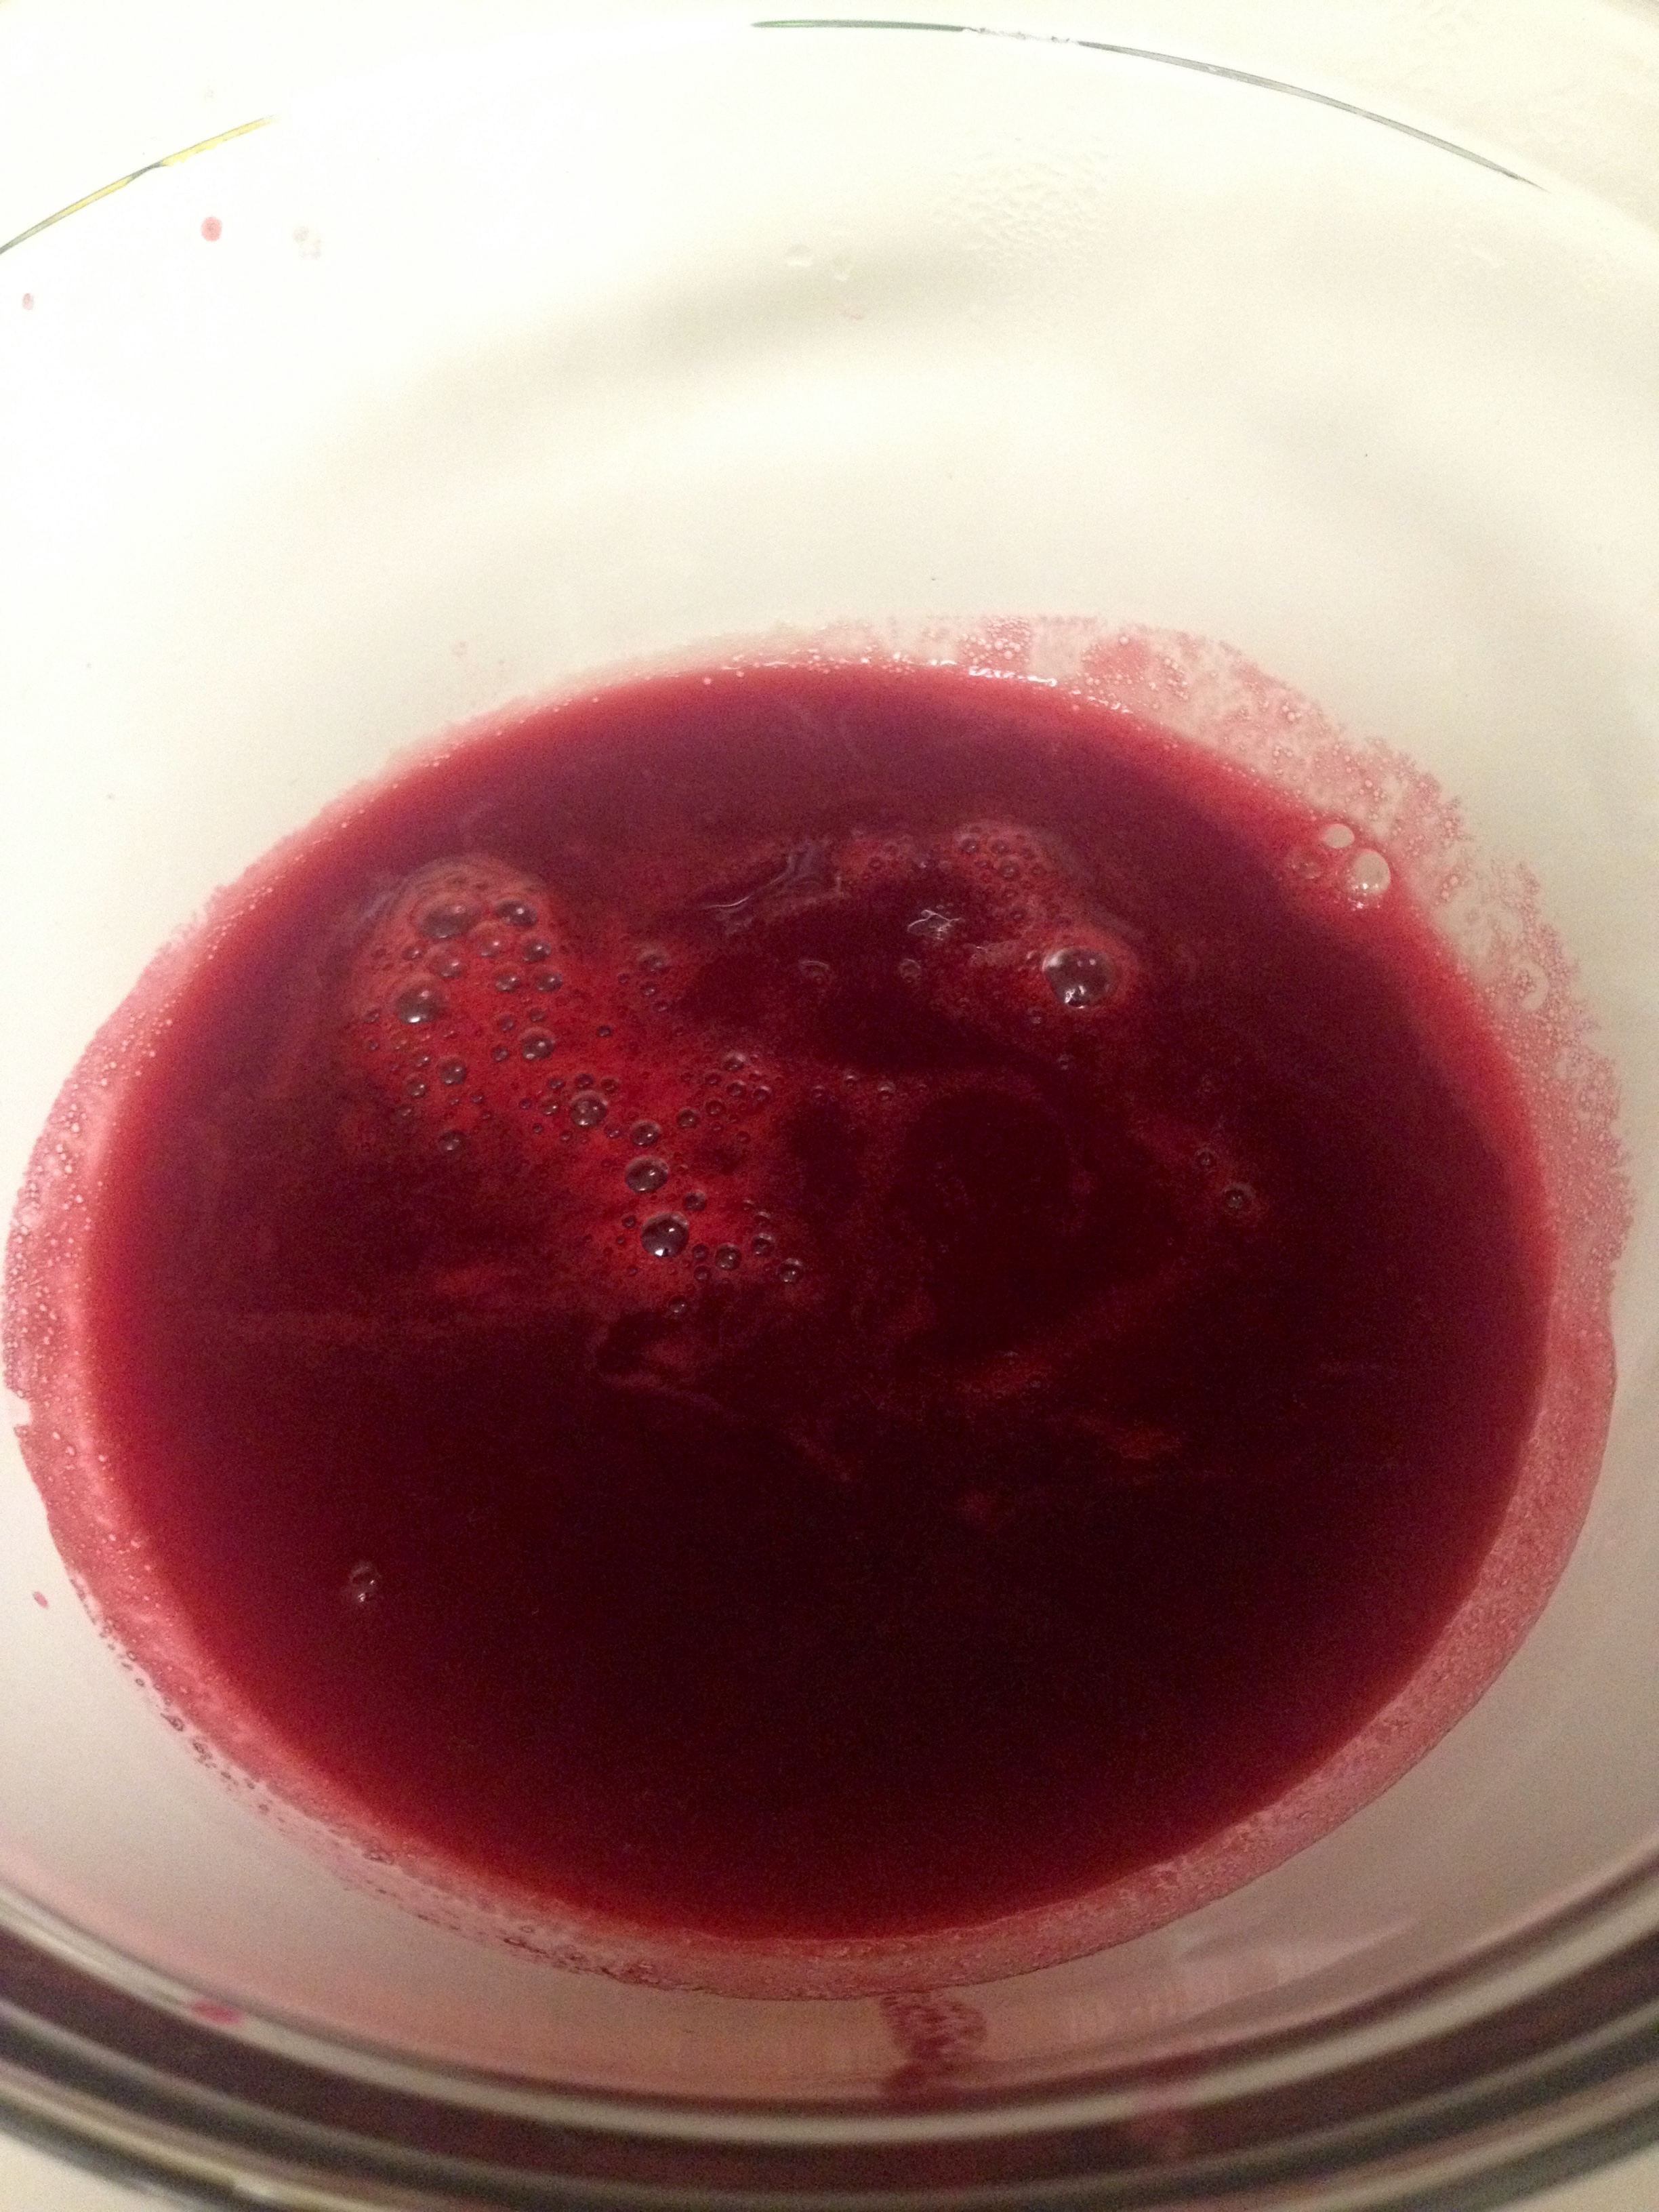
And that’s it! Now you have a wonderful raspberry sauce to top your cheesecake, and to give as gifts. Happy baking, and happy holidays!
Super Bowl LI
Hi all! Happy Super Bowl Sunday! I’m sure you’re all preparing your game day snacks and getting ready for the party, just like I am. I’m heading to a party full of Patriots fans, even though my husband and I are rooting against them (please don’t unsubscribe to my blog for that, though!). My job is dessert, so with a little help from my husband and some leftover orange juice, I have a fun and fitting dessert for the party: football-shaped cake. Here’s the recipe:
Cake Ingredients:
- 2 cups sugar
- 1/2 cup butter, softened
- 1/2 tsp salt
- 3 eggs
- 4 cups flour
- 4 tsp baking powder
- 2 cups orange juice
Topping:
- 1/2 cup sugar
- 1 tsp cinnamon
- 1/4 cup (1/2 stick) butter
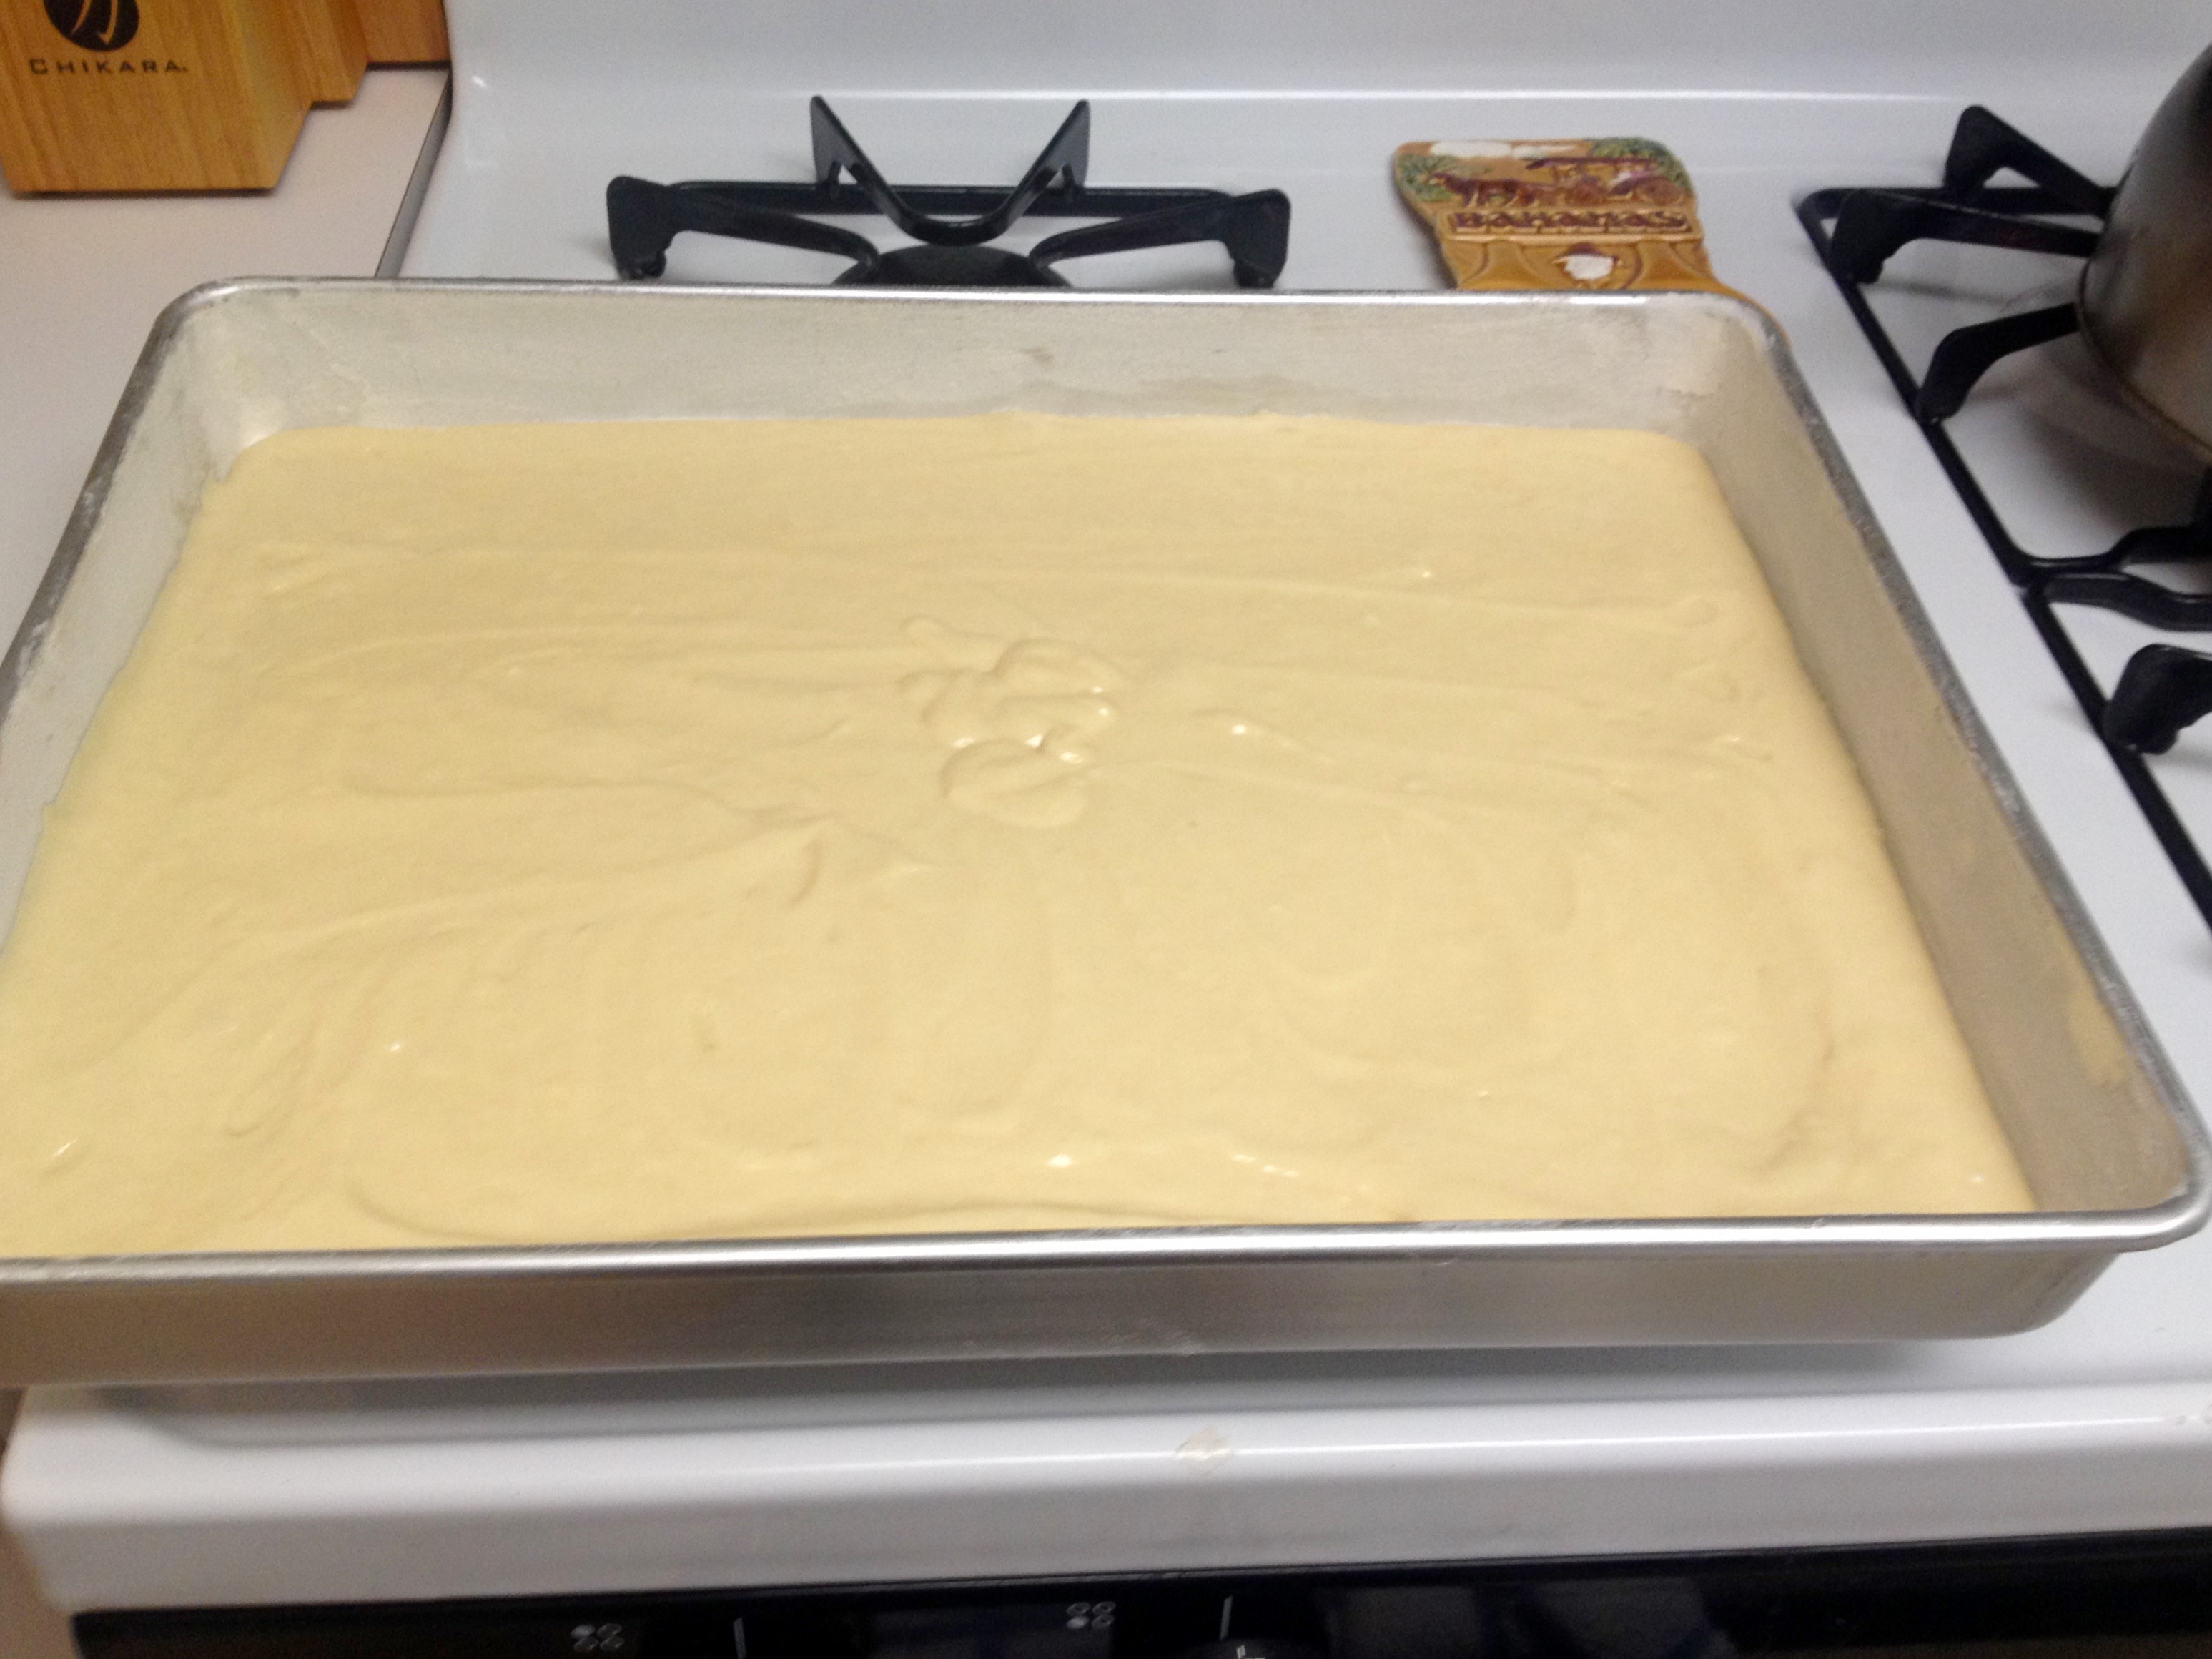
First, preheat the oven to 350°F. Grease and flour an 11×15″ baking pan and set aside. Cream the butter, sugar, salt, and eggs together. Sift the flour and baking powder together into a separate bowl. Then, using a stand mixer or a hand mixer, alternate gradually adding the orange juice and the flour mixture, until the batter is well mixed.
Pour the batter into the greased/floured baking pan.
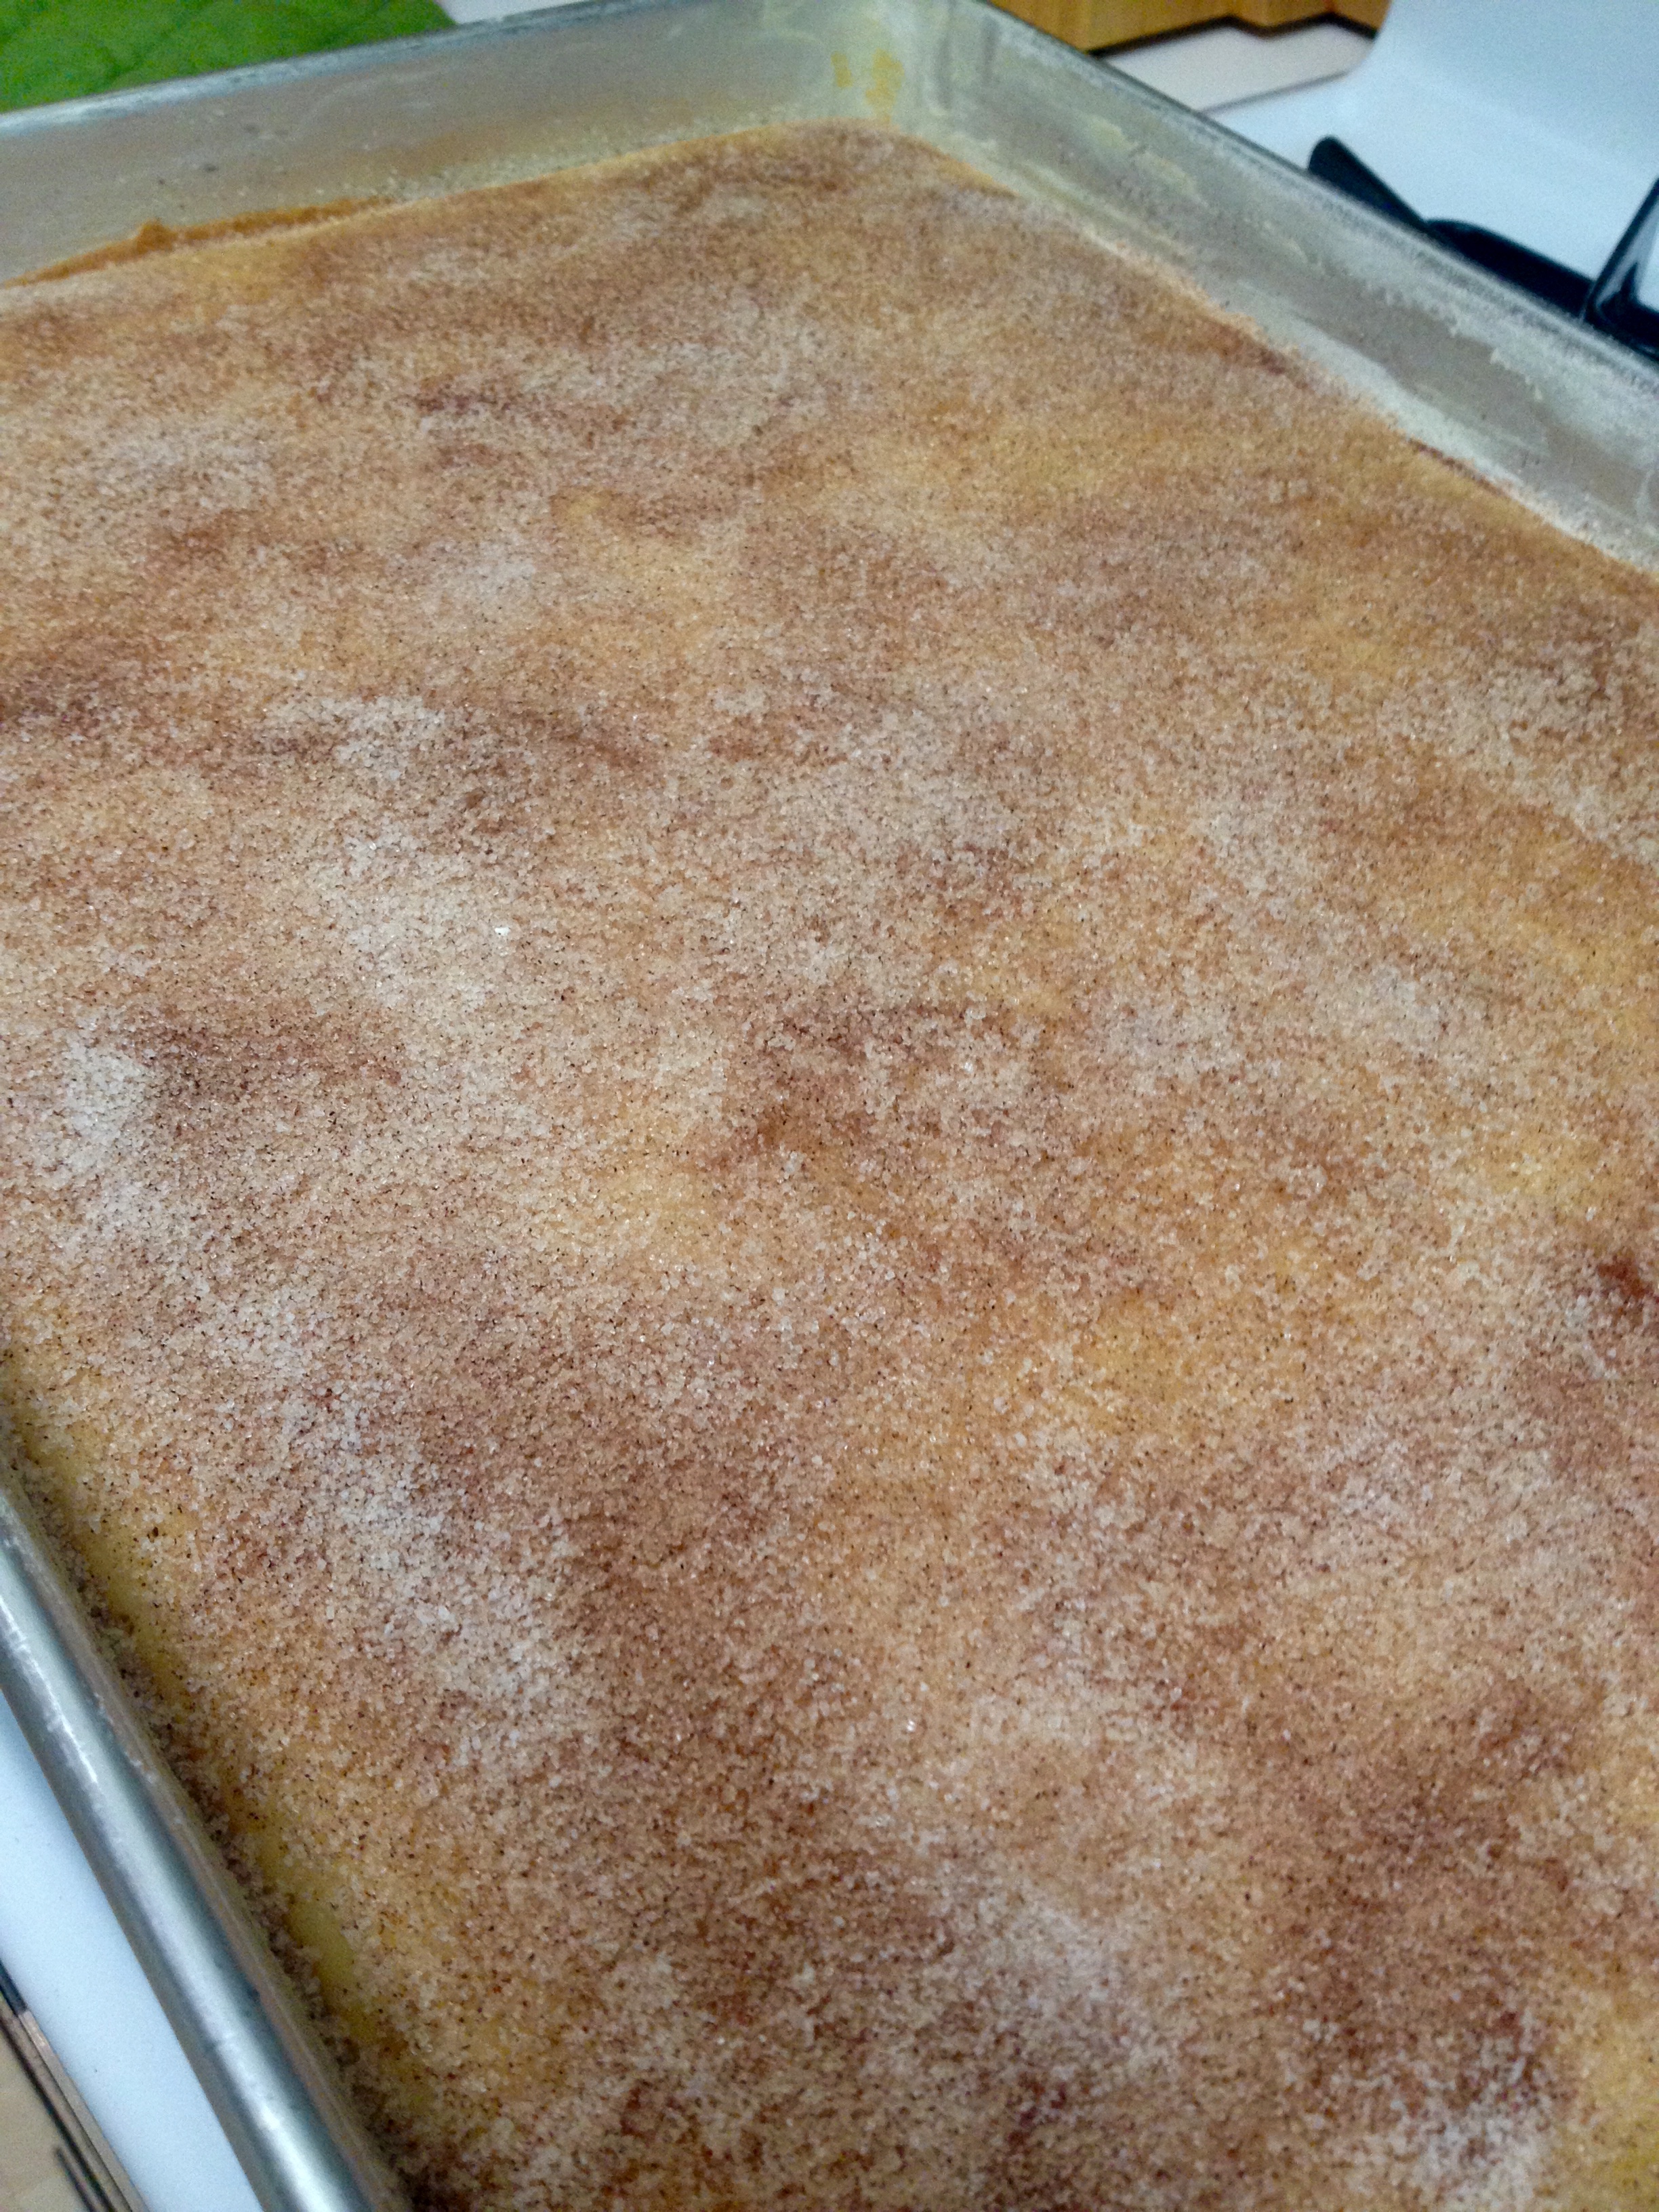
Bake for about 25 minutes, or until a toothpick comes out clean from the center. The cake will be super light when it comes out, so don’t let that fool you into thinking it’s not cooked! While the cake is still baking, combine the cinnamon and sugar for the topping.

While the cake is still piping hot, rub the 1/4 cup of butter over the top of the cake. The butter will melt and start to soak into the cake, and it makes it really delicious and moist. Then, sprinkle the cinnamon and sugar mixture over the top of the cake evenly.
Now, let the cake cool completely. This is where the recipe ends, but obviously it’s the Super Bowl, so I had to make it more football-related! I was originally planning to leave this cake in the sheet pan and decorate it to look like a football field, but my husband had the great idea to carve it and decorate it to look like a football (easier since the cake is brown to begin with!). Thus started the intense carving session.
First, we lined toothpicks up on the cake to make the shape of a football and its laces, etc. Then, using a plastic knife with short, sawing motions, I carved the cake to look like a football.
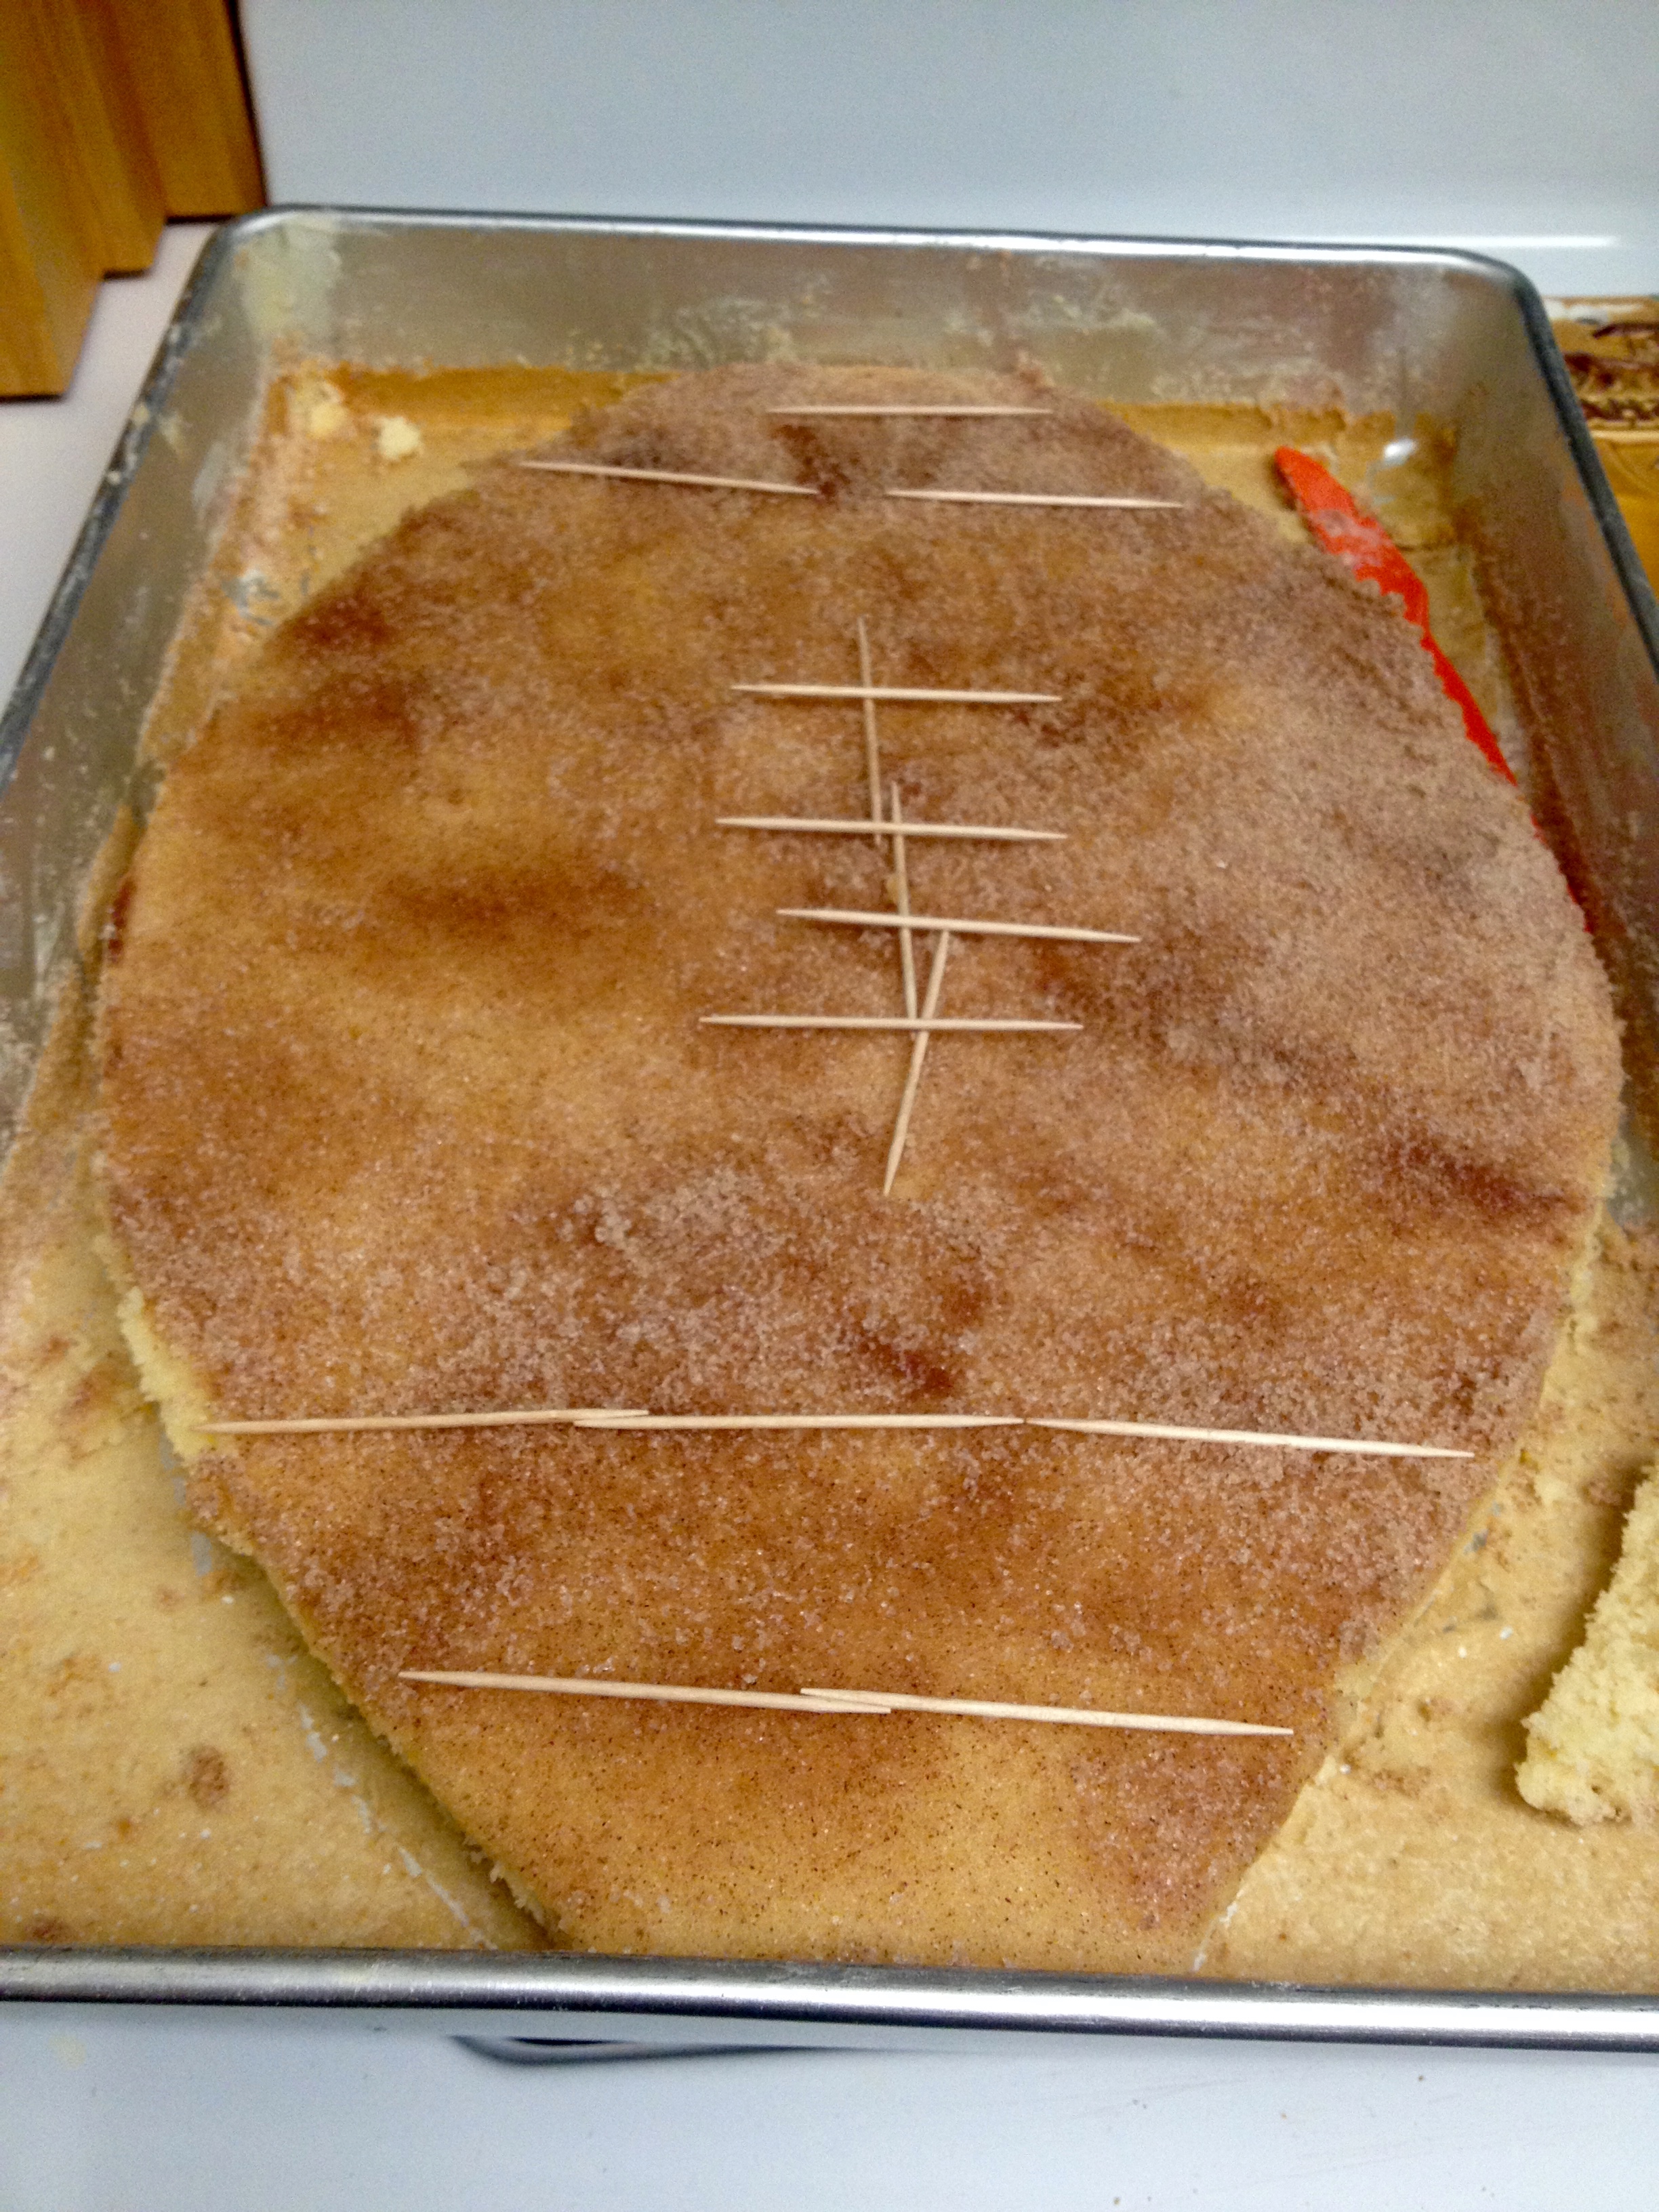
We had to very carefully lift out the corners of the cake that we weren’t using. Then, using two spatulas each, we transferred the cake to a serving platter. As in football, teamwork makes the dream work.
Next, I made a simple powdered sugar glaze that I use on lots of desserts. It’s made with ~1 cup powdered sugar and 2 Tbsp milk. These measurements can be altered to make your glaze thicker or thinner, depending on how much milk you add. In this case, you want to add just enough milk to make all of the sugar dissolve, but you still want the glaze to be fairly stiff so that you can maintain control over it while decorating.
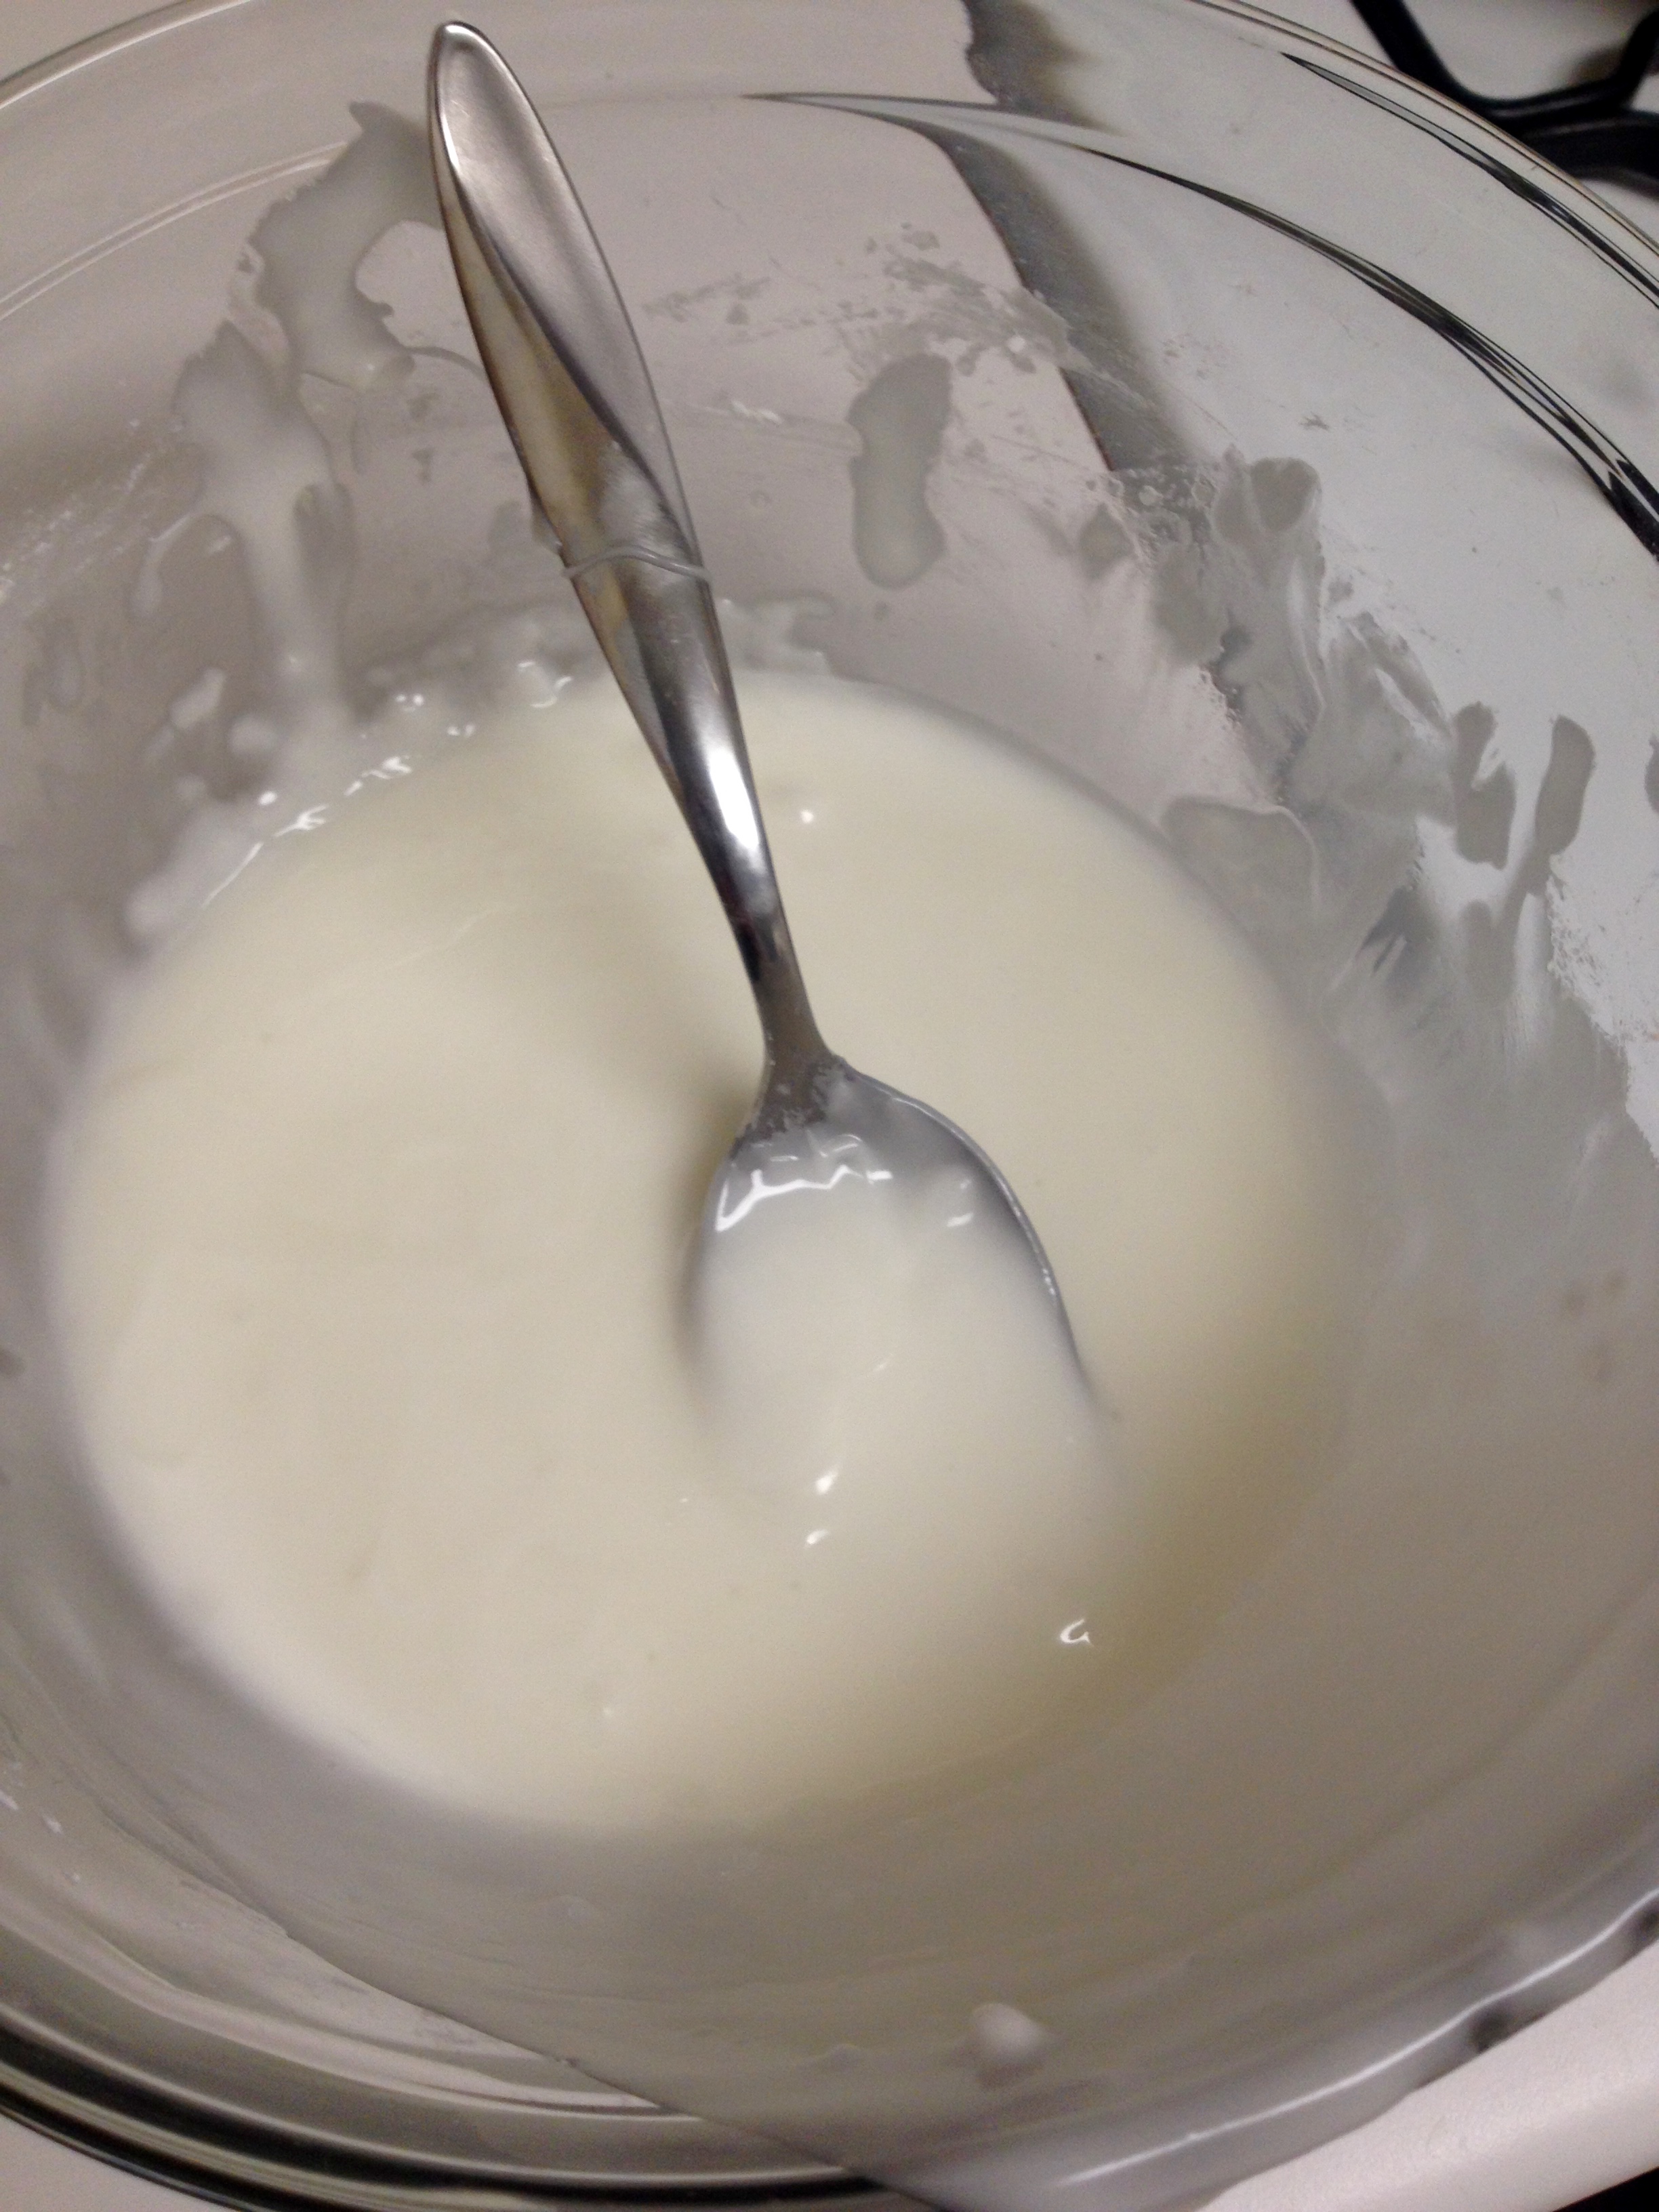
When the glaze is done, you can either pour it into a Ziploc bag with a corner cut off, or use a pastry bag. Then, go to town decorating your football! It’s pretty easy- just draw a straight line in the middle and make some hash marks for the laces, and draw two lines, one across either end of the football. You can mark it out with toothpicks like we did for easier decorating. Your finished product should look something like this:

And that’s all there is to it! I’m pretty excited for everyone to dig into this. It has a really light orange flavor and the cinnamon and sugar is a nice, light and sweet touch. I hope everyone has a great and safe night enjoying the big game, and here’s hoping for an NFC victory!
Friendsgiving
Hello, all! Happy Thanksgiving week! We have officially entered holiday season, which is the best time of year to get some baking in, and a time that is full of friends and family. I was lucky enough to herald in the holiday season with a few of my closest friends for our first “Friendsgiving”. We all contributed to the meal, and my job was (of course) the dessert. I made pumpkin pie, but not the traditional way. In my family, we call this recipe “PNG Pumpkin Pie” because it’s the recipe my Mom used when we lived in Papua New Guinea. It’s less sweet and firmer than traditional pumpkin pie, and I much prefer it to regular pumpkin pie. I decided to take it up a notch by roasting my own pumpkin instead of using canned pumpkin. Here’s the recipe:
Pie Filling Ingredients:
- 15 oz pureed pumpkin (you can use canned pumpkin)
- 3 eggs, beaten
- 1 1/2 cup evaporated milk
- 1 1/2 tsp ground cinnamon
- 1/2 tsp salt
- 3/4 cup sugar
Pie Crust Ingredients:
- 1 1/3 cup all-purpose flour
- 1/2 tsp salt
- 1/2 cup shortening
- 3 Tbsp water
Let’s start with how to roast the pumpkin. Like I mentioned above, it’s not necessary to roast your own pumpkin, but I think it’s a great way to use up your sugar pumpkins that you used for fall decorations!
First, preheat the oven to 350ºF. Line a baking sheet with foil, and place your pumpkin (a small sugar pumpkin) on the foil. Pierce the top of the pumpkin around the stem about eight times so that while the pumpkin is roasting, the steam can leave the pumpkin instead of building up and exploding the pumpkin.
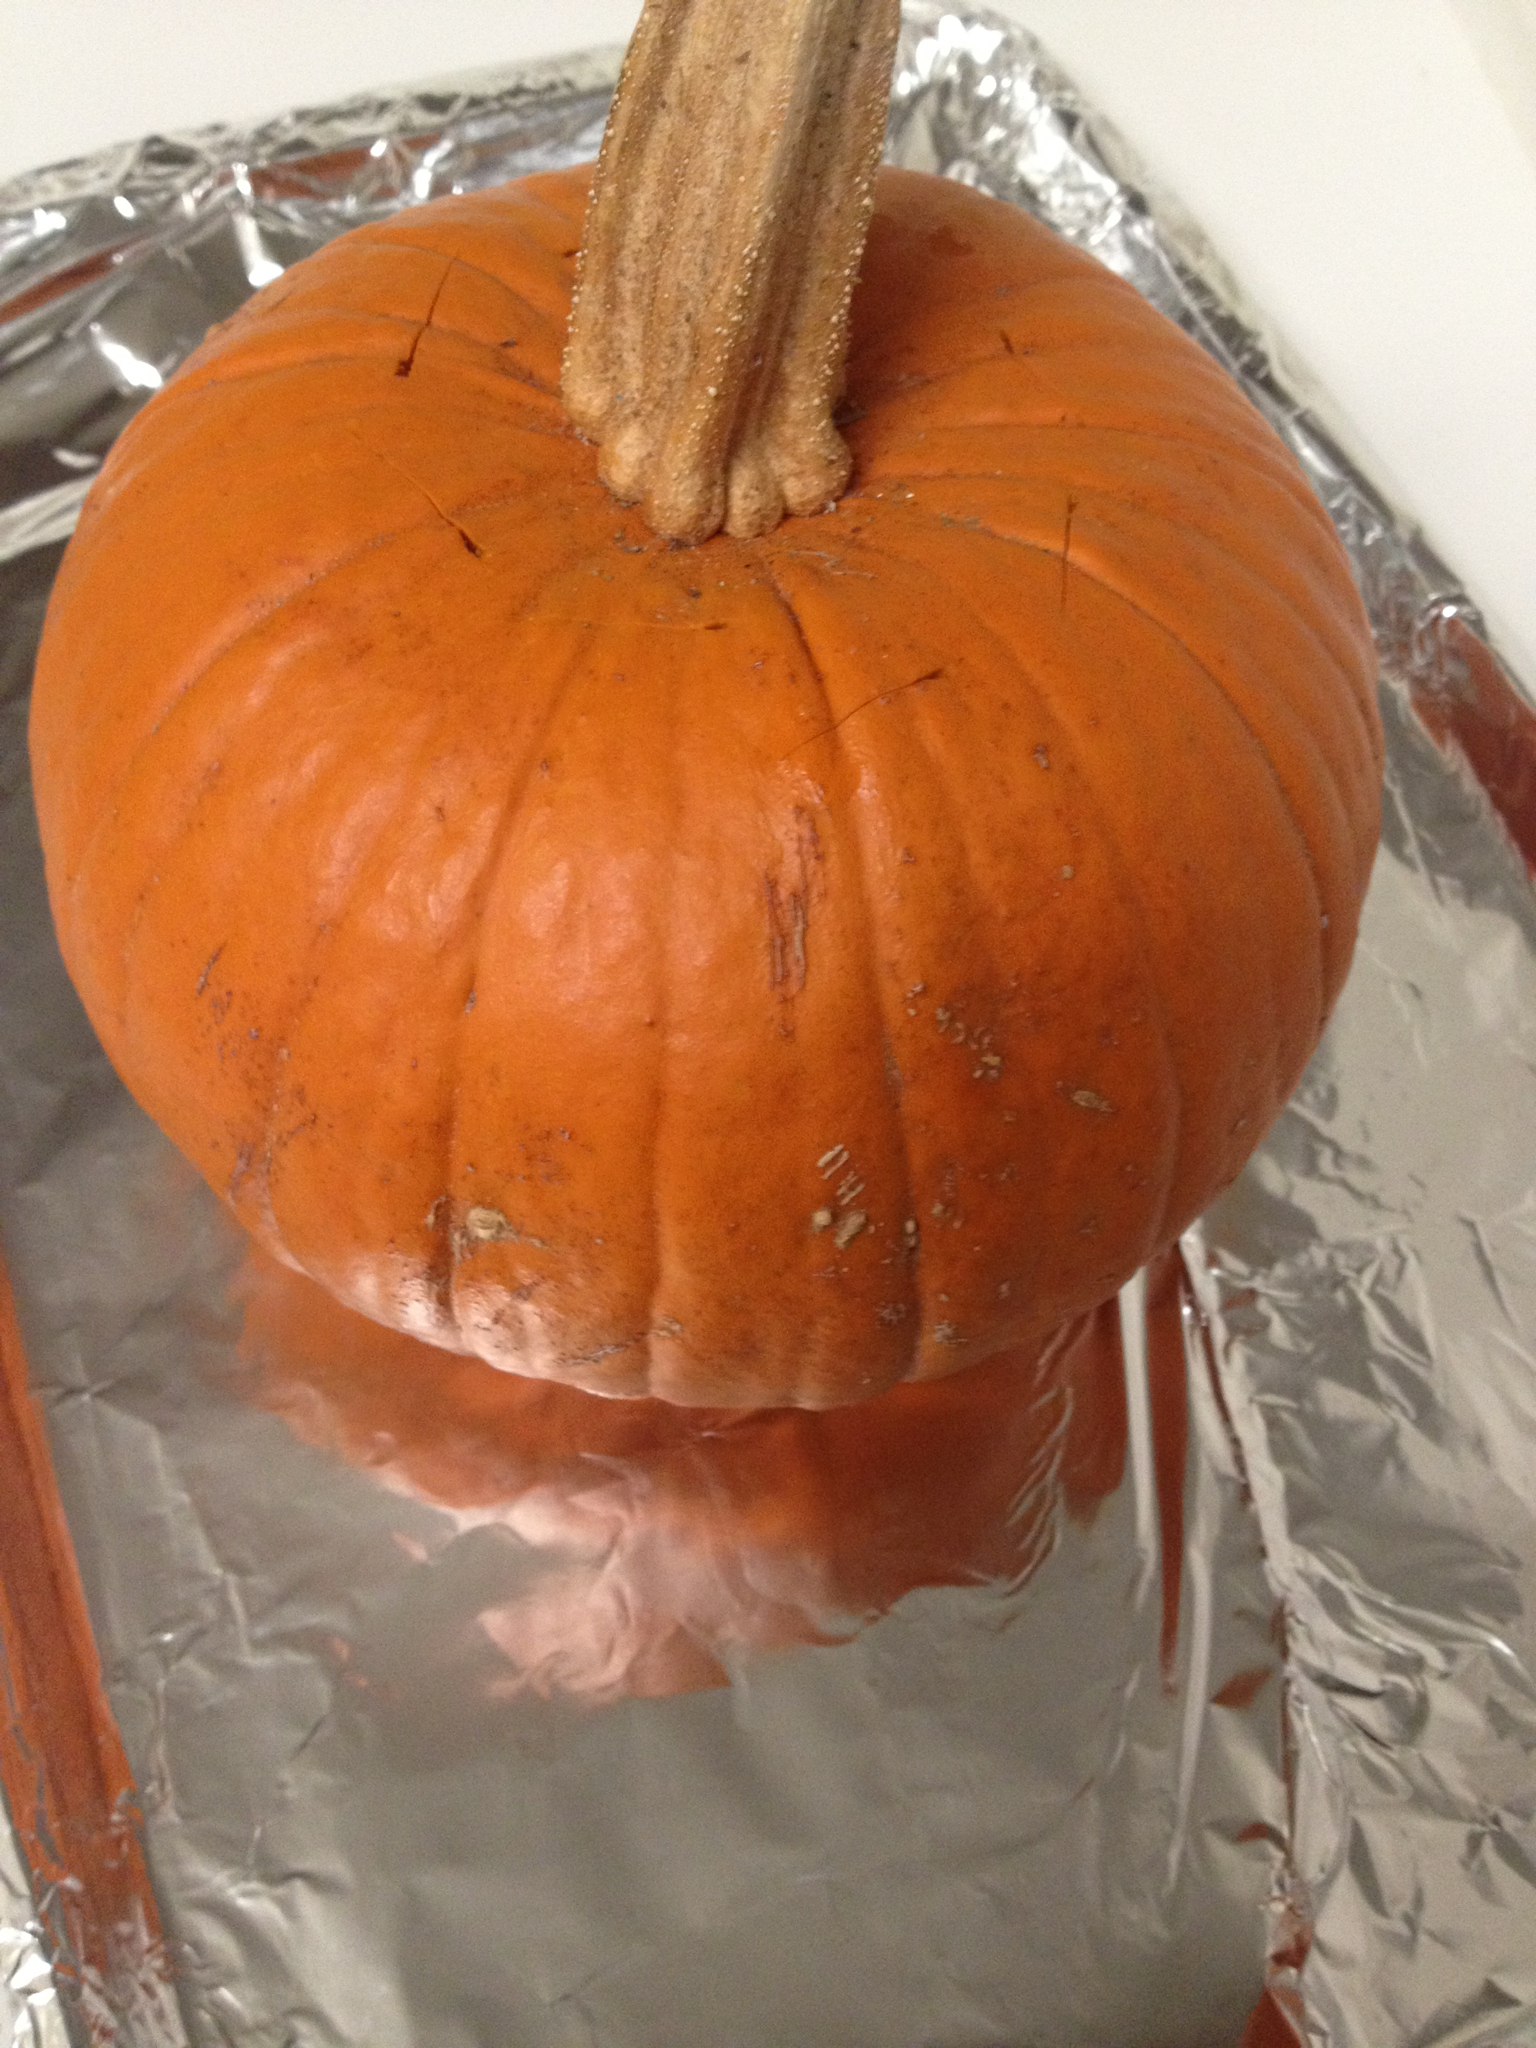
Roast the pumpkin at 350ºF for 2 hours until the pumpkin is brown and slumped. The skin will separate from the flesh of the pumpkin. Let it cool so that you can peel off the skin without burning your fingers.

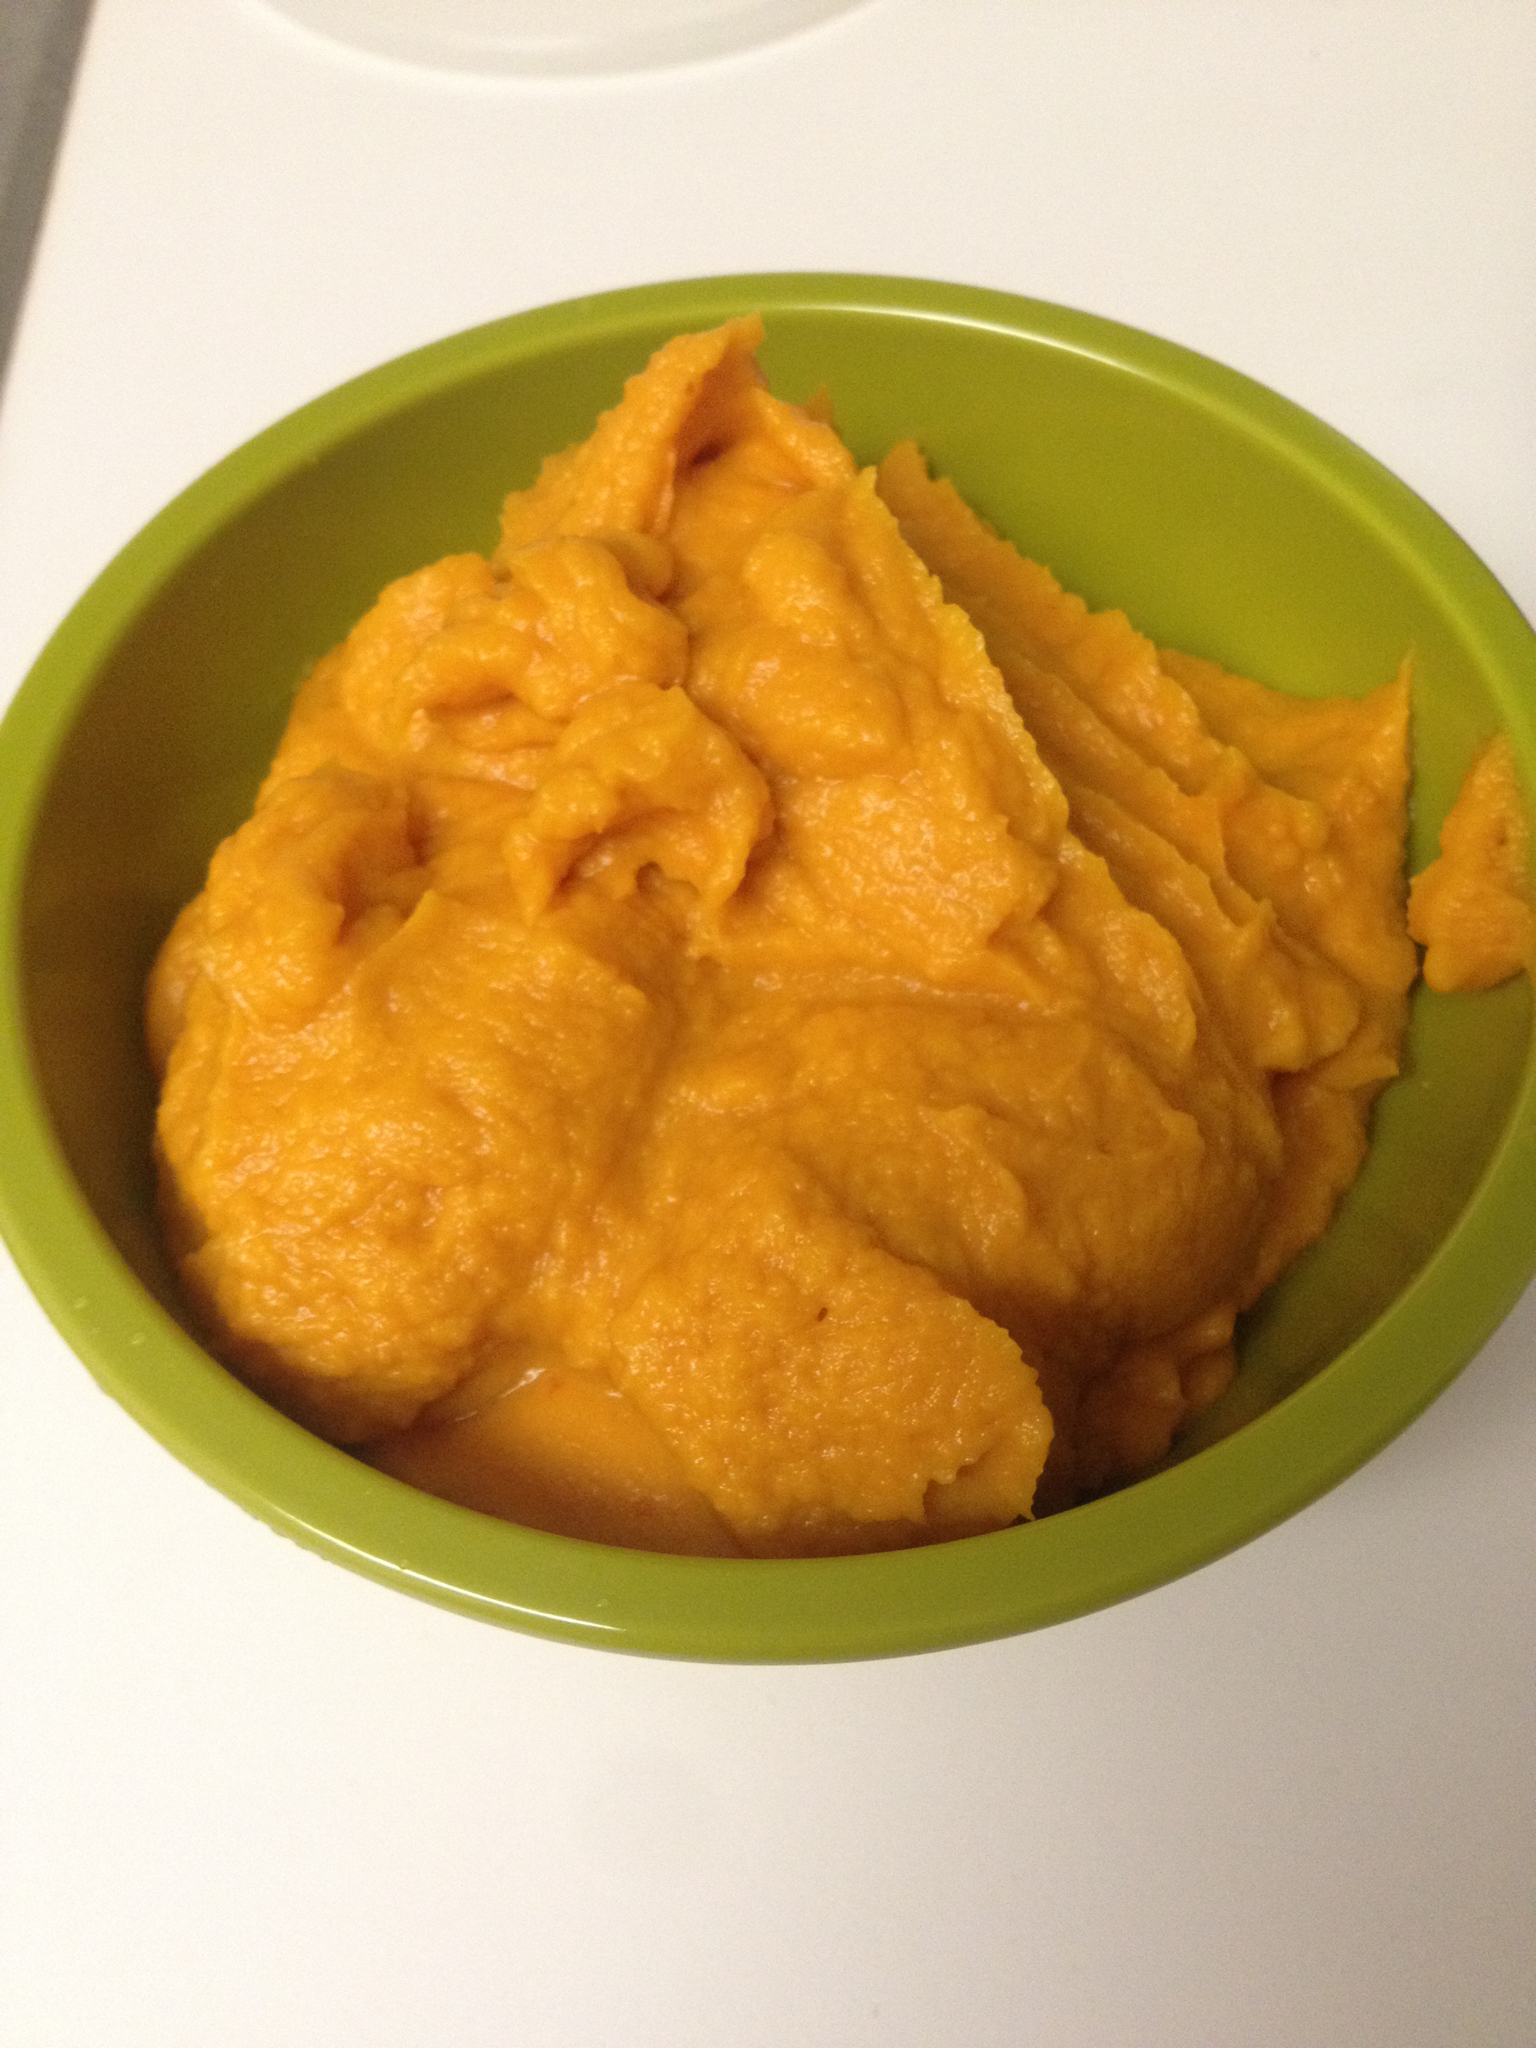
Next, peel off the skin, cut the flesh open, and scoop out the seeds and membranes. Put the flesh of the pumpkin in a food processor and puree it for about 2 minutes, or until it’s smooth. It will look something like this:
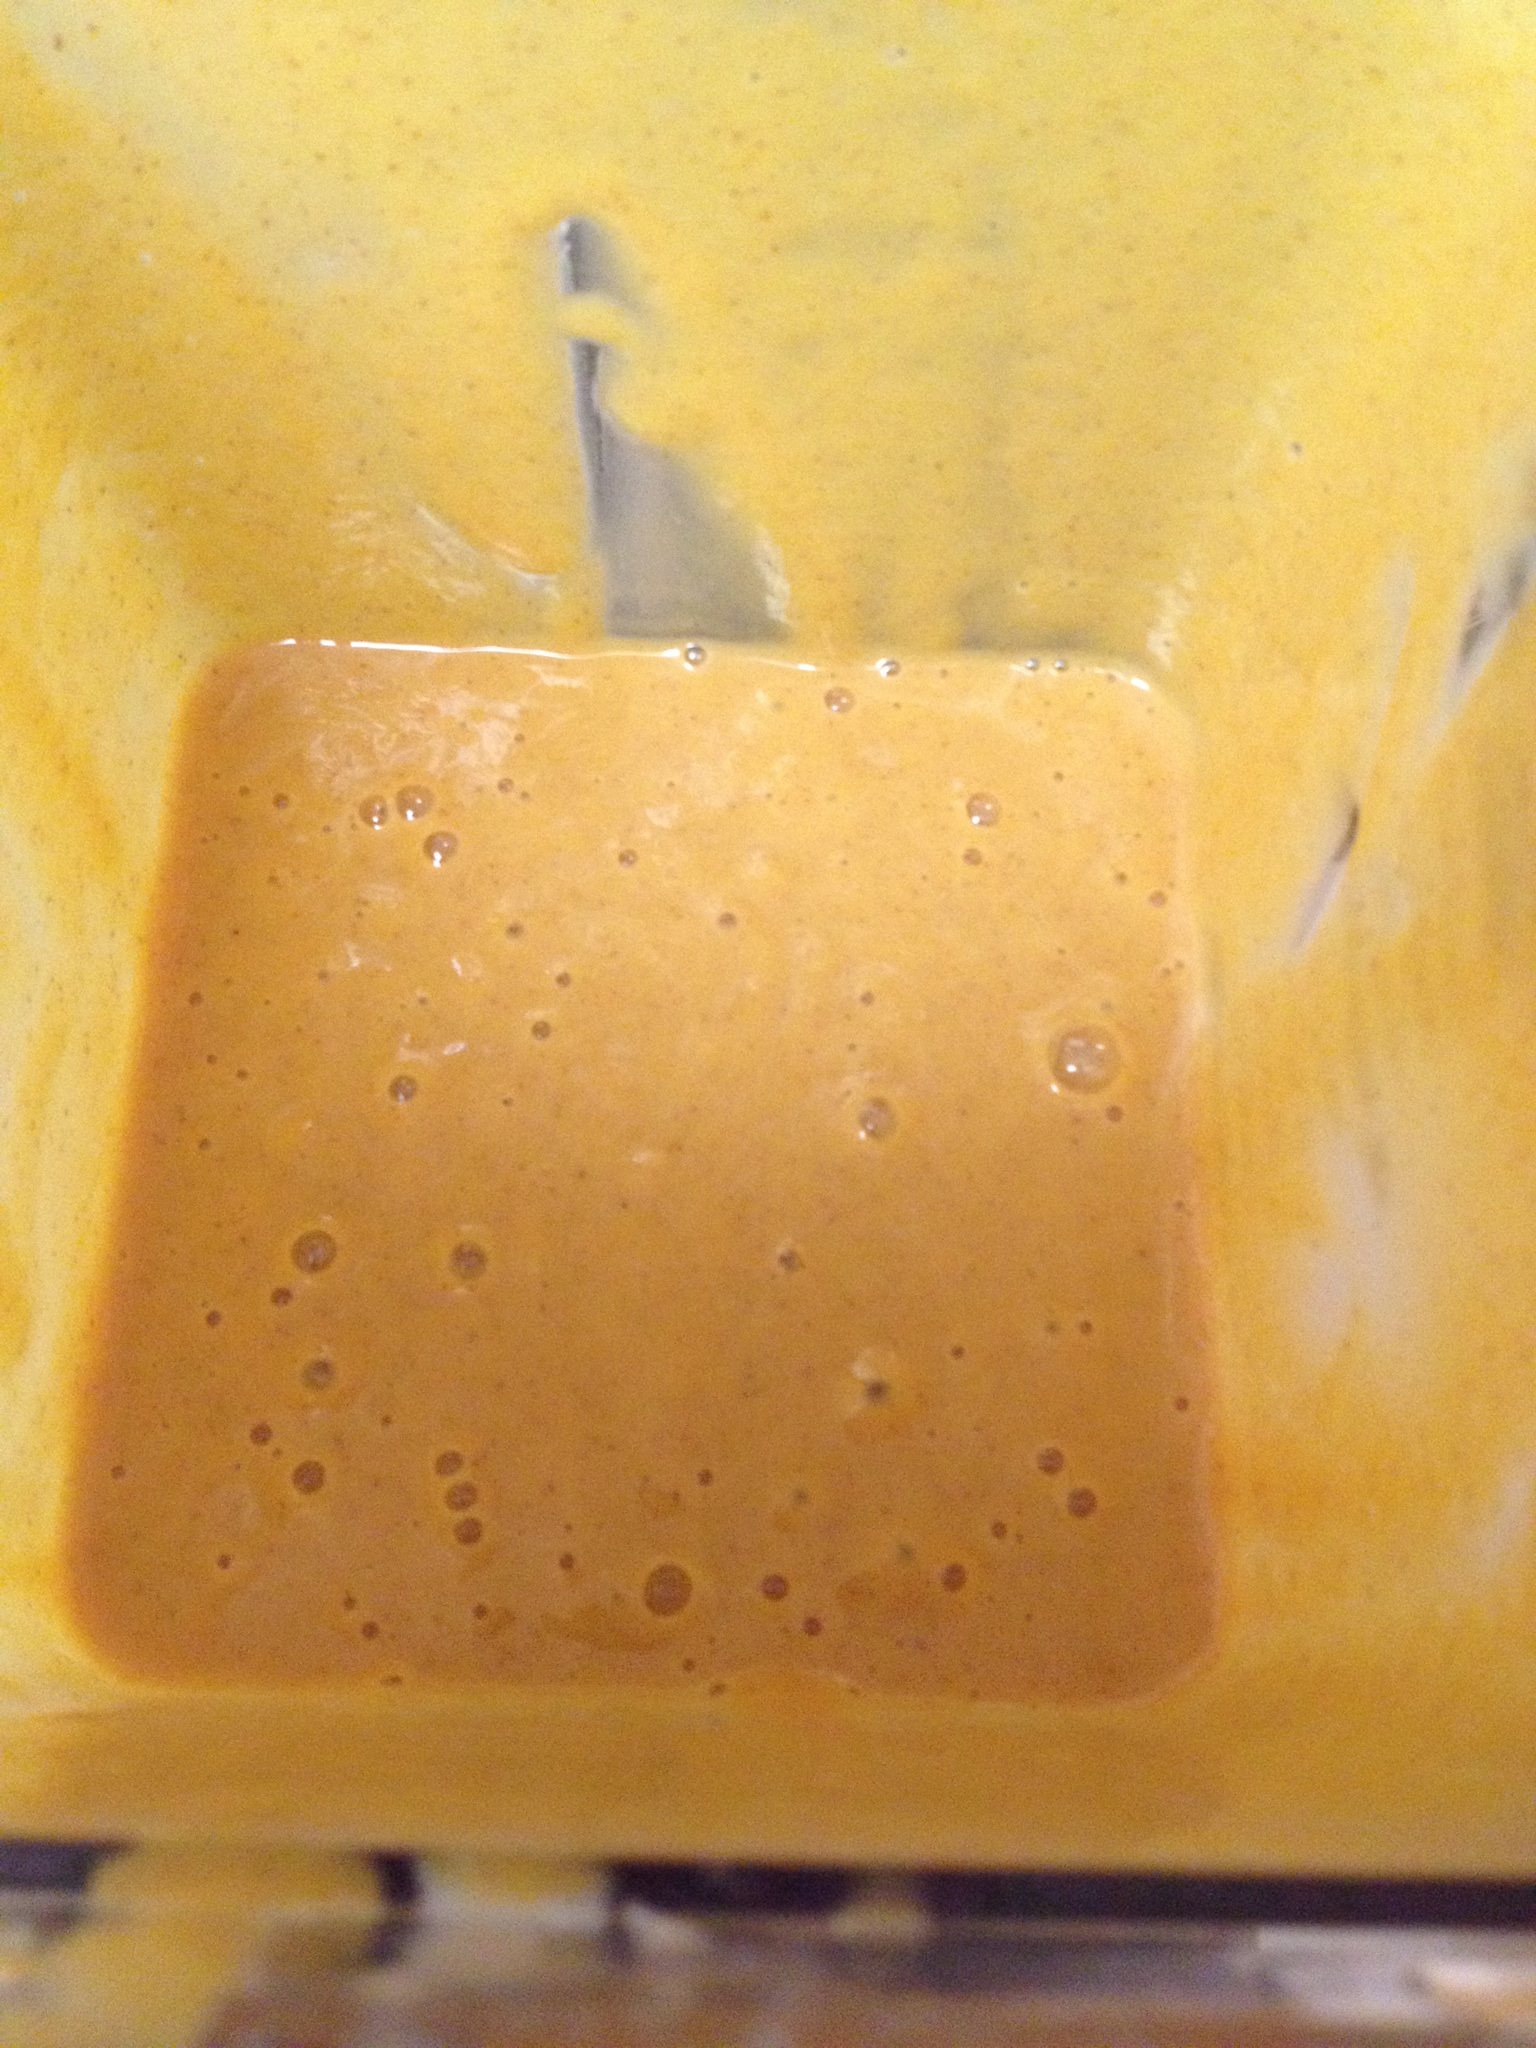
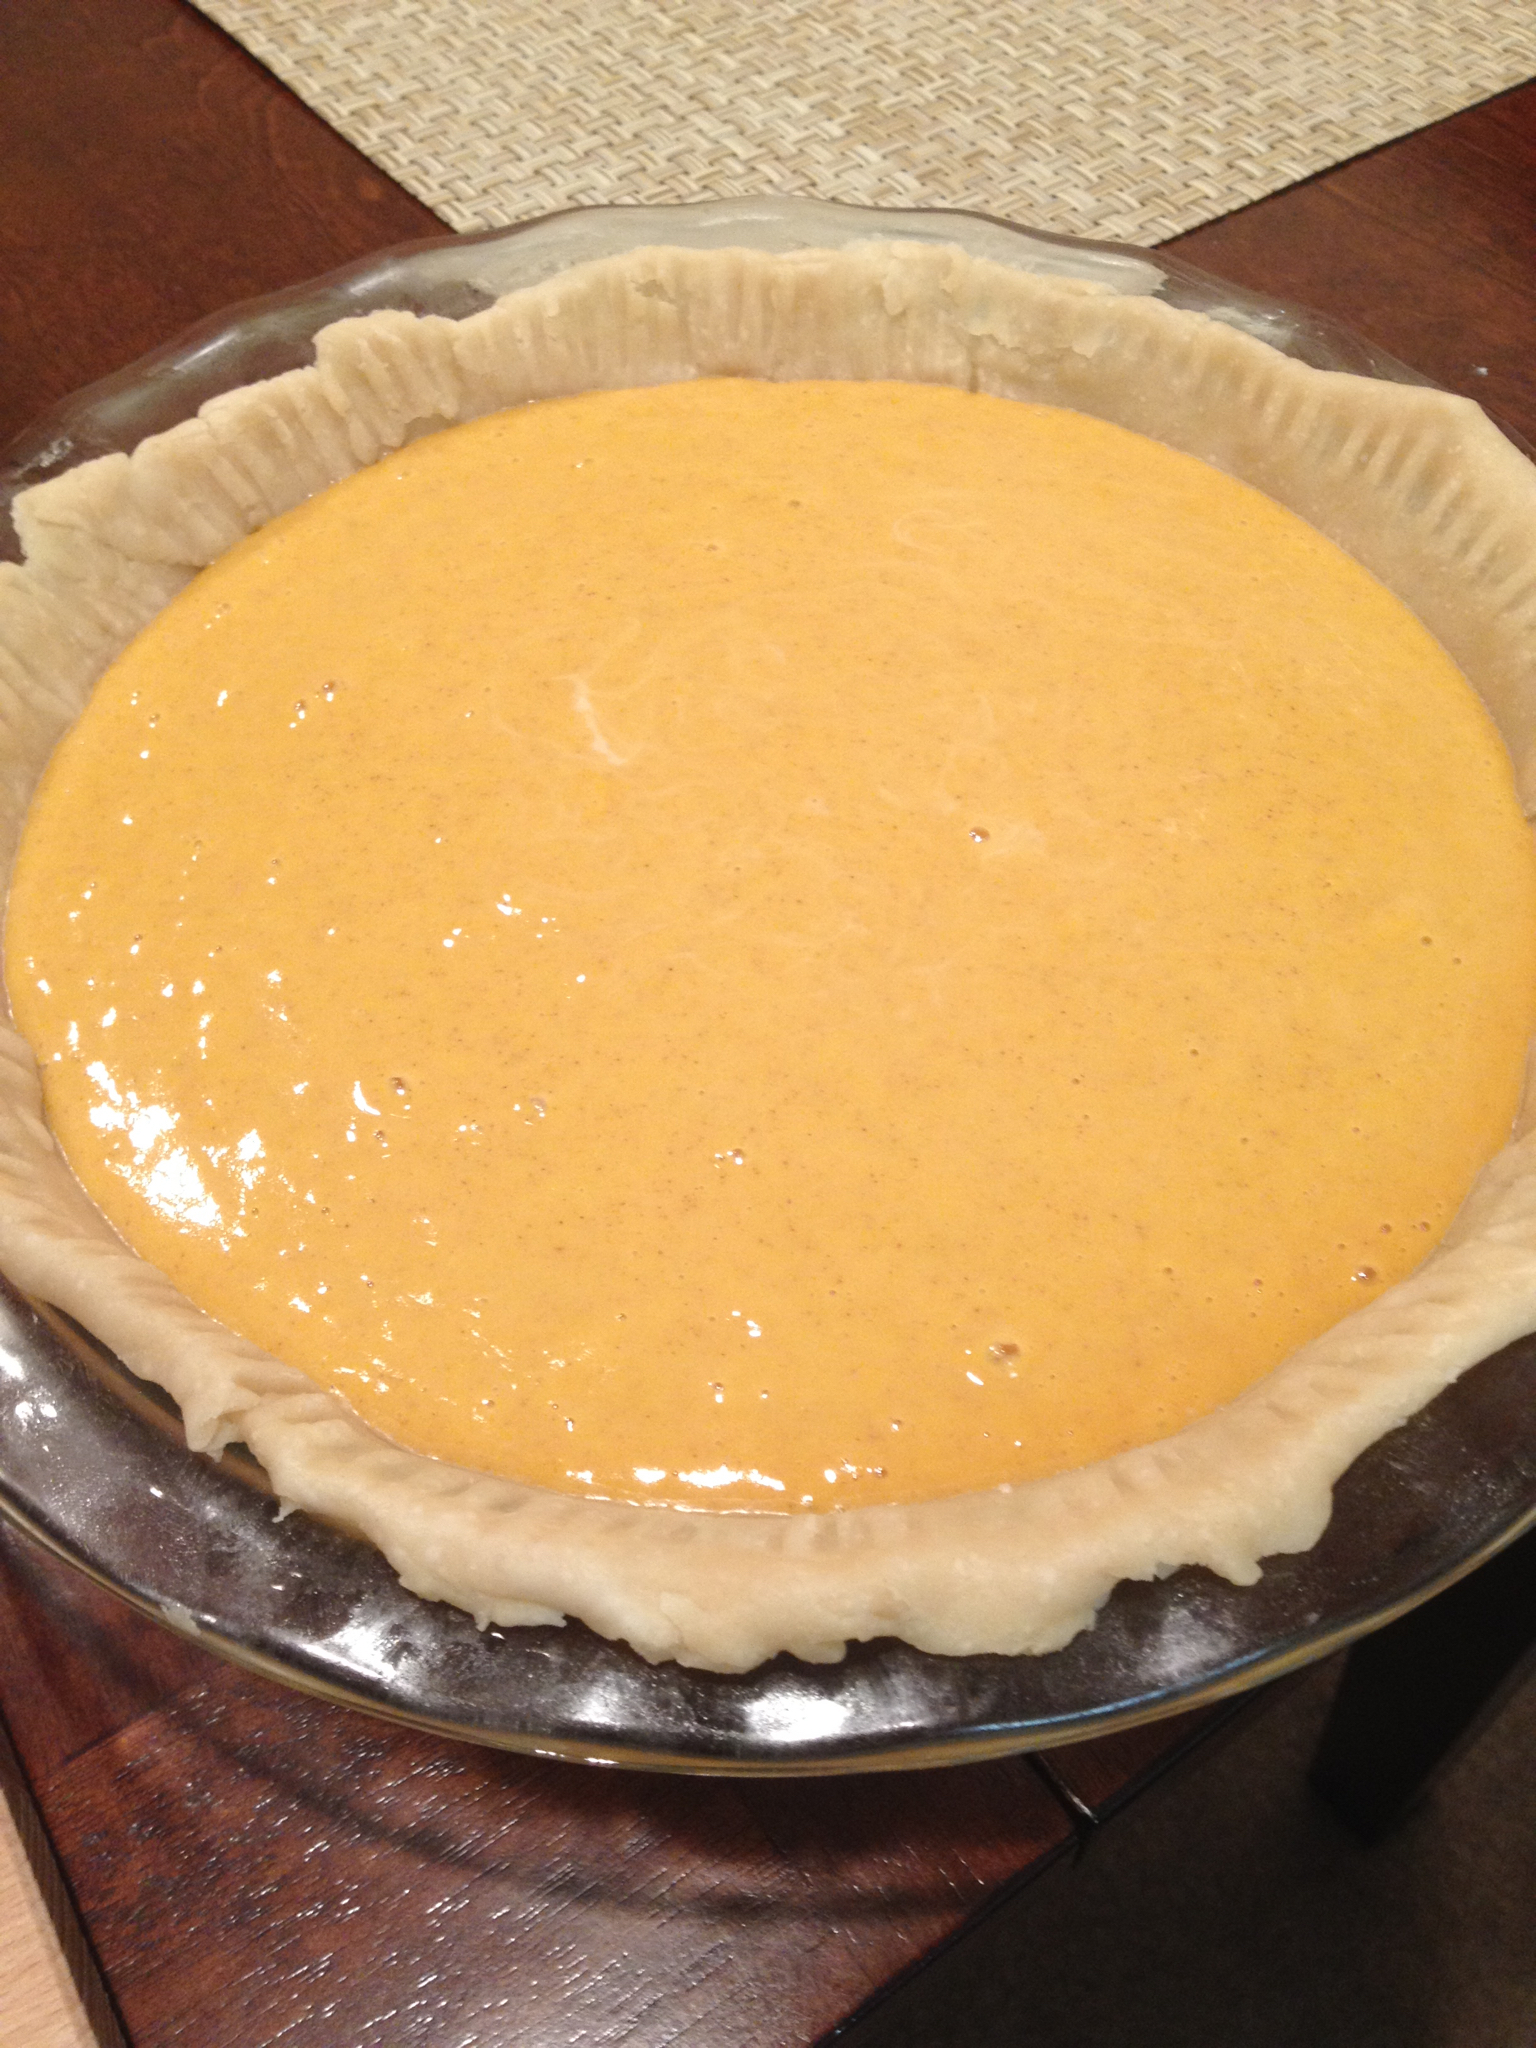
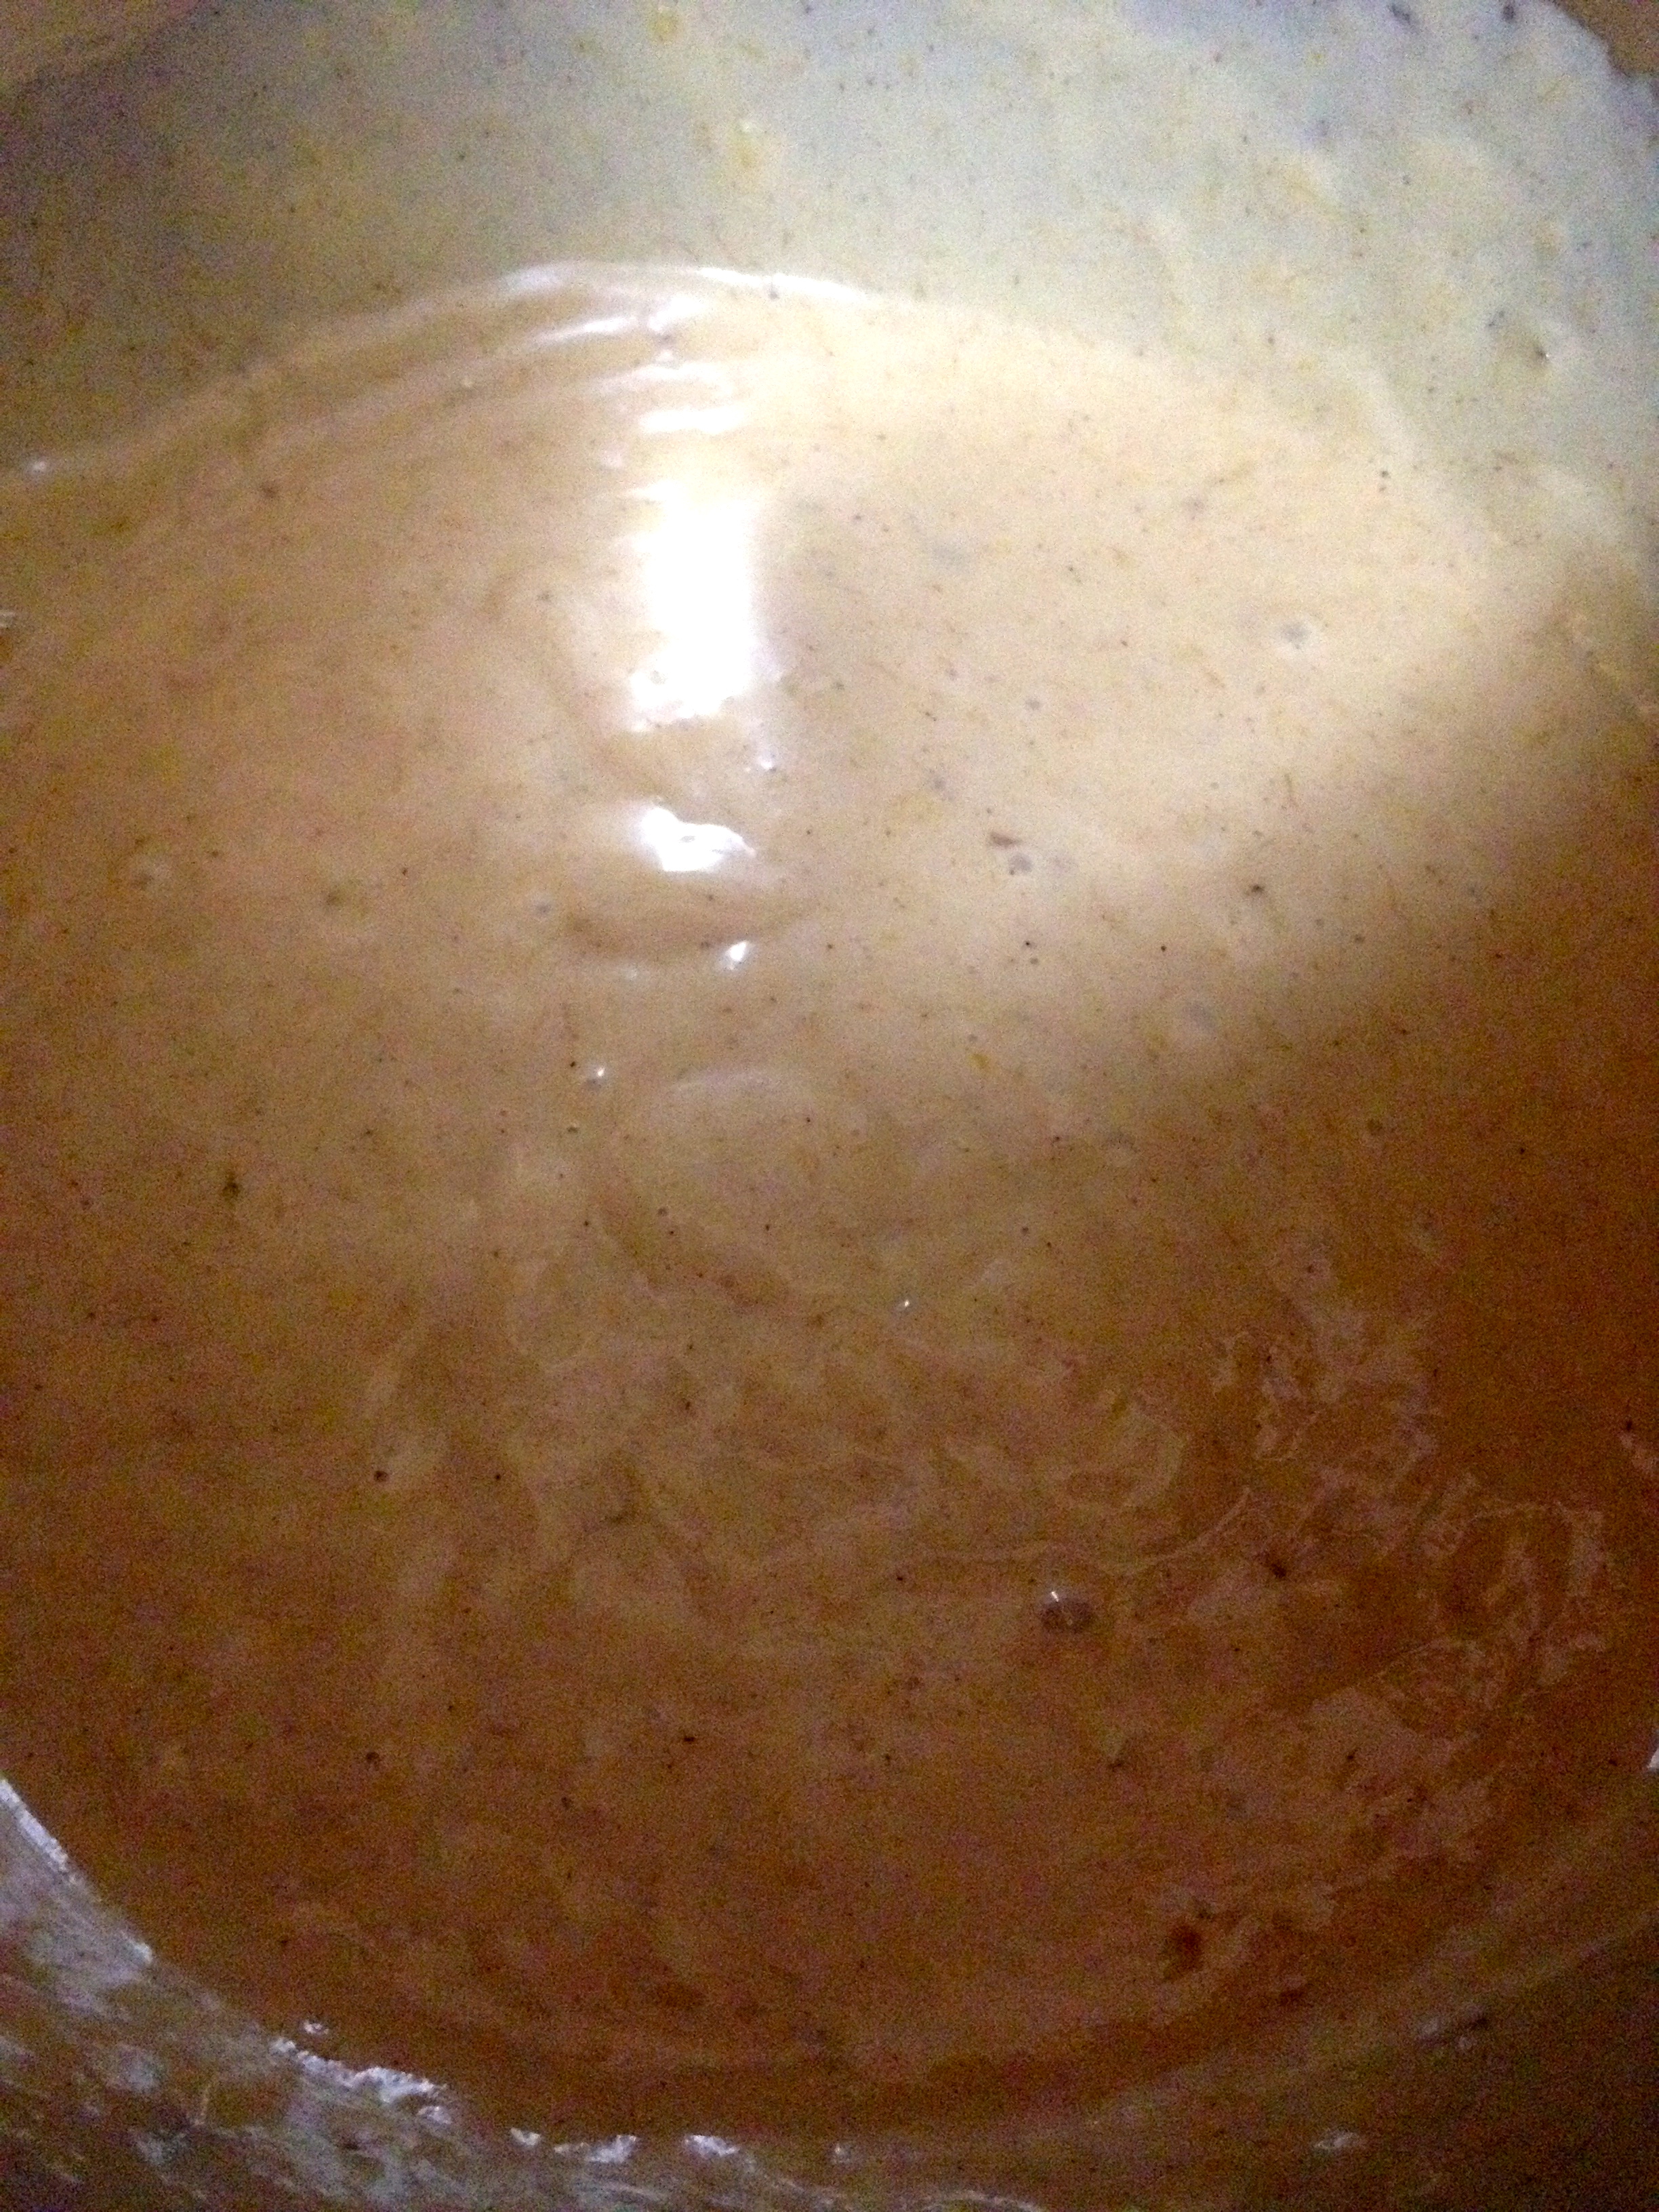
Now that you’ve roasted your pumpkin, it’s time to make the filling for the pie. In a blender, combine your pumpkin puree, evaporated milk, cinnamon, salt, eggs, and sugar. Blend it together until it’s completely mixed. It’ll look like this:
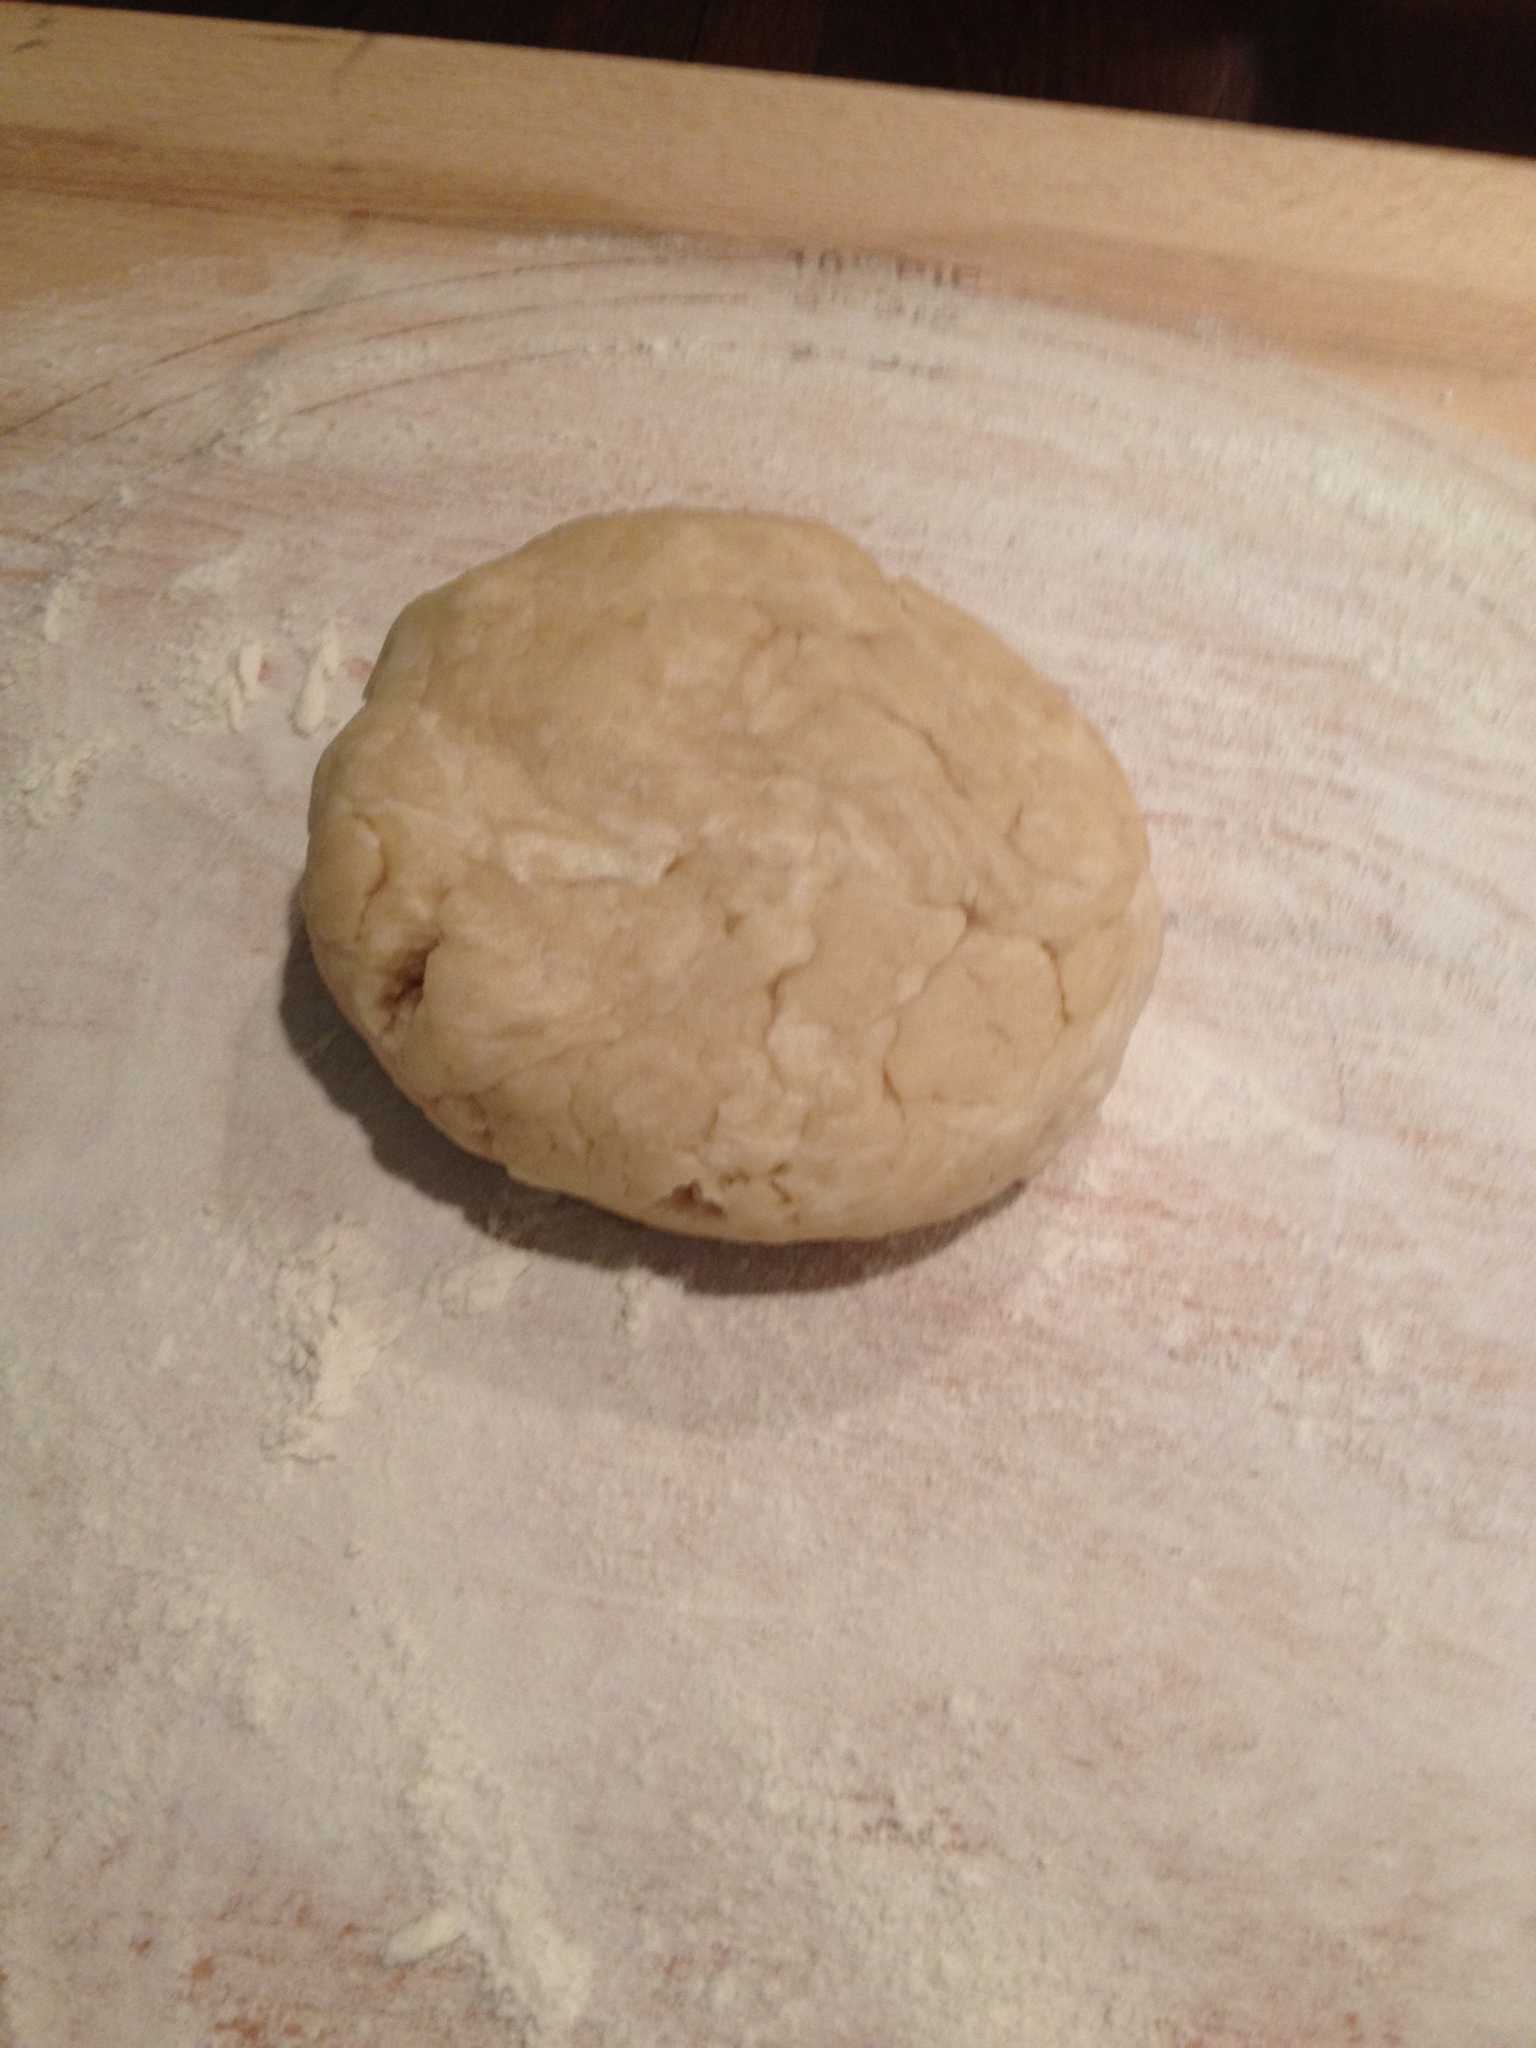
Okay, now set that aside. Now it’s time to make the crust. In a separate bowl, combine the flour and salt. Cut in the shortening until you have pea-sized chunks (or something like that).

Add the water, one tablespoon at a time. Mix the dough after each addition. By the time you’ve added all the water and have kneaded the dough a bit, it will hold together like this:
Now, using a floured surface and a floured rolling pin, roll the dough out until it’s about 10″ across to fit your 9″ pie pan. Here’s a tip: to transfer your pie dough to your pie pan, roll the crust up loosely around your rolling pin and then unroll the crust from the rolling pin over the pie pan. Fold the edges of the crust over and flute them so that you have a pretty edge around your pie pan.
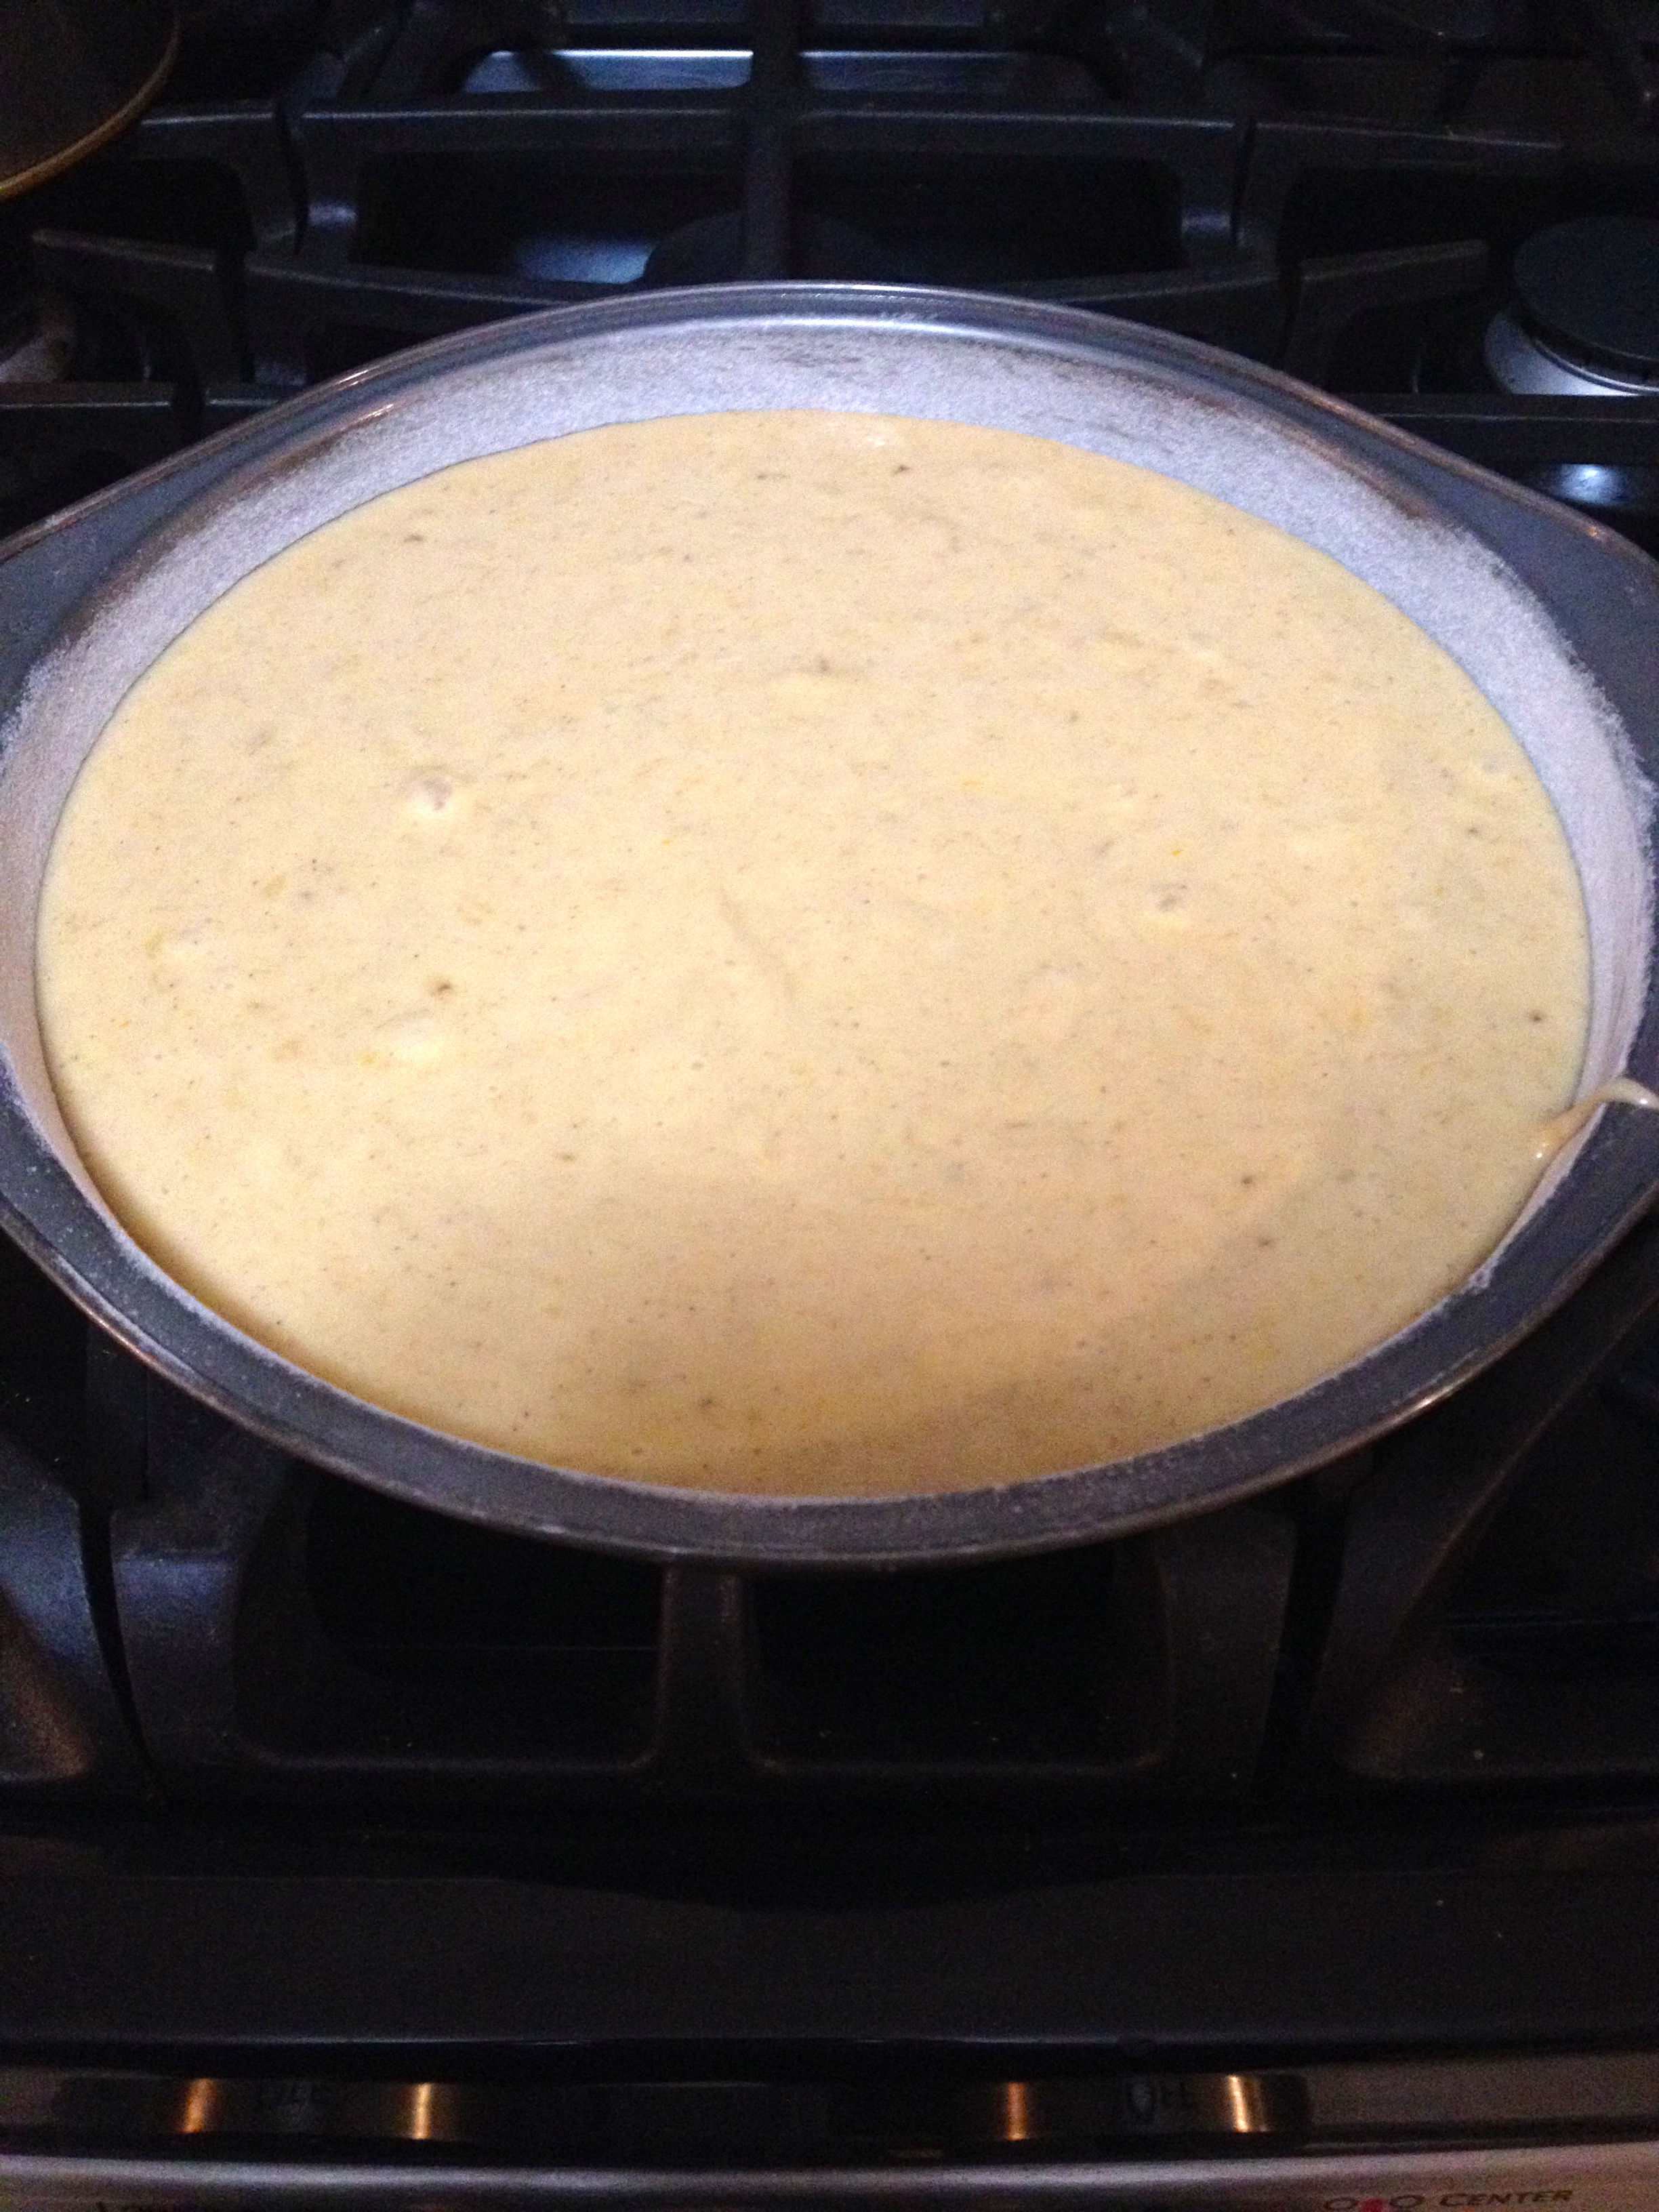
When you have your crust done and in the pie pan, pour the filling into the unbaked crust.
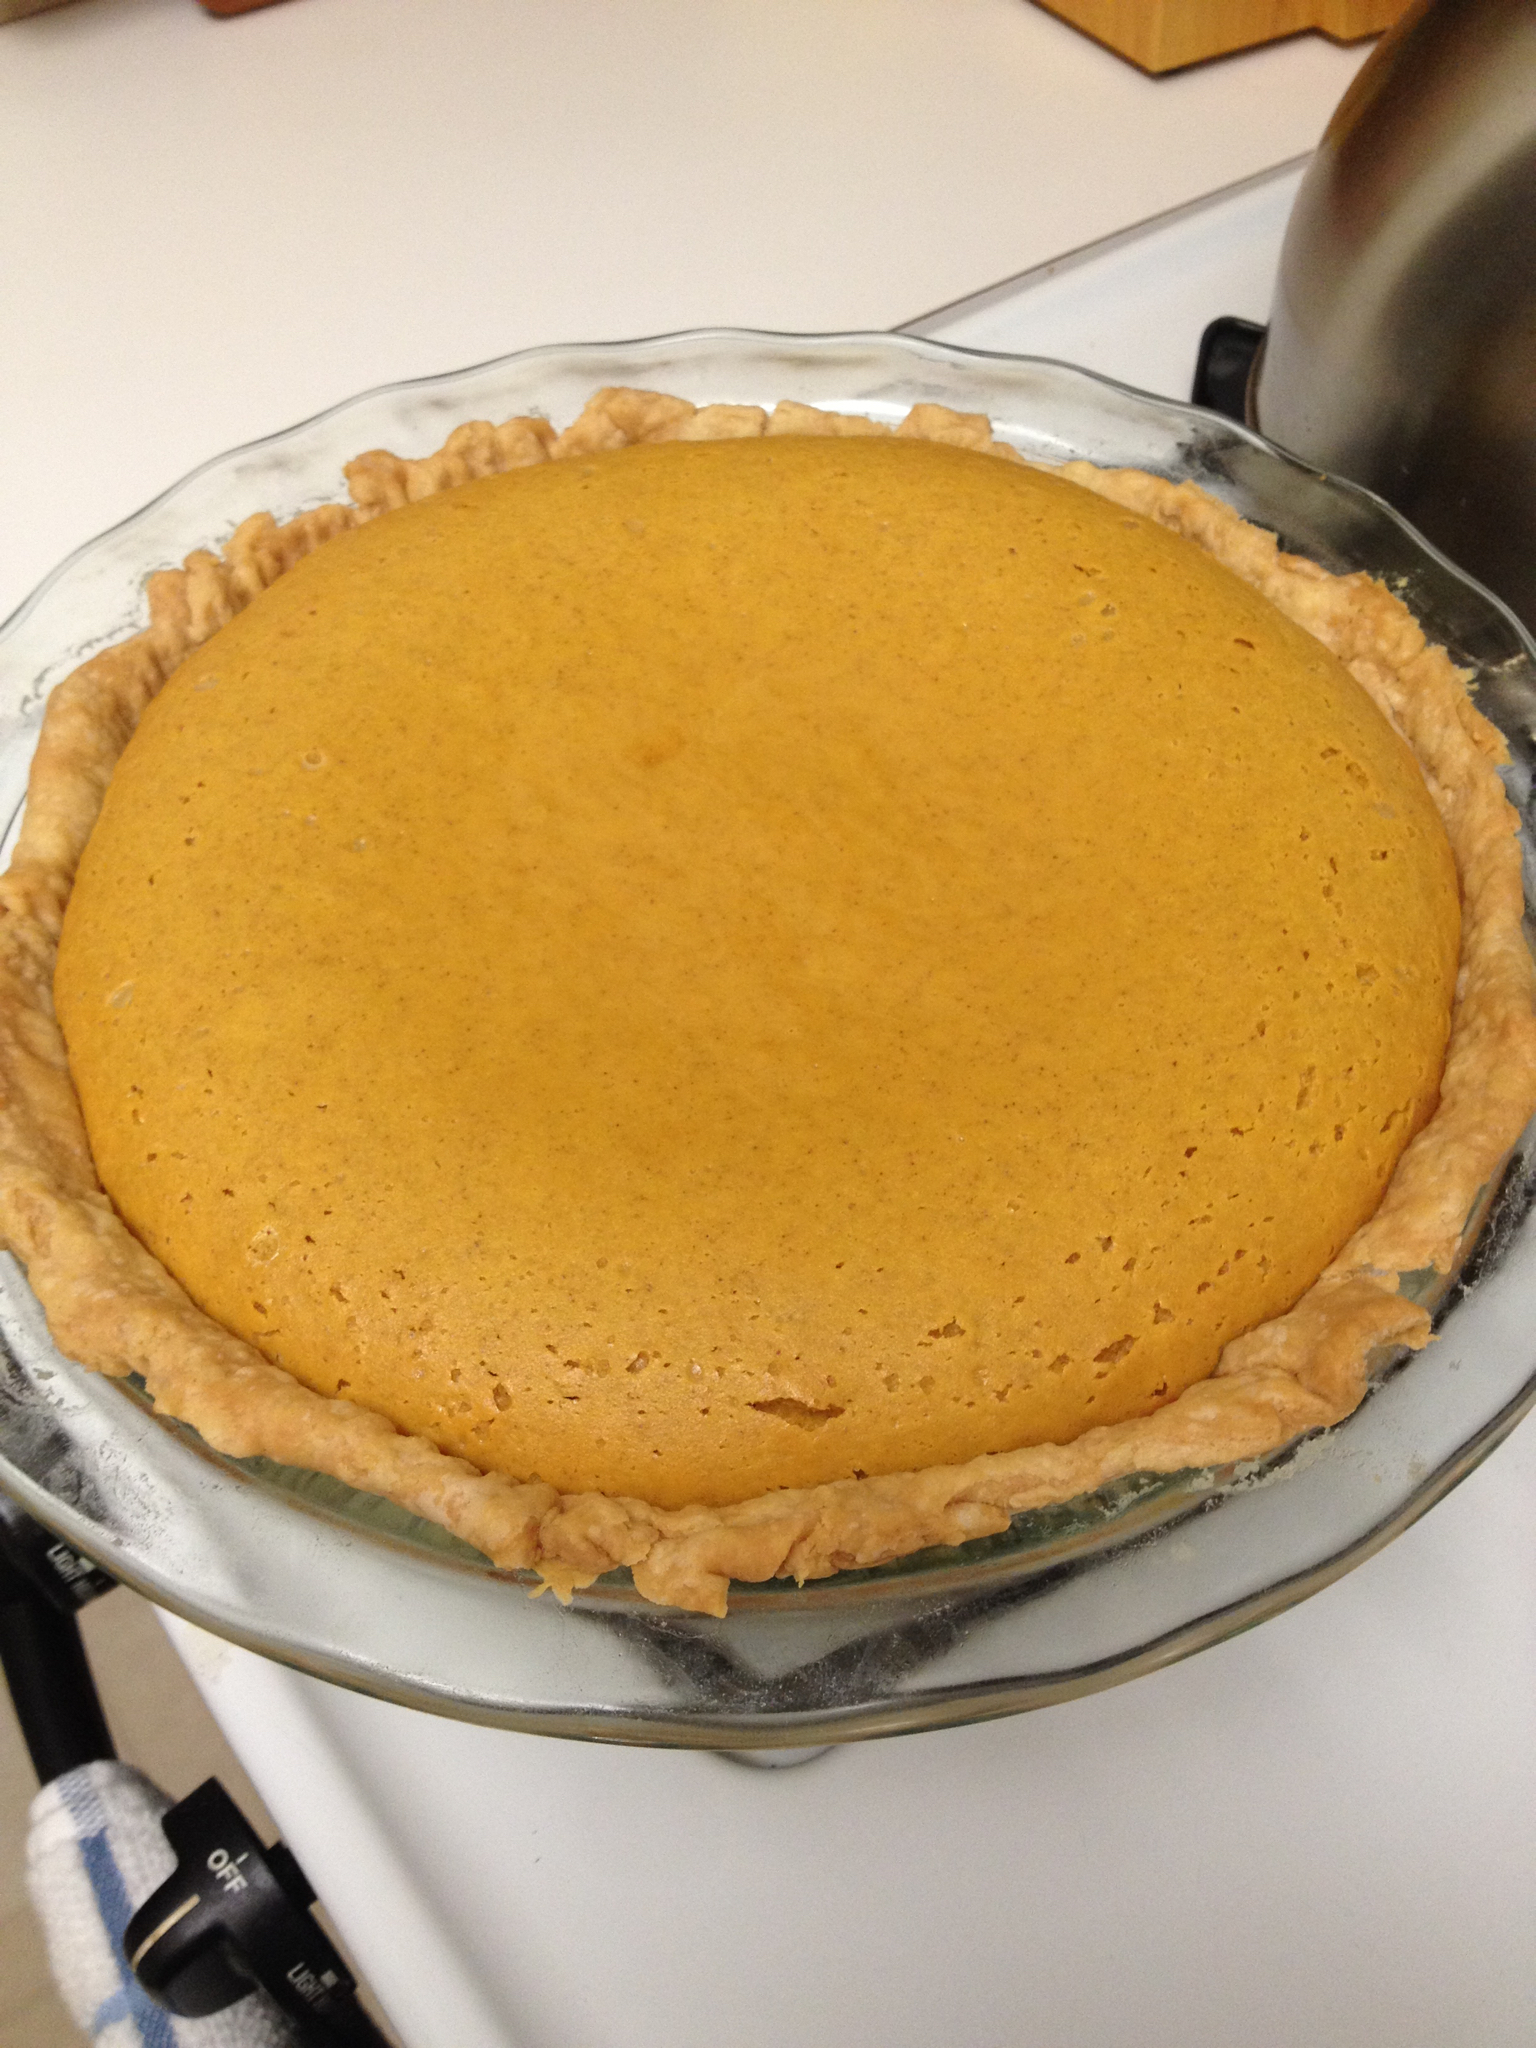
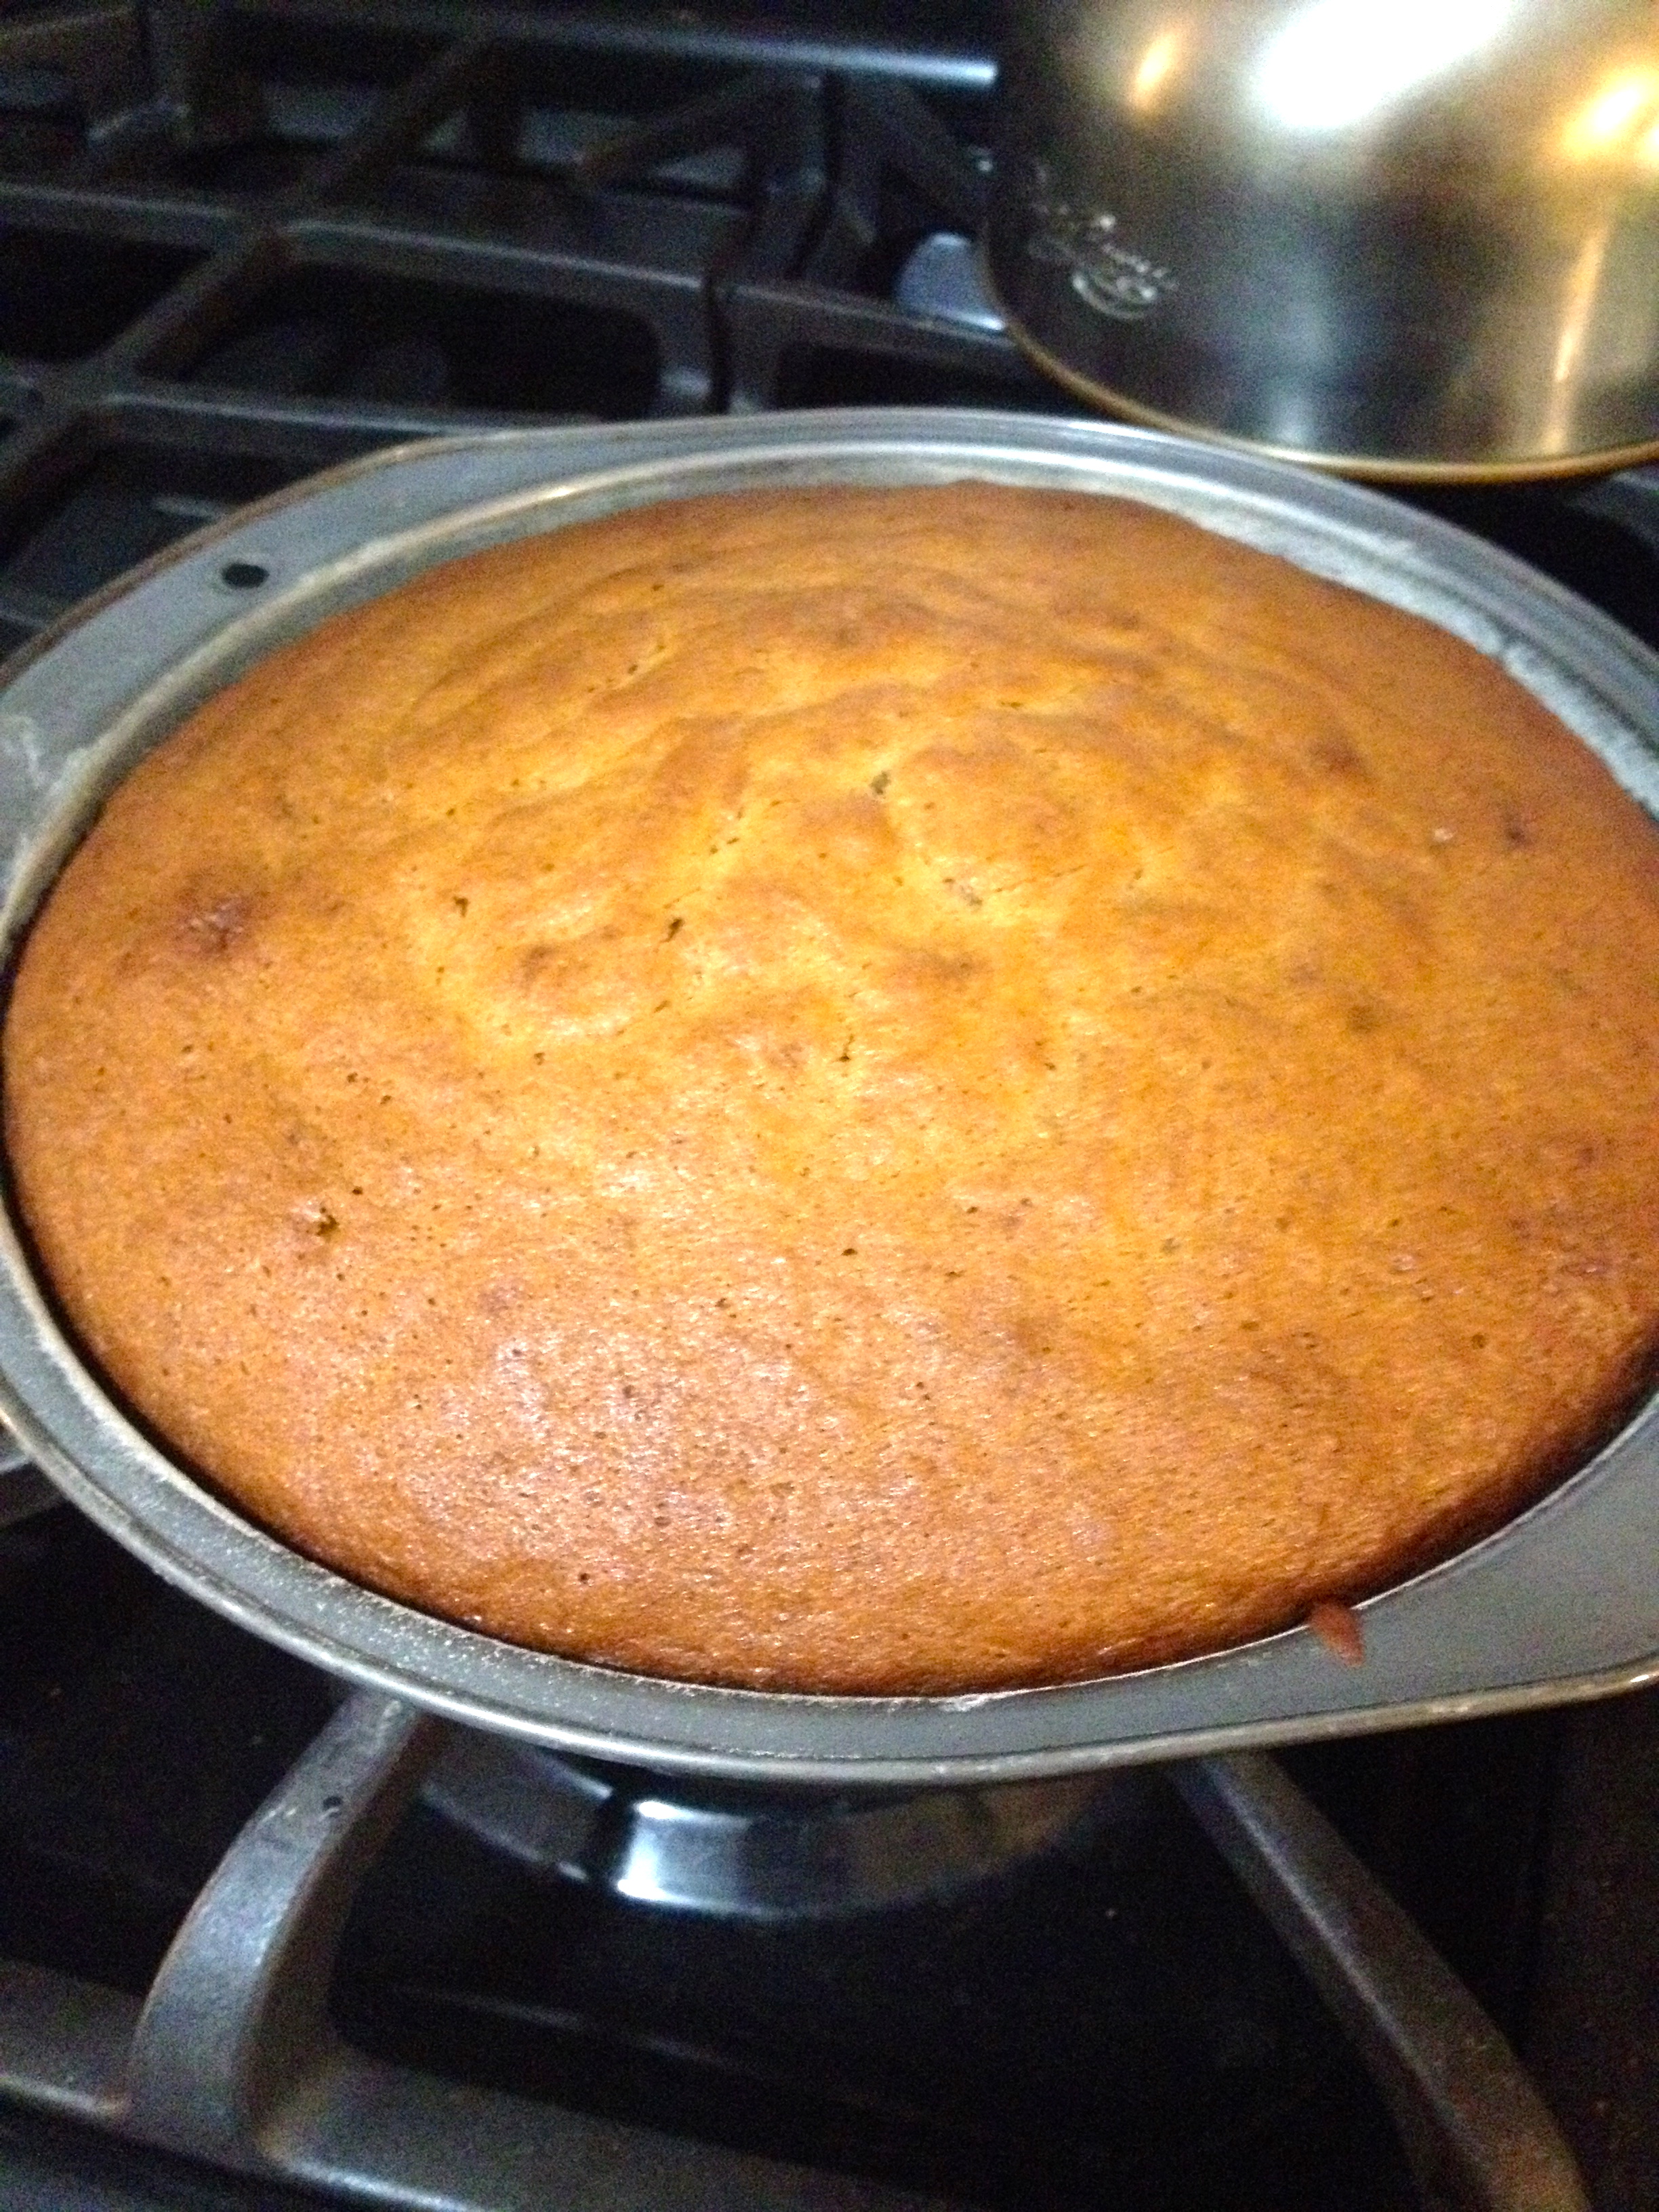
Bake the pie at 350ºF for one hour, or until a knife comes out clean when inserted in the center. When you first take it out of the oven, the filling will be puffed up. As it cools, the filling will deflate a bit (the cooled pie is shown in the picture on the right).
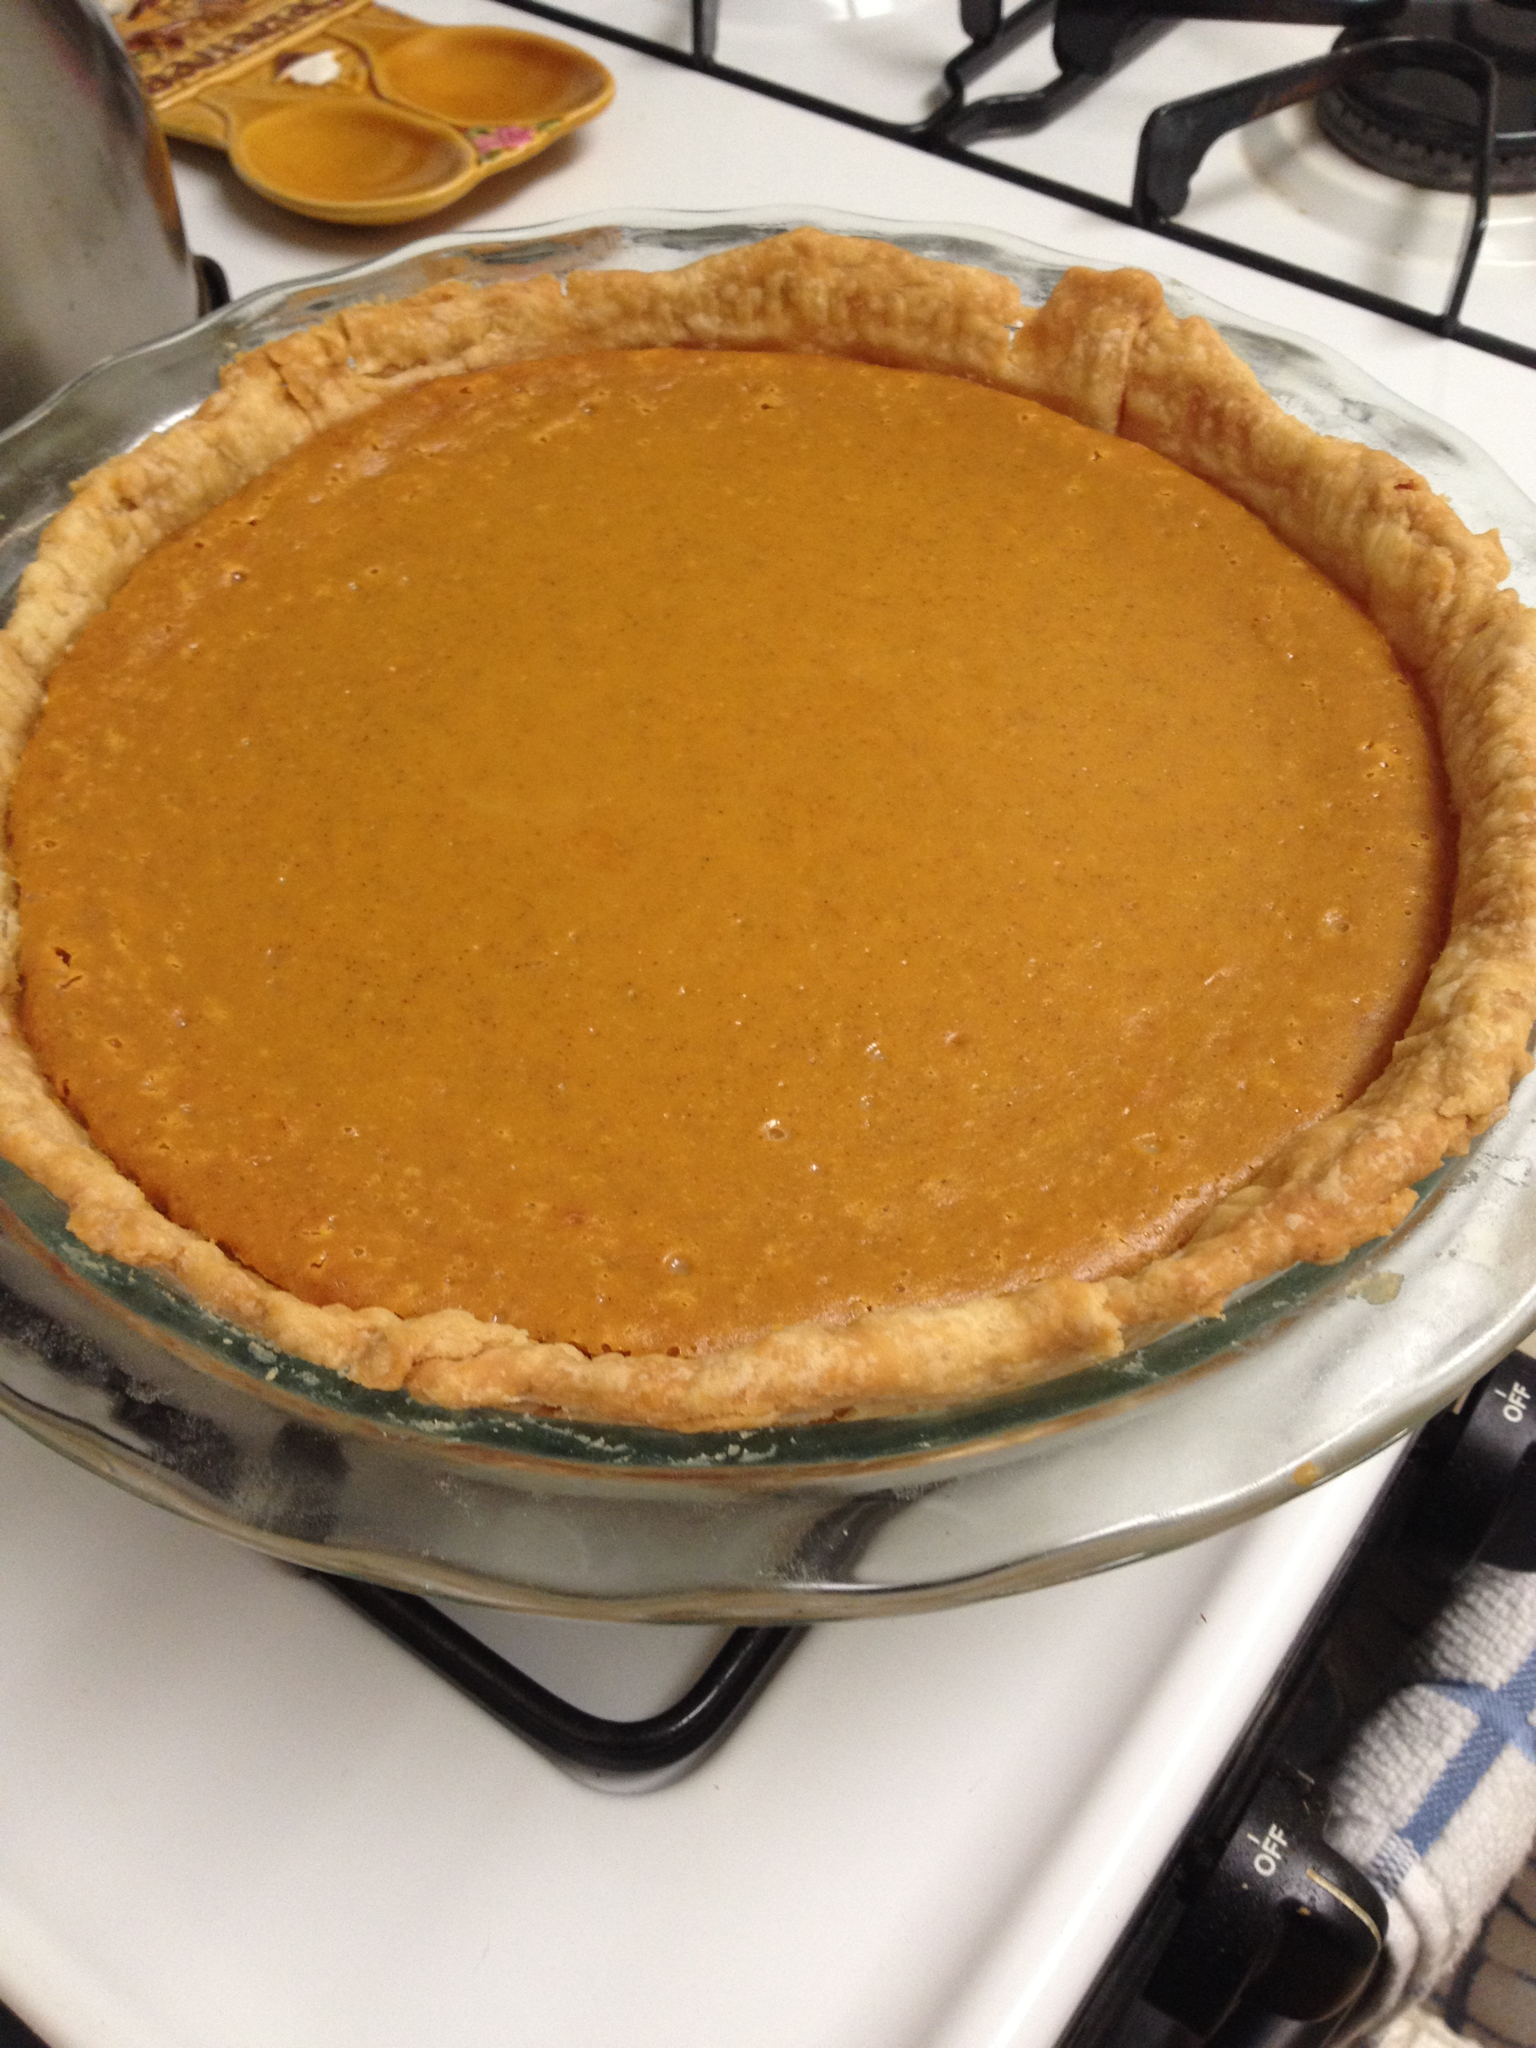
And there you have it! Let the pie cool and then dig in!
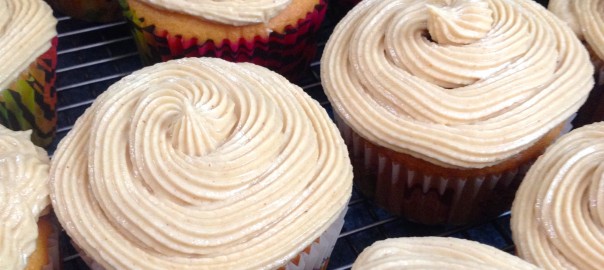
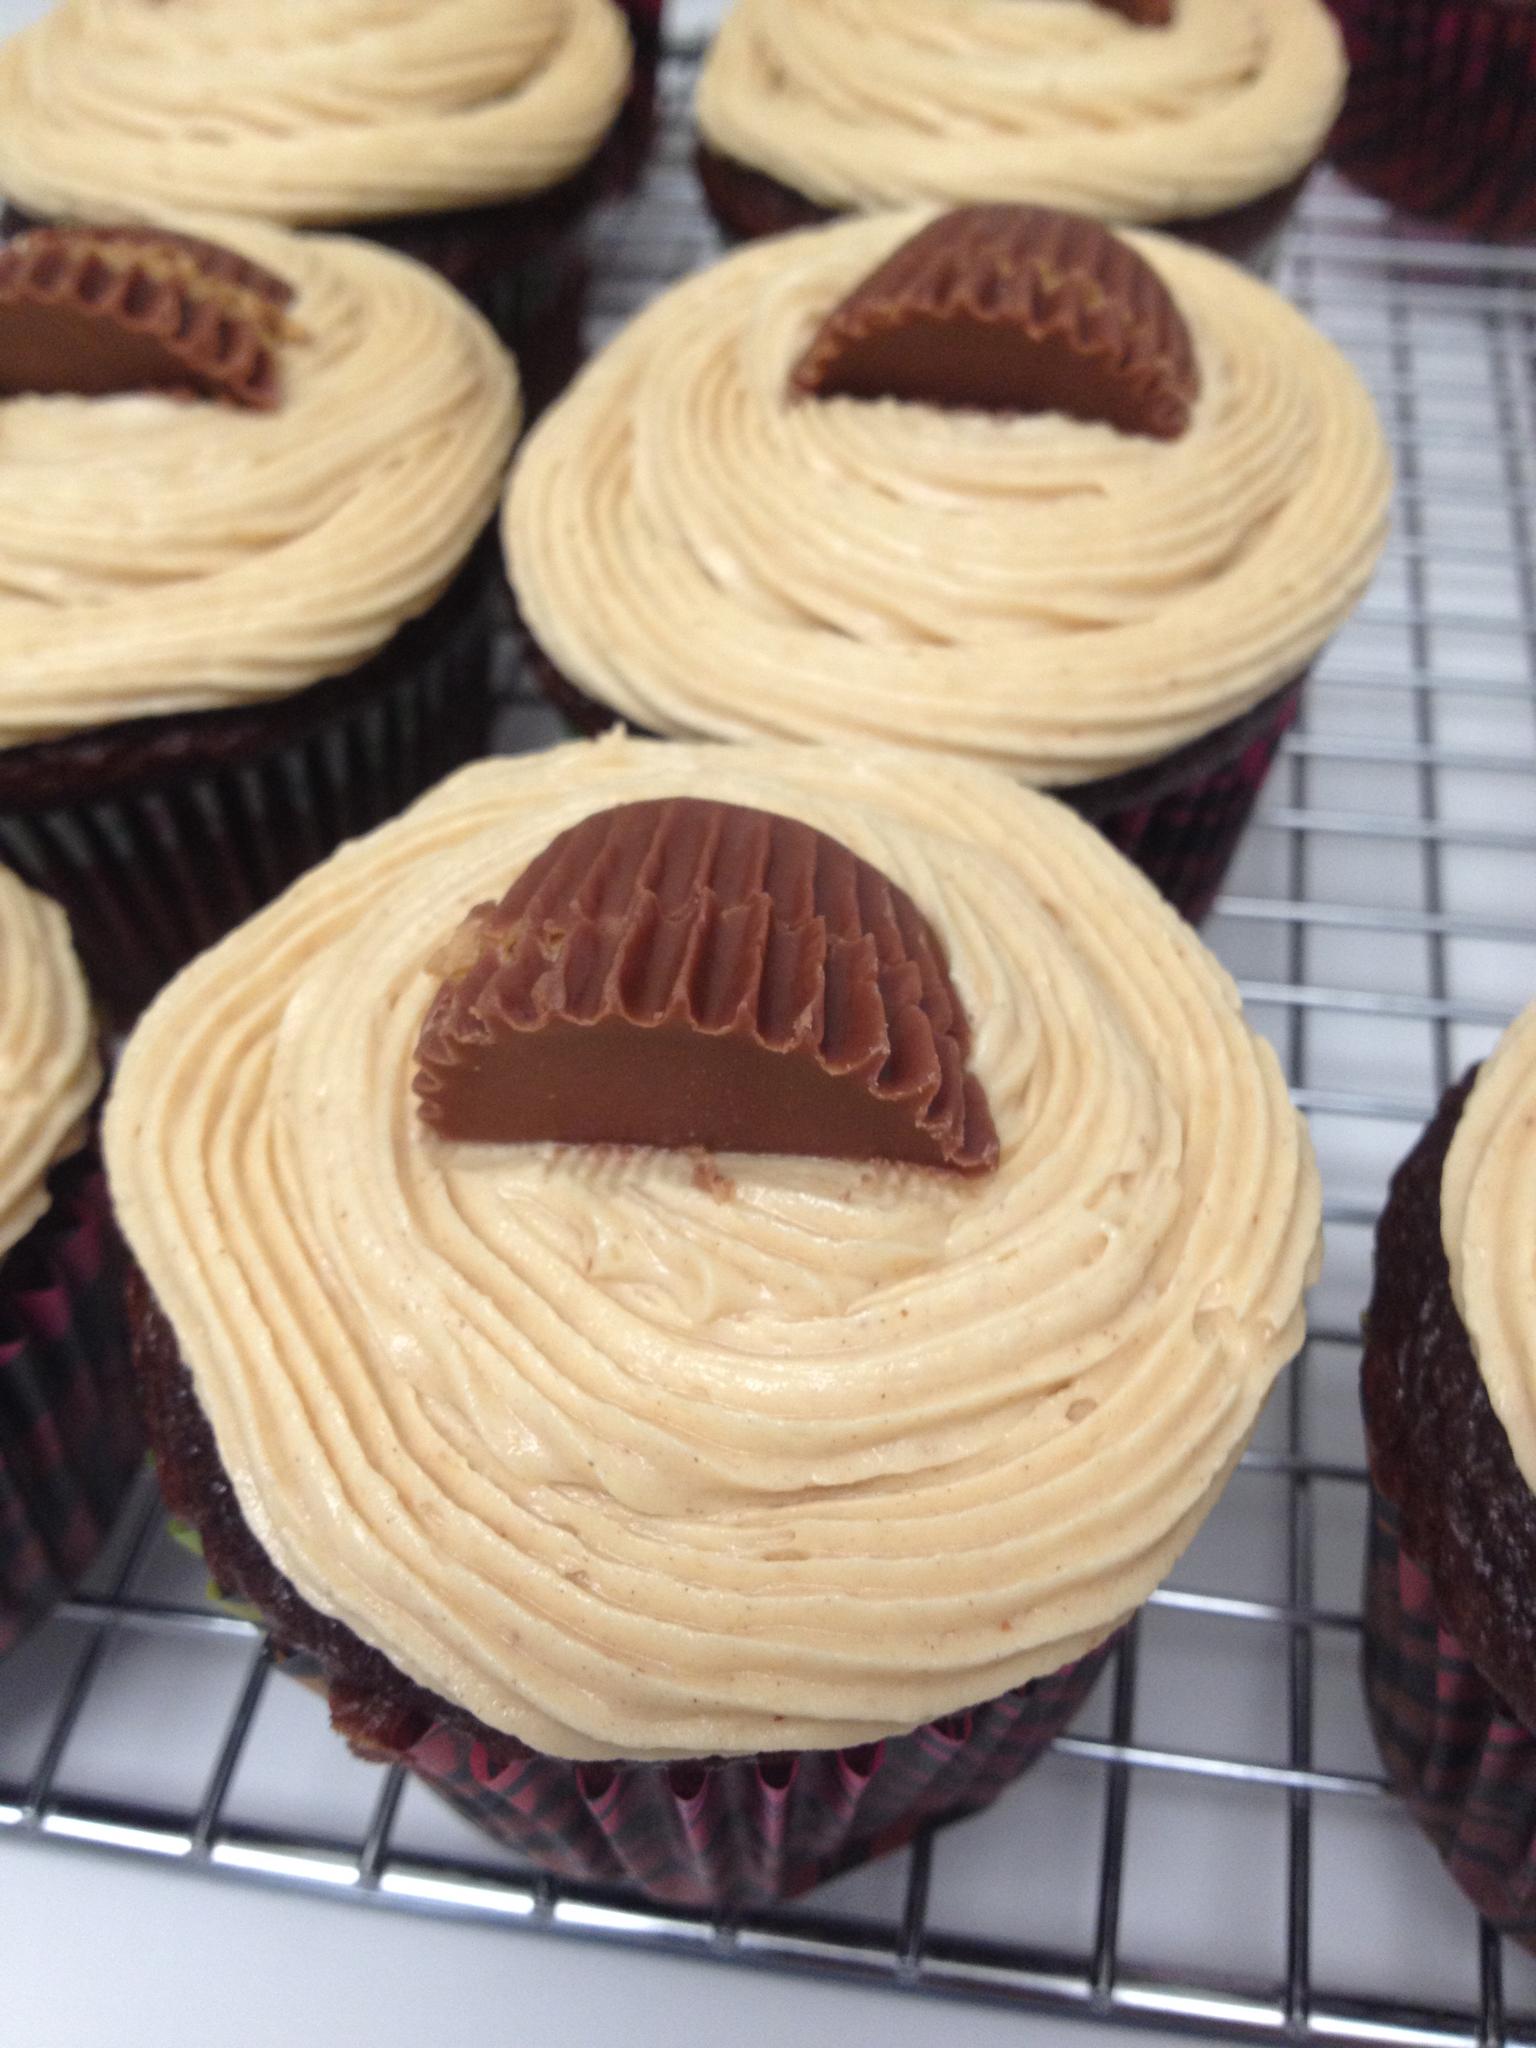
For our Friendsgiving, my friends and I also surprised our men with a birthday party since their birthdays are all close together. I made some chocolate cupcakes with peanut butter frosting- you can find the recipe for the frosting in my post about The Cupcake Bible under PB&J cupcakes.
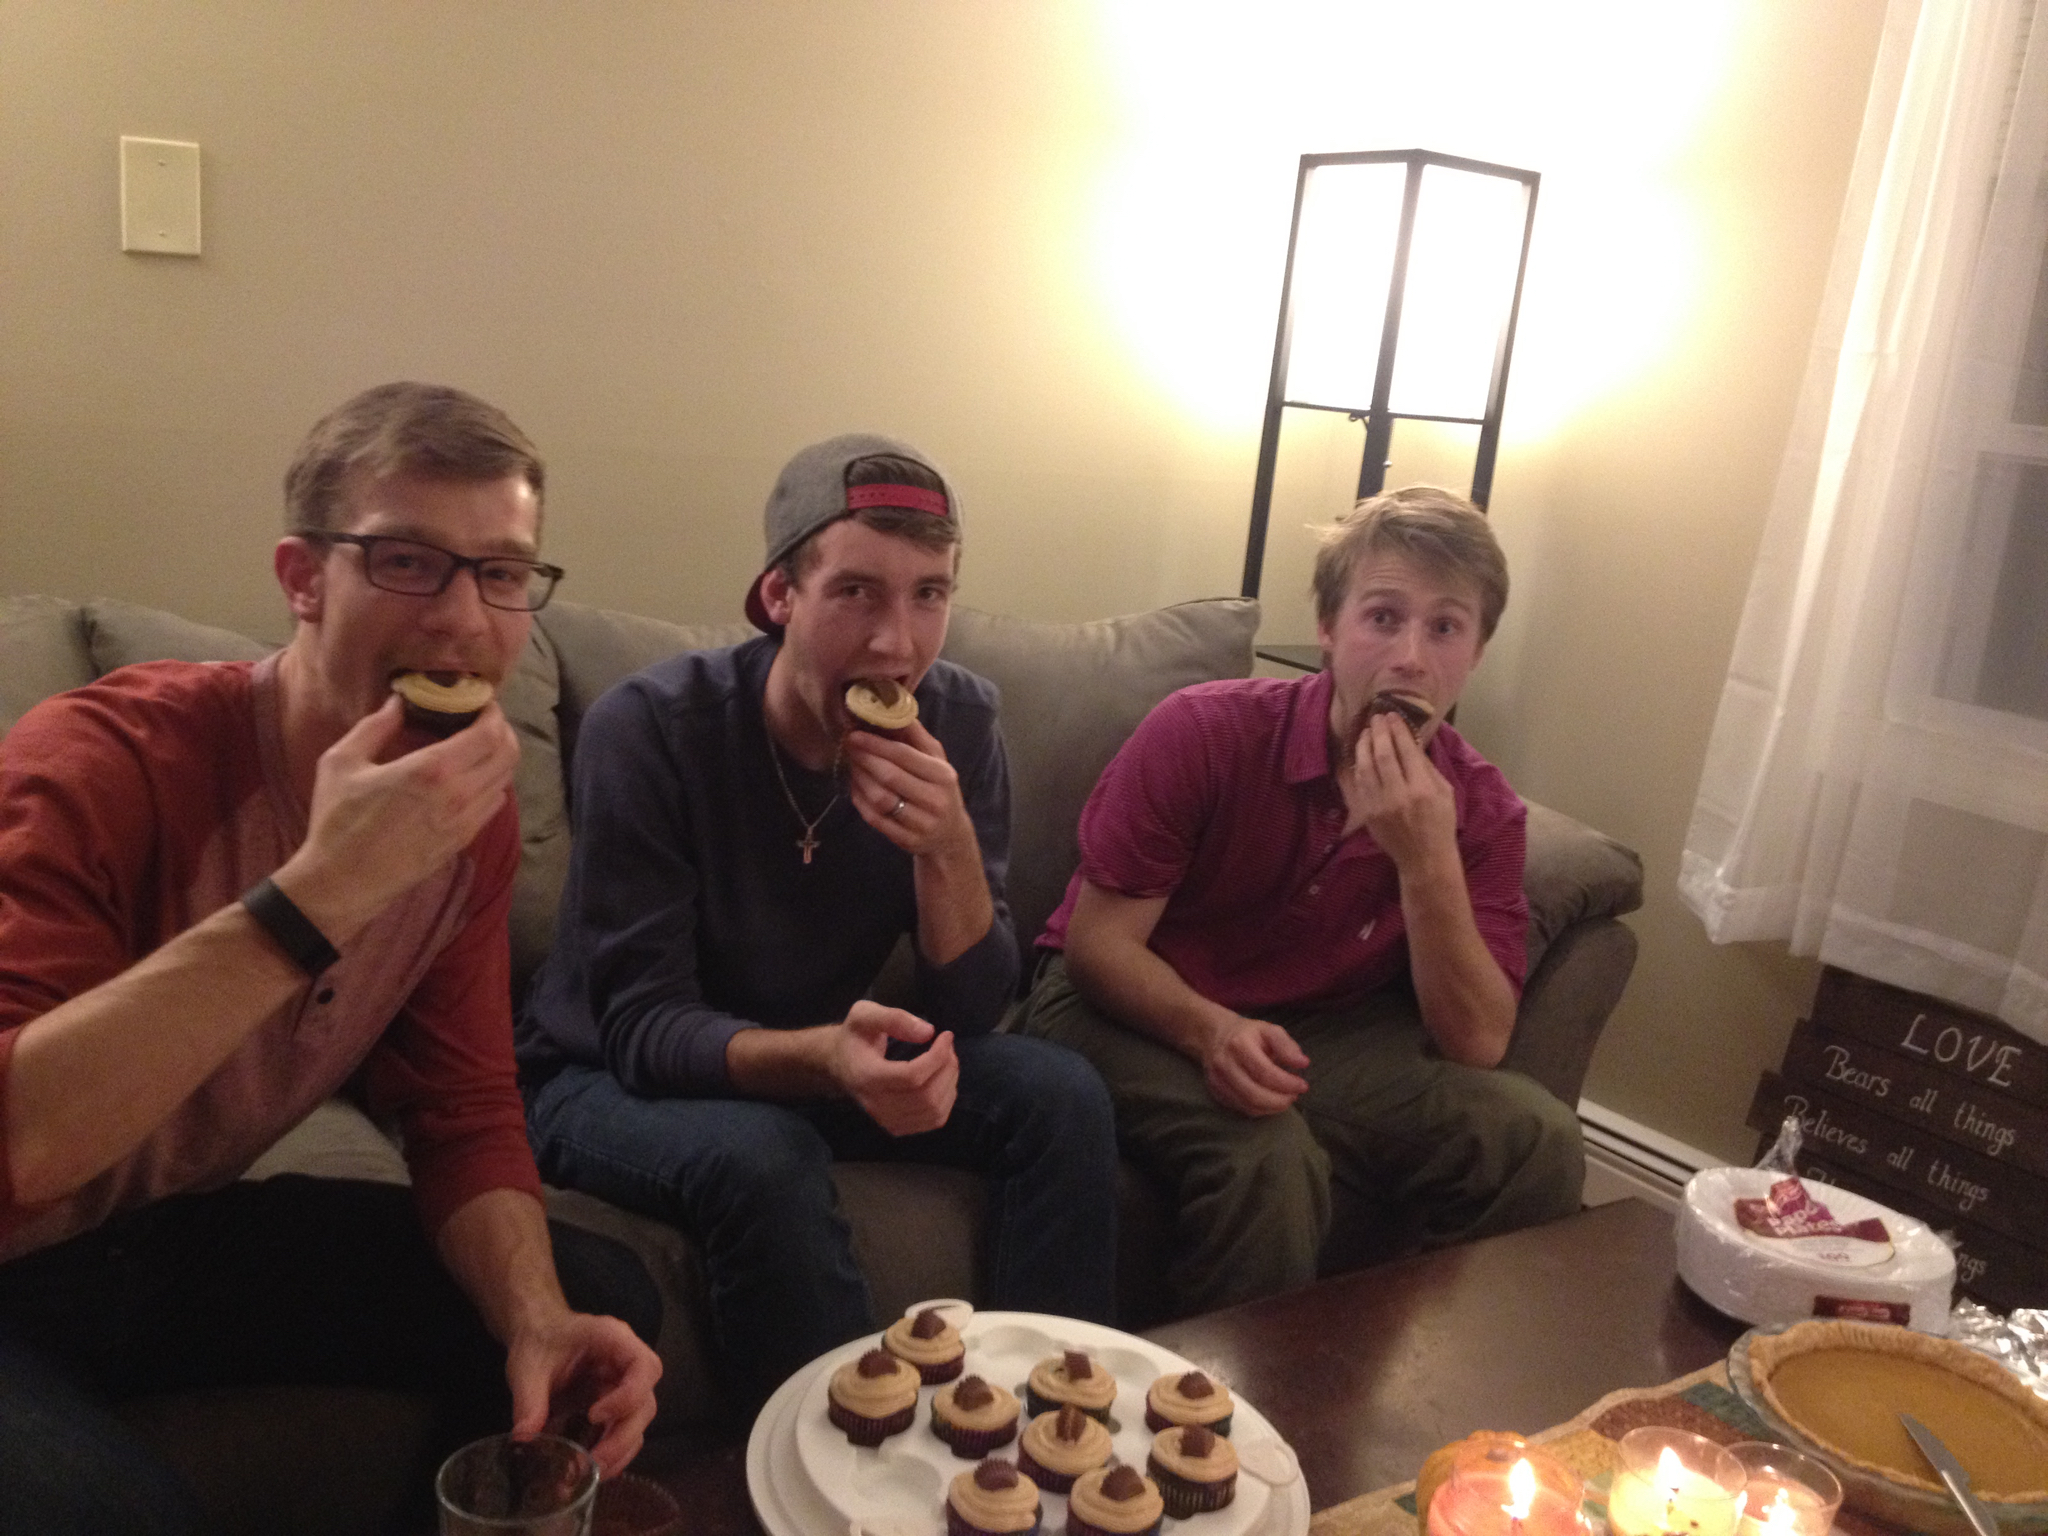
Friendsgiving was so much fun, and definitely a new tradition for us! This holiday season, be thankful, and always make sure to share good food! Happy holidays!
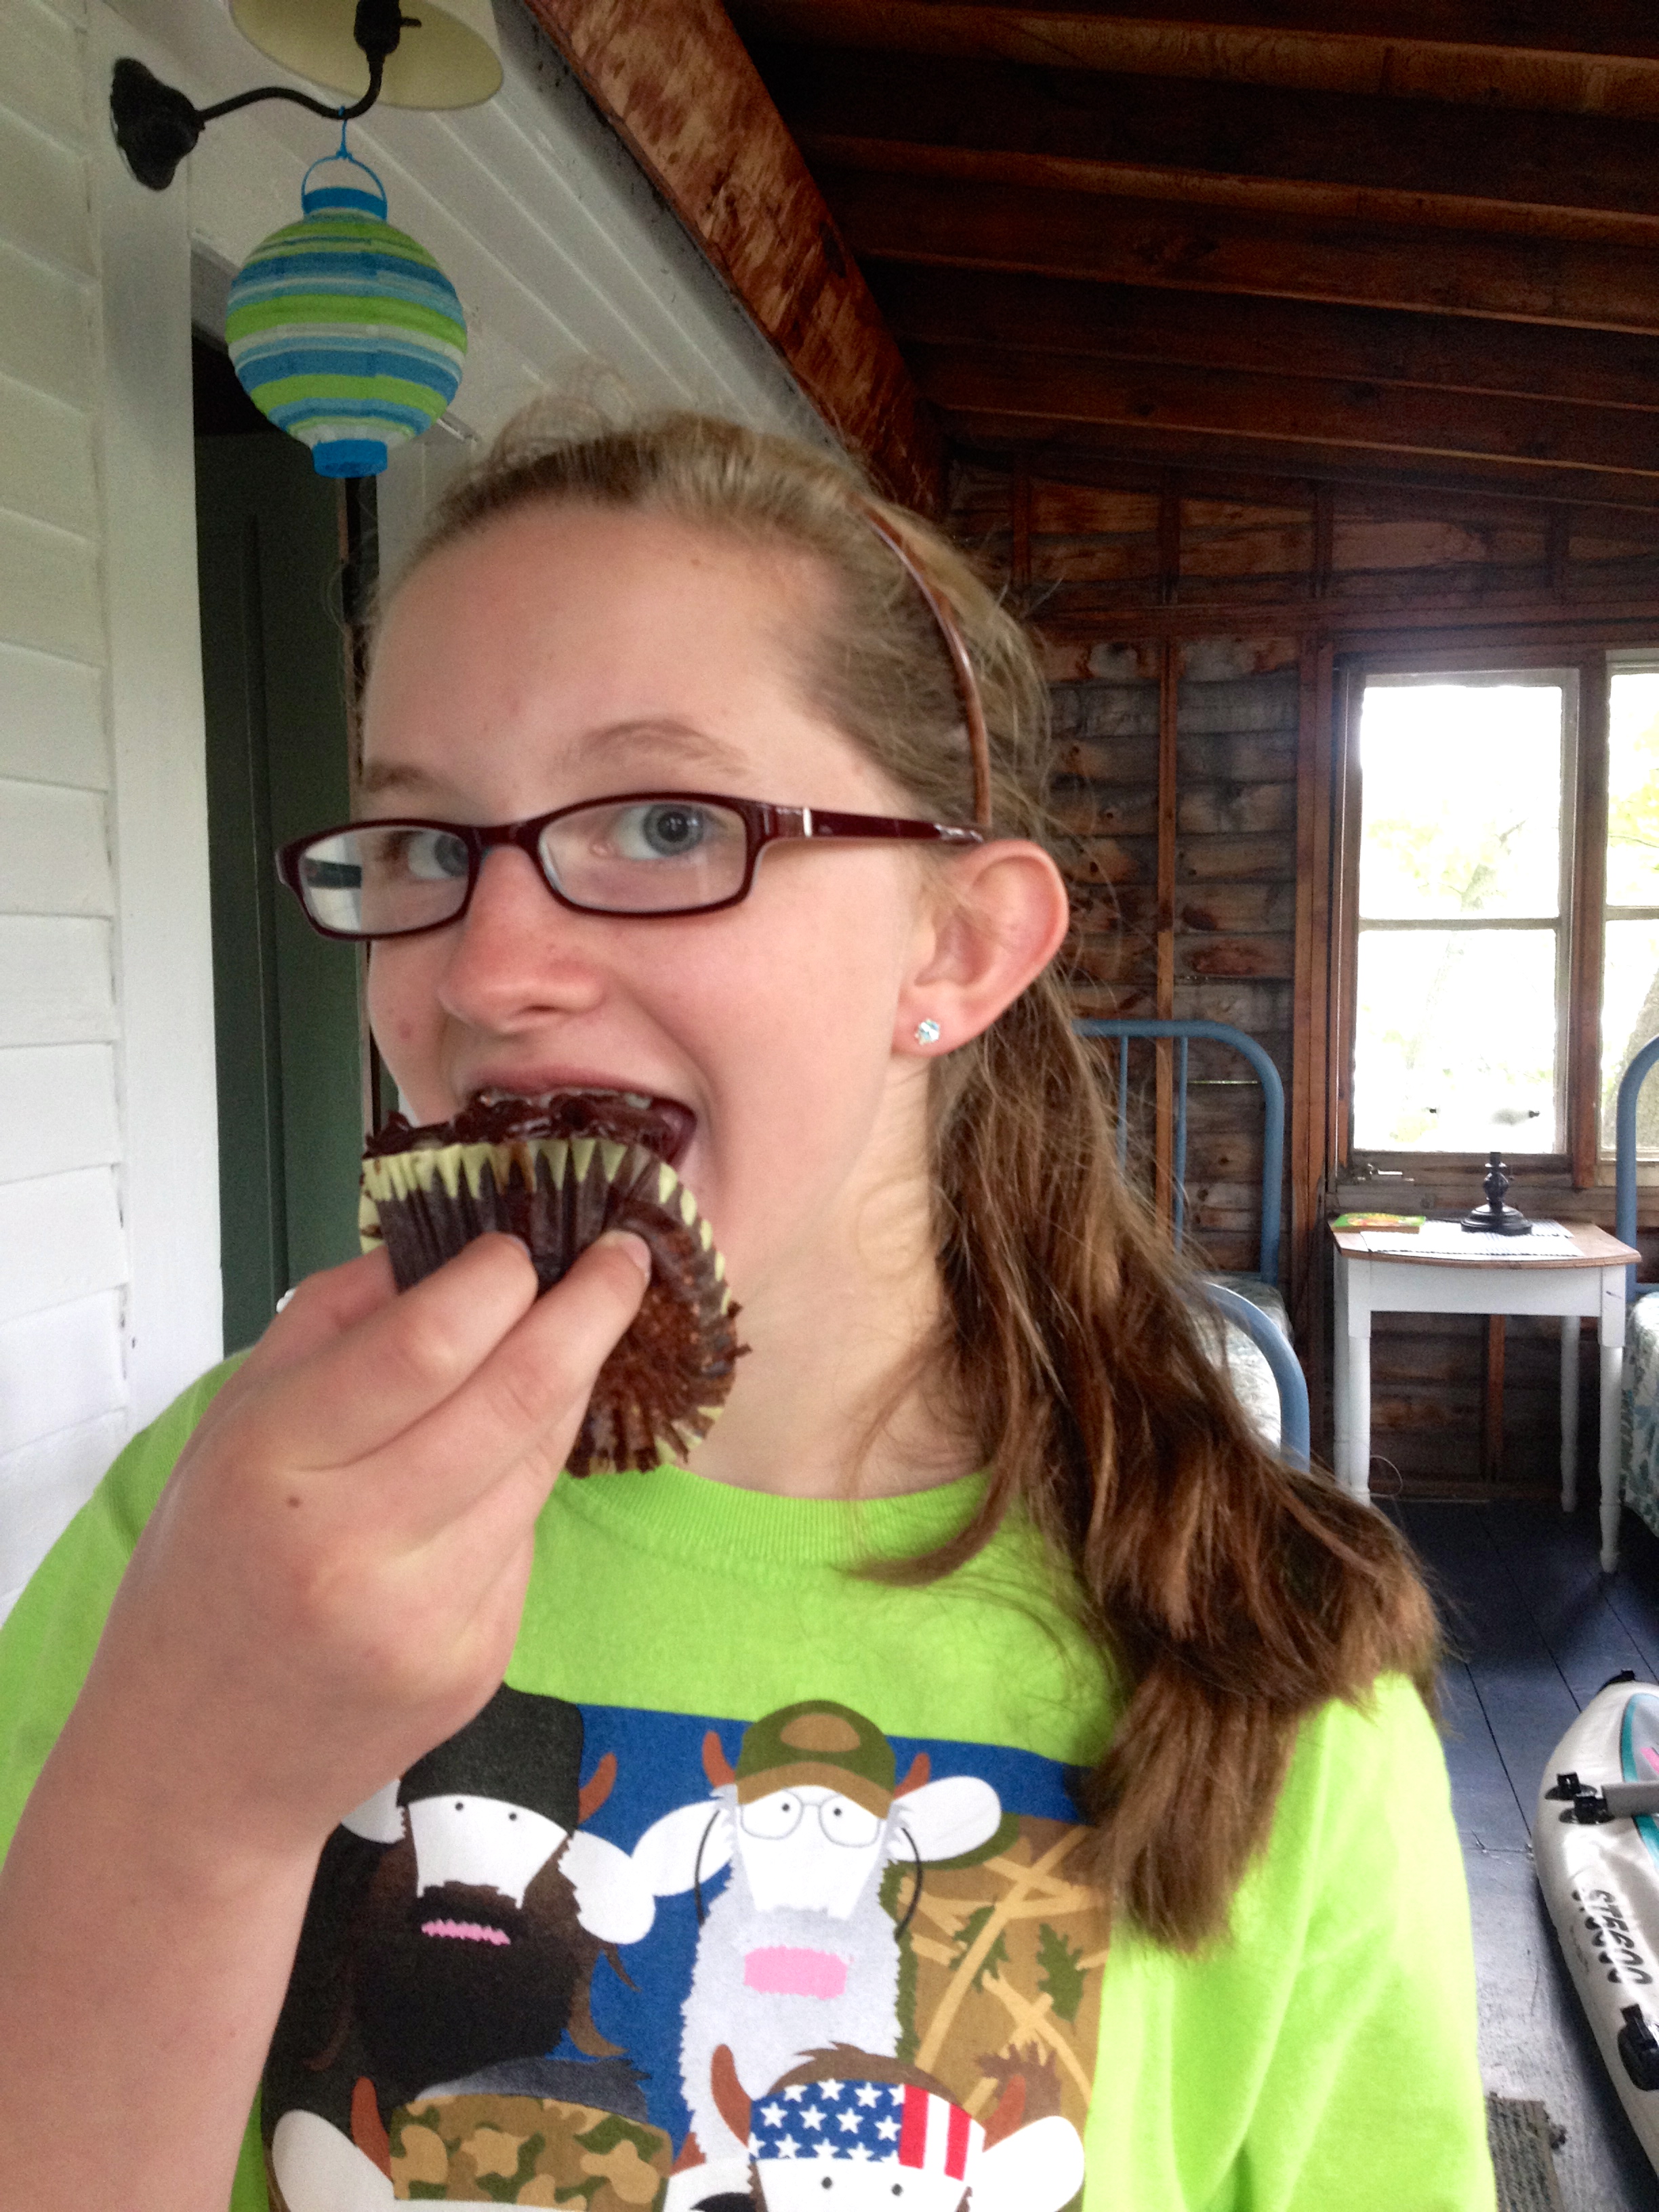
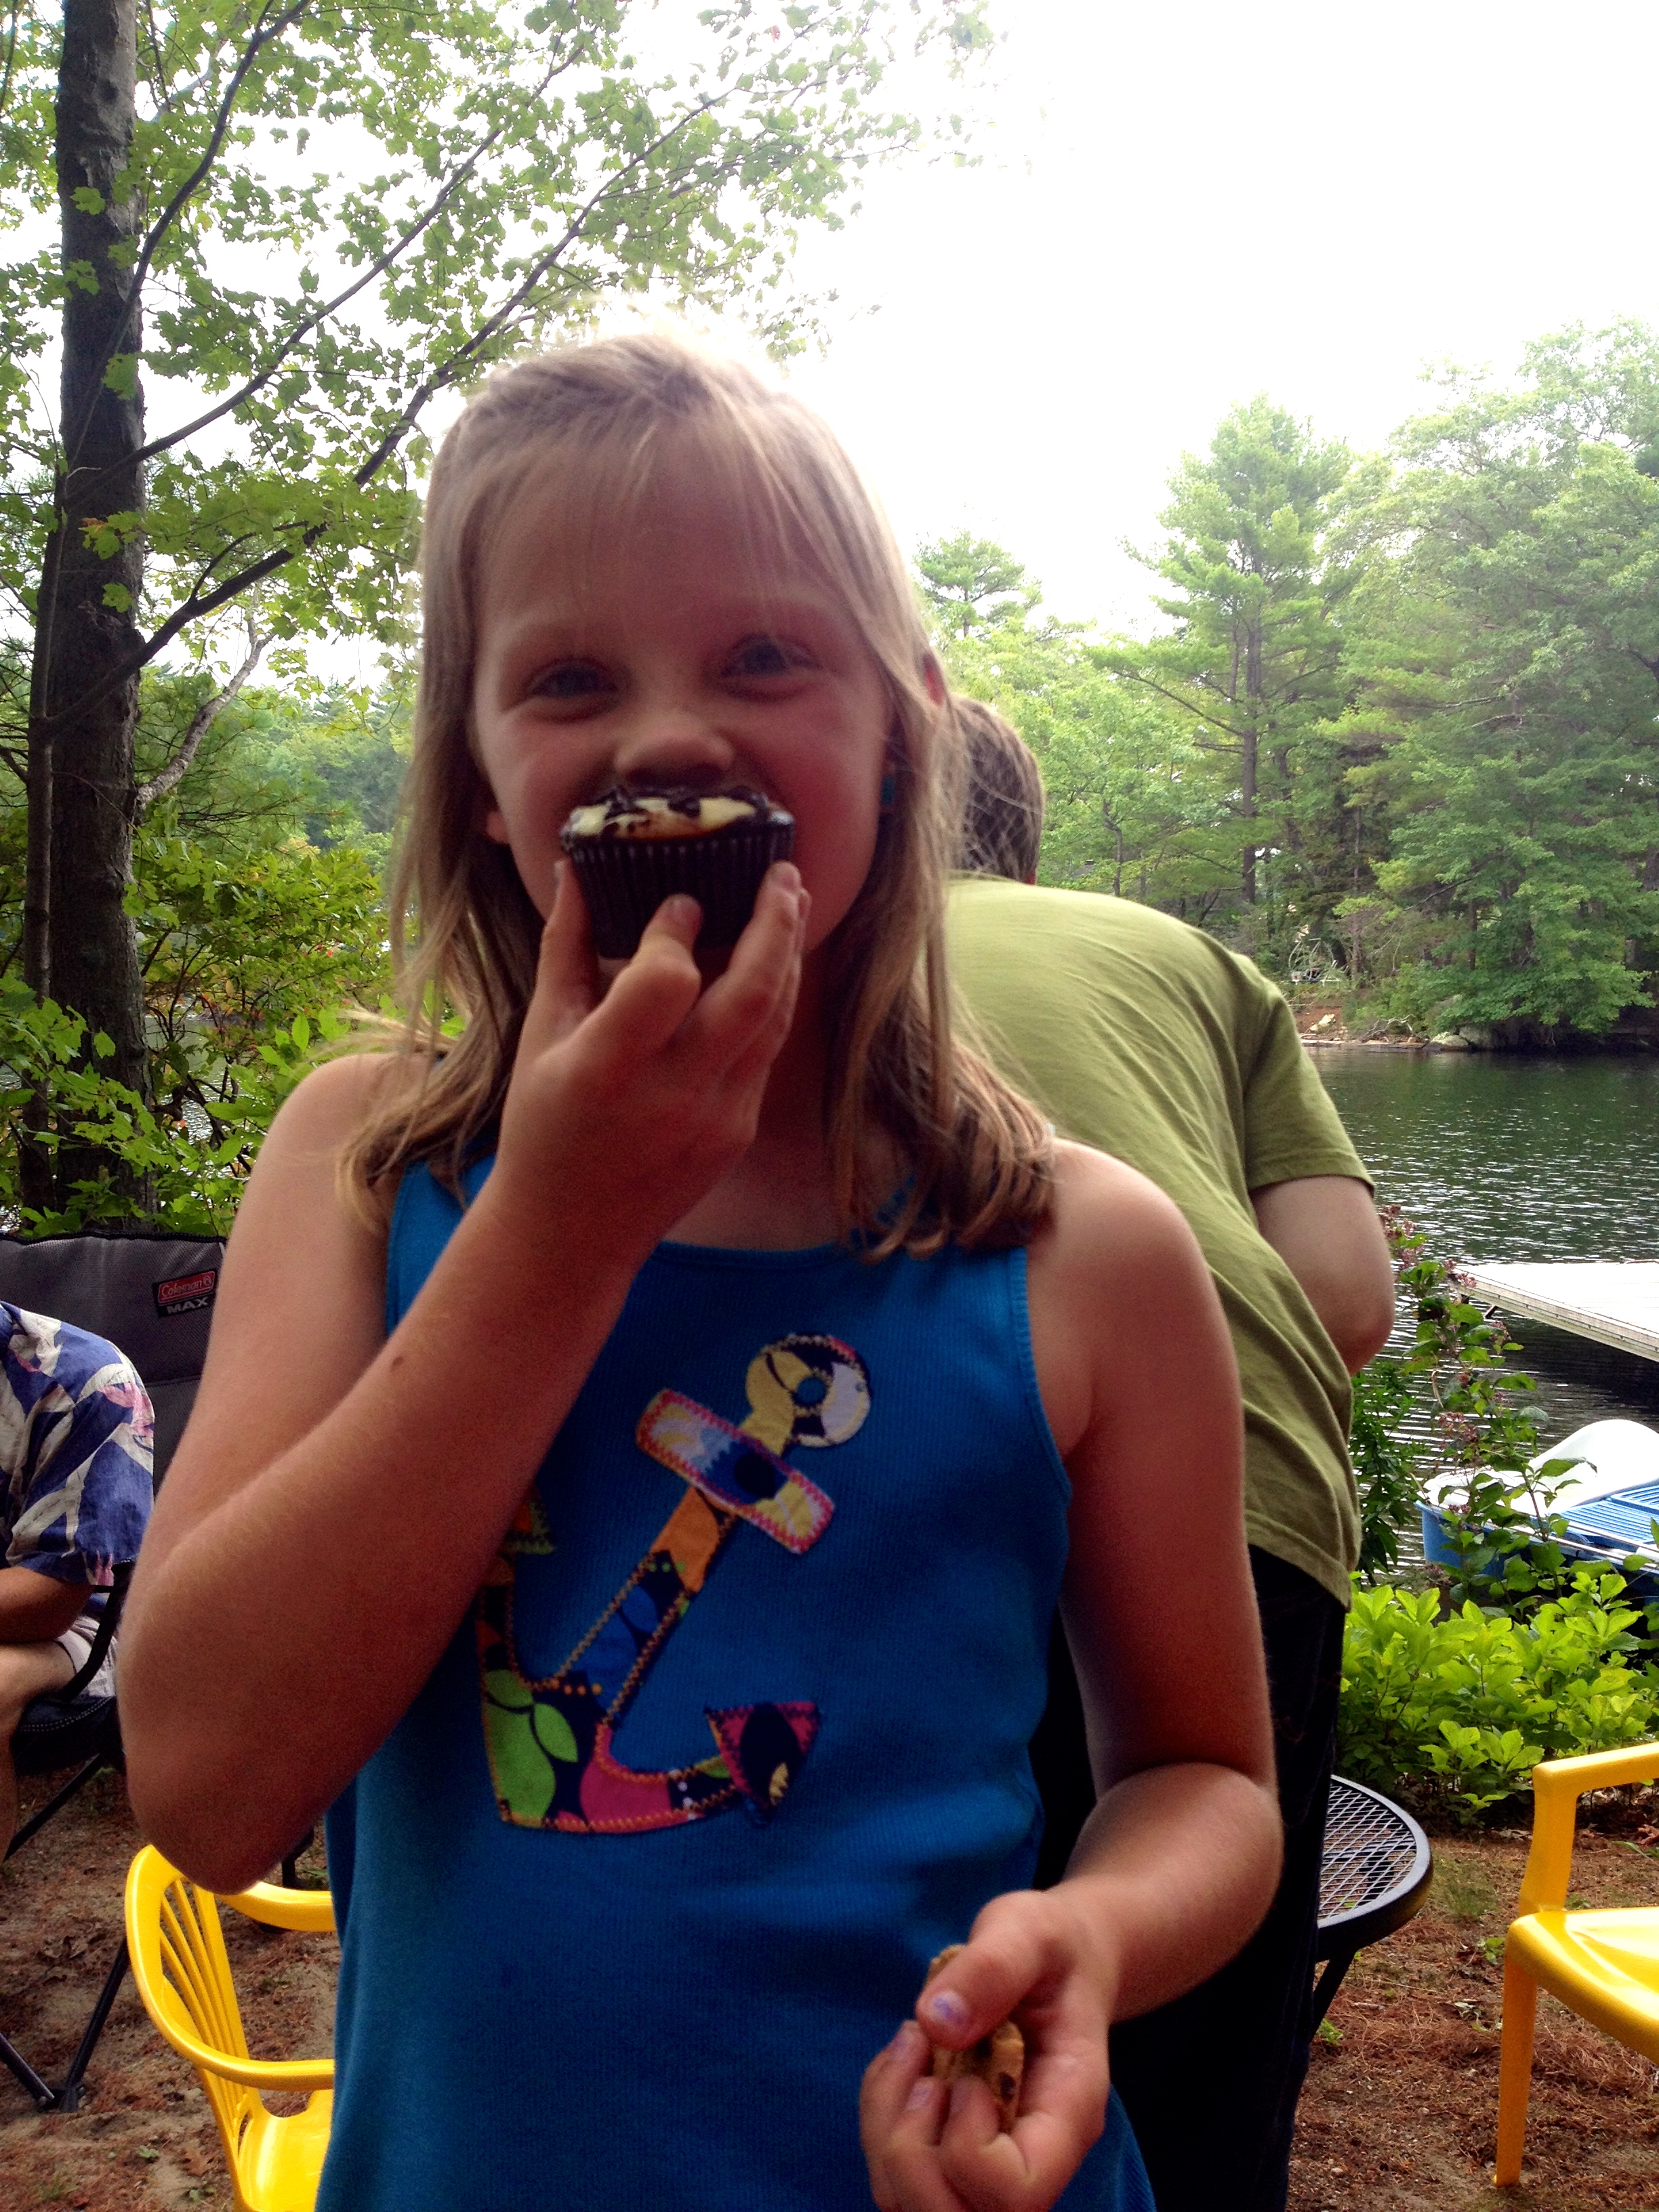
Campfire Cupcakes
Hi friends! Happy 4th of July weekend! I was flipping through my Cupcake Bible this past week and came across a great recipe for S’mores Cupcakes. Since my last S’mores Dip recipe was so popular, I decided to go round two for the s’mores! This recipe is really simple and cute, and was a huge favorite among my family and my dad’s coworkers. Here’s the recipe:
Ingredients:
- 1 and 1/4 cups all-purpose flour
- 1/2 cup unsweetened cocoa powder
- 3/4 tsp baking soda
- 1/2 tsp salt
- 1 stick softened butter or margarine
- 1 and 1/4 cups granulated sugar
- 2 eggs
- 1 cup milk
- 1 tsp vanilla
- 7 whole graham crackers (14 squares)
- 1 and 1/2 cup marshmallow fluff
- Chocolate candies of your choosing (I chose Kit-Kats, but Hershey milk chocolate bars are more traditional. You’ll need as much as you want to top each cupcake.)
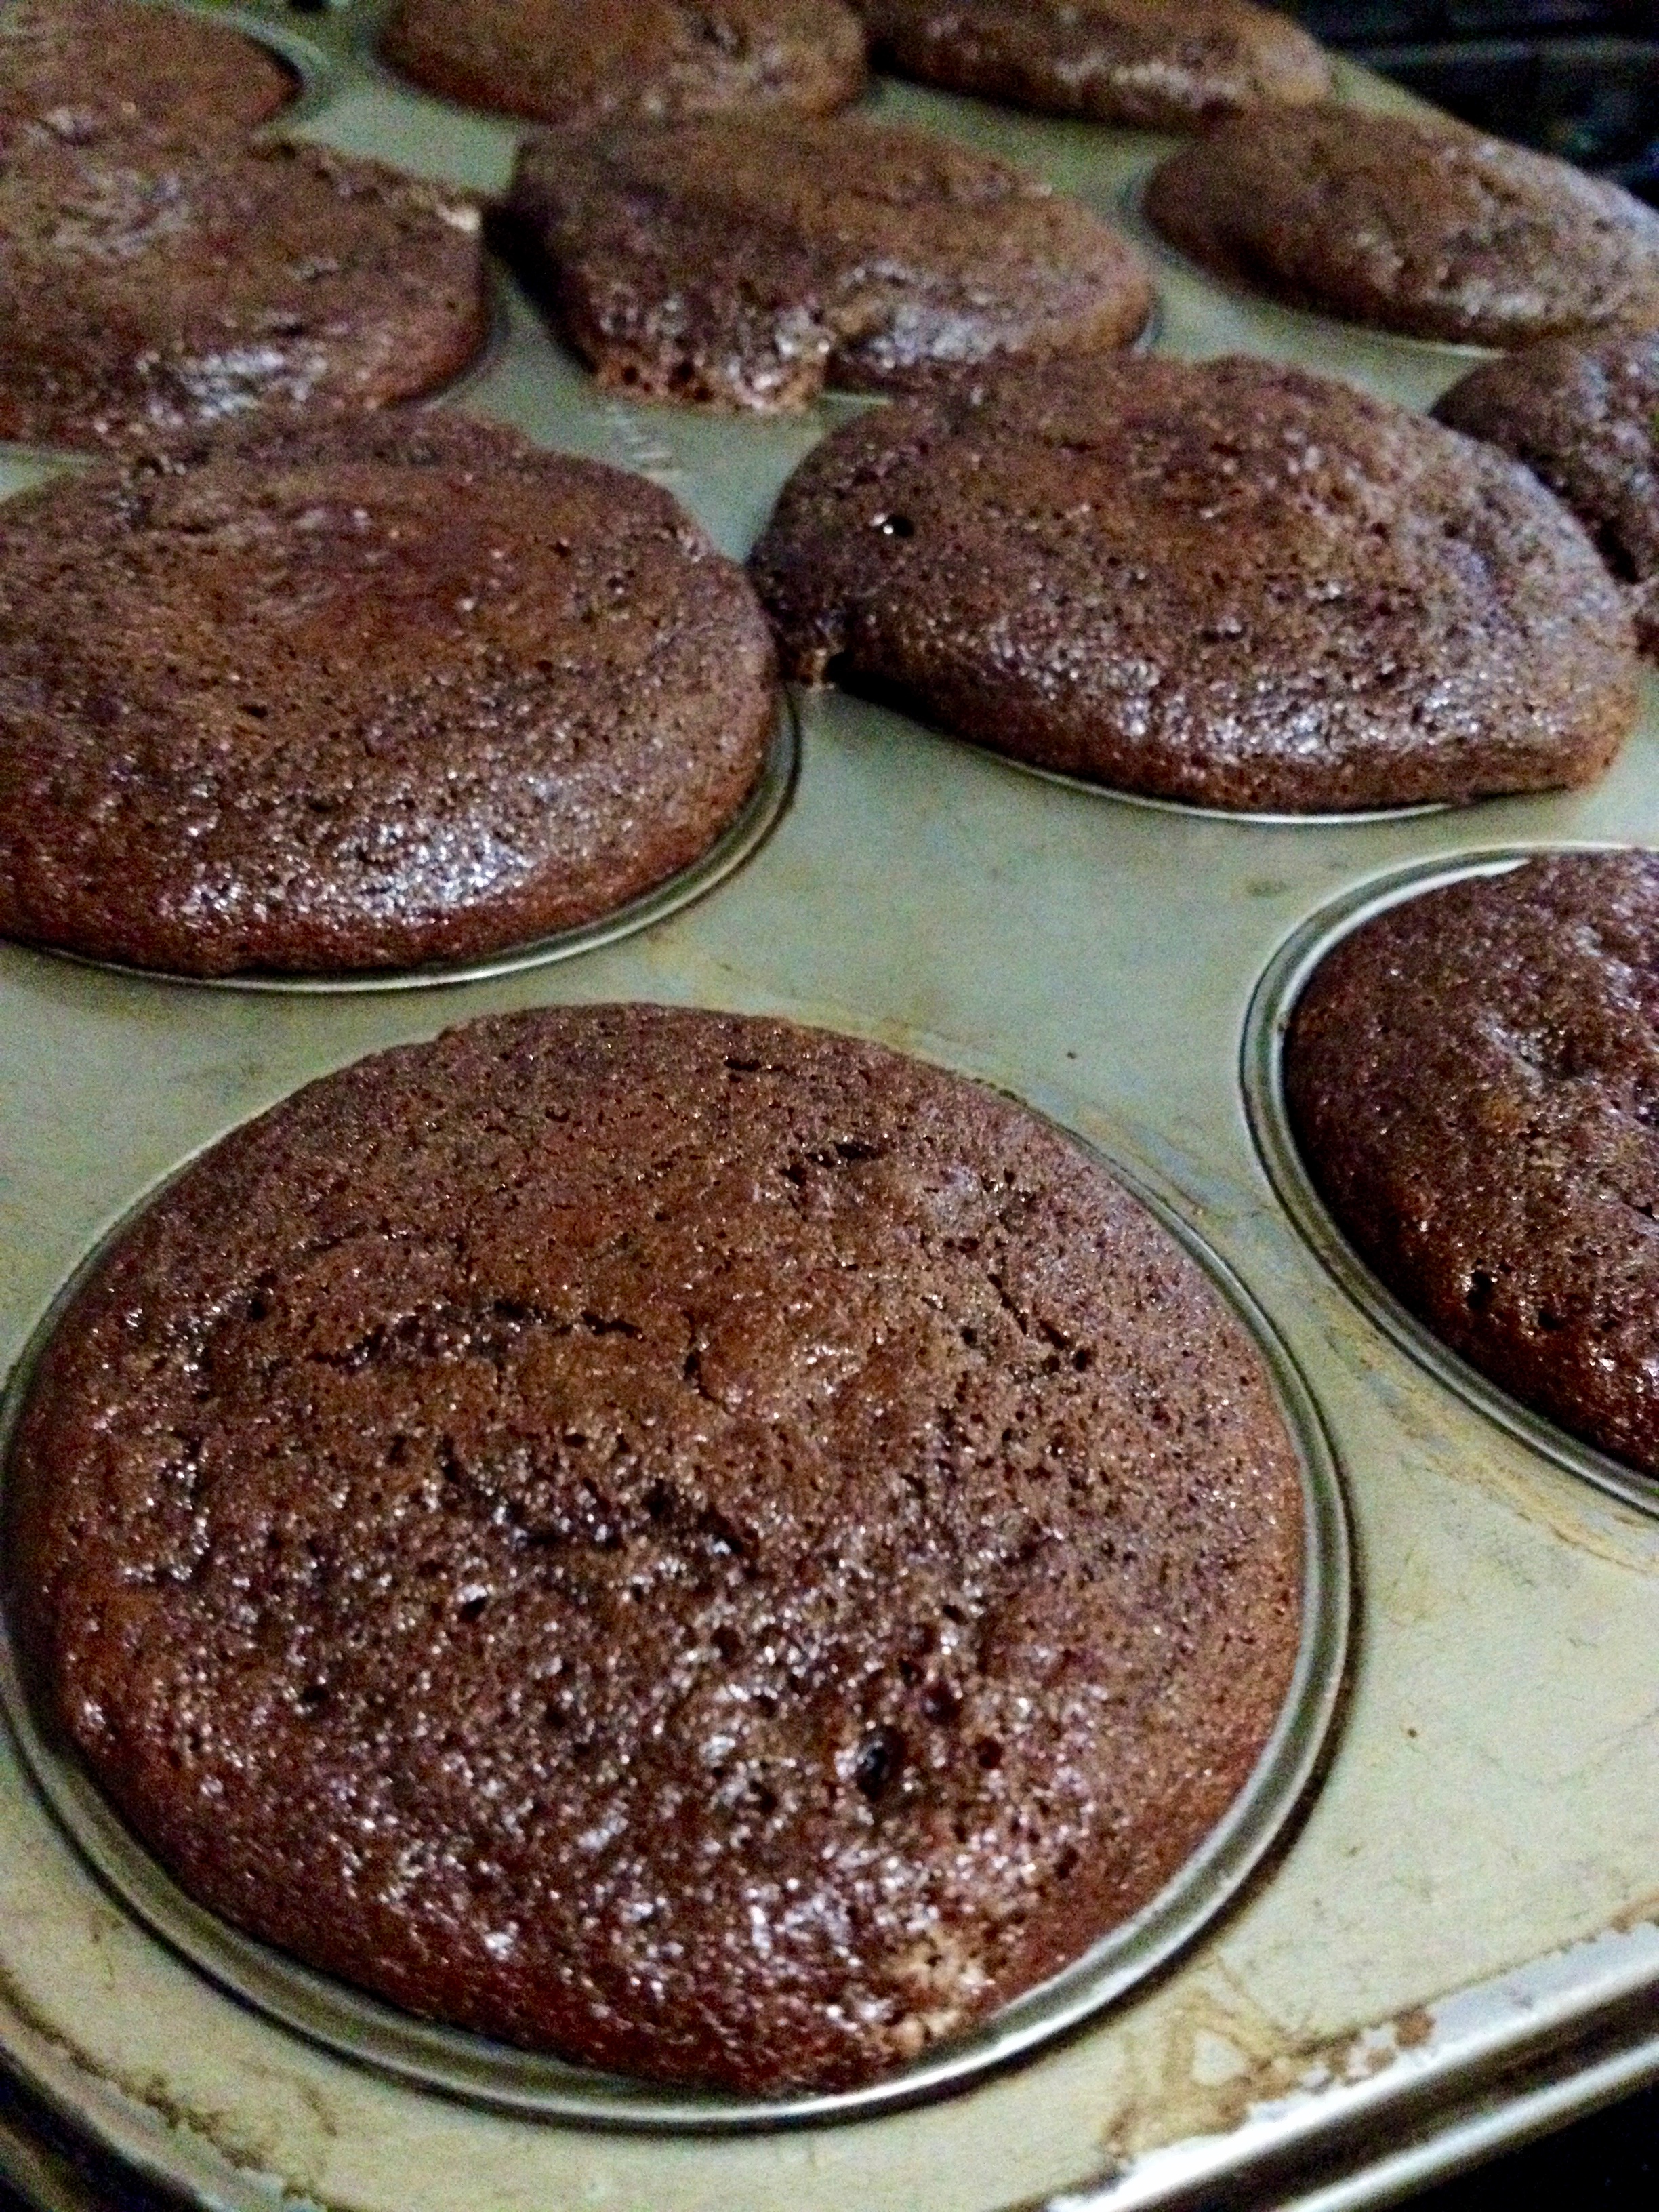
Preheat the oven to 350ºF, and line 14 cupcake cups with the paper baking cups. Combine the flour, cocoa, baking soda, and salt in a mixing bowl, and set it aside.
Combine the milk and vanilla, and set those aside.
Beat the butter in a large bowl with a stand mixer at medium speed until the butter is creamed. Add the sugar, and beat for three minutes. Add the eggs one at a time, beating well after each addition. Now, put the mixer to medium speed and add the milk mixture and flour mixture alternately, starting and ending with the flour mix.
Pour the batter into the cupcake cups, so that they’re about 3/4 full. I got 14 out of the mix, but you may get more or less. According to the book, I was only supposed to get 12. It happens!

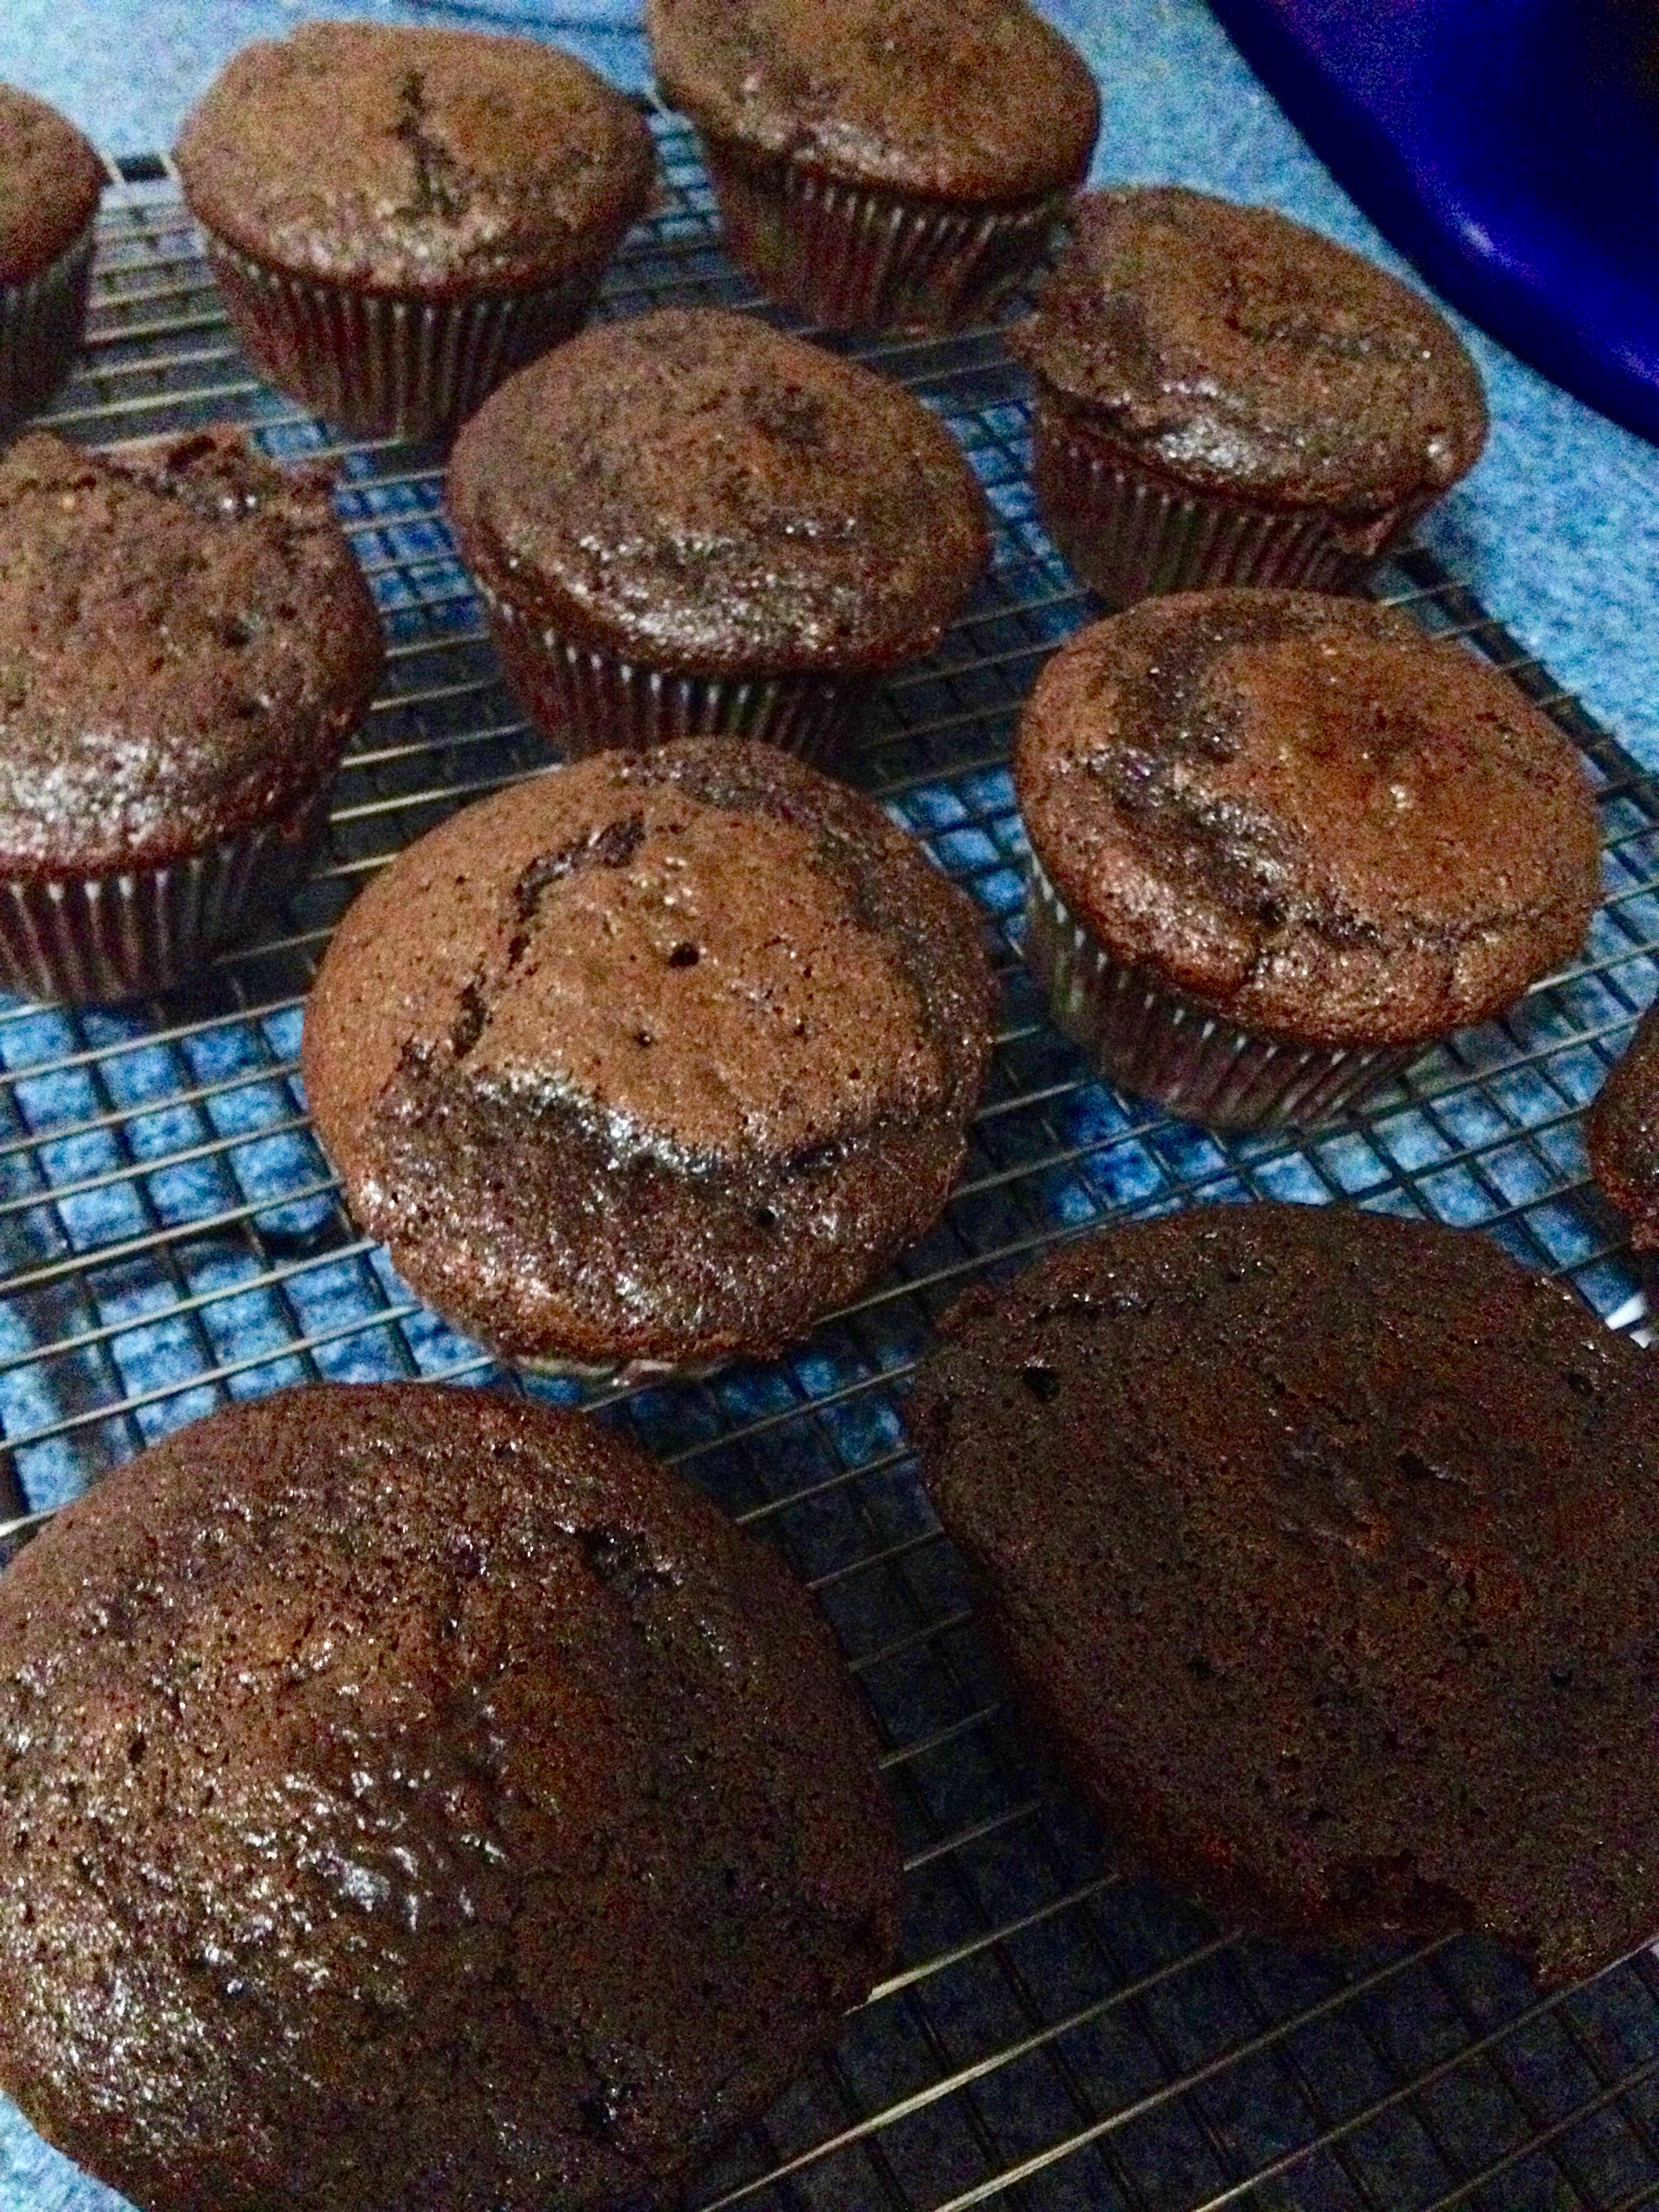
Bake the cupcakes for about 20 minutes, or until a toothpick inserted in the middle of a cupcake comes out clean. Cool them in the pan for 10 minutes, and then take them out and finish cooling them on a cooling rack.
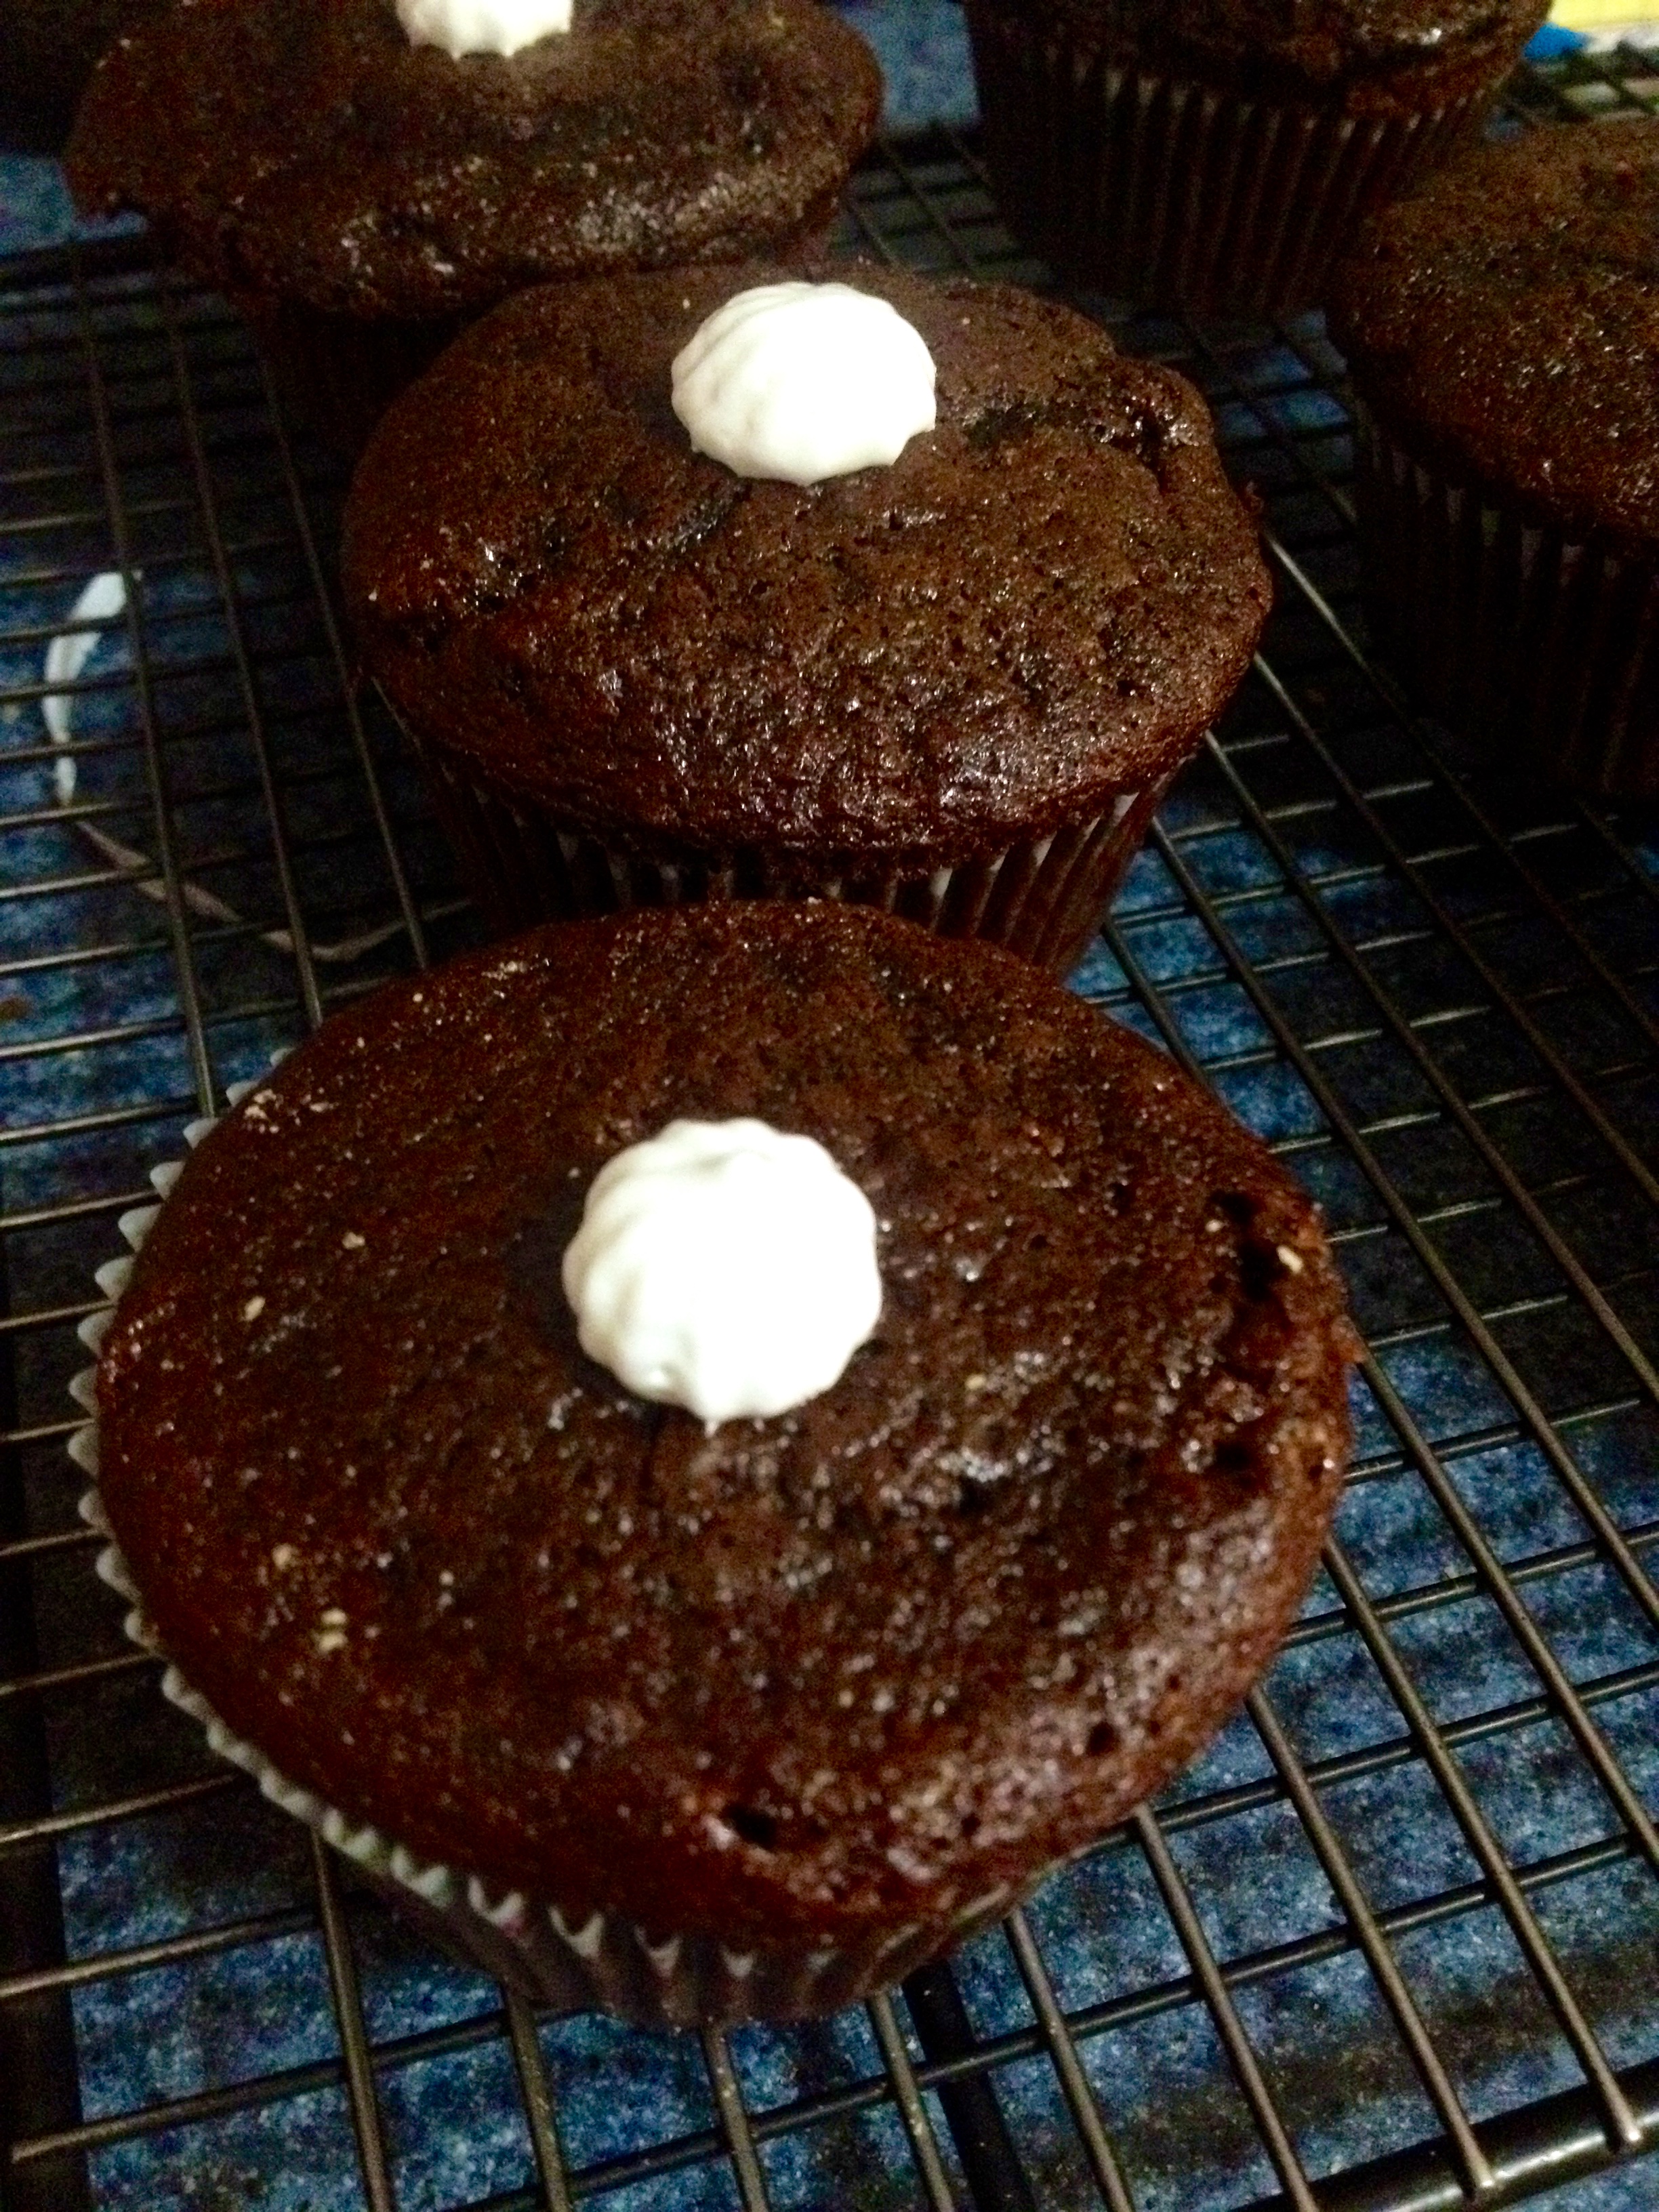
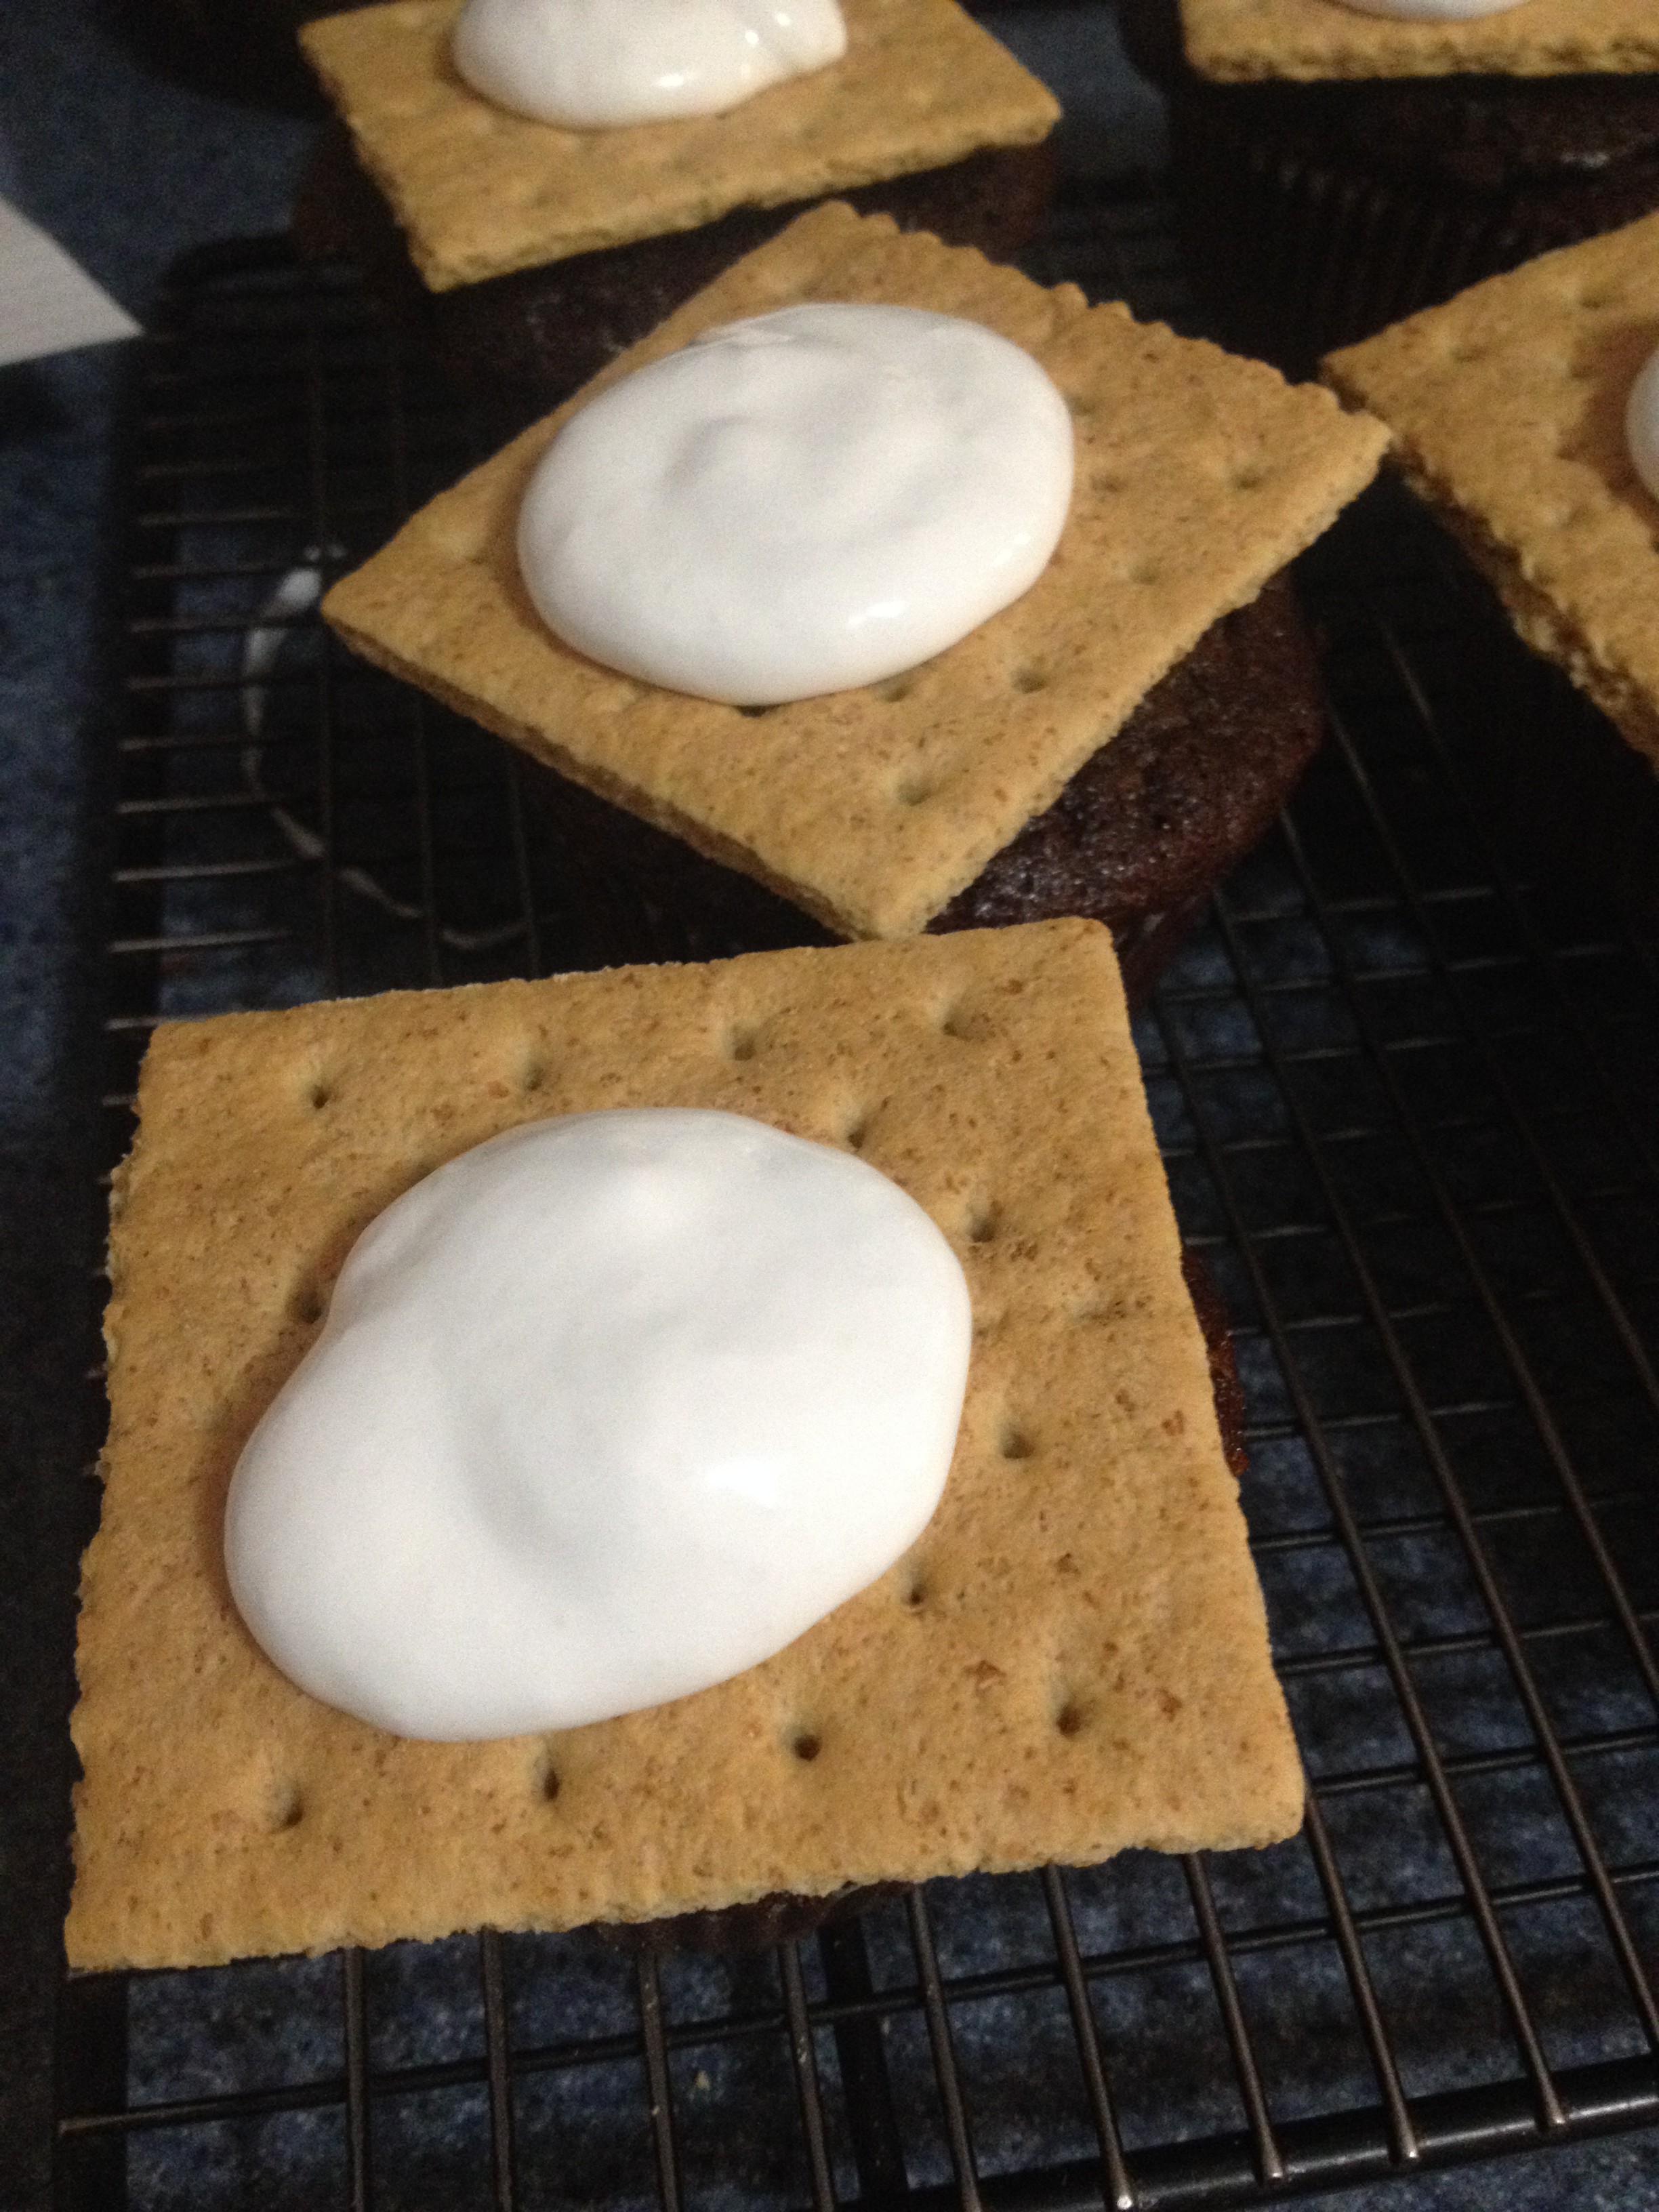
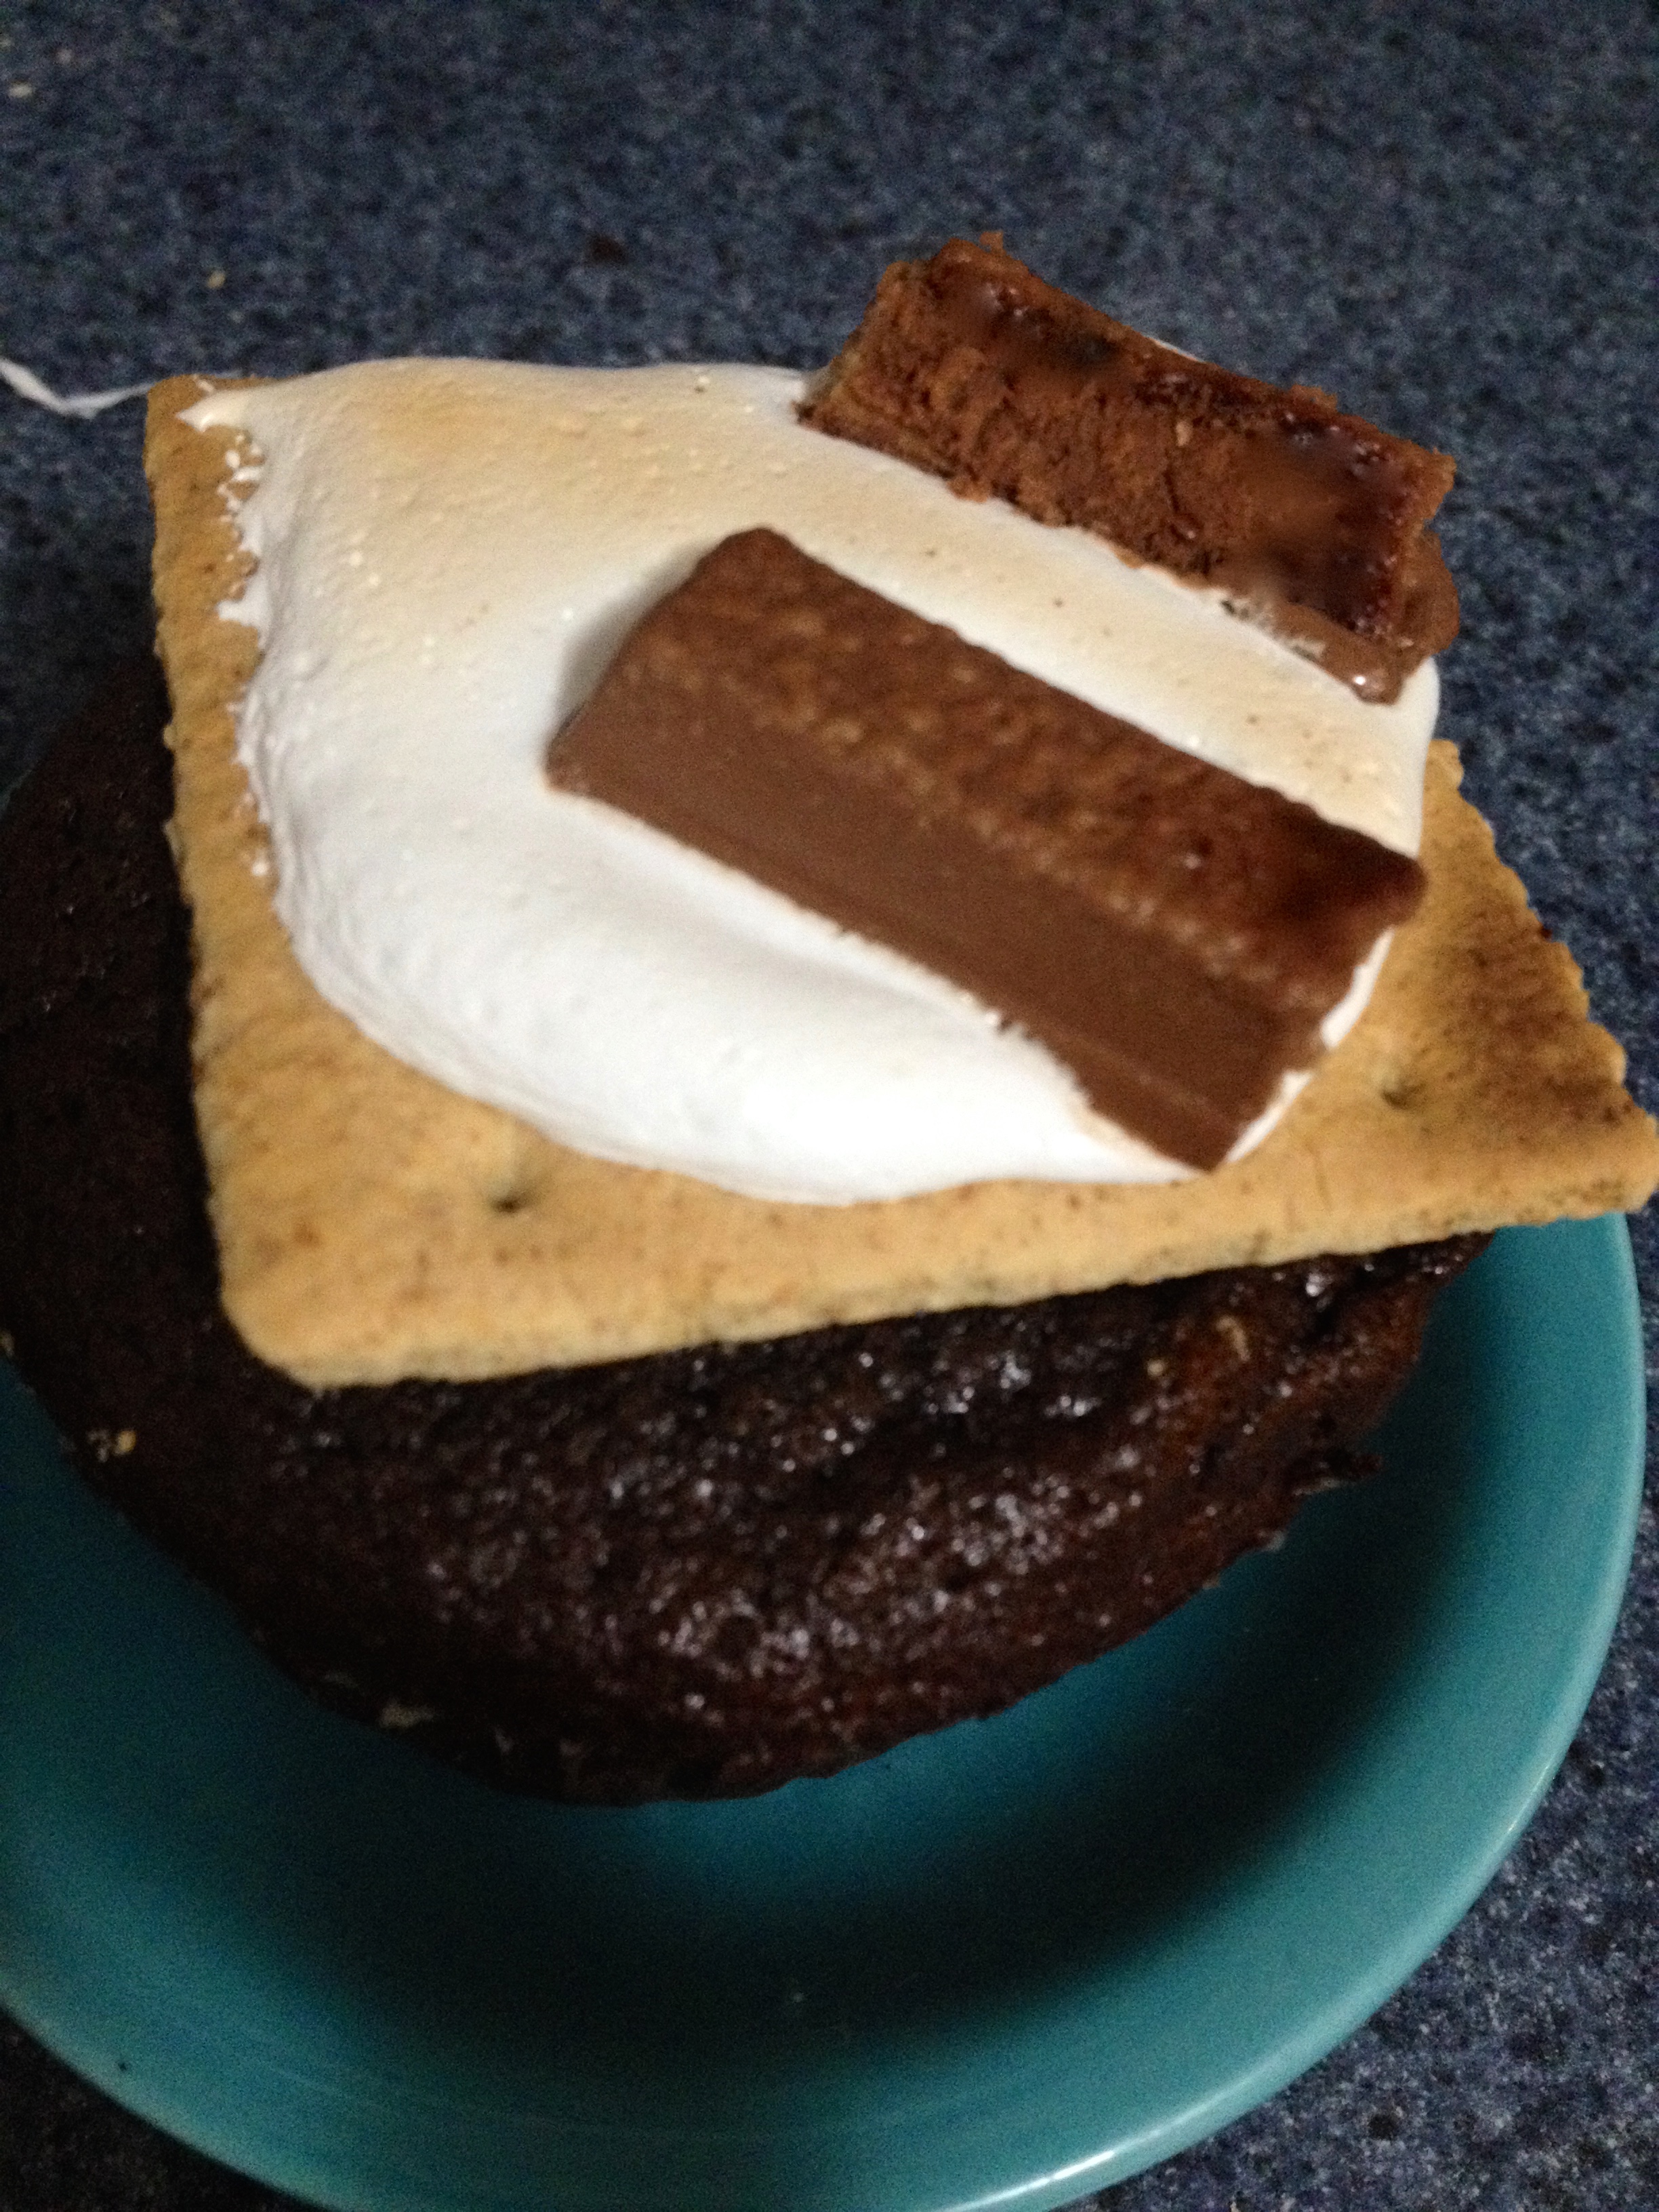
When the cupcakes are completely cooled, put a small dollop of fluff on the top of each one. This will act as the glue for the graham crackers.
Now, break each graham cracker in half so that you have about 14 squares. Put one square on each cupcake.
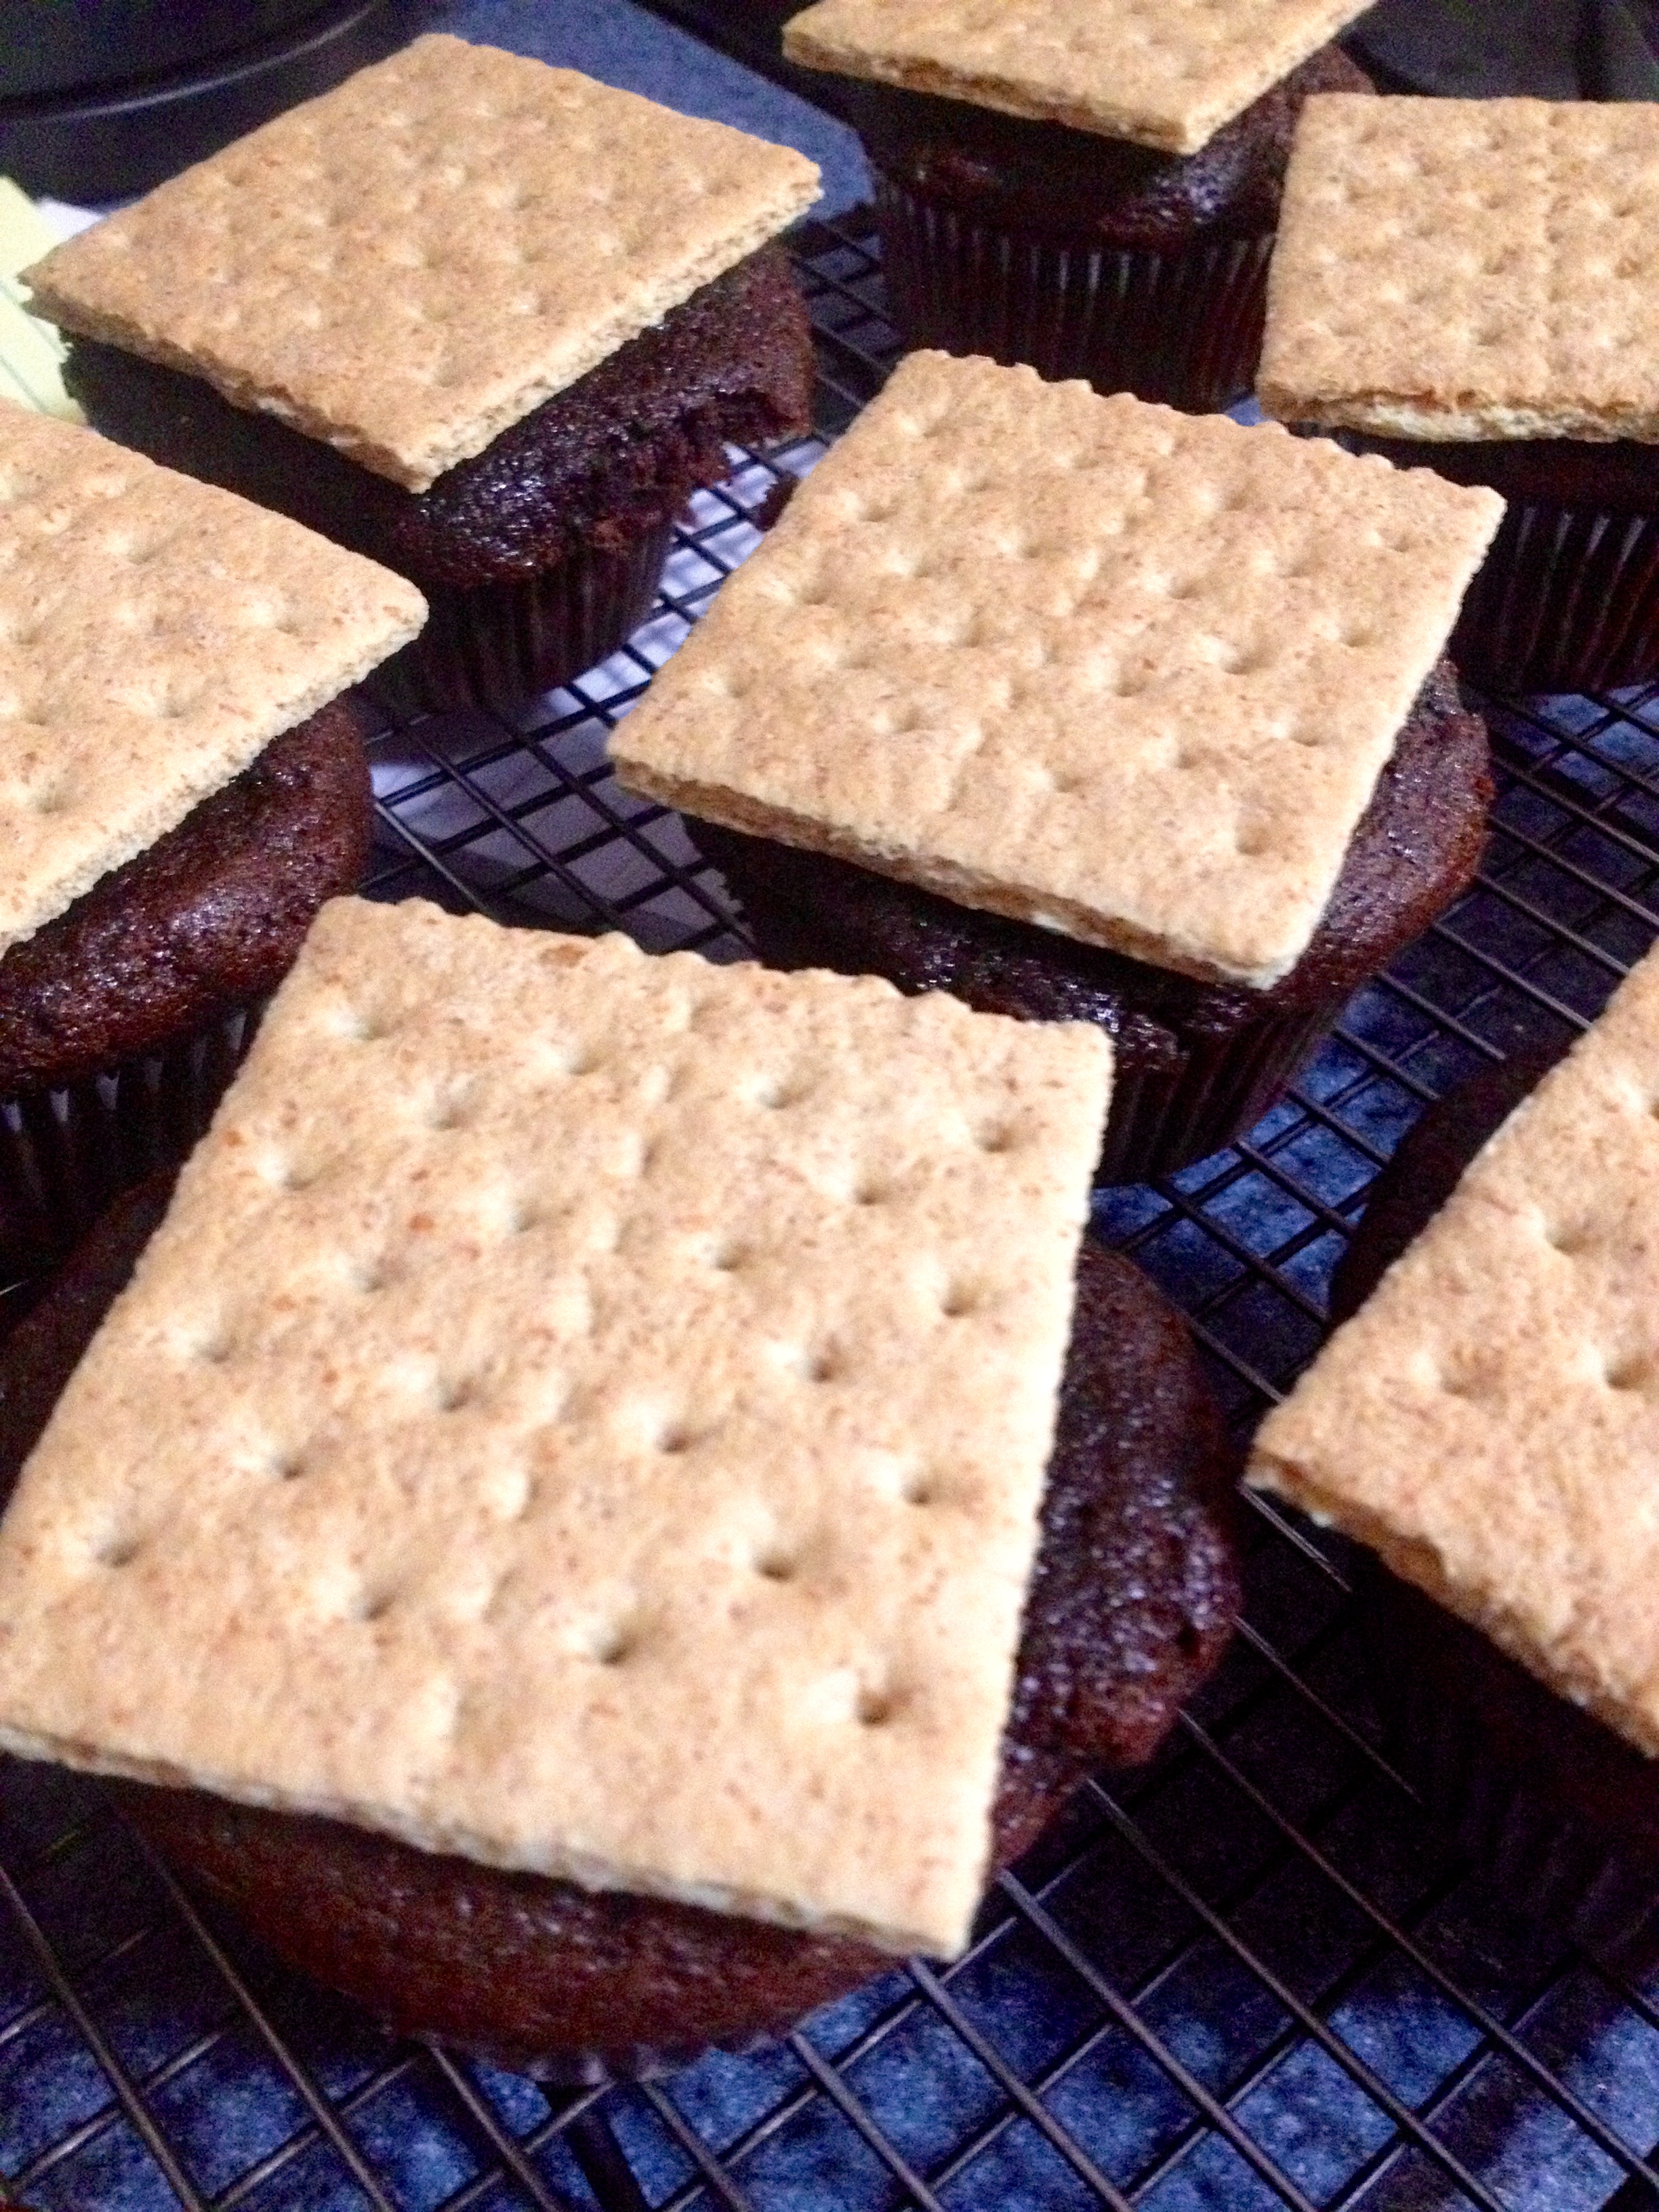
Now, put a larger dollop of fluff on each graham cracker.
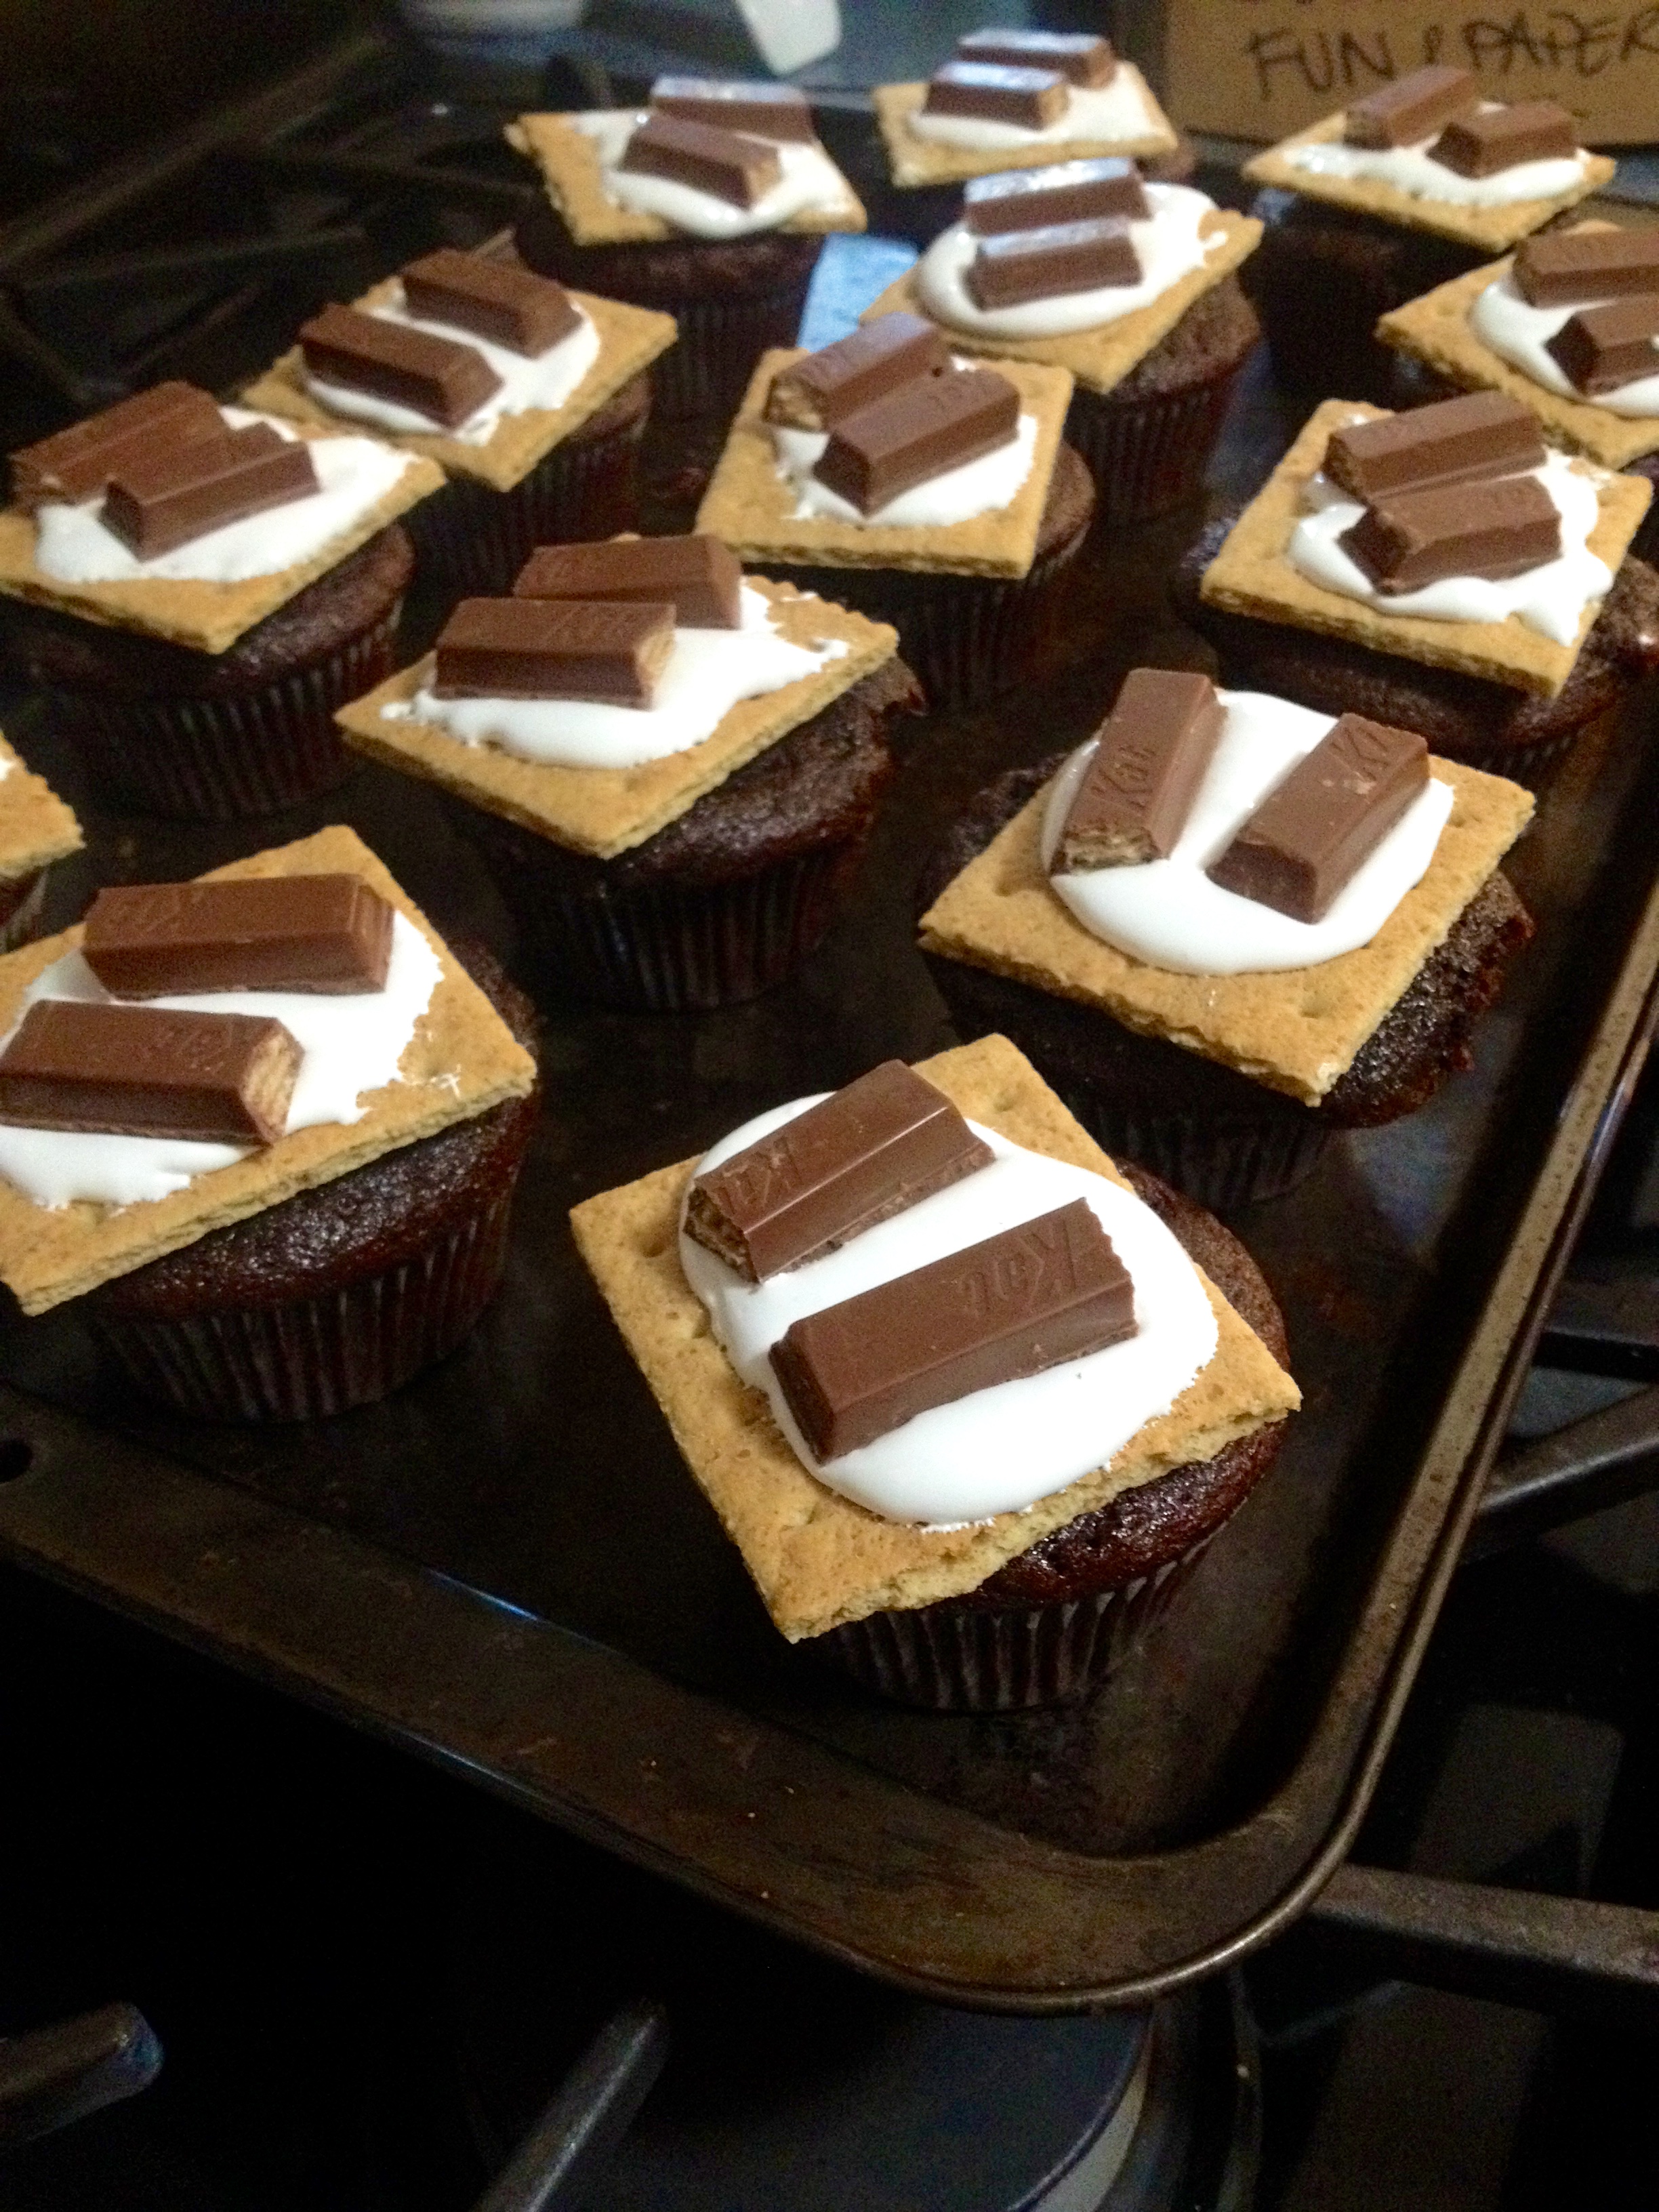
And now, put the candy on top of the fluff like you would on a s’more!
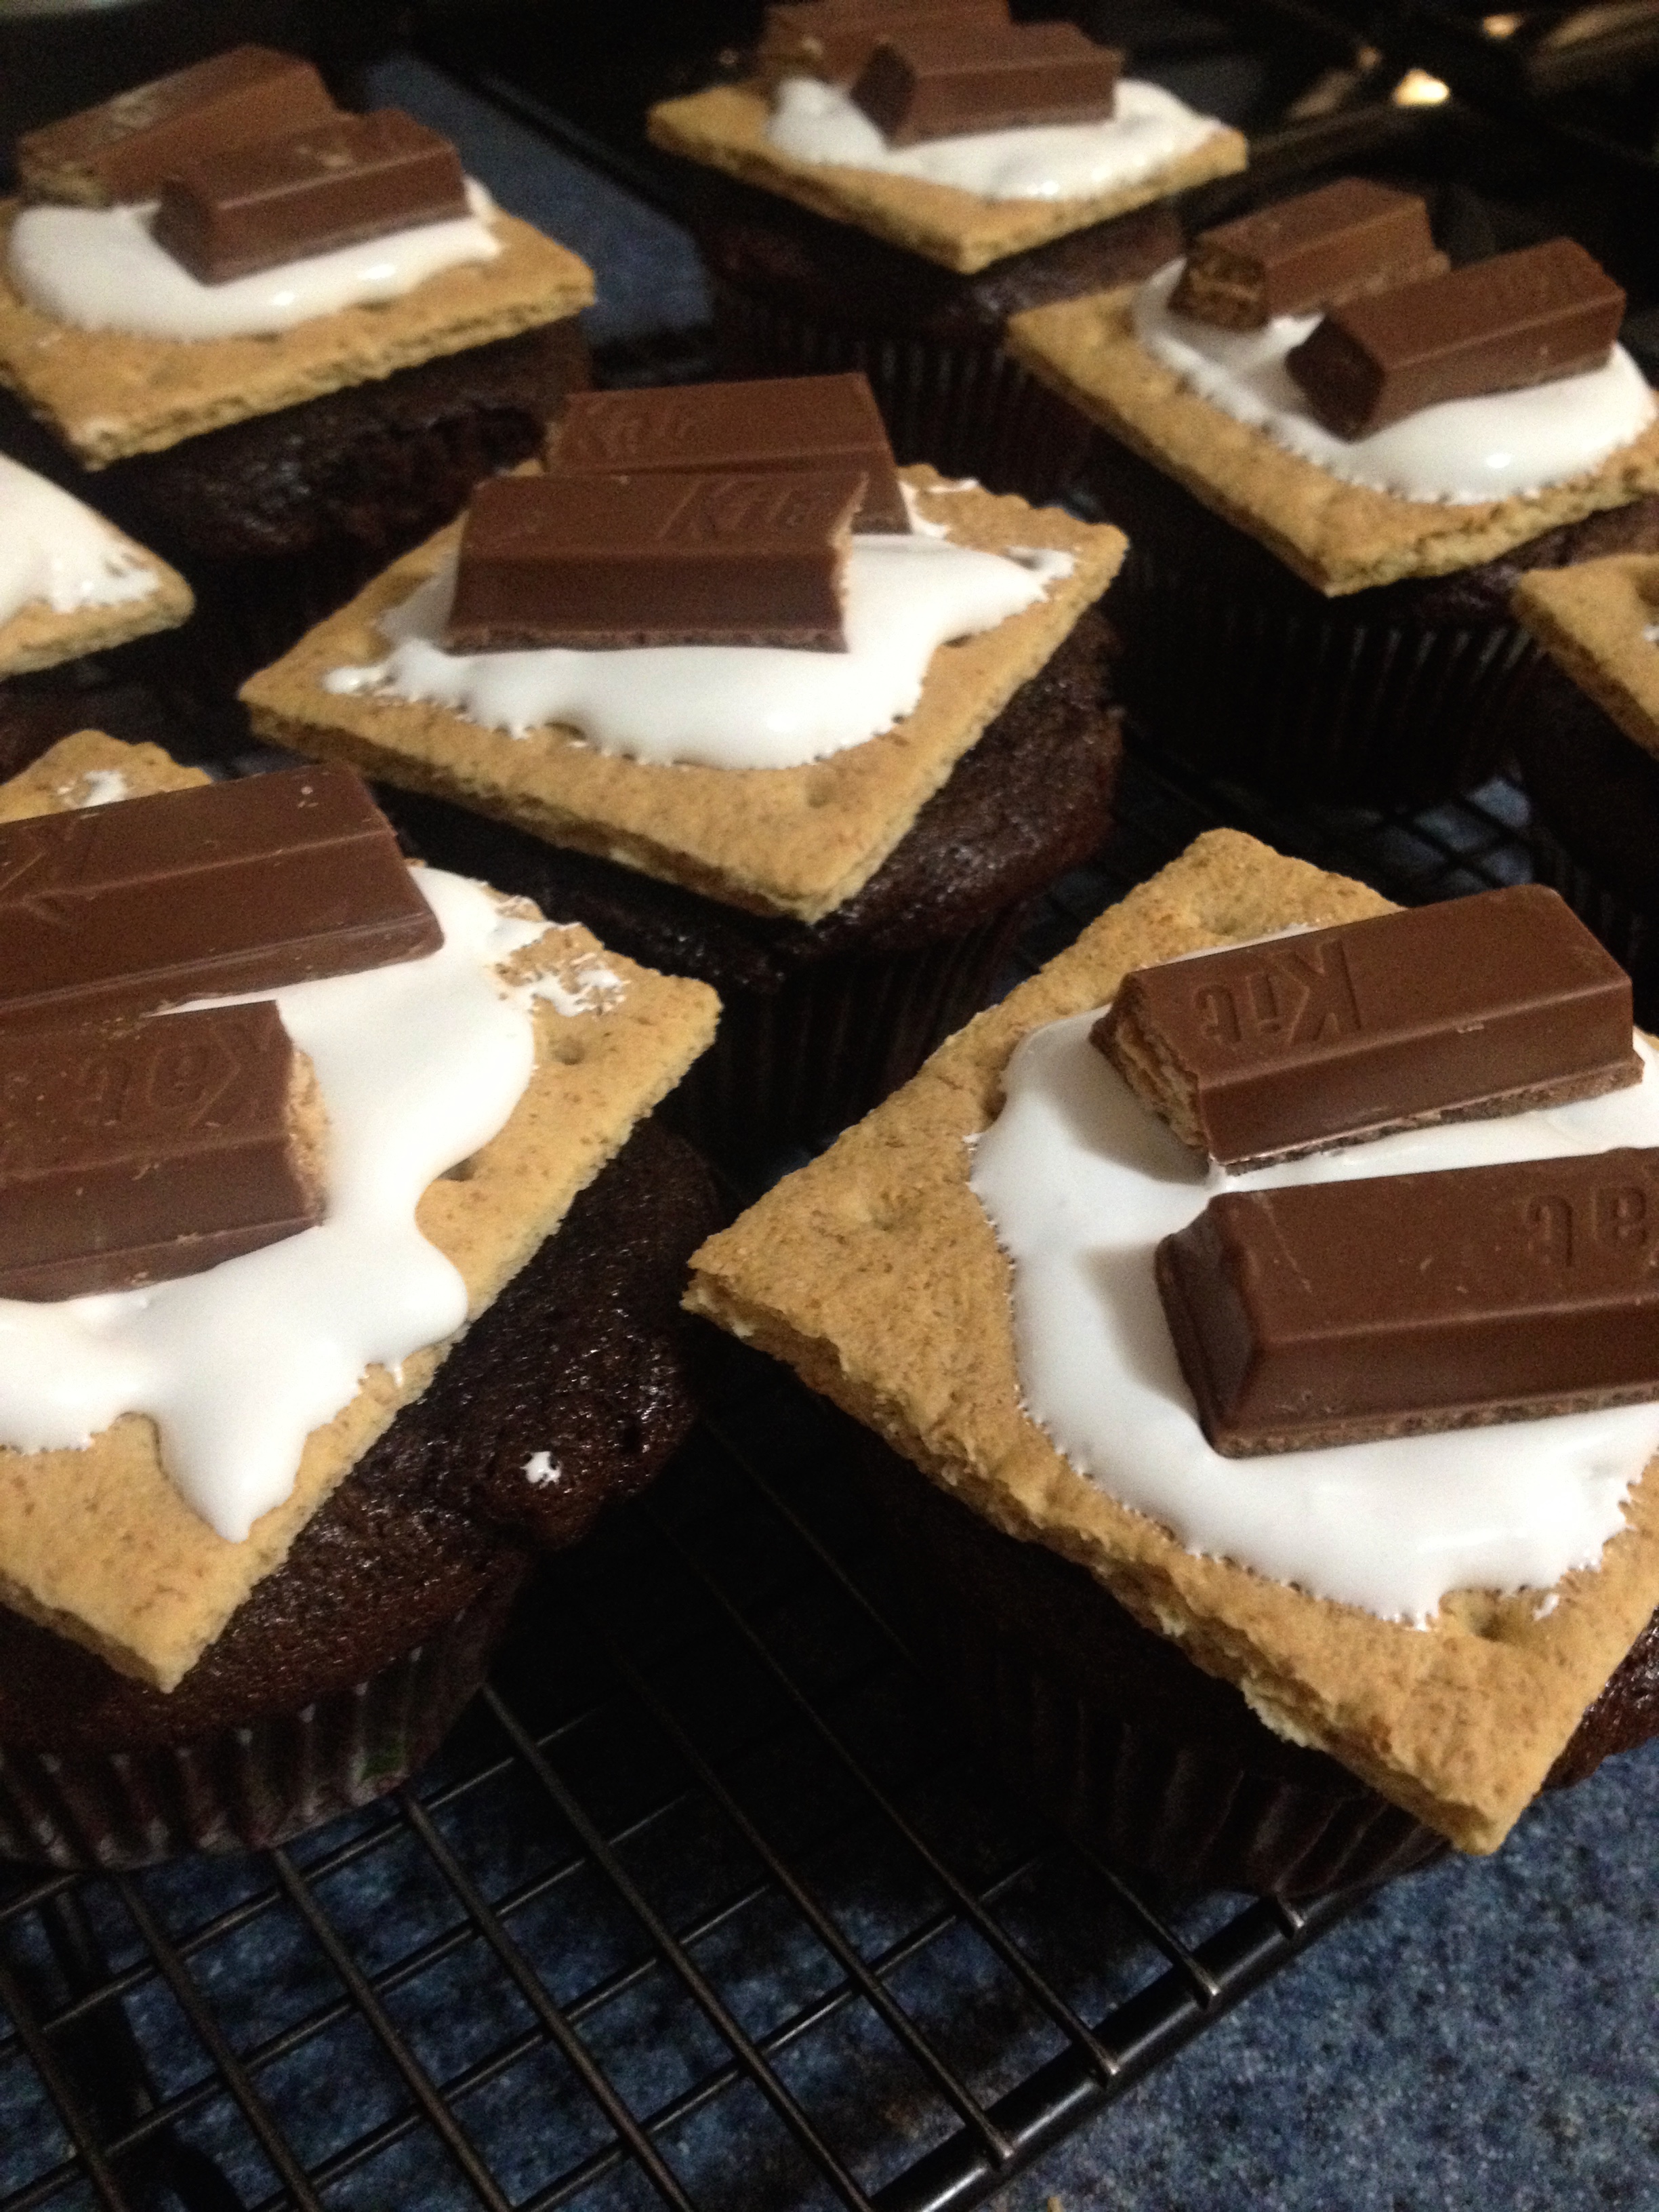
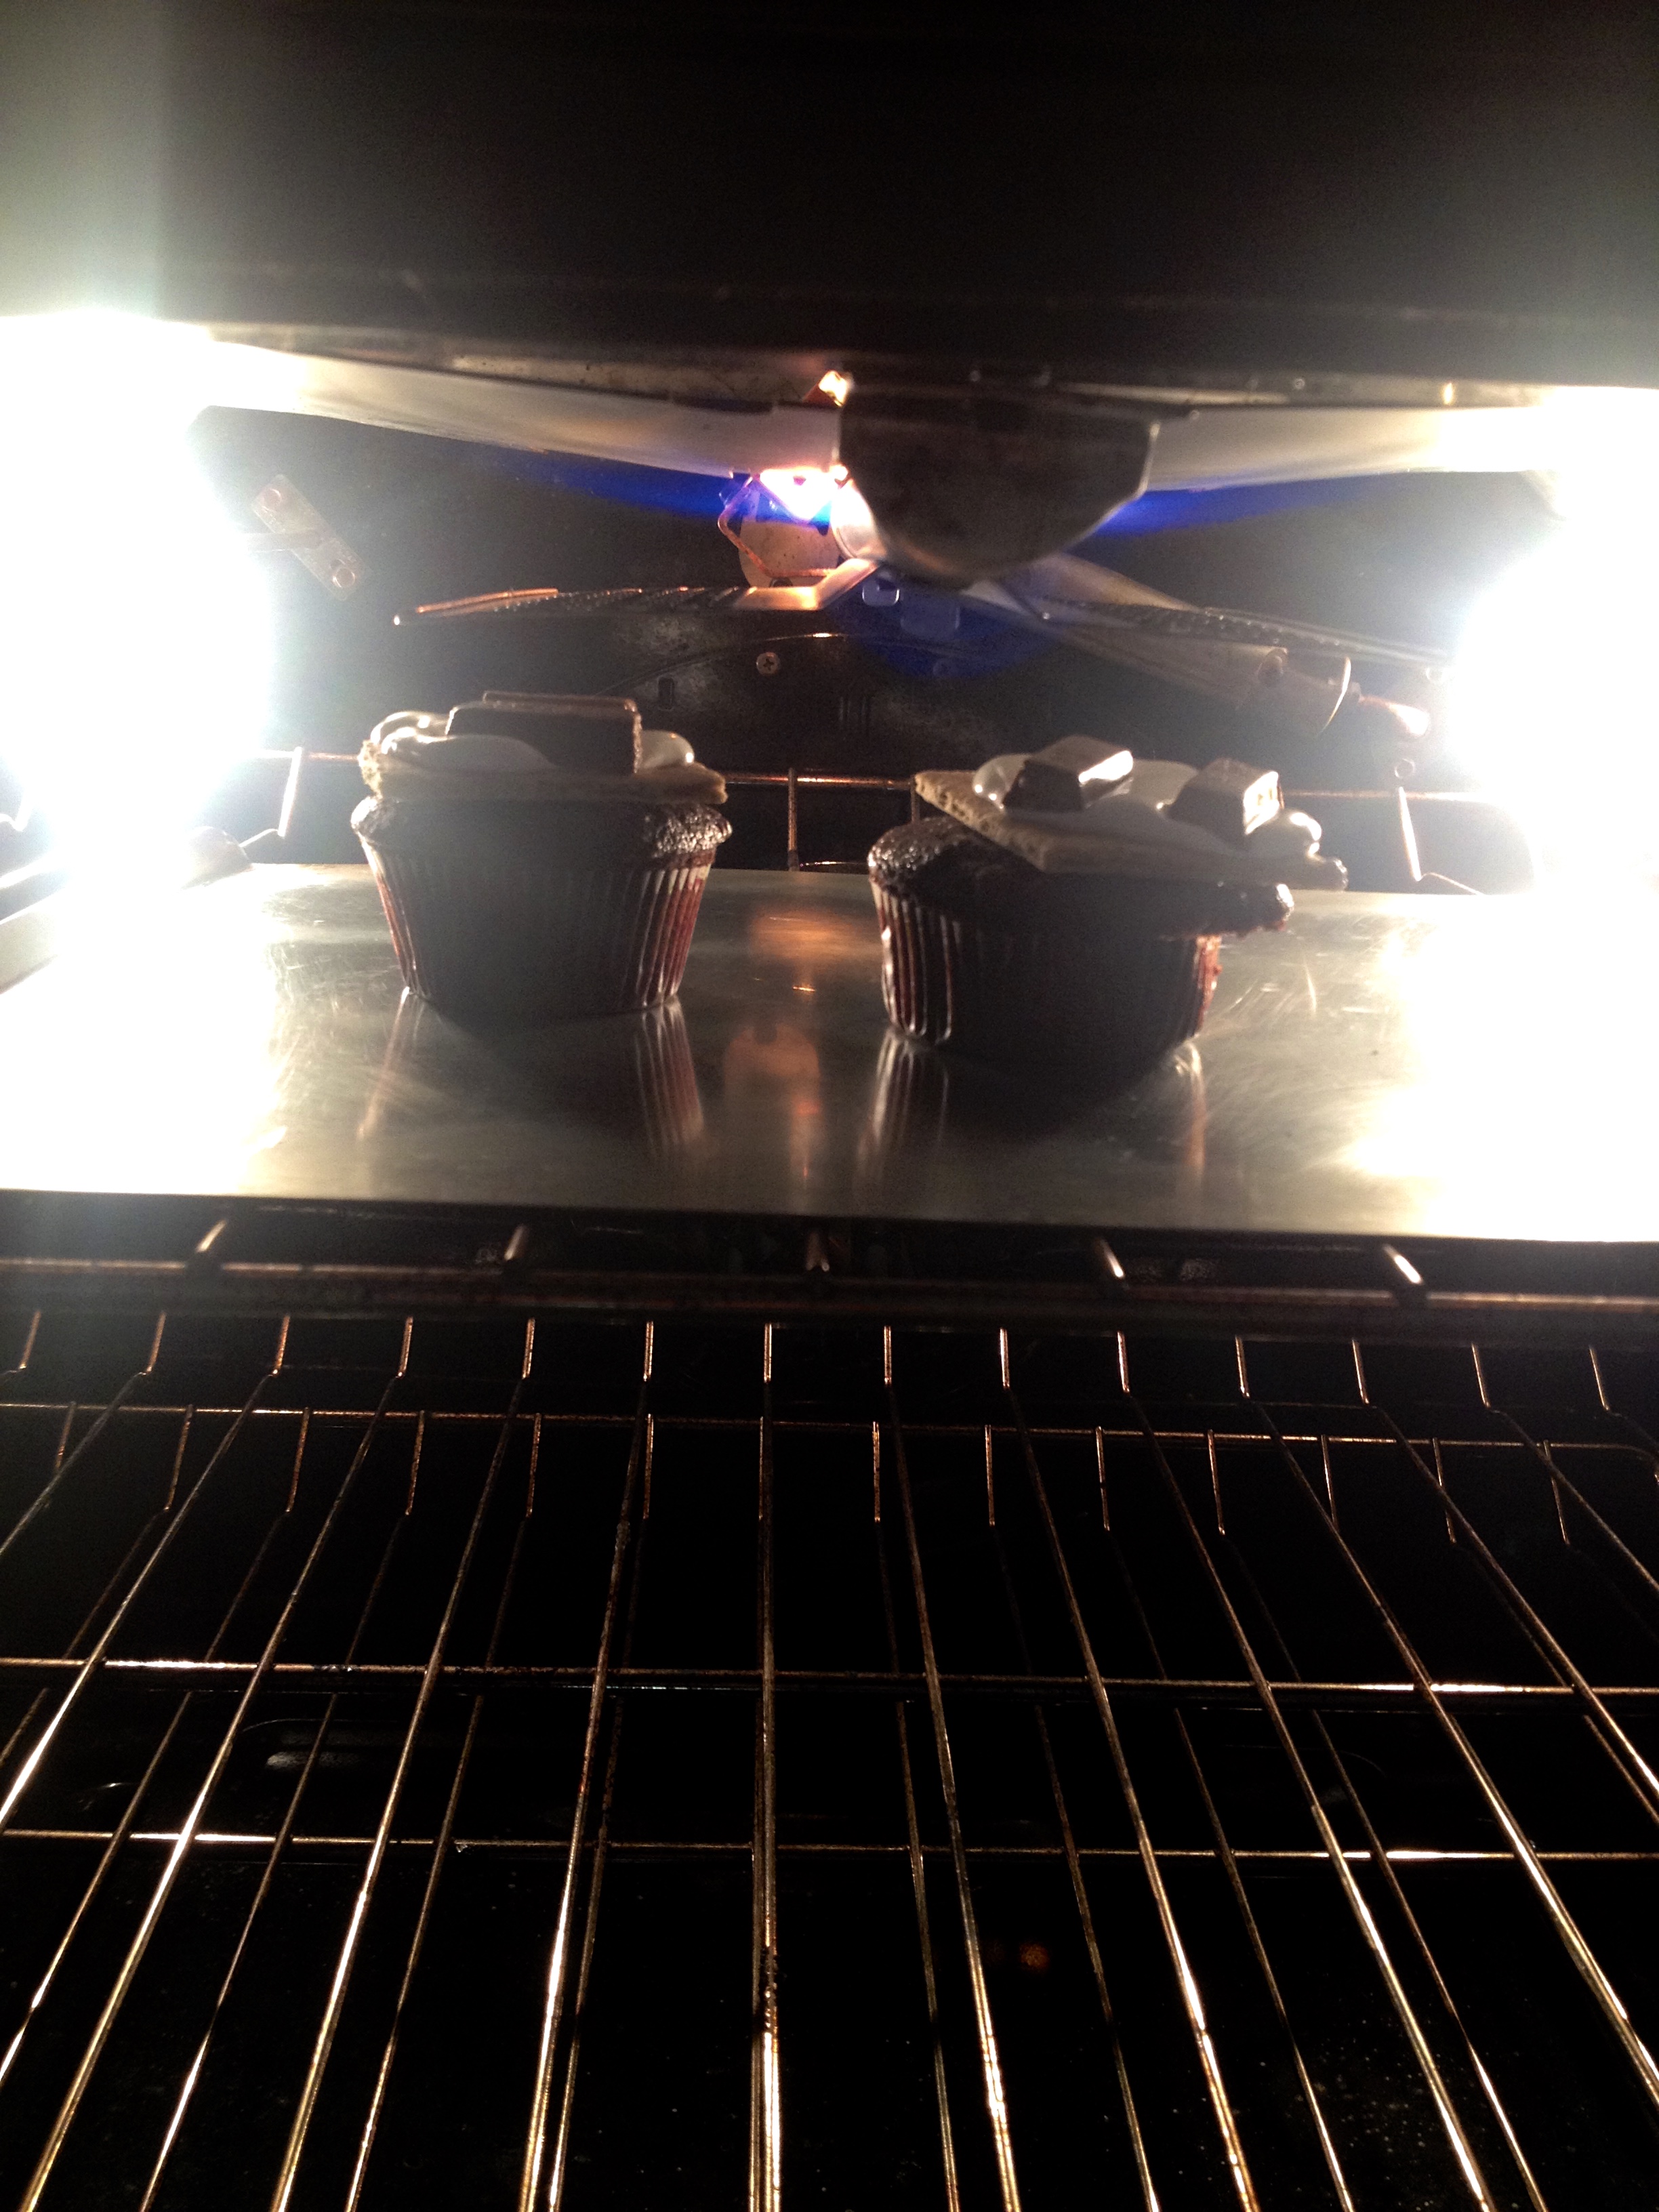
You can either eat the cupcakes like this, or take it up a notch by toasting the fluff. If you want to do that, put all the cupcakes on a baking sheet. Put them in the freezer for about 15 minutes (this prevents the cupcakes from cooking more when they’re under the broiler). When they come out of the freezer, broil them on high heat just until the fluff gets toasted. The chocolate may melt and the cracker may toast- added bonuses!
These cupcakes are seriously so good. I hope you’ll give them a try for your 4th of July party! Have fun on the 4th, and happy baking!
Strawberry Shortcake
Hi friends! I just got back from a visit to Pennsylvania for the annual Mennonite Relief Sale! It’s always a super fun time of eating homemade goods, auctioning off quilts, and much more (and it’s great knowing that all the proceeds go to charity!). While in Pennsylvania, we celebrated my sister’s birthday with a delicious strawberry shortcake. It was so good that I knew it was worthy of being my next recipe post! Here’s the recipe:
Ingredients:
- 1/4 cup granulated sugar
- 2 cups all-purpose flour
- 2 tsp baking powder (NOT BAKING SODA)
- 1/2 cup cold butter, cut into small cubes
- 1 beaten egg
- 2/3 cup milk
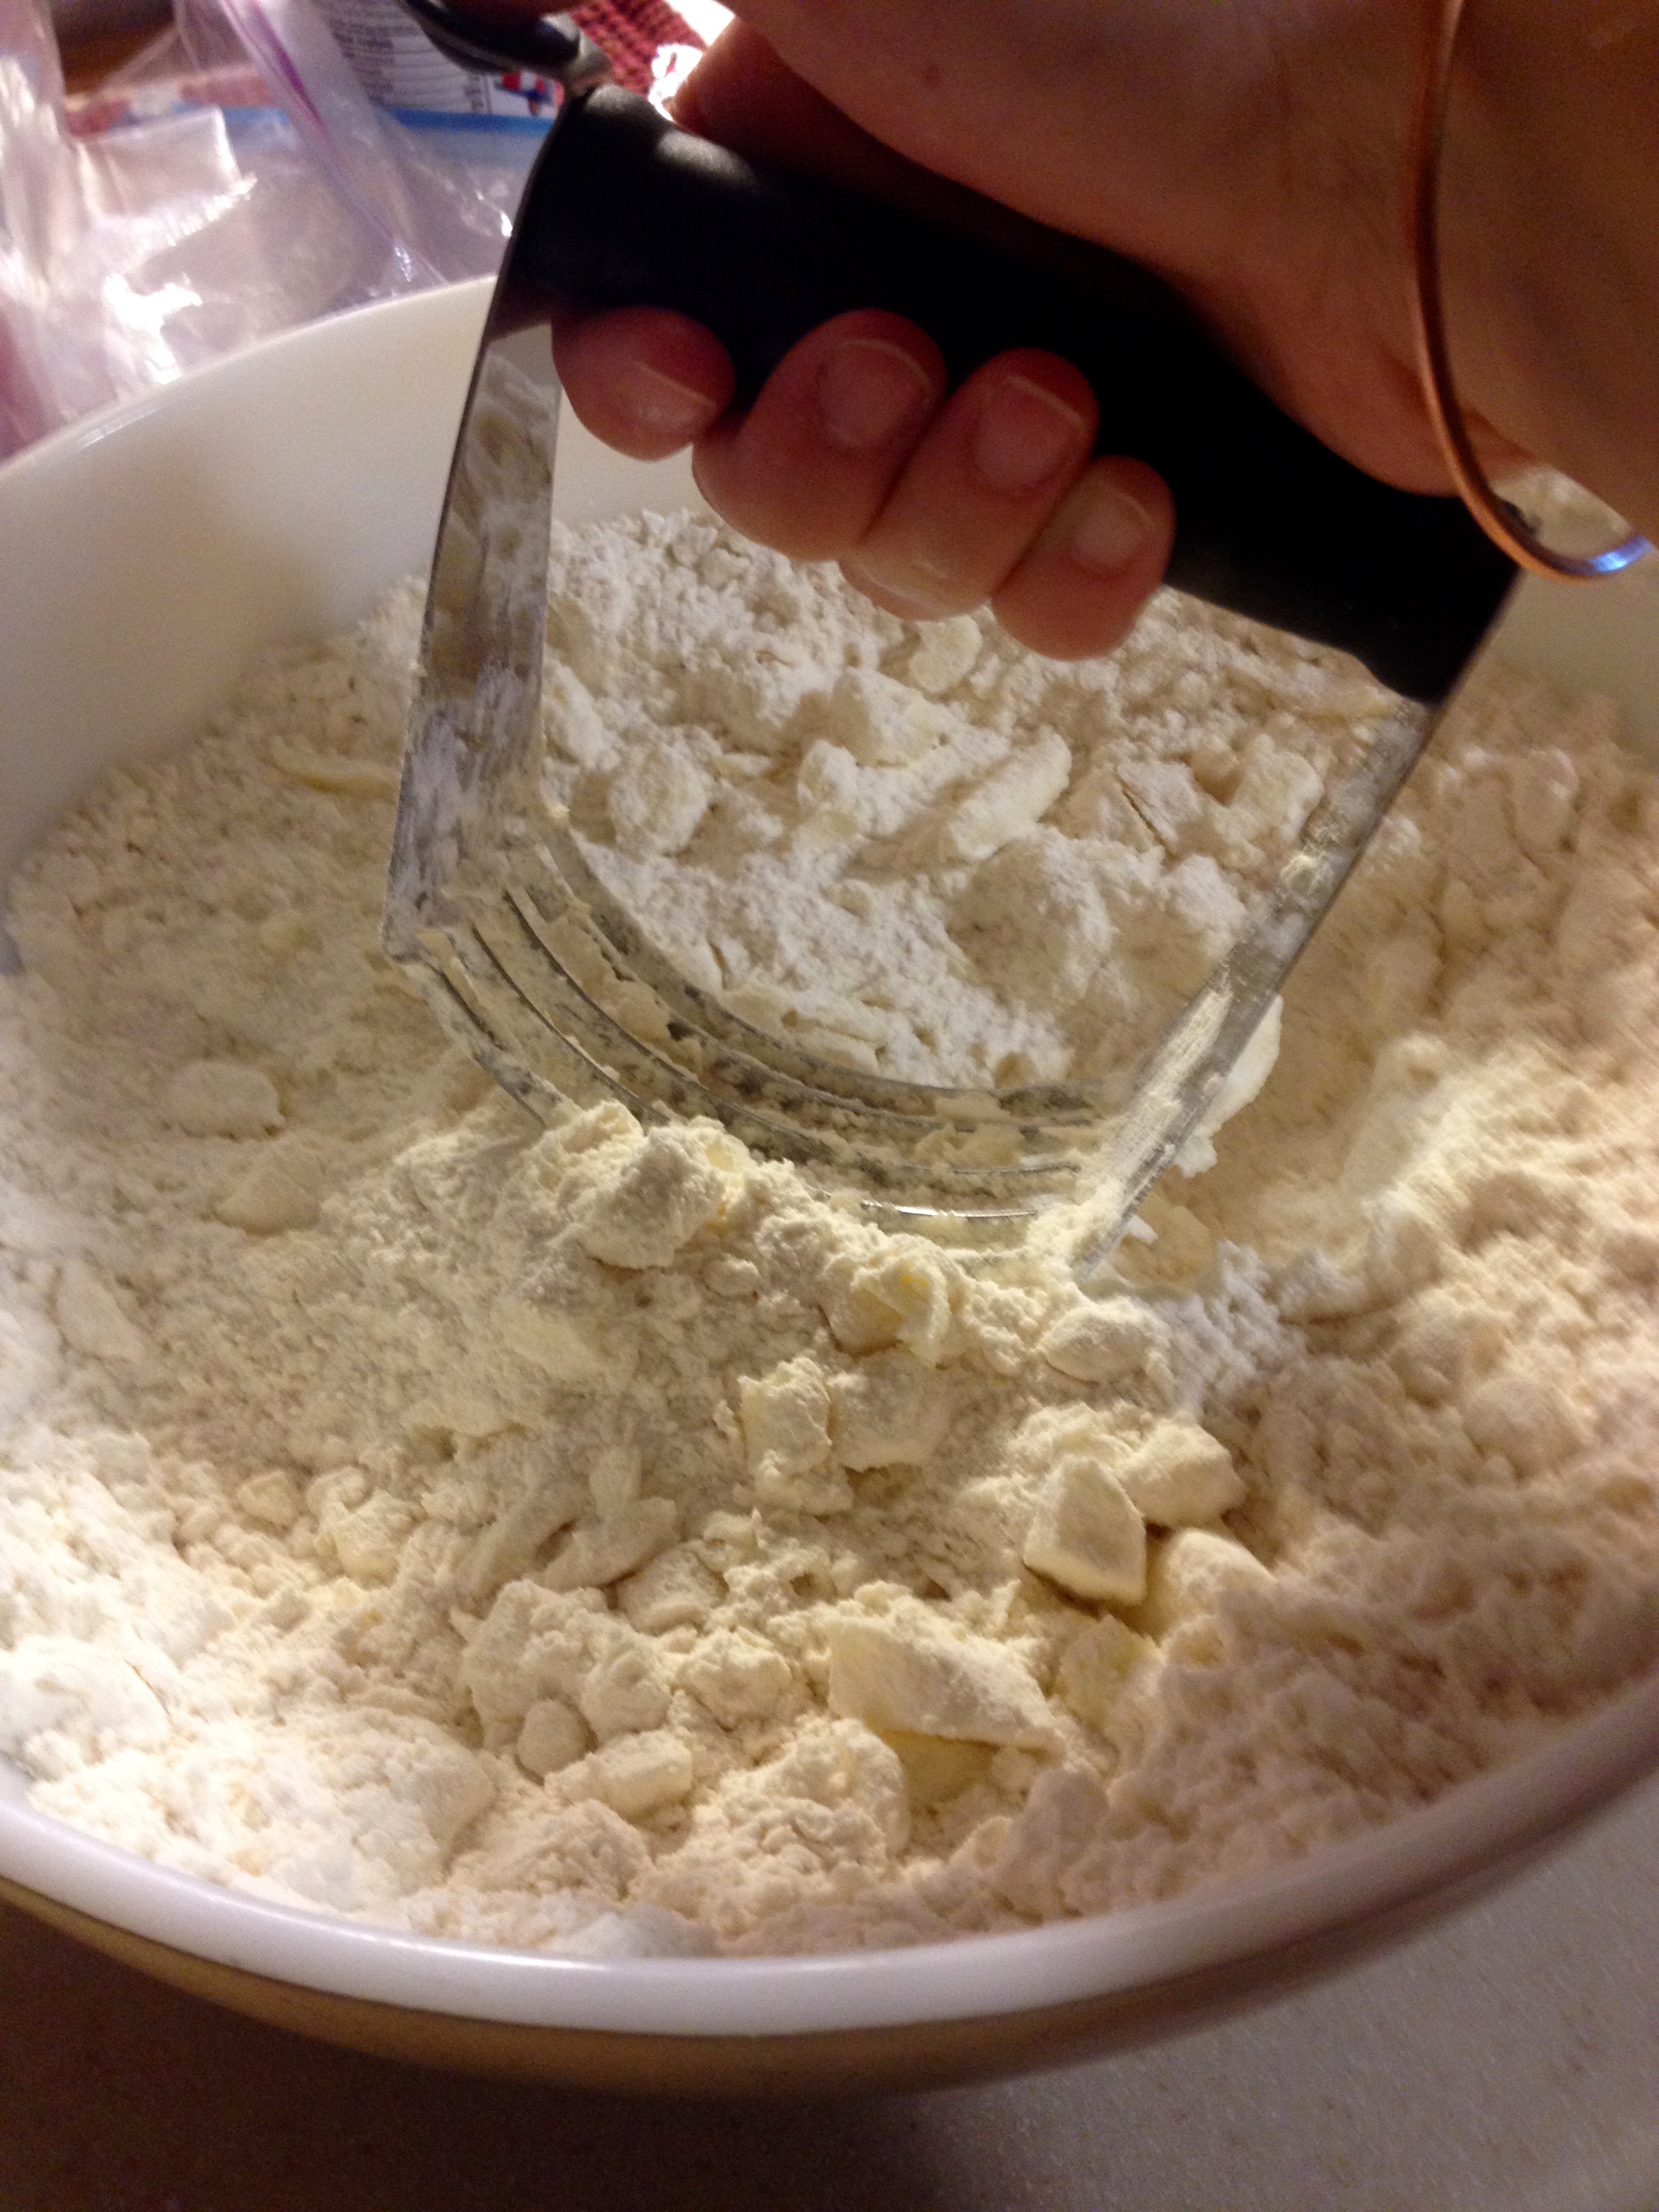
Preheat the oven to 450ºF. Combine the flour, sugar, and baking powder together in a large bowl. Using a pastry cutter, cut in the cold butter until the mixture looks like large crumbs.
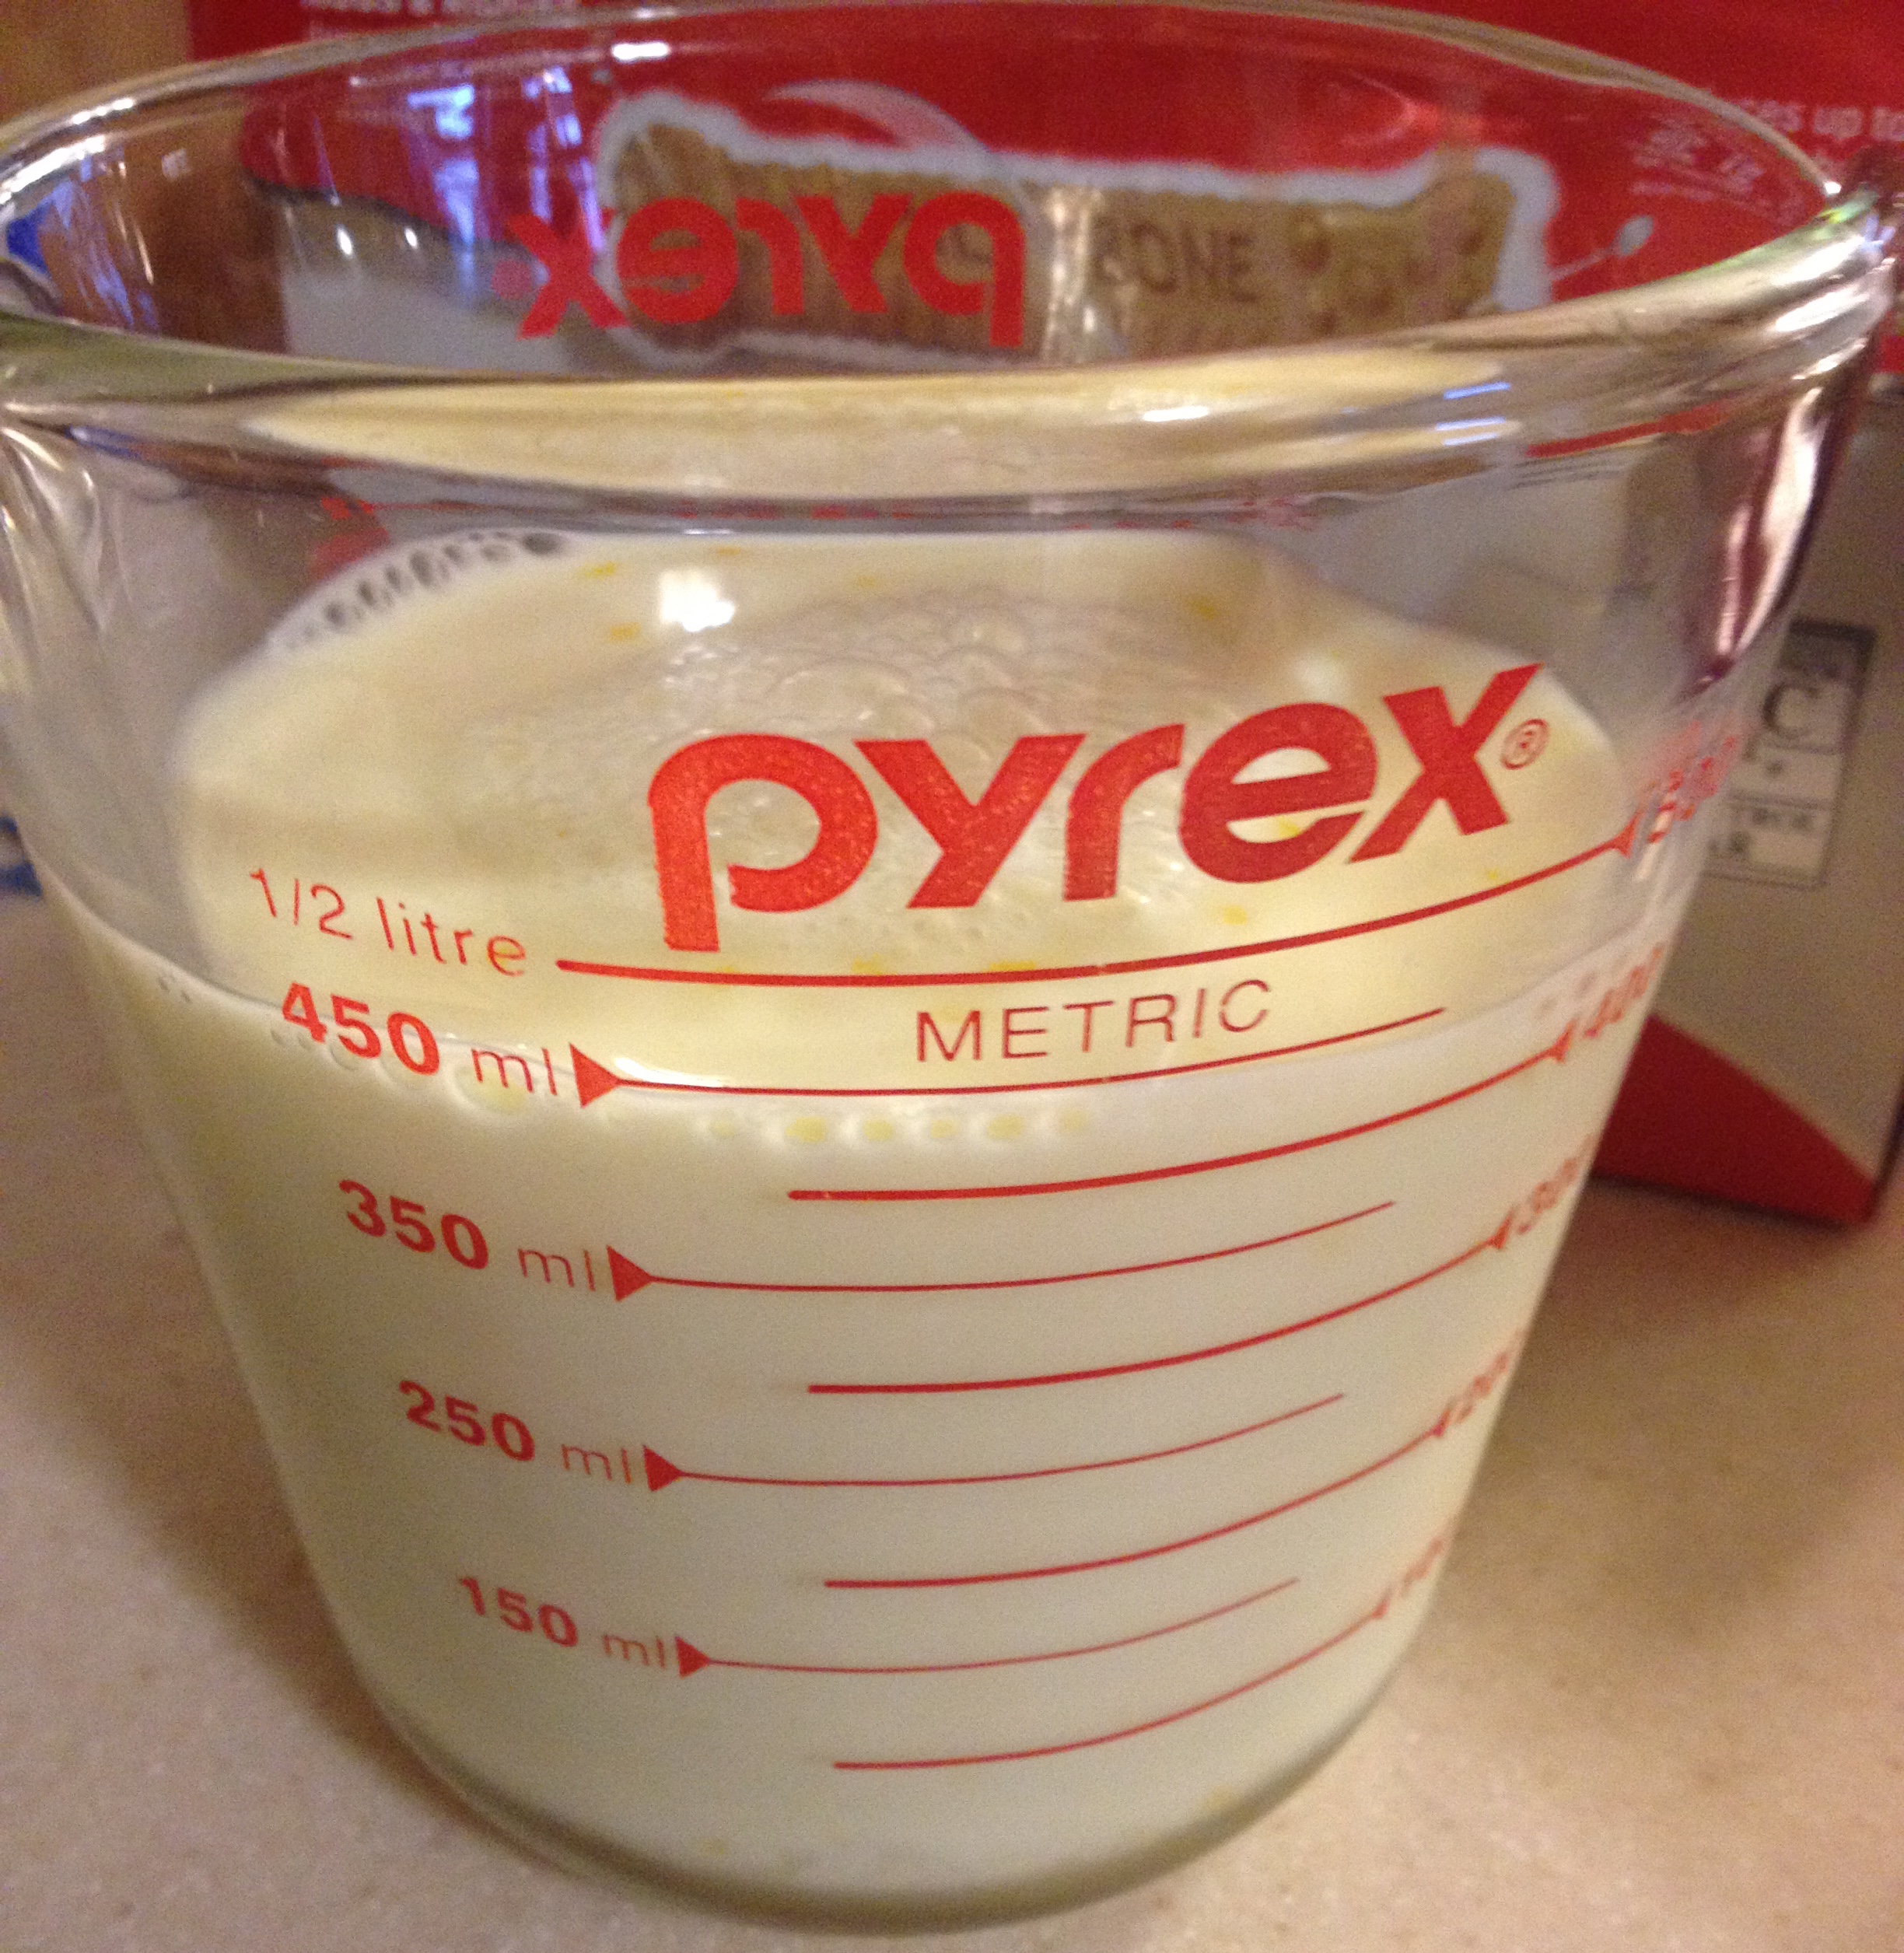
Measure out the milk in a liquid measuring cup, and then crack an egg into the milk. Beat the egg and milk together until they are thoroughly mixed.
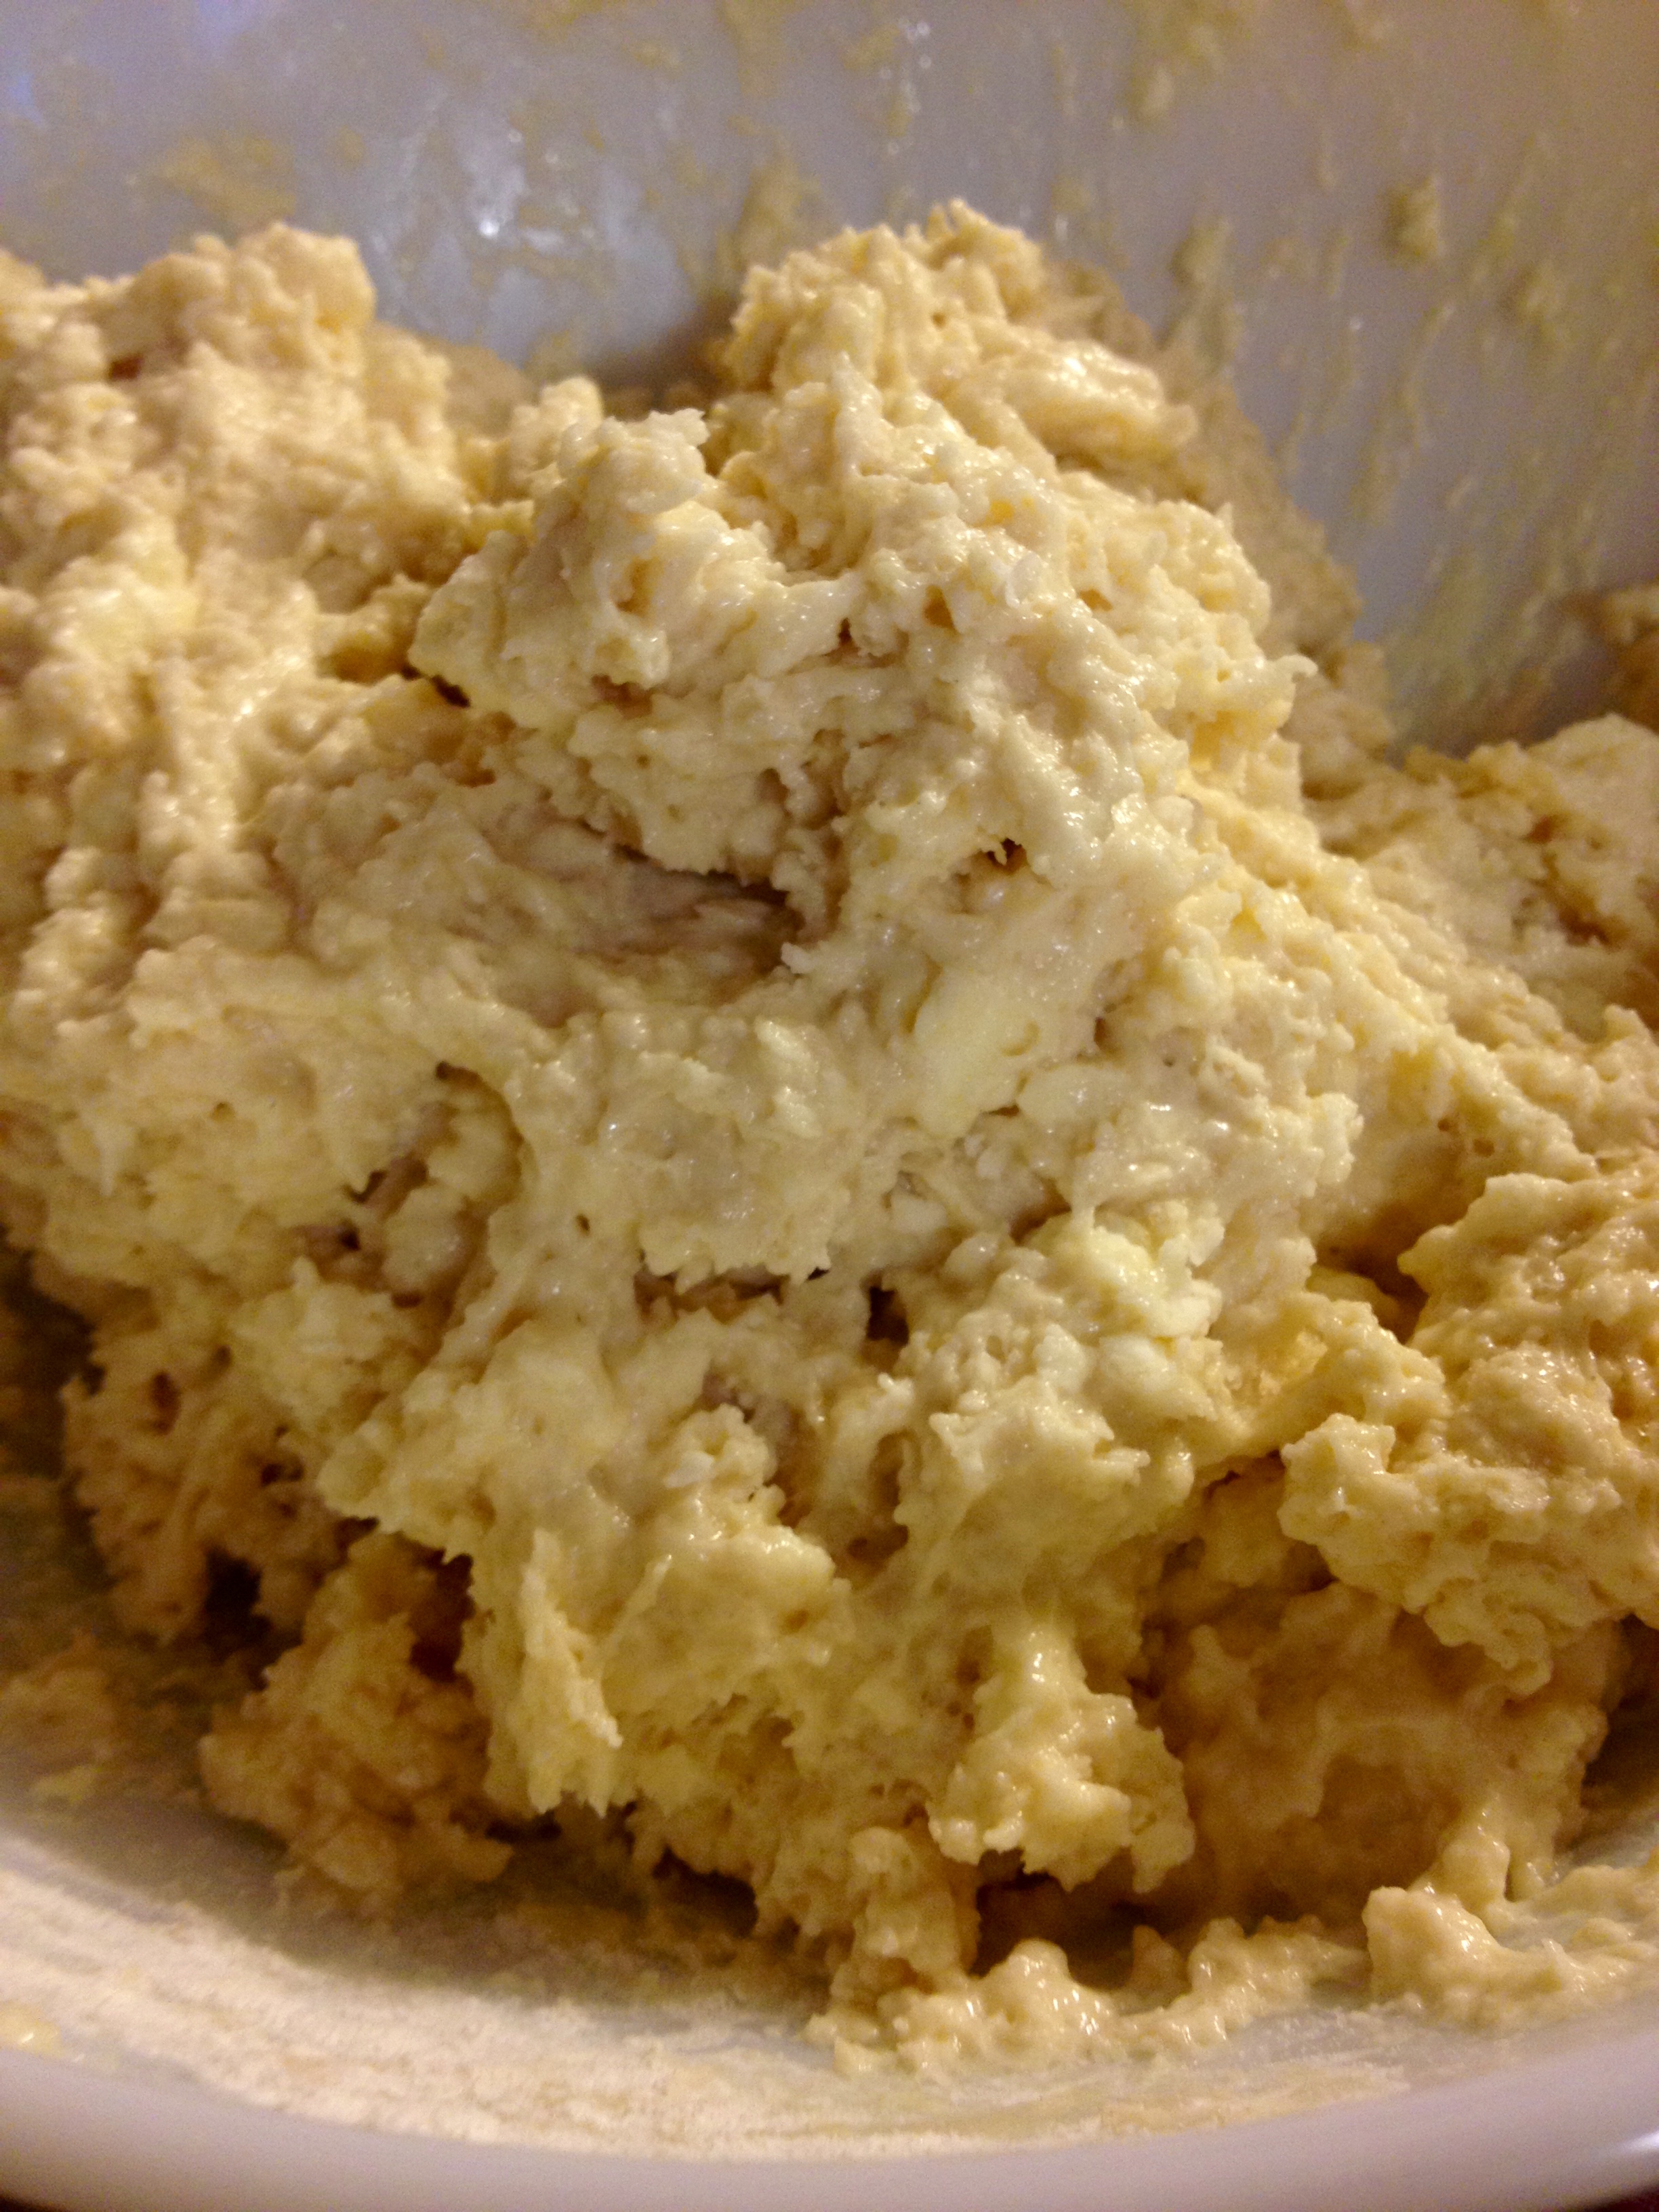
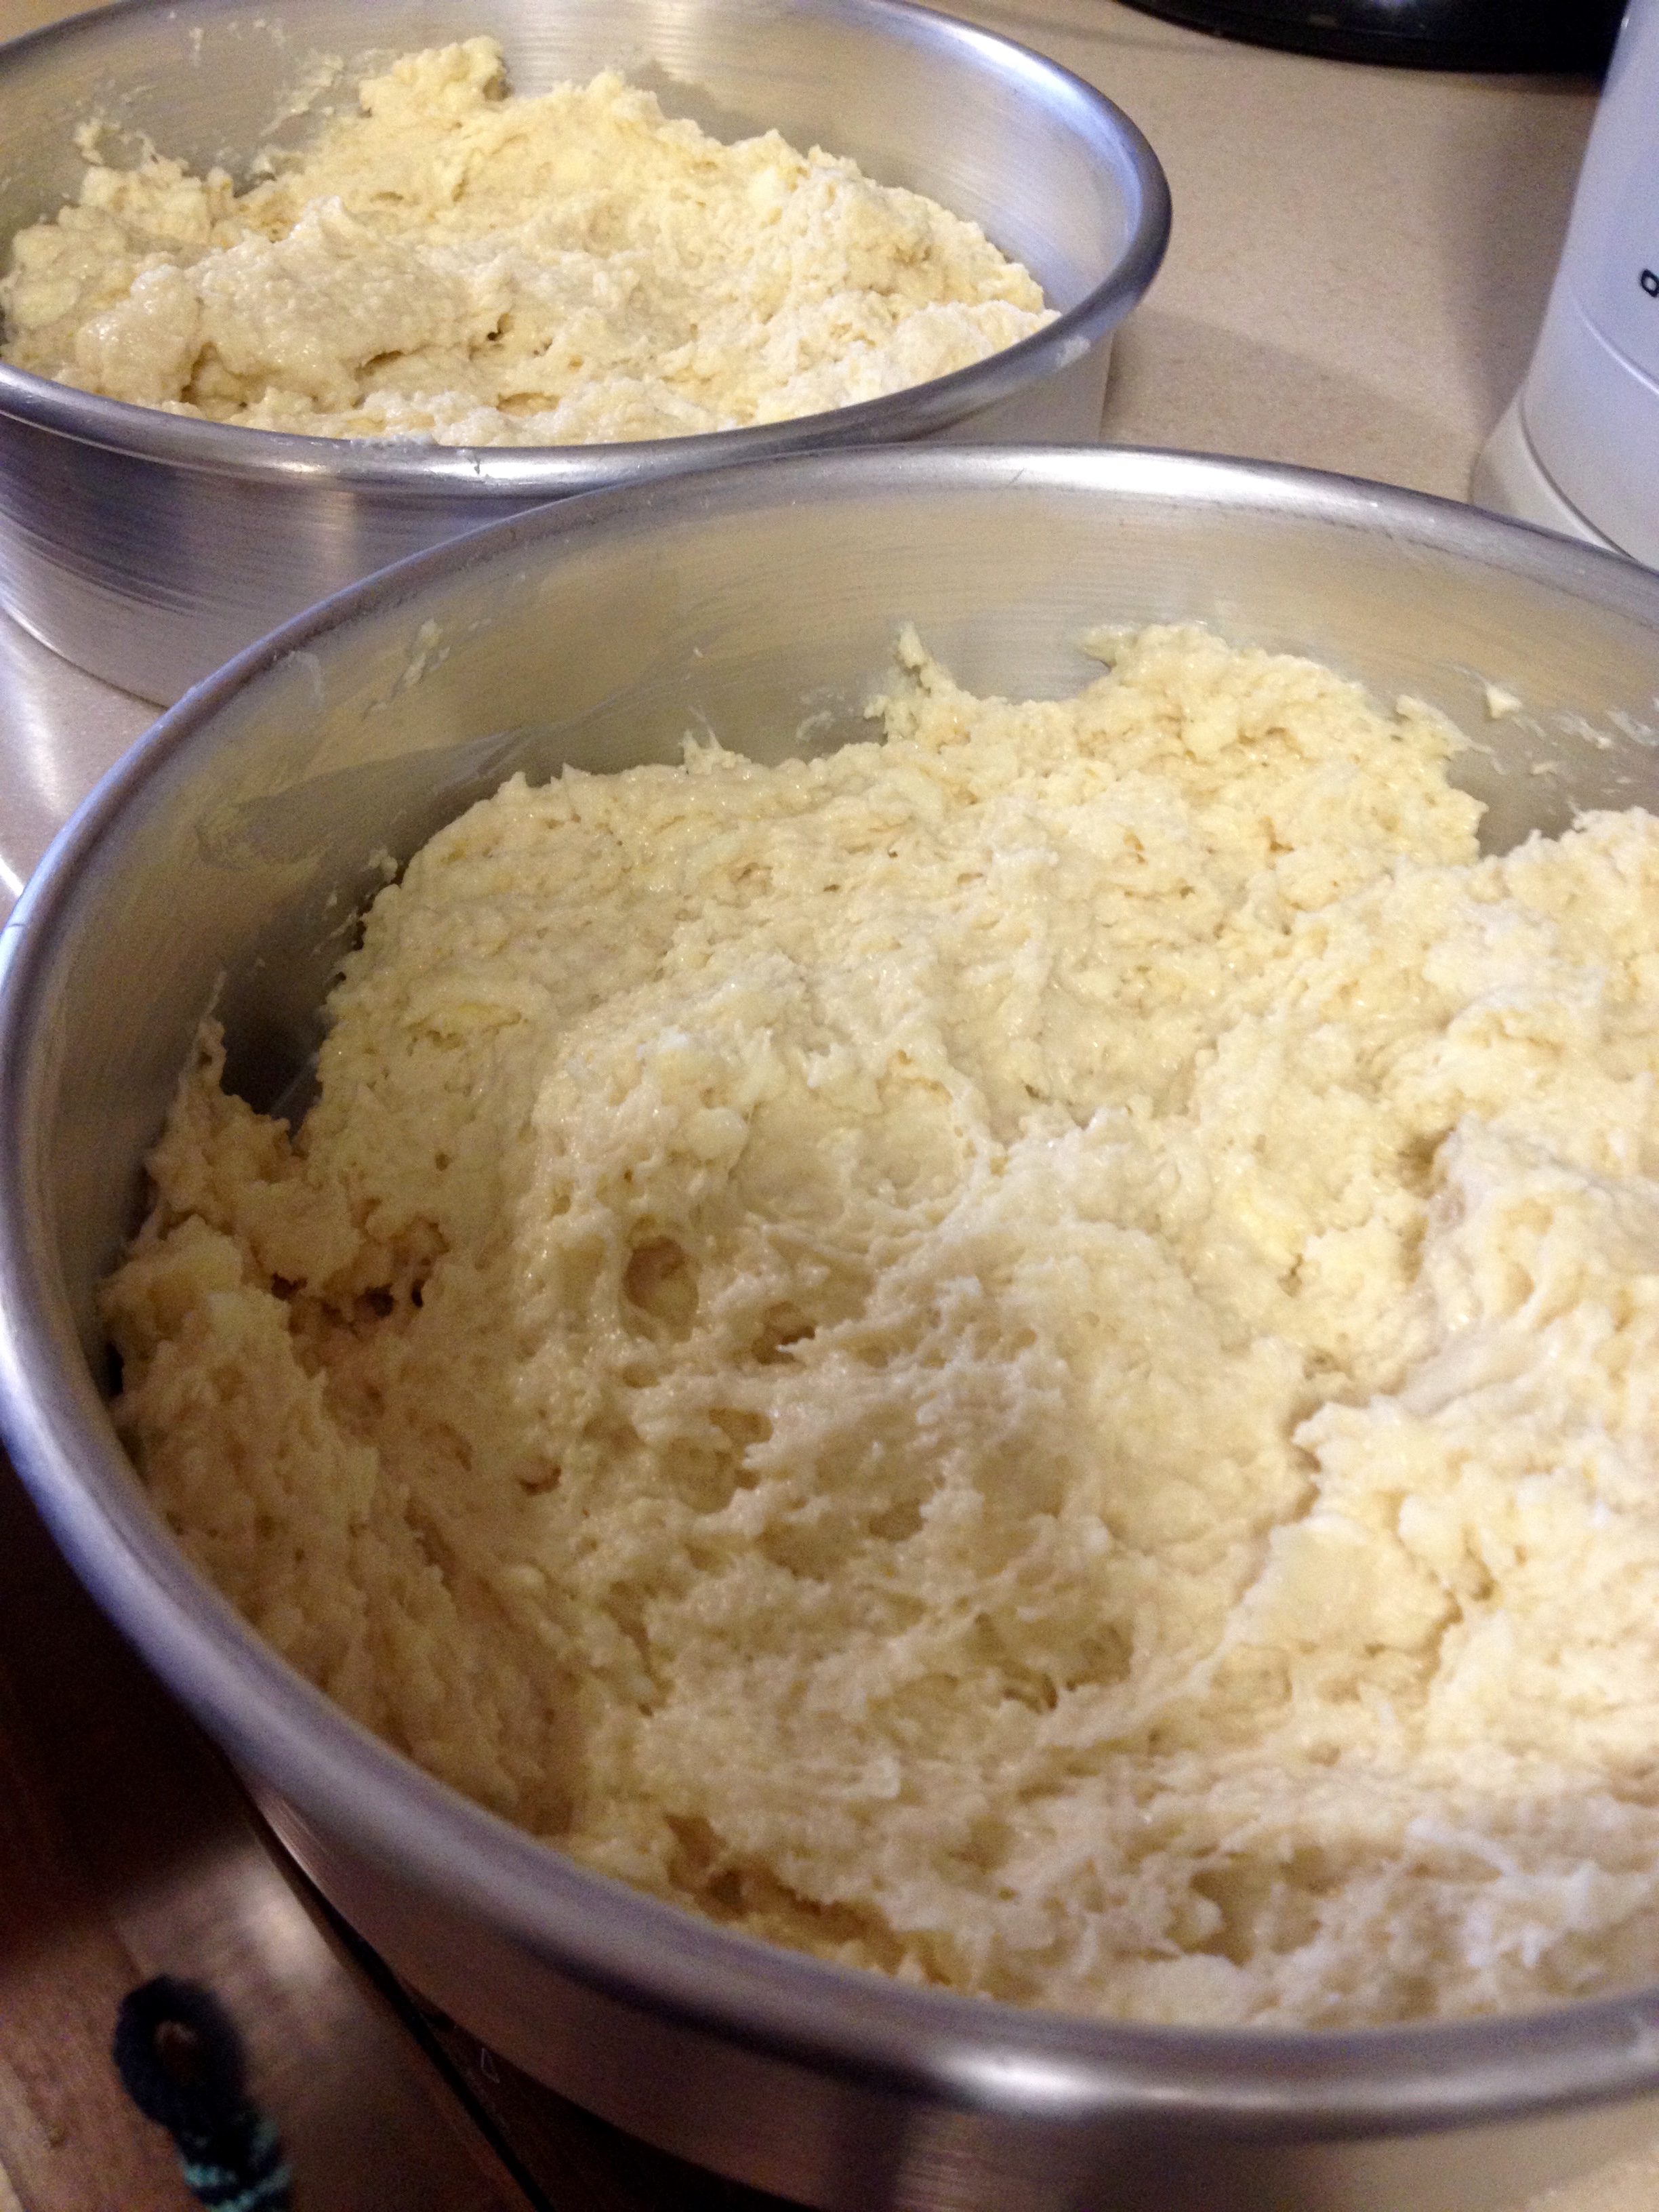
Pour the milk/egg mixture into the dry ingredients. Using a spoon, spatula, or your hands (my favorite tool) mix the ingredients together just until they’re moistened and combined. Don’t overmix it, or else you won’t get a light and flaky shortcake- you’ll get dense bread.
Spread the dough into a greased 8″x1.5″ round baking pan. (We doubled the recipe, which is why you see two pans here.)
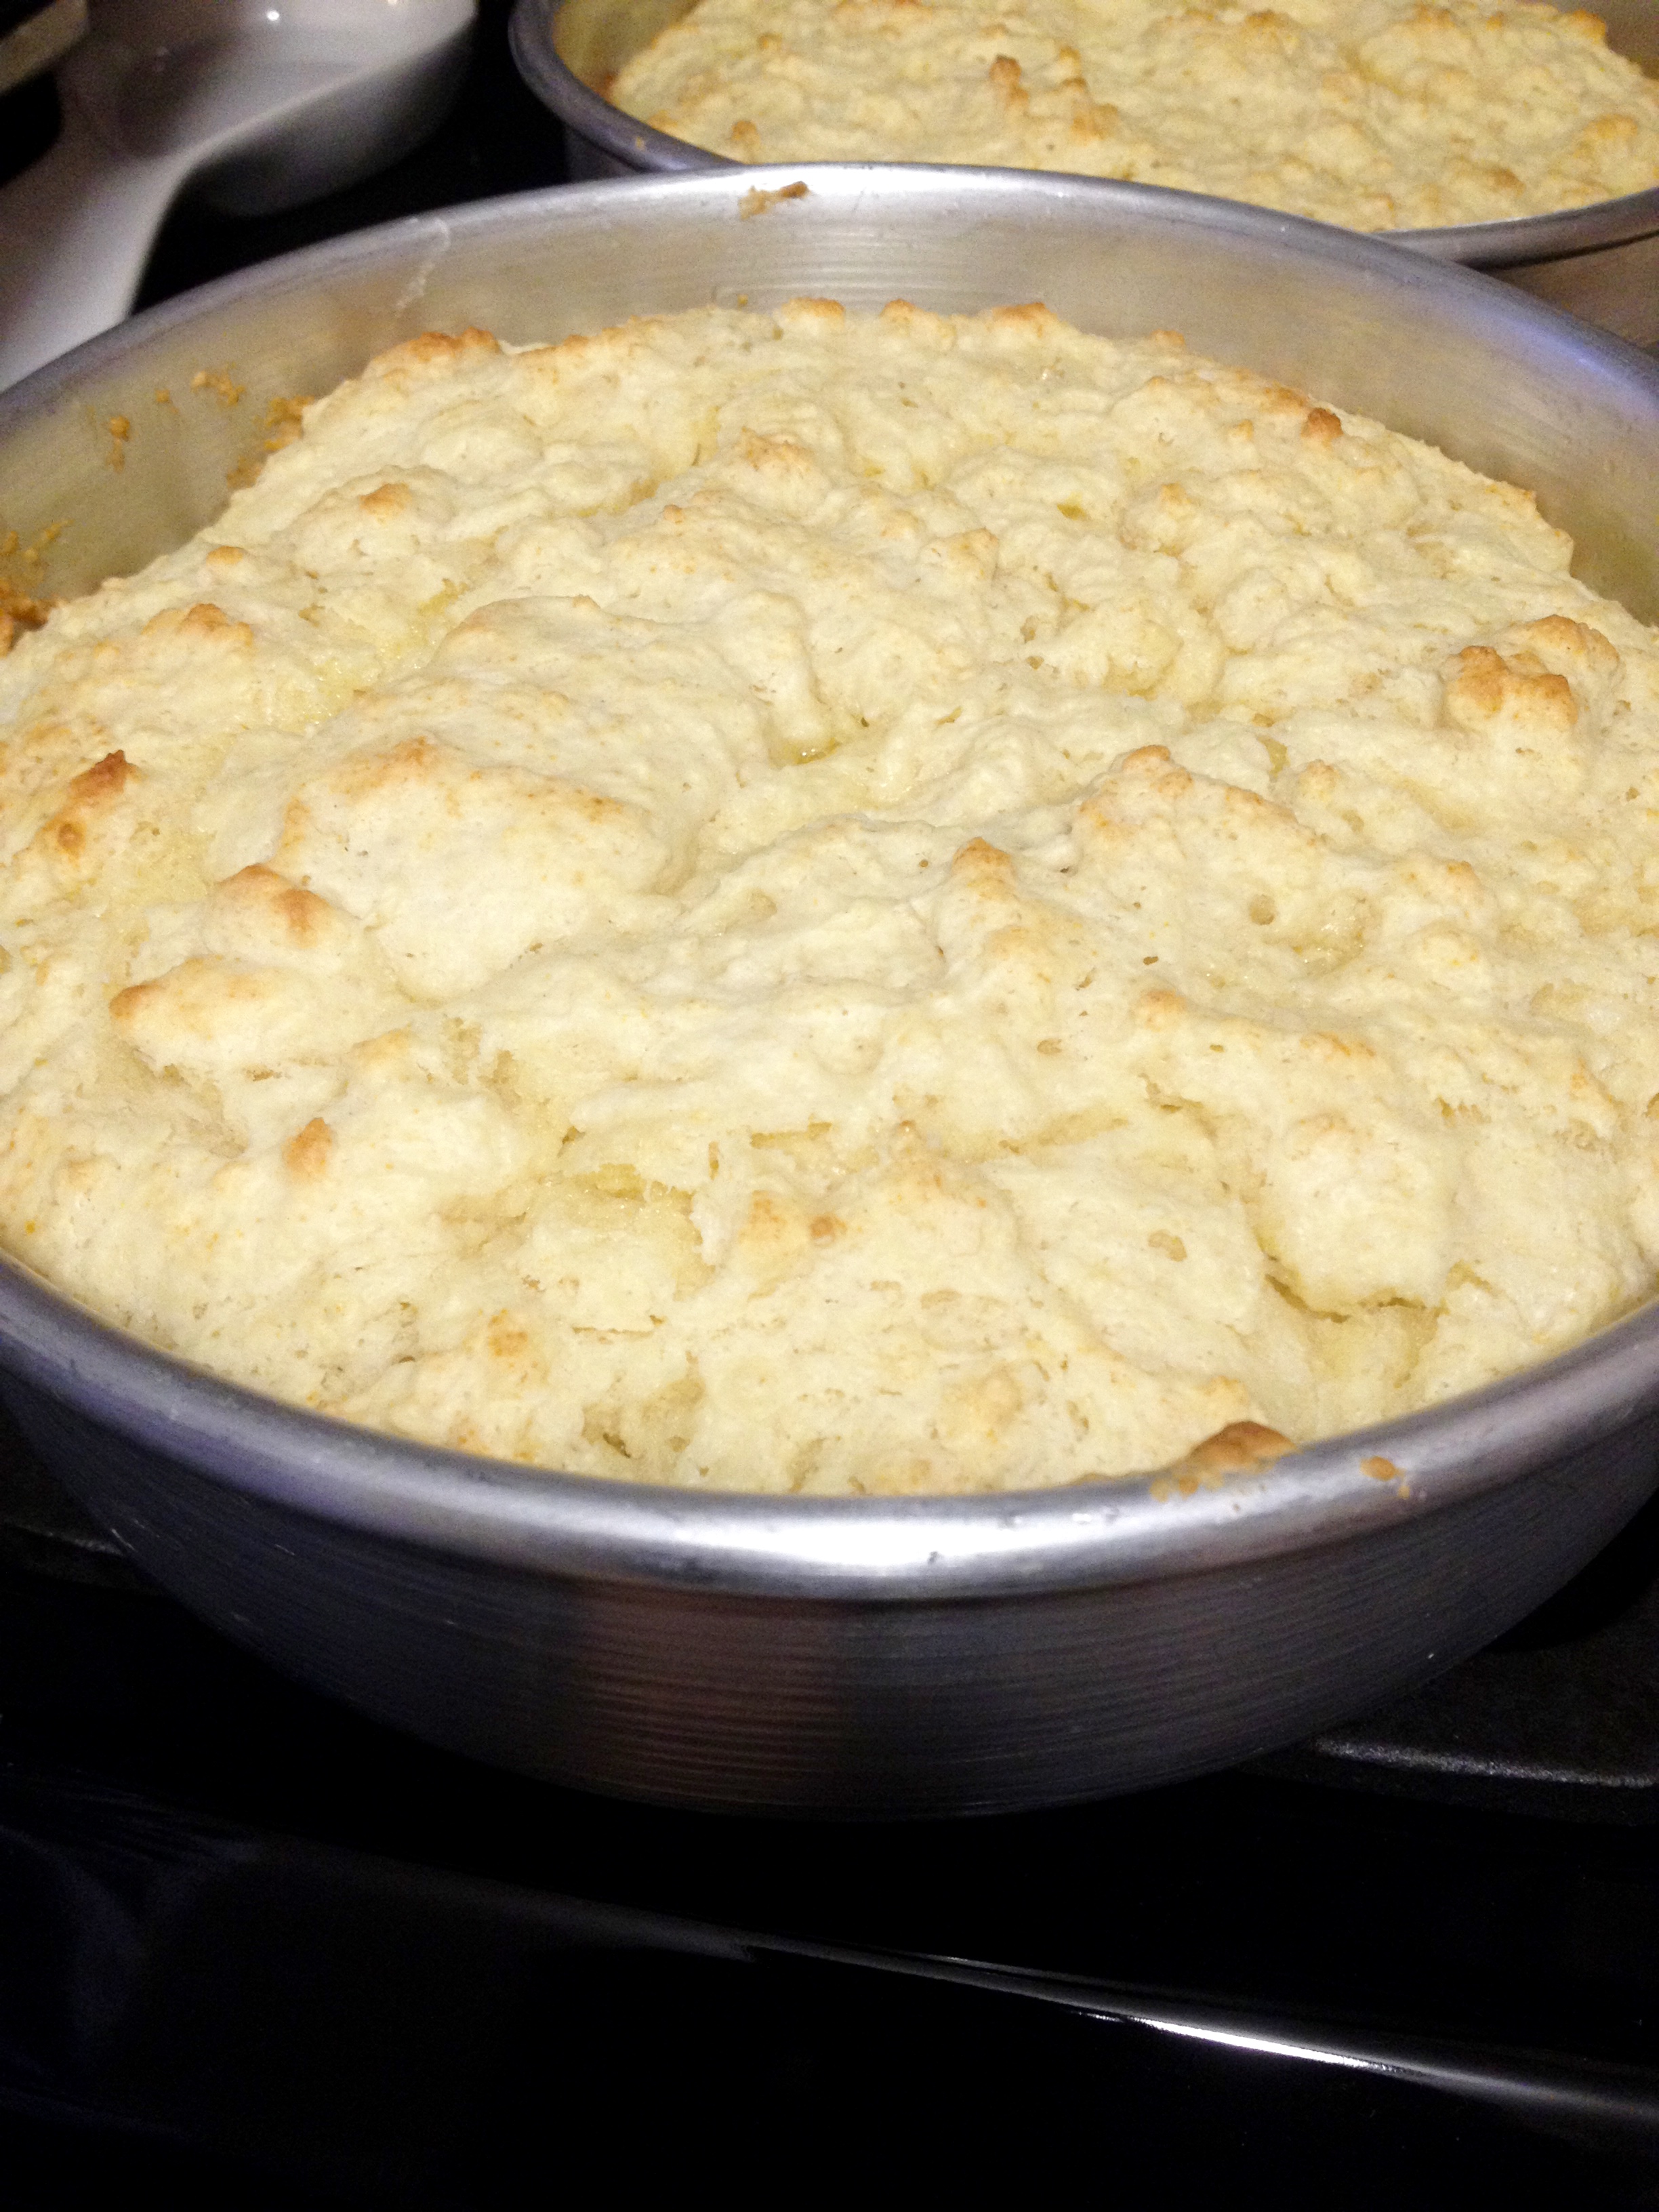
Bake the dough for 15-18 minutes, or until a toothpick inserted in the middle comes out clean. Cool the cake in the pan for 10 minutes.
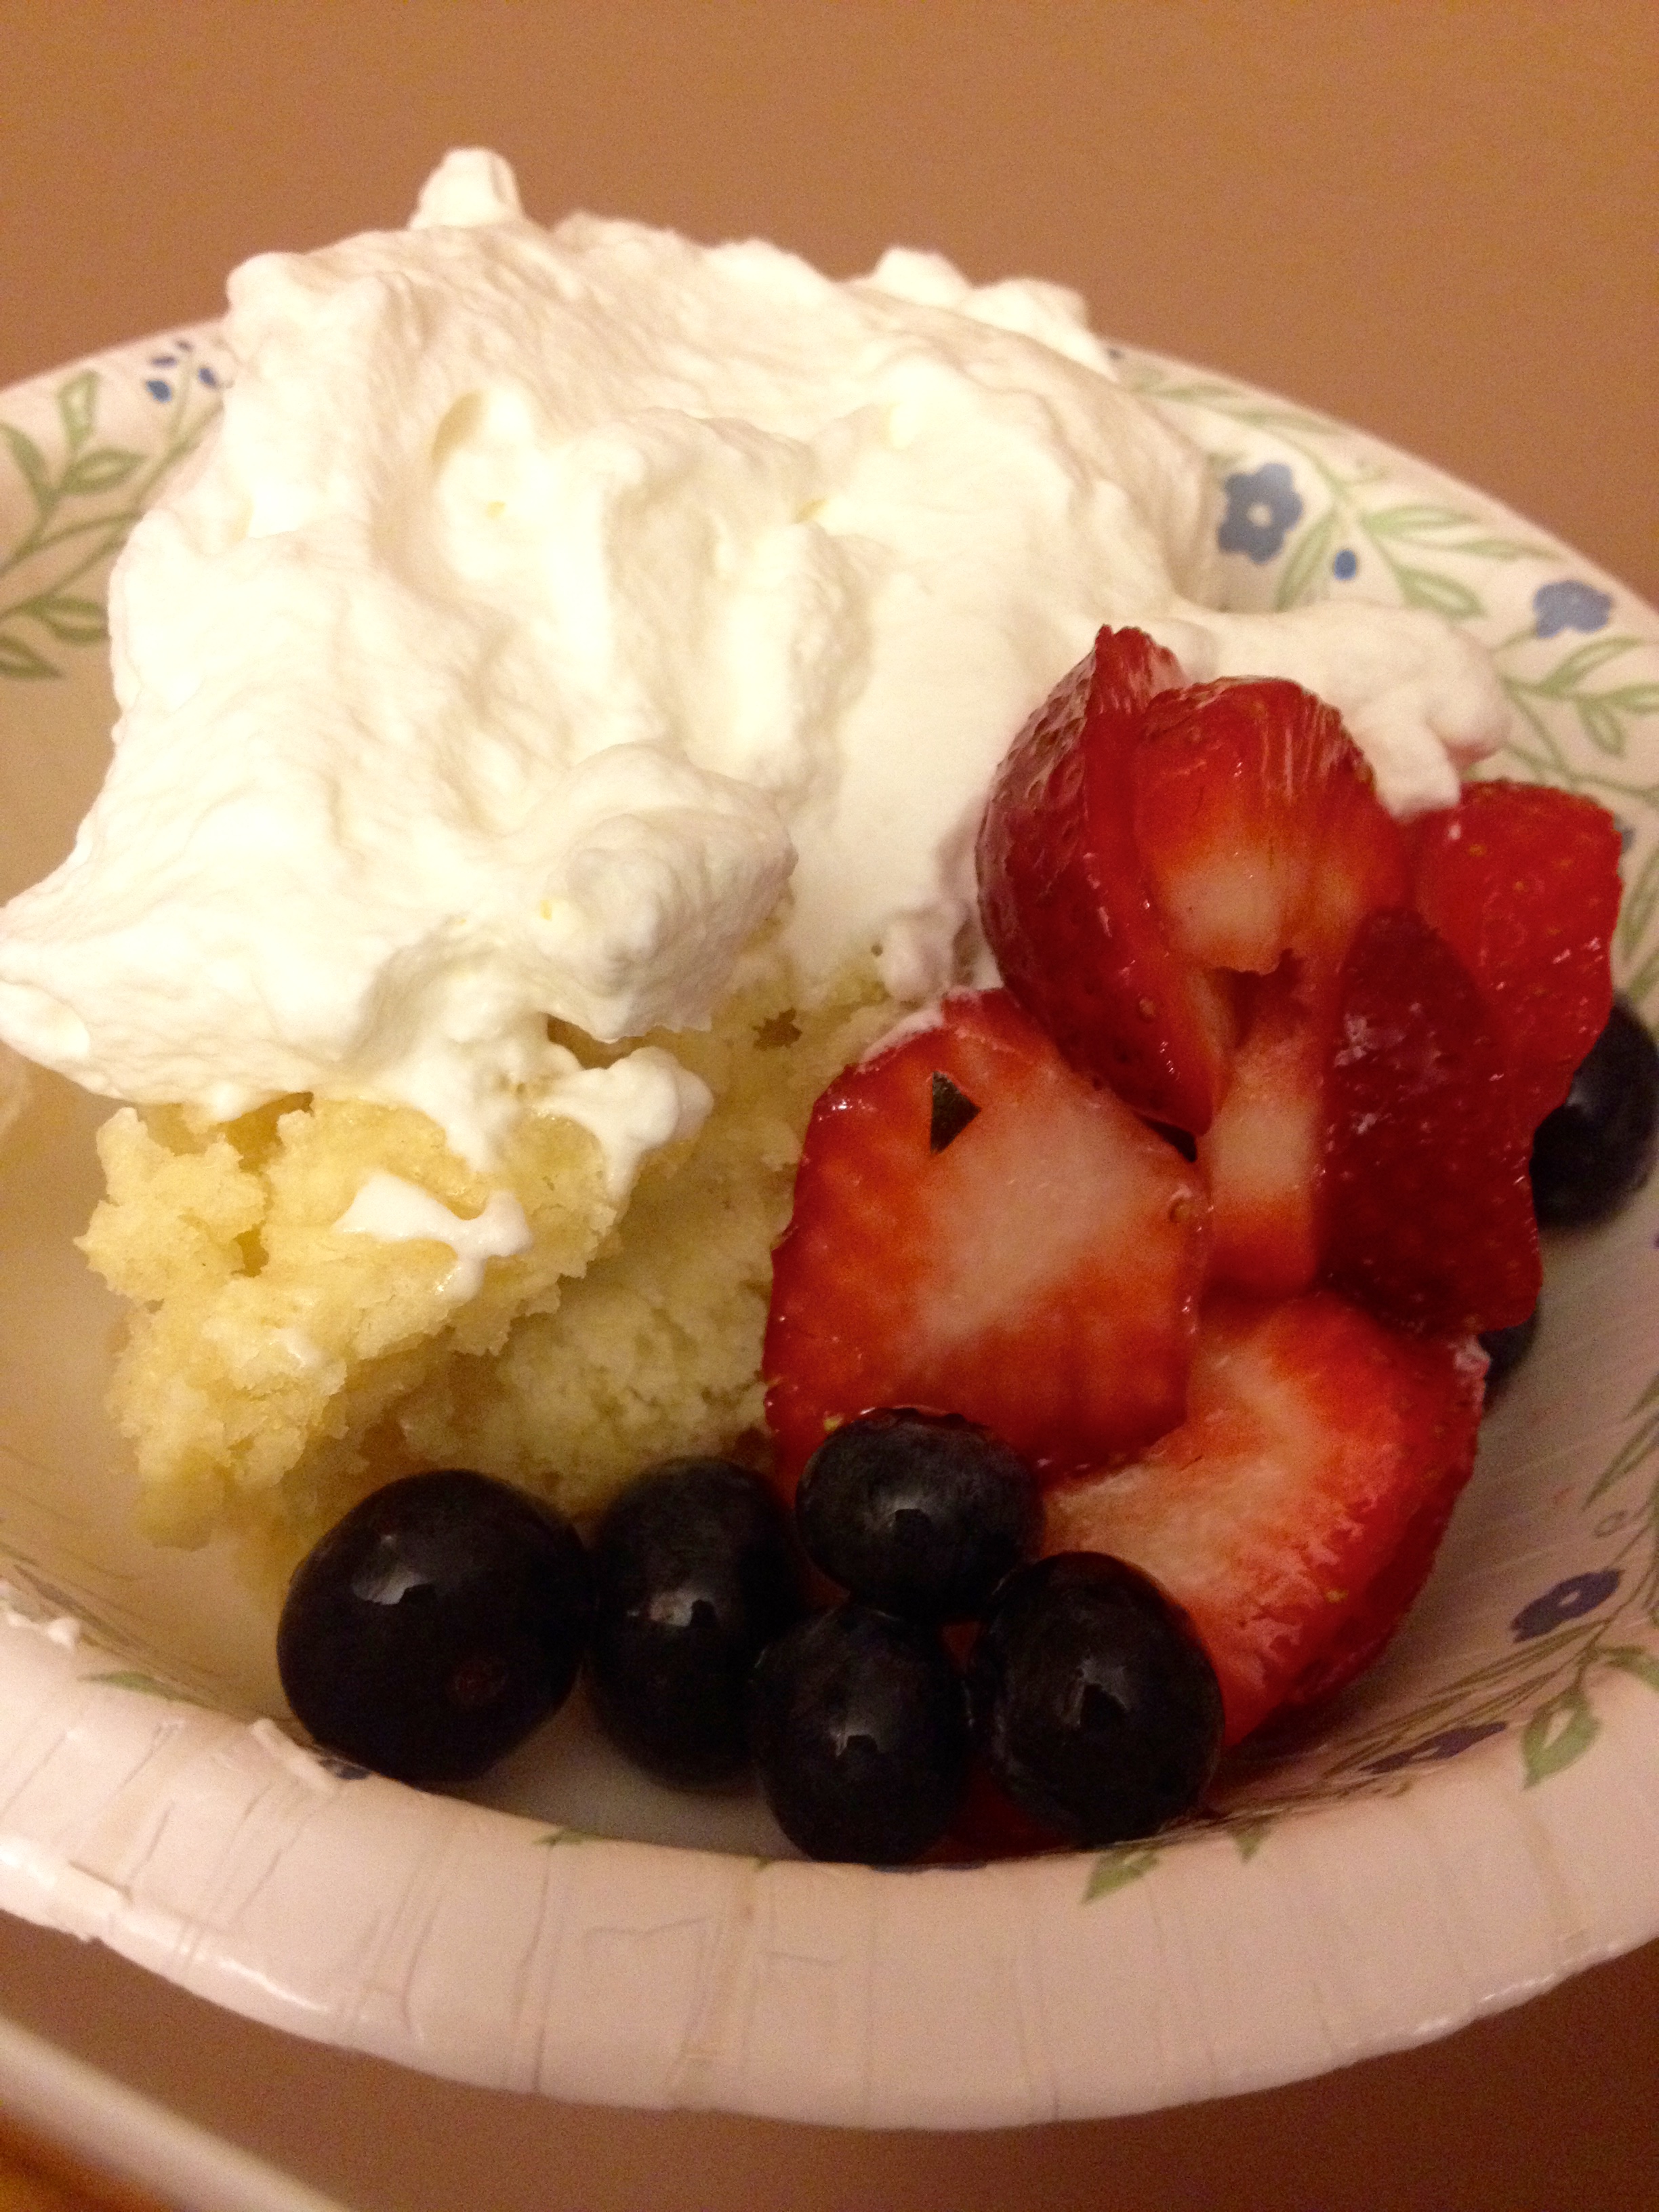
While the cake is baking and cooling, you can get your berries going! We used fresh strawberries and blueberries, and just sprinkled sugar over them and let them macerate so that they were really sweet and juicy.
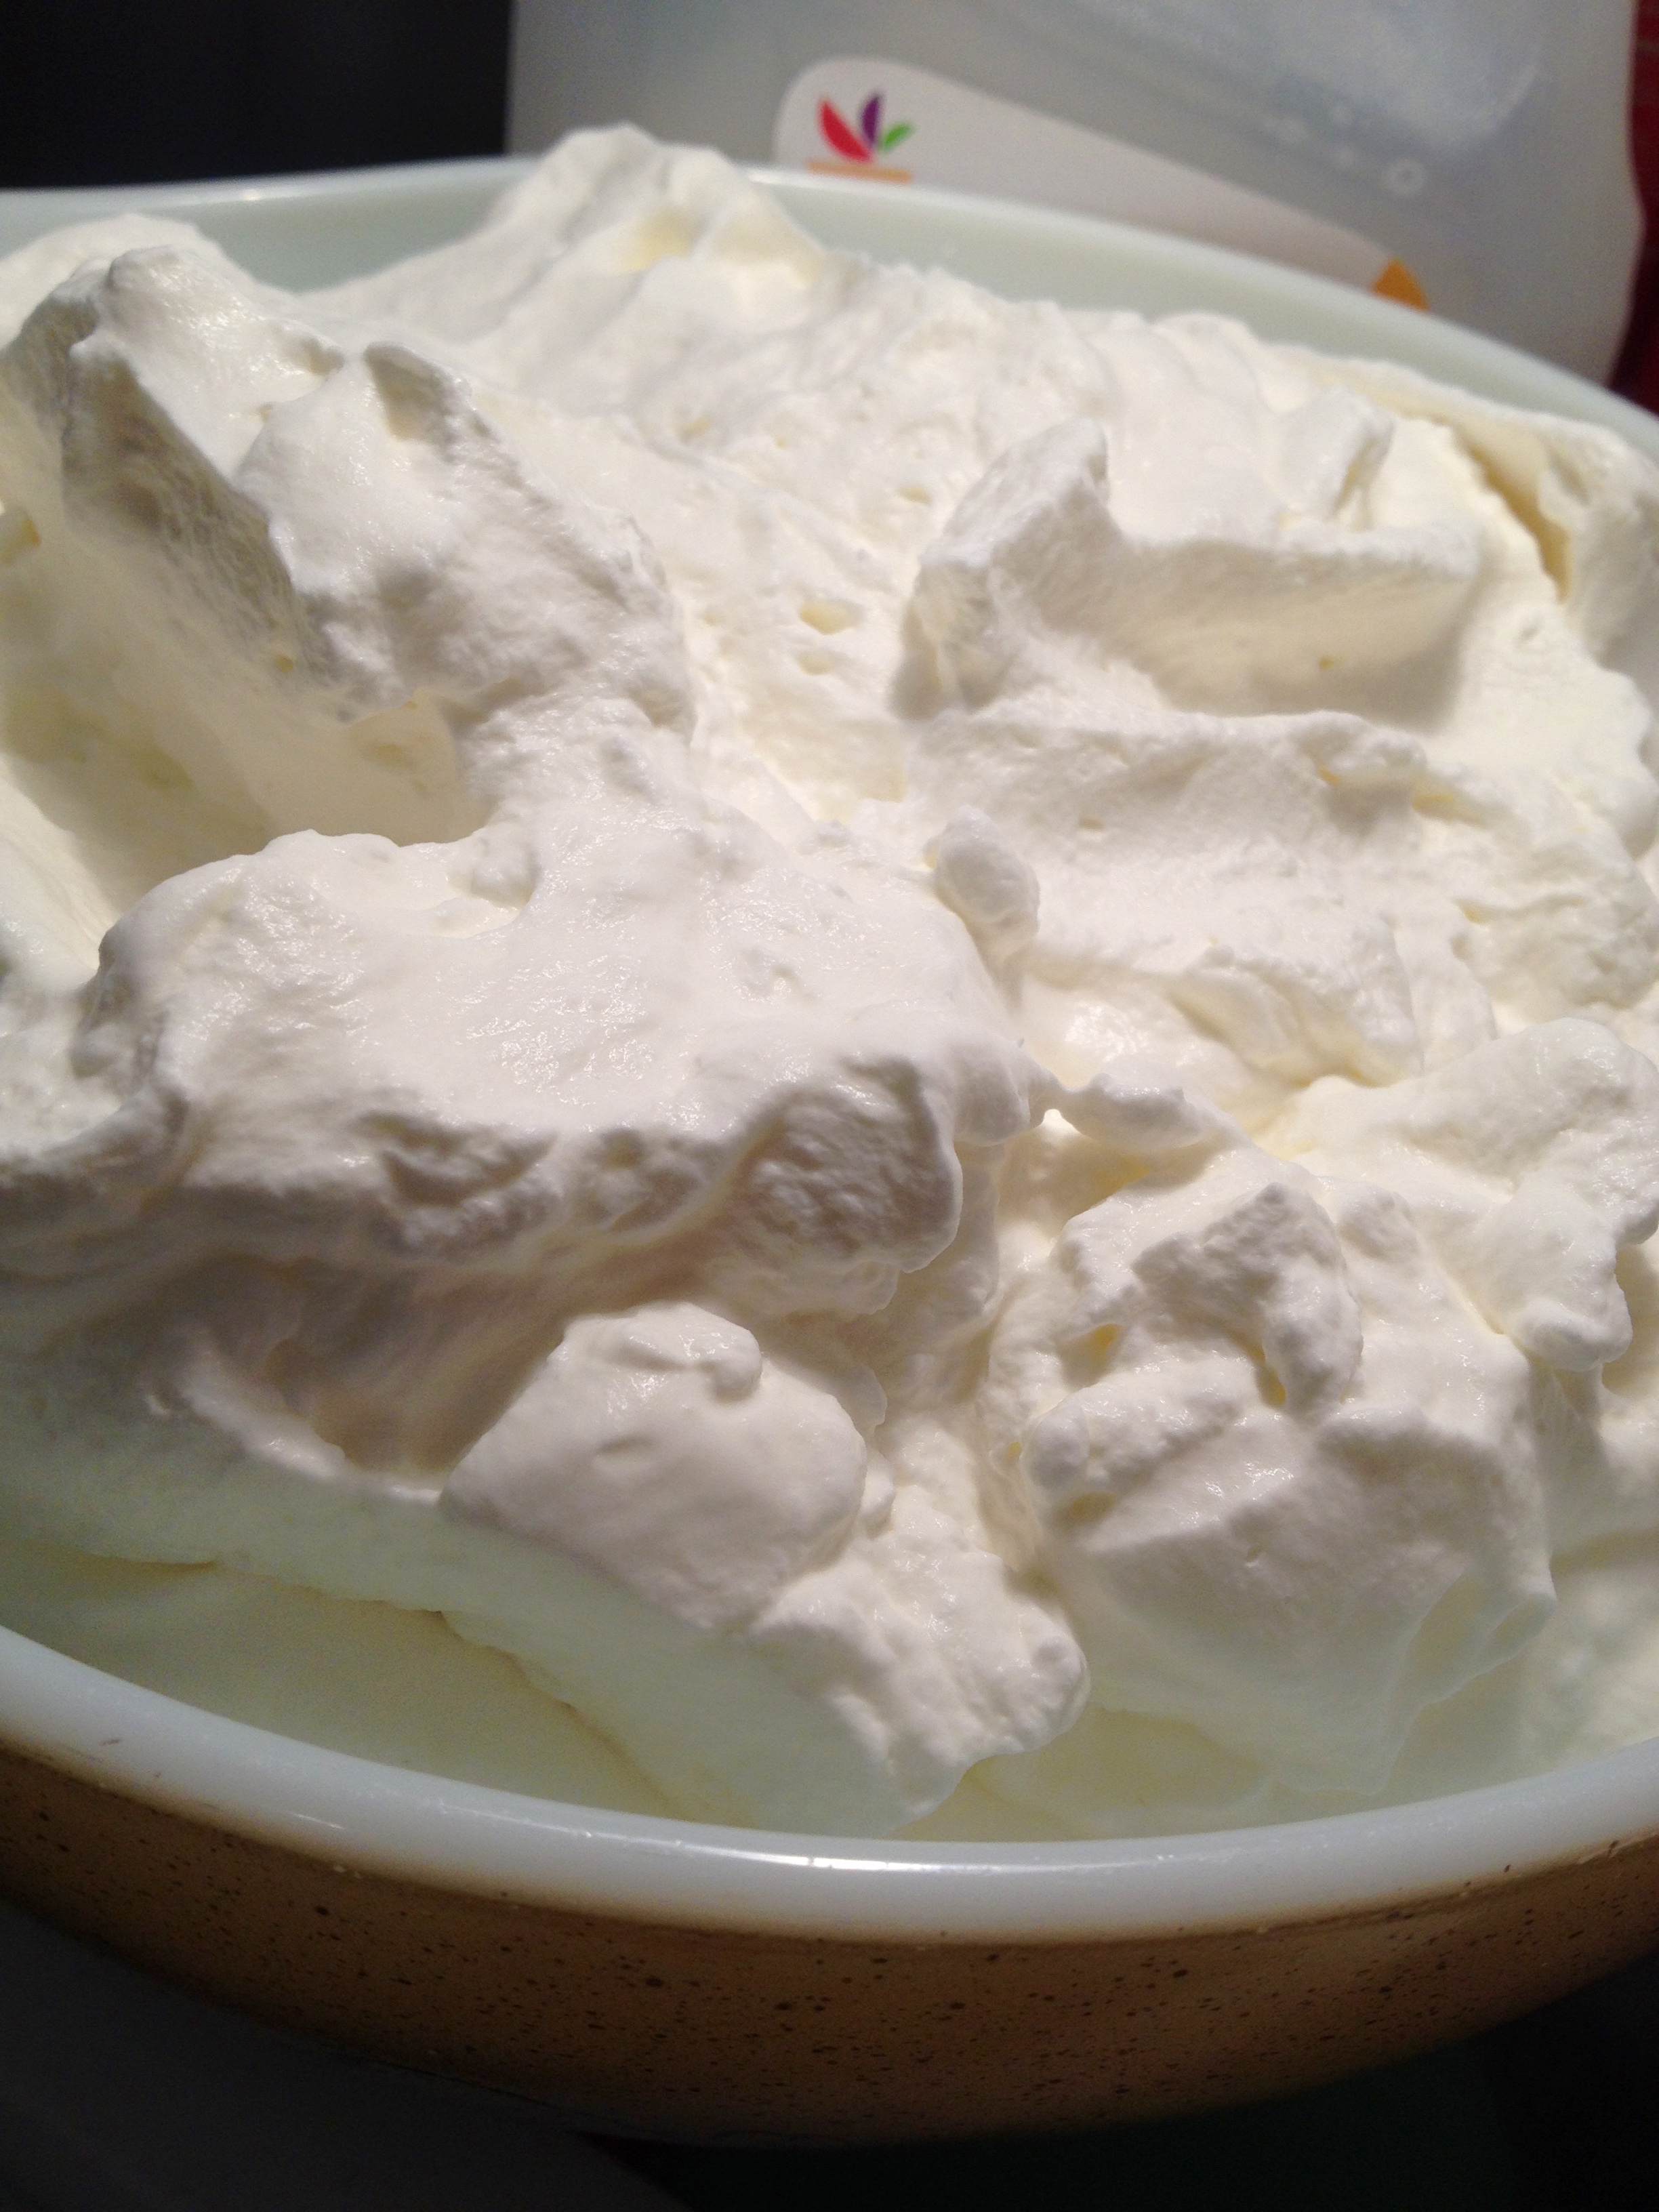
You can also make some fresh whipped cream! All you have to do is take however much you want of heavy whipping cream and, using either a stand mixer or a hand mixer, whip the cream until it forms soft peaks. Then, sprinkle some sugar into the cream until you have your desired sweetness.
And now, put it all together into a sweet, light, and fresh dessert! This cake is so delicious and flaky and buttery, and the berries added the perfect touch of freshness and a slight tart bite. And of course, the whipped cream was just perfect. I hope you all give this recipe a try! Happy baking!
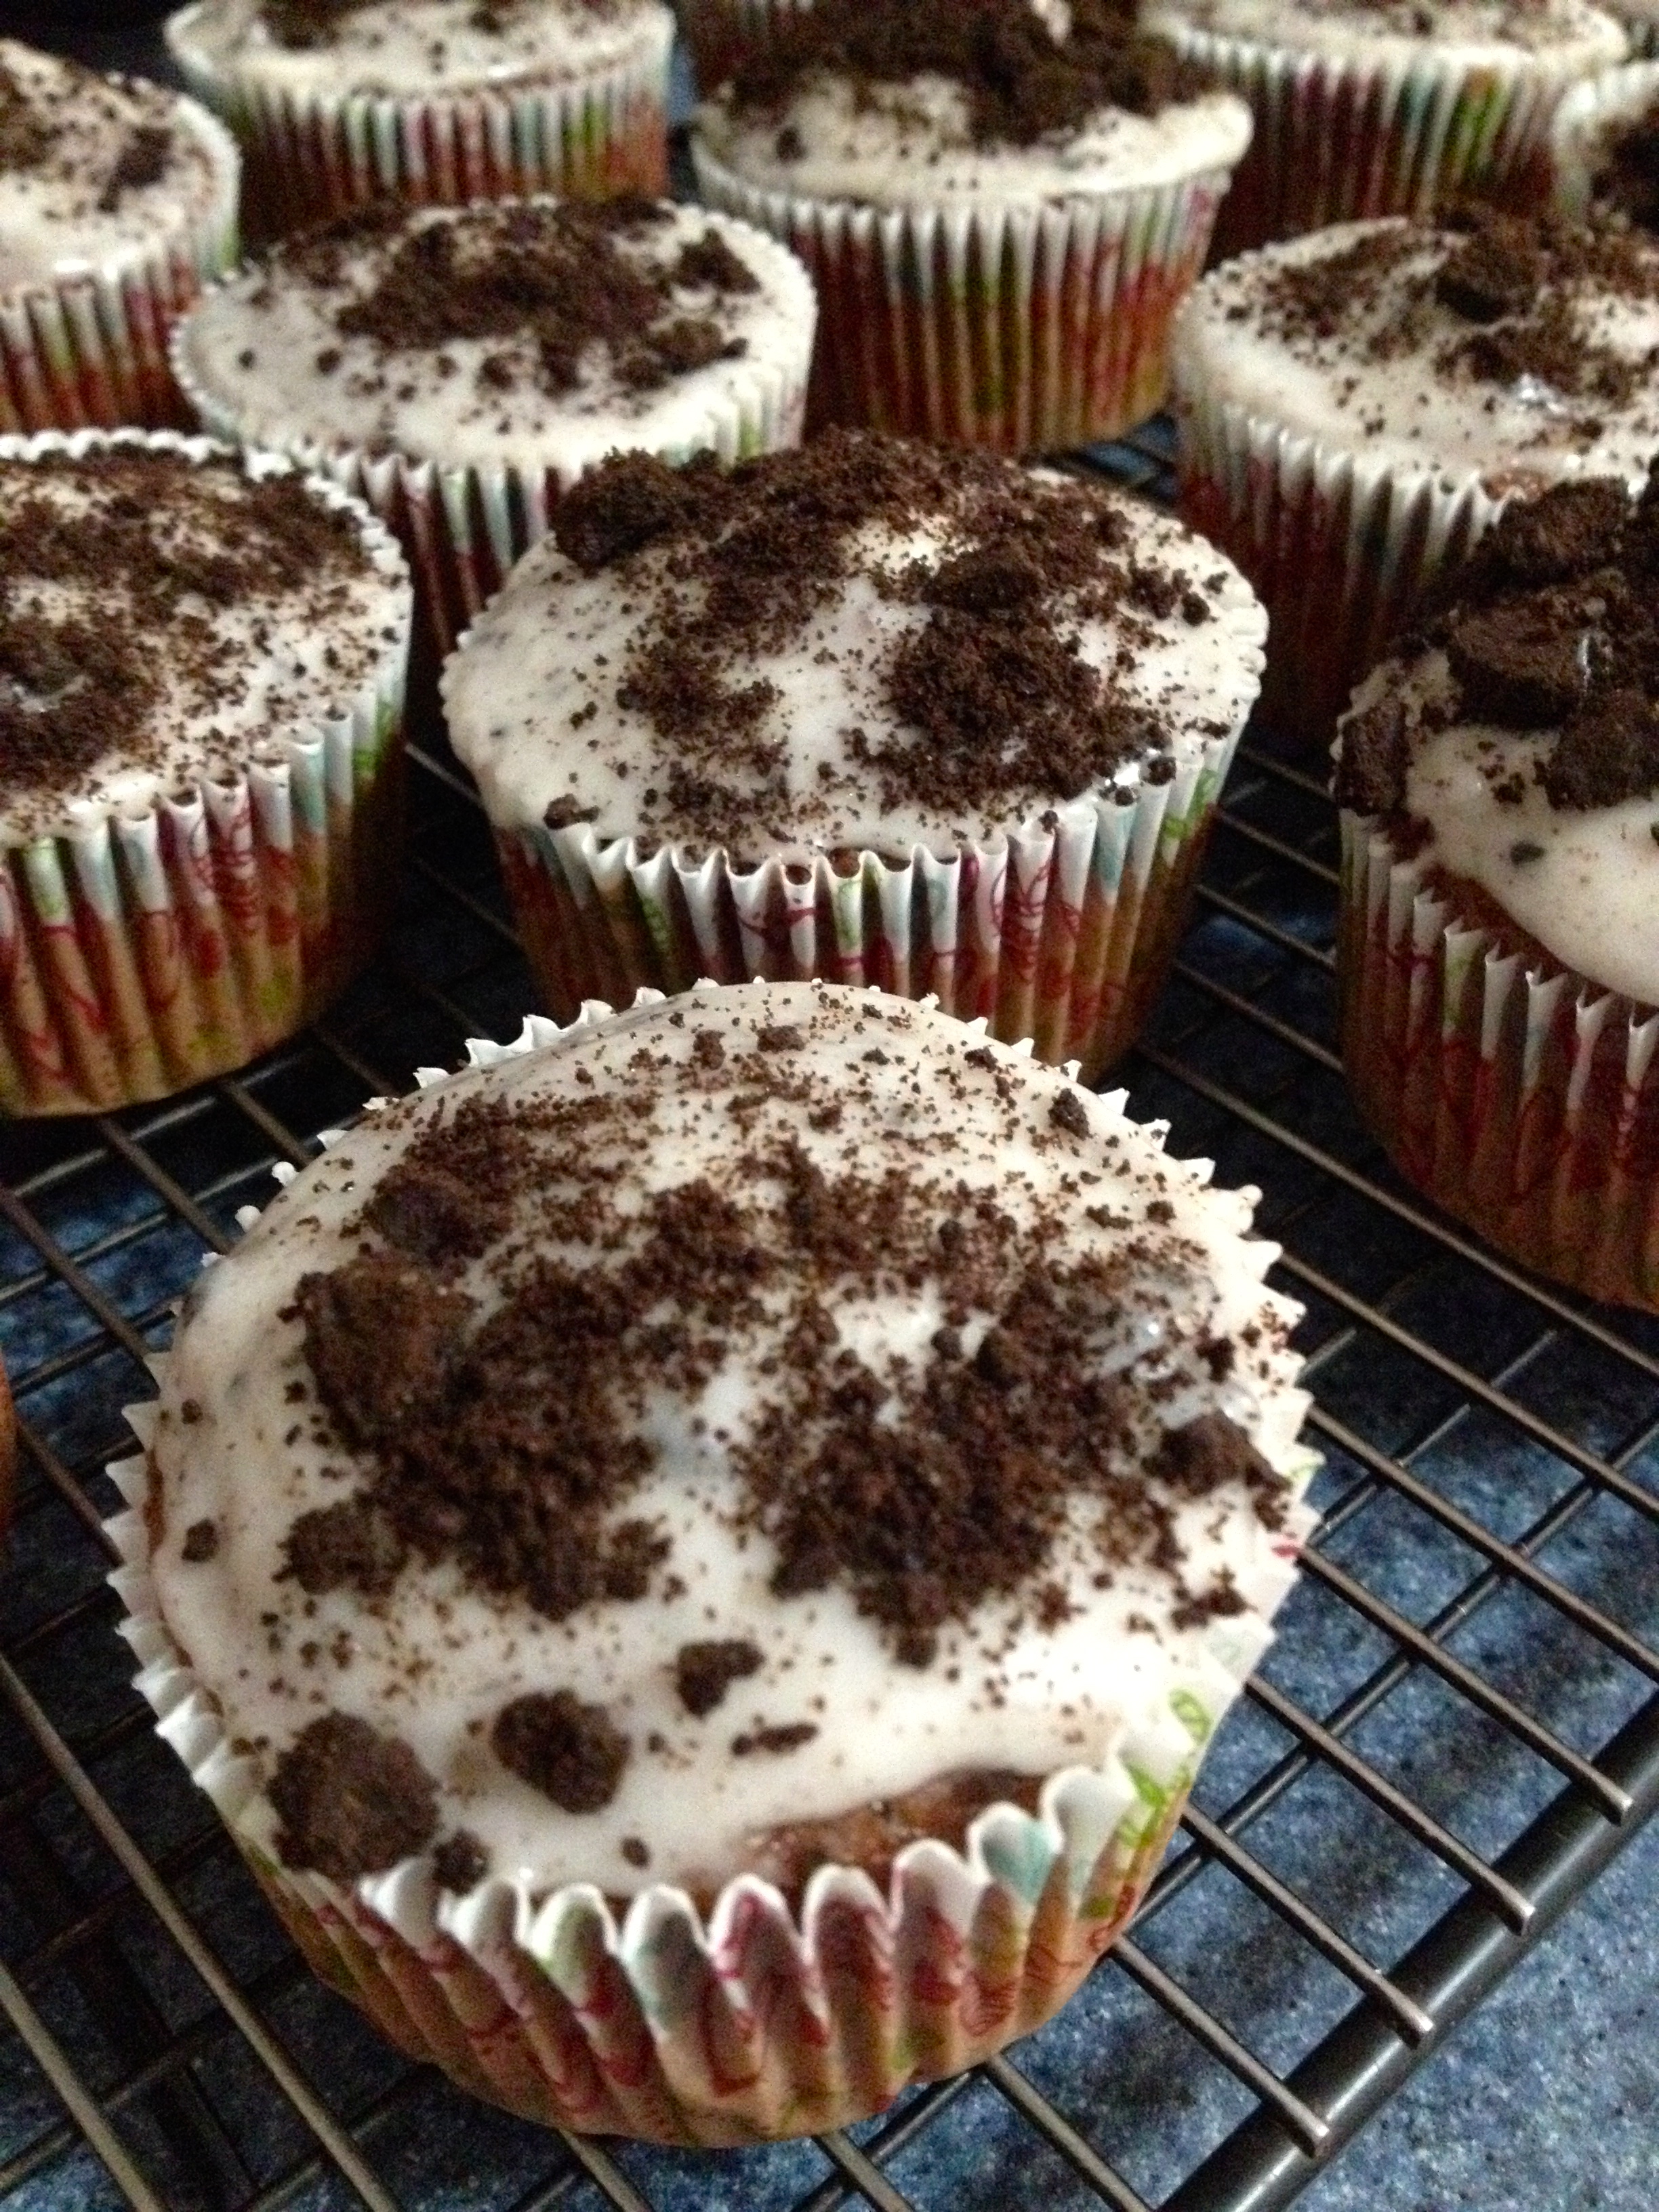
Cookies ‘n Cream Cupcakes
Hey friends! Happy end of February- Spring is officially coming! To celebrate, I made a great new recipe for Cookies ‘n Cream cupcakes! They’re light and sweet chocolate cupcakes, with that perfect Oreo crunch and the thick Oreo cream in a sweet glaze! Here’s the recipe:
- 1 chocolate cake mix, plus ingredients for the mix (I used a milk chocolate mix, but I also think a dark chocolate mix would give the cake a perfect bittersweet taste.)
- 1/2 package Mega-Stuf Oreo’s
- 2 cups confectioner’s sugar
- 3 tbsp and 1/2 tsp milk
- 1/8 tsp cream of tartar
First, preheat the oven to 375ºF (or whatever the mix instructs) and line 2 cupcake sheets with cupcake papers (this recipe makes about 24 cupcakes). Make the cake mix according to the directions on the box, and portion the batter evenly among the cupcakes. Bake for however long the box directs, or about 15 minutes. When the cupcakes come out of the oven, cool them in the sheets for 5 minutes and then transfer them to a cooling rack to cool thoroughly.
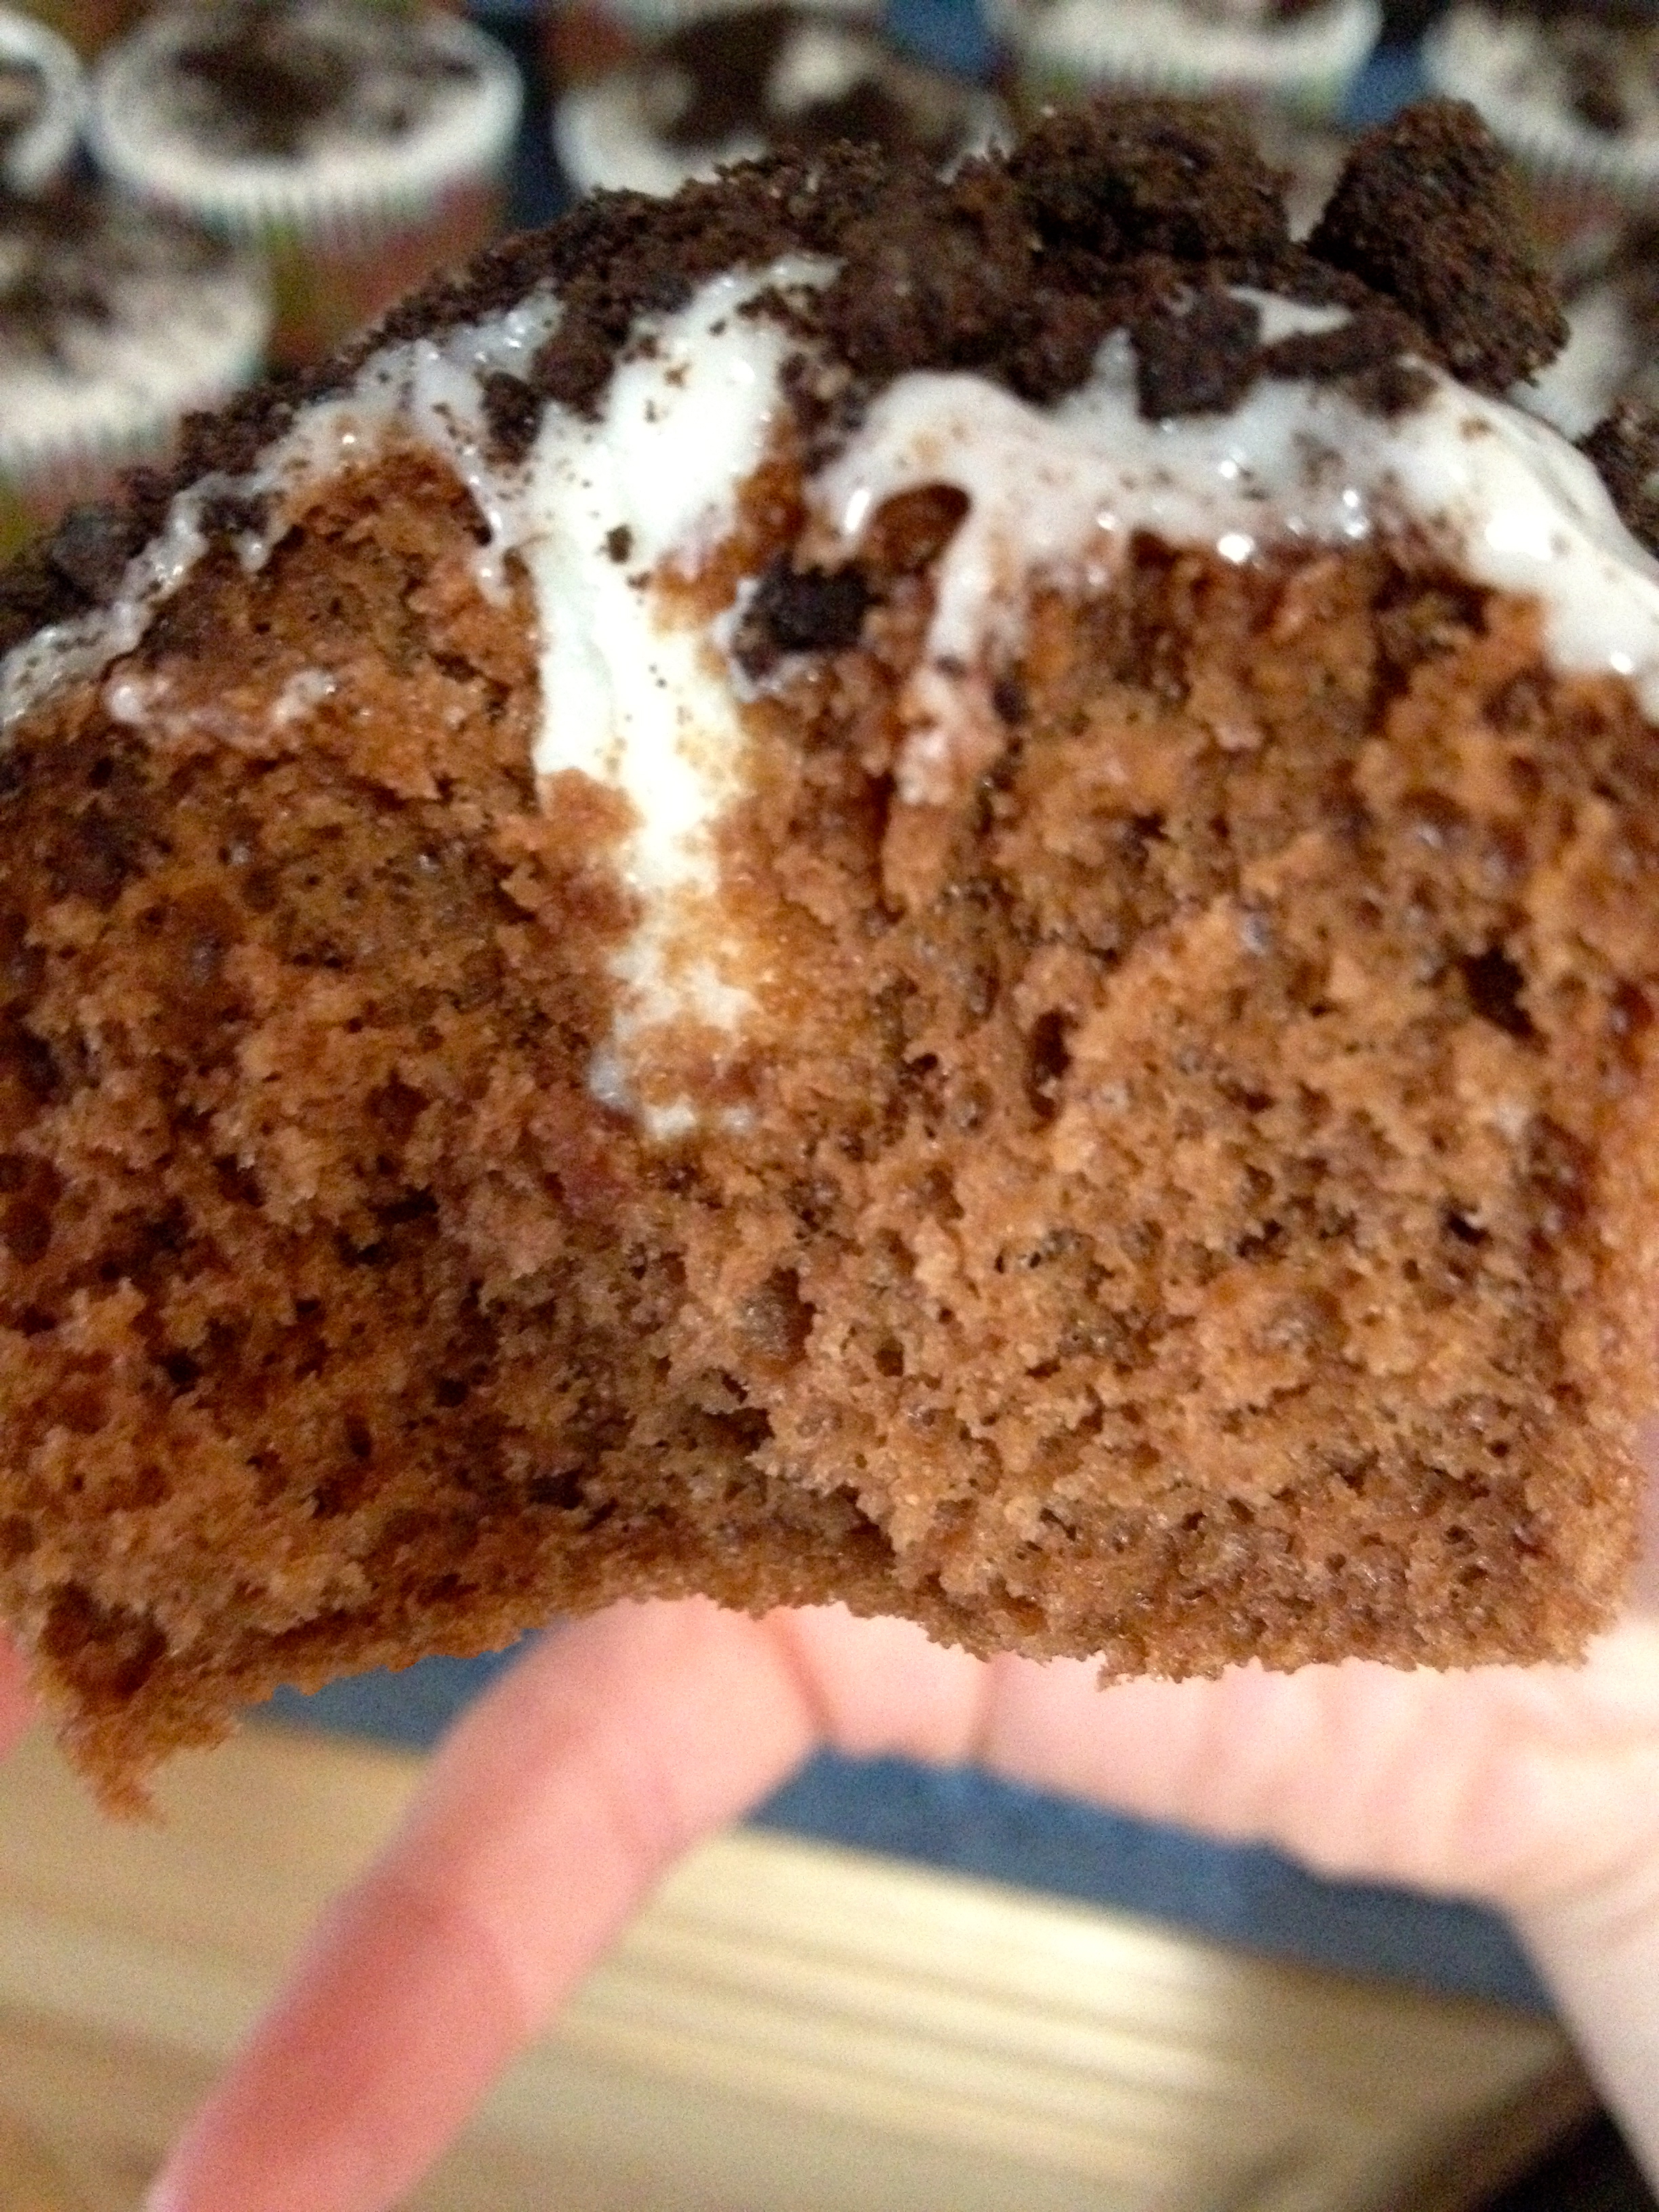
While the cupcakes are baking, separate the Oreo’s into the cookies and the cream. I did this by twisting the Oreo’s until one cookie came off, and then ran a knife under the cream to separate it from the other cookie. With a fork, fluff up the cream. Put the cream in a pastry bag or a plastic food storage bag with the corner cut off (you’re going to pipe the cream into the cupcakes).
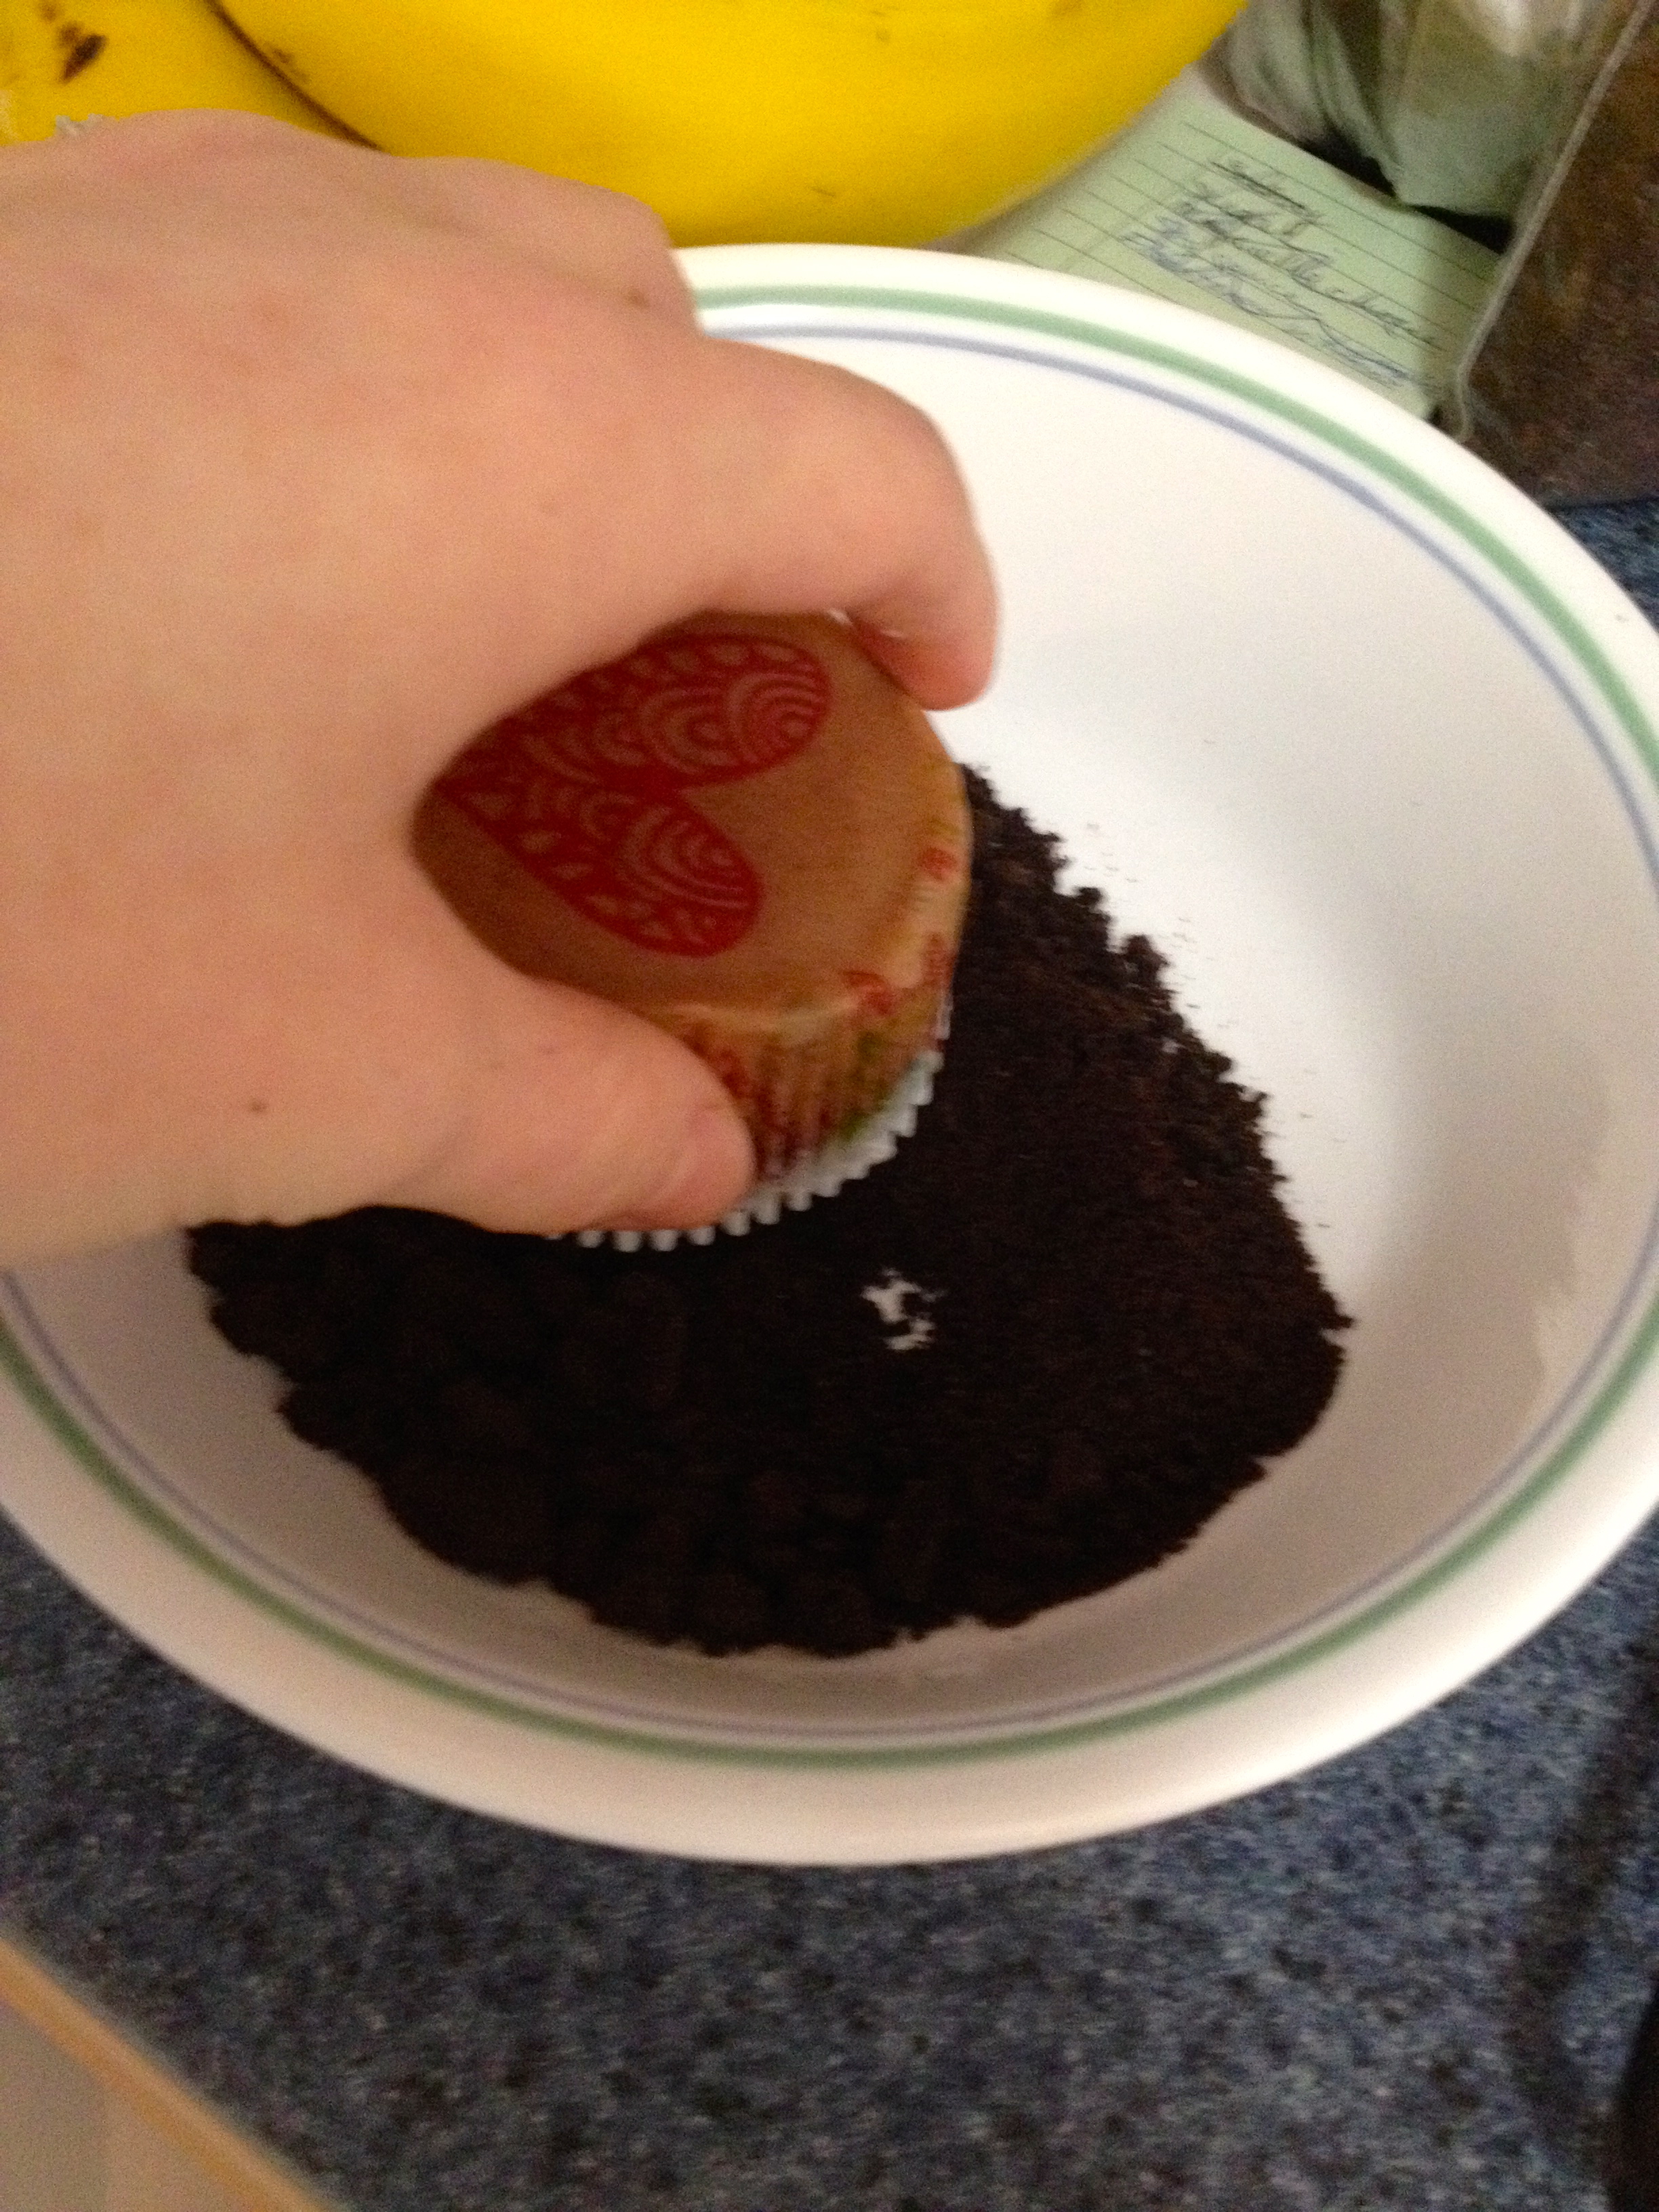
Put the chocolate cookies in a plastic storage bag, and pound the bag with either a rolling pin or a meat tenderizer until you’ve successfully smashed the cookies to smithereens. Set the cookie crumbs aside.
When the cupcakes are fully cooled, begin piping the cream into the center of the cupcakes. To do this, insert the tip of the pastry bag into the cupcake and squeeze the bag as hard as you can! The cream is reeealllllyyyy thick, so it took some muscle to get it out of the bag. Totally worth it, though! You can also do this by hollowing out a little area in the cupcake and just squeezing some of the cream into the little hollowed area.
Now, time to make the glaze for the cupcakes! Take the confectioner’s sugar, milk, and cream of tartar and mix them in a small bowl until they form a glaze consistency. It should be slightly runny, but not so thin that it can’t be controlled when being spread over a cupcake. Take as many of the Oreo cookie crumbs as you want and sprinkle them into the glaze- but be sure to save some to top the cupcakes with!
Spread glaze over each cupcake to taste. Don’t worry, there is plenty for each, so you don’t have to skimp!
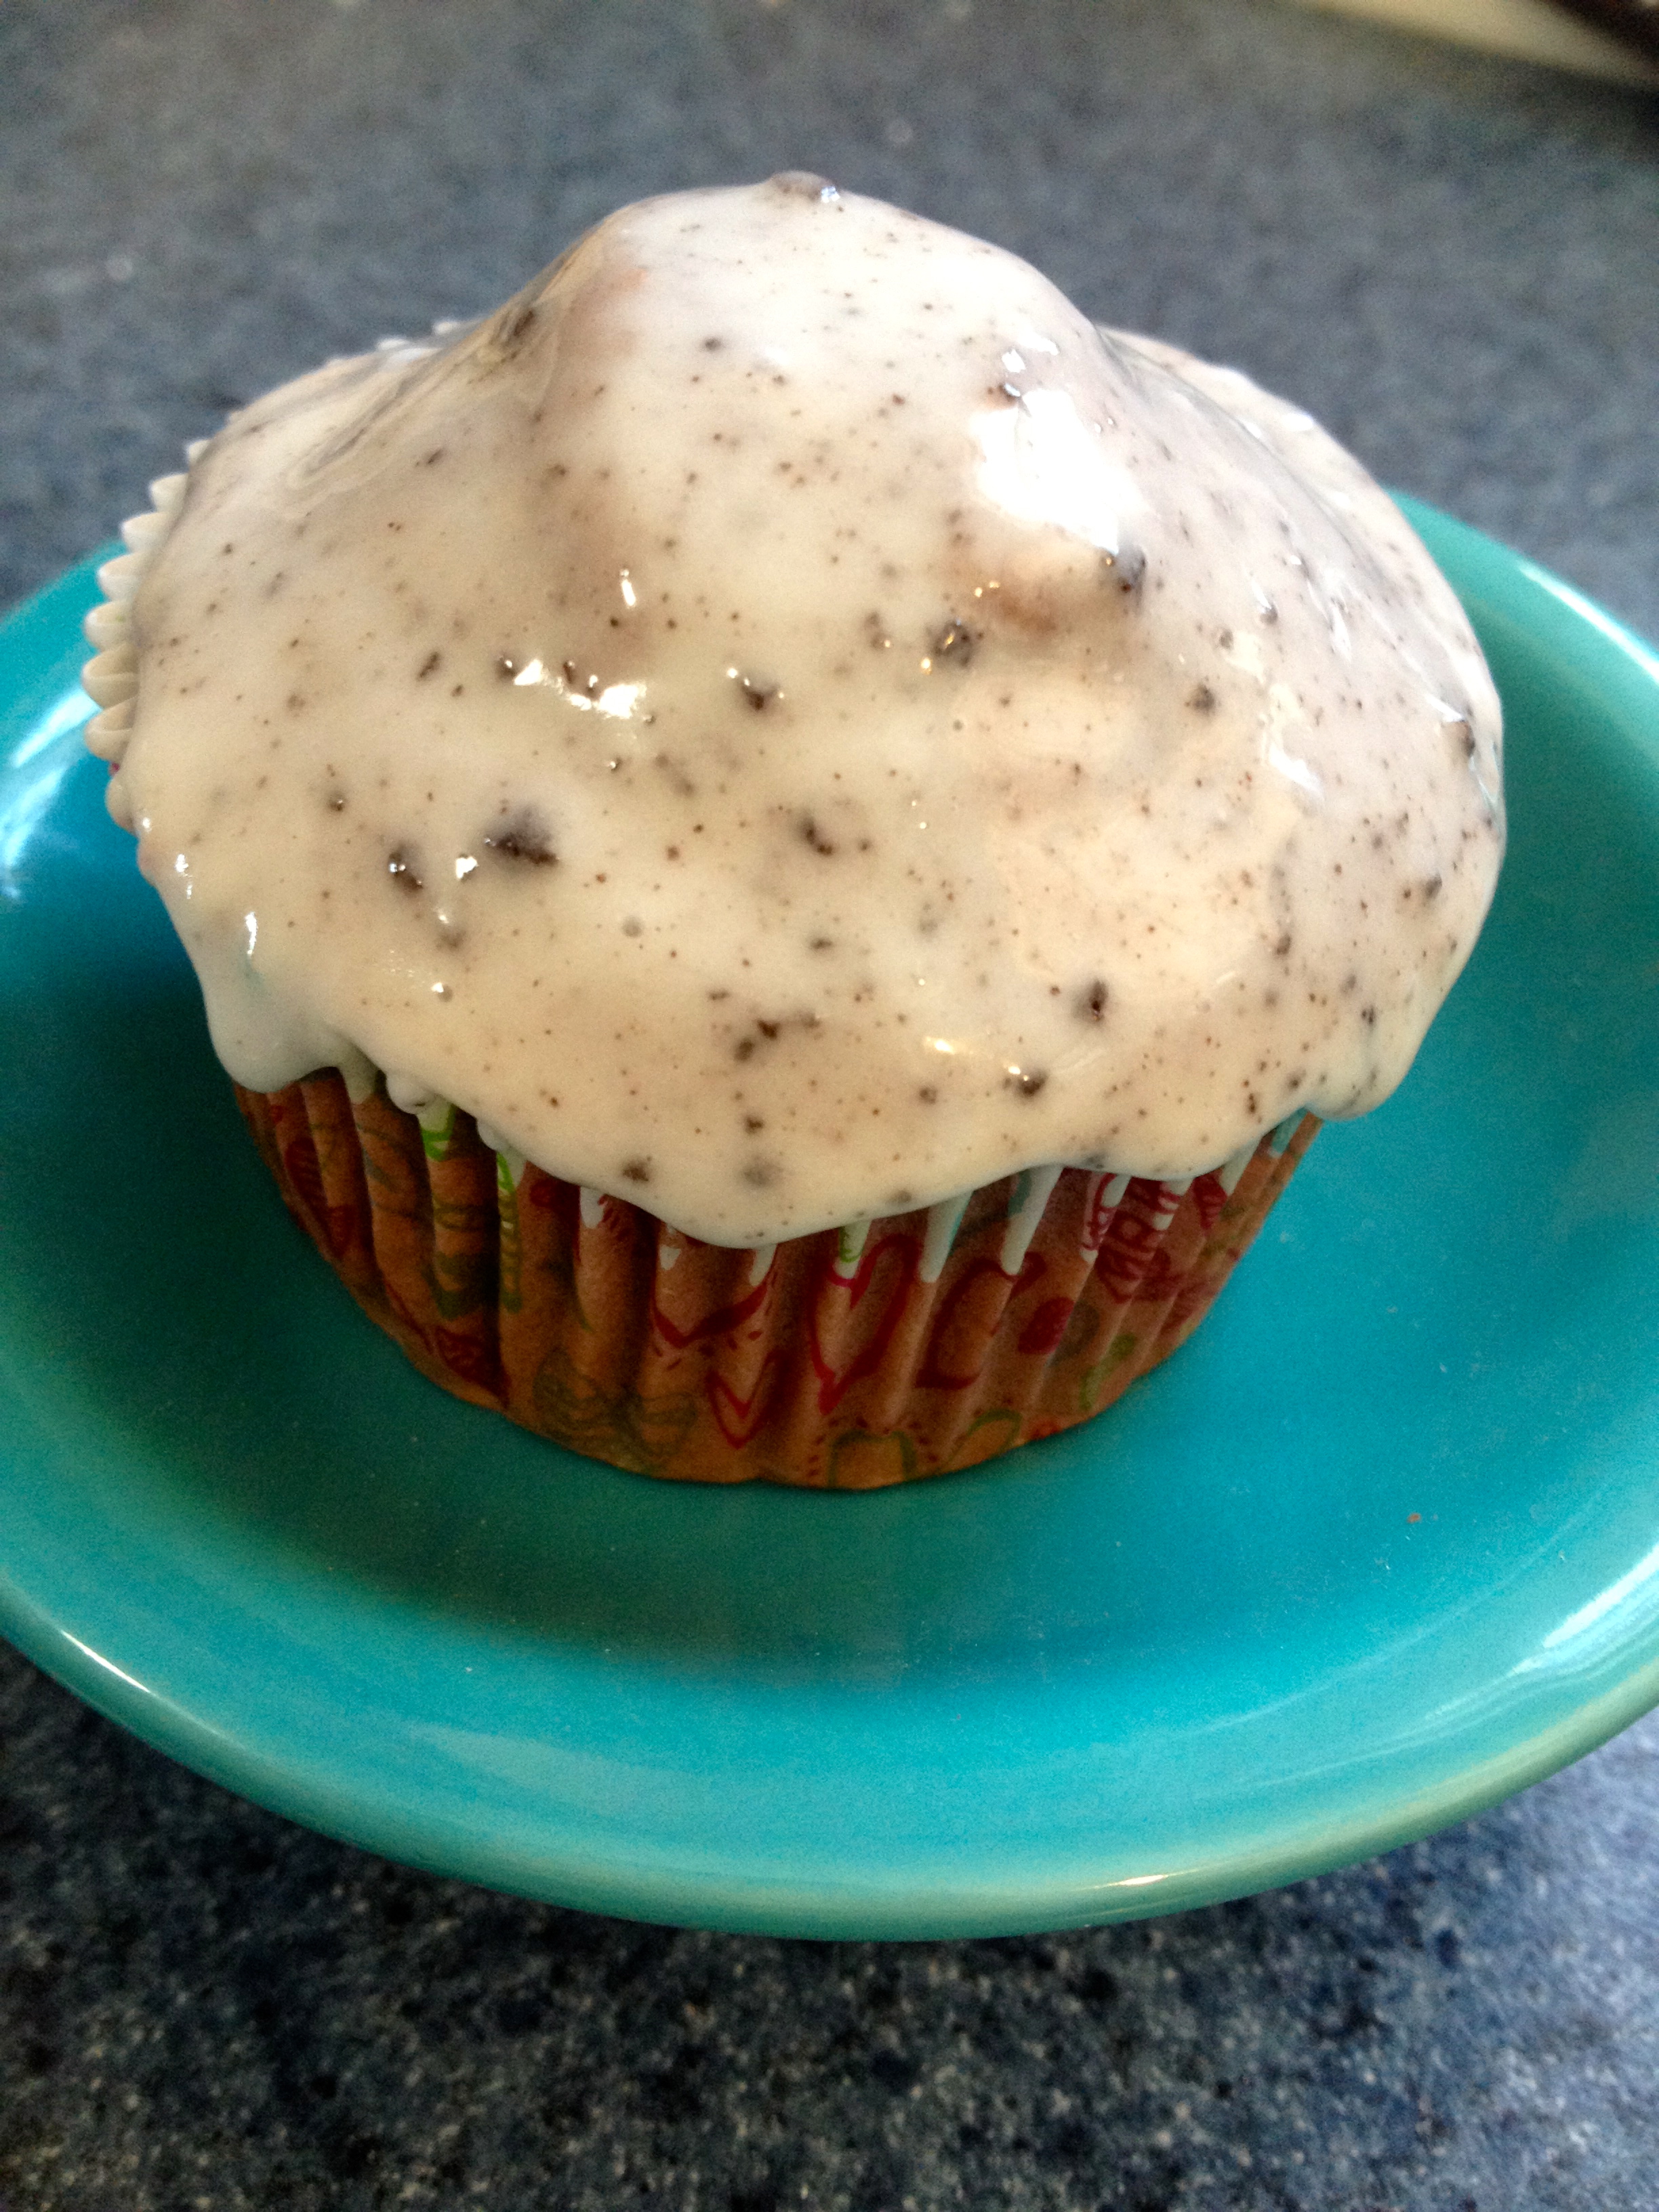
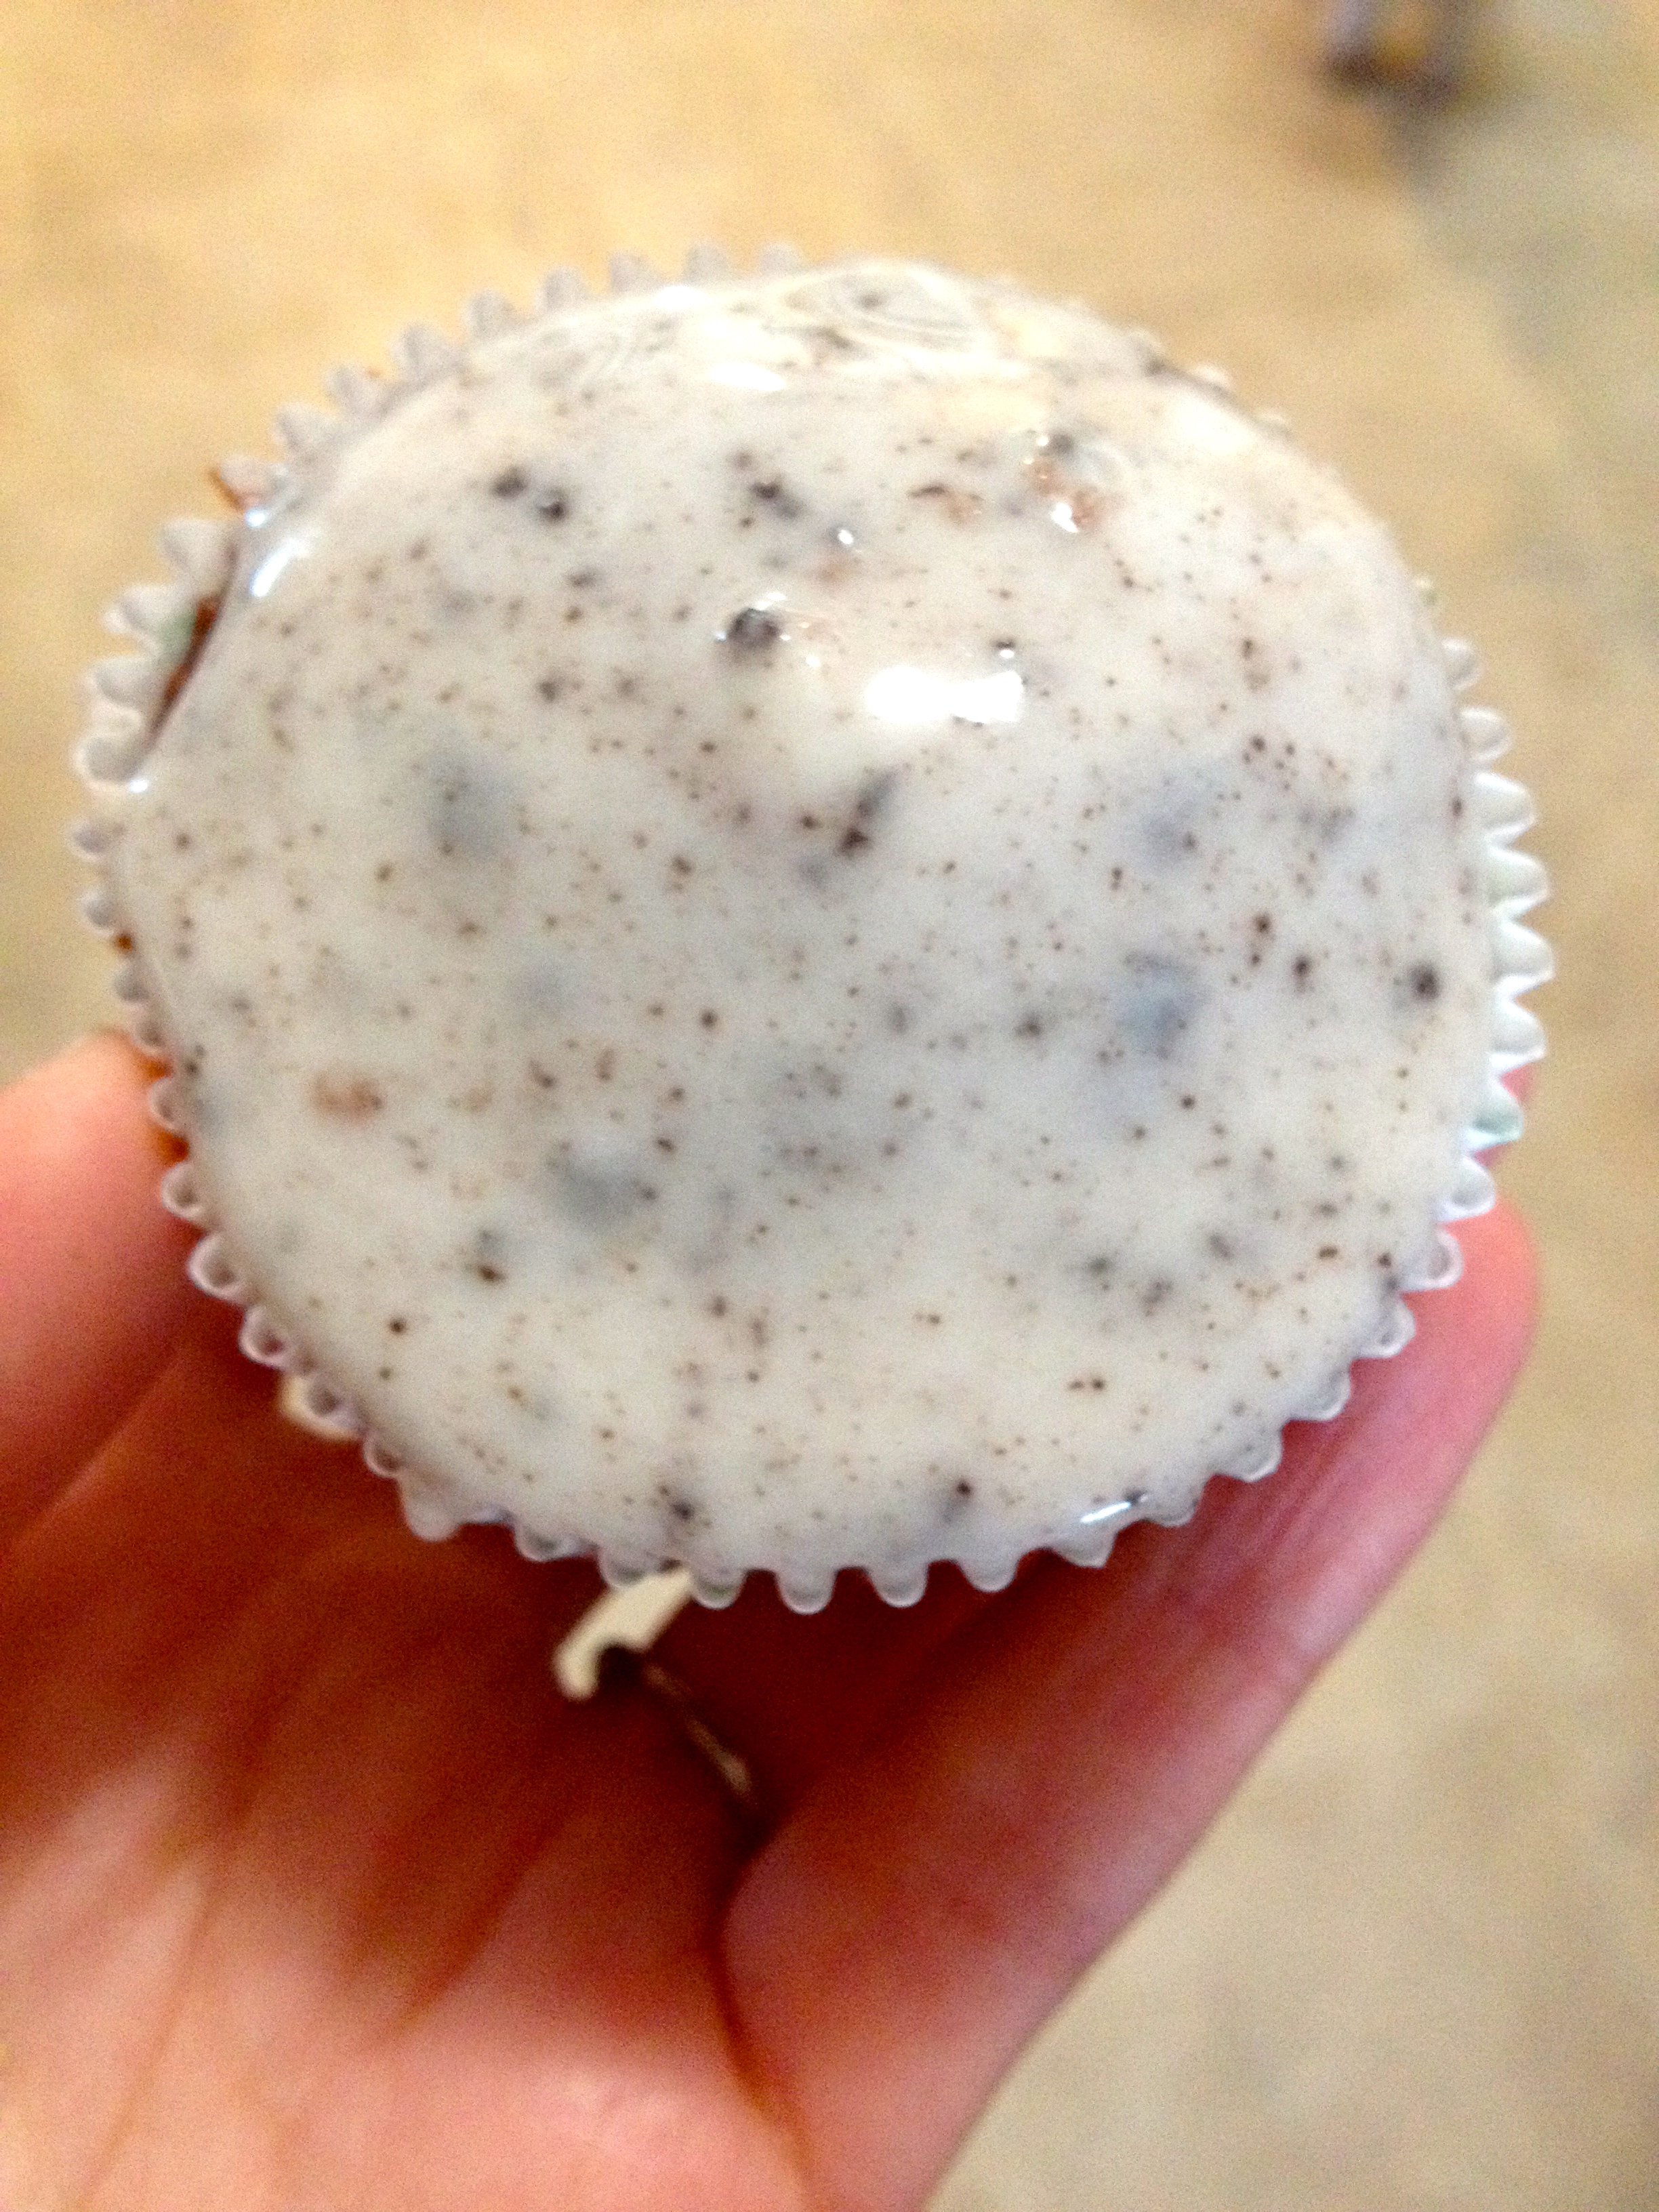
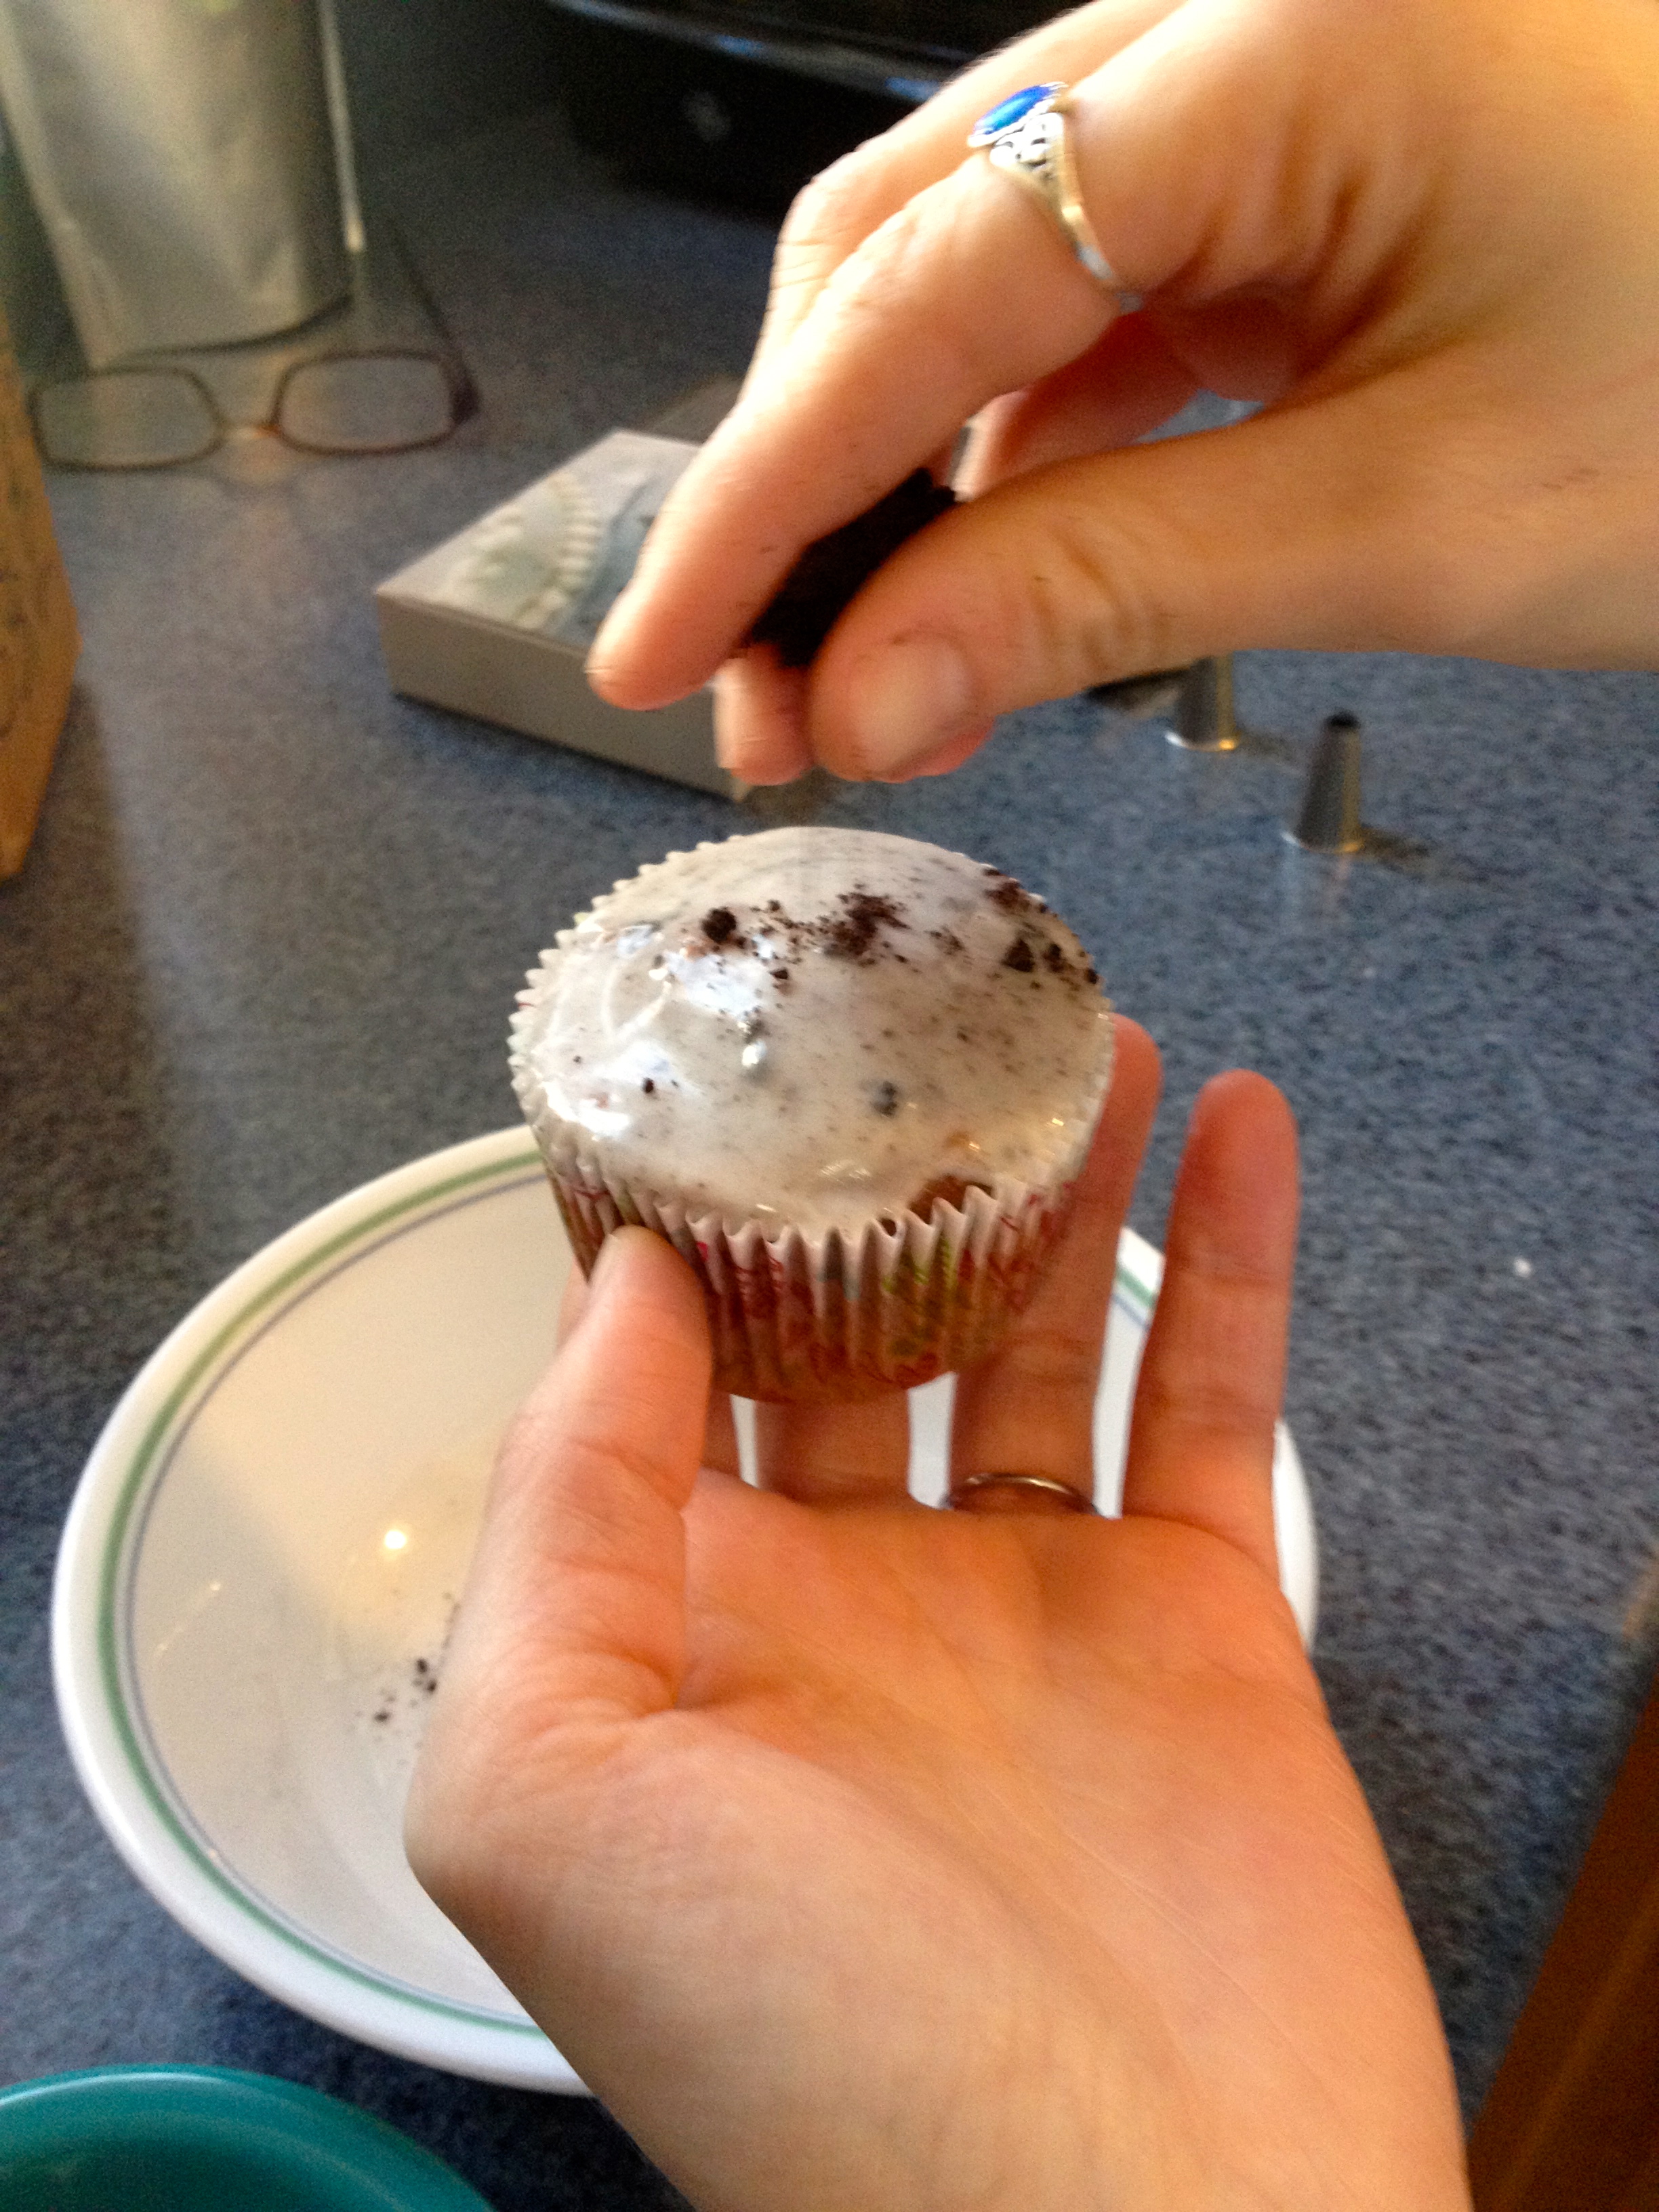
Finally, top the cupcakes with the Oreo cookie crumbs. You can do this either by sprinkling the crumbs on top, or by putting the crumbs in a bowl and rolling the cupcake in the crumbs. Both methods worked well!
And finally, enjoy! These cupcakes are super yummy and so fun and easy to make! Feel free to give them a try, and treat yourself! Happy baking, and happy March!
Barefoot Contessa Muffins
Hi all! I hope you’re all staying healthy through the winter! I’m on the tail end of a cold, but luckily I’m still perfectly capable of baking! Today, I have a recipe for Blueberry Lemon Muffins, created by the Food Network’s own Barefoot Contessa (Ina Garten). I thought and thought about how I could change her recipe and make my own twist on it, but after quite a bit of pondering, I decided “if it ain’t broke, don’t fix it!” The only change I made was to double the recipe- pretty creative, I know. Don’t worry though, I will definitely be adding my own input about the science behind the muffins! So, true to the original recipe, here are the ingredients for these scrumptious muffins:
Ingredients:
- 5 cups all-purpose flour
- 3/4 cup granulated sugar (this can be used interchangeably with the brown sugar and vice versa- whatever you have, use it!)
- 3/4 cup light brown sugar
- 2 tbsp baking powder
- 1/4 tsp salt
- 2 sticks butter, melted
- 2 cups milk
- 4 eggs
- 1 tbsp lemon zest
- 1 tsp vanilla
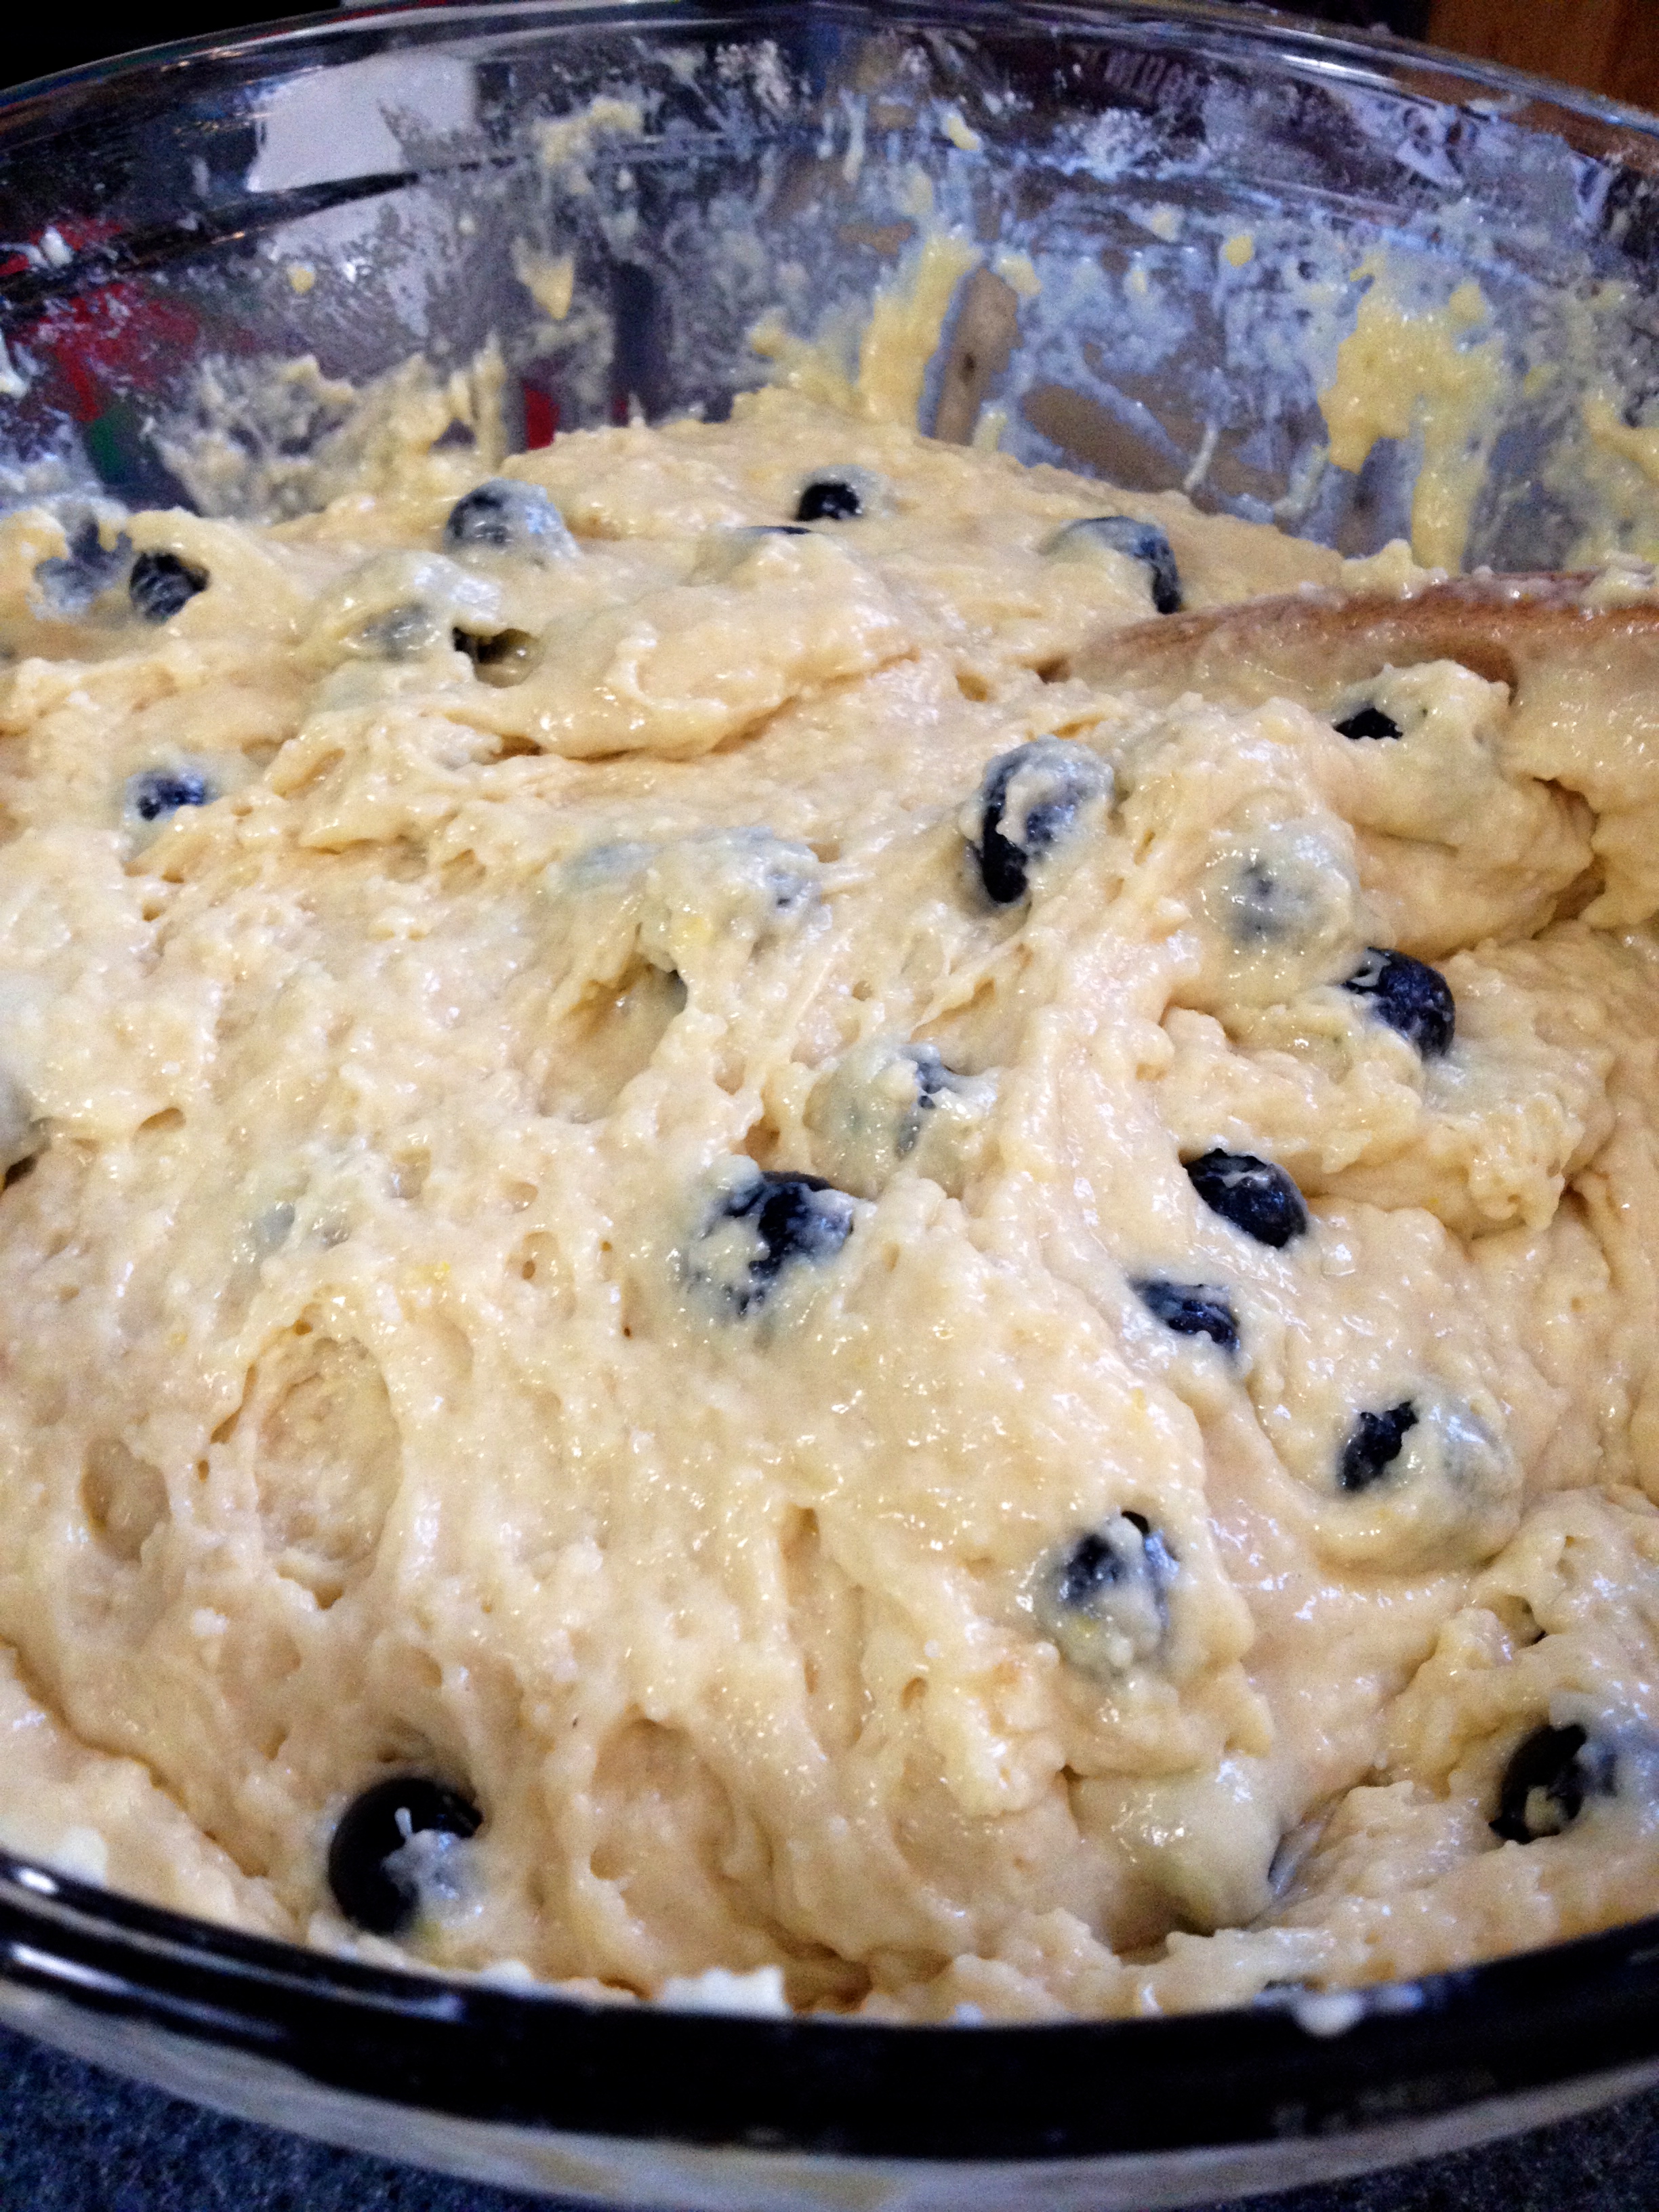
- 1 pint fresh blueberries, washed and dried
First, preheat the oven to 425ºF. In a medium mixing bowl, combine the butter, milk, eggs, lemon zest, vanilla, and blueberries.
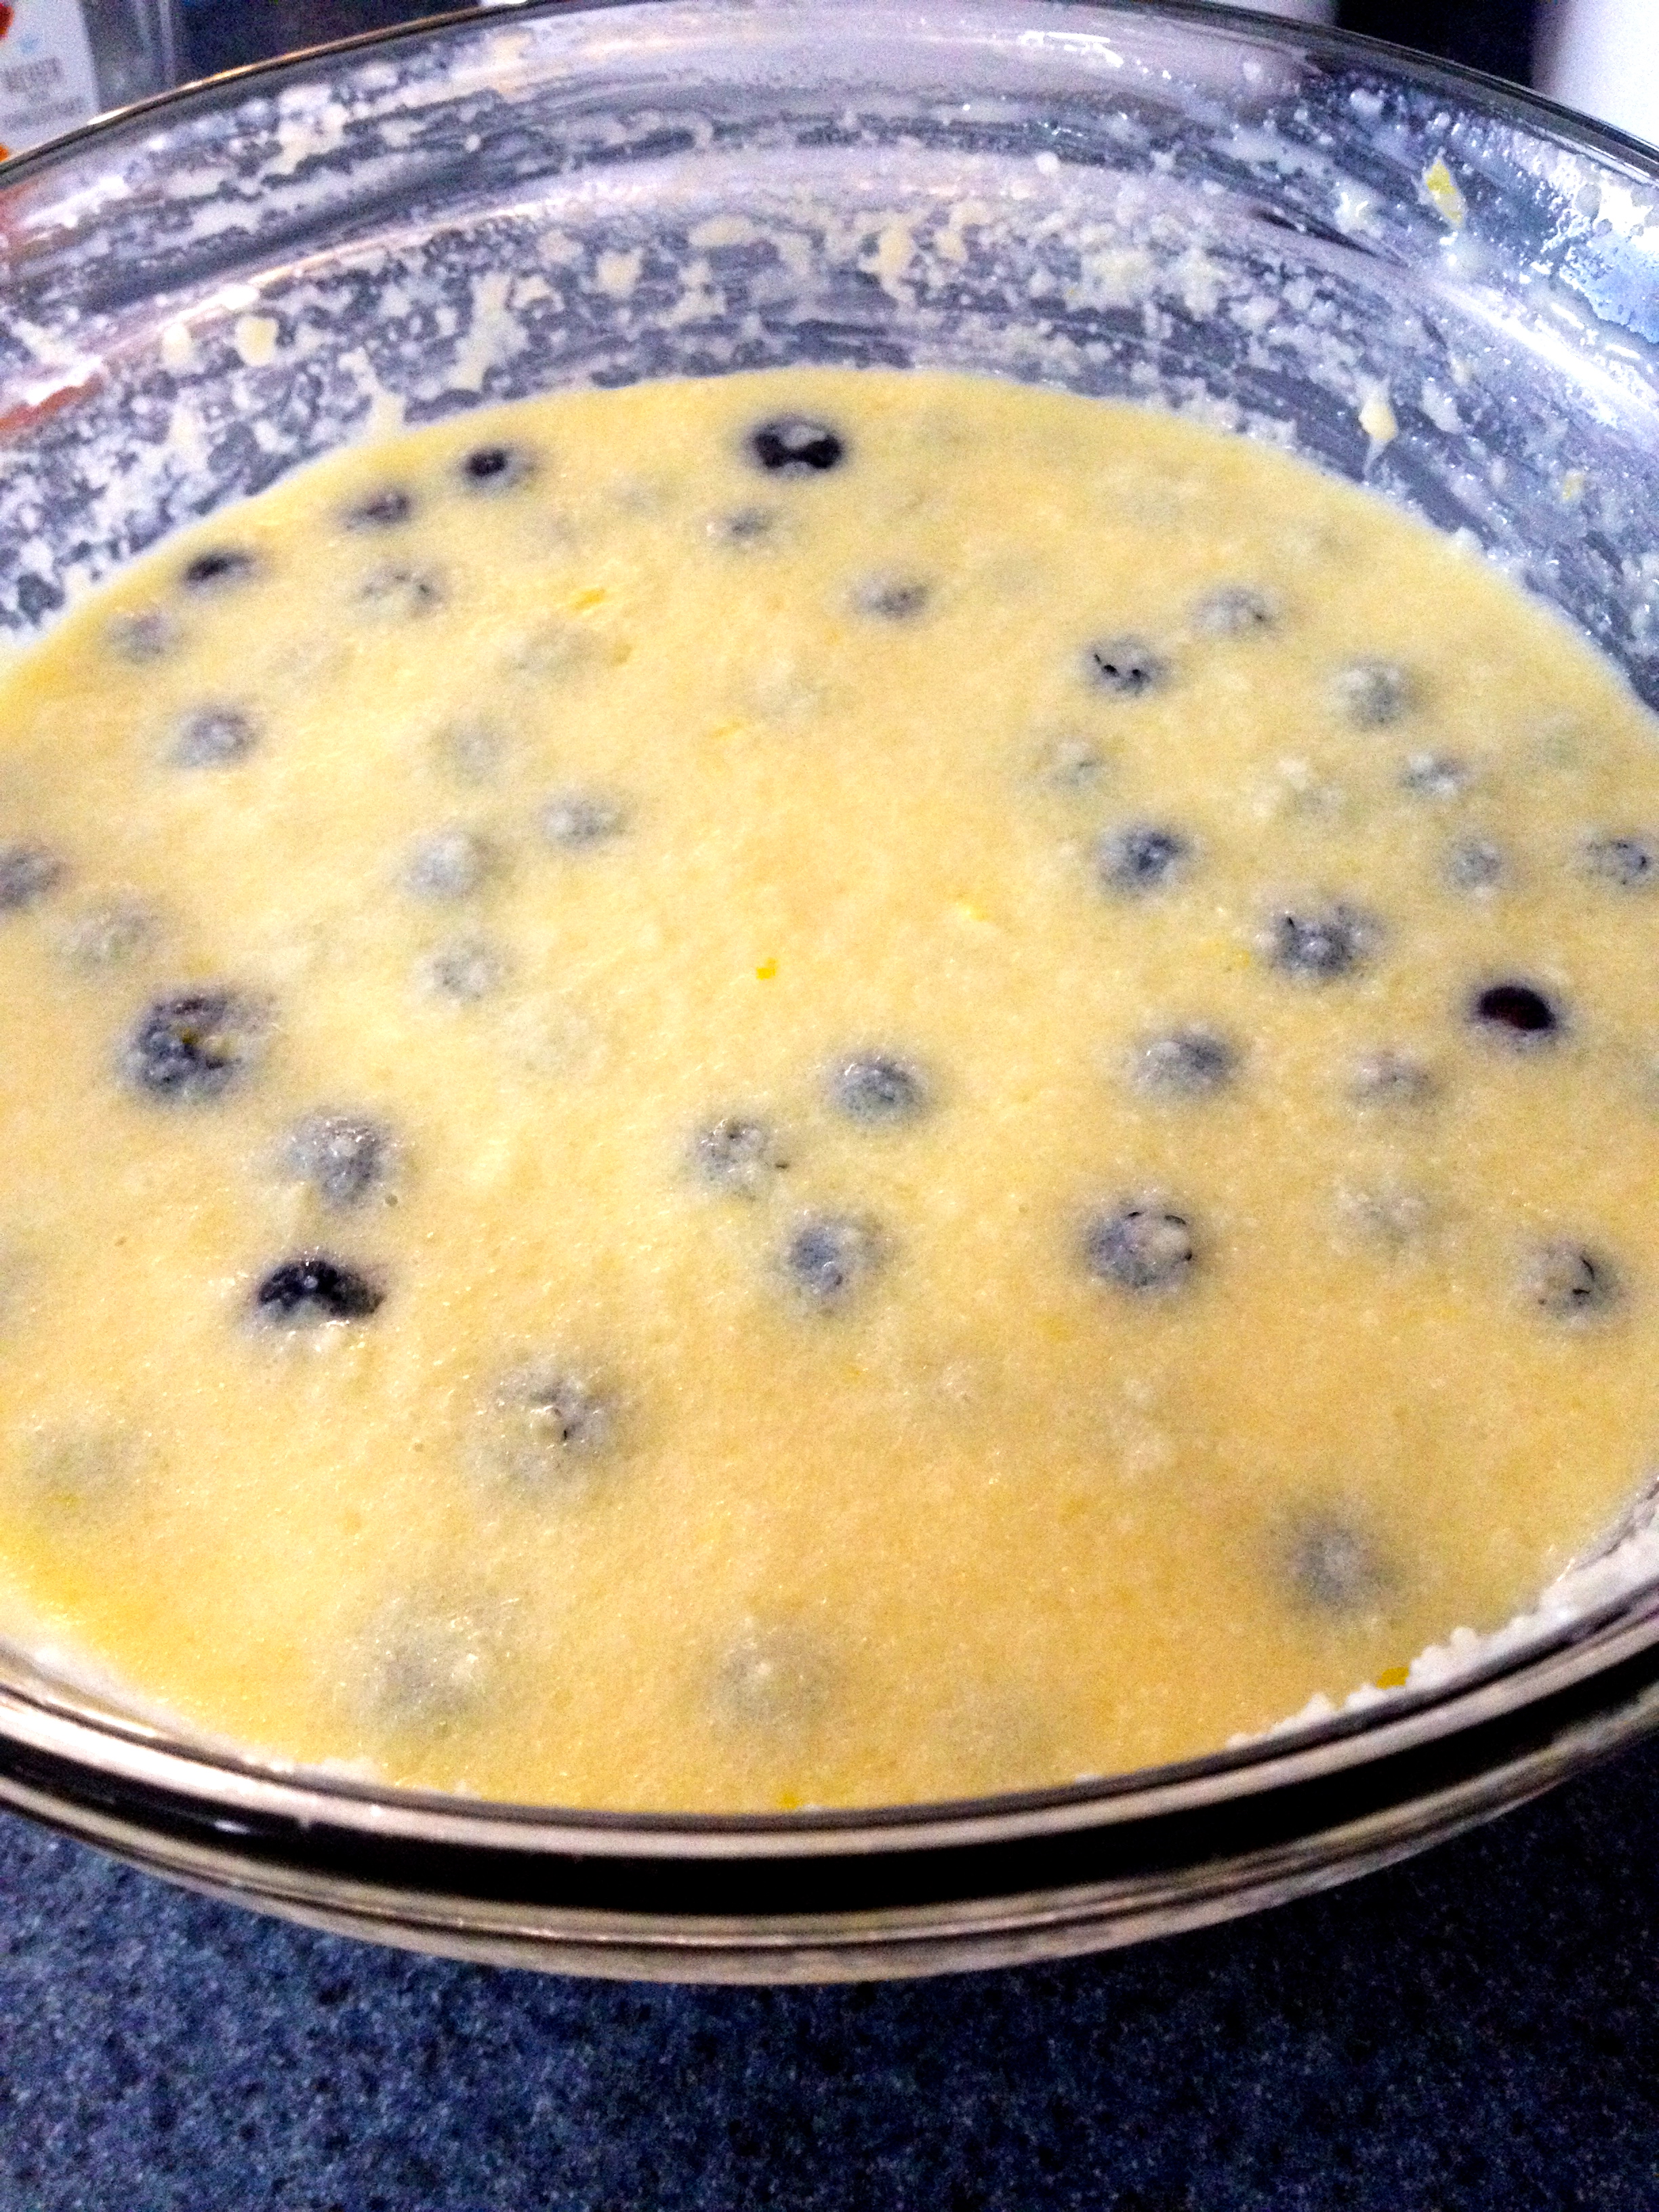
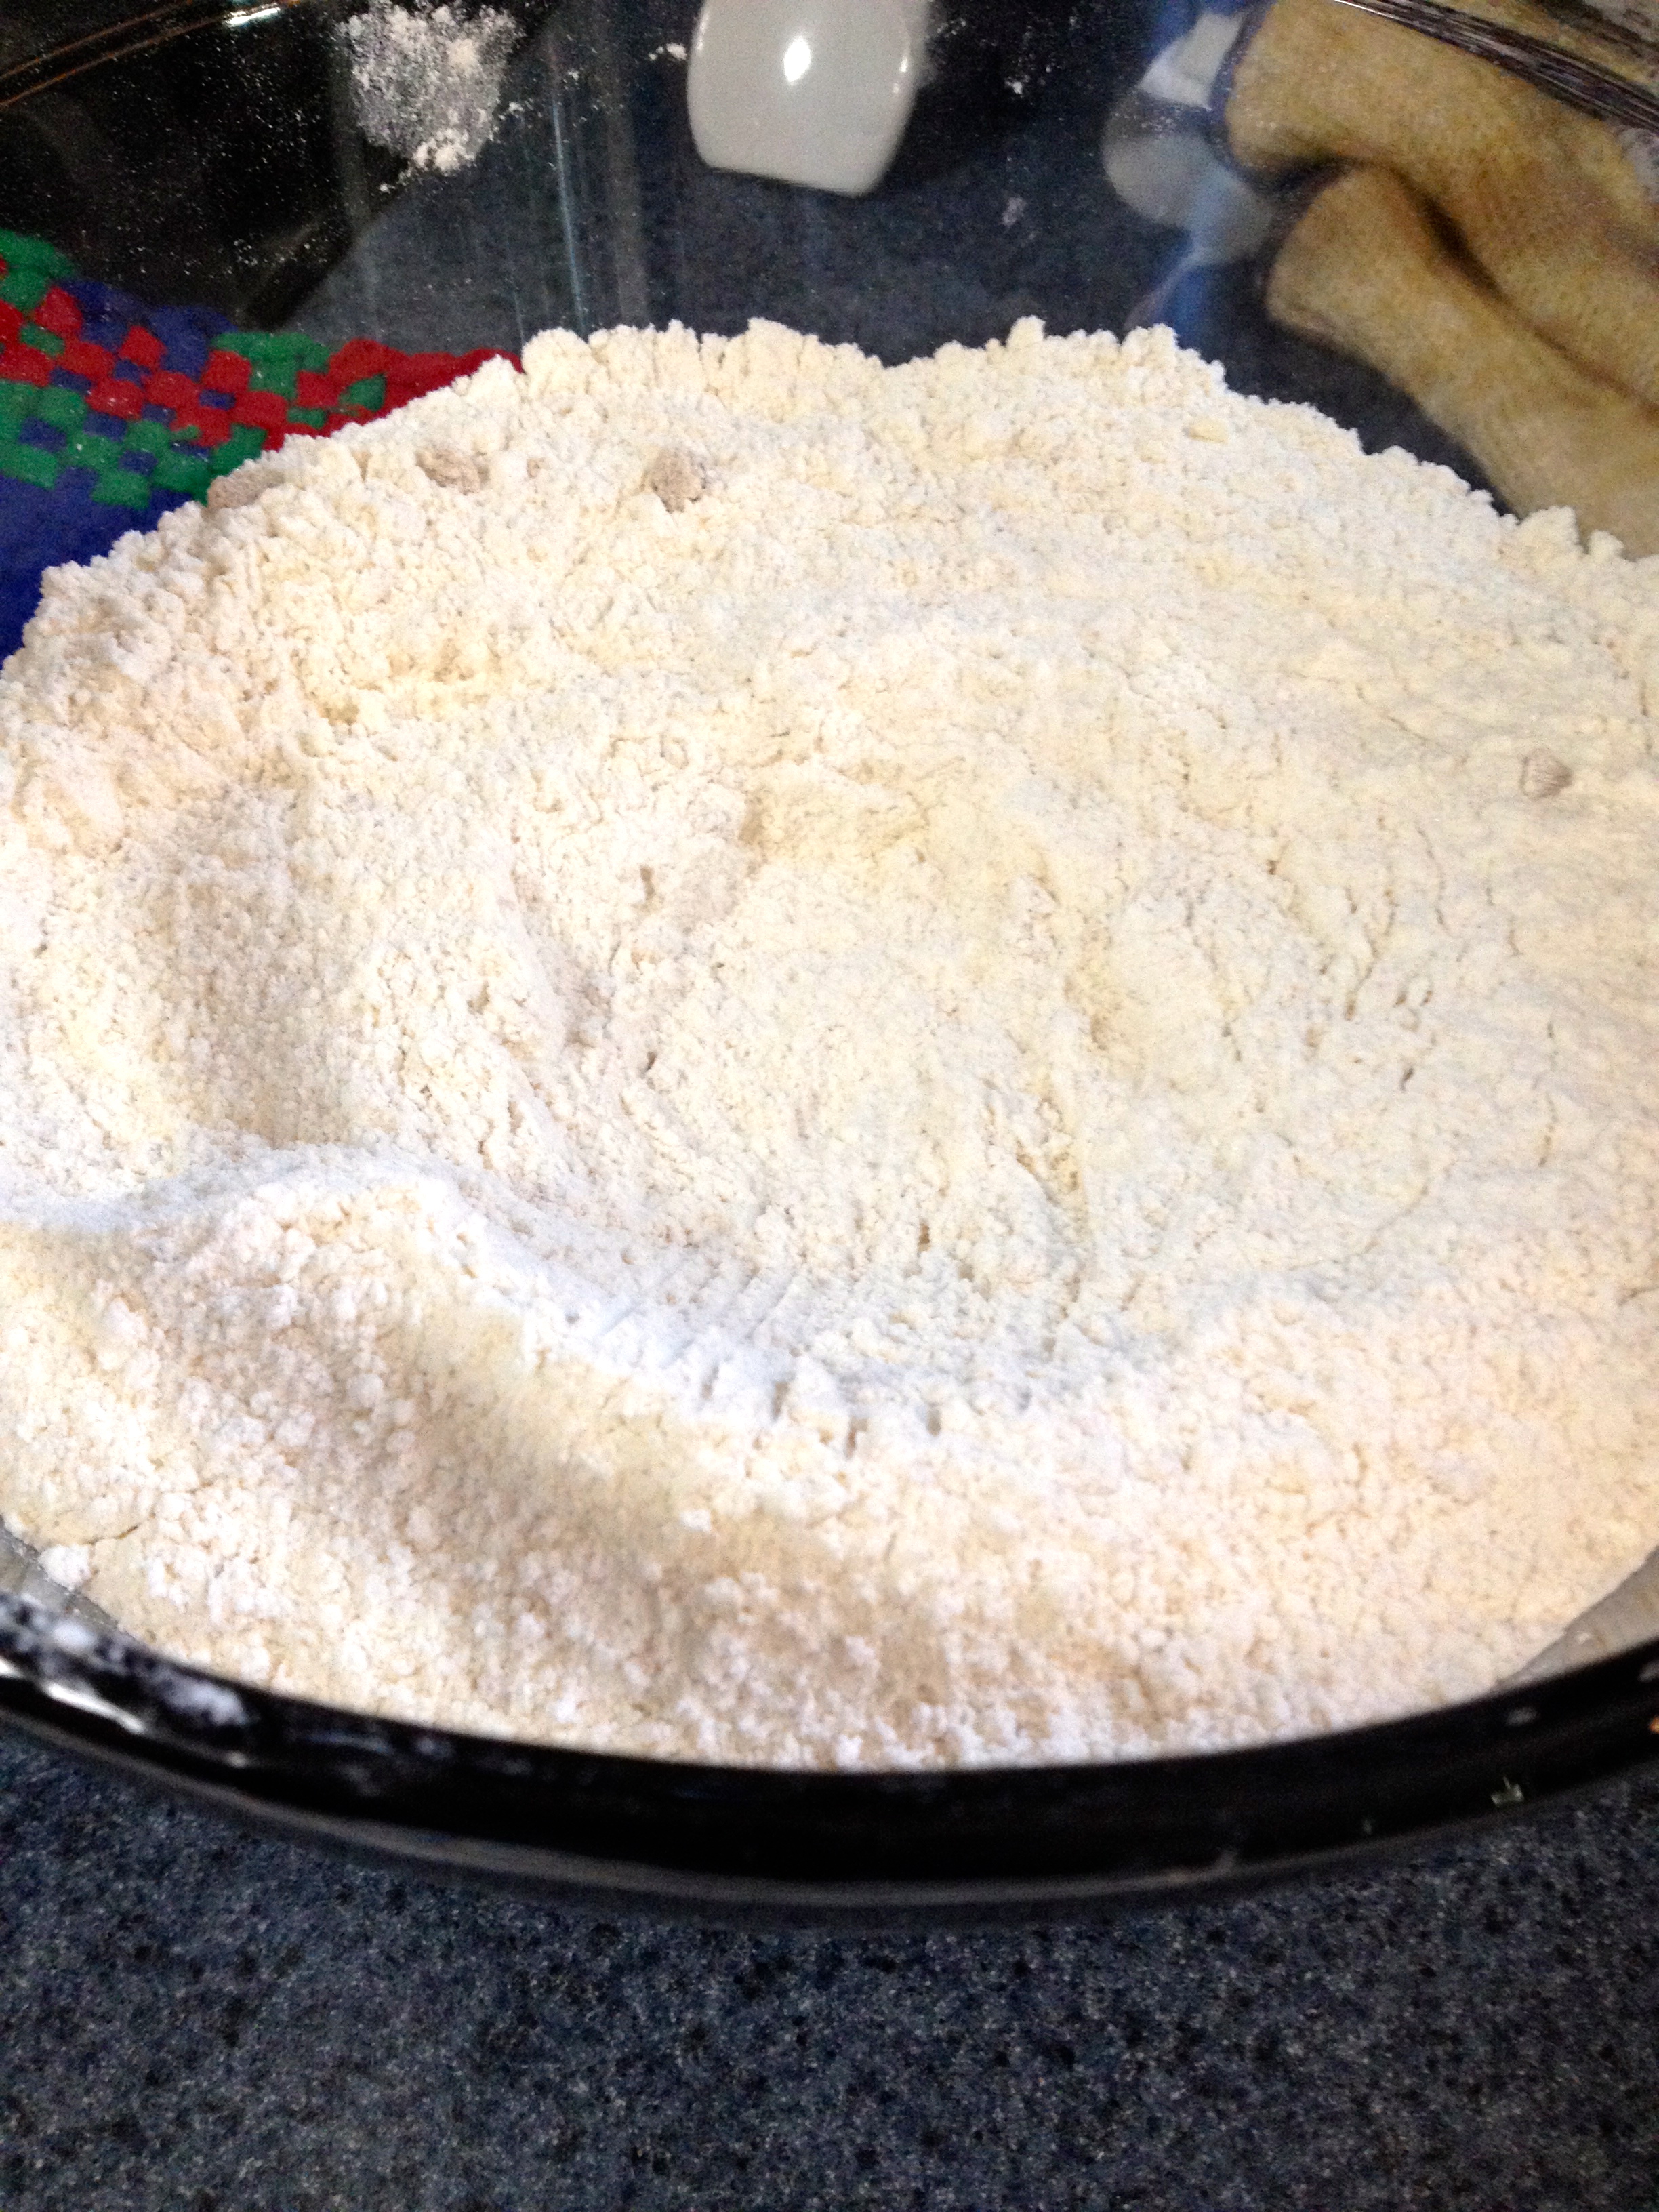
Now, in a large mixing bowl, combine the flour, sugars, baking powder, and salt. Make a well in the center of the dry ingredients, into which you will pour the wet ingredients.
Here comes the important part- pour the wet ingredients into the well of dry ingredients, and then stir gently, just until the ingredients are mixed and no further. Really, only 15 or so turns with the spoon should be sufficient. Just get the dry ingredients fully moistened.
Here’s the food science part of this: When water comes in contact with flour, two proteins (gliadin and glutenin) in flour combine to form the protein complex known as gluten. This gluten formation will lead to a sticky, doughy mass that makes great bread- but not great muffins. If you stir the mixture too much before baking it, the gluten formation will create chewy, hugely risen muffins with holes in them. Instead, this minimal mixing (known as the “Muffin Method”) will create soft, cakey, perfect muffins.
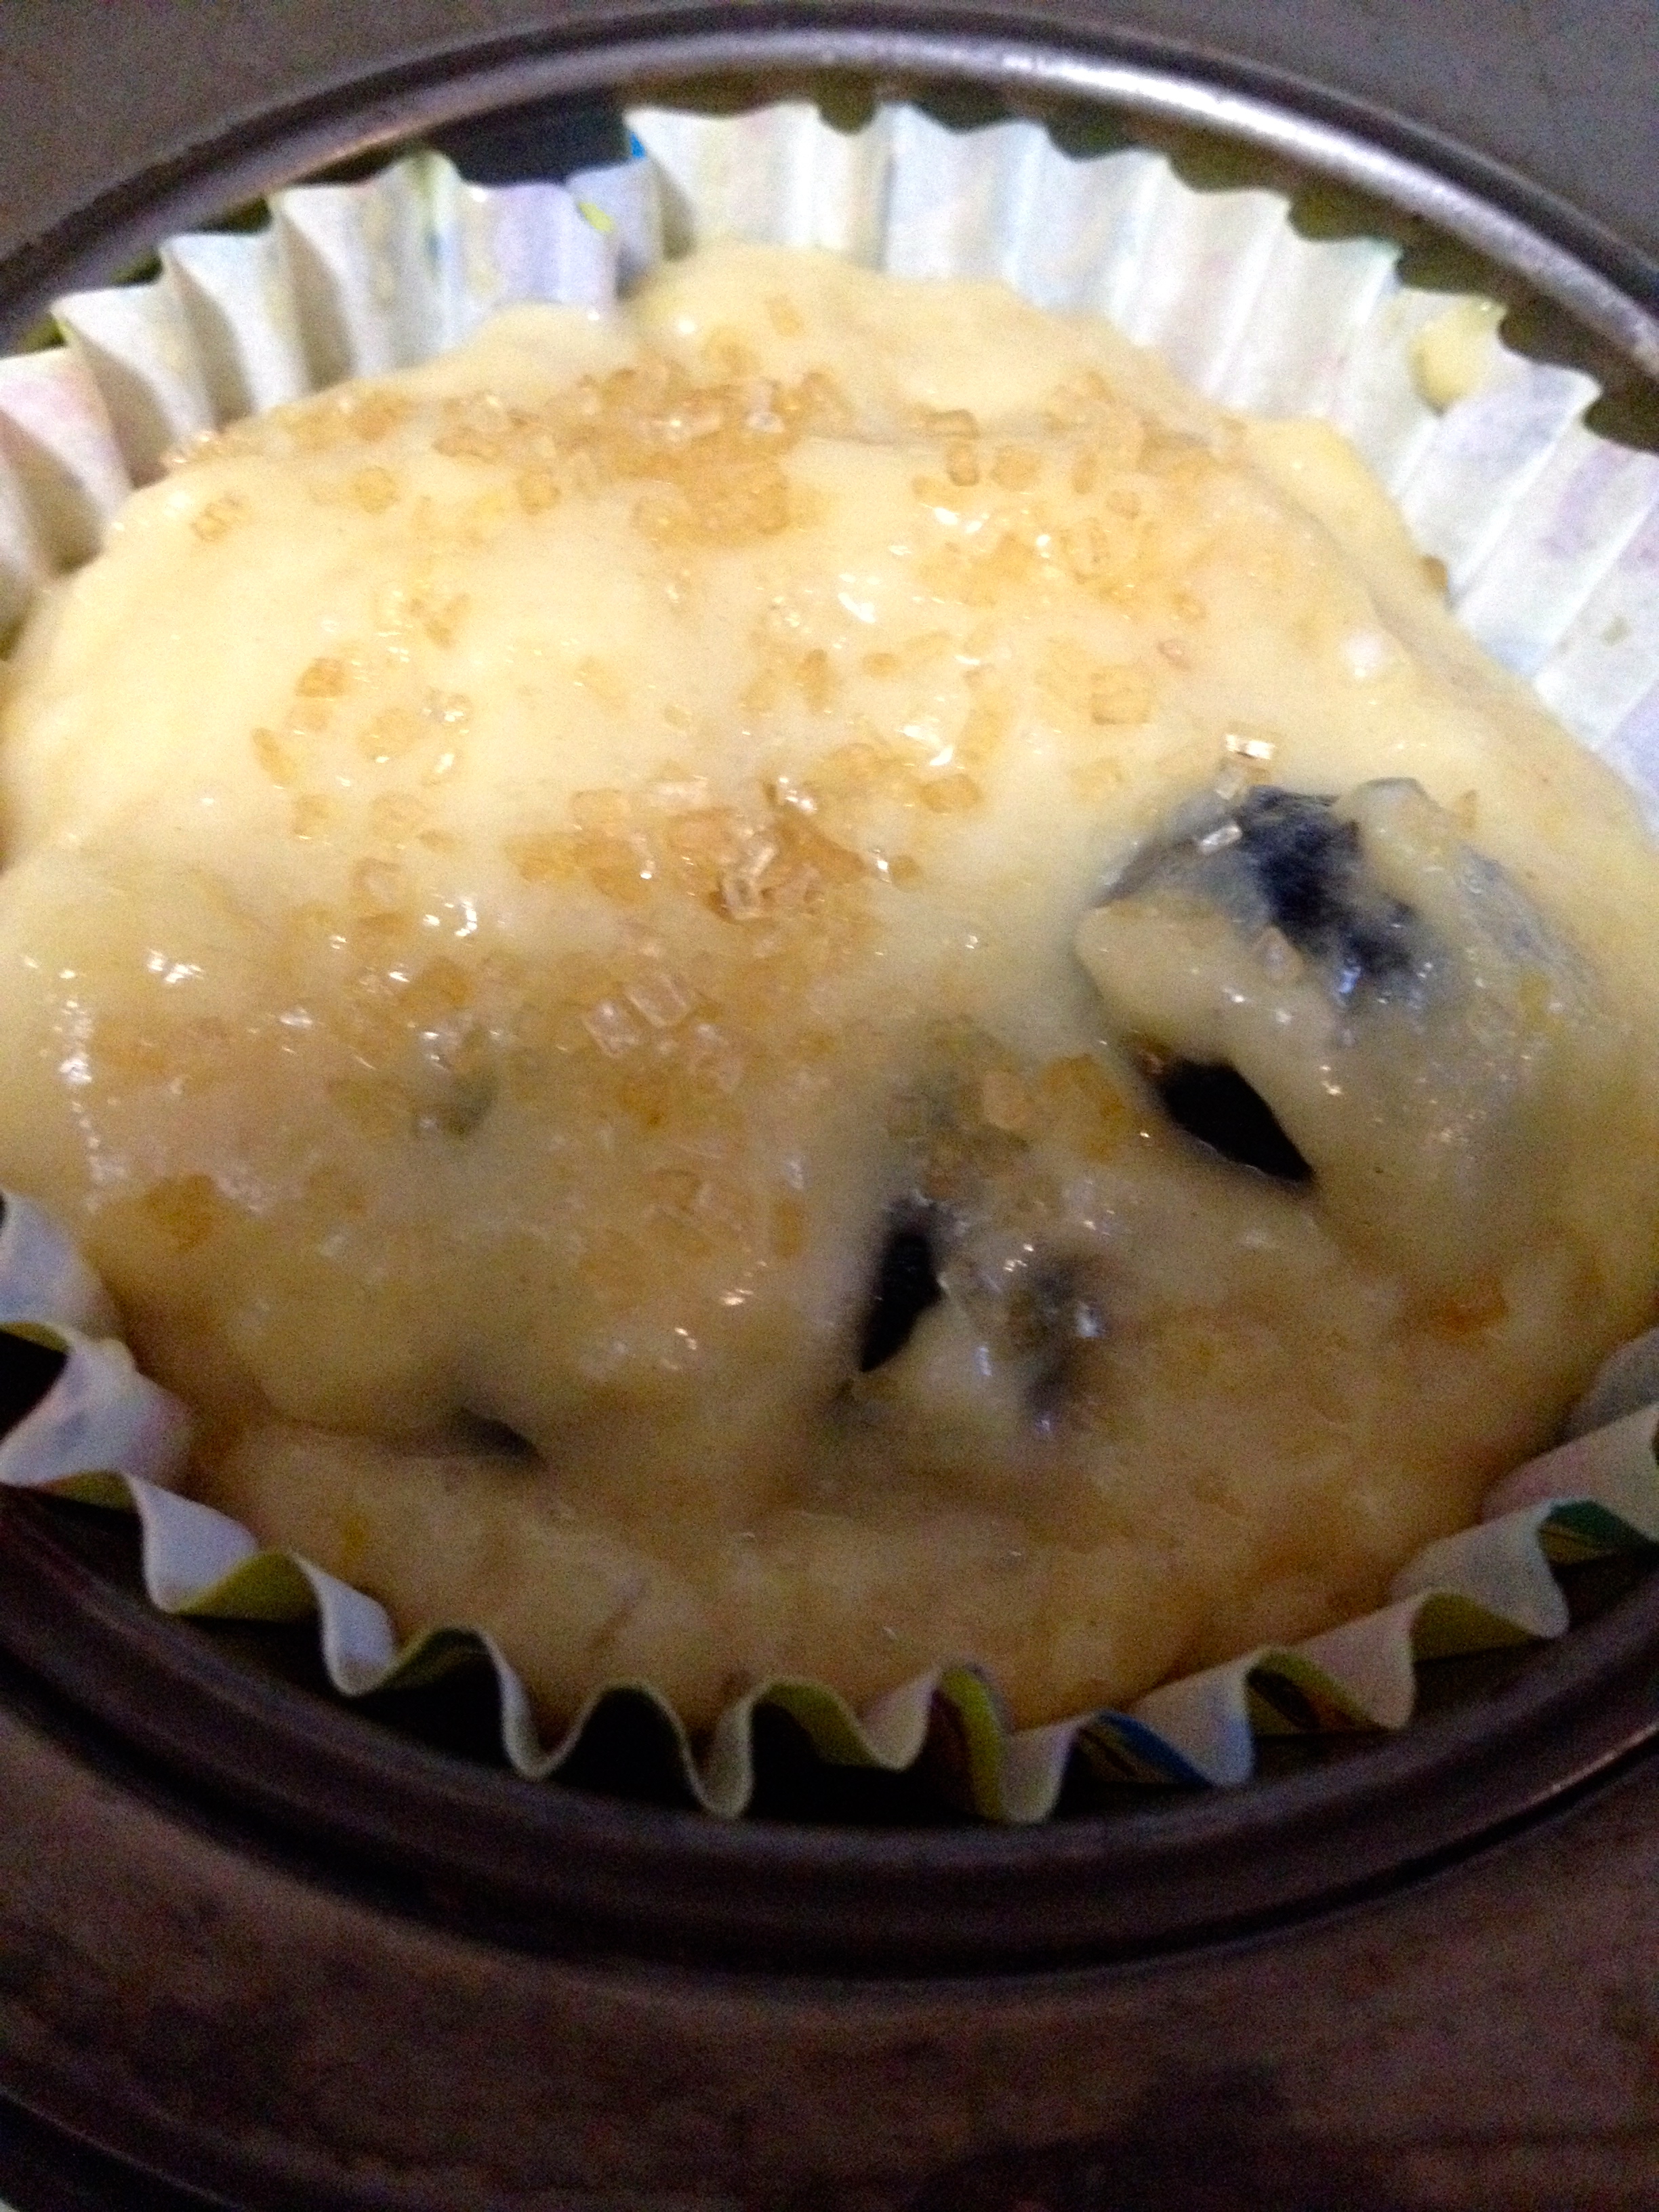
Now, portion the muffin mix into muffin tins. This recipe will make about 24 muffins, give or take a few. Sprinkle each portion of batter with a generous helping of raw sugar, or really whatever sugar you prefer. This will give the muffin tops a great sweetness and crunch to offset the tanginess of the lemon and blueberries.
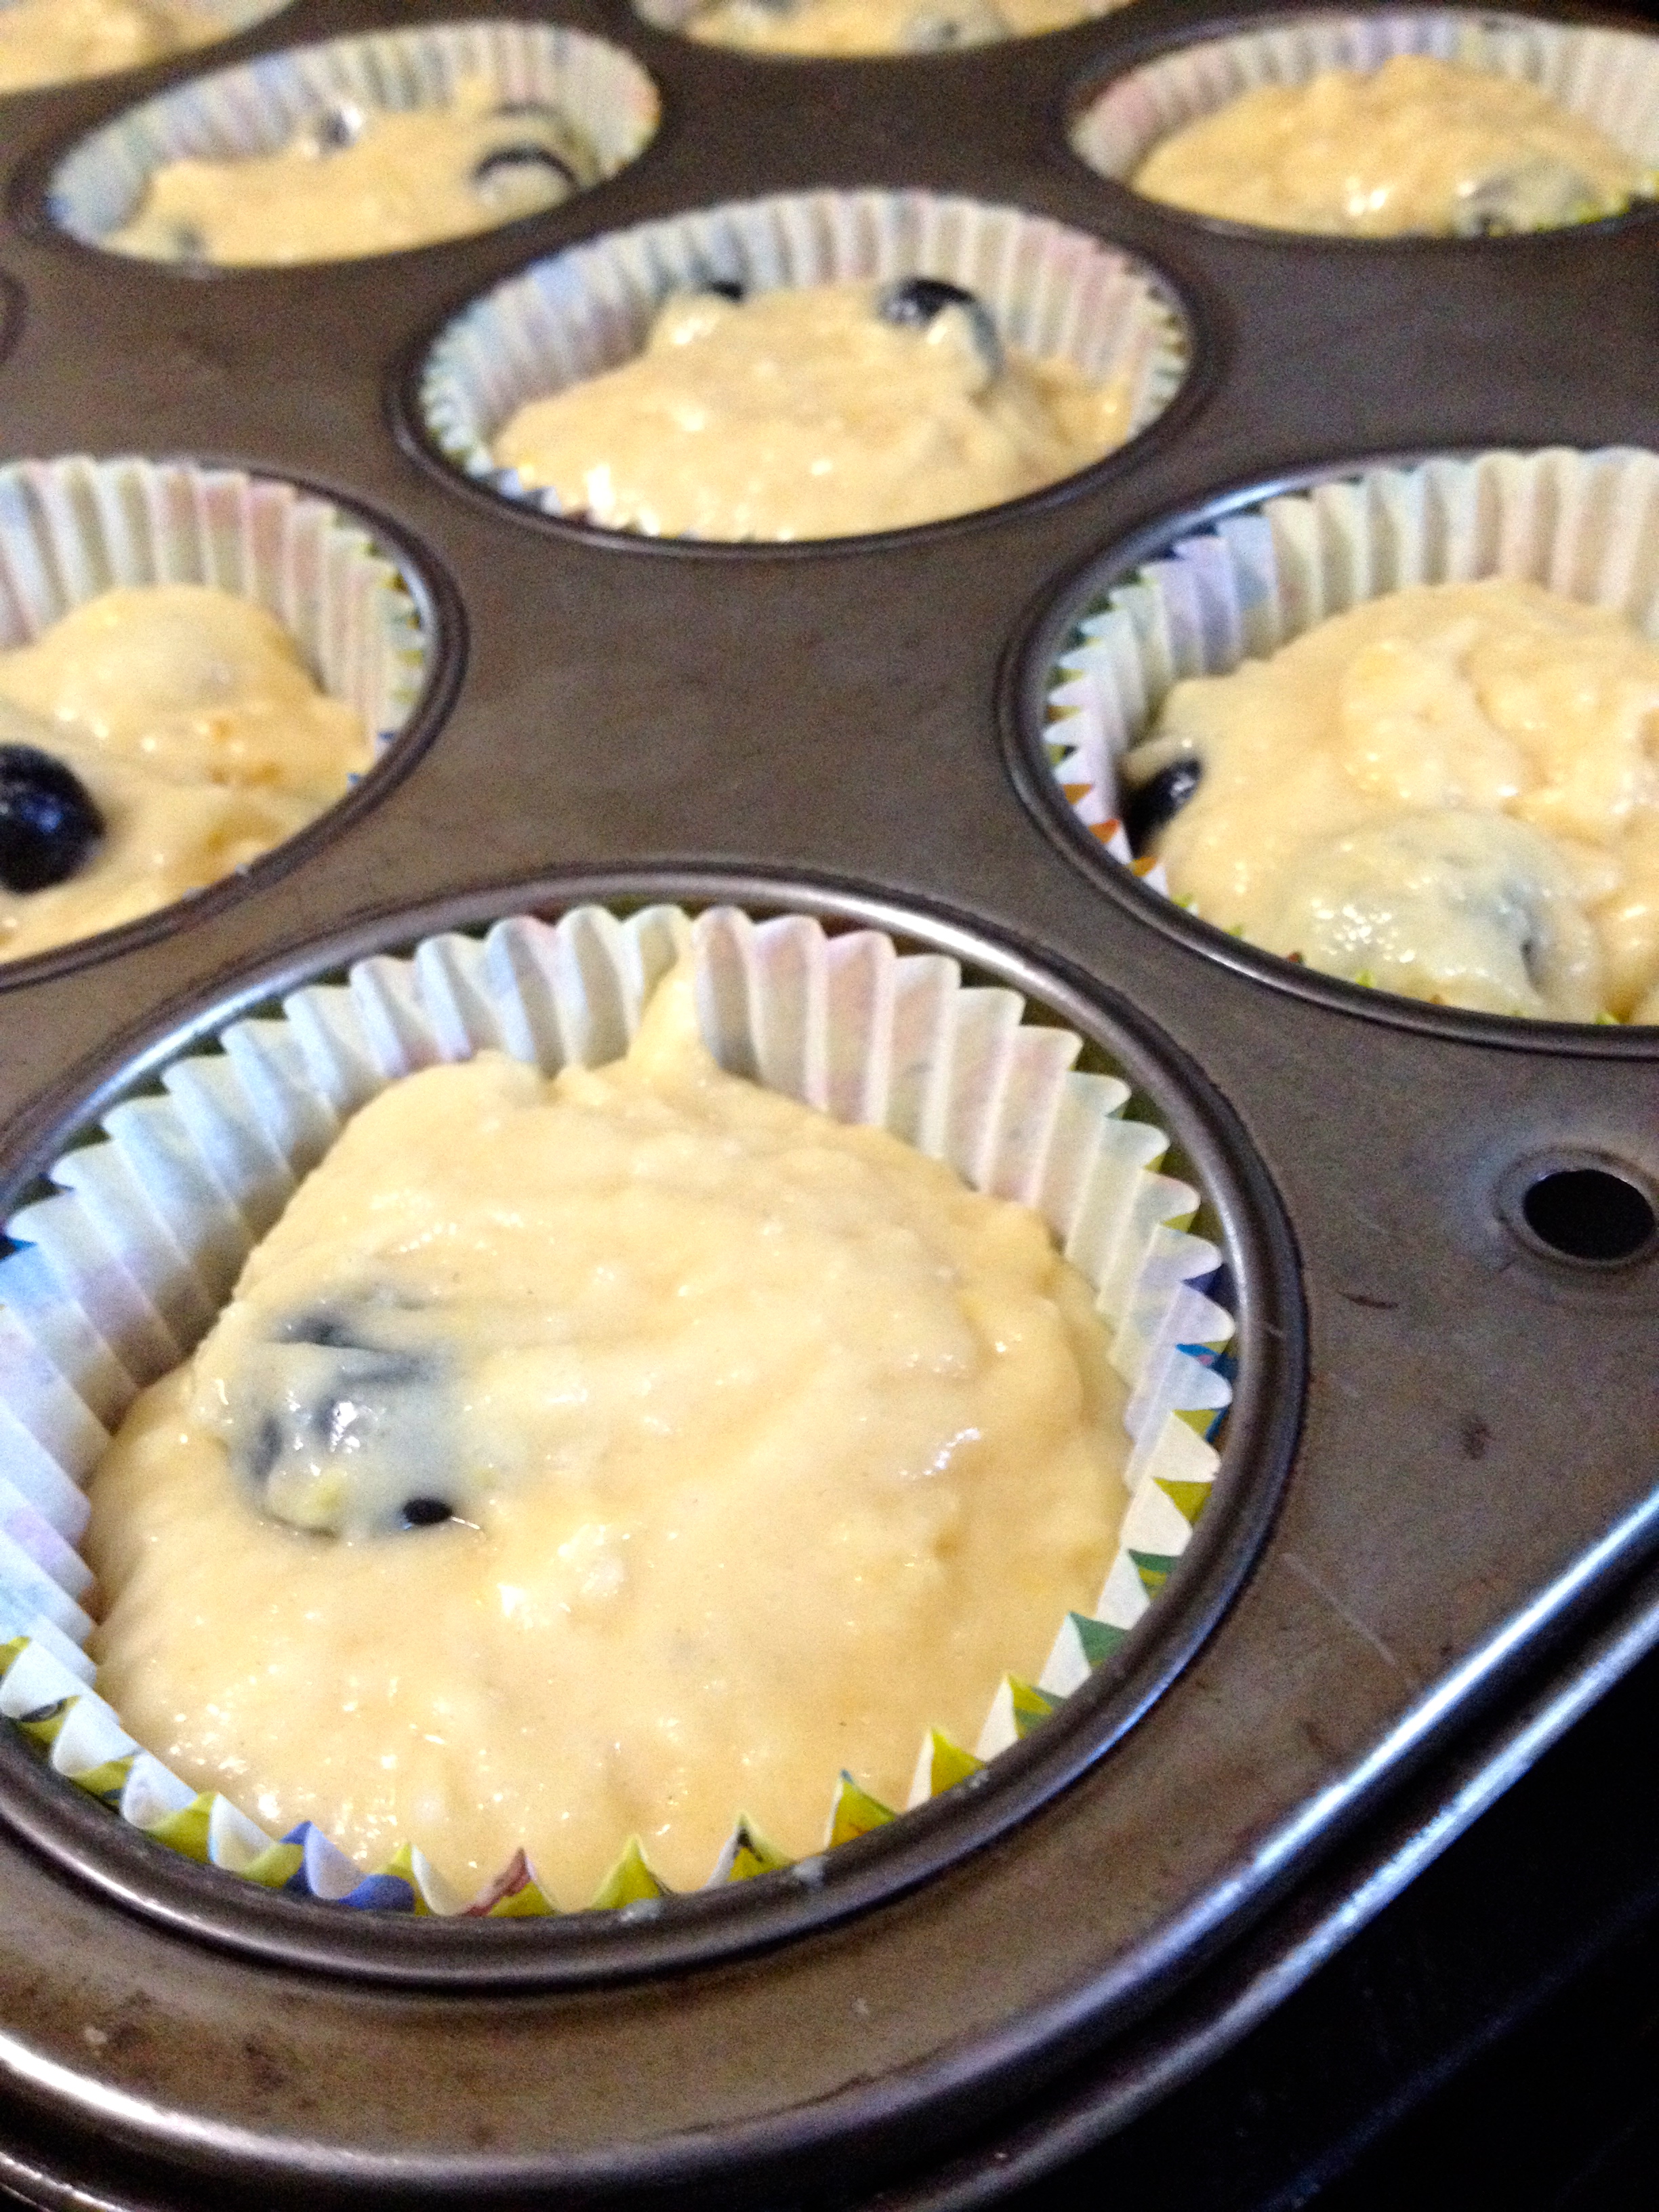
Put them in the oven and immediately drop the oven temperature to 375ºF. This lower oven temperature will prevent uneven browning and overbaking, but the lingering heat will still allow the muffin tops to become firm. Bake the muffins for about 25 minutes, and then remove them from the oven and let them sit in the muffin tins for about 2 minutes. Then, dump them out onto a wire cooling rack to ensure that they get full air circulation during the whole cooling process, to prevent a soggy muffin bottom.
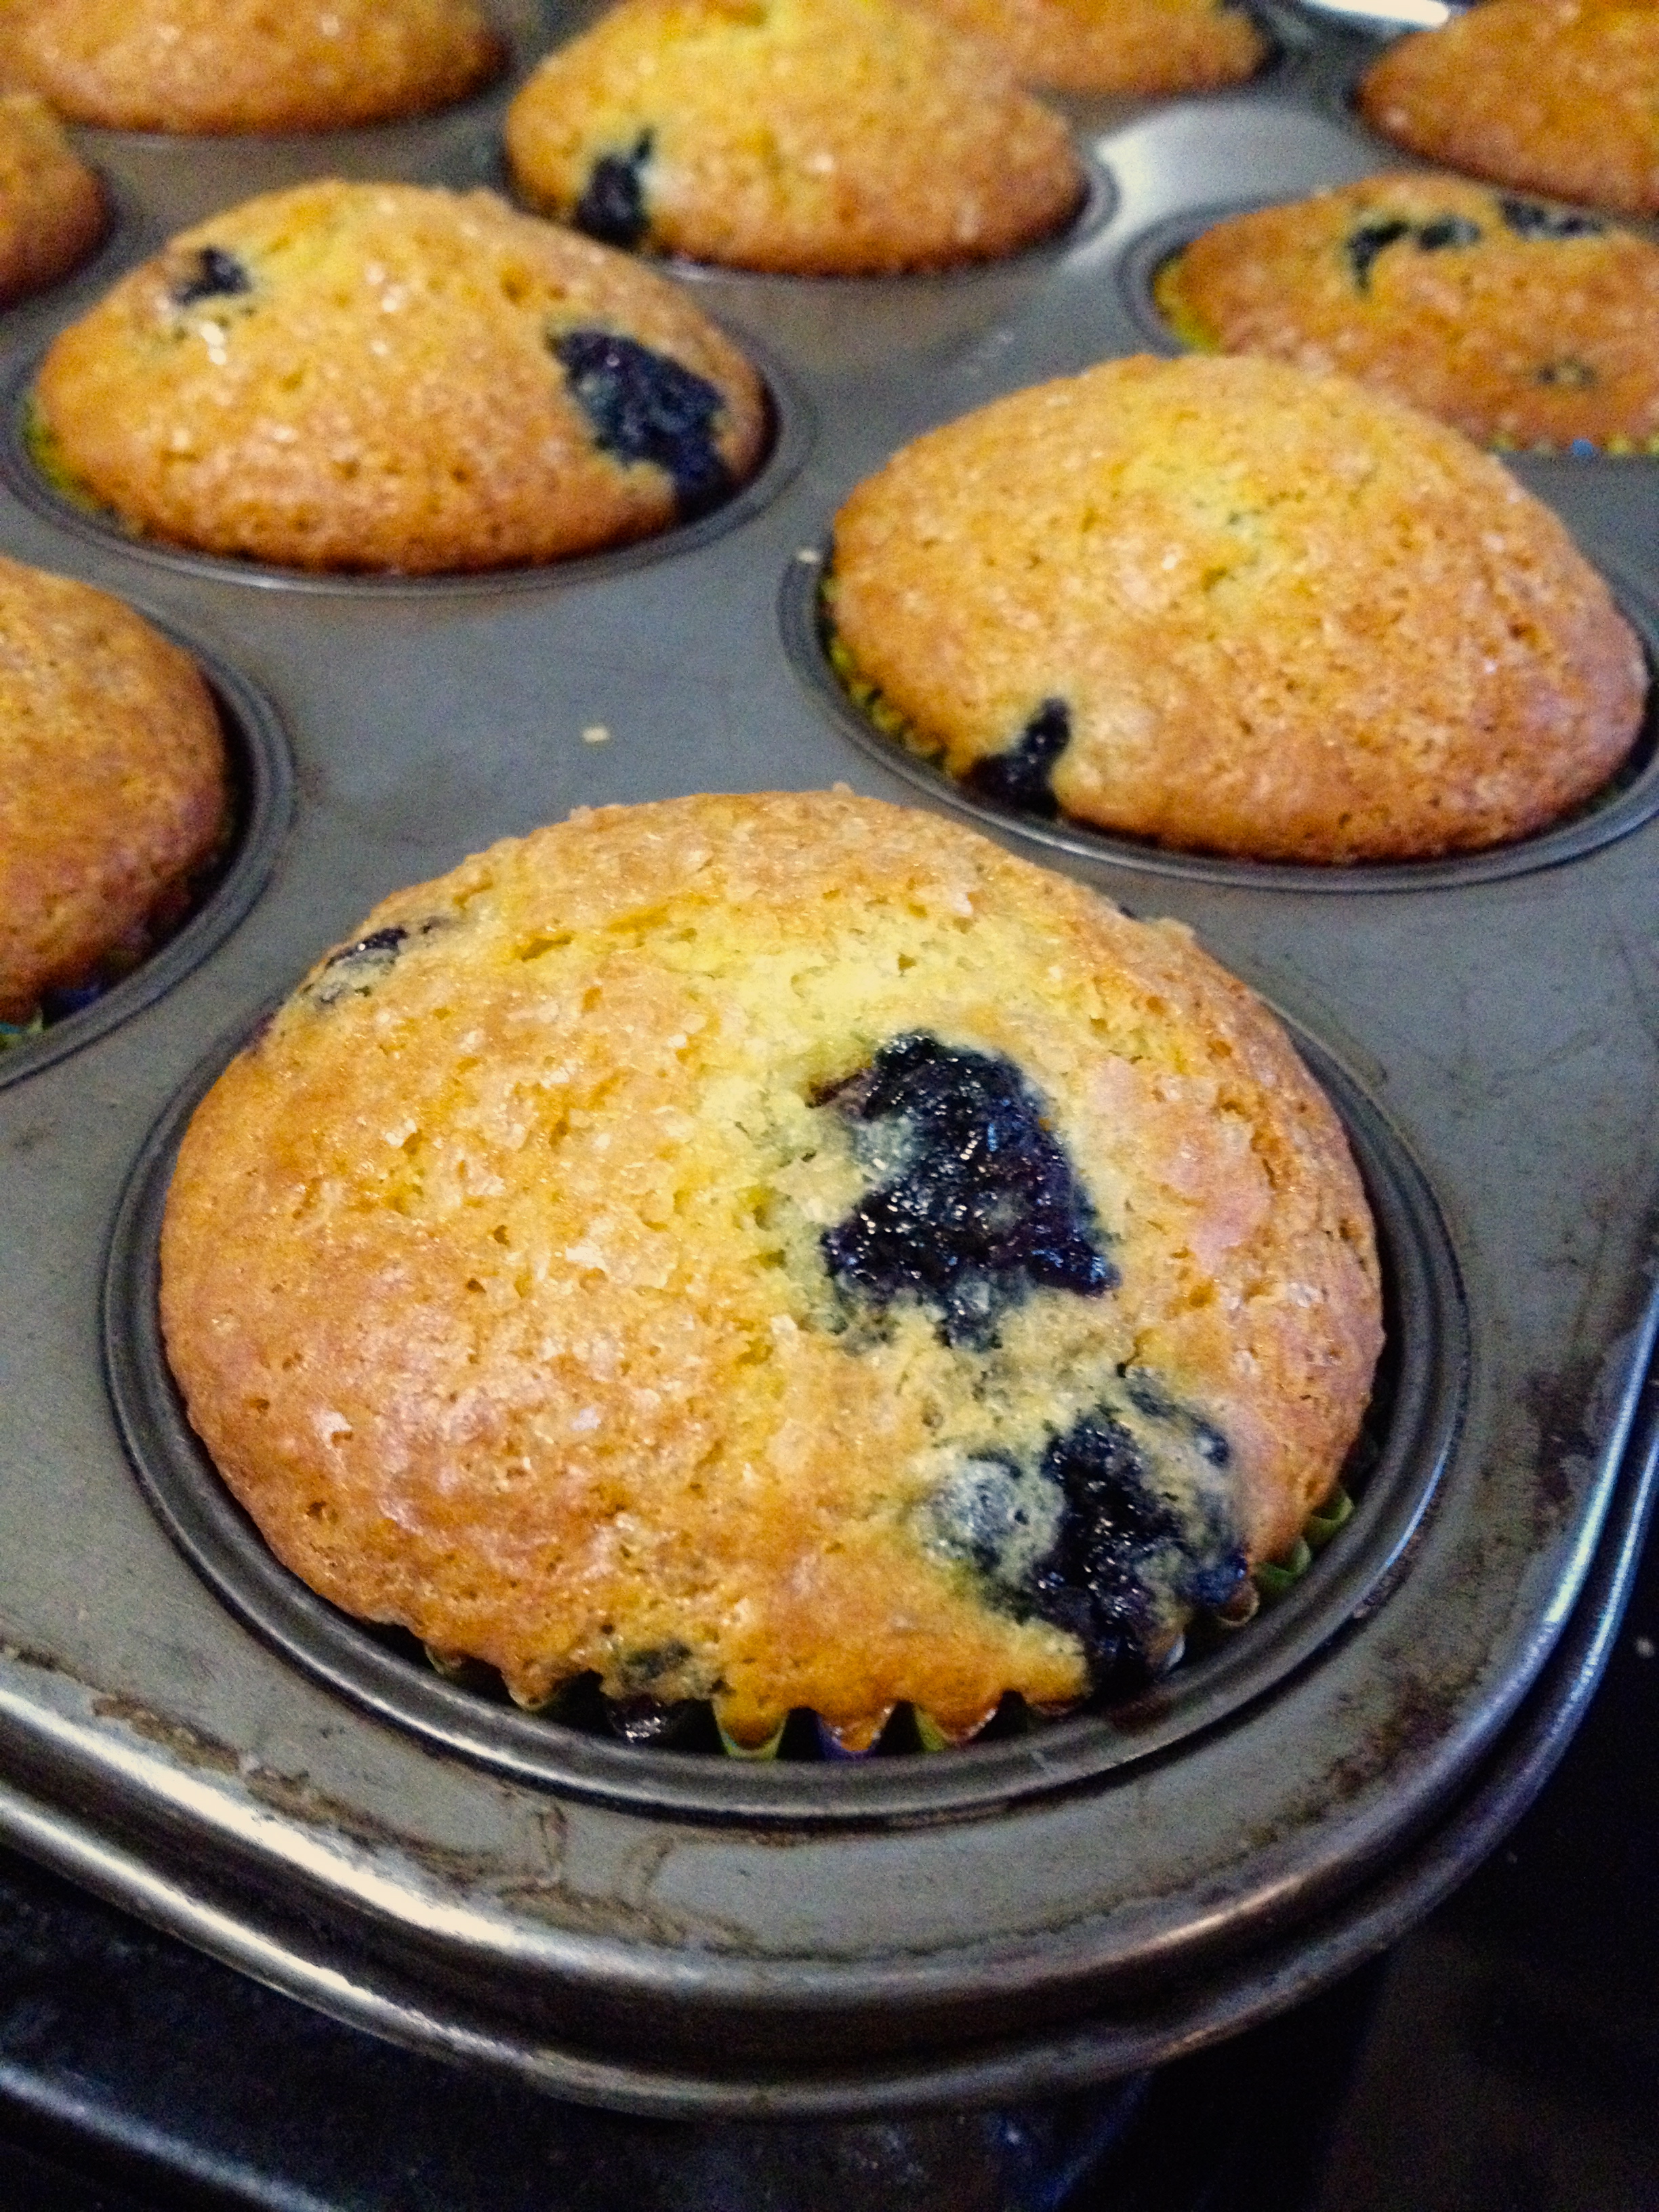
And then you’re free to eat! These are absolutely delicious served warm, but are also great as a snack the next day. The flavors are light and sweet, and the fresh fruit gives these muffins a pop of freshness and tartness that pairs perfectly with the crispy sugar on top. I hope you give these muffins a try, because they are soooo yummy! Props to Ina Garten for being a wonderful baker and chef, and I hope you enjoy her recipe as much as I did. Happy baking!
Sunday Special Coffee Cake
Hello, everyone! Happy December! We had our first big snowfall where I live recently, and I’m loving it! Not only is it fun to play in, it gives me an excuse to stay inside and bake if I don’t feel like going outside in the cold. Today’s recipe is an oldie but goodie- Sunday coffee cake, originally created by McCall’s Great American Recipe Card Collection. This recipe came out when my mom was a little girl, and it’s still very popular in my family! It’s the perfect warm, sweet, light cake with the cinnamon topping swirled throughout the cake, crisp on the top and soft on the inside. Everything good about cake is in this recipe! Here are the ingredients:
Topping:
- 1/2 cup granulated sugar
- 1/4 sifted all-purpose flour
- 1/4 cup butter or margarine, softened
- 1 tsp ground cinnamon
Cake Batter:
- 1 egg
- 3/4 cup granulated sugar
- 1/3 cup melted butter or margarine
- 1/2 cup milk
- 1 tsp vanilla extract
- 1 1/2 cup all-purpose flour
- 2 1/2 tsp baking powder
- 1/2 tsp salt
First, let’s make the topping. Put all the topping ingredients into a small bowl, and mix it up with your hands so that all of the ingredients are combined and the topping is crumbly.

Set the topping aside and start on the batter. First, crack the egg into a small bowl. Using either a hand mixer or a little rotary beater, beat the egg until it’s frothy.
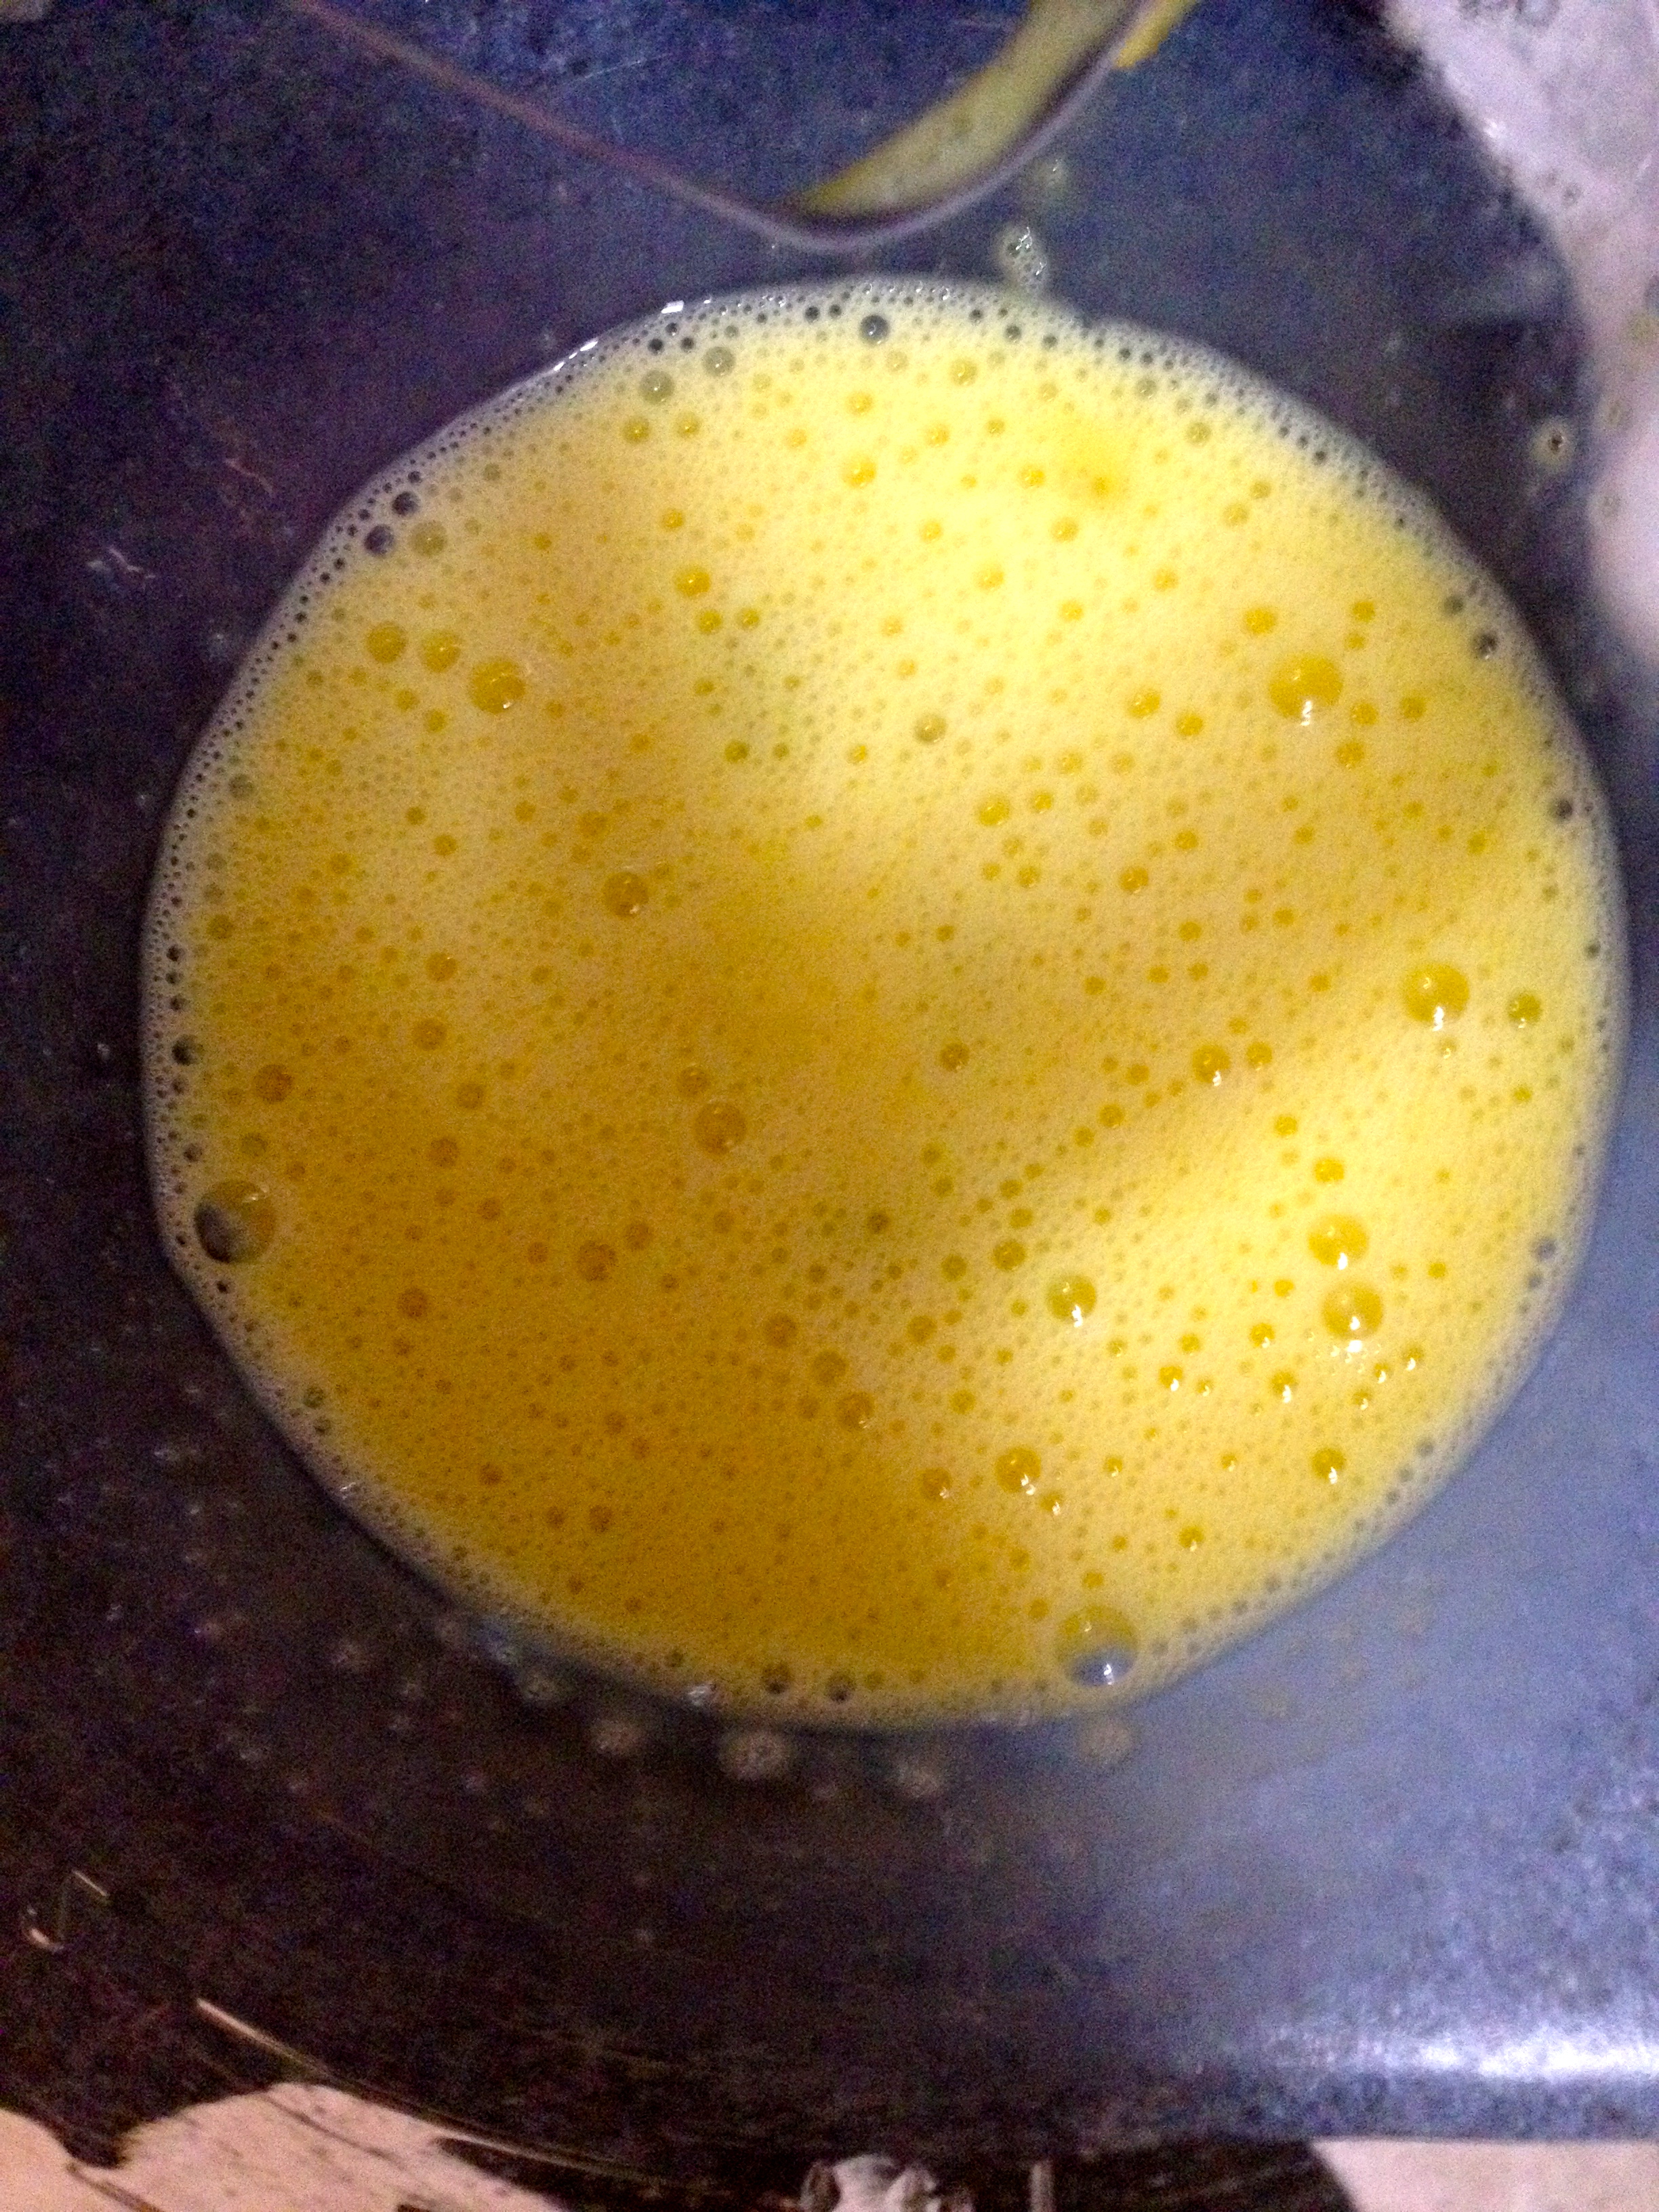
Now, add in your sugar and butter, and mix until the ingredients are fully combined. Tip: If your butter is still hot out of the microwave when you’re ready to add it, put a little of the butter in and stir it around before adding all of the hot butter to the mixture. If you add all the hot butter in at once, you might end up with a cooked egg. Now, add the milk and vanilla in and mix well. The batter at this point will be very fluid.
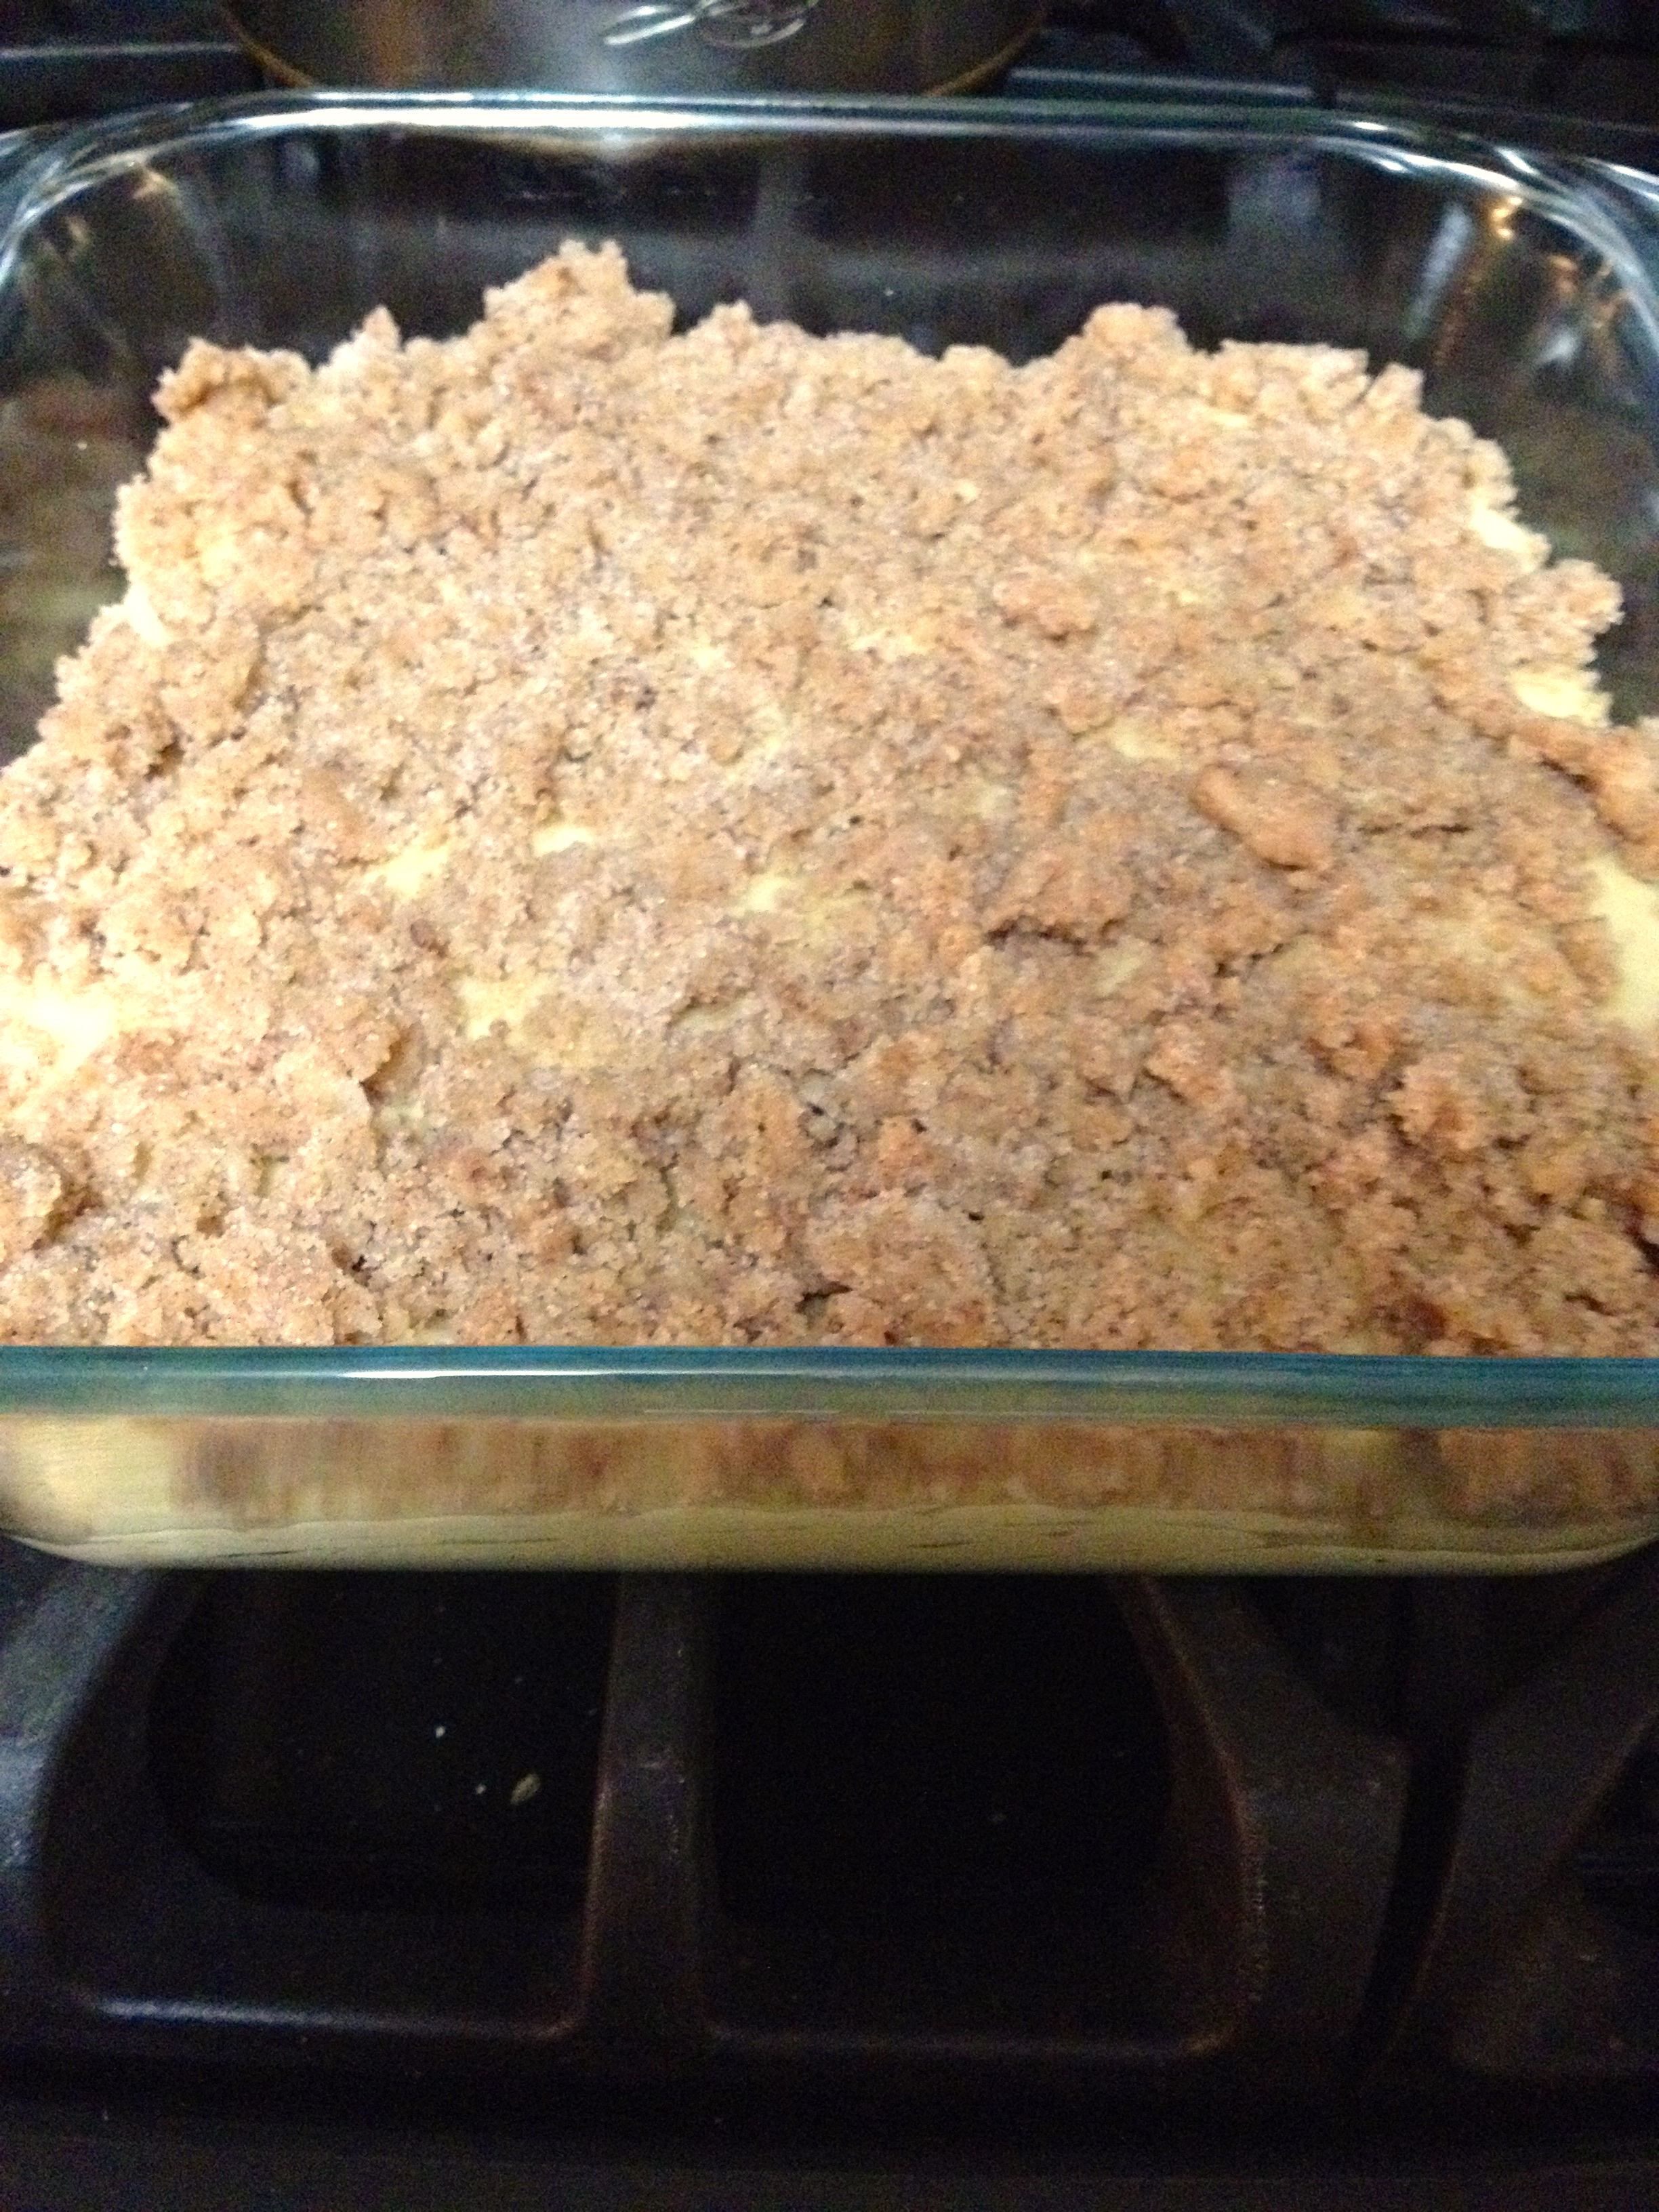
Add the flour, baking powder, and salt, and mix well until everything is fully combined. Pour the batter into a greased 8x8x2″ pan, sprinkle evenly with the topping, and bake at 375ºF for 25-30 minutes, or until a toothpick inserted in the middle comes out clean.
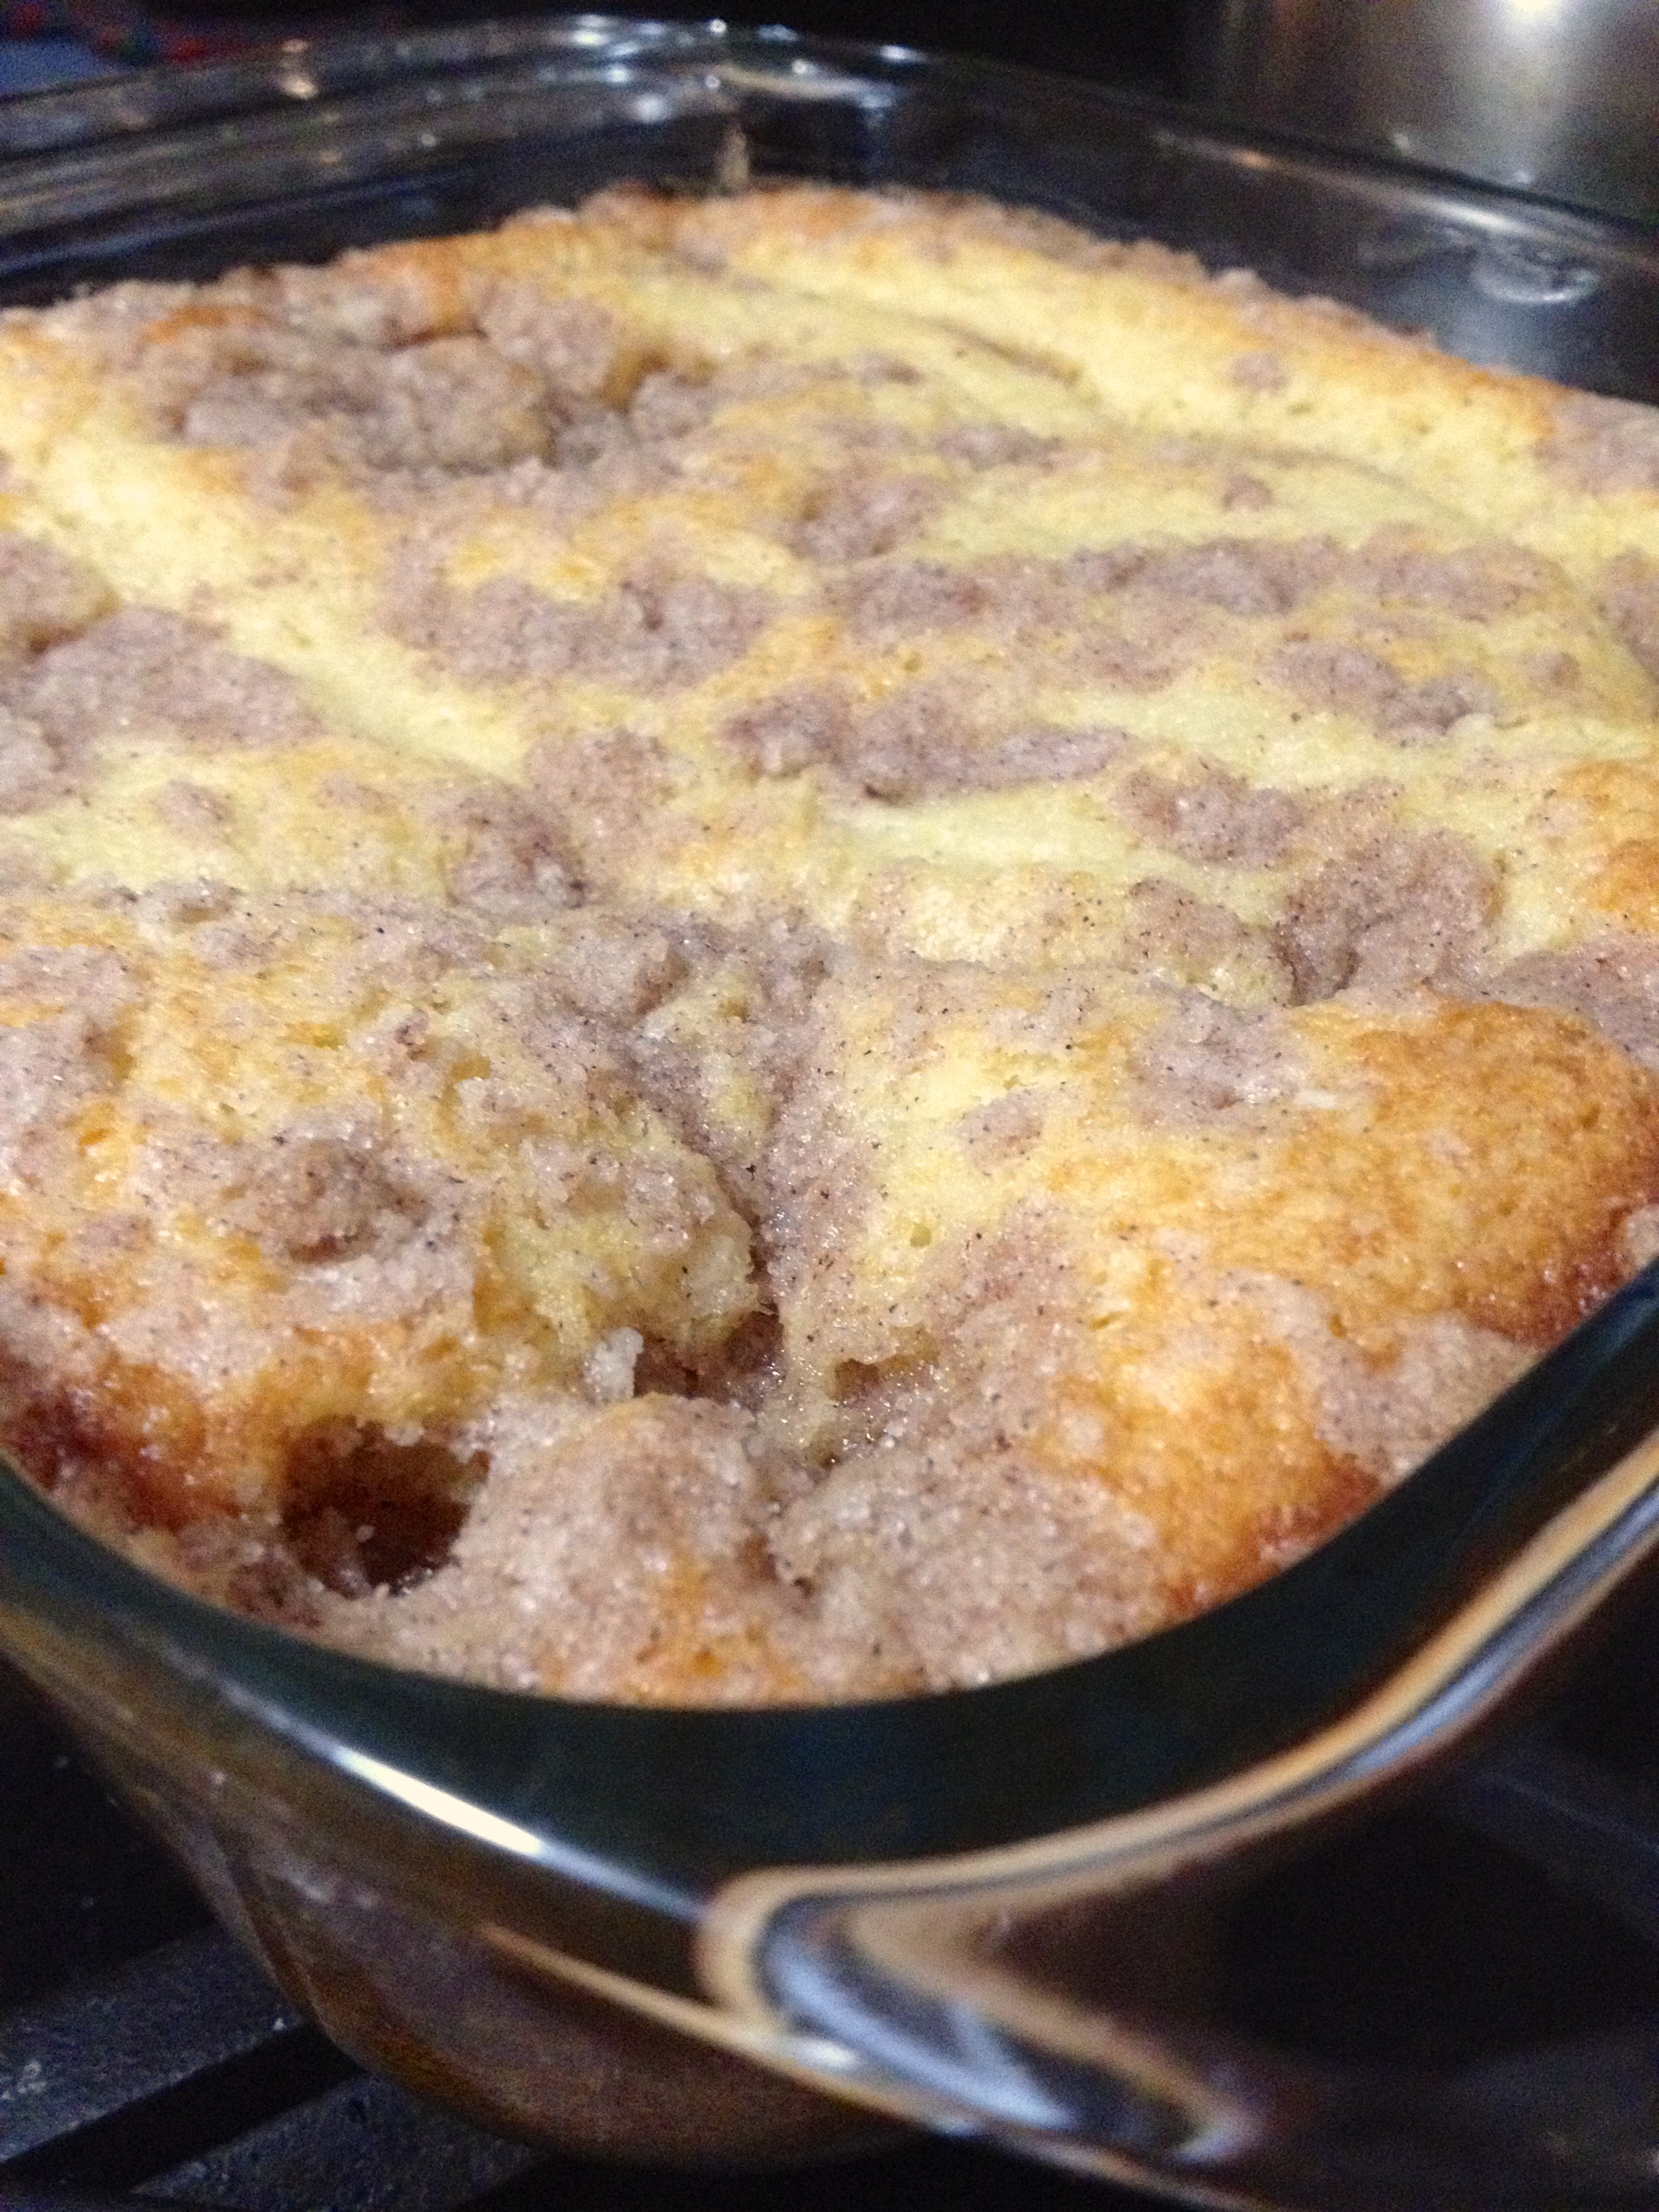
When it’s done, you can either cool it or serve it hot. My family refused to let me cool the cake because they wanted to eat it then, and it tasted great! The topping melted down into the cake, and made delicious cinnamon swirls in the cake.
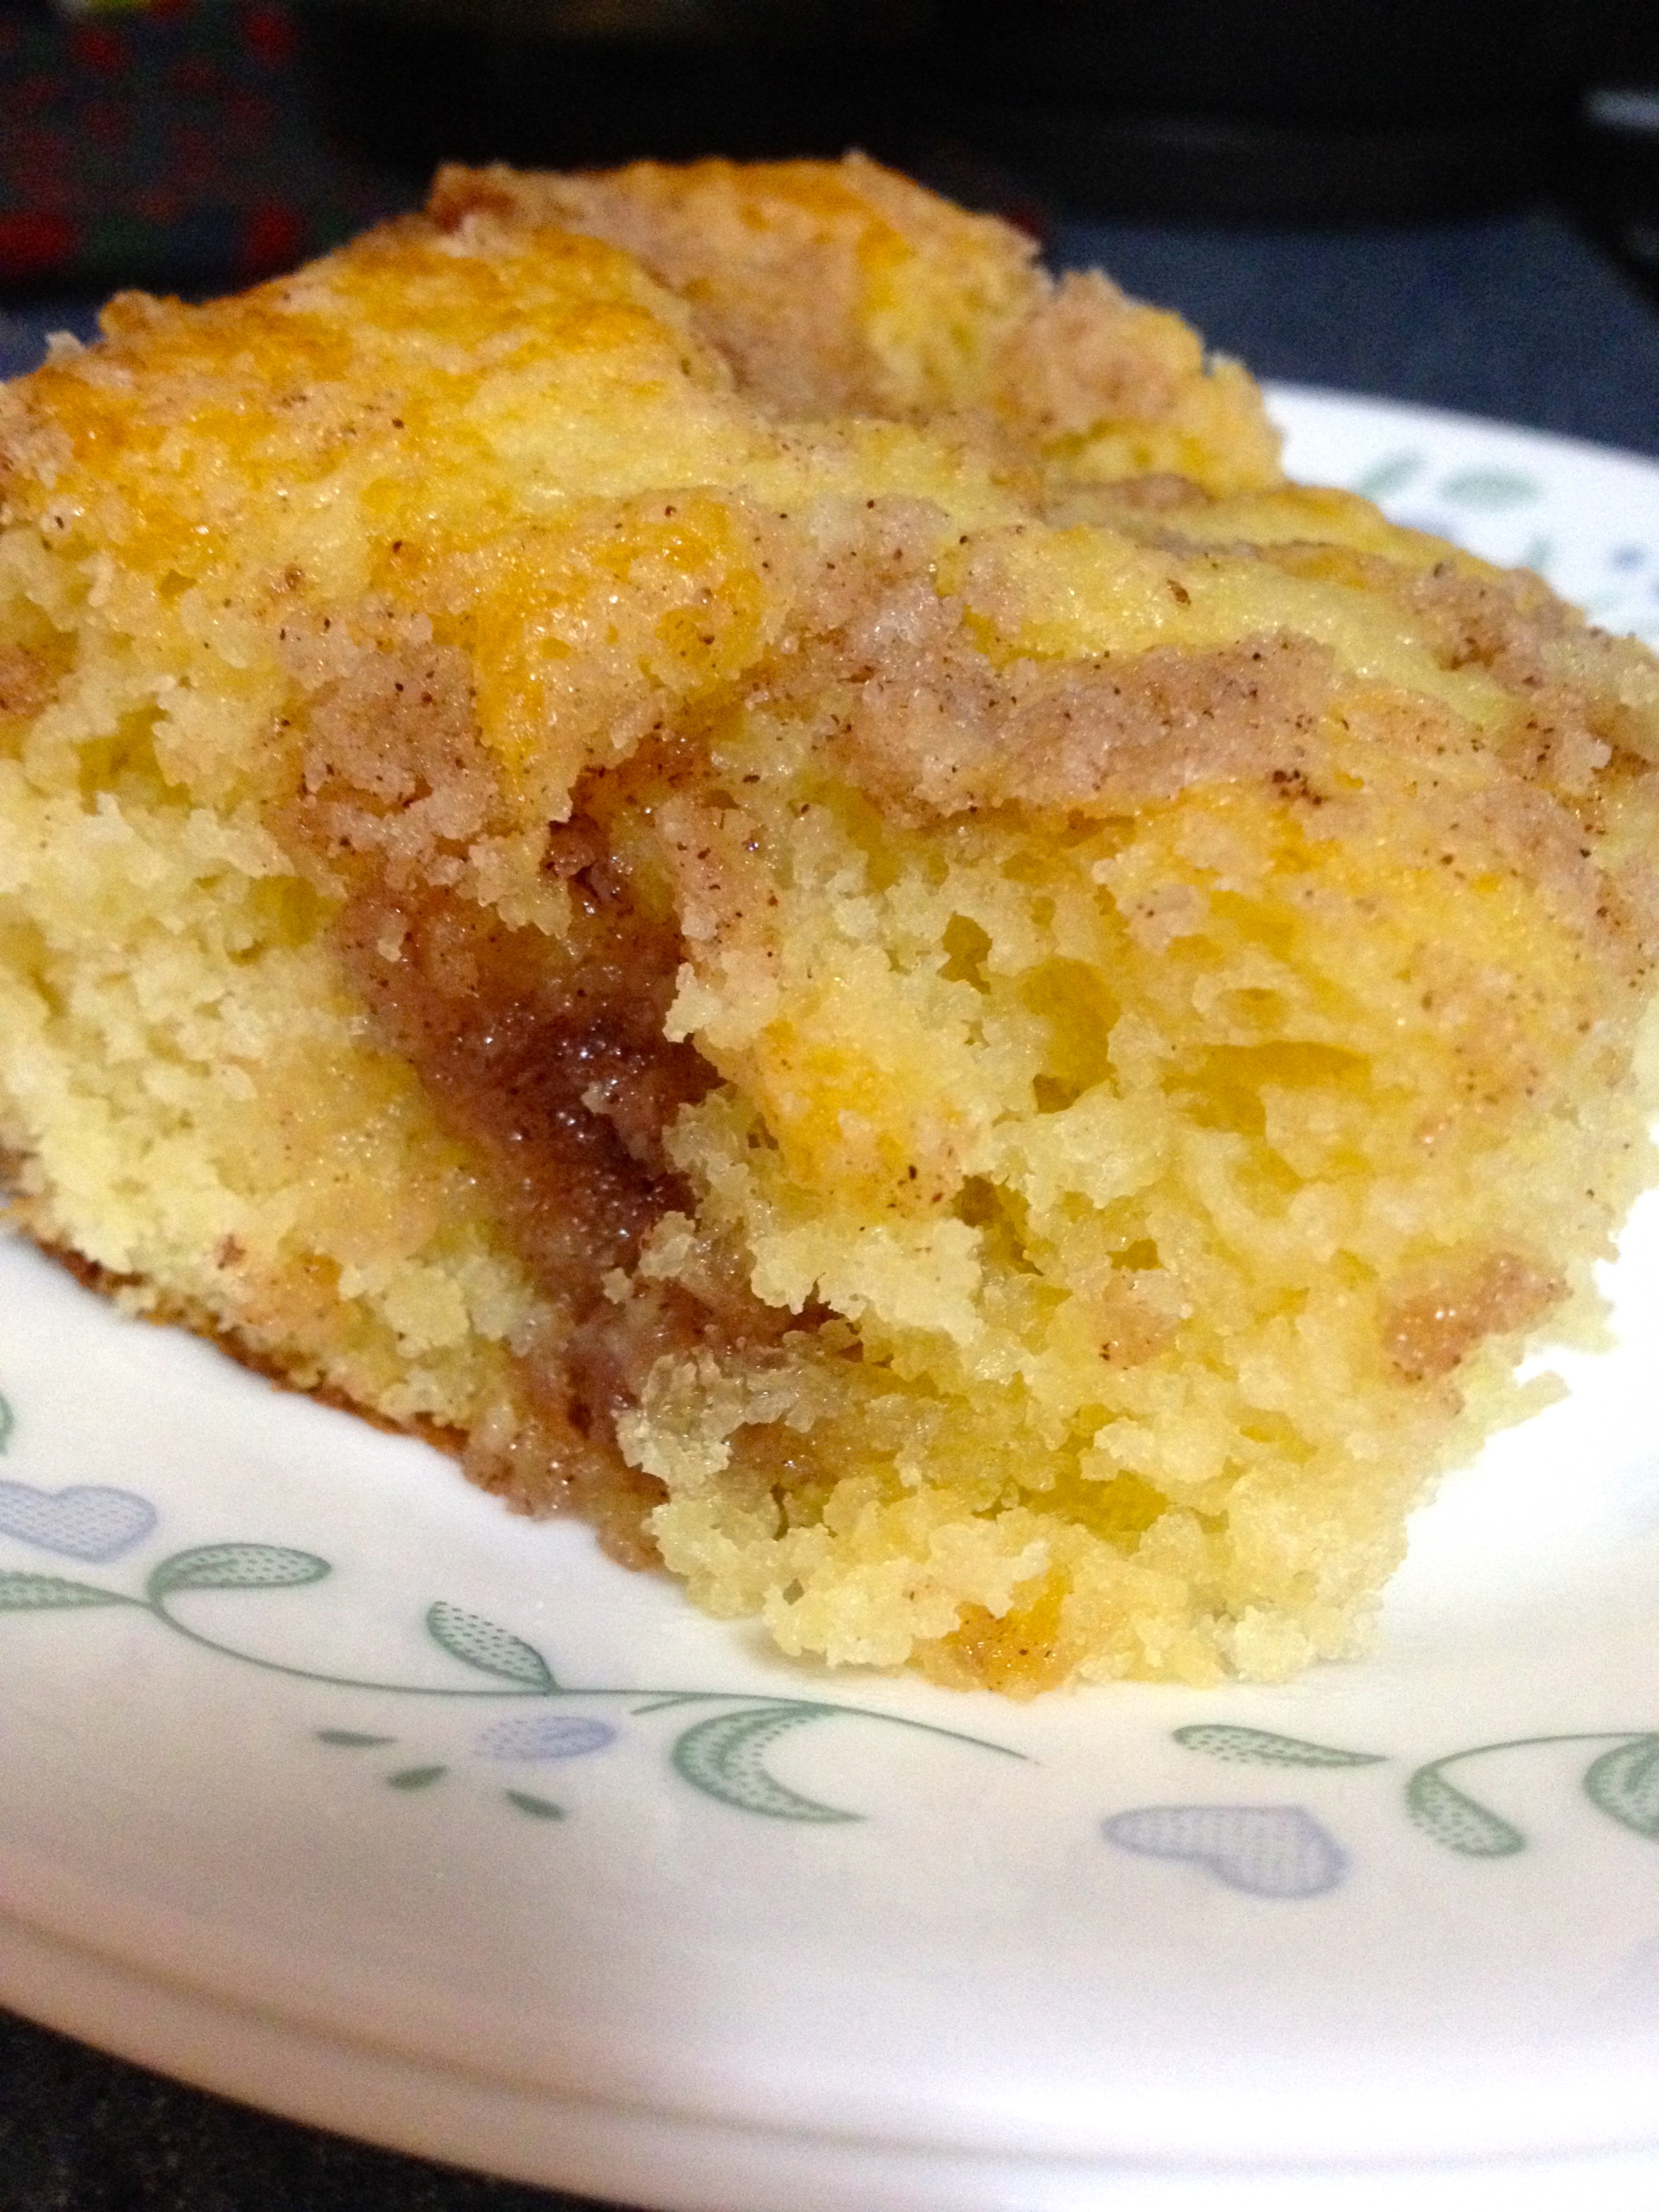
Although this recipe is great as it is, feel free to try putting fruit into it, like blueberries, apples, or peaches. After you pour the batter into the pan, put the fruit into a little flour (this will prevent them from sinking to the bottom of the cake) and then drop the flour-dusted fruits on the top of the cake batter. Then, sprinkle with the topping as usual, and bake away! I personally think the peach one sounds the best, but experiment with whatever type you want, and see how it goes!
A warning: once you make this cake, people will beg you to make it again and again! Happy baking!
It’s Like Banana Bread…
Hello everyone! I hope you’re excited for Thanksgiving! I know my family is gearing up for having our usual twenty-something people at our house. More on Thanksgiving and holiday desserts to come in a few weeks, though- for now I’m focusing on something that can be made any time of year, not just the holidays!
I’m sure you’ve all experienced having overripe bananas. No one wants to eat them, but you hate to throw the fruit away because it’s technically still edible. This happened in my house yesterday, and I decided that instead of making my usual banana bread, I would break out of the mold and make something new. A banana cinnamon cake!
This cake is moist, sweet, spiced, and drizzled with the perfect cinnamon and sugar glaze. Here’s the recipe!
Cake Ingredients:
- 3 very ripe bananas, mashed (until they’re basically pureed)
- 3/4 cup granulated sugar
- 1/2 cup brown sugar
- 1/2 cup vegetable oil
- 2 eggs
- 1 tsp vanilla extract
- 2 cups flour
- 1 tsp baking soda
- 1/2 tsp salt
- 1/2 tsp ground cinnamon
Glaze Ingredients:
- 1/2 cup powdered sugar
- 1/4 tsp ground cinnamon
- 1/8 tsp cream of tartar
- 1/2 cup milk
In a stand mixer, stir the bananas, granulated sugar, and brown sugar until they’re well mixed. Add the eggs, oil, and vanilla, and stir to combine. Add the dry ingredients and mix on low speed until the ingredients are fully combined, and then mix on high speed for about 2 minutes.
Grease and flour a 9×2″ round cake pan, and pour the batter into it.
Bake at 350ºF for 40-45 minutes, or until a toothpick inserted in the middle of the cake comes out clean.
Once the cake is completely cool, start making your glaze. Combine the sugar, cream of tartar, and cinnamon together. Add a little milk at a time and mix the glaze with a hand mixer on low speed until the glaze is fairly loose and runny. When you have reached your desired thickness, turn the mixer onto high speed to add a little air and volume into the glaze.
Pour the glaze over the top of the cake. It will drip down the sides, so you may want to put it on a plate to start with so that the glaze doesn’t end up on the counter! The glaze will become firm shortly (thanks to the cream of tartar), so don’t worry about it being sticky and messy.
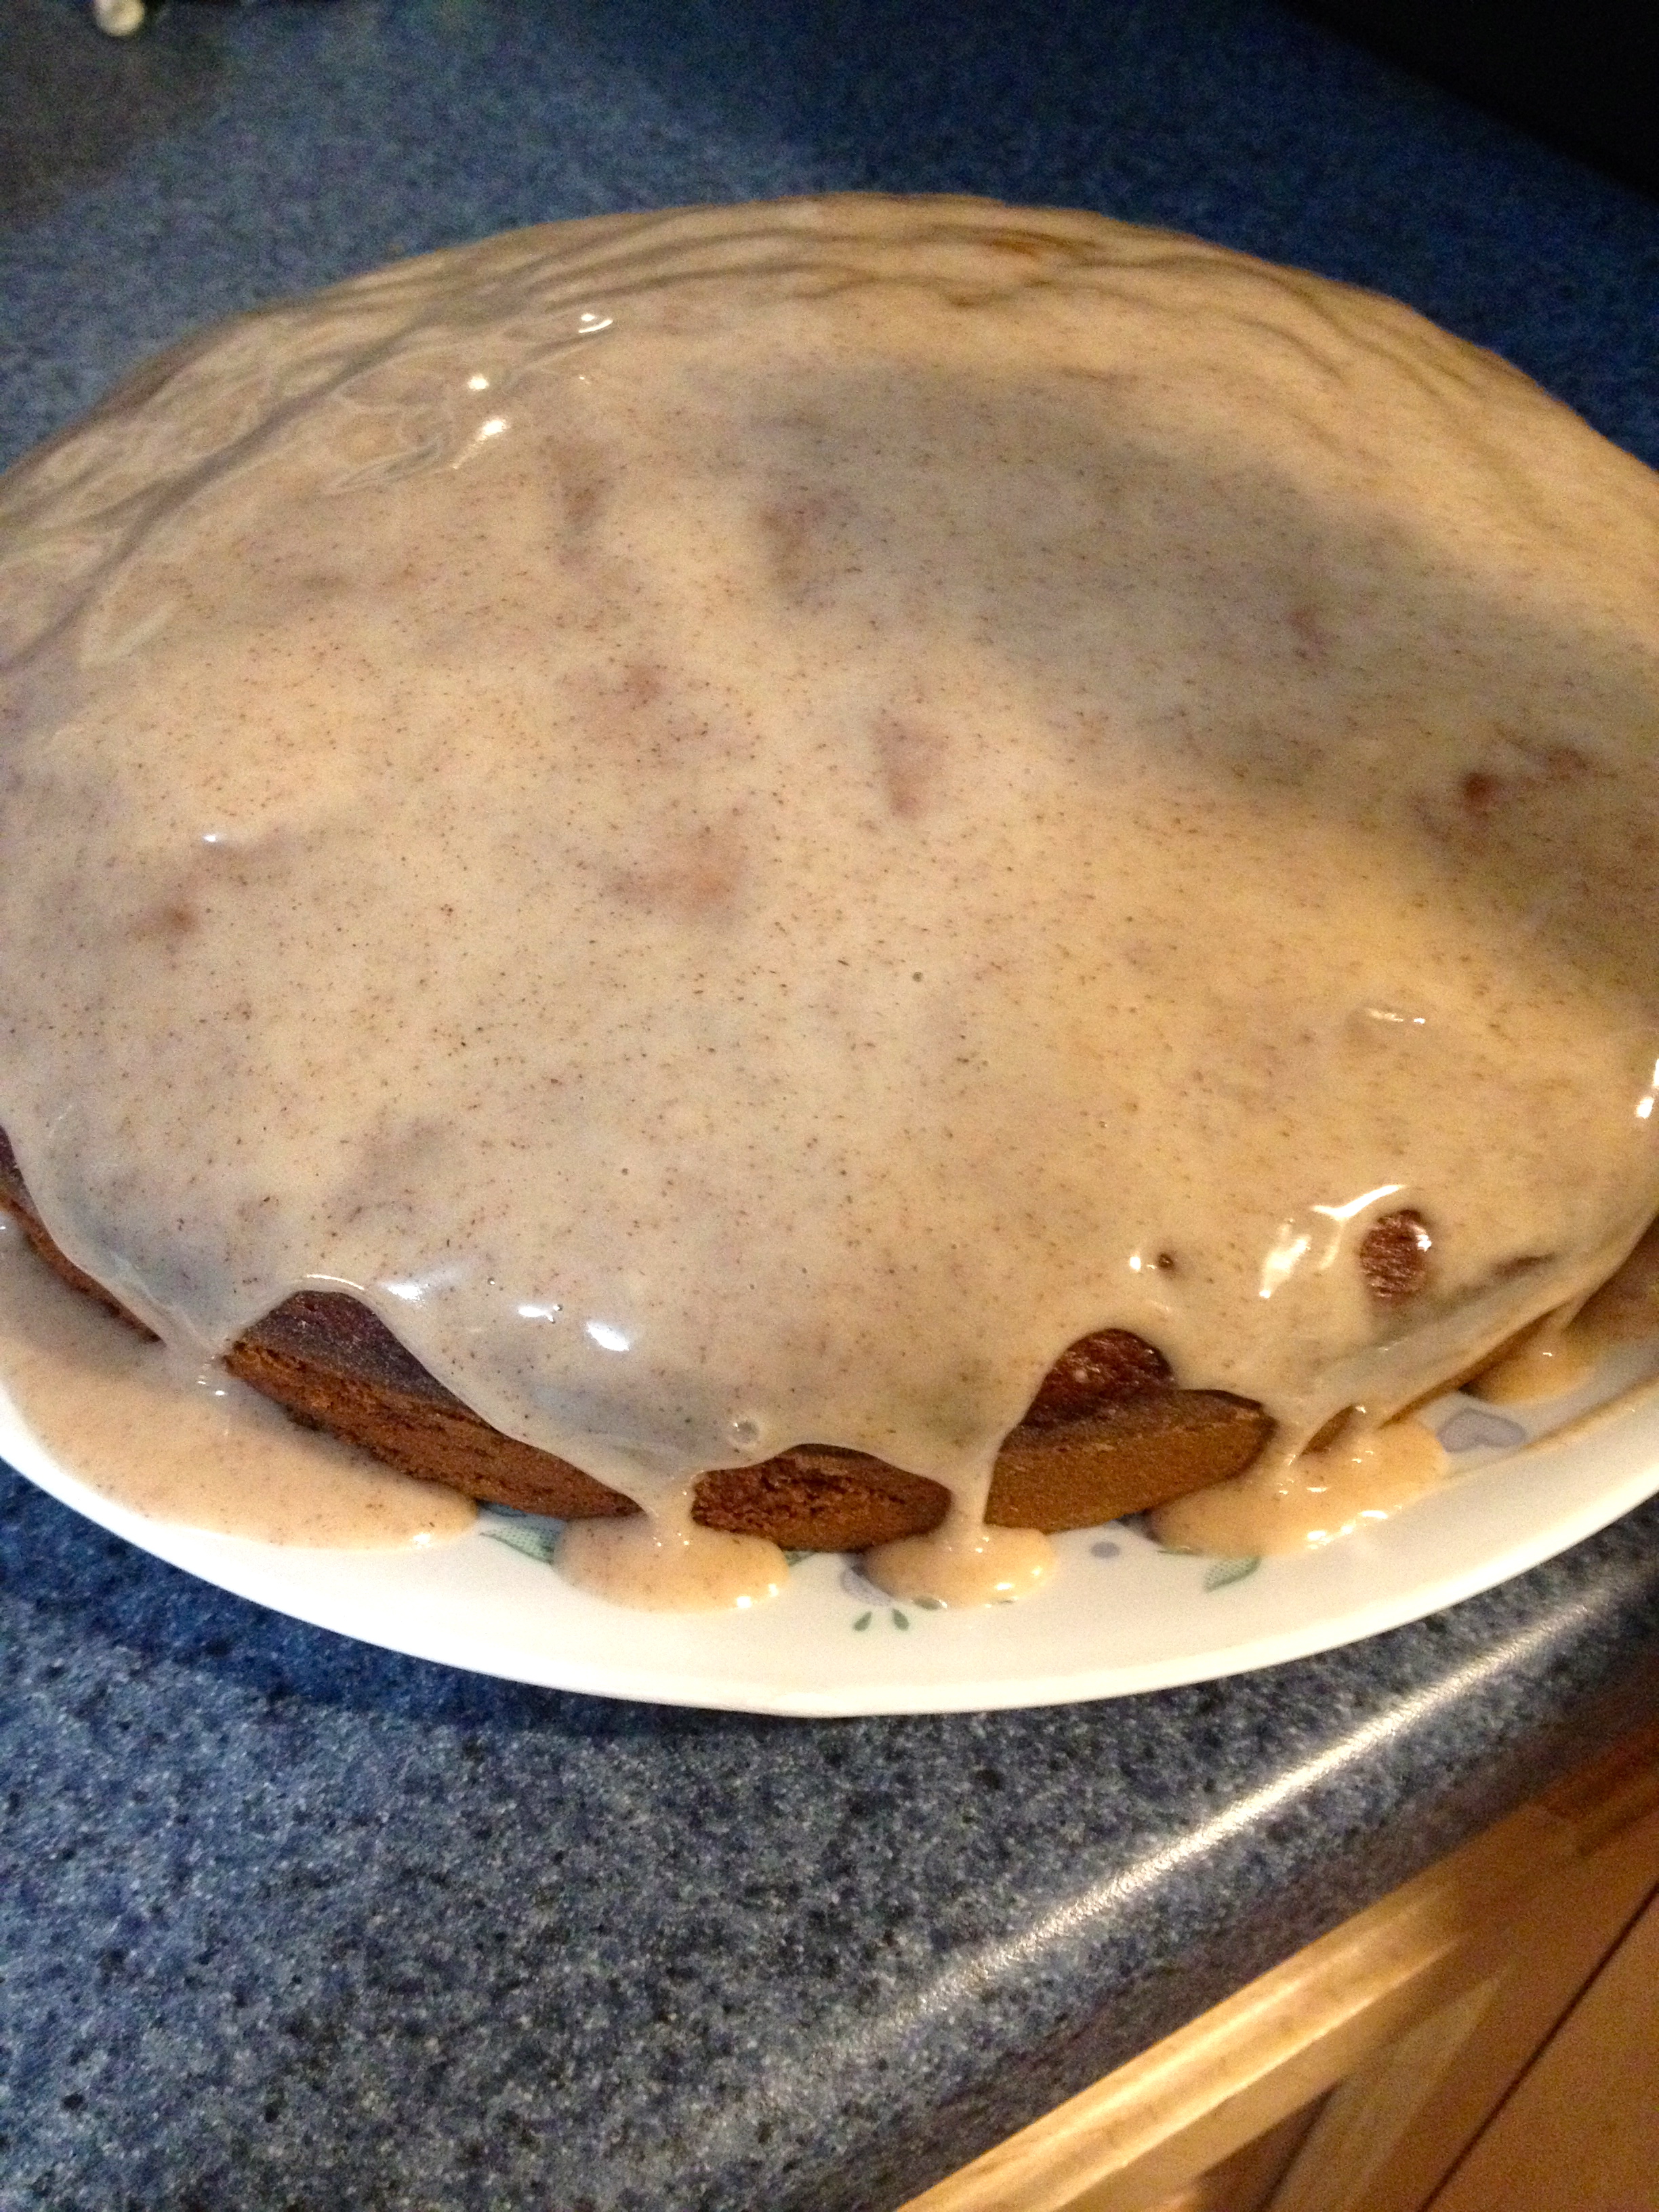
And now, enjoy! This cake is so yummy and such a great way to use up those bananas so that nothing goes to waste! I hope you all have a wonderful Thanksgiving, and happy baking (for the bread and for the holiday desserts)!
Cupcakes: The Fall Edition
Hello friends! I’m proud to announce a new recipe (a Ruth semi-original) that is the epitome of fall: pumpkin cupcakes with cream cheese frosting and a caramel drizzle. Yeah, you read it right. And they’re every bit as good as they sound! Imagine a light, fluffy pumpkin cake with a soft, creamy, tangy frosting, drizzled with a warm, smoky, smooth caramel. And now that your mouth is watering, I’ll tell you how to make them!
Ingredients:
- 1 package (16 oz) pound cake mix
- 1 cup canned pumpkin
- 1/3 cup water
- 2 large eggs
- 2 tsp pumpkin pie spice (or 1/2 tsp cinnamon, 1/4 tsp ginger, 1/4 tsp allspice, and 1/8 tsp nutmeg if you don’t have pumpkin pie spice)
- 1 tsp baking soda
Frosting:
- 8 oz light cream cheese
- 1/4 cup softened butter
- 1 tsp vanilla extract
- 1 lb powdered sugar
Caramel Drizzle
- 1 package soft caramels
- 3 Tbsp milk (any type)
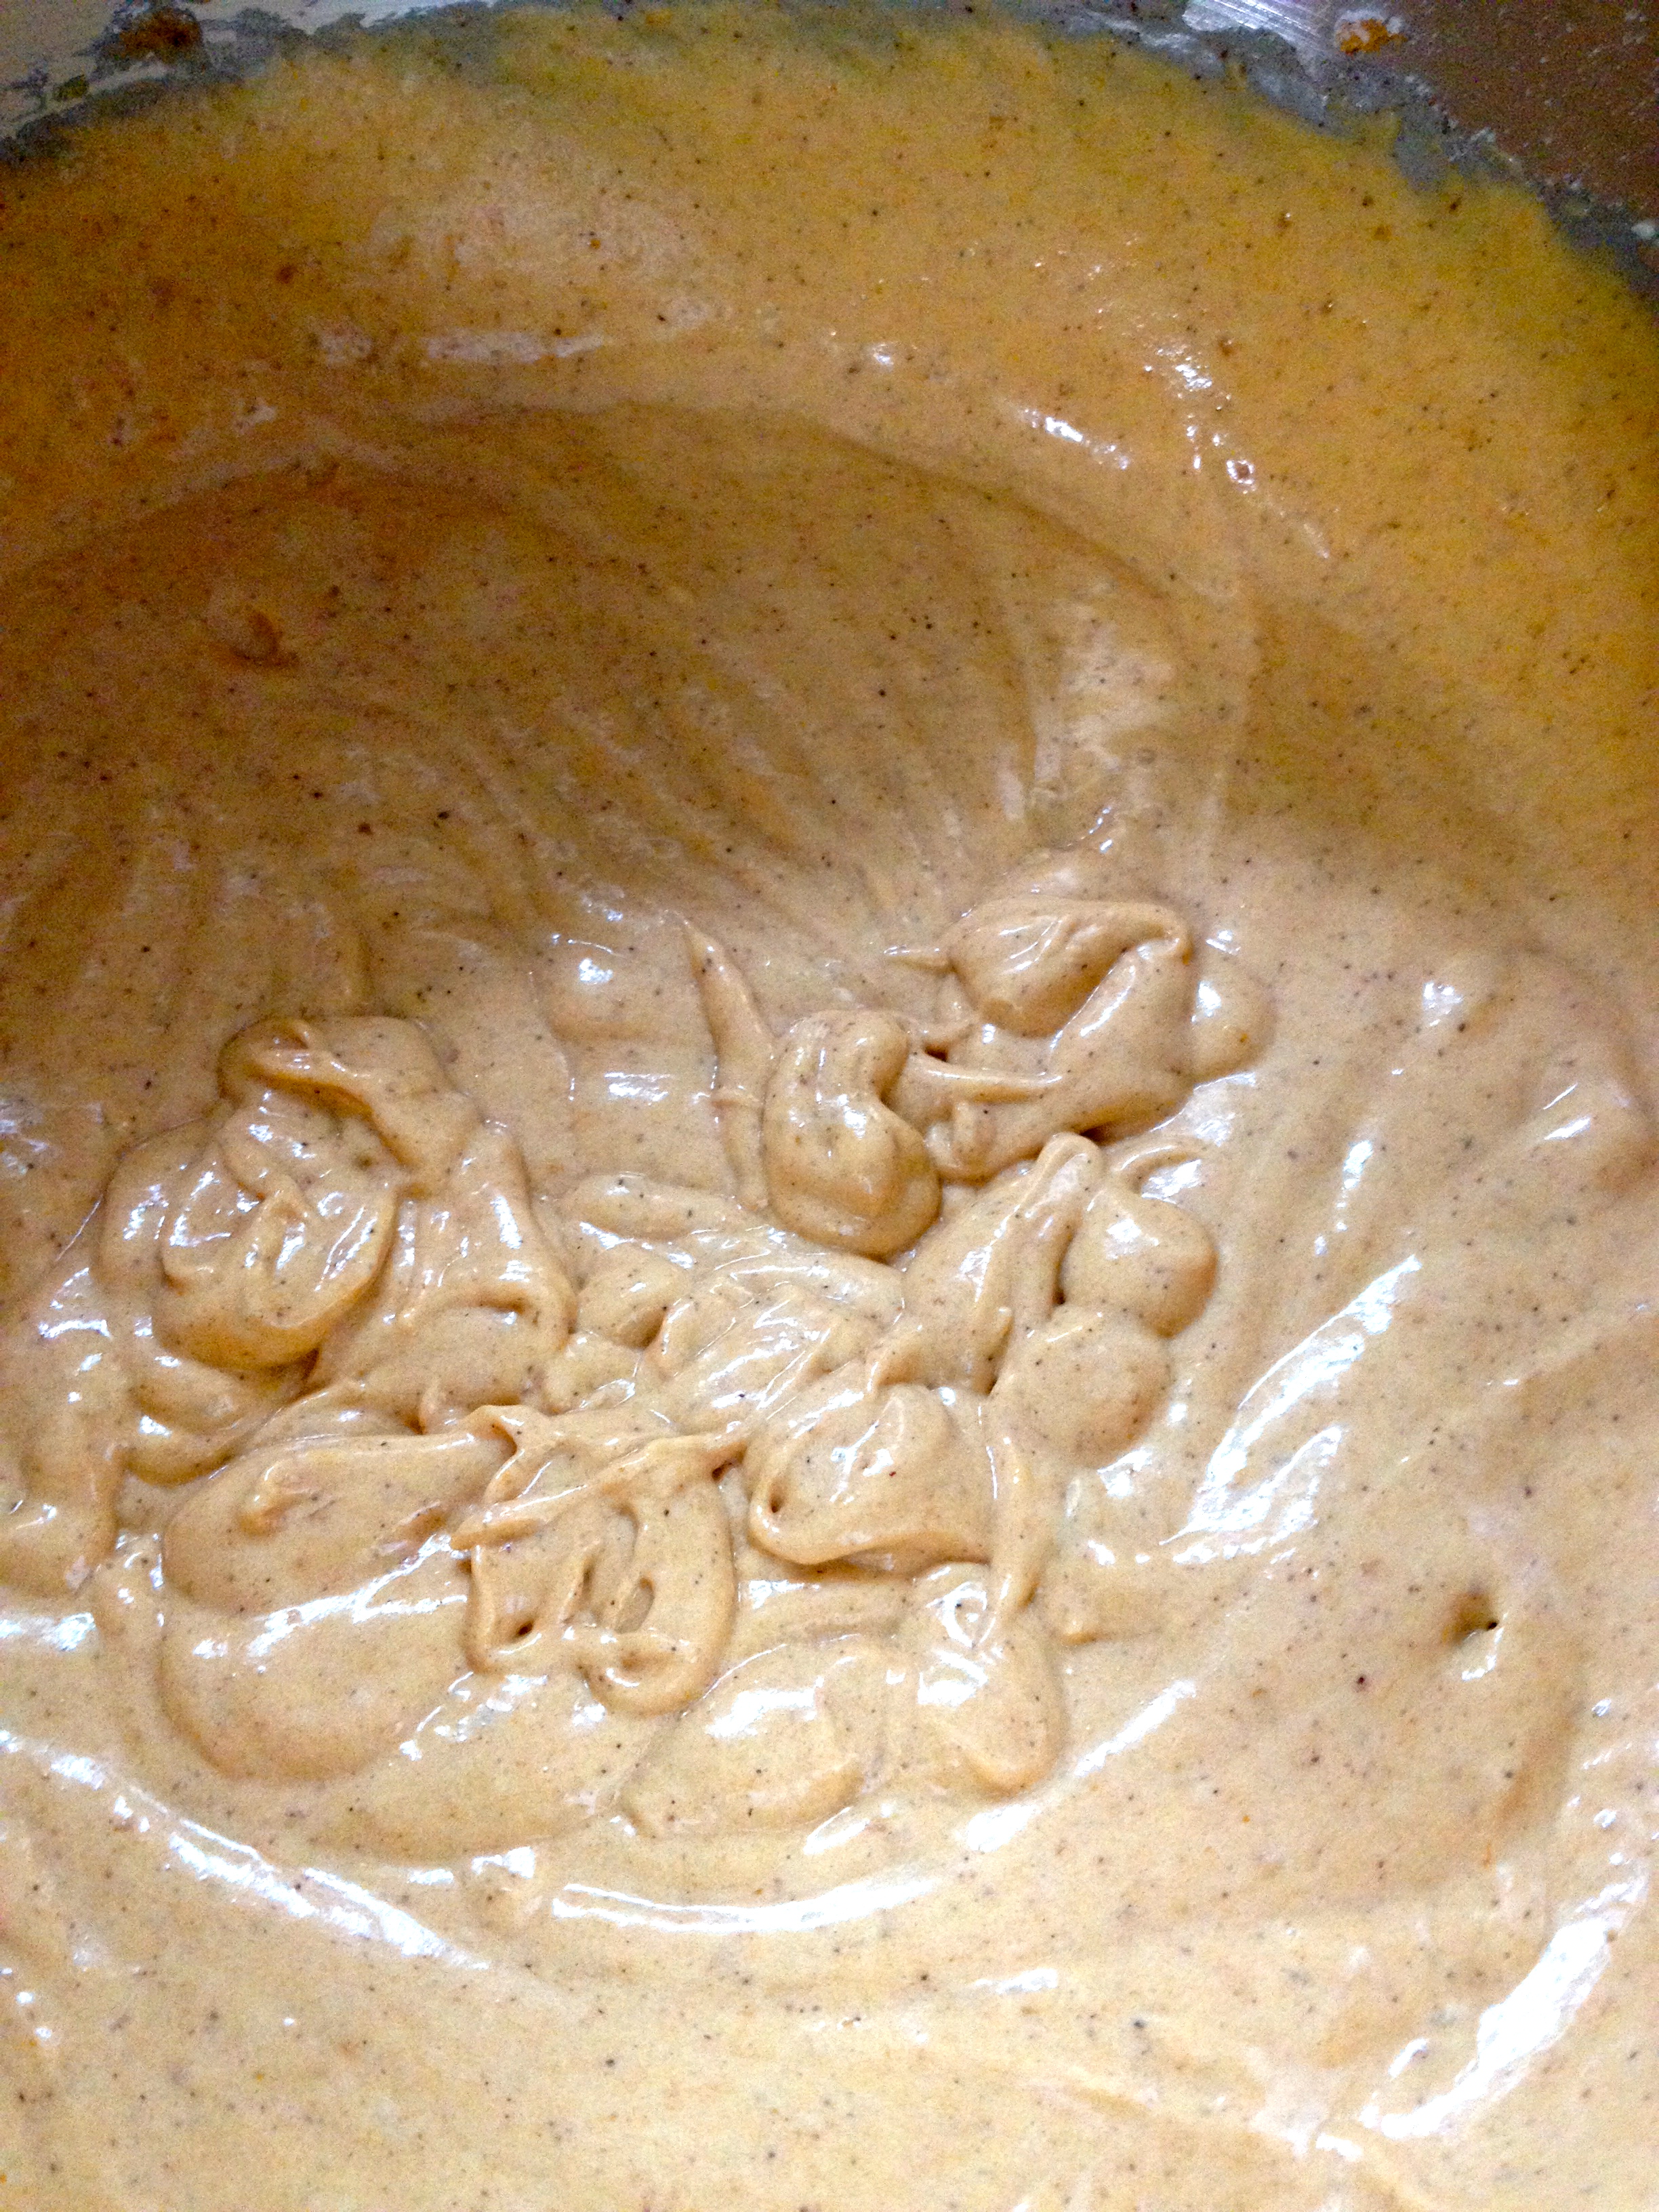
First, mix the cake mix with the water, eggs, and vanilla until it is fully combined. Then, add the pumpkin, spices, and baking soda. Stir until the ingredients are combined, and then beat the mixture on medium speed for 3 minutes. It will be a lovely light pumpkin-orange color.
Pour the batter into prepared cupcake pans, filling each cupcake paper about 3/4 full. It should fill about 24 cupcake papers.
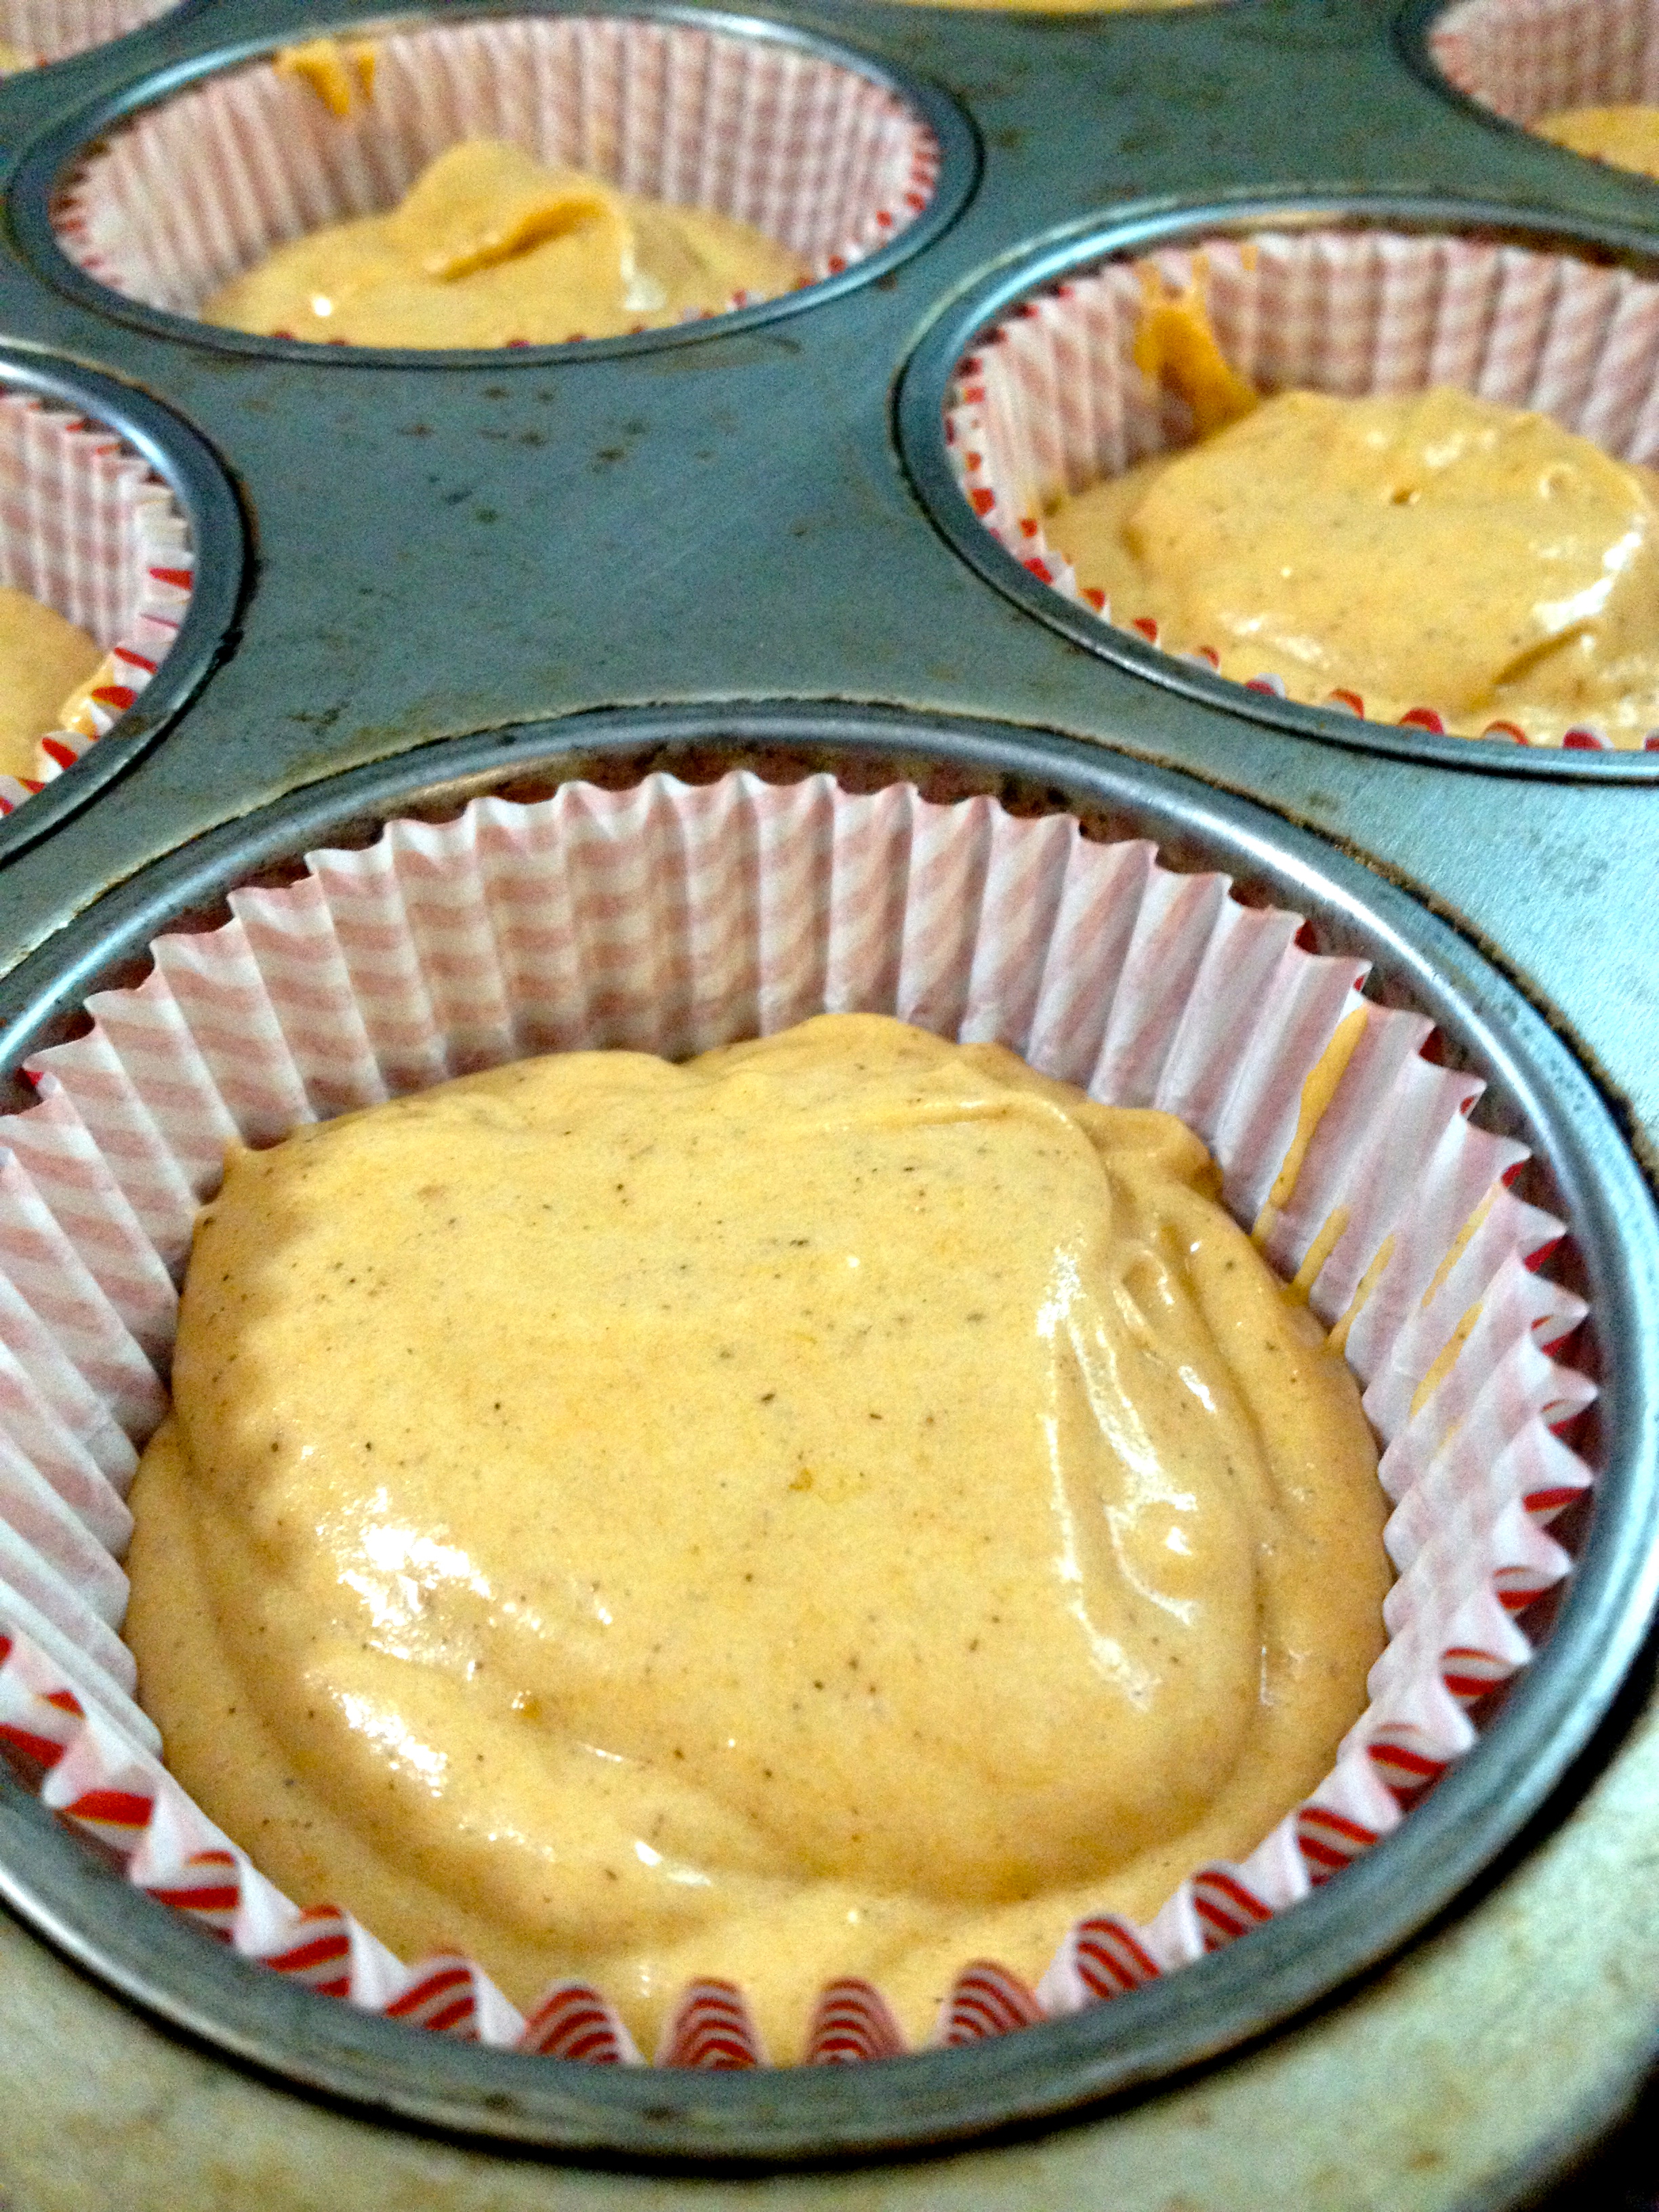
Bake at 325ºF for 25-30 minutes, until a toothpick inserted in the center of the cakes comes out clean.
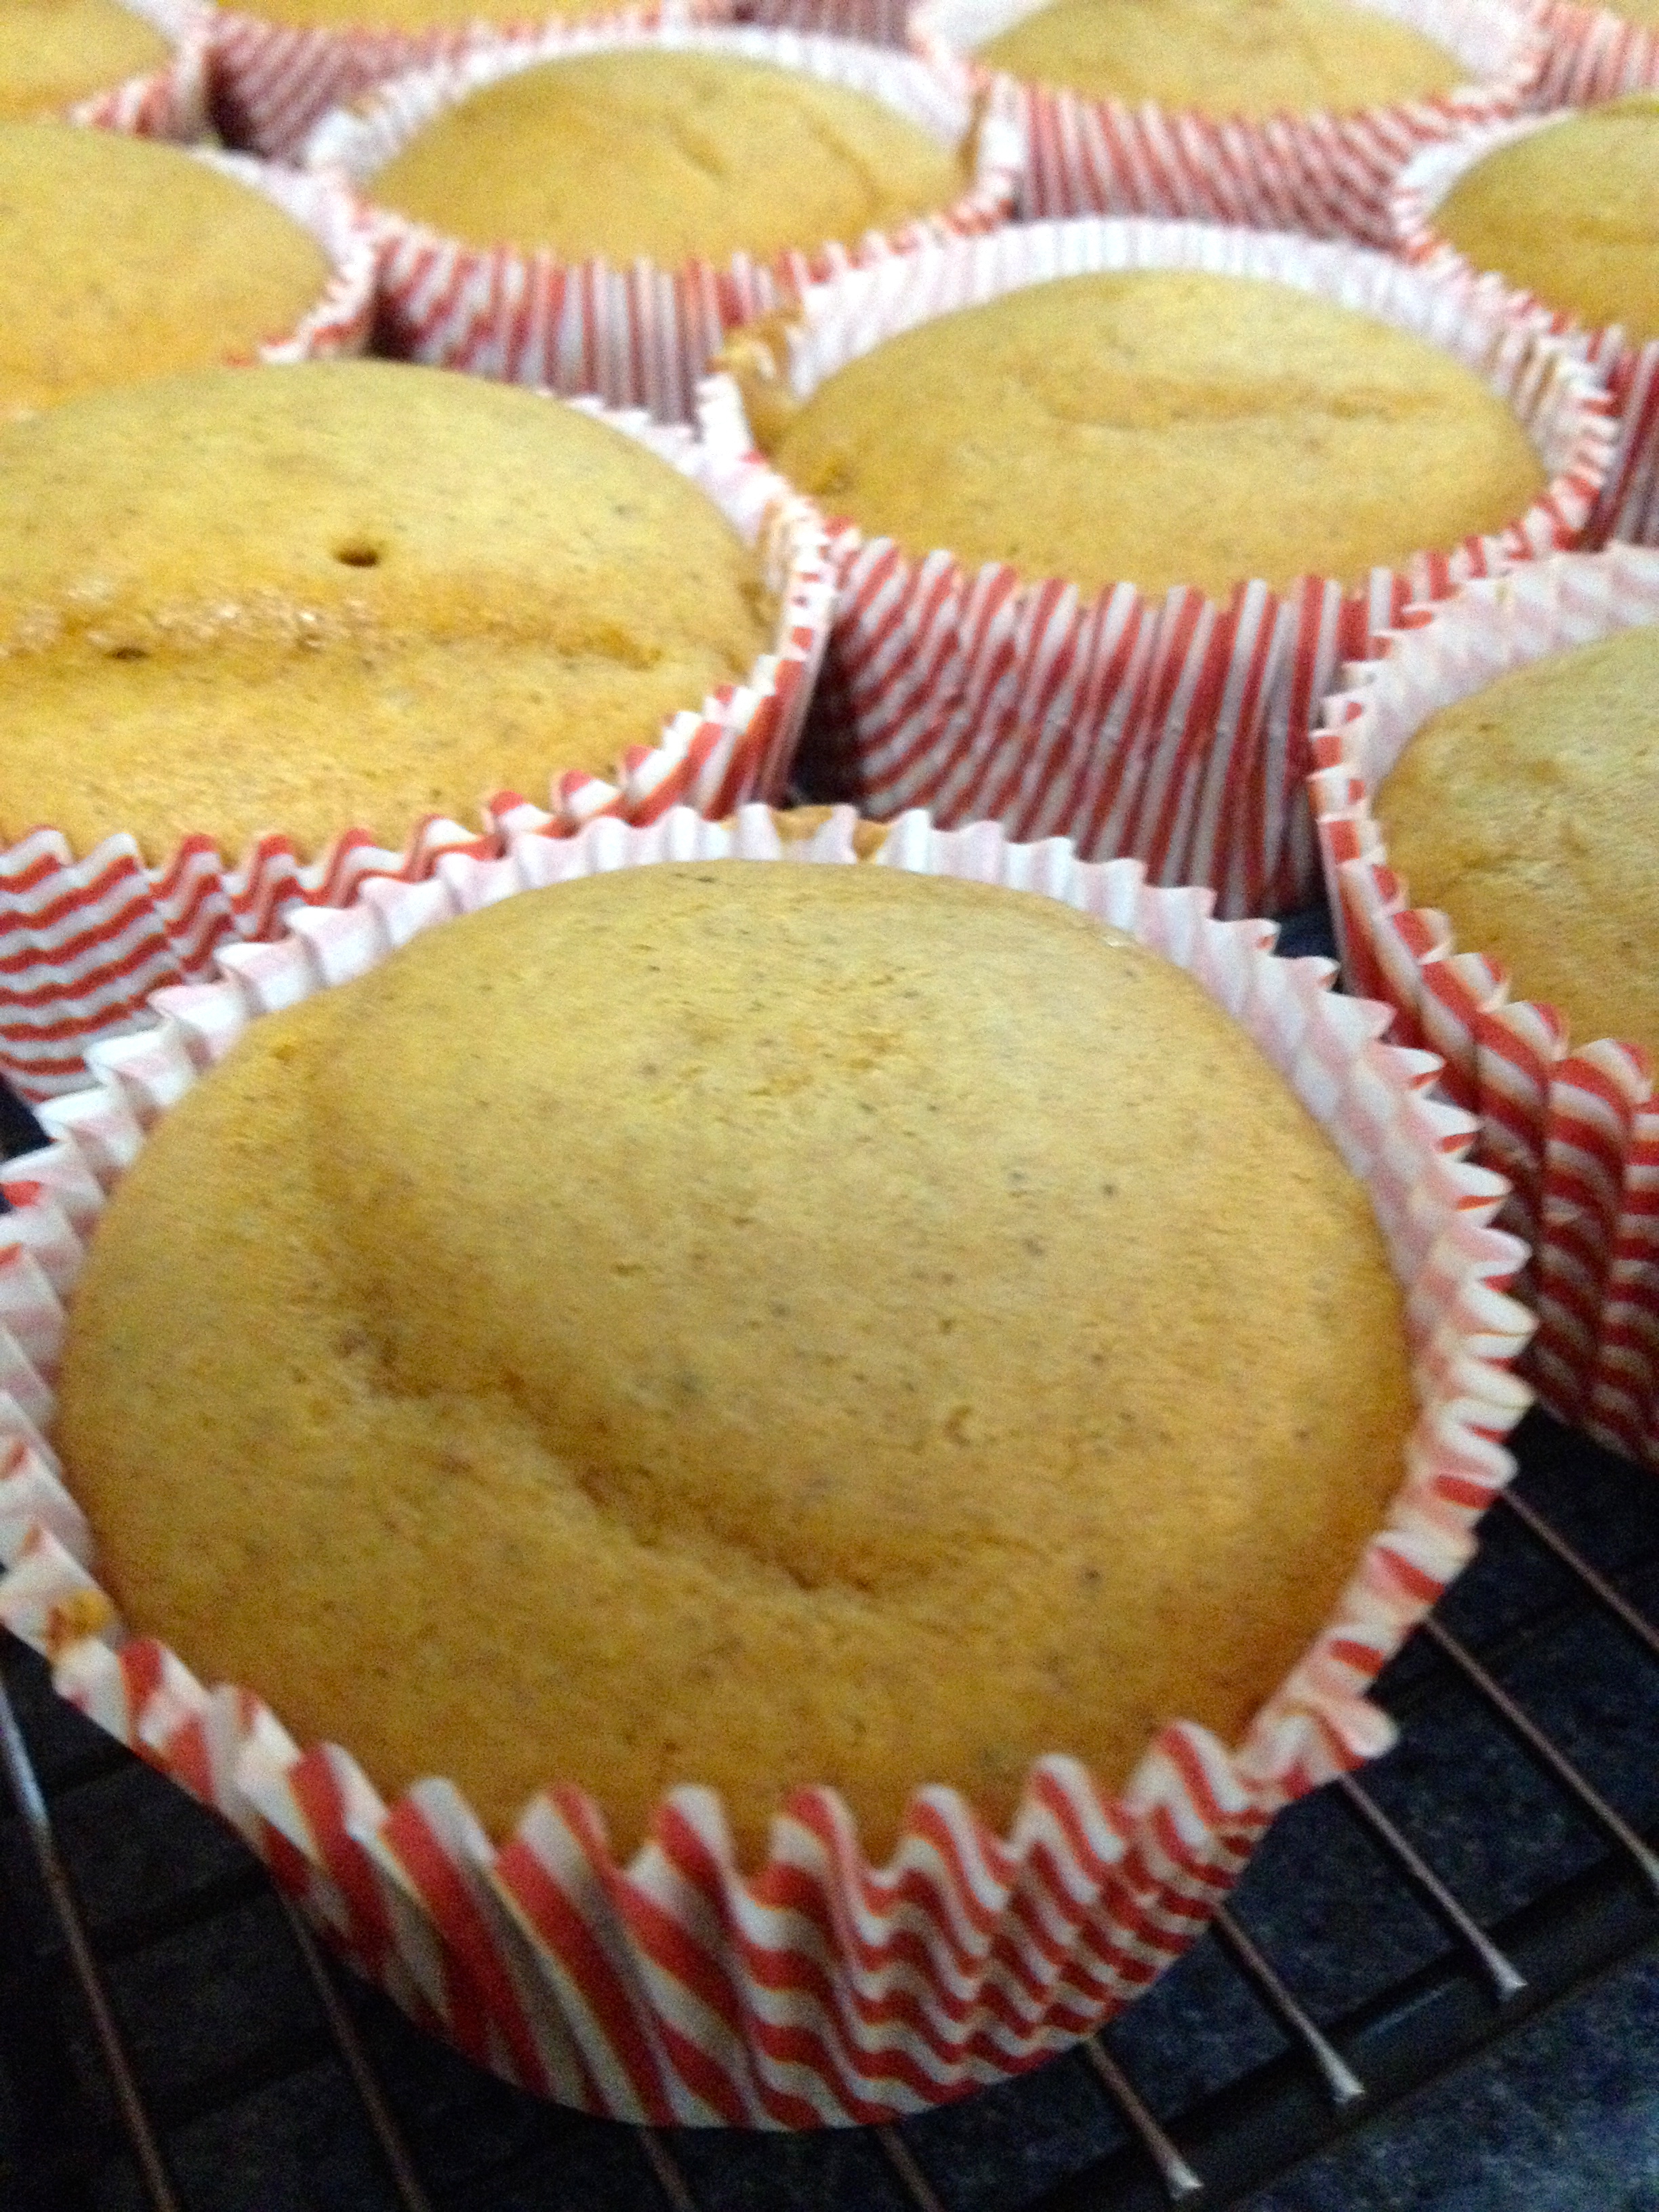
Let the cupcakes cool completely before even thinking about frosting them! Nothing is worse than melted frosting!
Once the cupcakes are completely cool, cream the cream cheese, vanilla, and butter together. Slowly add the powdered sugar while beating the mixture on low speed until you have reached your desired thickness. Then, turn the mixer up to medium speed and whip the frosting for about 30 seconds, just to give it some lightness. Just a note- the frosting recipe will make more frosting than is needed for these cupcakes, but I would rather have more than enough frosting than not enough!

Using either a cake decorating set or a knife, frost the cupcakes. Now it’s time for the caramel drizzle!
Put all the unwrapped caramels in a microwave safe bowl with the milk. Microwave them for 30 seconds, and then stir them. Put them in for another 30 seconds, and then stir them again. Repeat this process until they are fully melted and smooth. Tip: the reason you have to continue heating them for 30 seconds is so that nothing burns, and the milk doesn’t cook. Also, don’t be worried if the caramel foams- that’s normal!
Using a spoon or a knife, drizzle the caramel sauce over the cupcakes. Be warned: caramel is ridiculously hot and sticky! Try your best not to get it on your fingers, and if you do, run them under cold water- don’t put your fingers in your mouth or else you’ll also burn your mouth!
These cupcakes are so good, and surprisingly easy to make. They look beautiful and make your friends think you worked for hours to make them, but we know better than to make a difficult recipe!
I hope you all try this recipe and enjoy the tastes of fall as much as I do. Happy baking!
The Cupcake Bible
Hello, all you fantastic bakers out there! Sorry I haven’t posted in a few weeks, but college classes have unfortunately been in full swing. Not to worry, because I’ve been baking away in my spare time! This post will be a shout-out to my brother because he gave me brand new cupcake equipment, as well as a review of a cupcake cookbook that my boyfriend gave me for my birthday, called The Cupcake Bible. It has over 150 recipes in it, but I’ll only take you through three of their recipes (with my adaptations included). Here we go!
Peanut Butter and Jelly Cupcakes
This recipe is super simple and so fun! Not to mention the cupcakes are absolutely delicious. I don’t like PB&J sandwiches, but I went out on a limb and made these cupcakes, and loved them. It’s the perfect combination of sweet cake, tangy jelly, and creamy, nutty frosting.
Ingredients:
- 1 package yellow cake mix (plus ingredients to prepare the mix)
- ~ 2 cups strawberry jelly
- 3/4 cup creamy peanut butter
- 1 stick softened butter or margarine
- 2 cups powdered sugar (aka confectioner’s sugar)
- 1/2 tsp vanilla
- 1/4 low-fat milk
Preheat the oven to 350ºF, and line 24 cupcake/muffin cups with cupcake papers. Speaking of which, check out these adorable new cupcake papers my brother got me! What a guy!
Make the cake mix as instructed on the box, and then spoon the batter into the cupcake papers, filling them about 2/3 full. (Hint: use a ladle to get all the papers filled about the same.) Bake according to the directions on the box, or until a toothpick inserted in the middle comes out clean. Cool the cupcakes in the pan for 5 minutes, and then transfer them to a cooling rack until they’re completely cool.
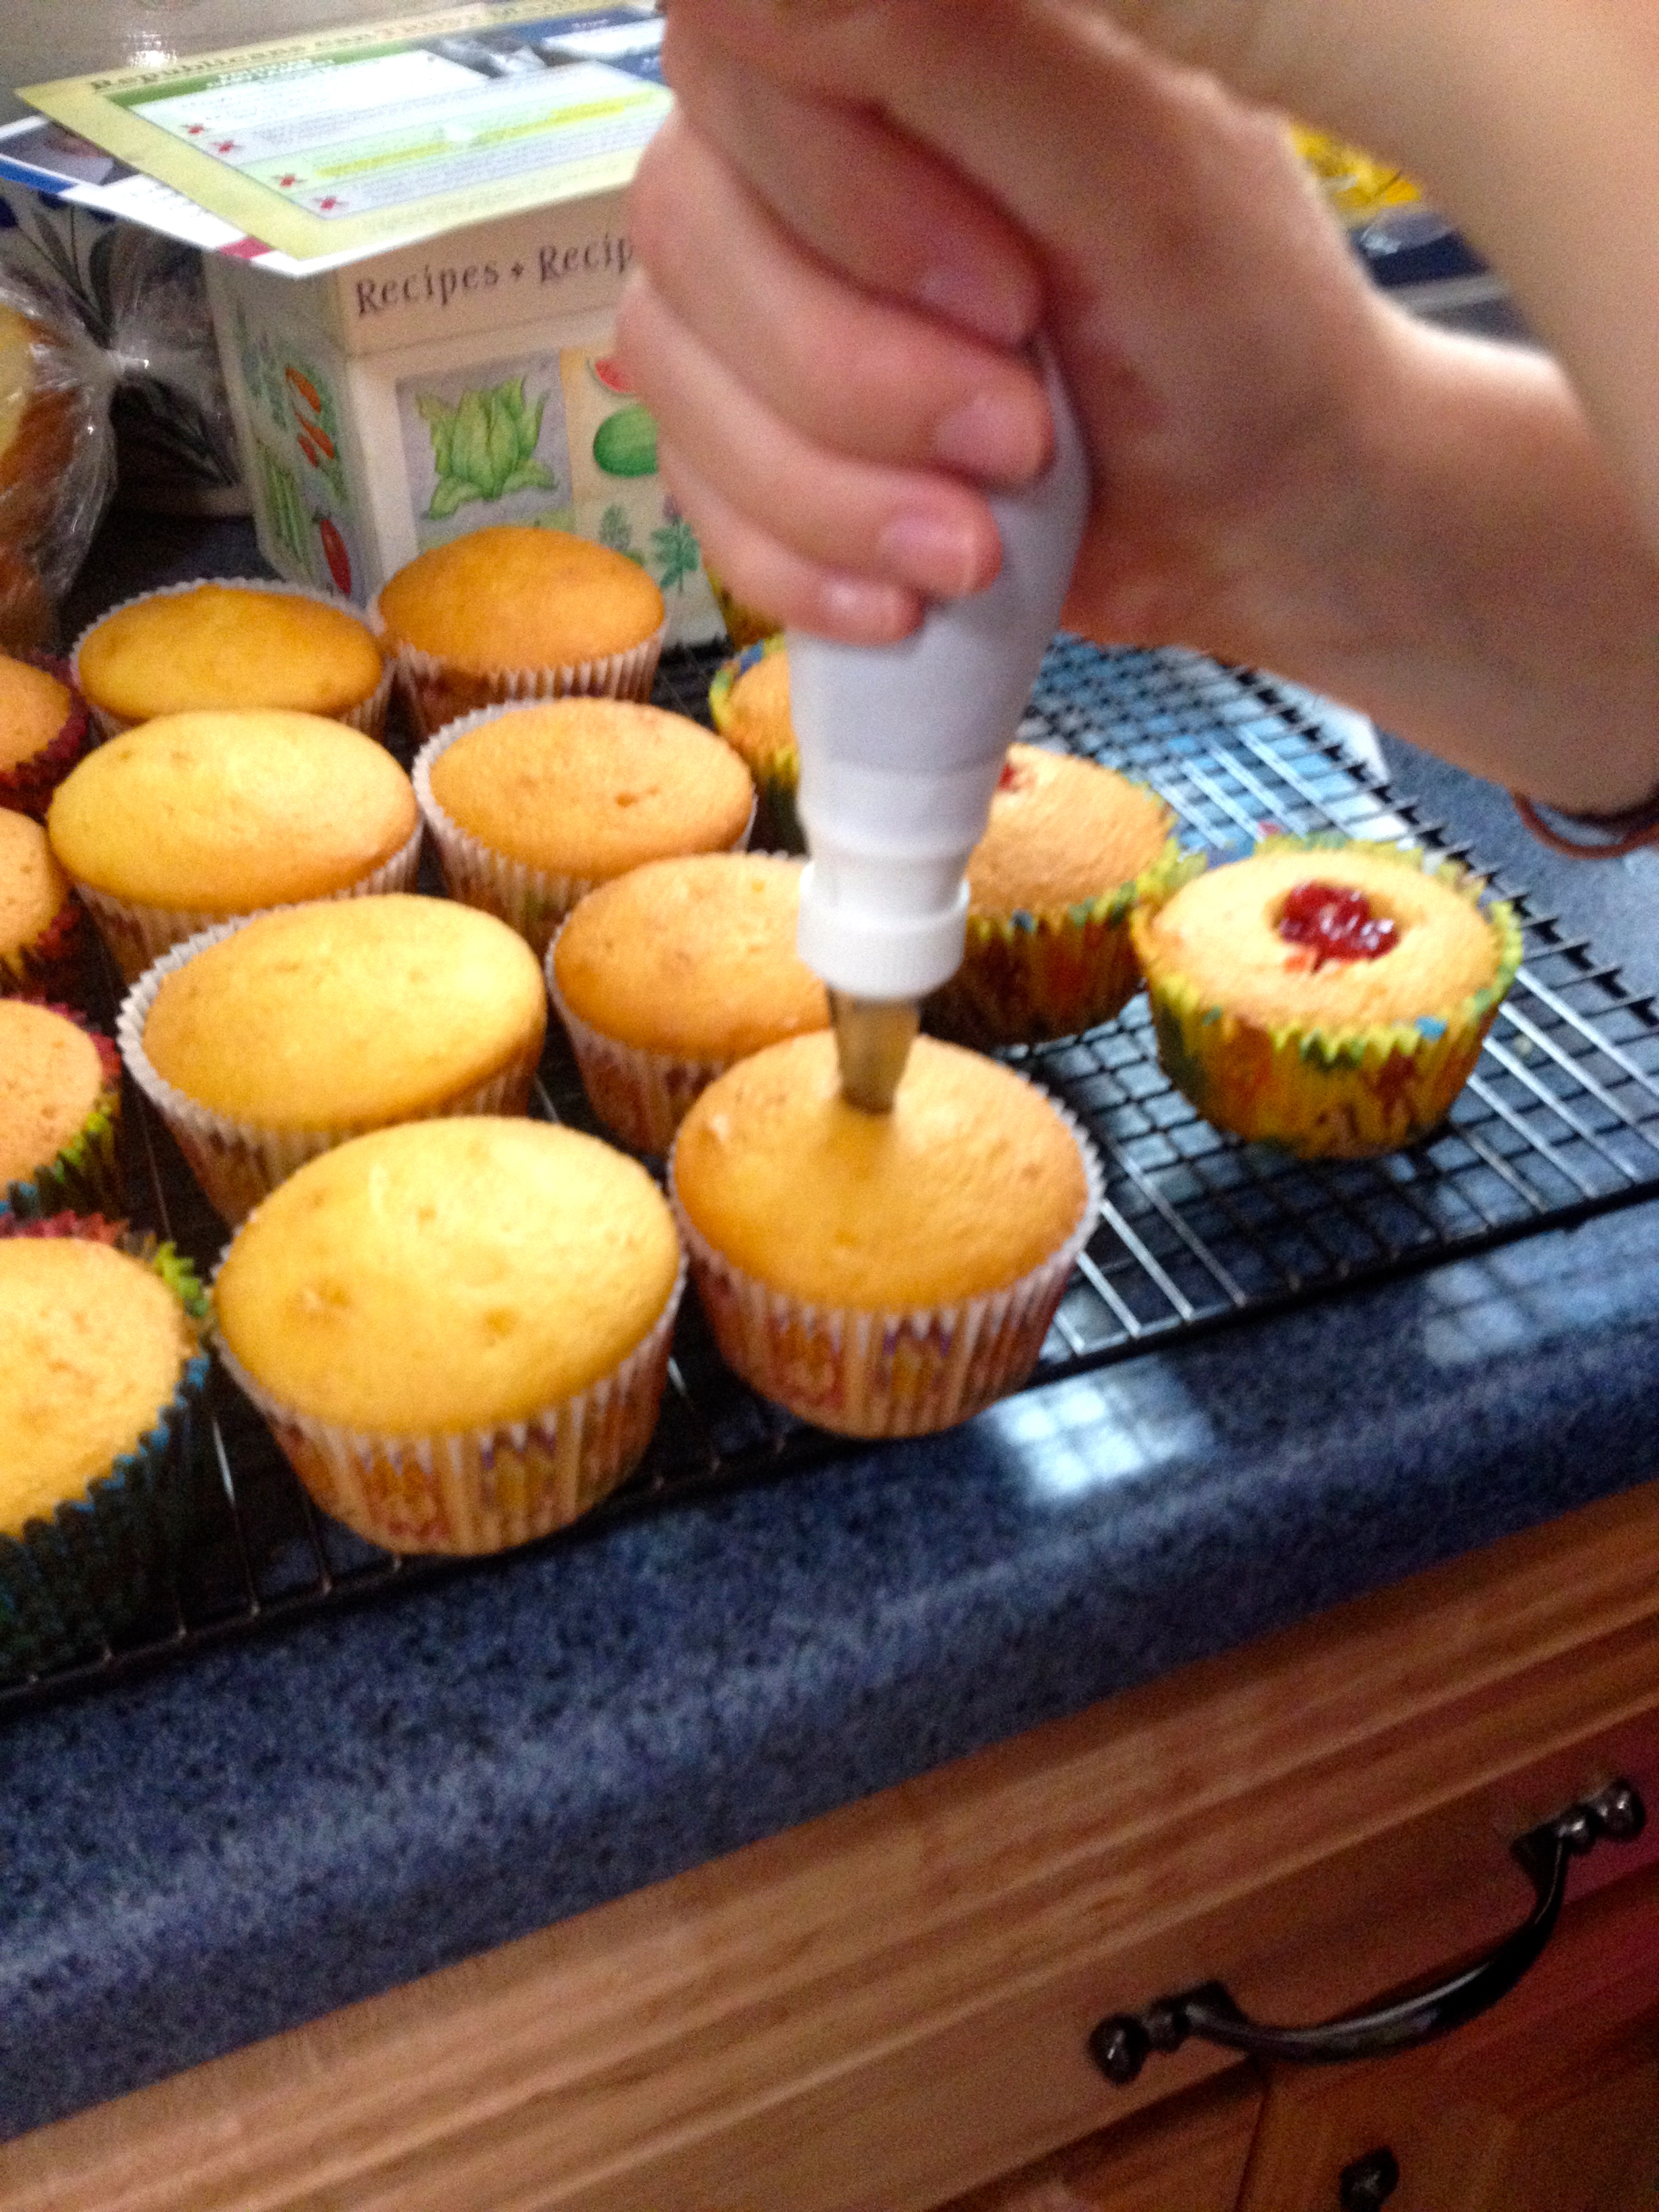
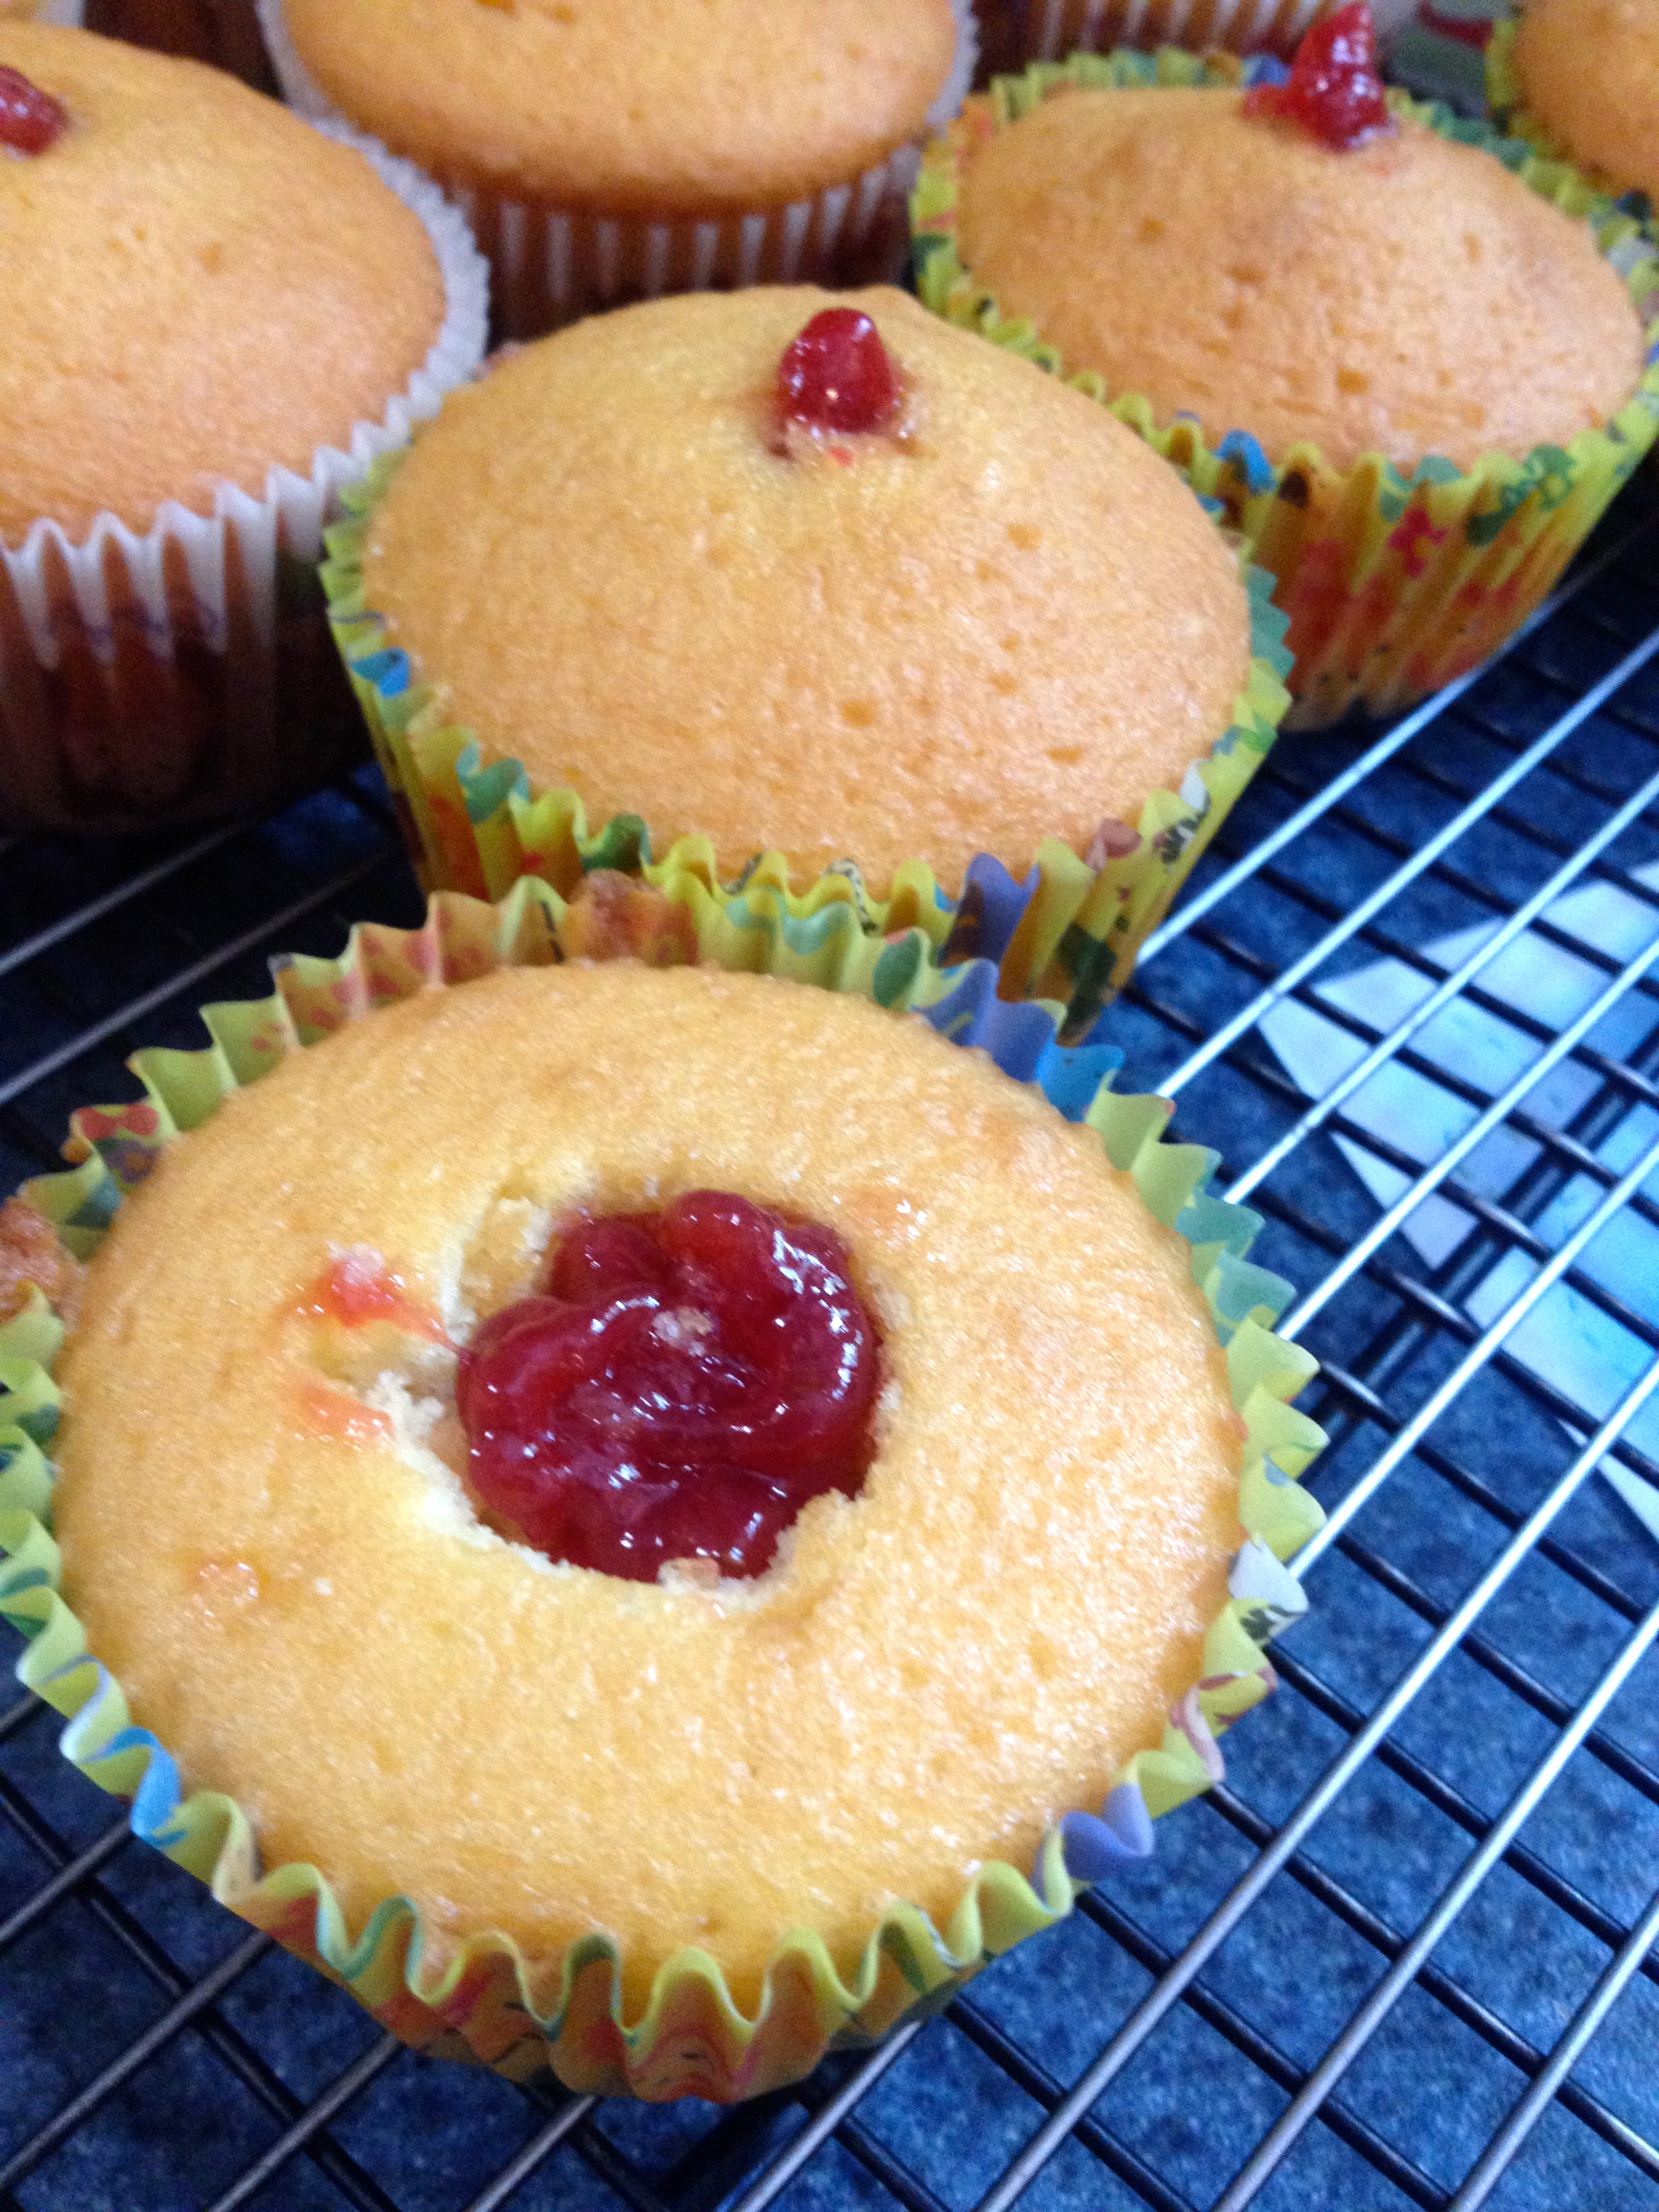
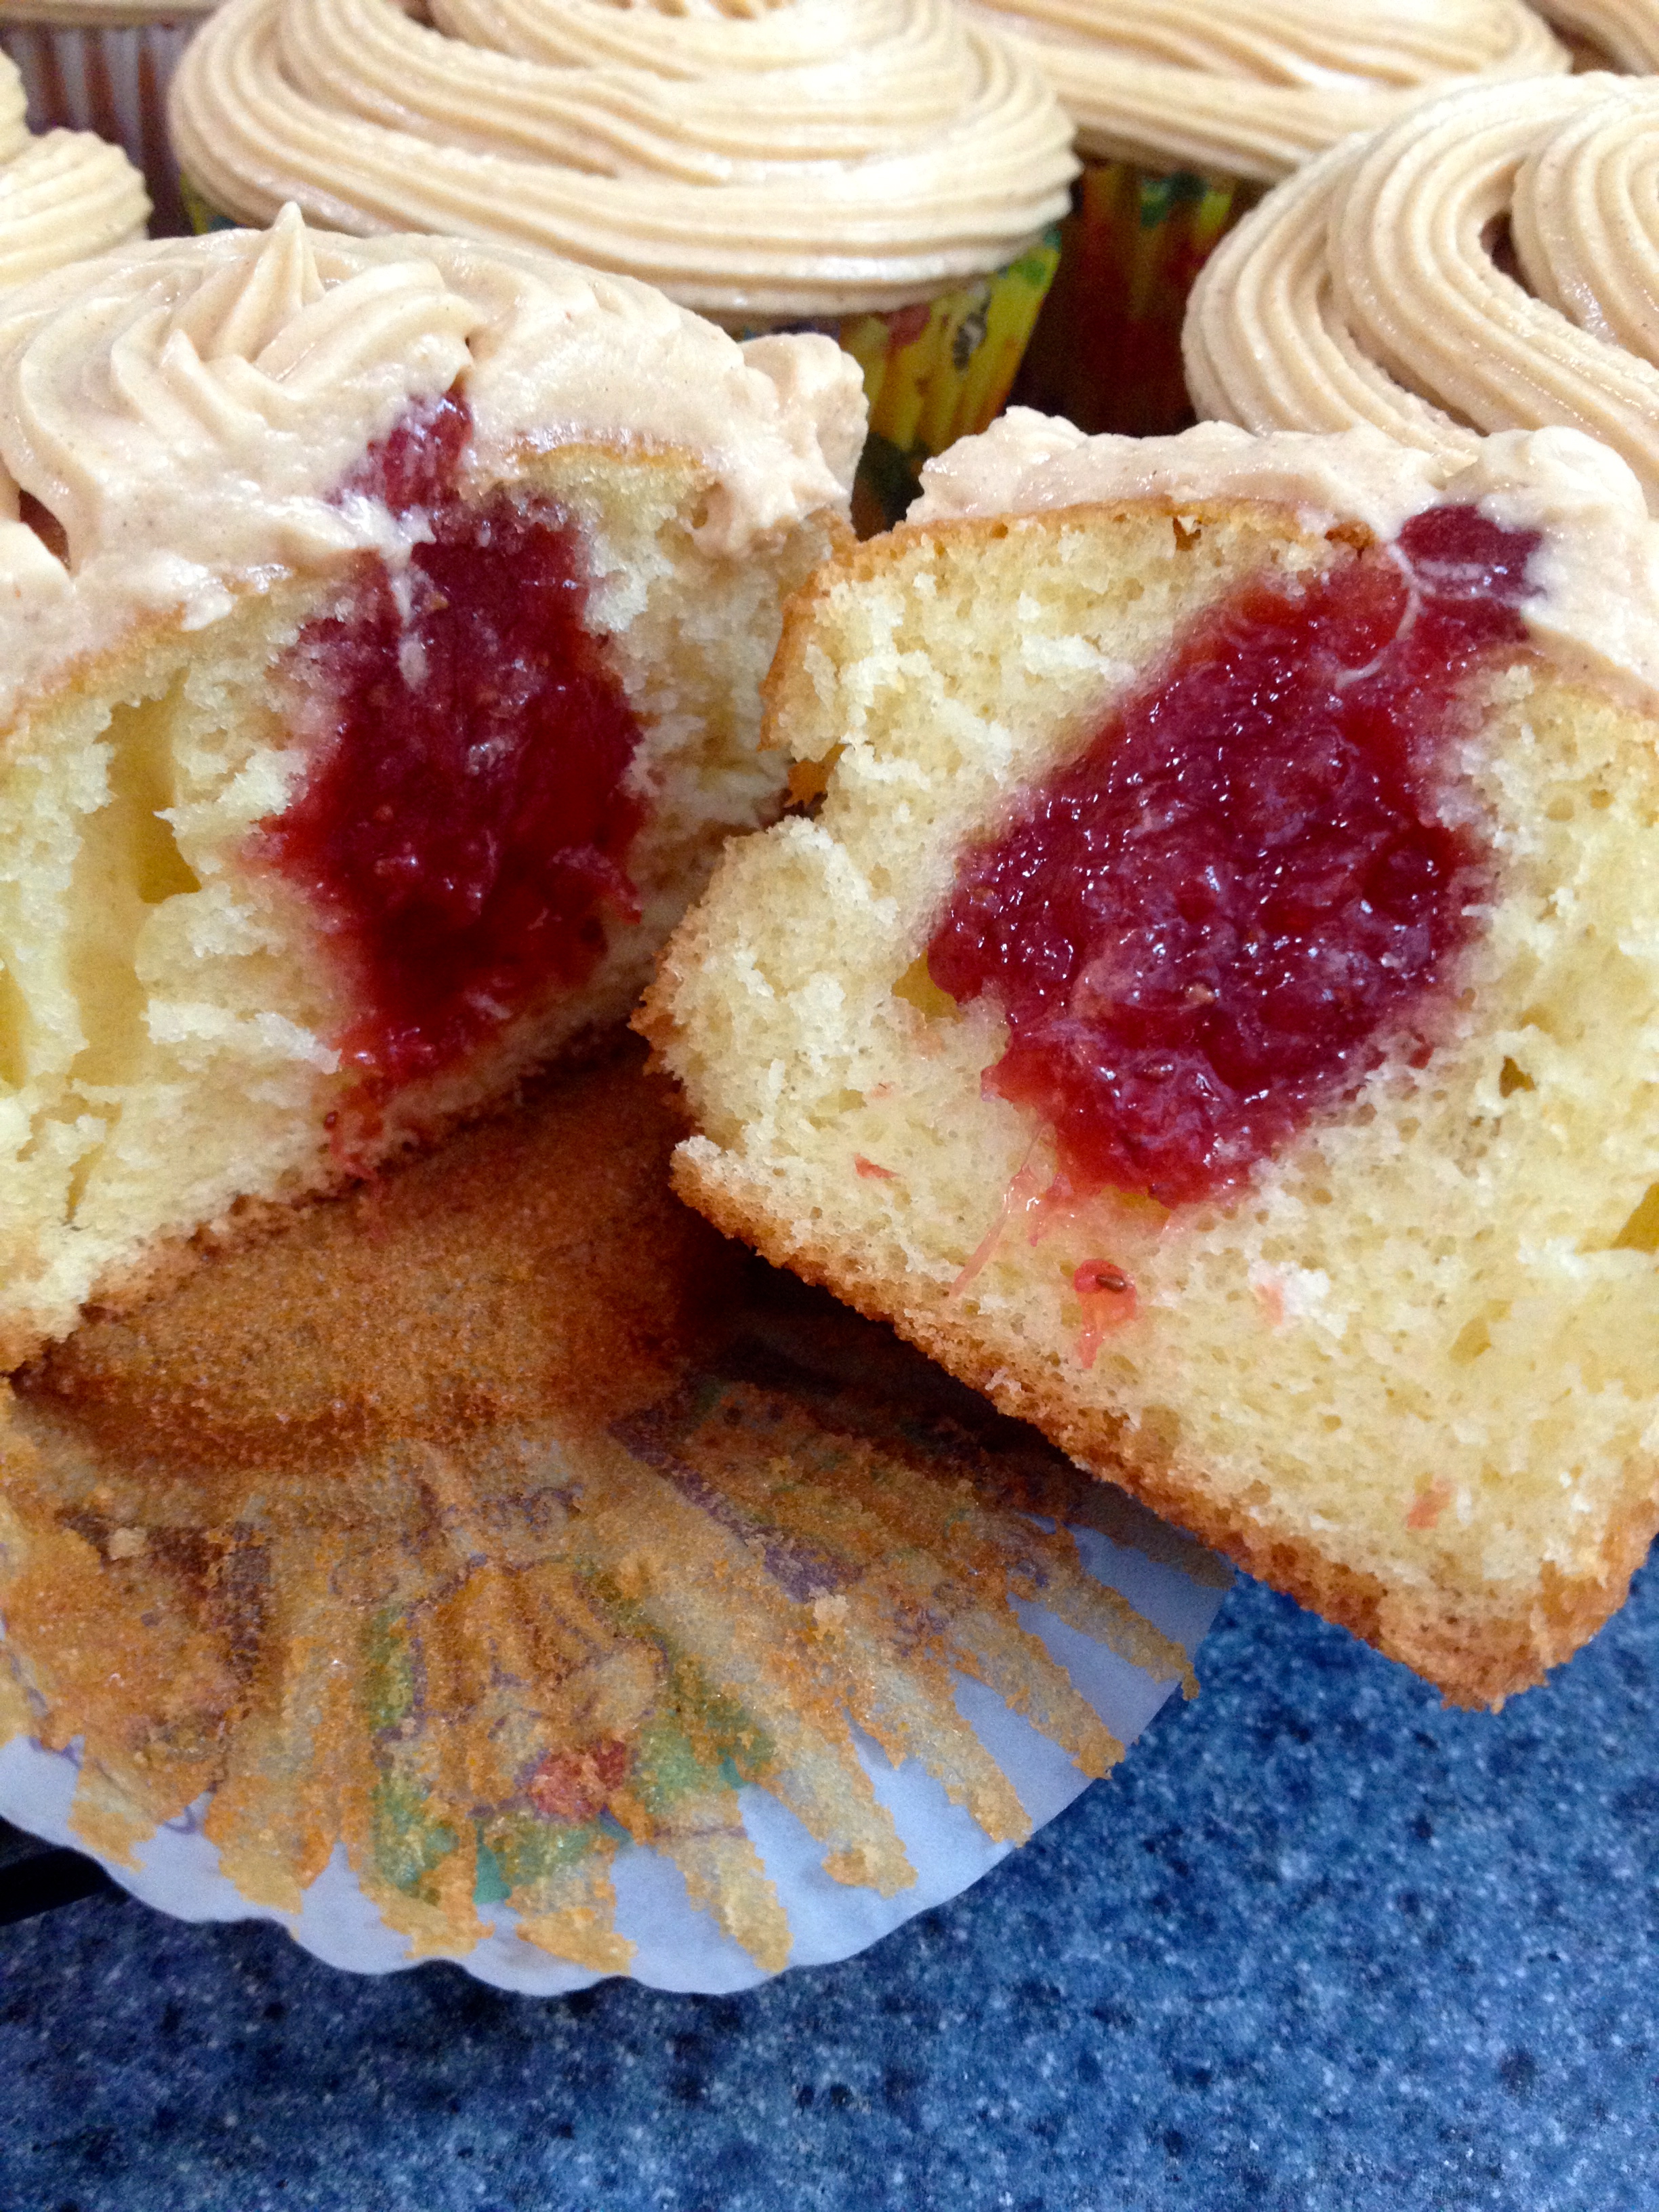
Here’s the awesome part: filling the cupcakes with jelly! You can do this two ways. If you have a pastry bag set (like I now do, because my brother rocks!), go ahead and fill a pastry bag with the strawberry jelly and attach a small circular tip. If you don’t, no worries! Cut a small hole in the center of the cupcake either using a knife, or a nifty cupcake corer- like the one my brother got me!
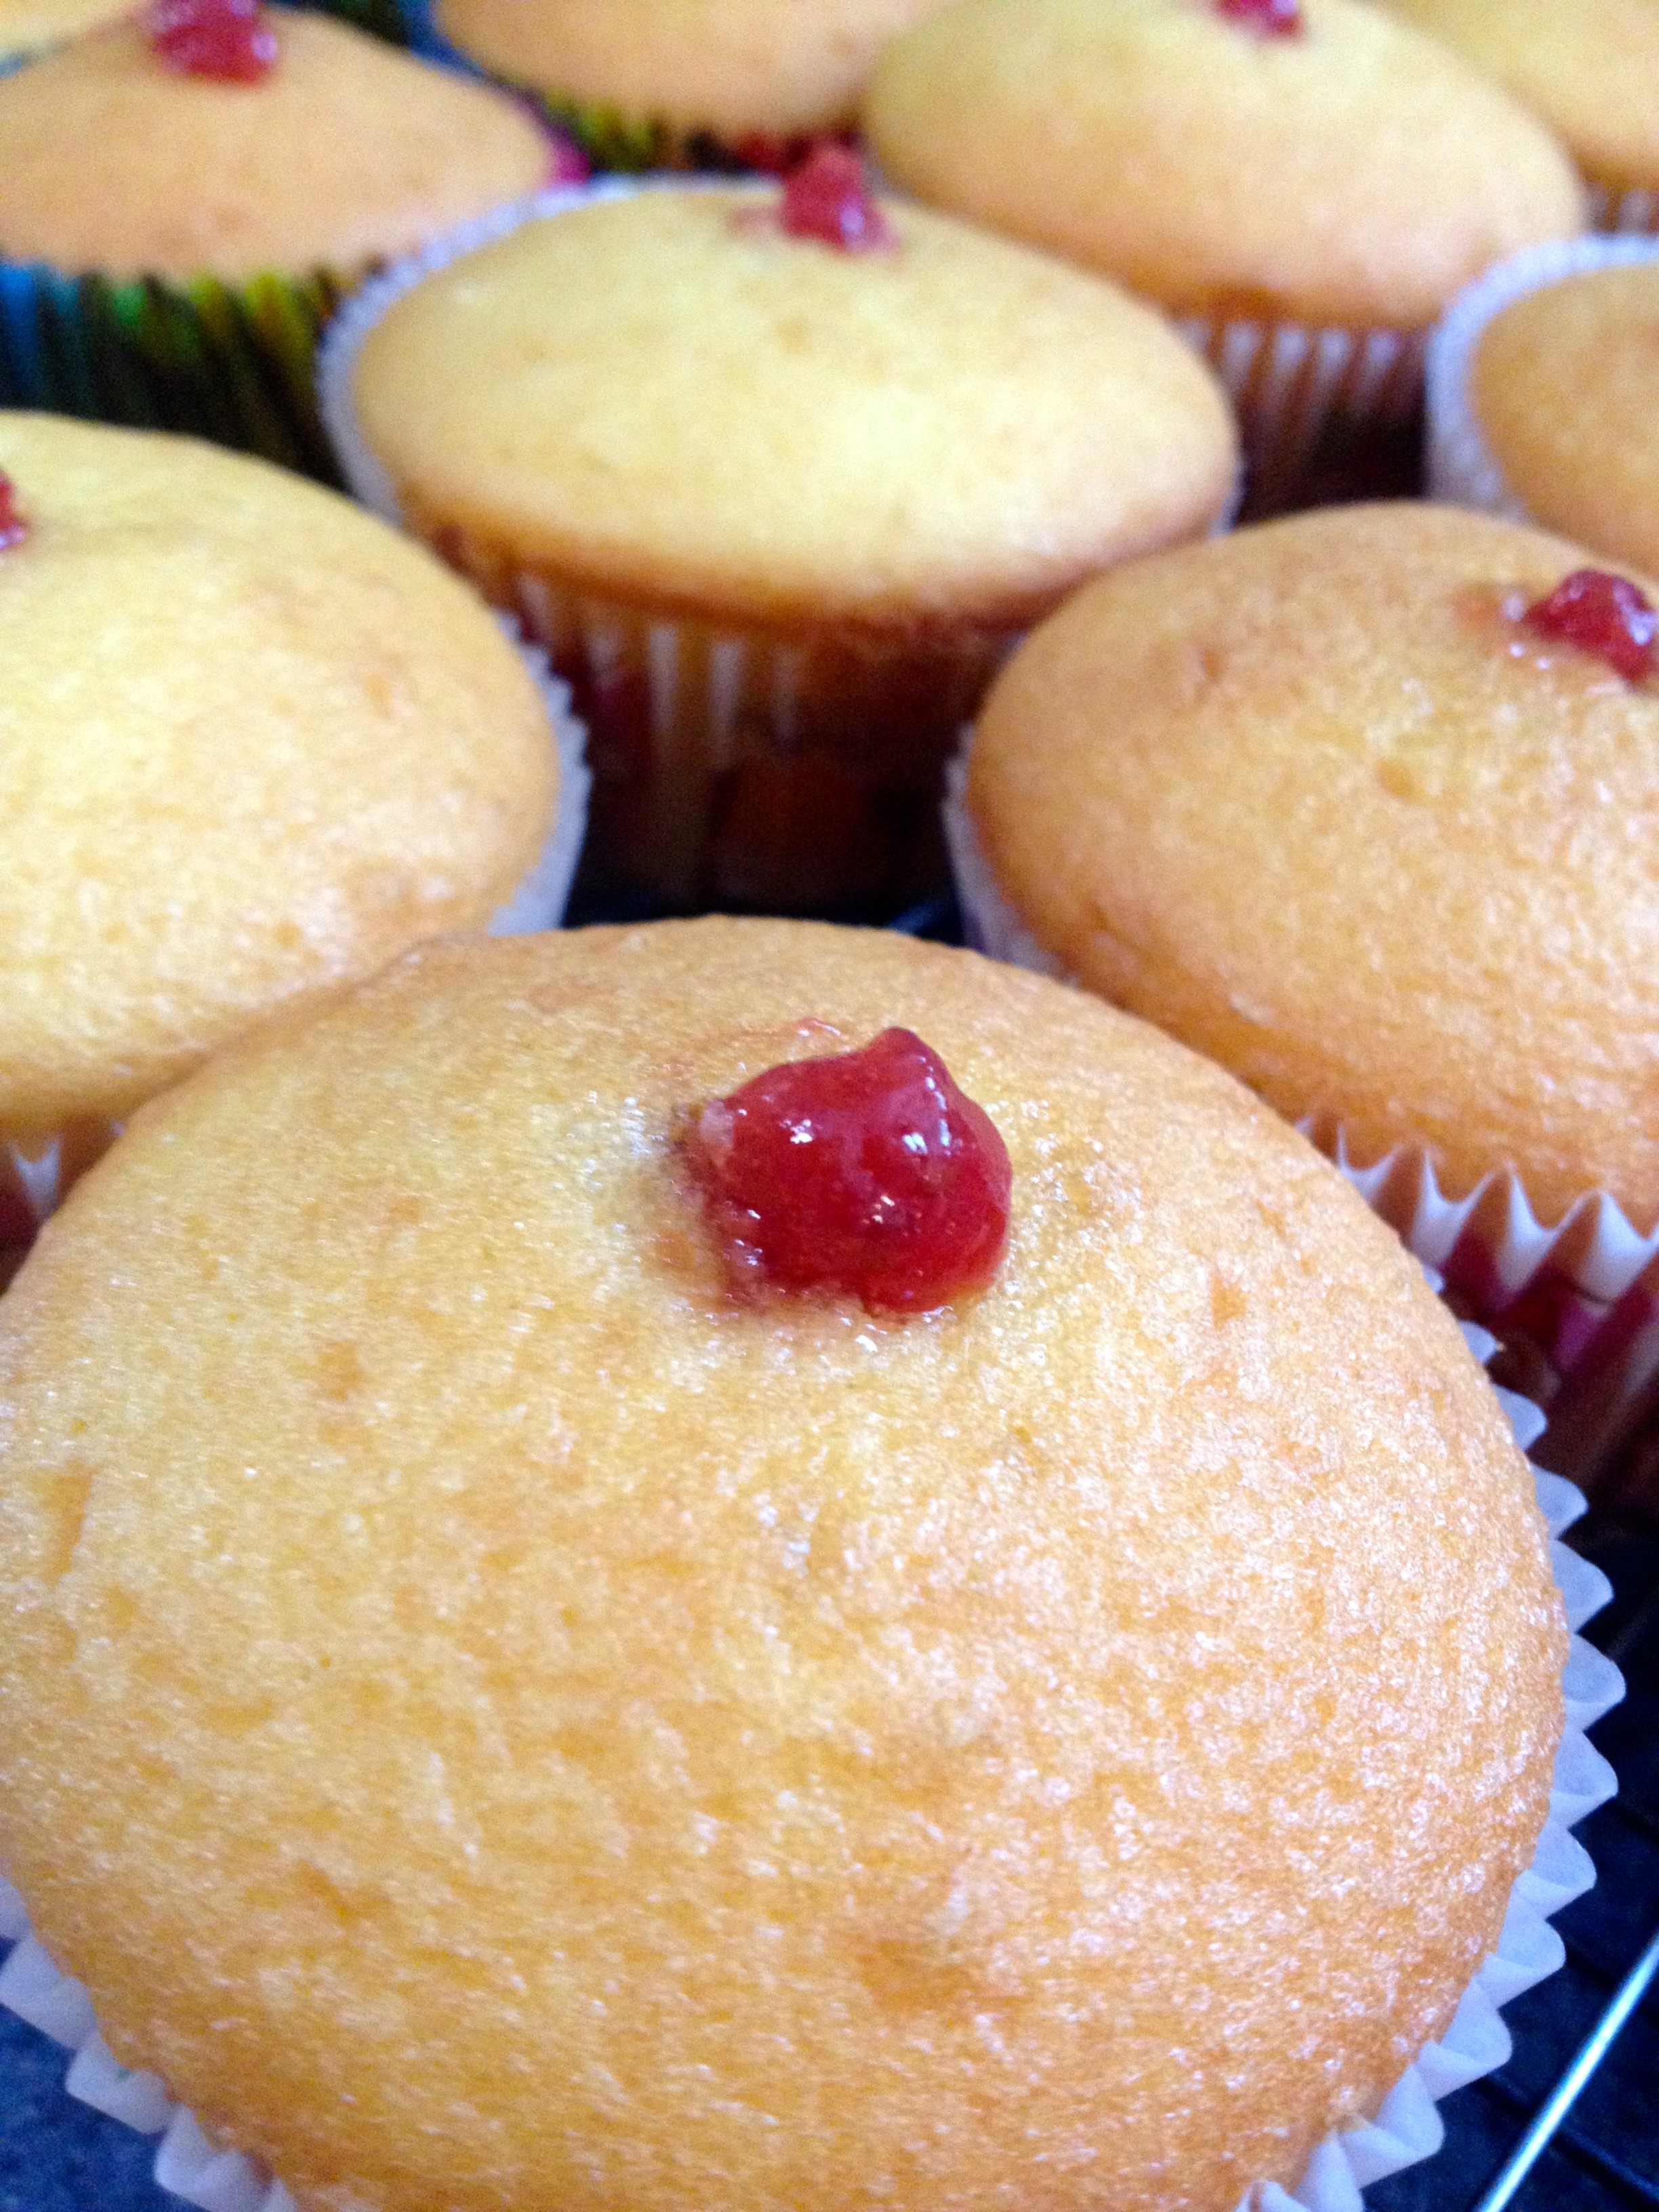
If you cut holes in the center of the cupcakes, spoon a little jelly into the holes. If you’re using a pastry bag, insert the tip into the center of the cupcake and squeeze out jelly until the jelly just starts coming out the top of the cupcake. It should look like this:
If you cored your cupcake, it should look like this:
Now on to frosting! Beat the peanut butter and margarine together with a hand held mixer for 2 minutes on medium speed. Add the powdered sugar and vanilla, and mix on low speed for 1 minute. At this point, it’ll be really thick. Then, gradually add the milk and mix the frosting until it’s really smooth and creamy. To frost, you can either use a knife and spread the frosting onto the cupcakes, or use a pastry bag and pipe the frosting on. Since I wanted to play with my new pastry bags, I piped my frosting. Here’s the final product!
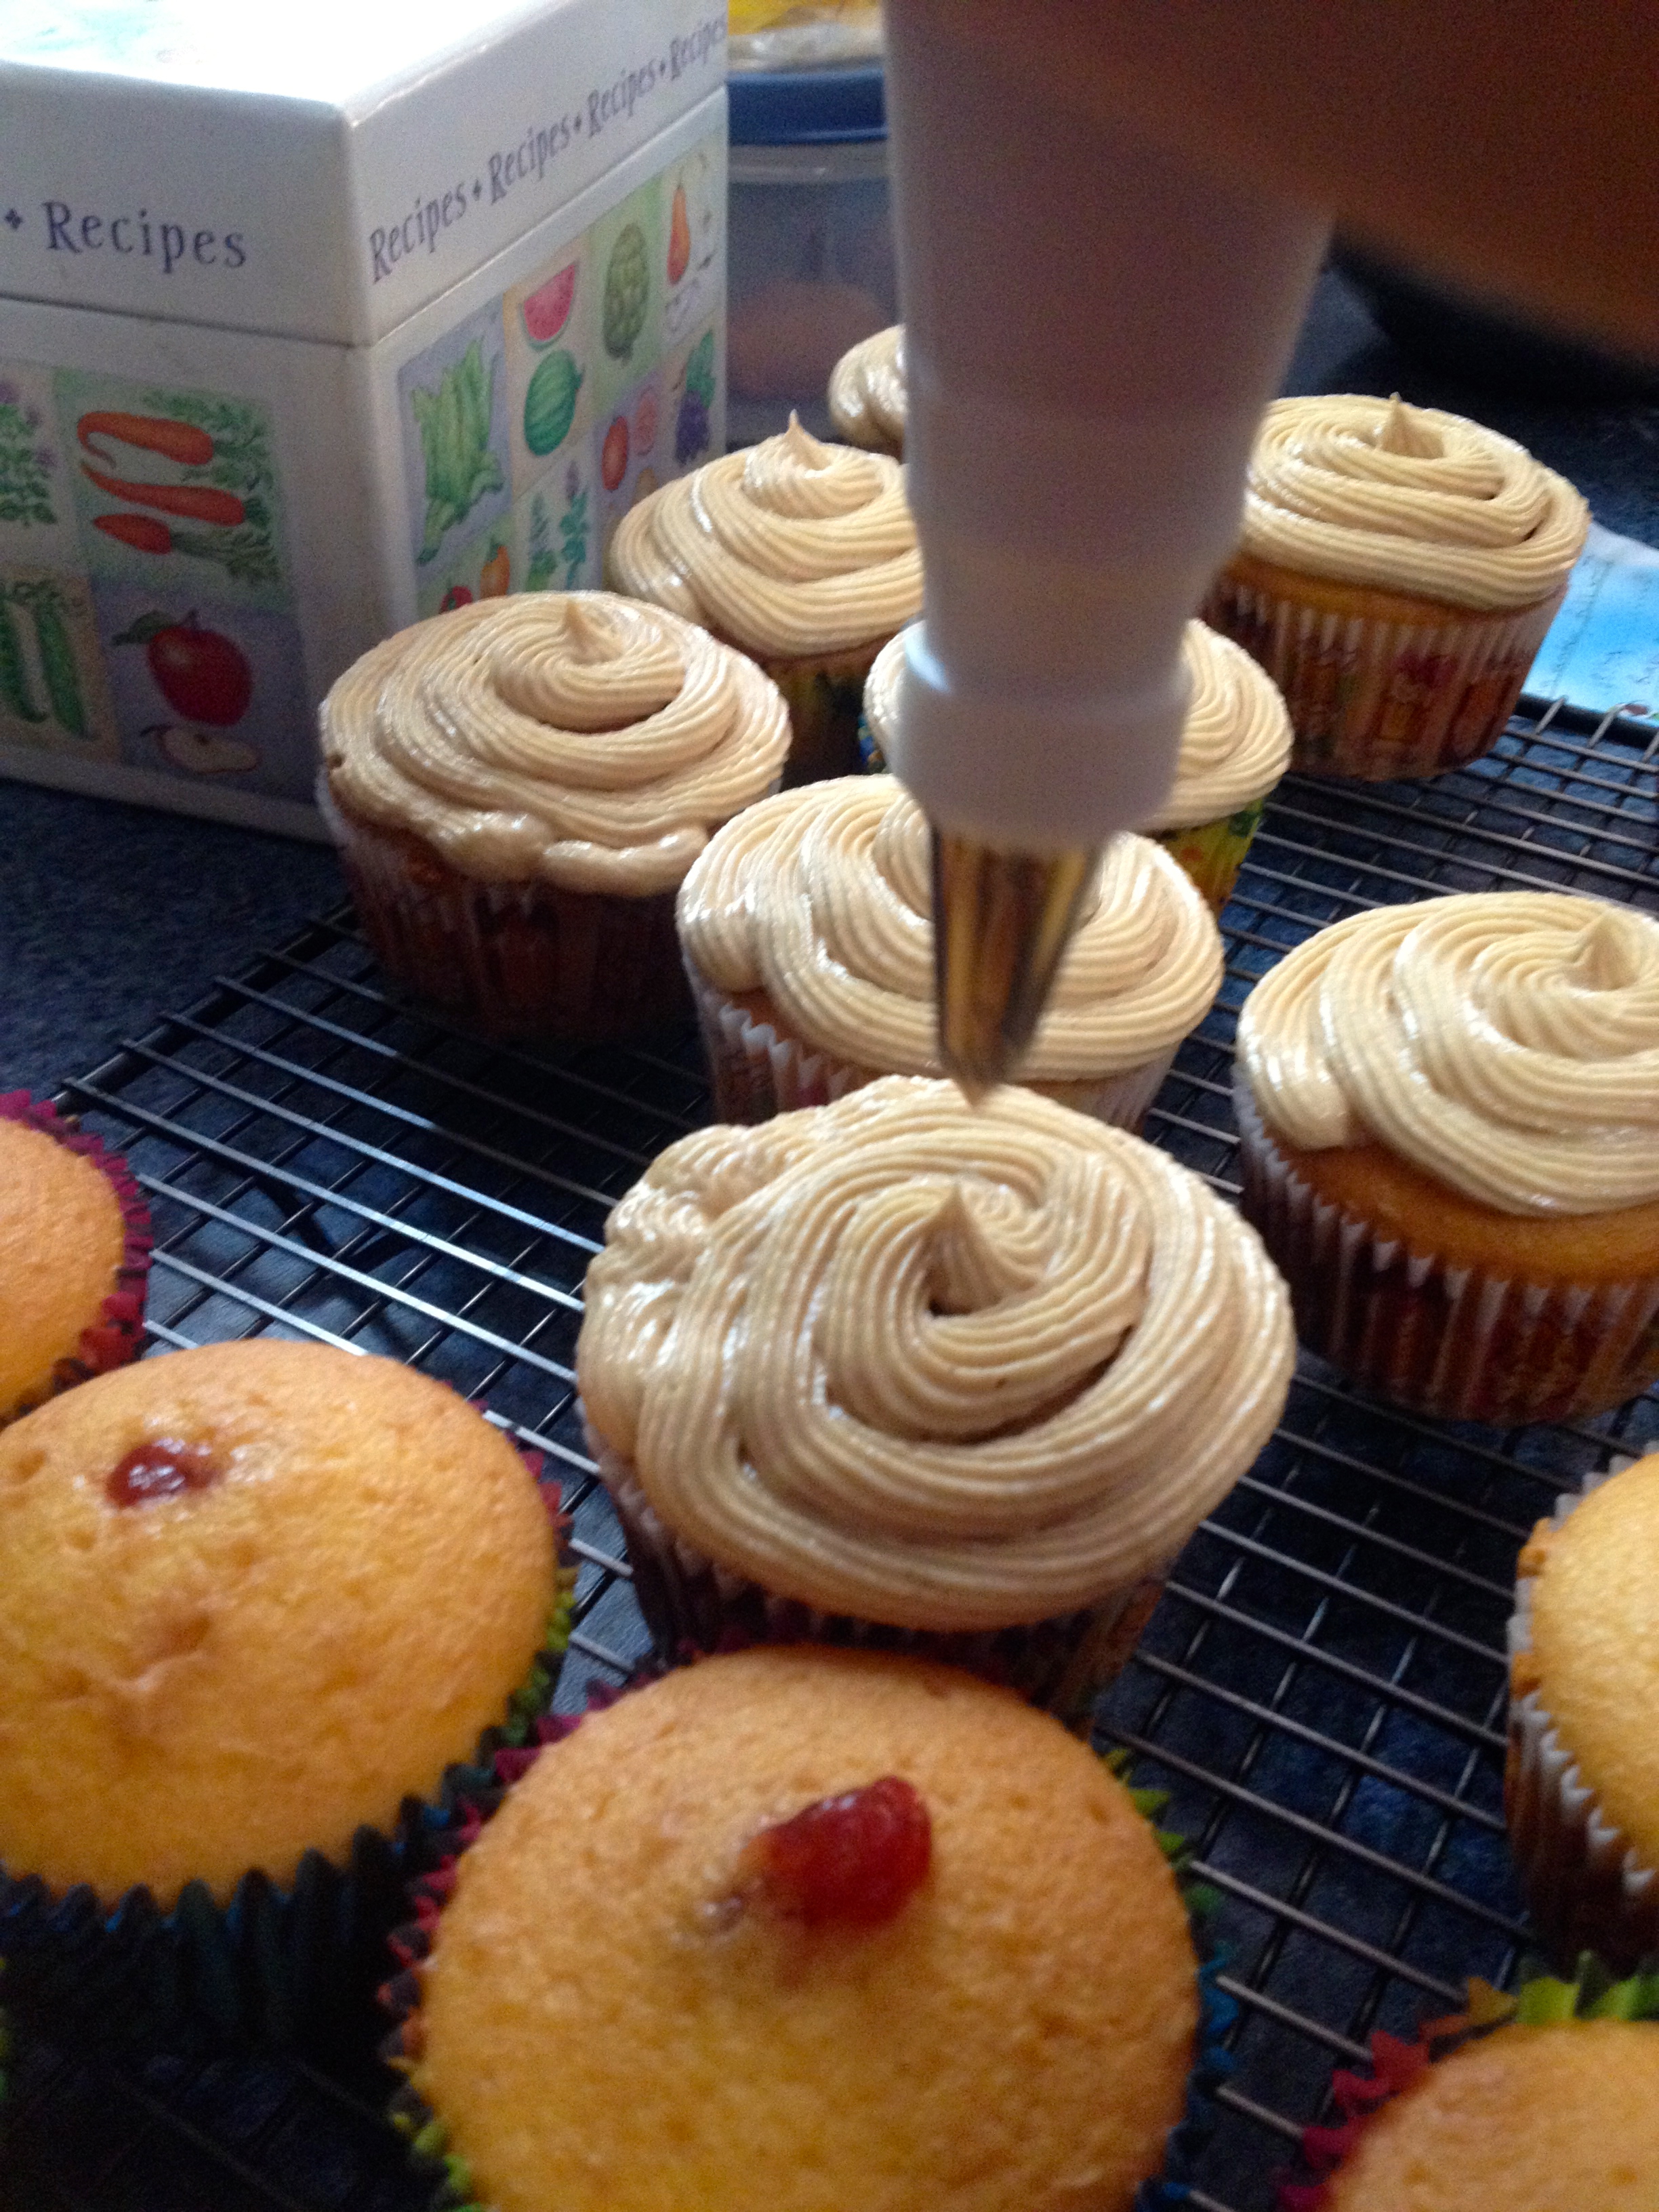
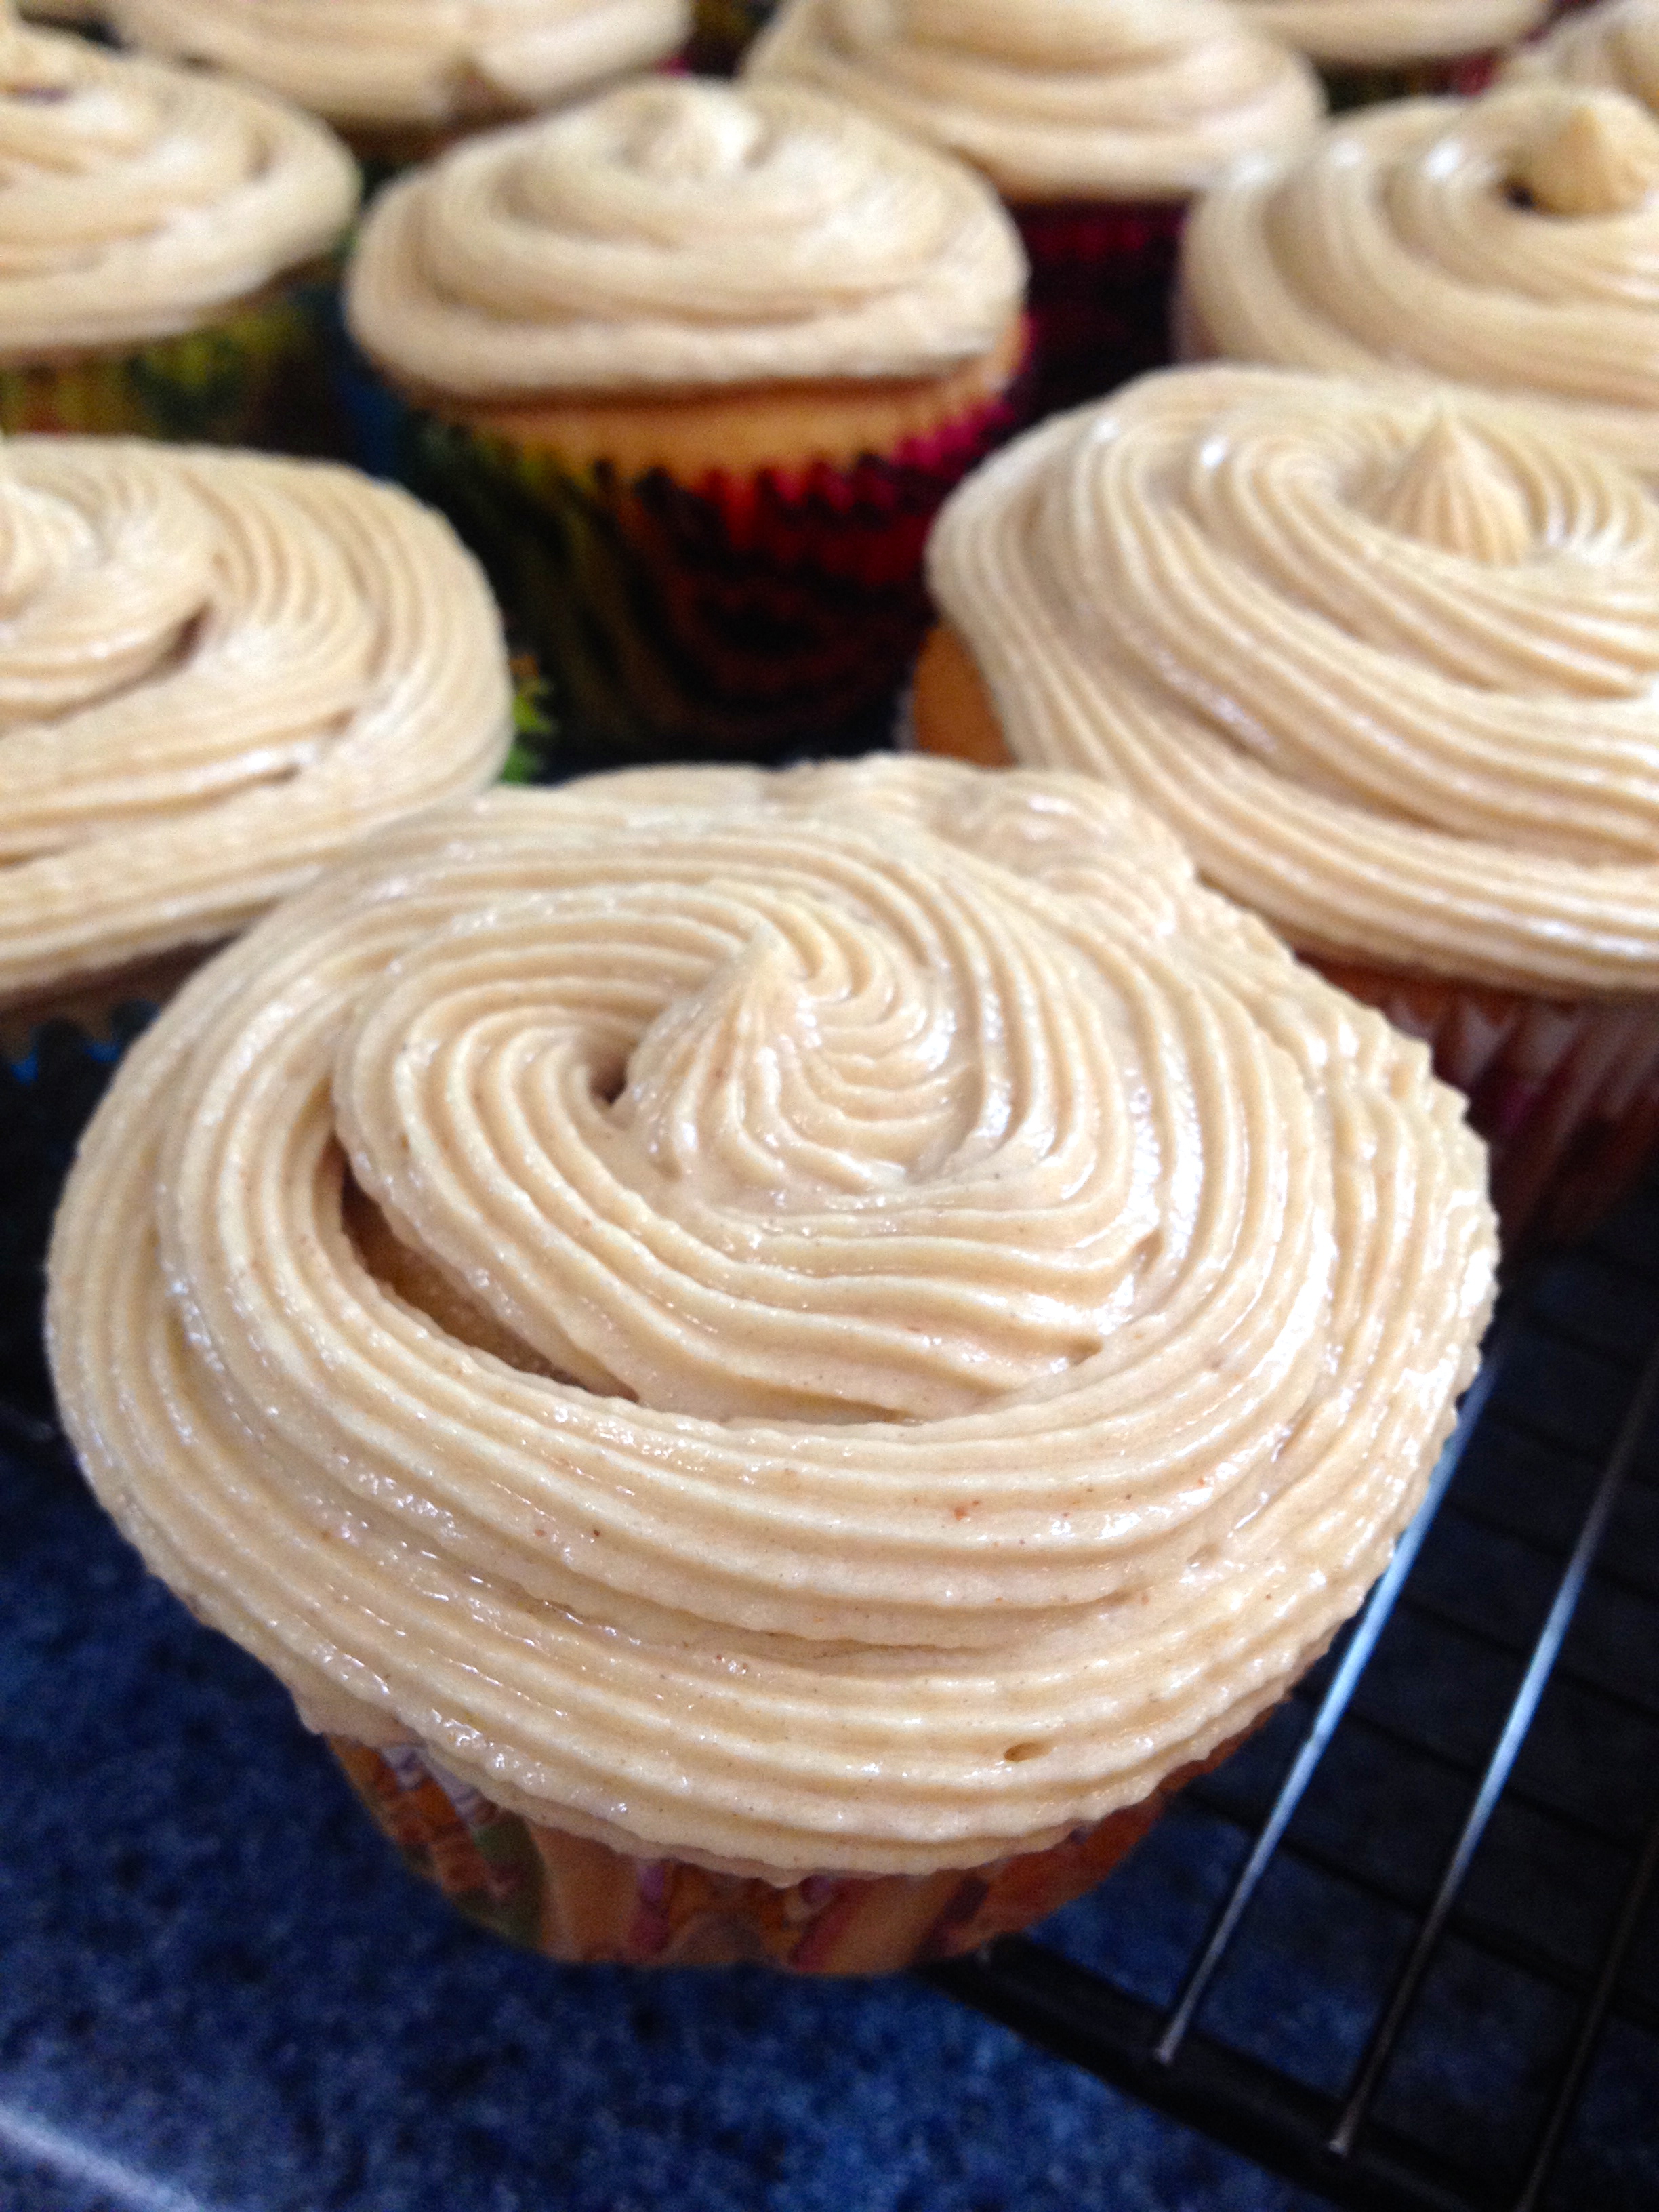
I’m telling you, that’s the perfect cupcake. Peanut butter and jelly really is a match made in Heaven. So, this recipe is a total winner. On to the next one!
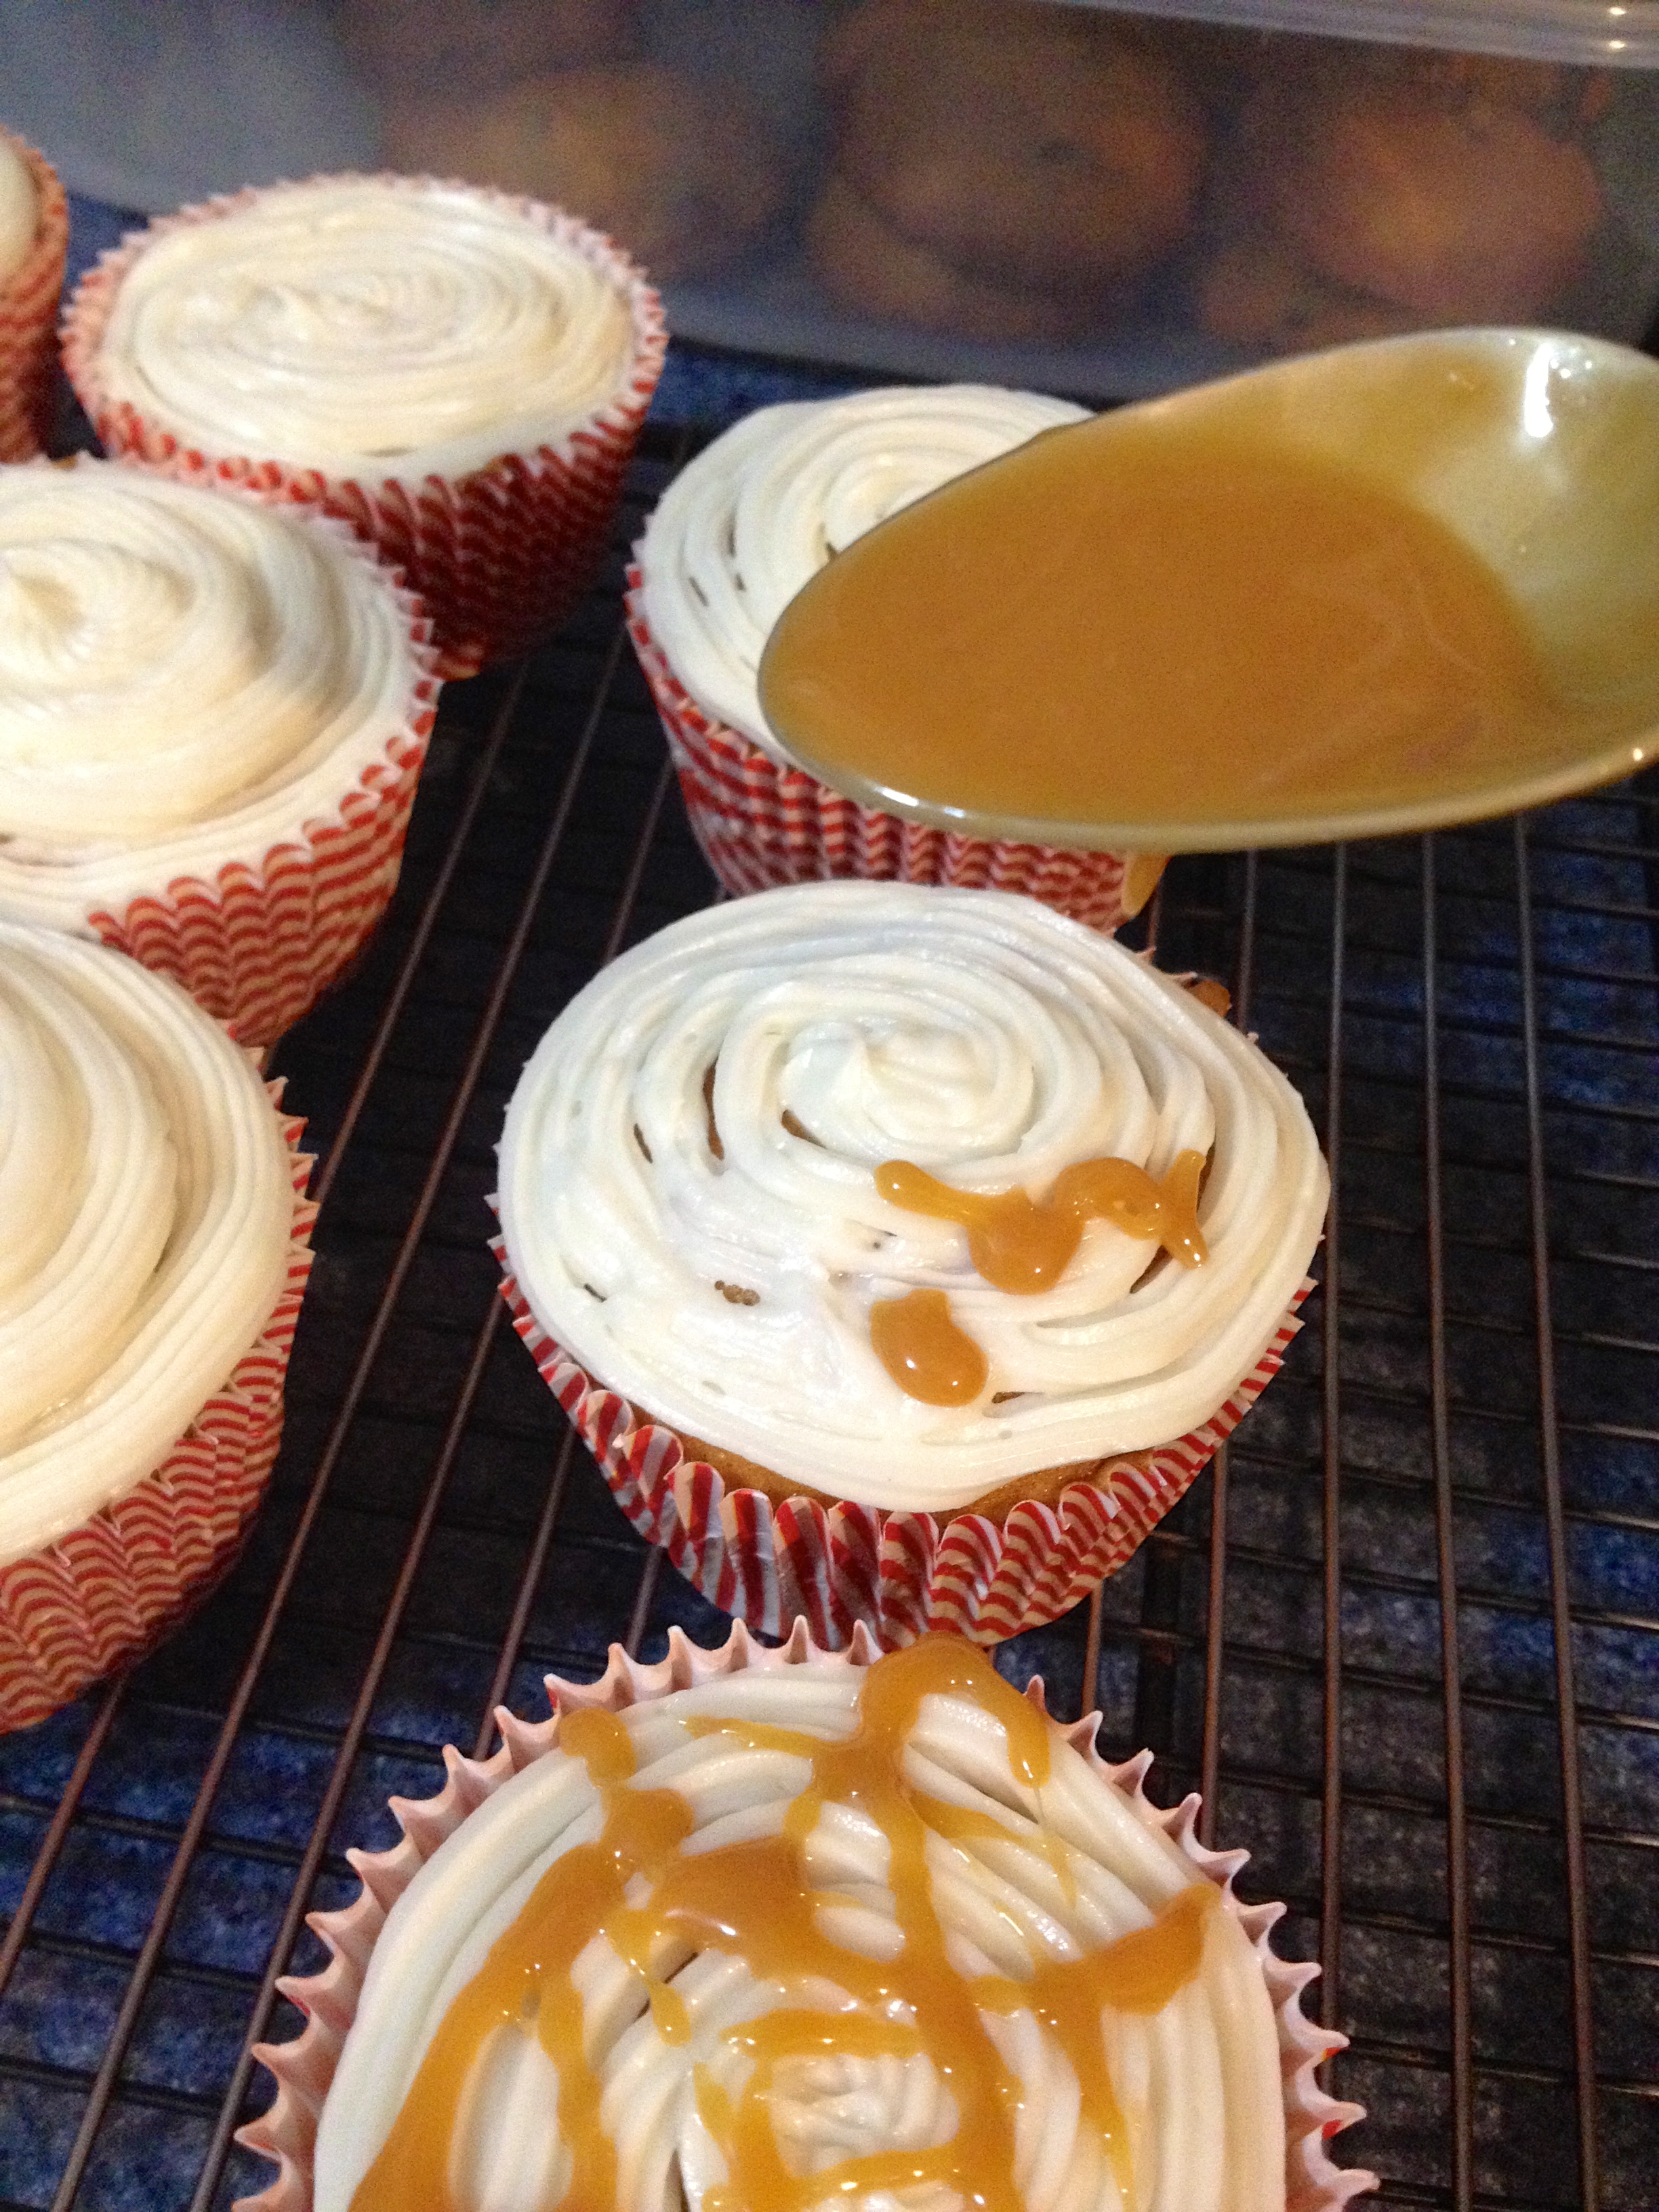
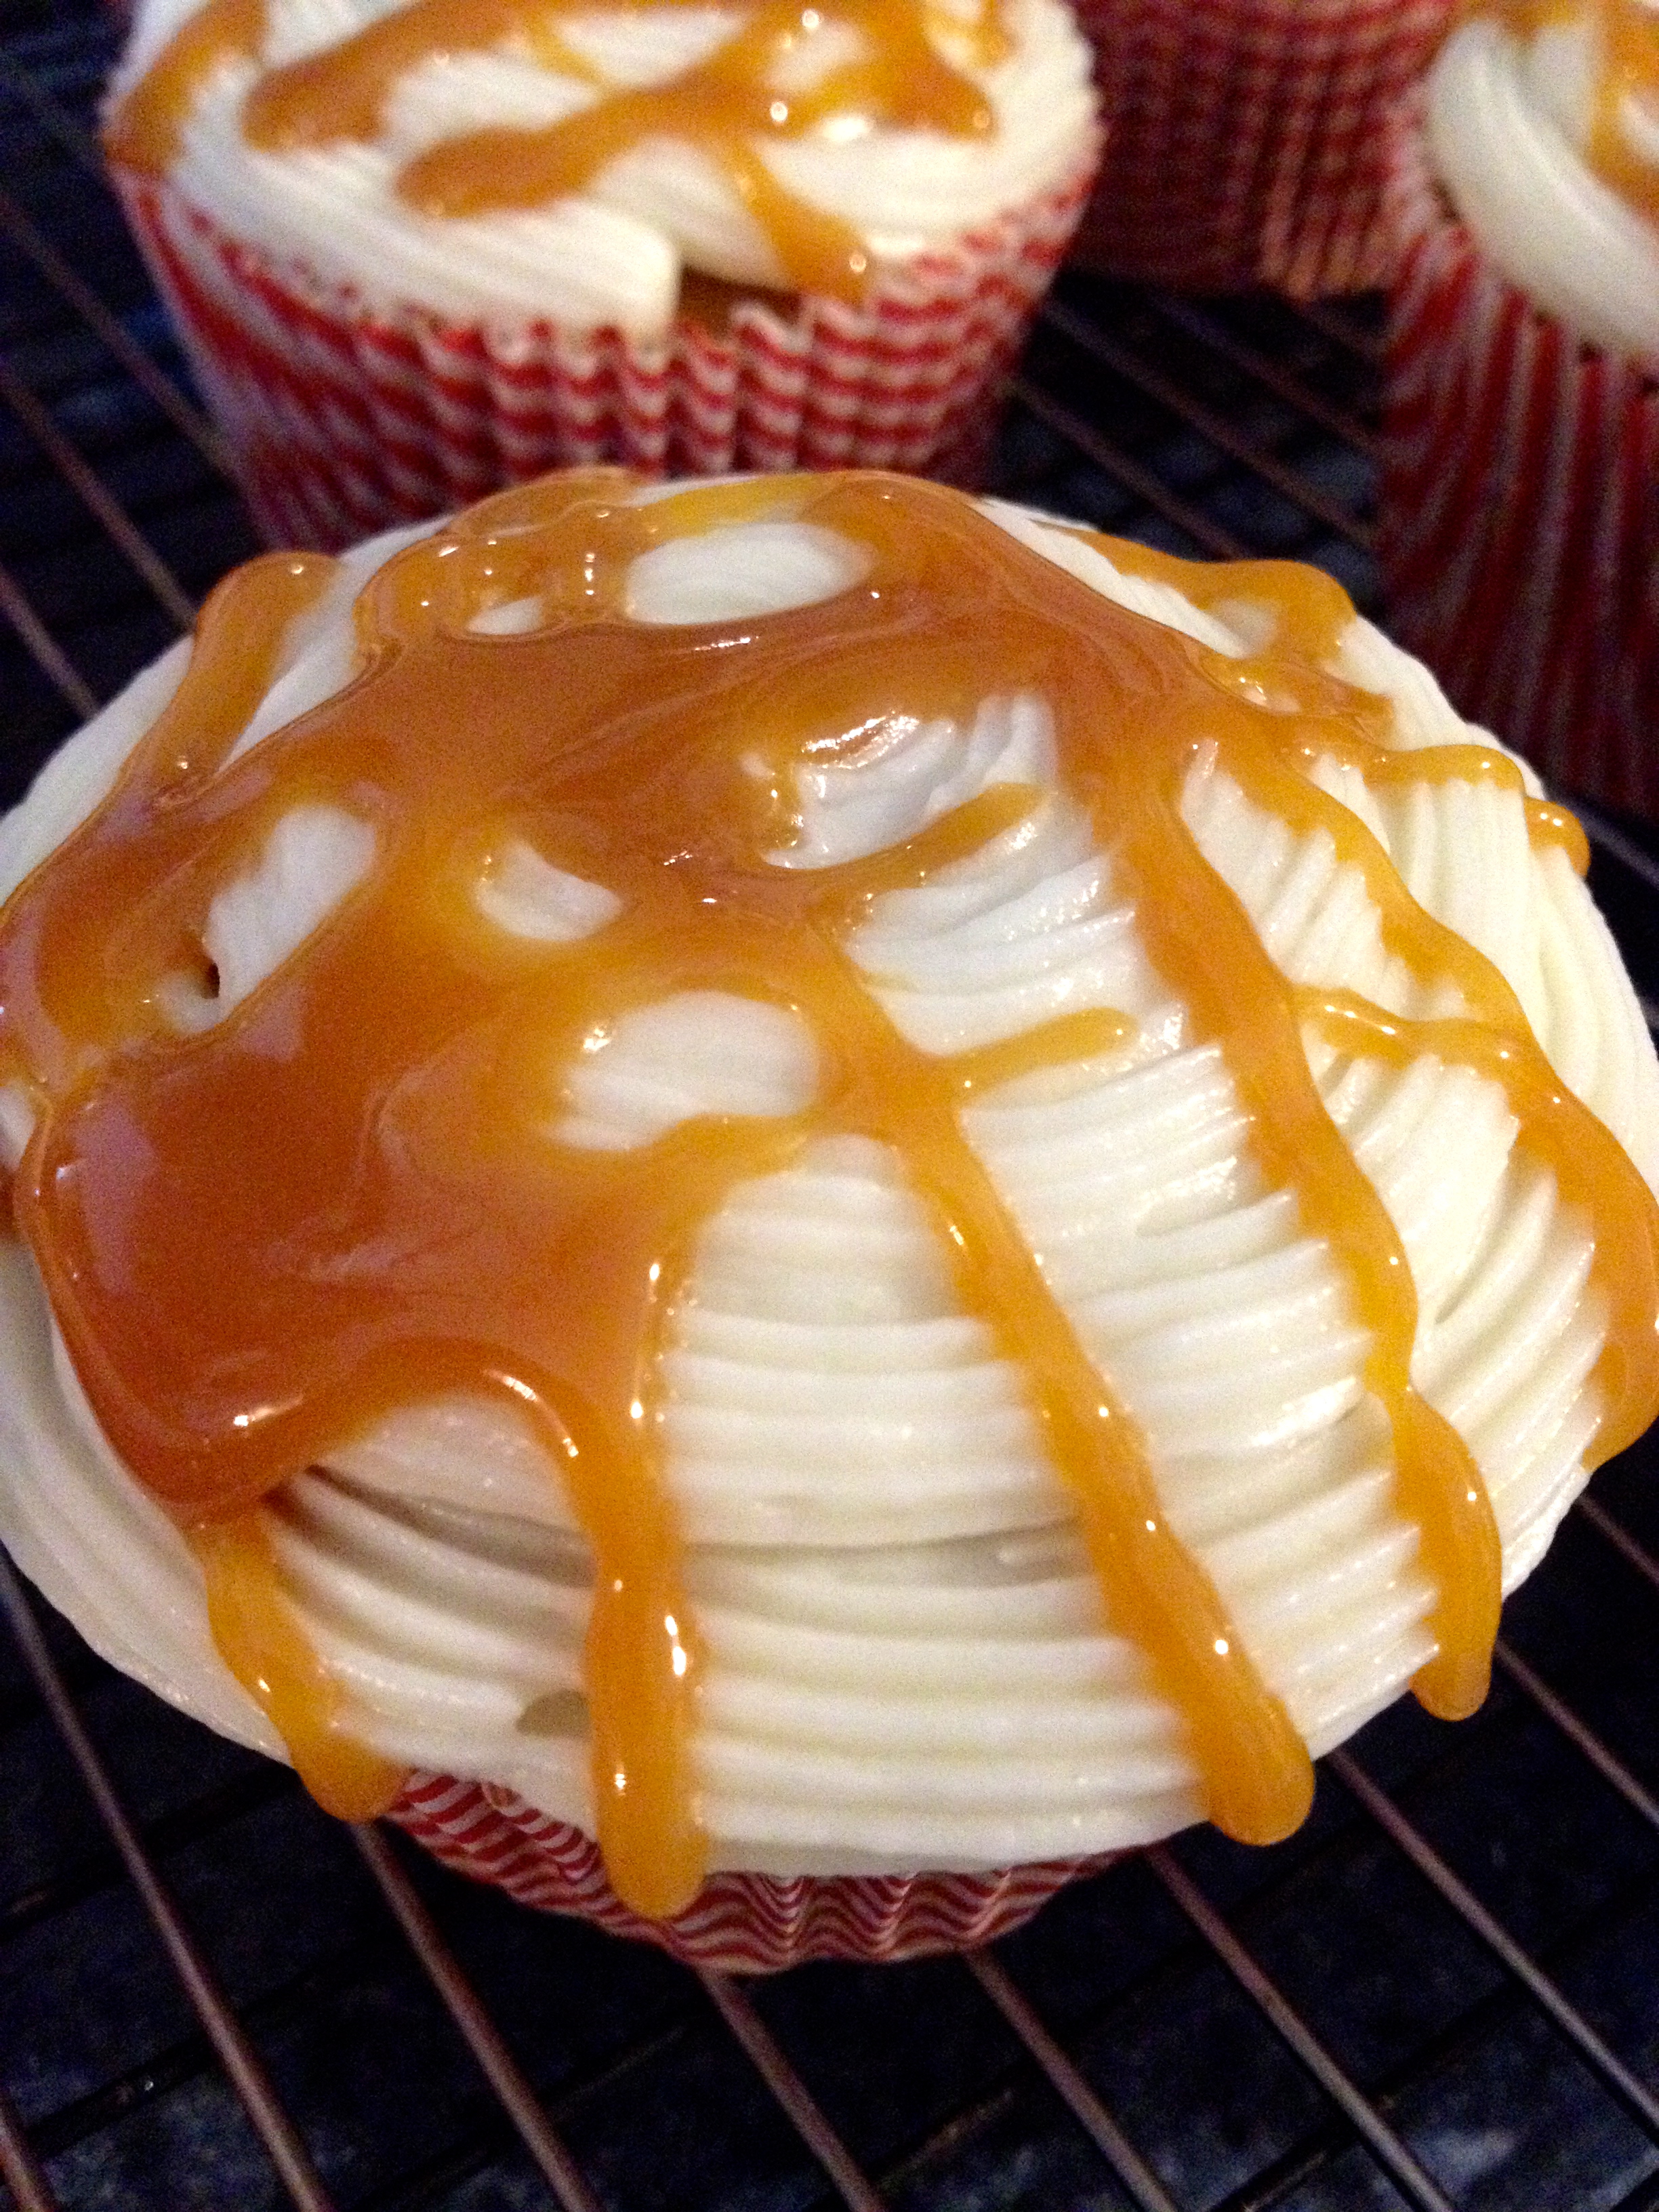
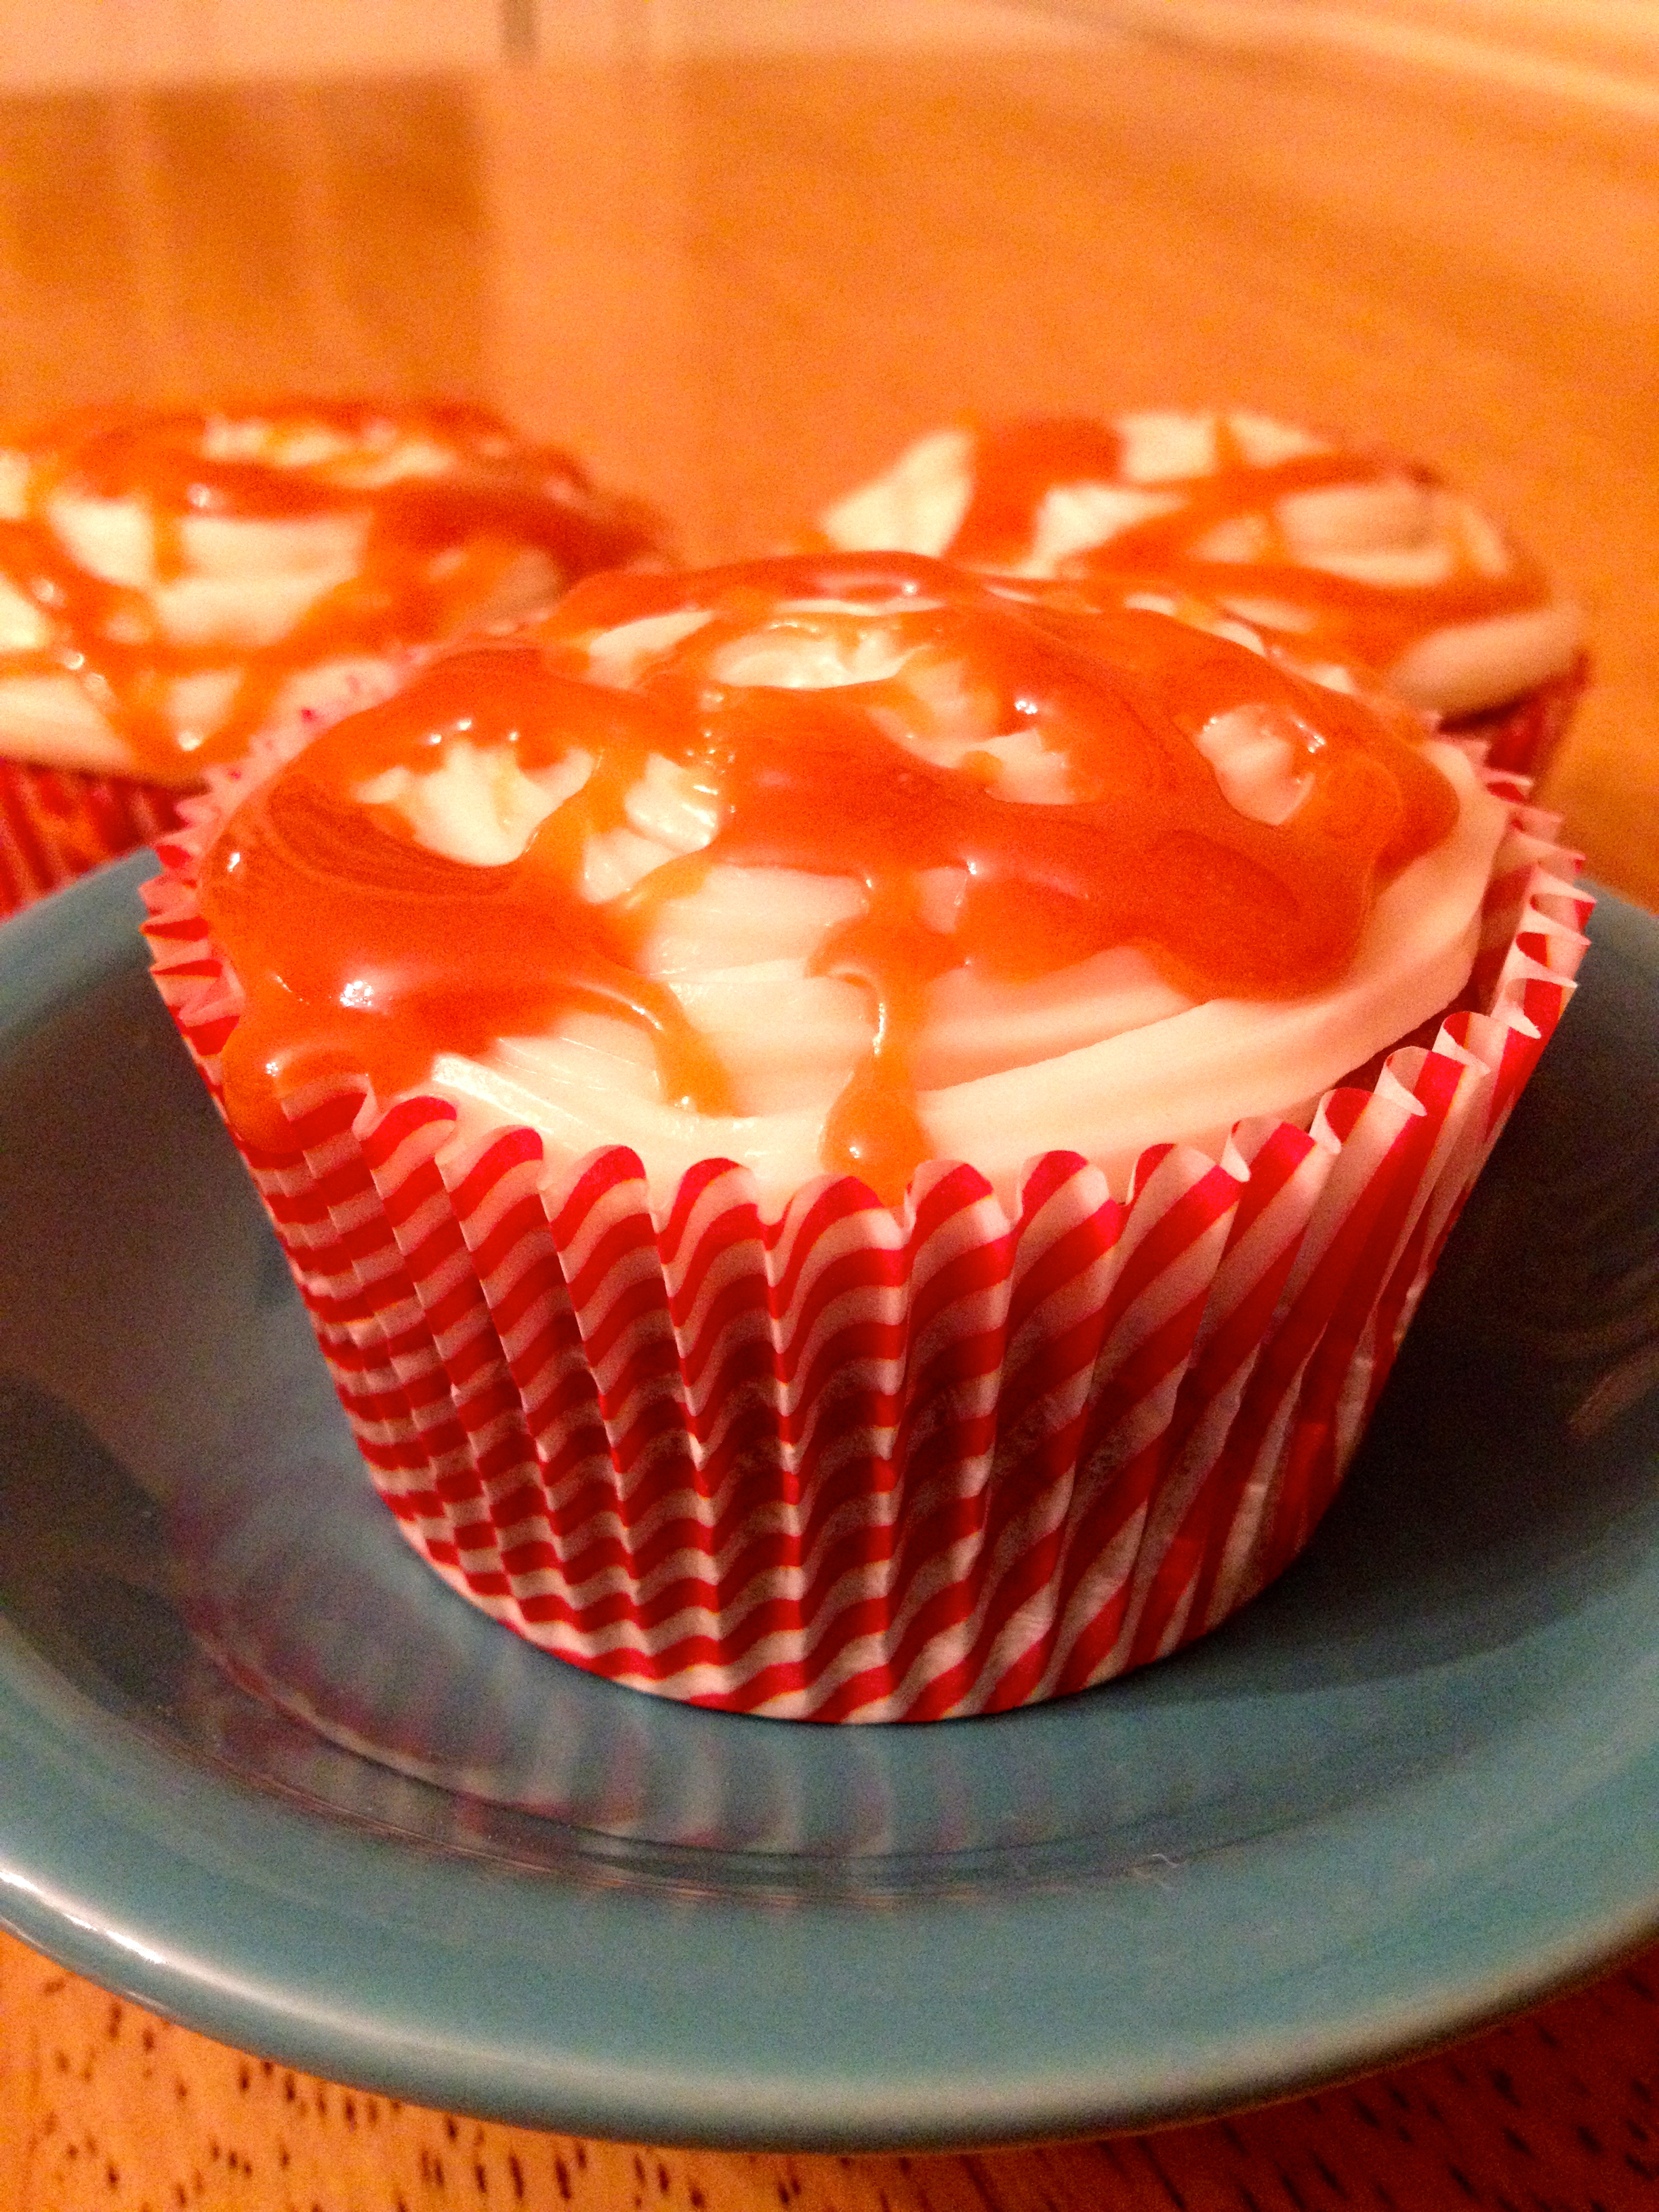
Taffy Apple Cupcakes (renamed by me to Caramel Apple Cupcakes)
These mini cupcakes are the perfect little bite: the warm spiced applesauce cake, with a smooth and smoky caramel, rolled in just the right amount of toffee crunch. This was a huge hit with my roommates, and I know it will be for you!
Ingredients:
- 1 & 3/4 cups all-purpose flour
- 1 tsp baking soda
- 1 tsp ground cinnamon
- 1/2 tsp salt
- 1 cup unsweetened applesauce
- 3/4 cup granulated sugar
- 1/2 vegetable oil
- 1 egg
- 1 package caramels (~14 oz)
- 3 tbsp low-fat milk
- 30 wooden craft sticks
- 1 bag toffee bits (optional- you can use whatever topping you prefer, or none at all)
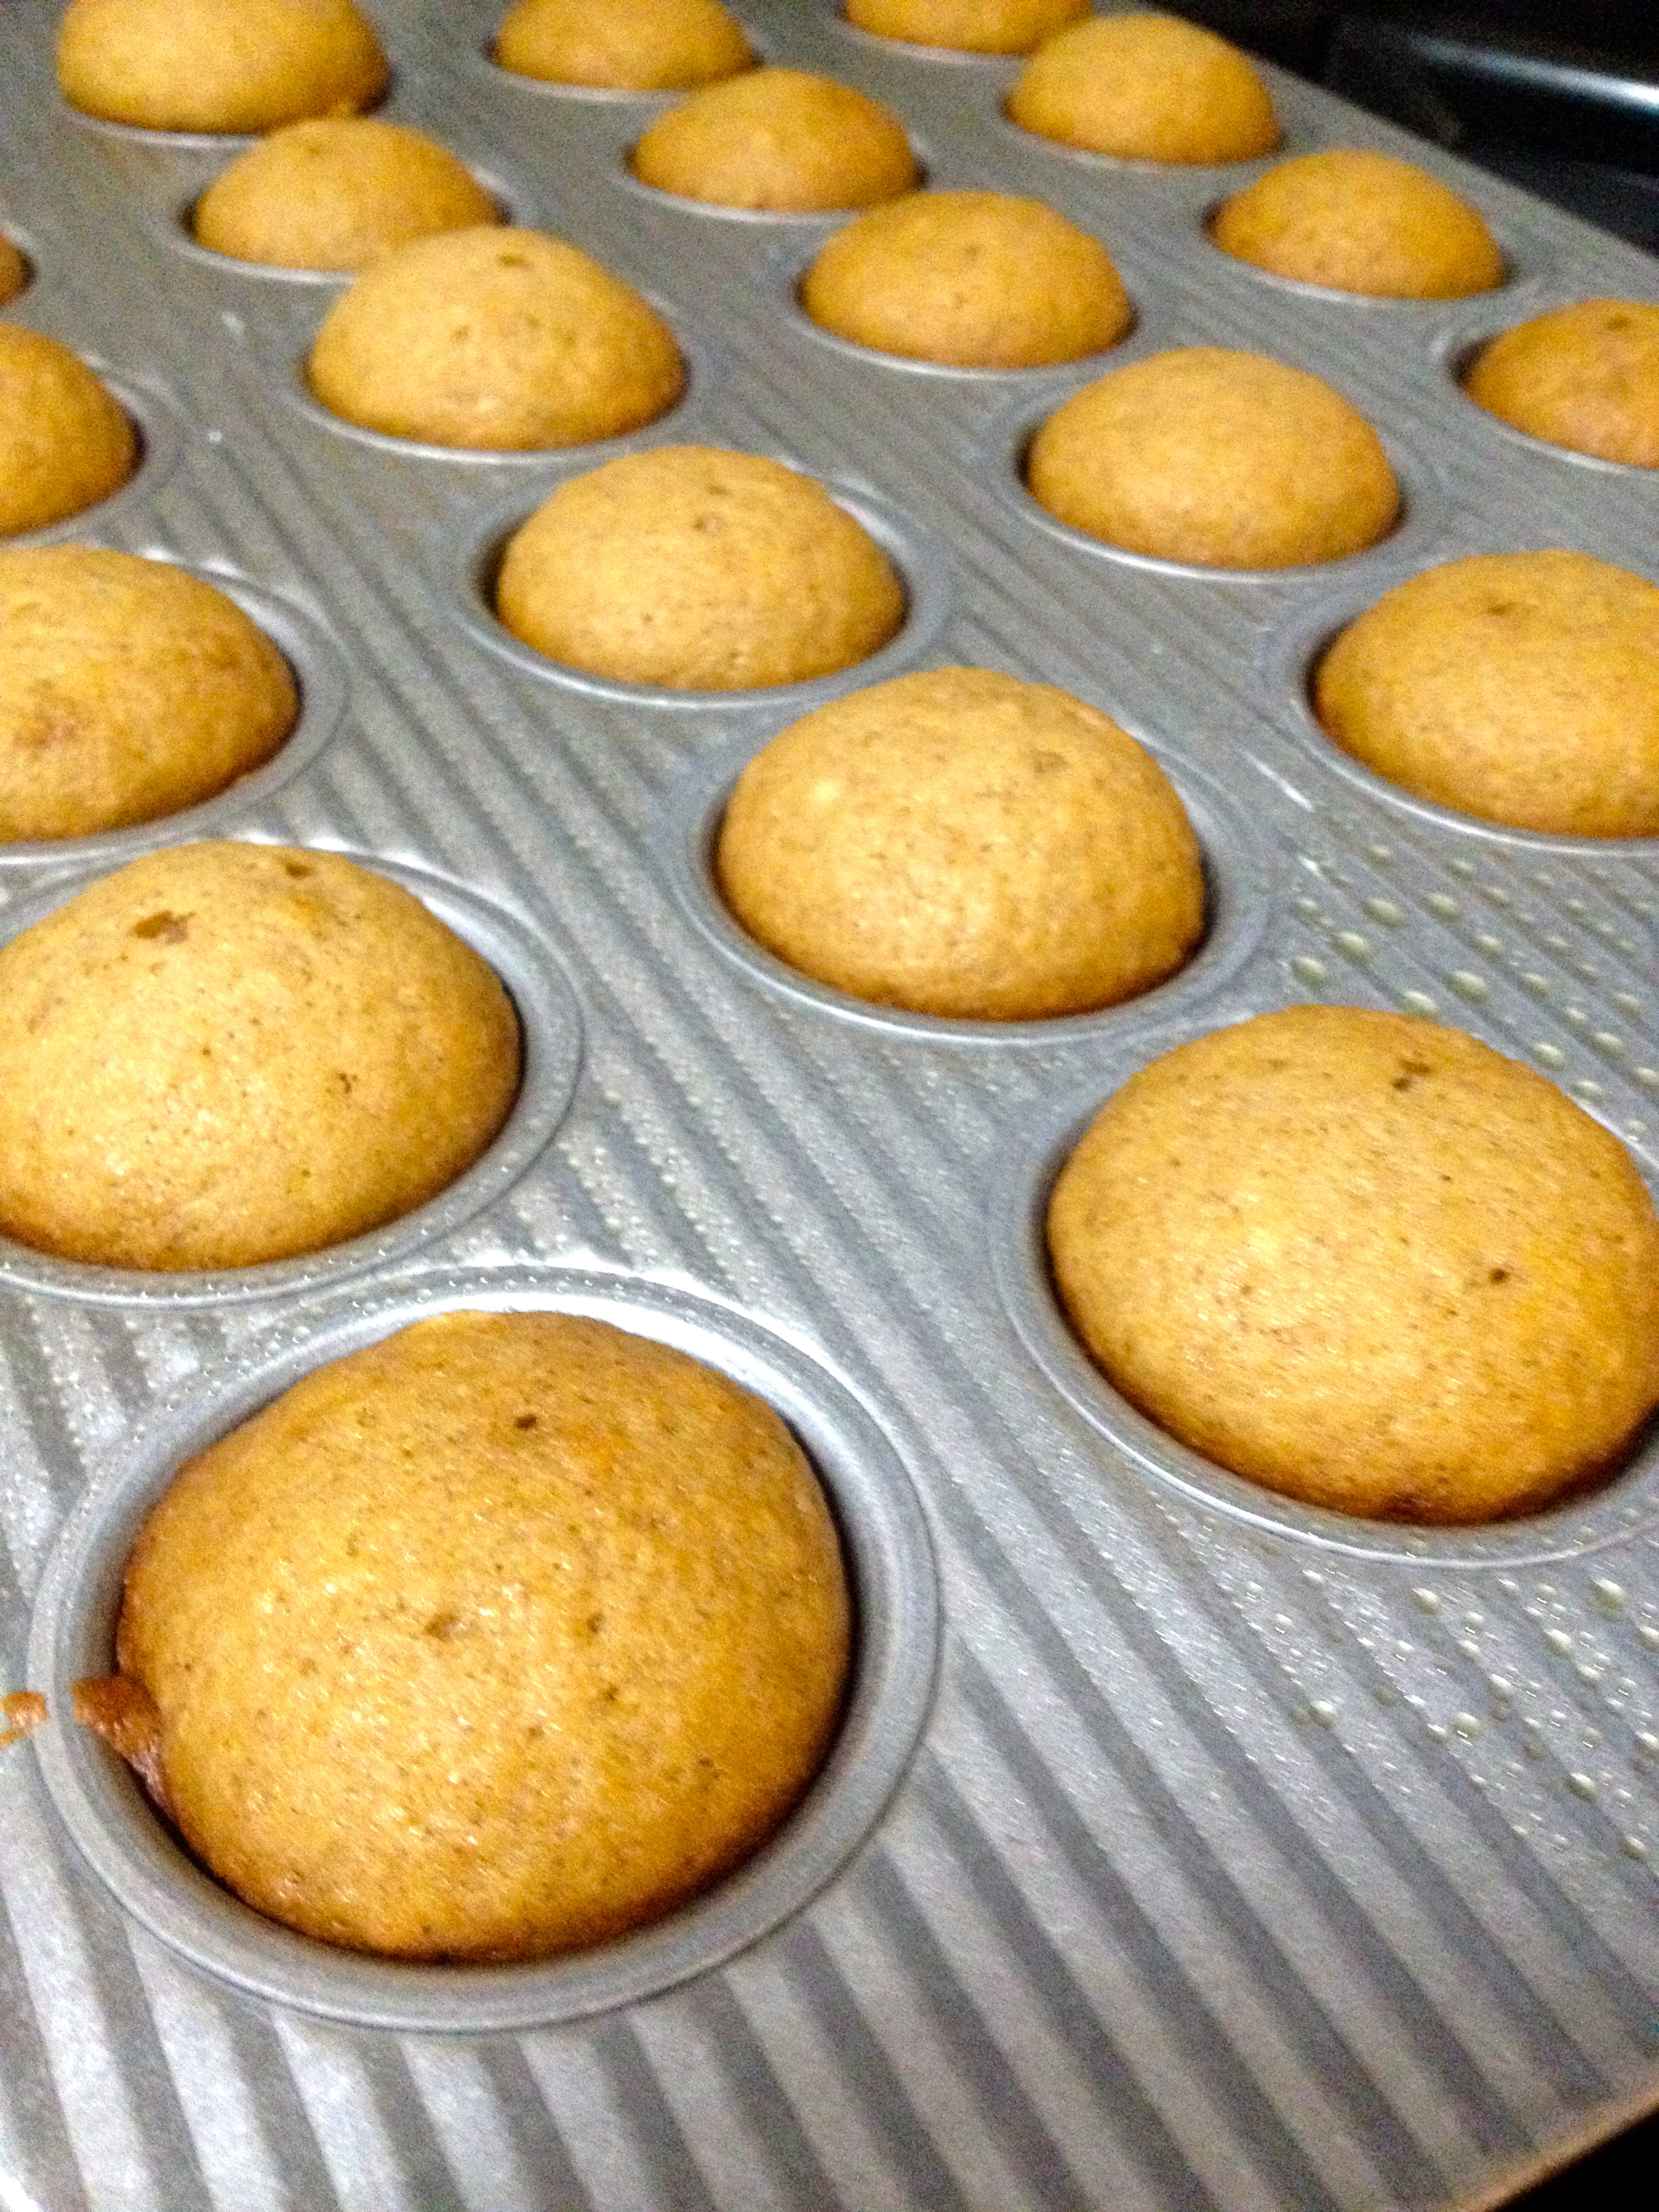
Preheat the oven to 350ºF, and spray 30 mini muffin cups with nonstick cooking spray. Combine the applesauce, sugar, oil, and egg in a large bowl. Add the flour, baking soda, cinnamon, and salt, and mix well until thoroughly combined. Fill the cups about 3/4 full. (Tip: These mini muffin cups are a lot smaller than you might think- I overflowed my first few, so go easy at first.) Bake 15 minutes, or until a toothpick comes out clean. Cool in the pans for 5 minutes, and then transfer them to a cooling rack to cool completely.
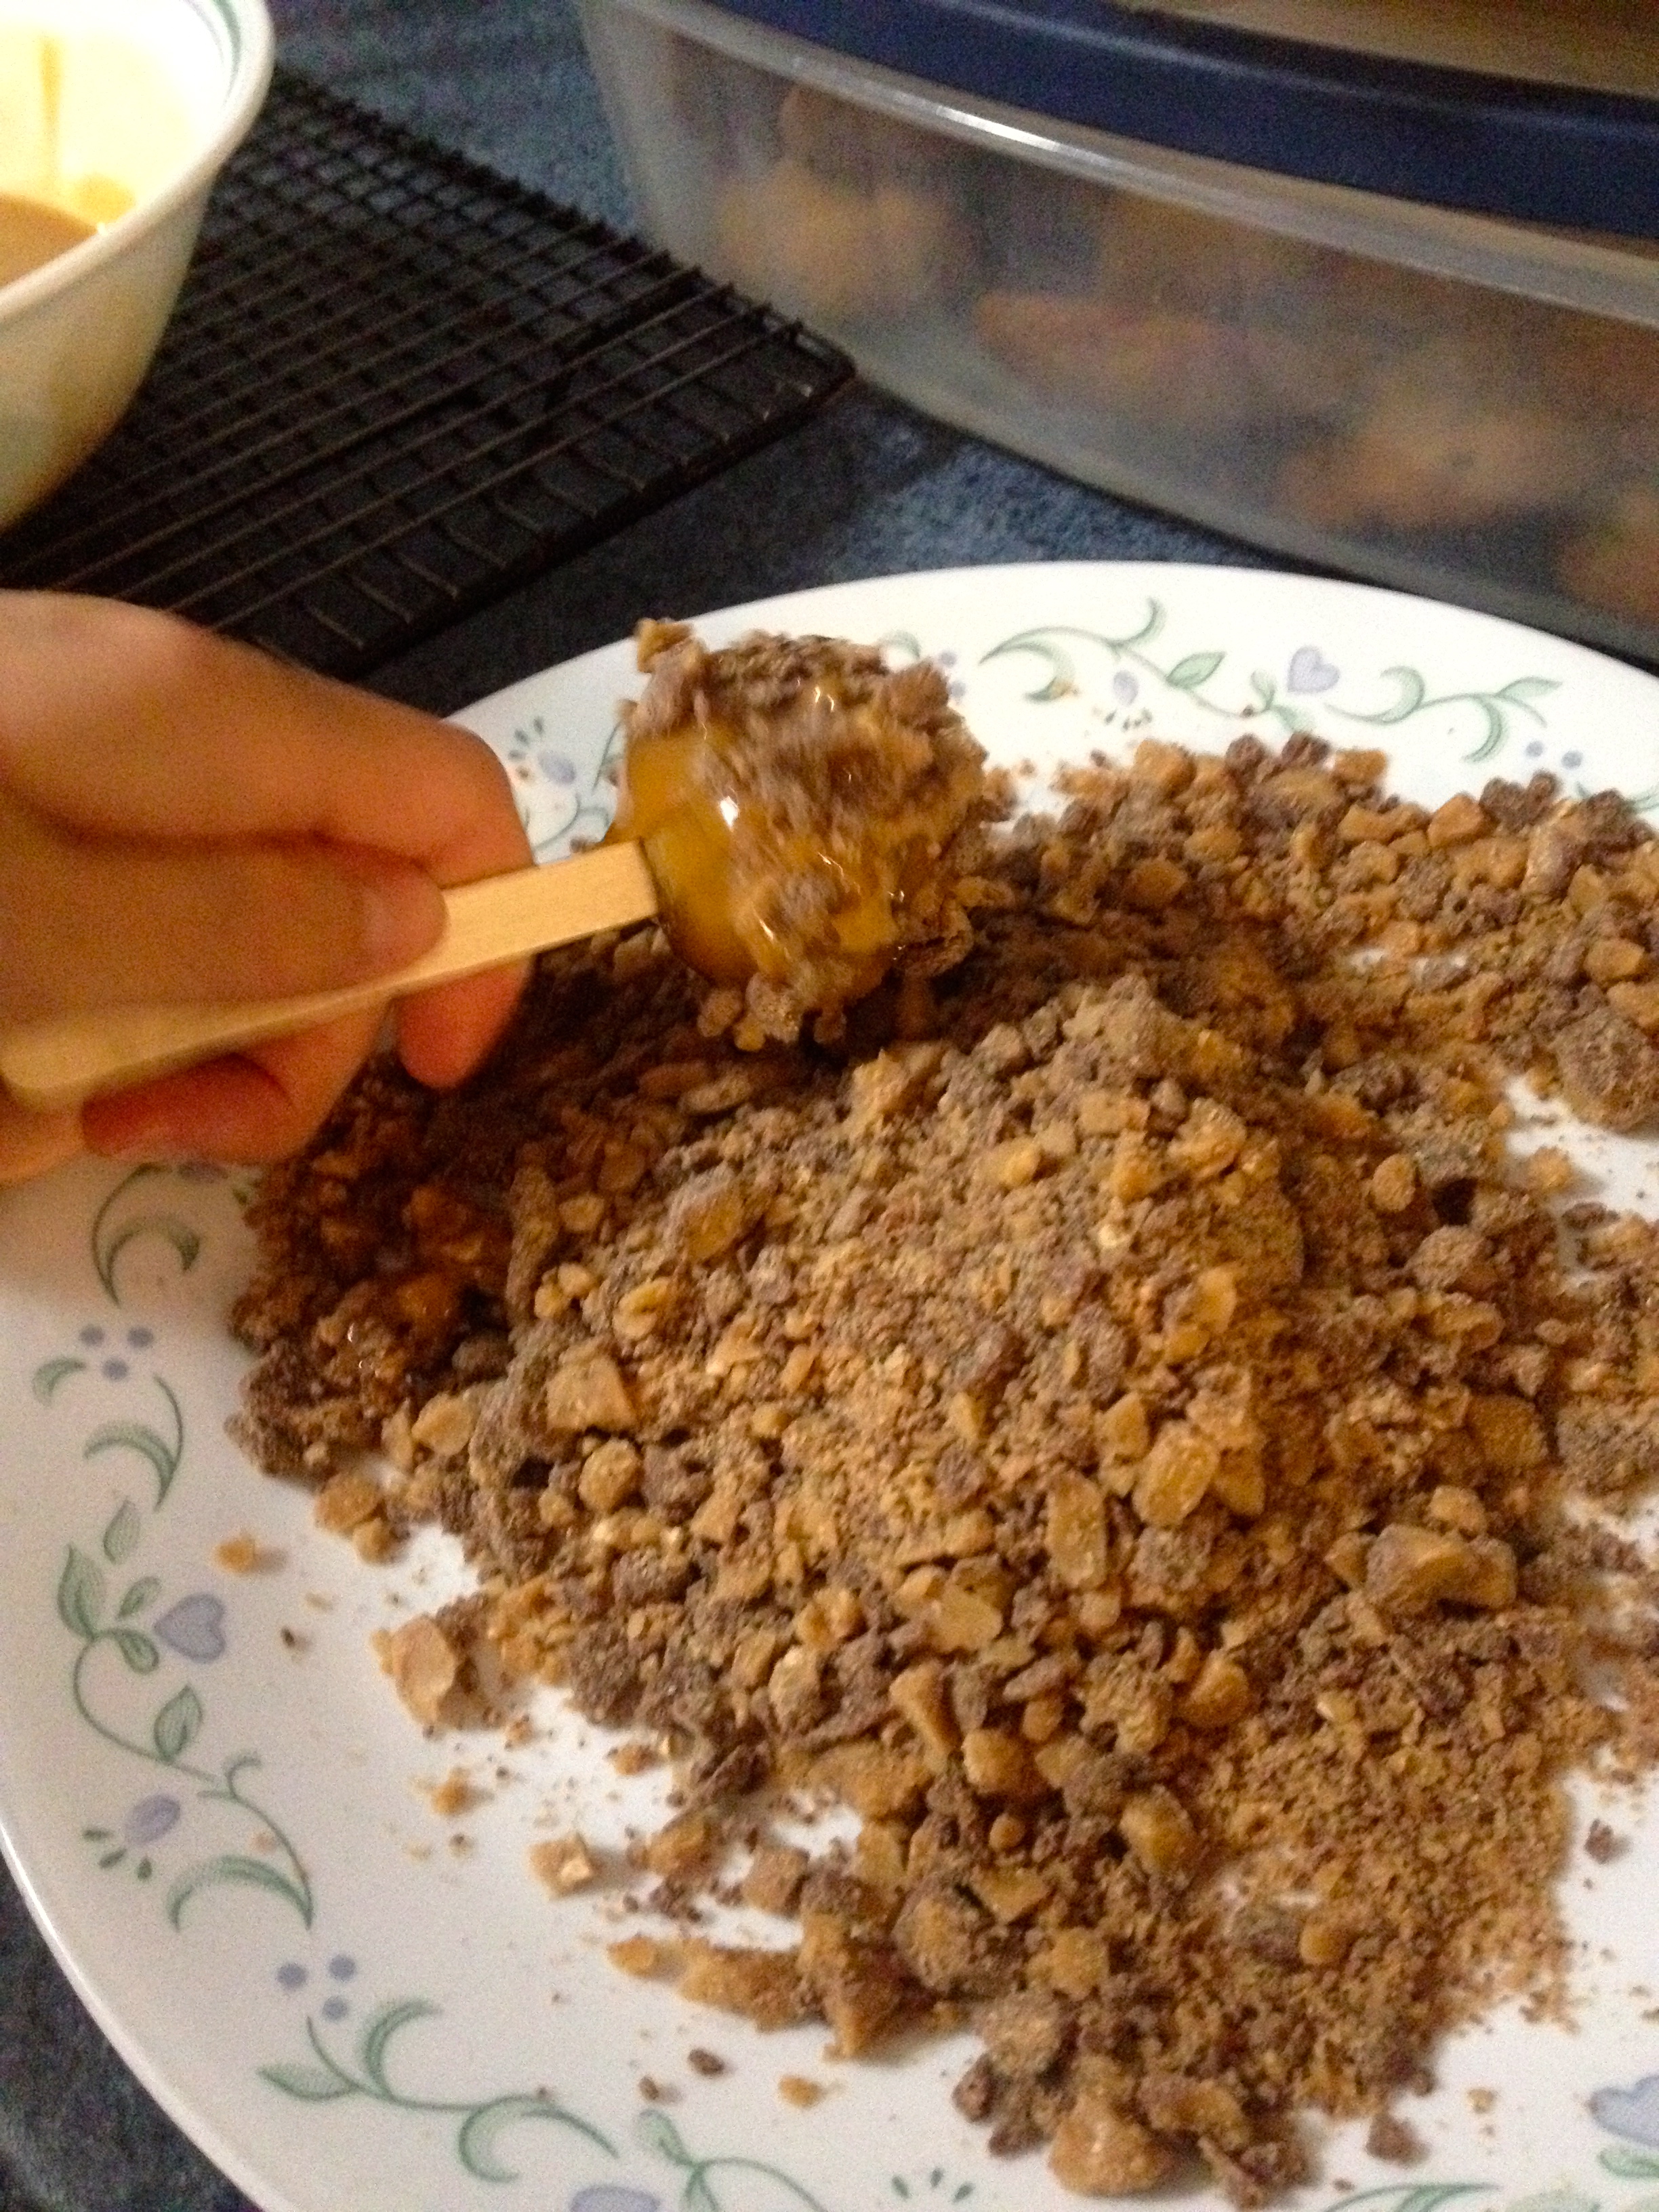
Line a baking sheet with wax paper, and spray the paper with nonstick cooking spray. Also, pour your toffee bits out onto a plate. Then, insert the craft sticks into the tops of the cupcakes. Make sure it’s the tops of the cupcakes, because otherwise the cupcakes won’t be able to stand up. Next, put the package of caramels with the milk in a large, microwave-safe bowl and put them in the microwave for 2-3 minutes on high, stirring each minute. They might bubble up pretty high, but that’s totally normal! It’ll go down when it comes out of the microwave. Here comes the fun part!
Dip each cupcake into the melted caramel sauce, rolling the cupcake around to fully cover it. Quickly, roll the cupcake in the toffee bits and set it, stick up, on the baking sheet.
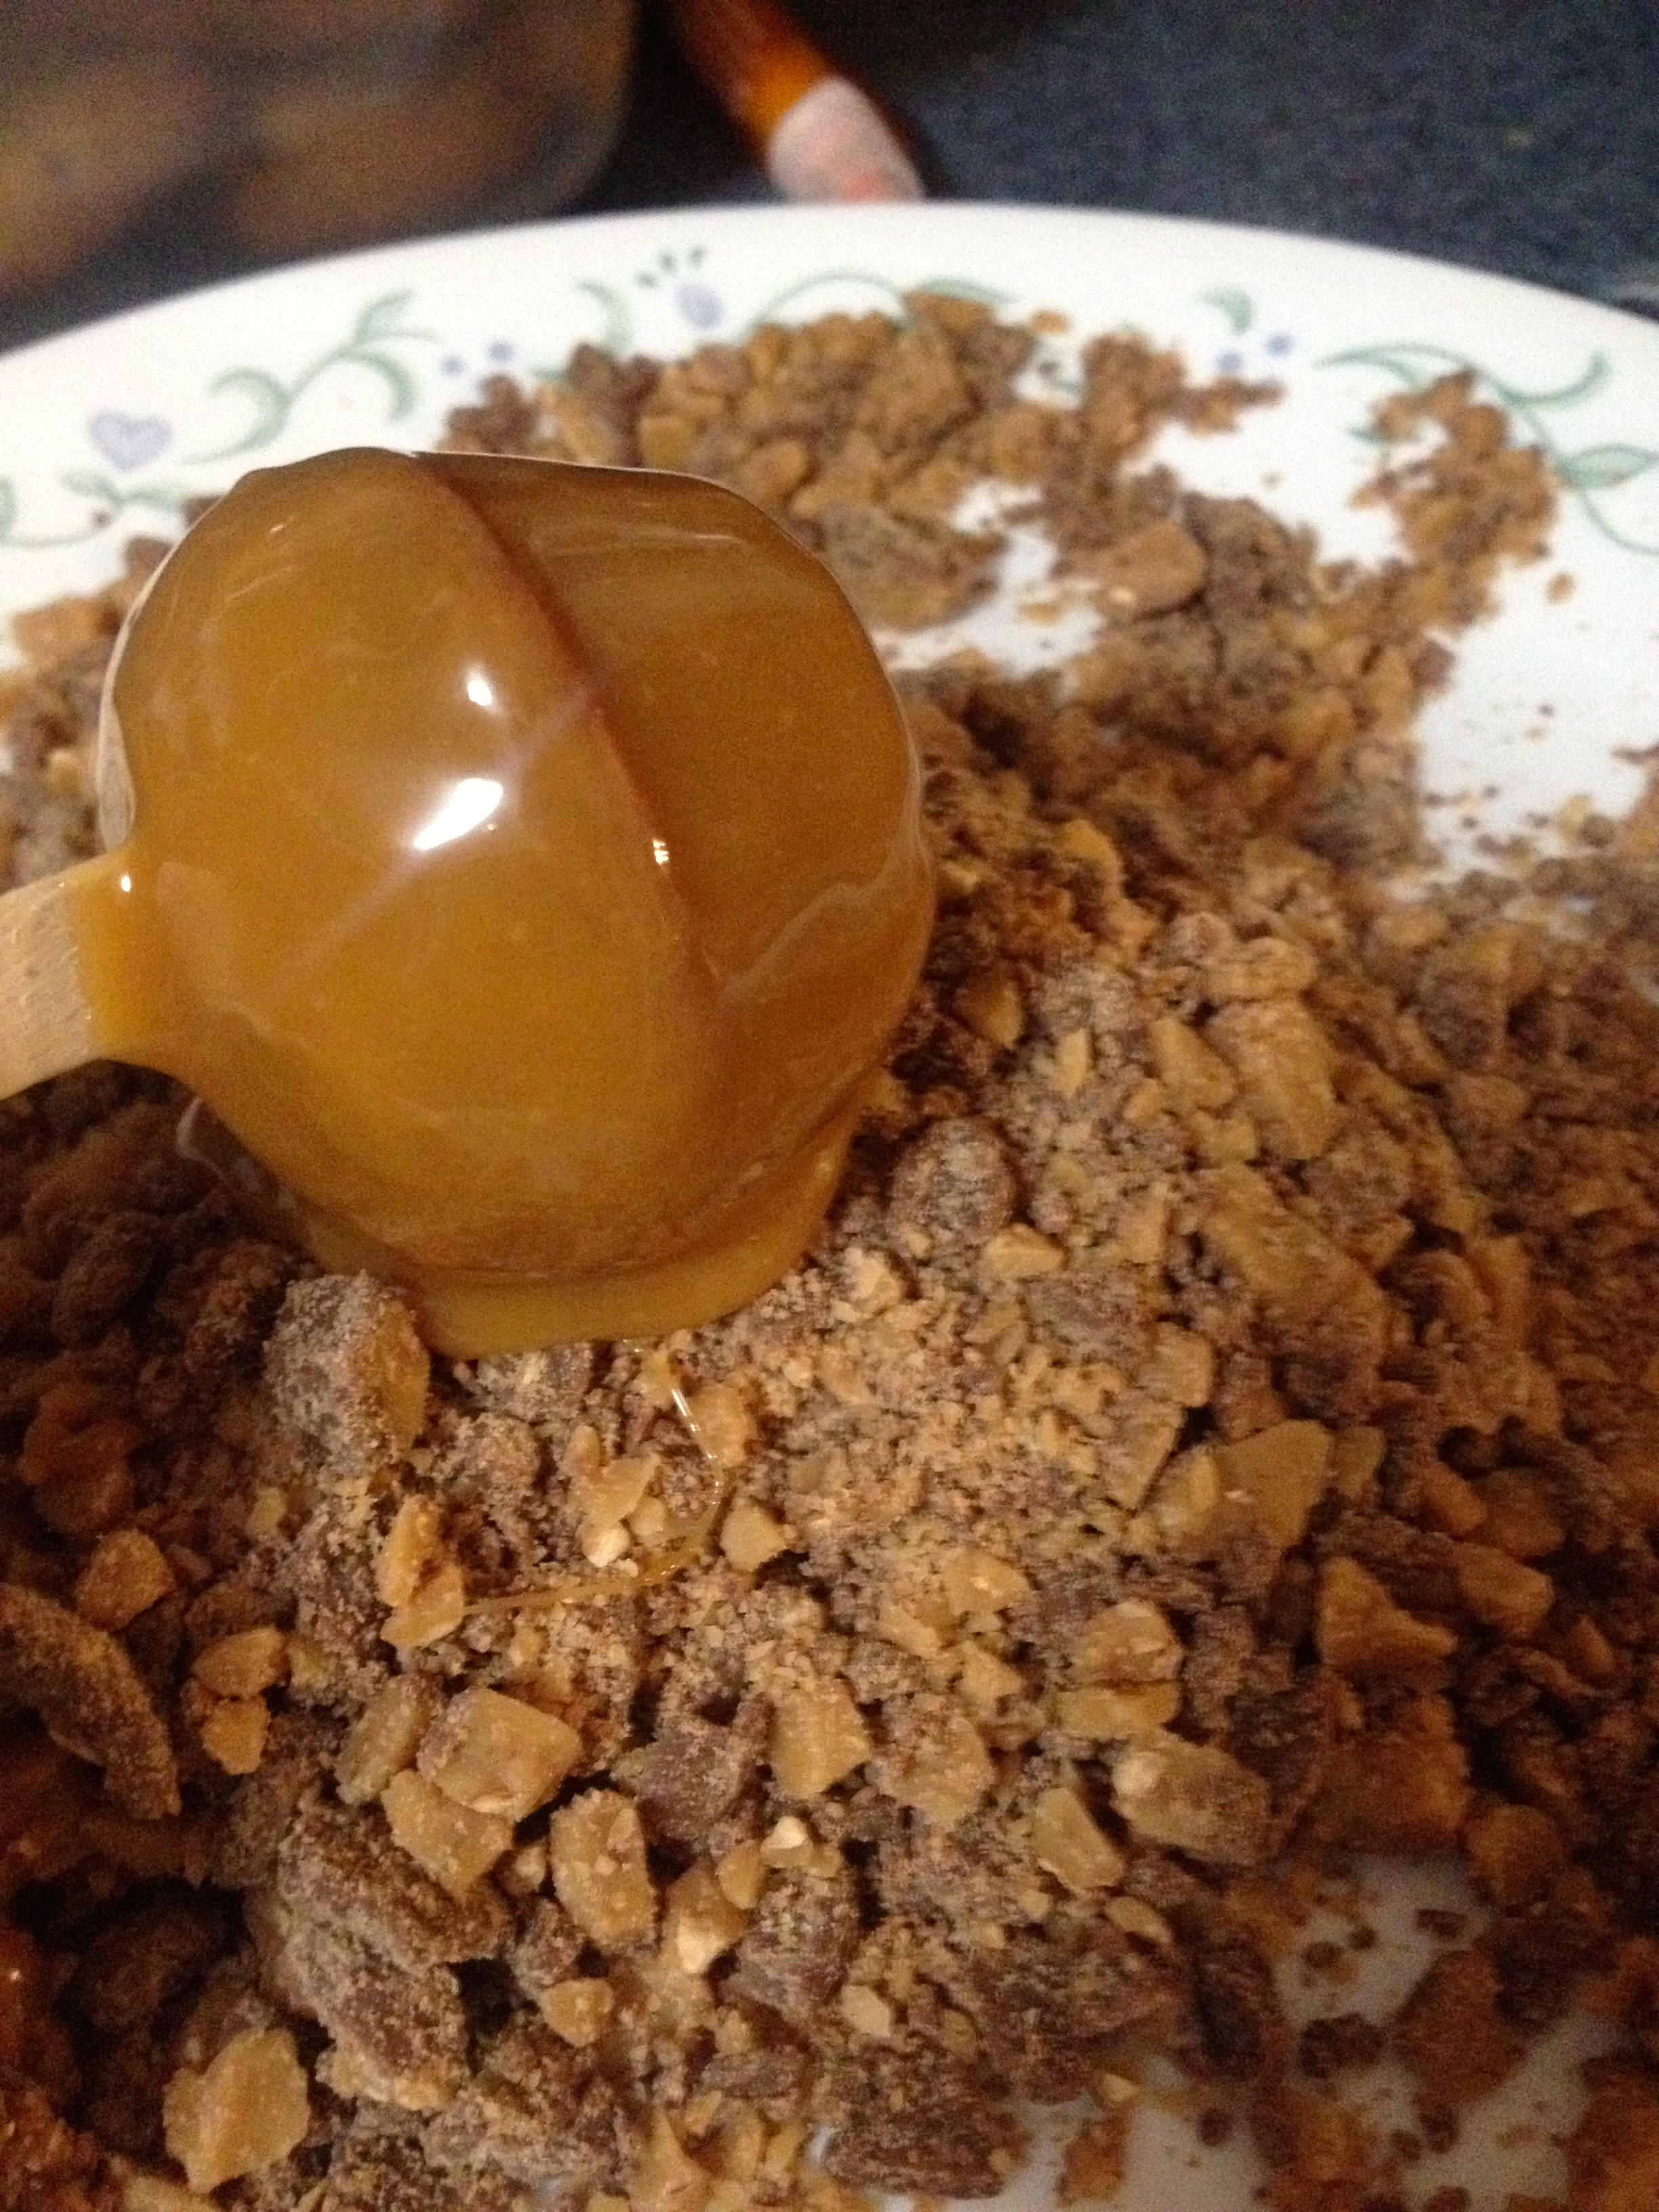
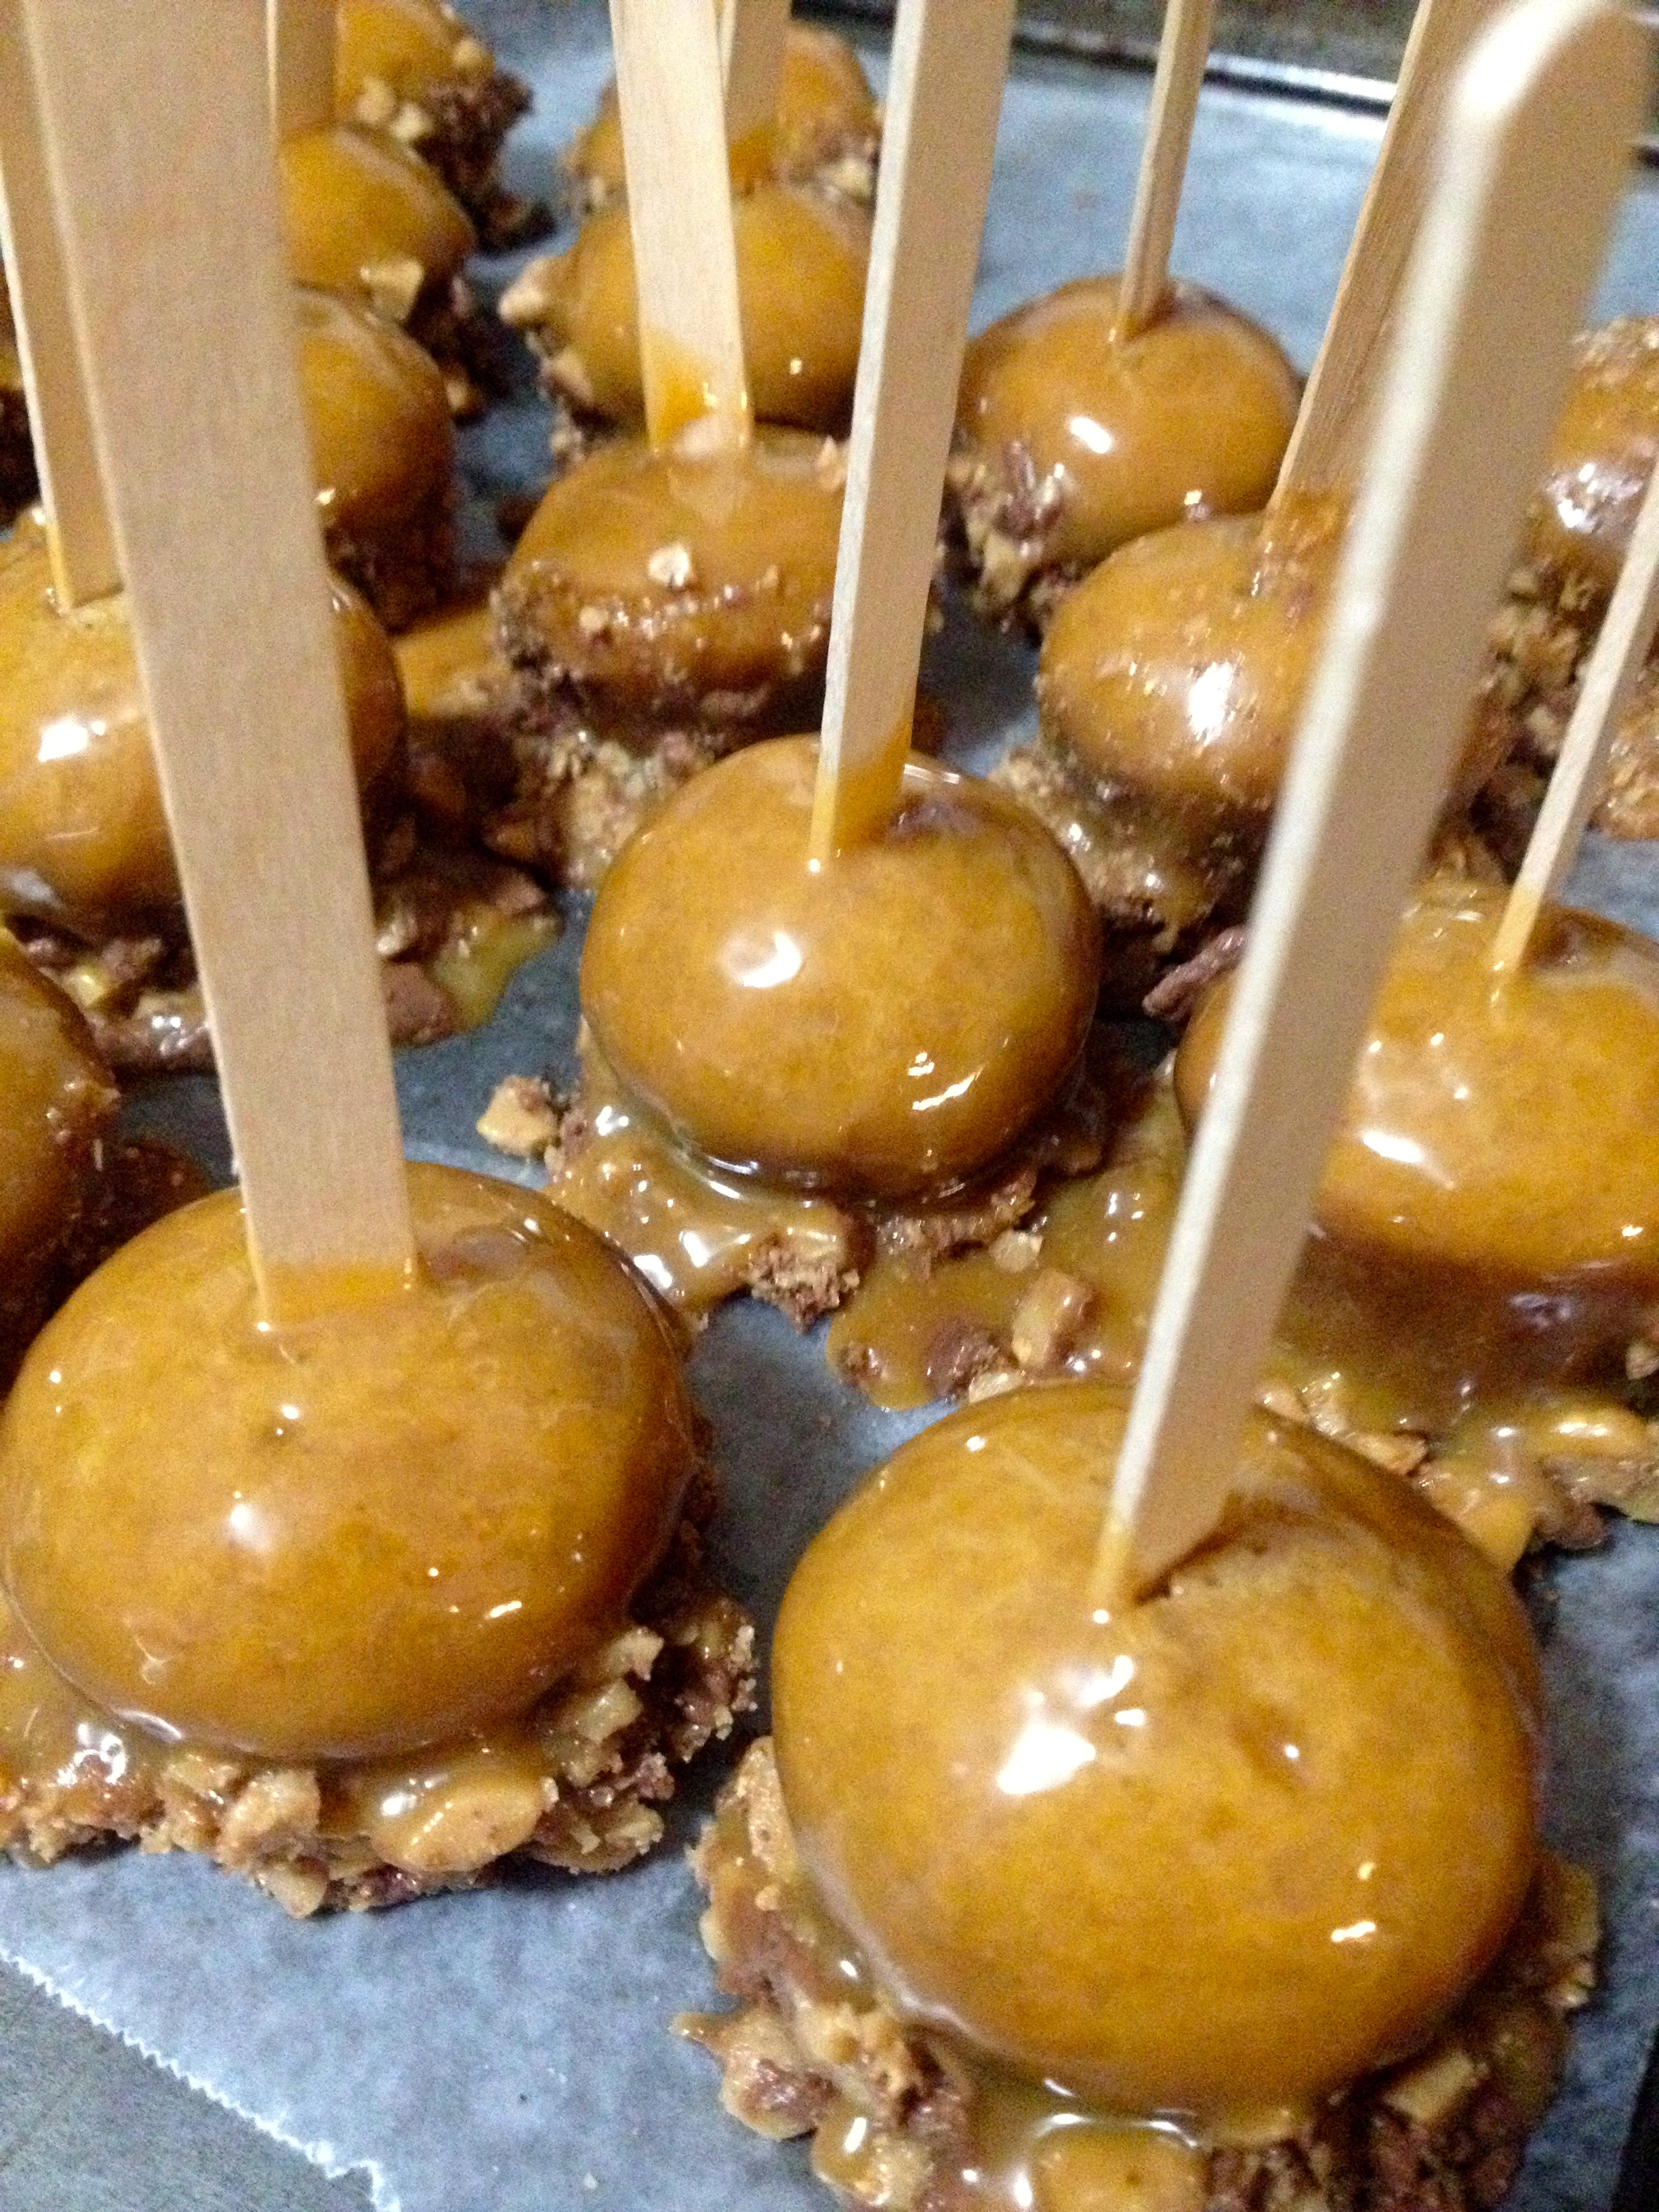
Just a heads-up, the toffee does tend to slide down the cake and pool at the bottom. Although the toffee was yummy with the cupcakes, I wouldn’t use it again. I would go without a topping, because the caramel soaks into the cake and makes it perfectly moist and delicious on its own, and I thought the toffee just got in the way of the caramel. However, if you want to use it, go right ahead!
This recipe was fantastic! The size of the cupcakes is great, because they’re just a little bite for when you get a sweets craving, instead of having to commit to a large cupcake. The cake recipe on its own is also perfect for an applesauce cake! I made mini applesauce cake muffins with this recipe, and ate them as snacks and breakfasts. Delicious!
And last but not least…
Filled Rich Chocolate Cupcakes (Chocolate Cheesecake Cupcakes)
Ingredients:
- 3 cups all-purpose flour
- 2 cups sugar
- 2/3 cup cocoa powder
- 2 tsp baking soda
- 1 tsp salt
- 2 cups water
- 2/3 cup vegetable oil
- 2 tbsp white vinegar
- 2 tsp vanilla extract
Filling:
- 8 oz cream cheese, softened
- 1/3 cup granulated sugar
- 1 egg
- 1/8 tsp salt
- 1 cup semi-sweet mini chips (I used more, and no one was complaining!)
A note about the vinegar, before any questions arise: this is the coolest recipe ever, because the cake part has no eggs! It uses a reaction between the baking soda and the vinegar to foam the cake and make it lighter, so no eggs are needed! I promise you can’t taste the vinegar.
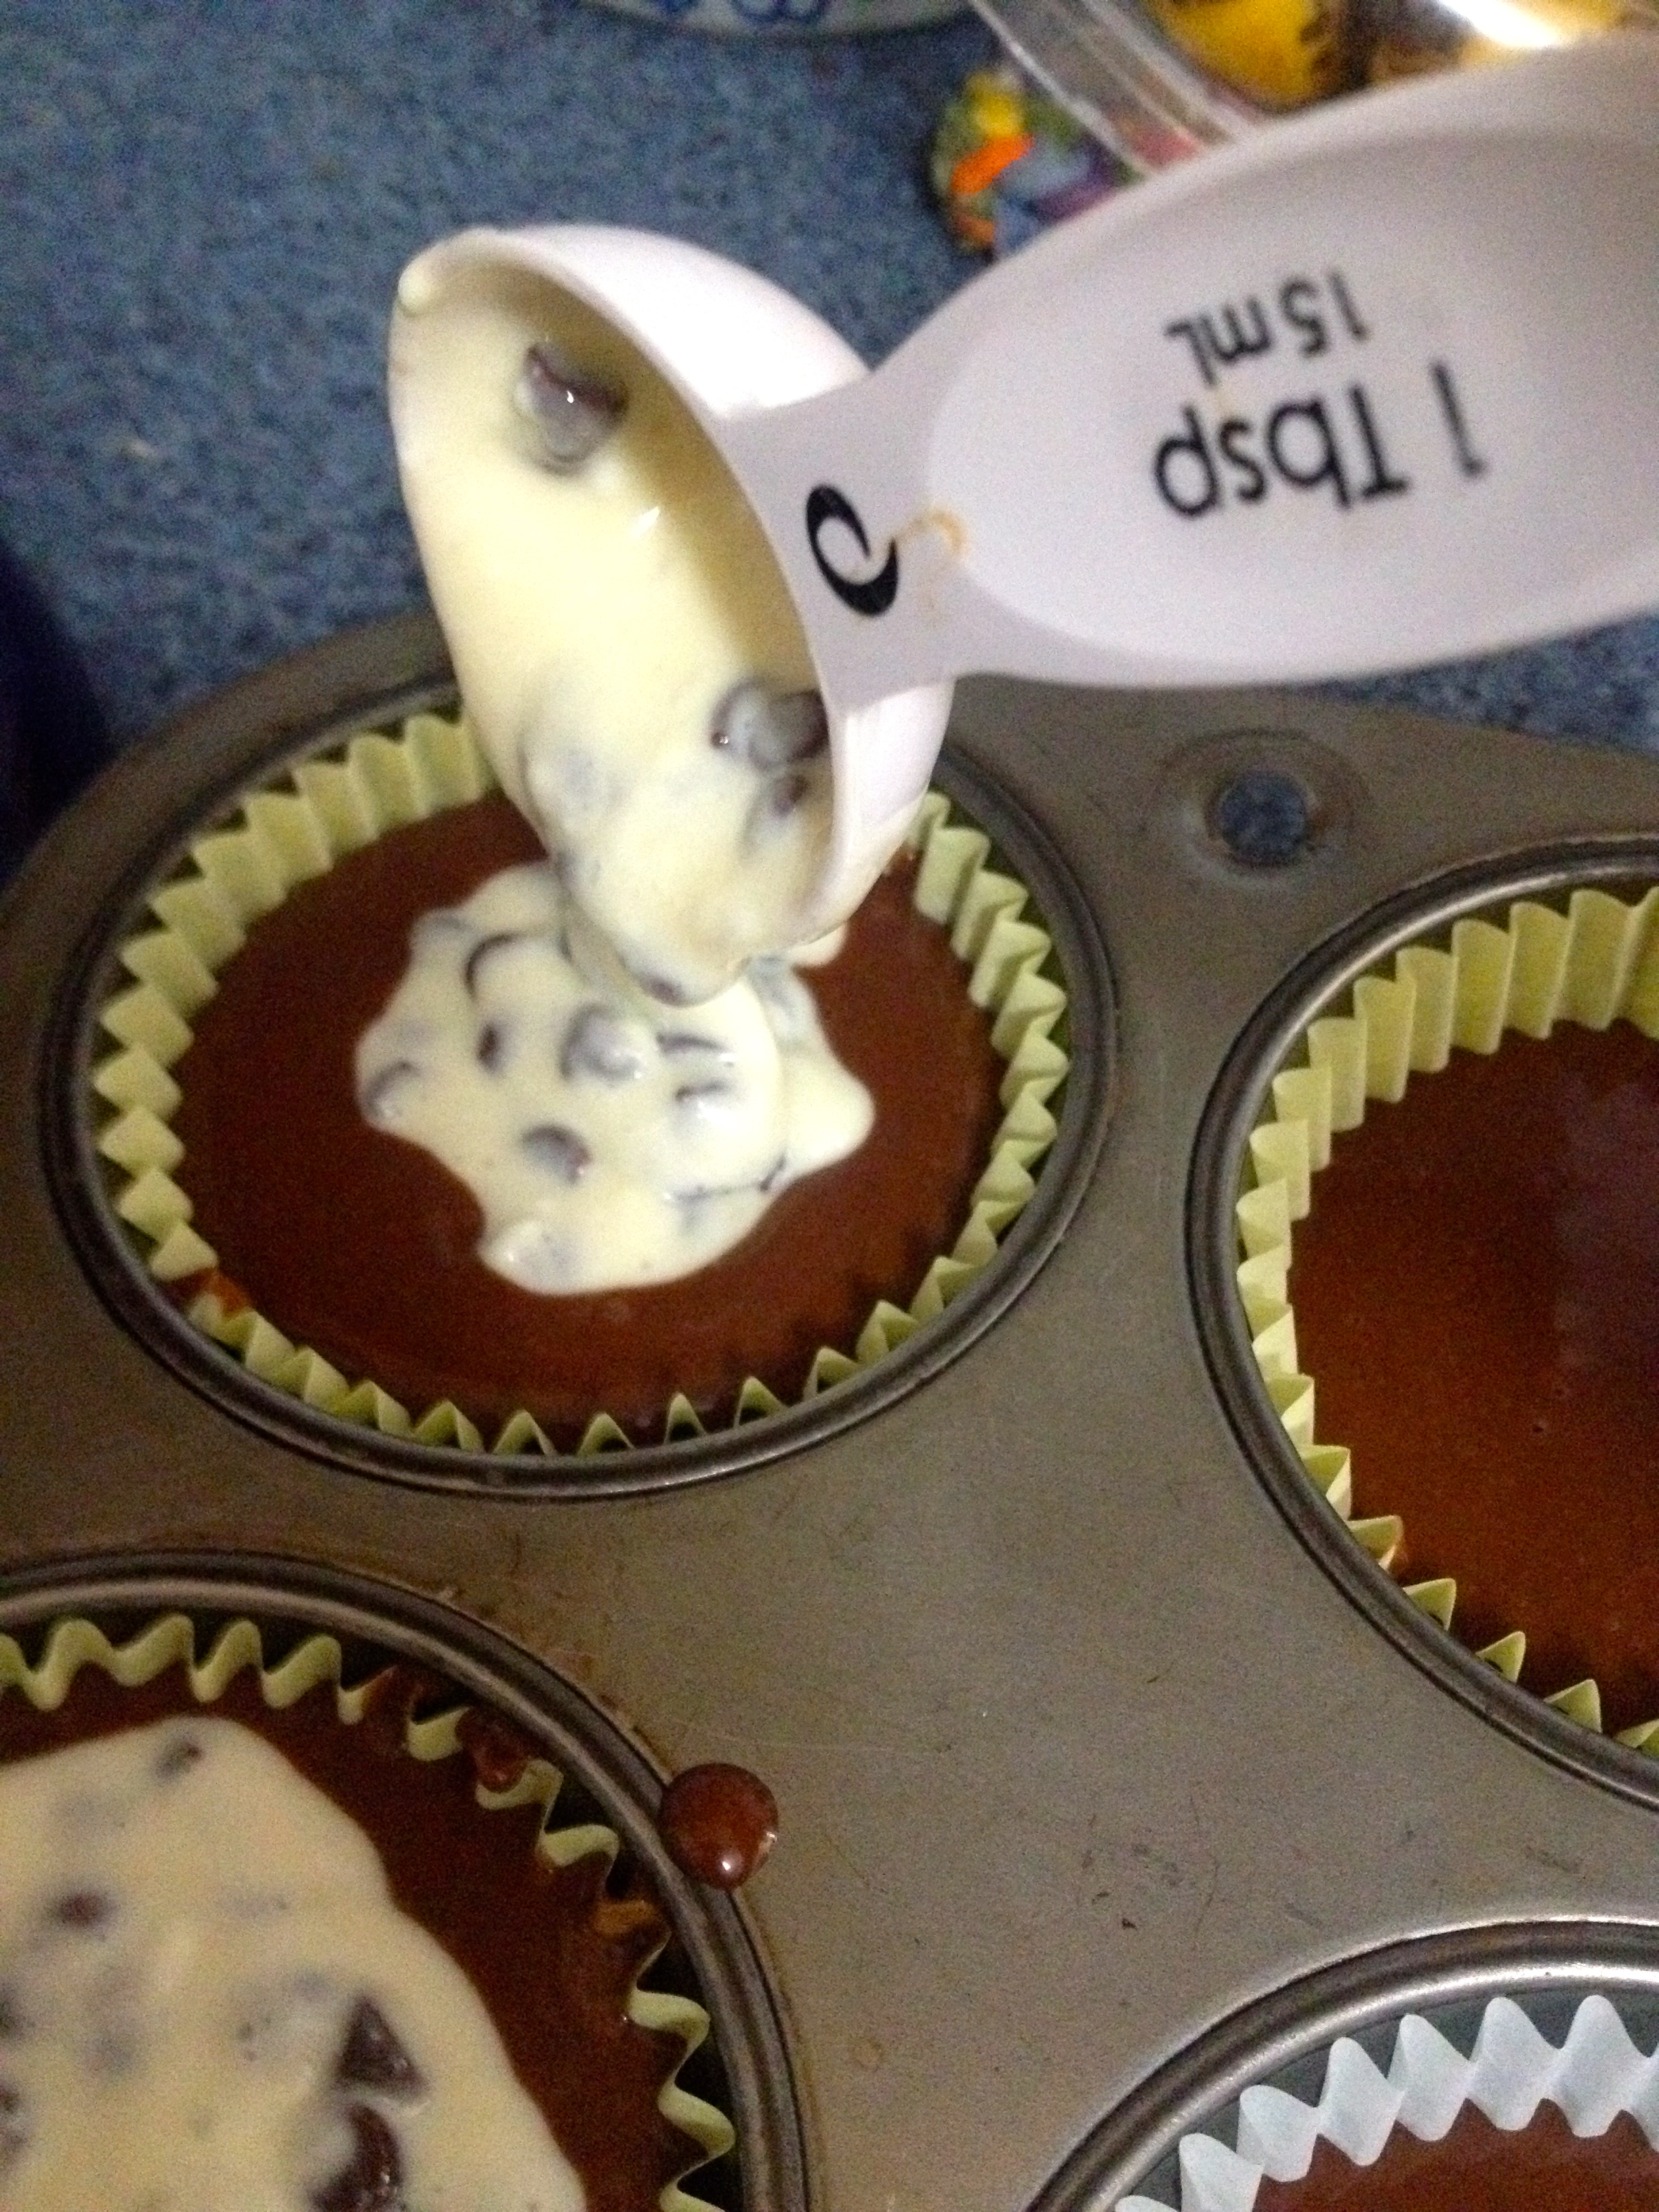
Preheat oven to 350ºF, and line 24 cupcake cups with cupcake papers. Prepare the filling by beating the cream cheese, sugar, egg, and salt in a small bowl with a hand held mixer. Then, stir in the chocolate chips.
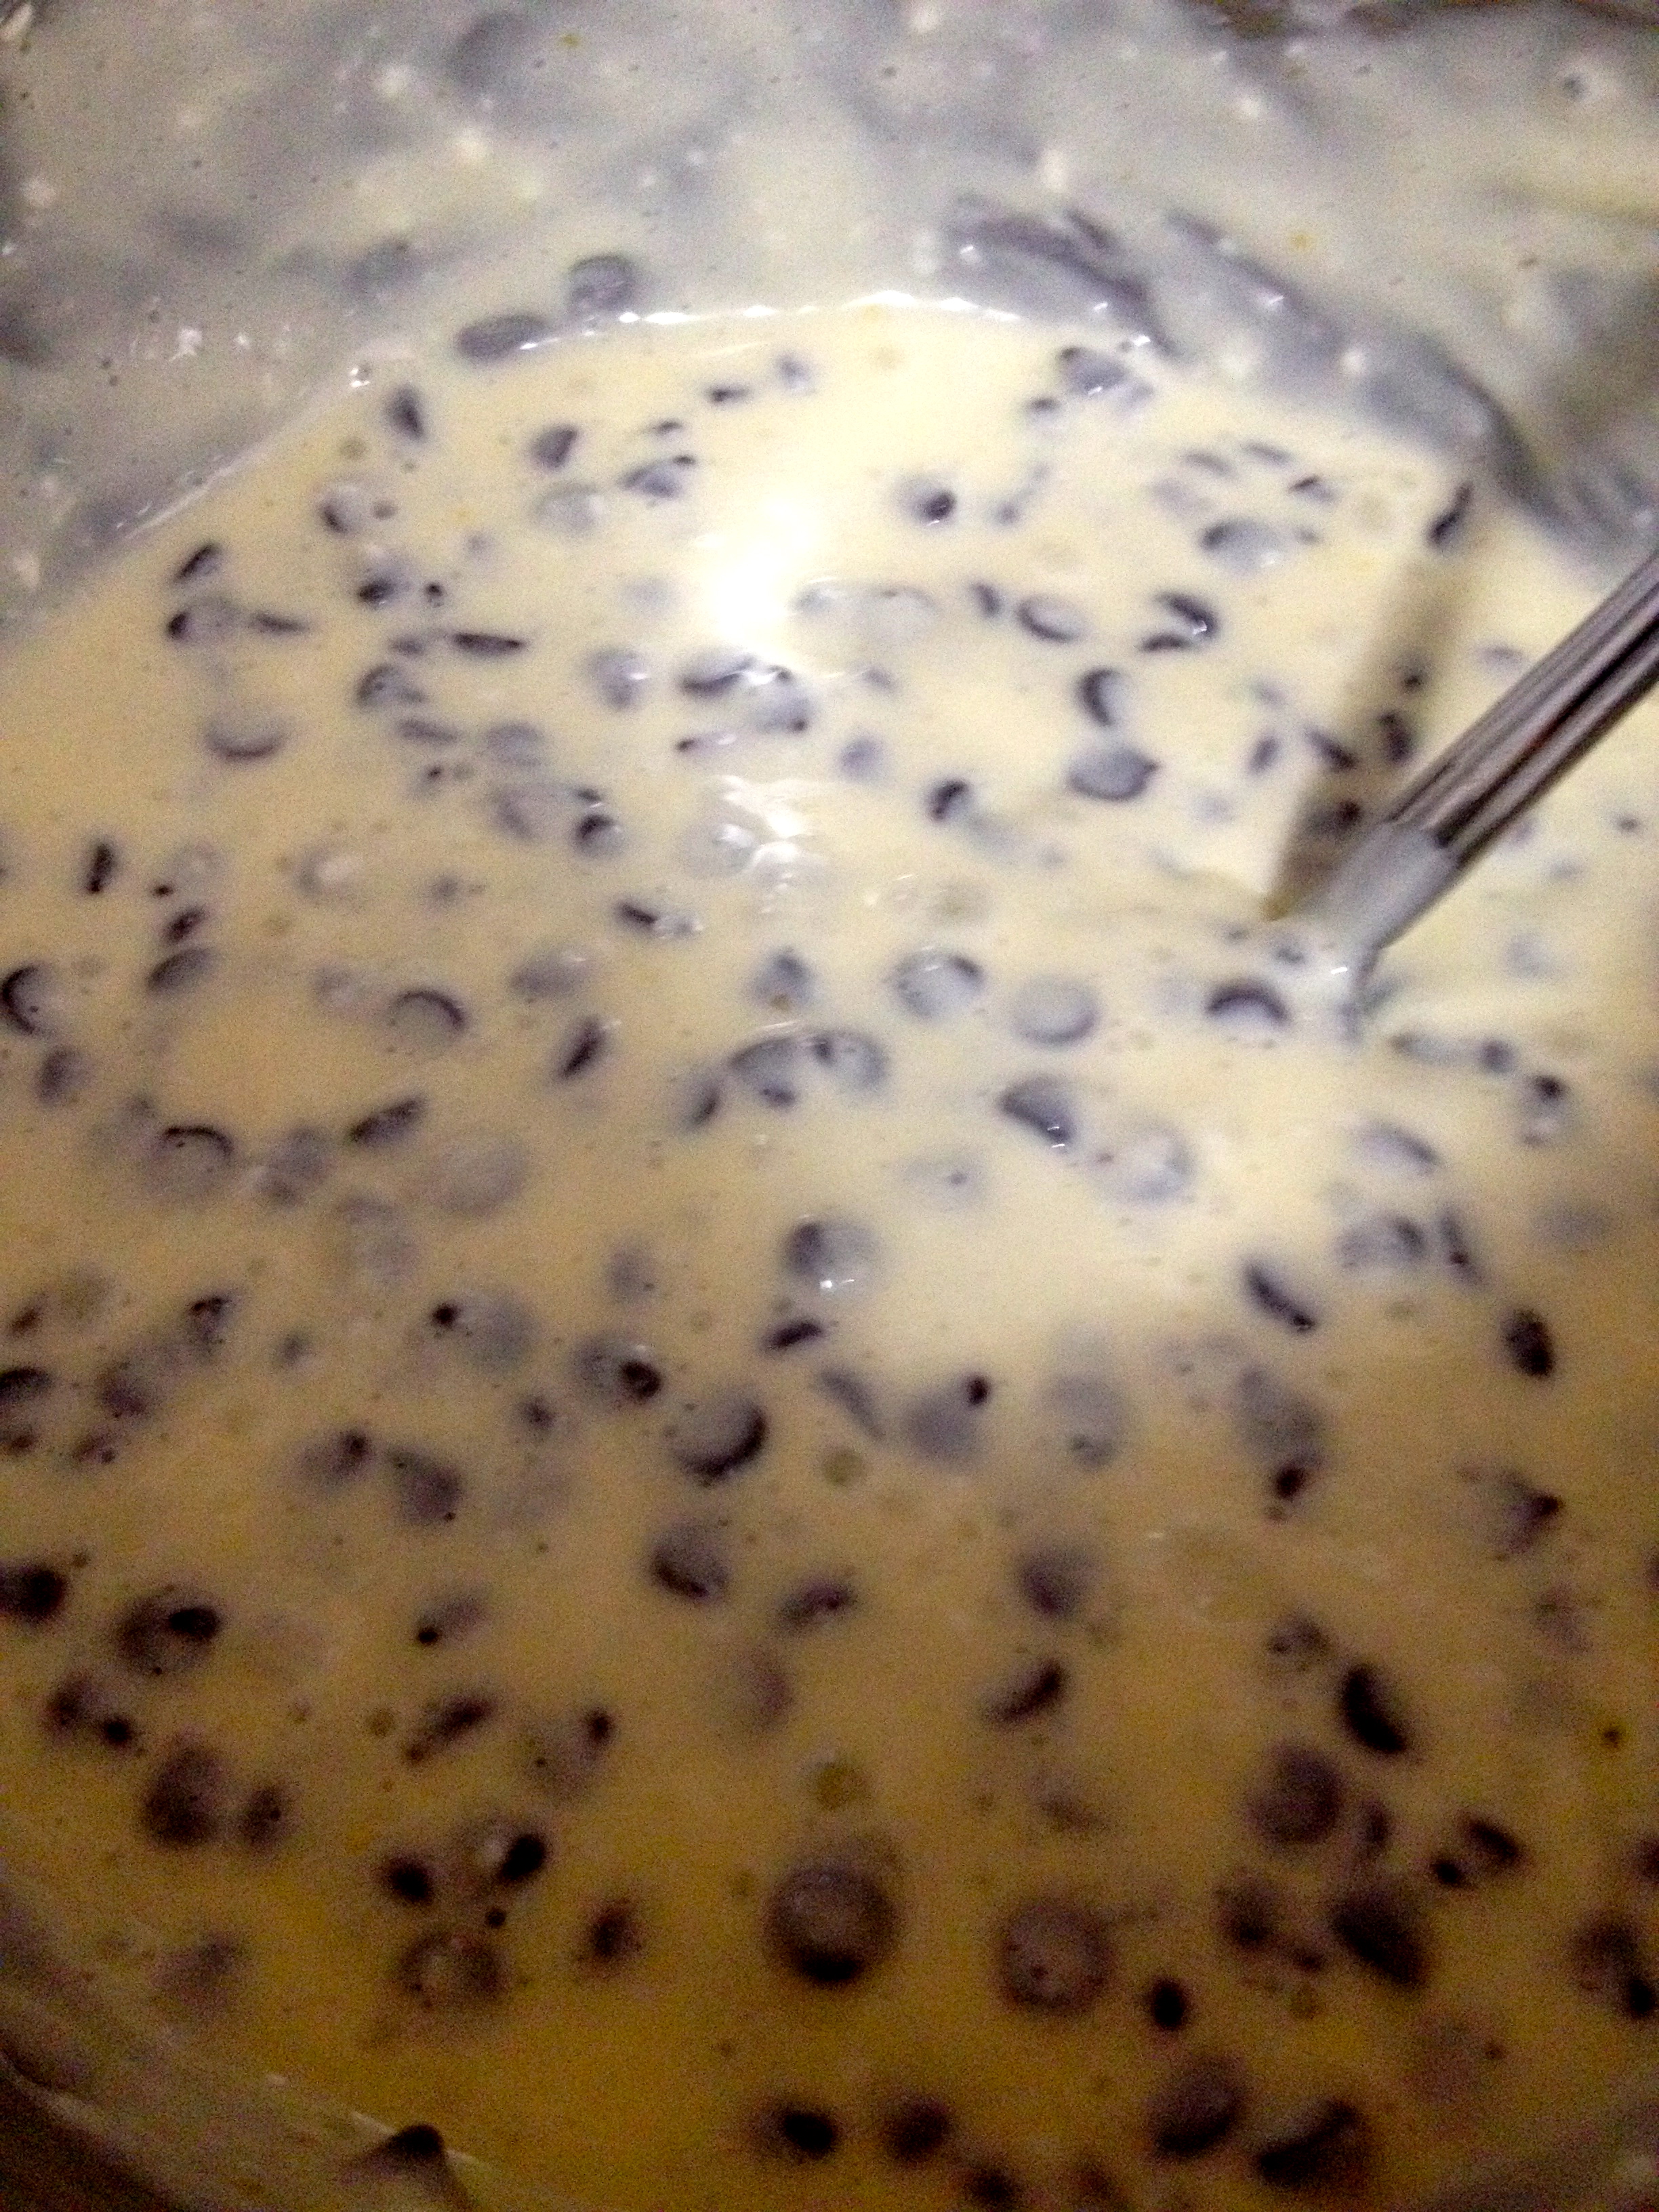
Stir the flour, sugar, cocoa, baking soda, and salt in a mixing bowl. Add the water, oil, vinegar, and vanilla, and beat the mixture on medium speed for 3 minutes. Fill the cupcake papers 2/3 full with the batter. Then, spoon about 3/4 tbsp of the filling into the center of each cupcake.
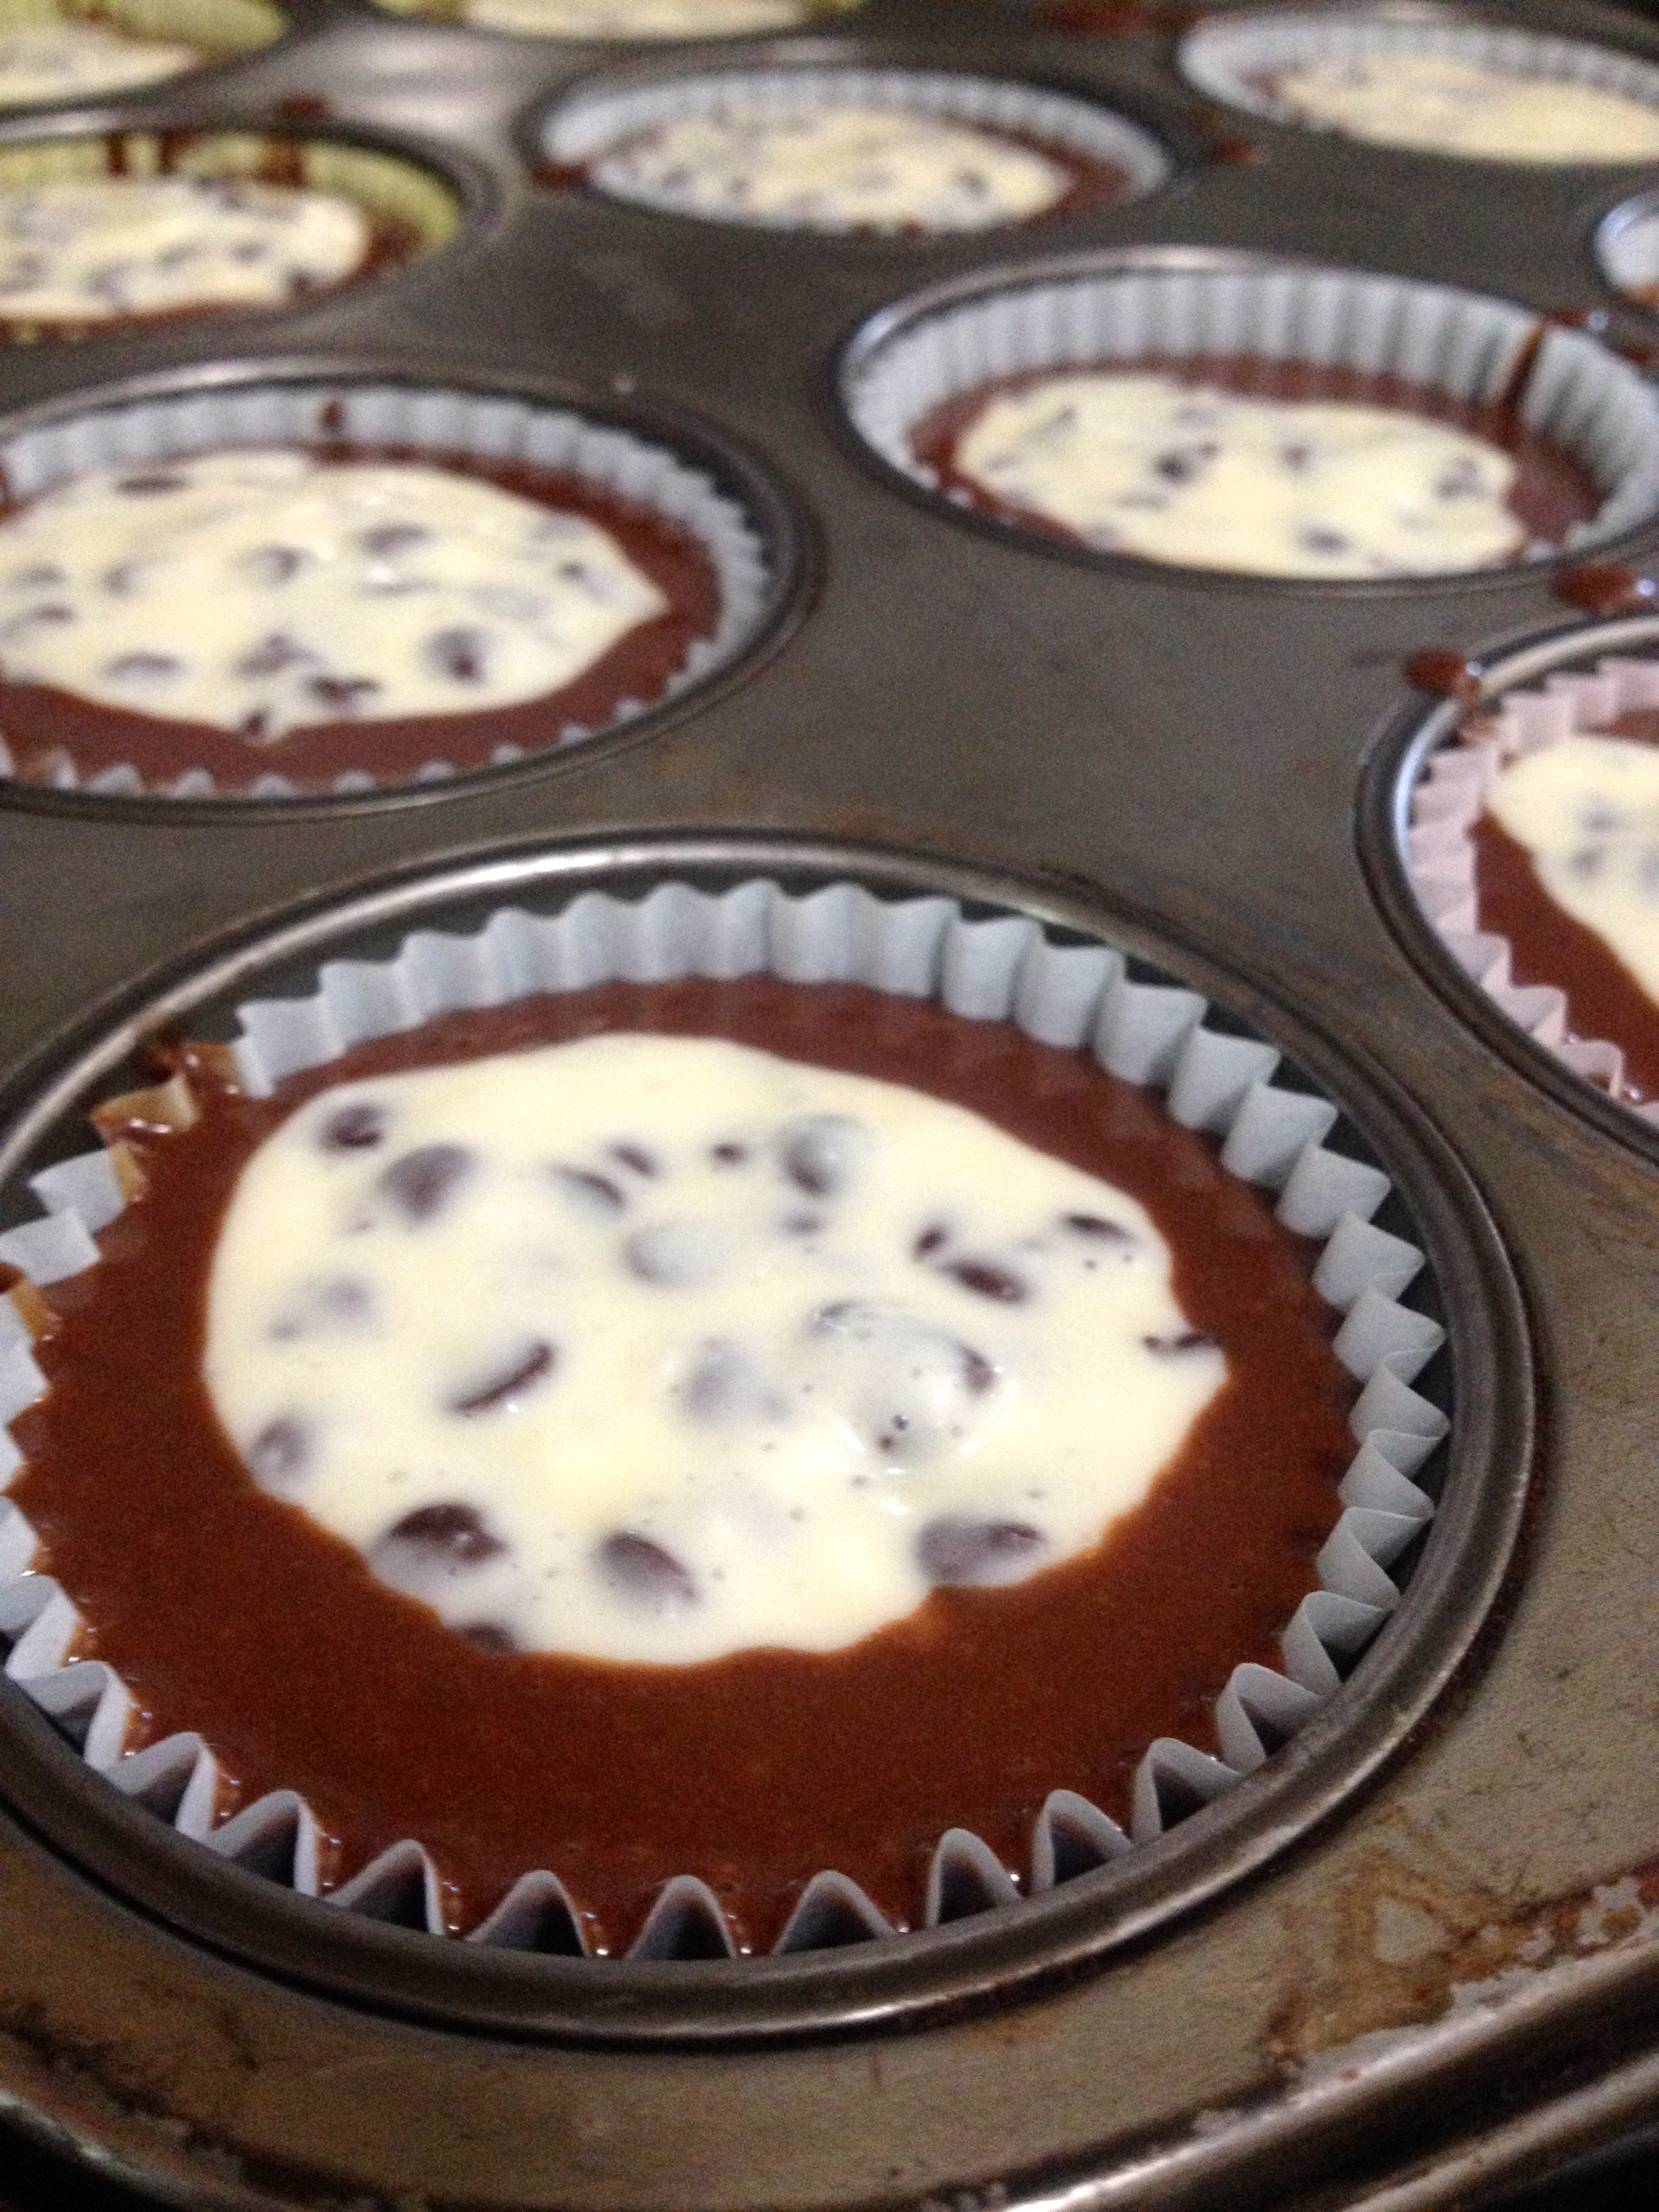
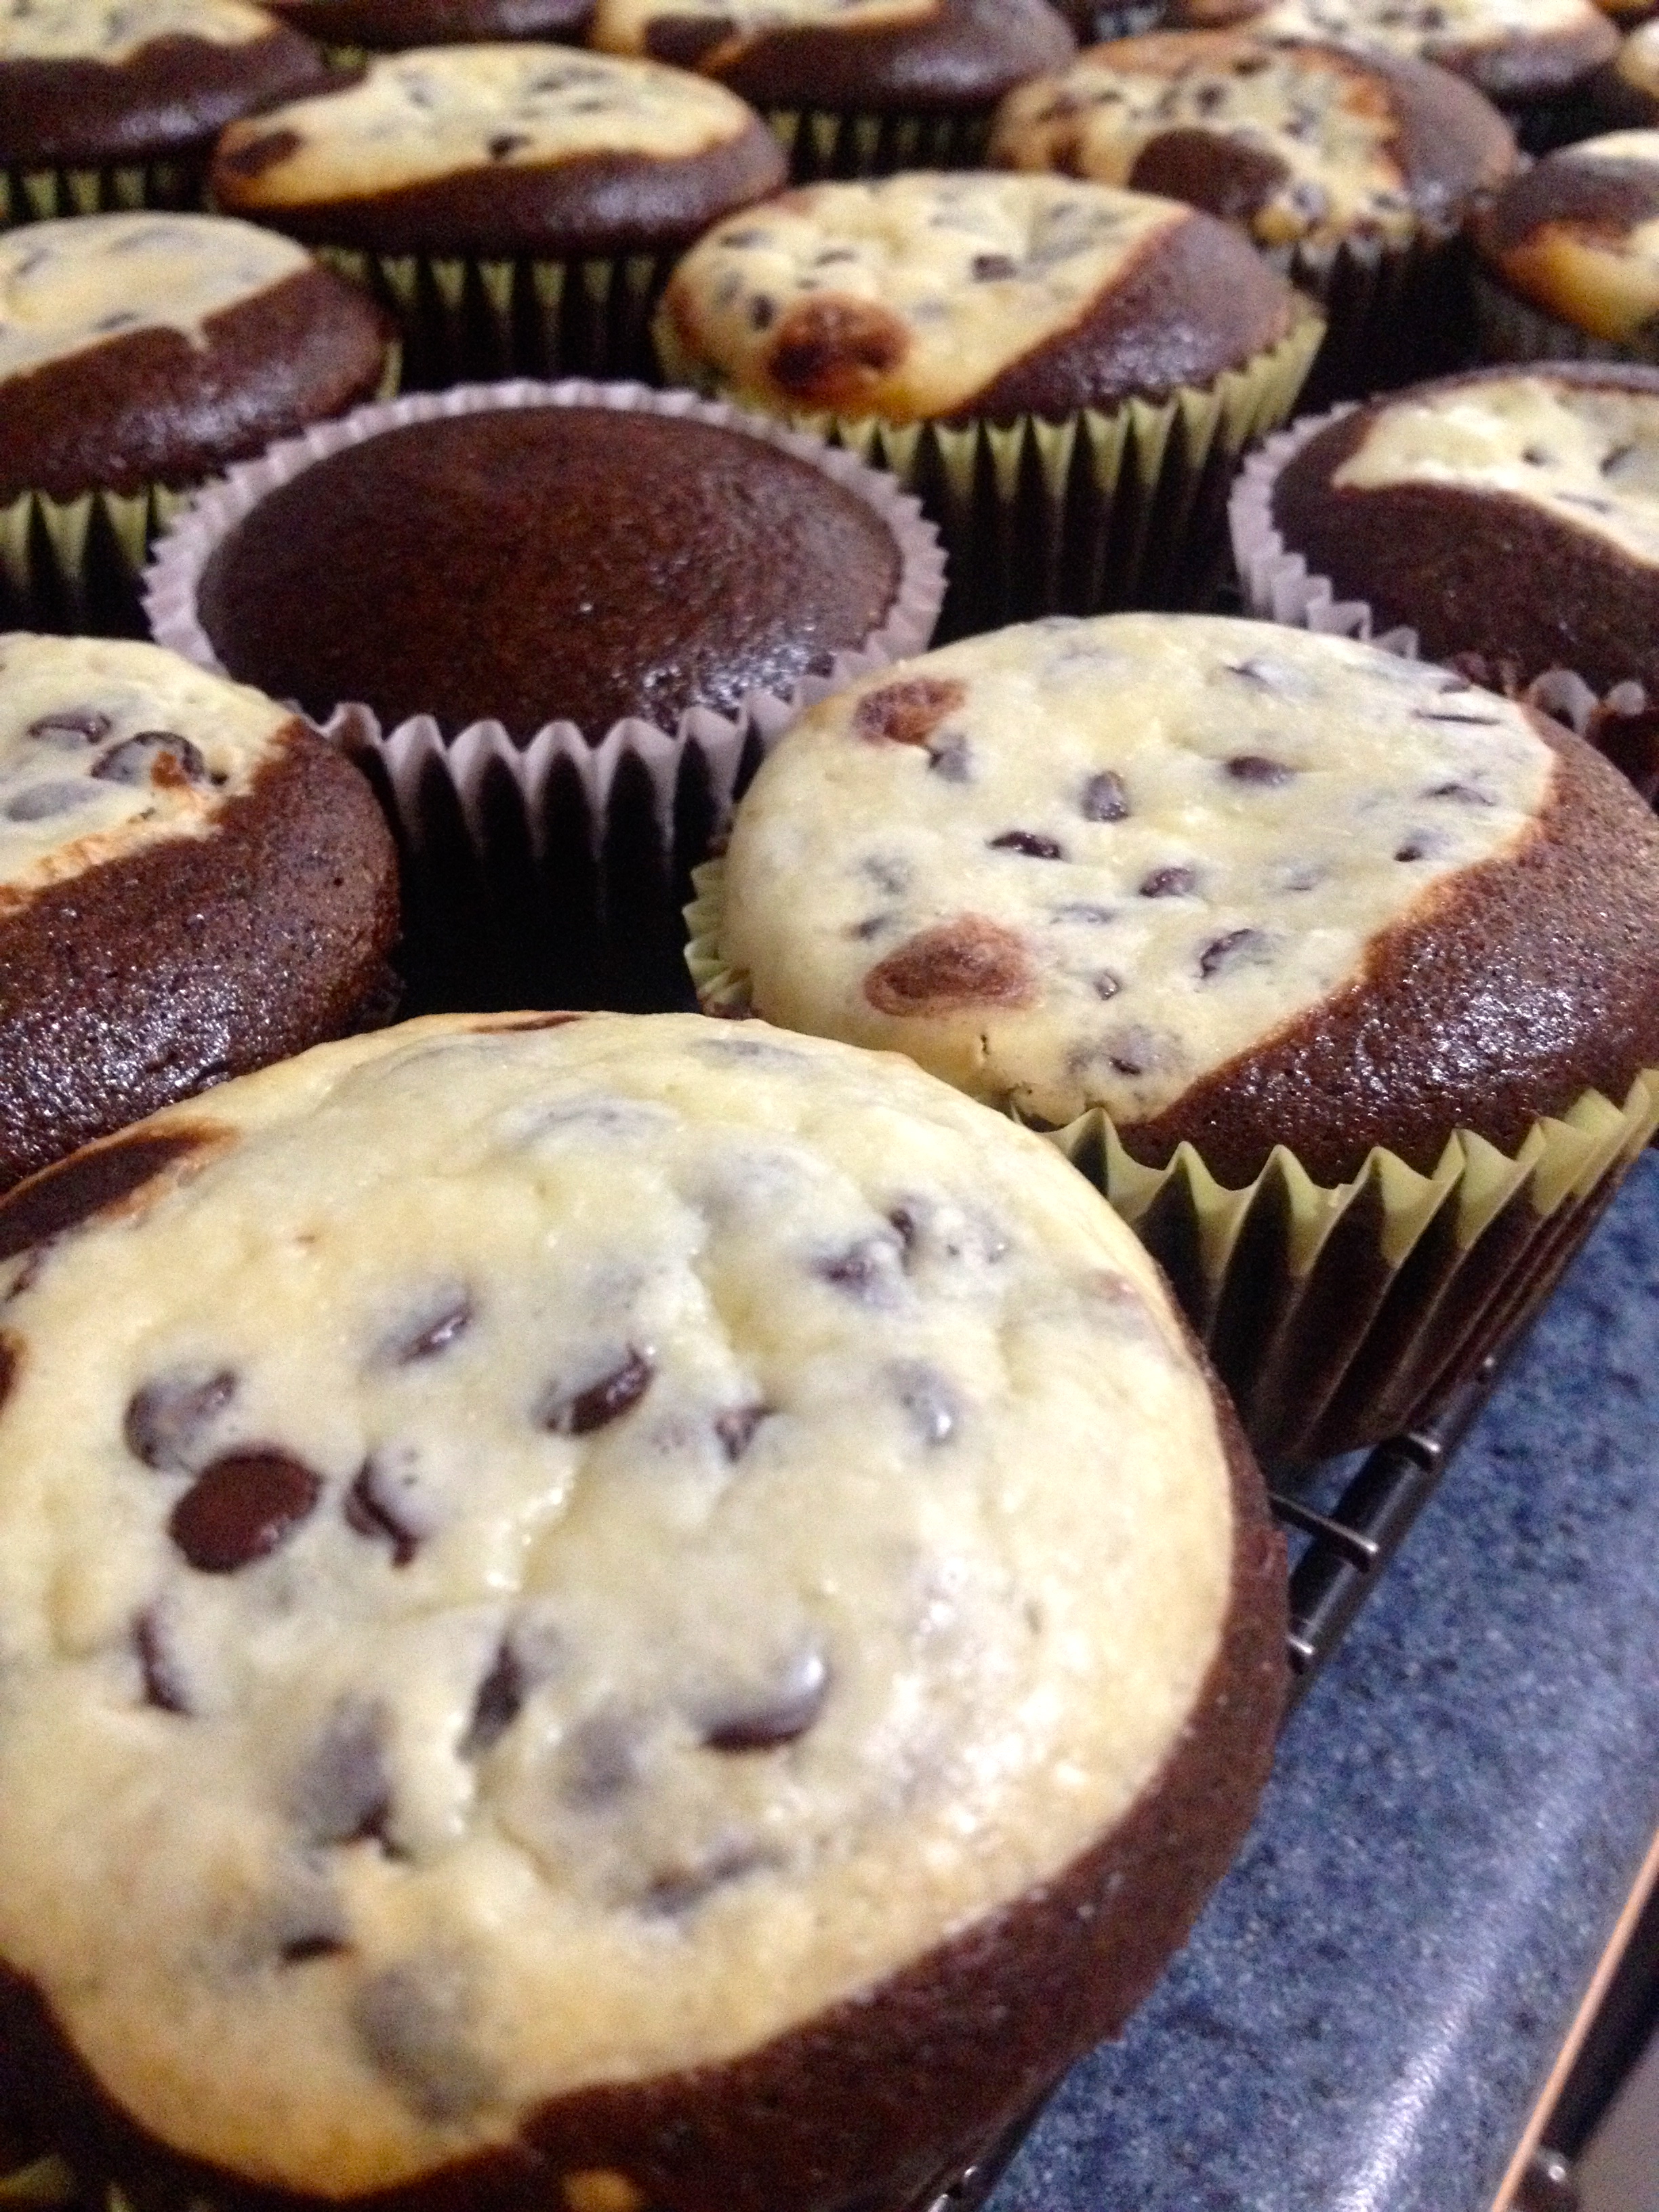
Bake the cupcakes for 20-25 minutes, or until a toothpick inserted in the middle comes out clean. Transfer the cupcakes to a cooling rack, and cool completely.
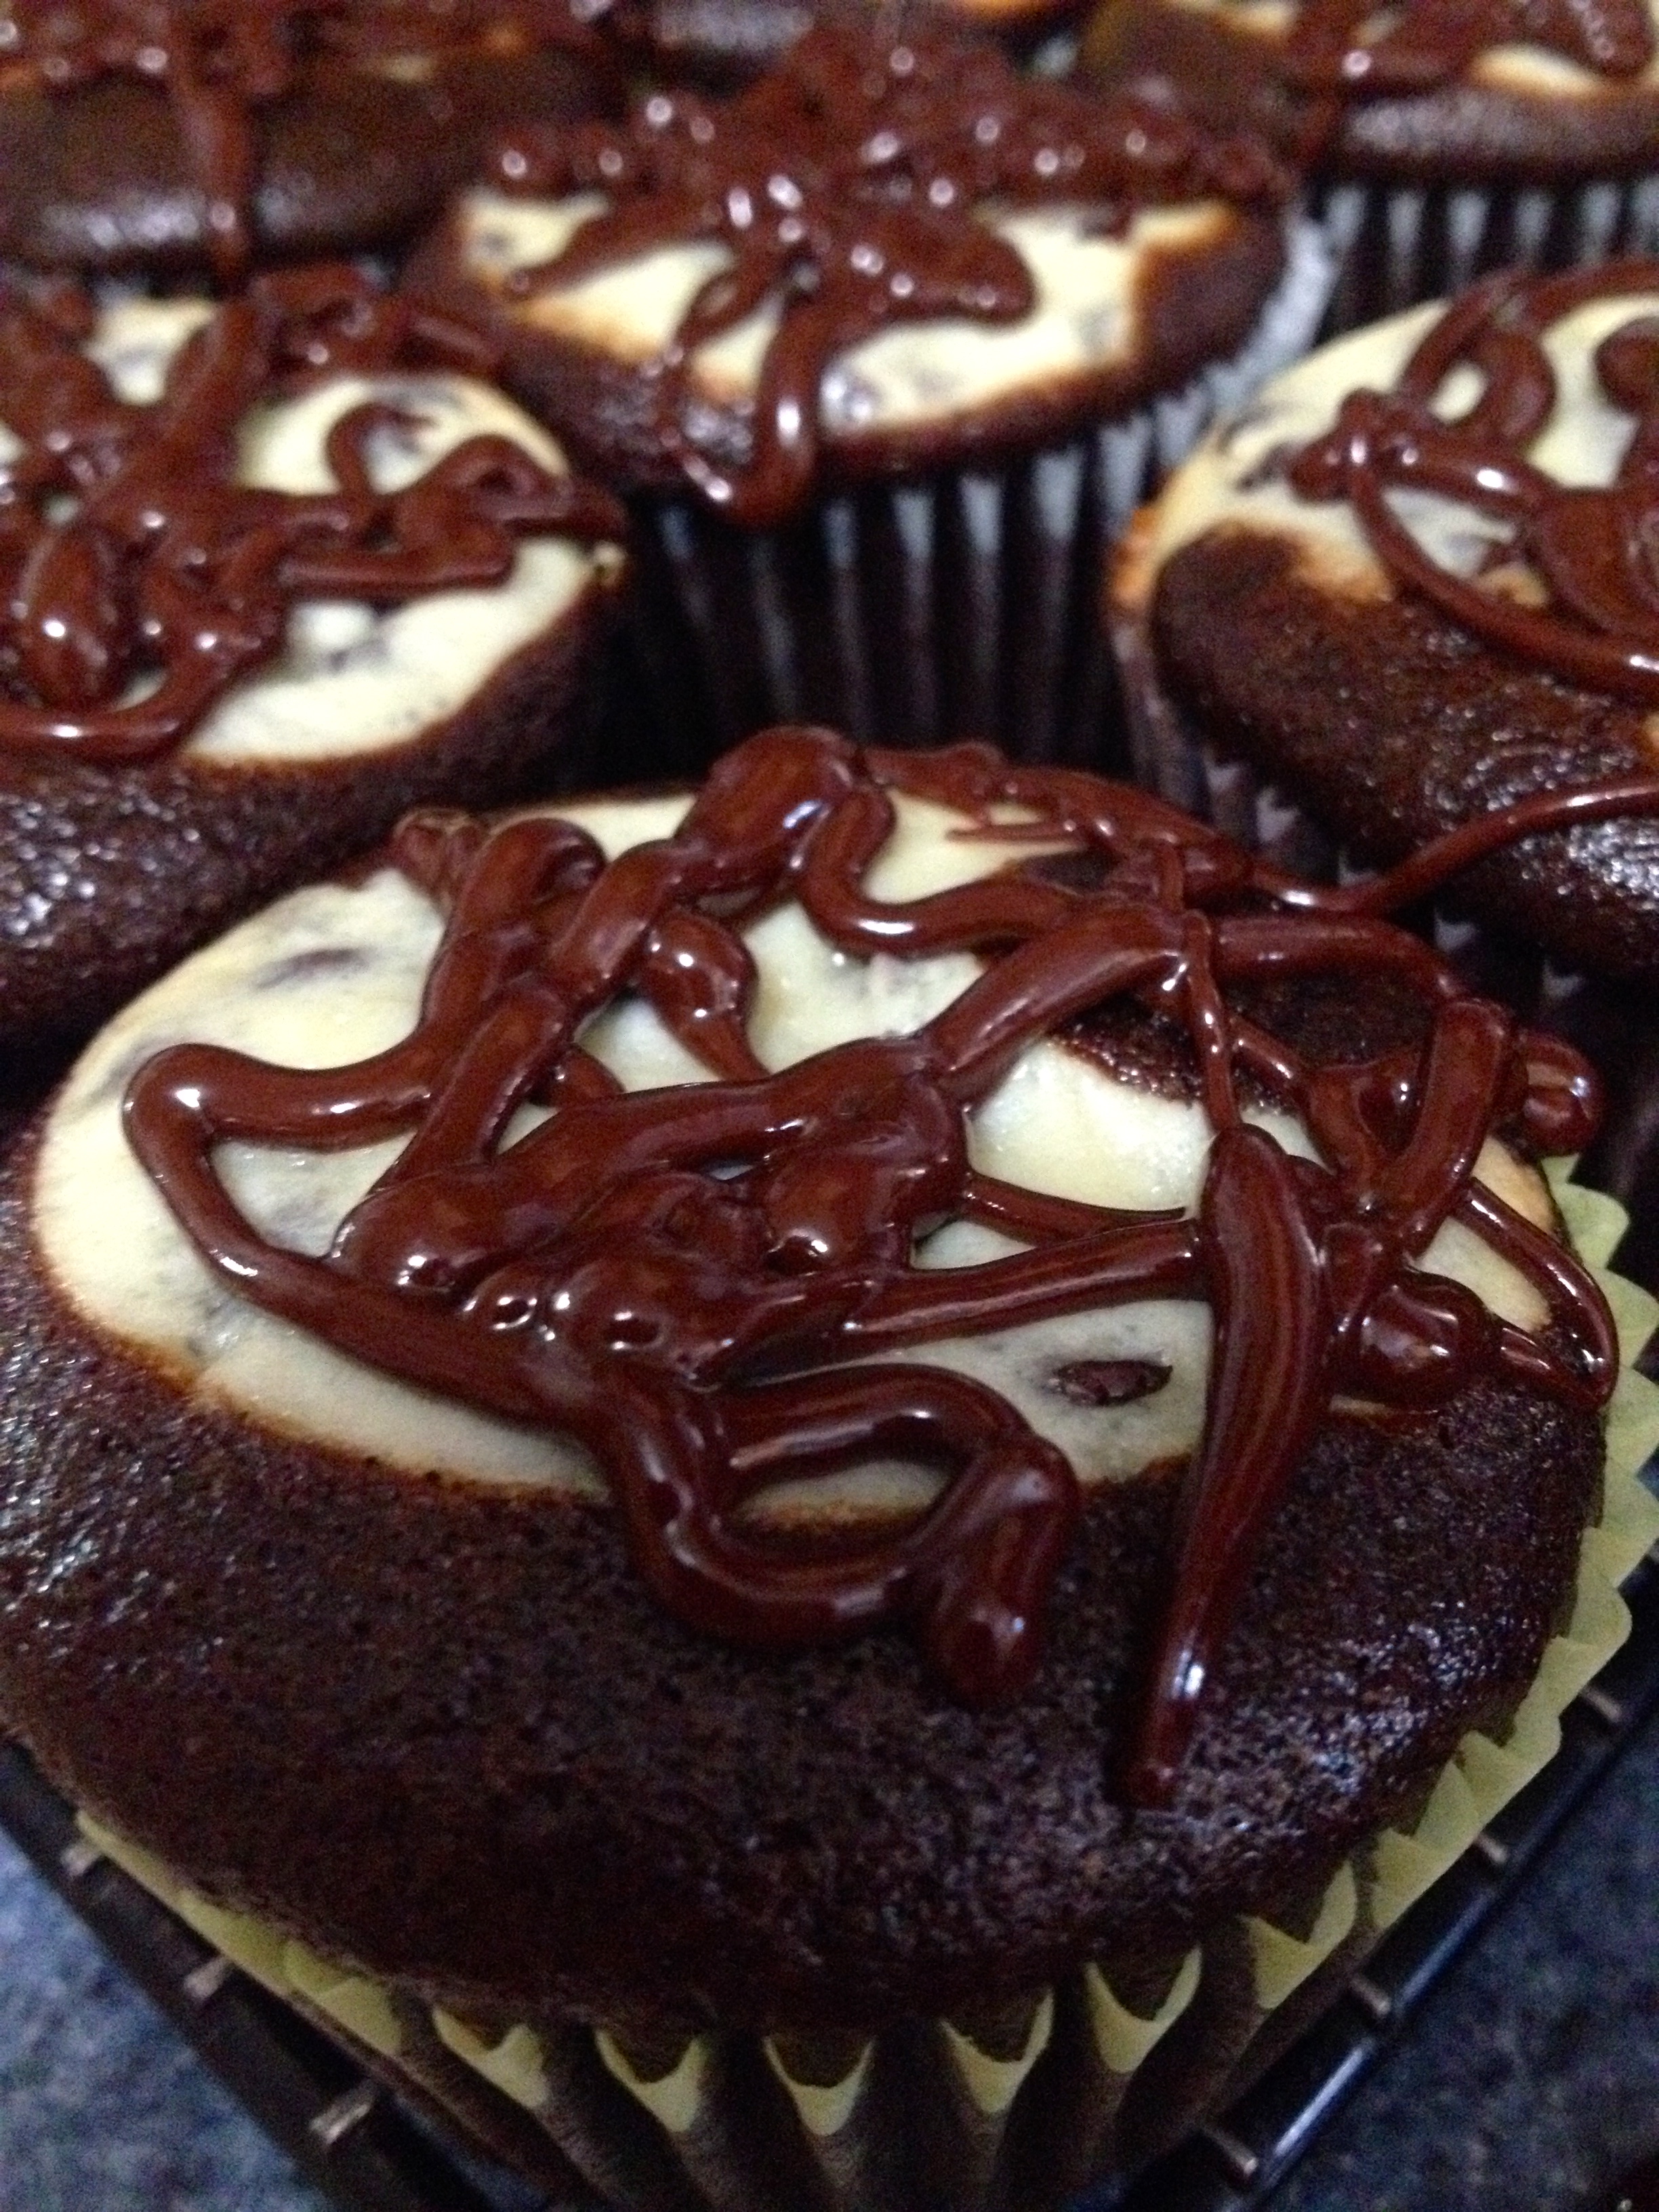
This is where the official recipe ends, but really, what’s a cupcake without some sort of frosting?? So, I made a chocolate glaze to go on top. Here’s the recipe:
Ingredients:
- 1 cup chocolate chips
- 3 tbsp butter
- 1 tbsp corn syrup
- 1/4 tsp vanilla
Melt all these ingredients together and stir well, and then drizzle the glaze over the cupcakes. It really gave the cakes a finishing touch, and added another dimension of chocolate heaven.
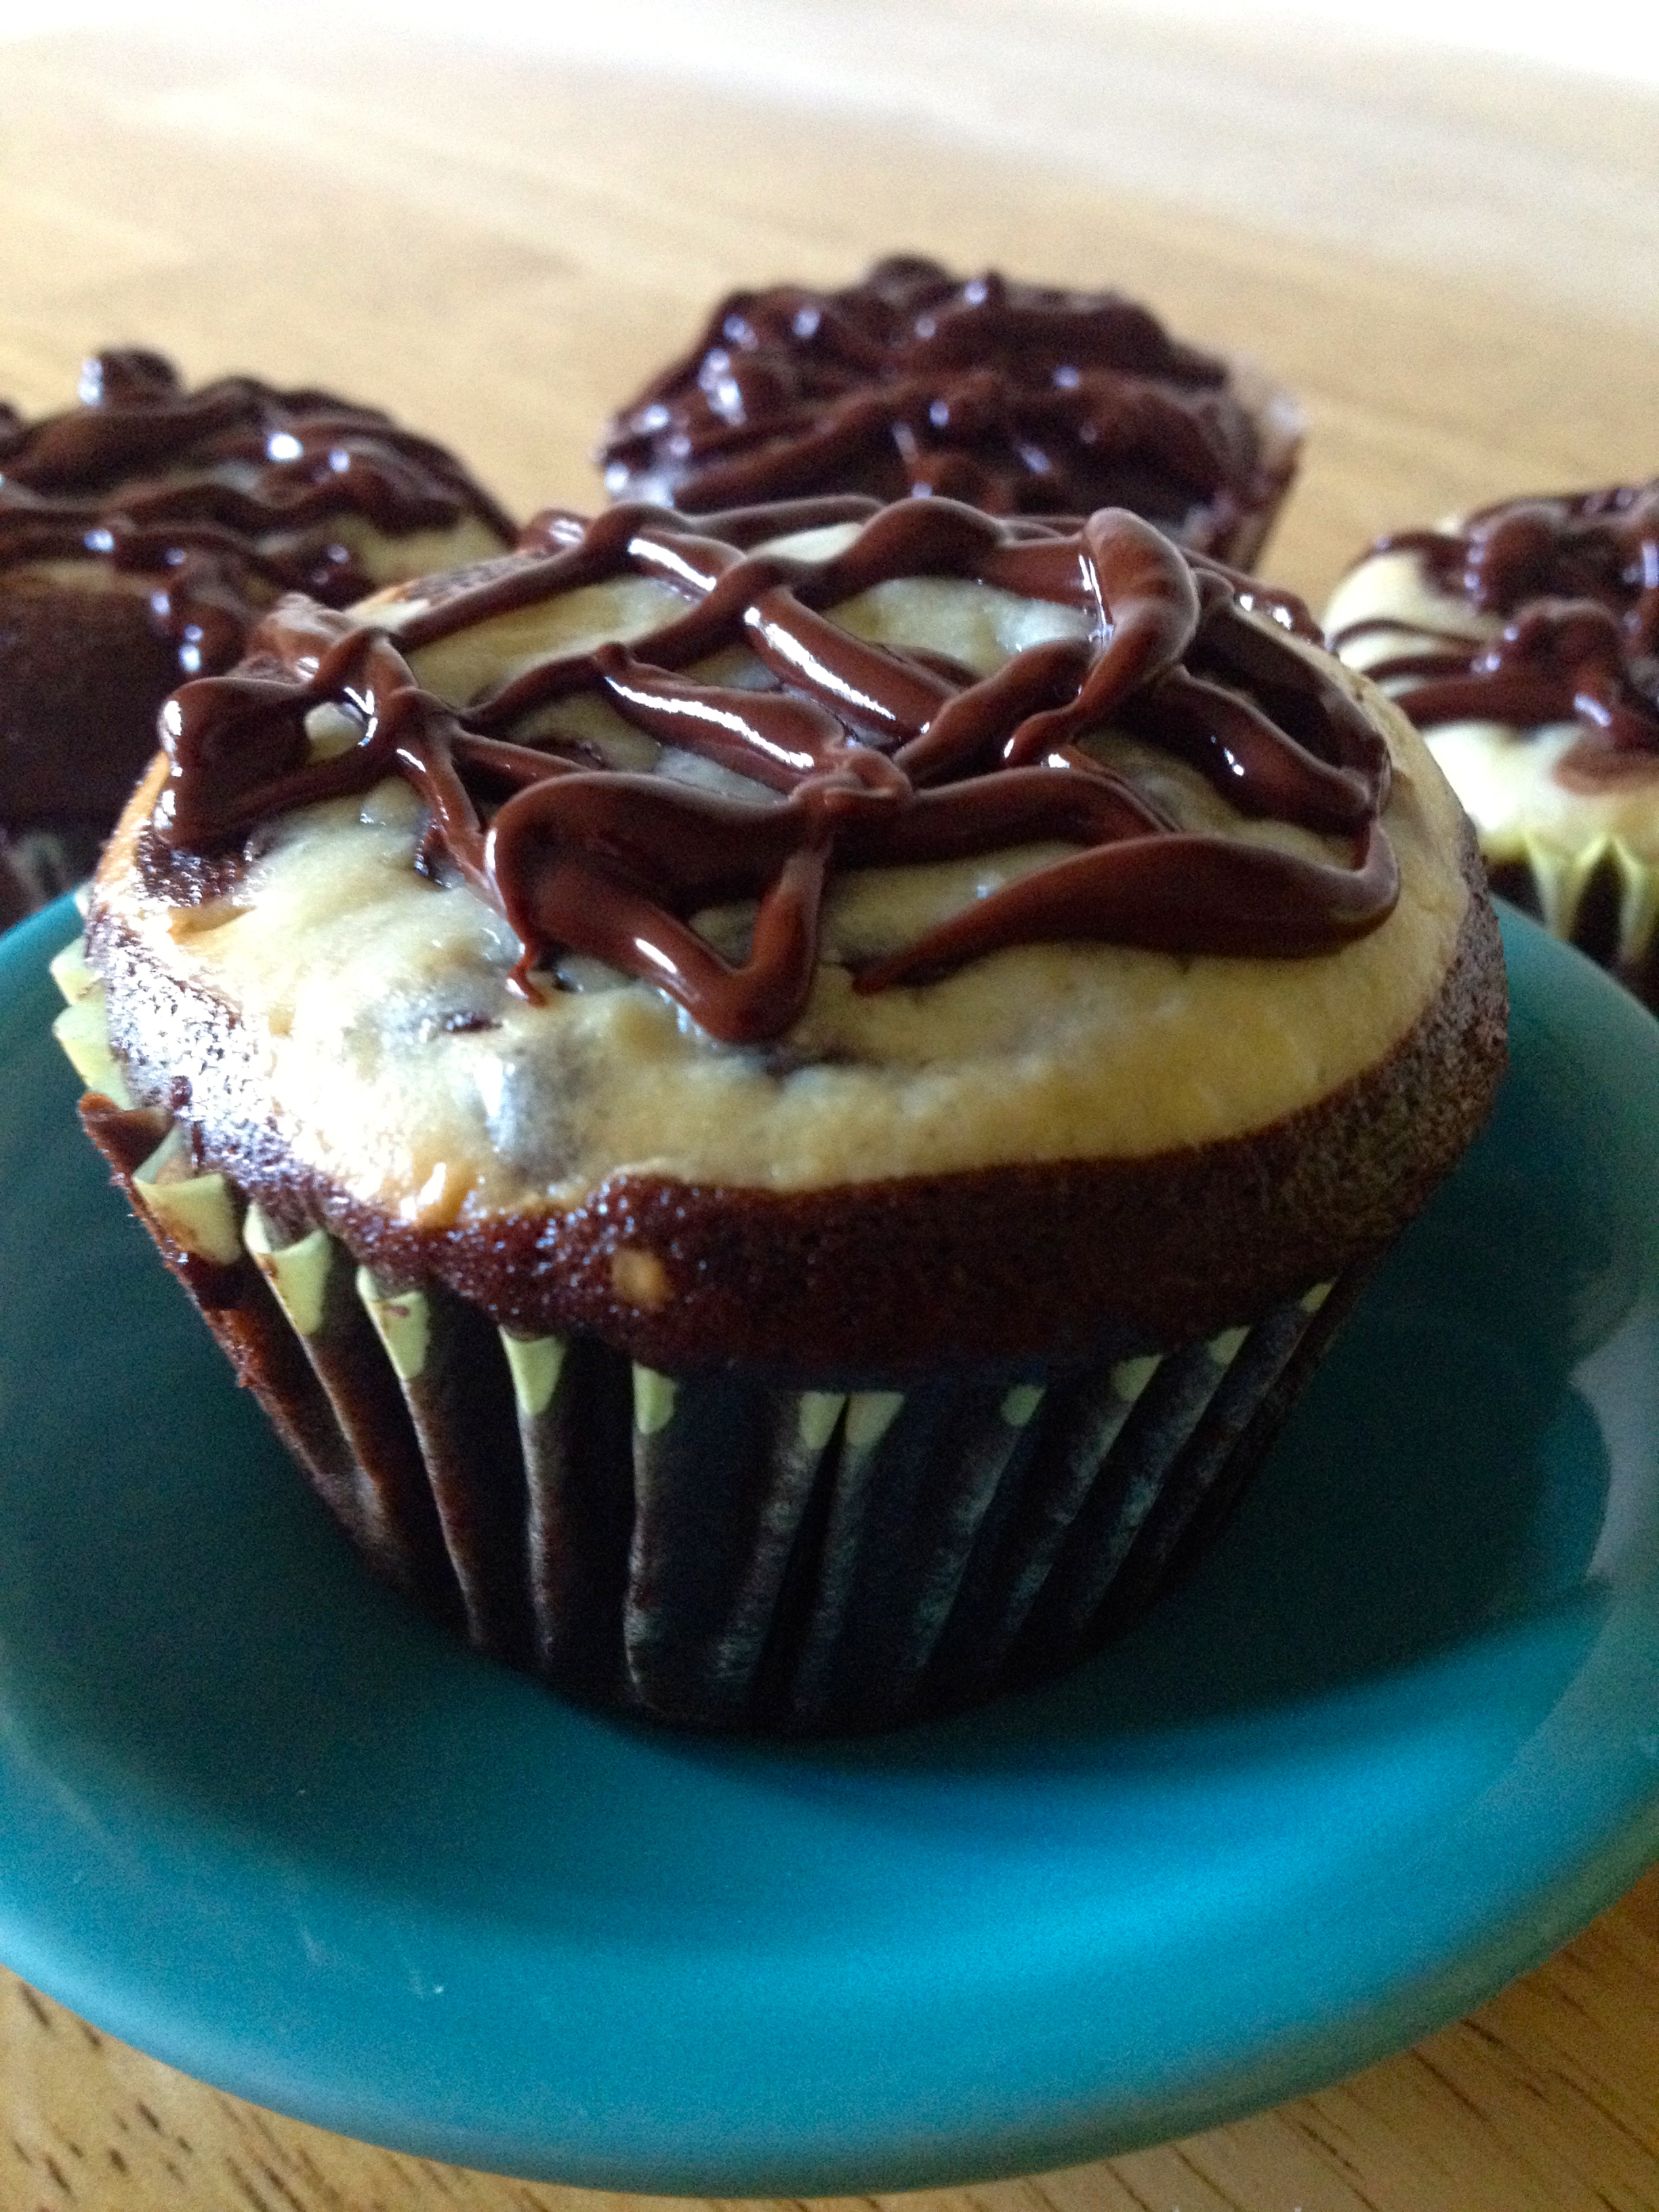
This recipe was a huge hit! I took the cupcakes to a family party, and they were well-loved by all. Even my dog kept barking at the cupcakes because he wanted to try them so badly.
I hope you’ve enjoyed reading this post as much as I’ve enjoyed writing it, and I hope you’ll try these recipes, and maybe even buy The Cupcake Bible. I will use this cookbook for years, and can’t wait to try all of its recipes! Happy baking!
The Grammy Cake
I’m back! I’ve been a tad busy recently, because my boyfriend left for college today and I wanted to spend some extra time with him. However, now that he’s gone, I’m back at the baking and ready to share my latest!
Here’s the story of my newest creation: I was feeling sad because my boyfriend was leaving, and his Grammy messaged me and suggested that I bake a “comfort food” cake to help me feel better. For me, that says ‘peanut butter and nutella sandwiches’. I decided to try her idea and see how it turned out, and if it was delicious, I’d call it the Grammy Cake! Now stick with me, here. No, I didn’t actually make a sandwich. What I did make was a moist, delicious, chocolate peanut butter cake with Nutella peanut butter frosting. If you’ve never tried peanut butter and Nutella, don’t knock it until you’ve tried it! Even my dad loved this cake, and he likes neither cake nor Nutella!
Here’s how you make it:
Ingredients/Equipment:
- 1 chocolate cake mix (any brand should work, but I used Betty Crocker)
- 1/2 cup & 2 tbsp creamy peanut butter
- 1/2 jar Nutella (or chocolate hazelnut spread of any kind)
- A hand mixer and an 9×13″ baking pan
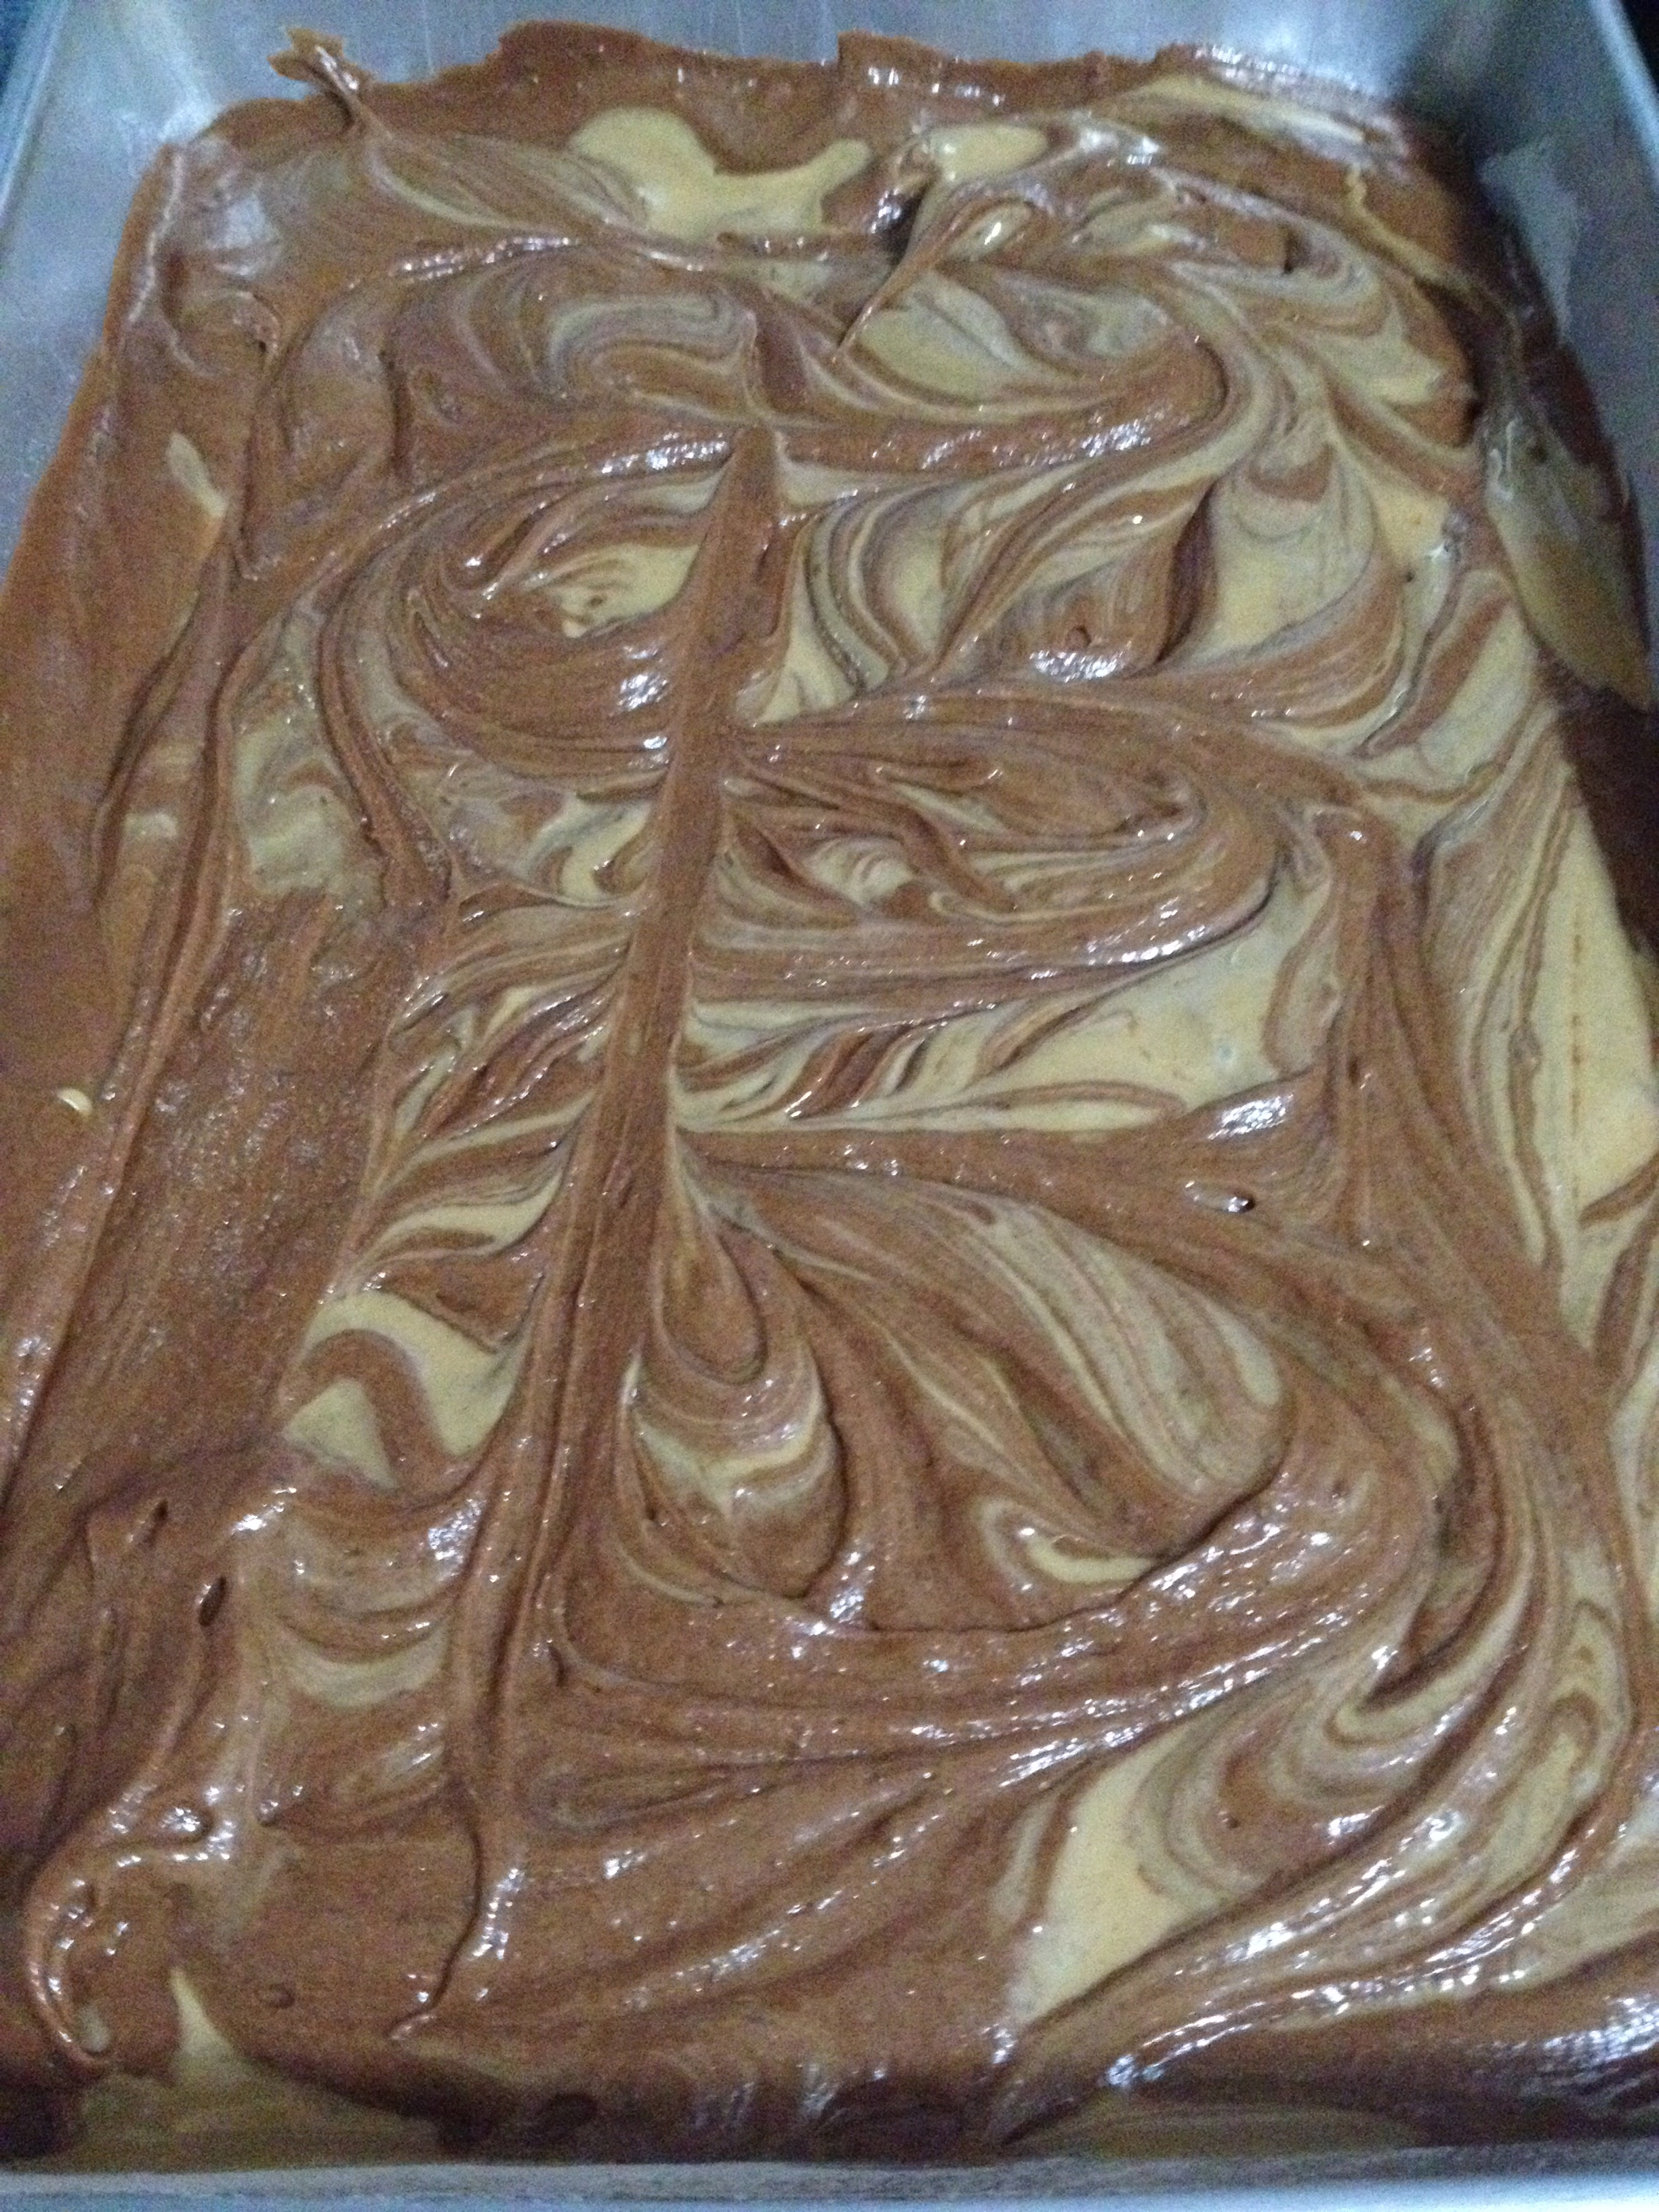
First, mix up the cake mix according to the directions on the box, and pour the batter into the baking pan. Then, put the 1/2 cup peanut butter into microwave for 30 seconds. It sounds unusual to heat it up, but from my experience of toasted peanut butter and Nutella sandwiches, I knew that the peanut butter gets warm and melty and delicious! Drizzle the melted peanut butter over the chocolate batter until the cake is mostly covered in peanut butter.
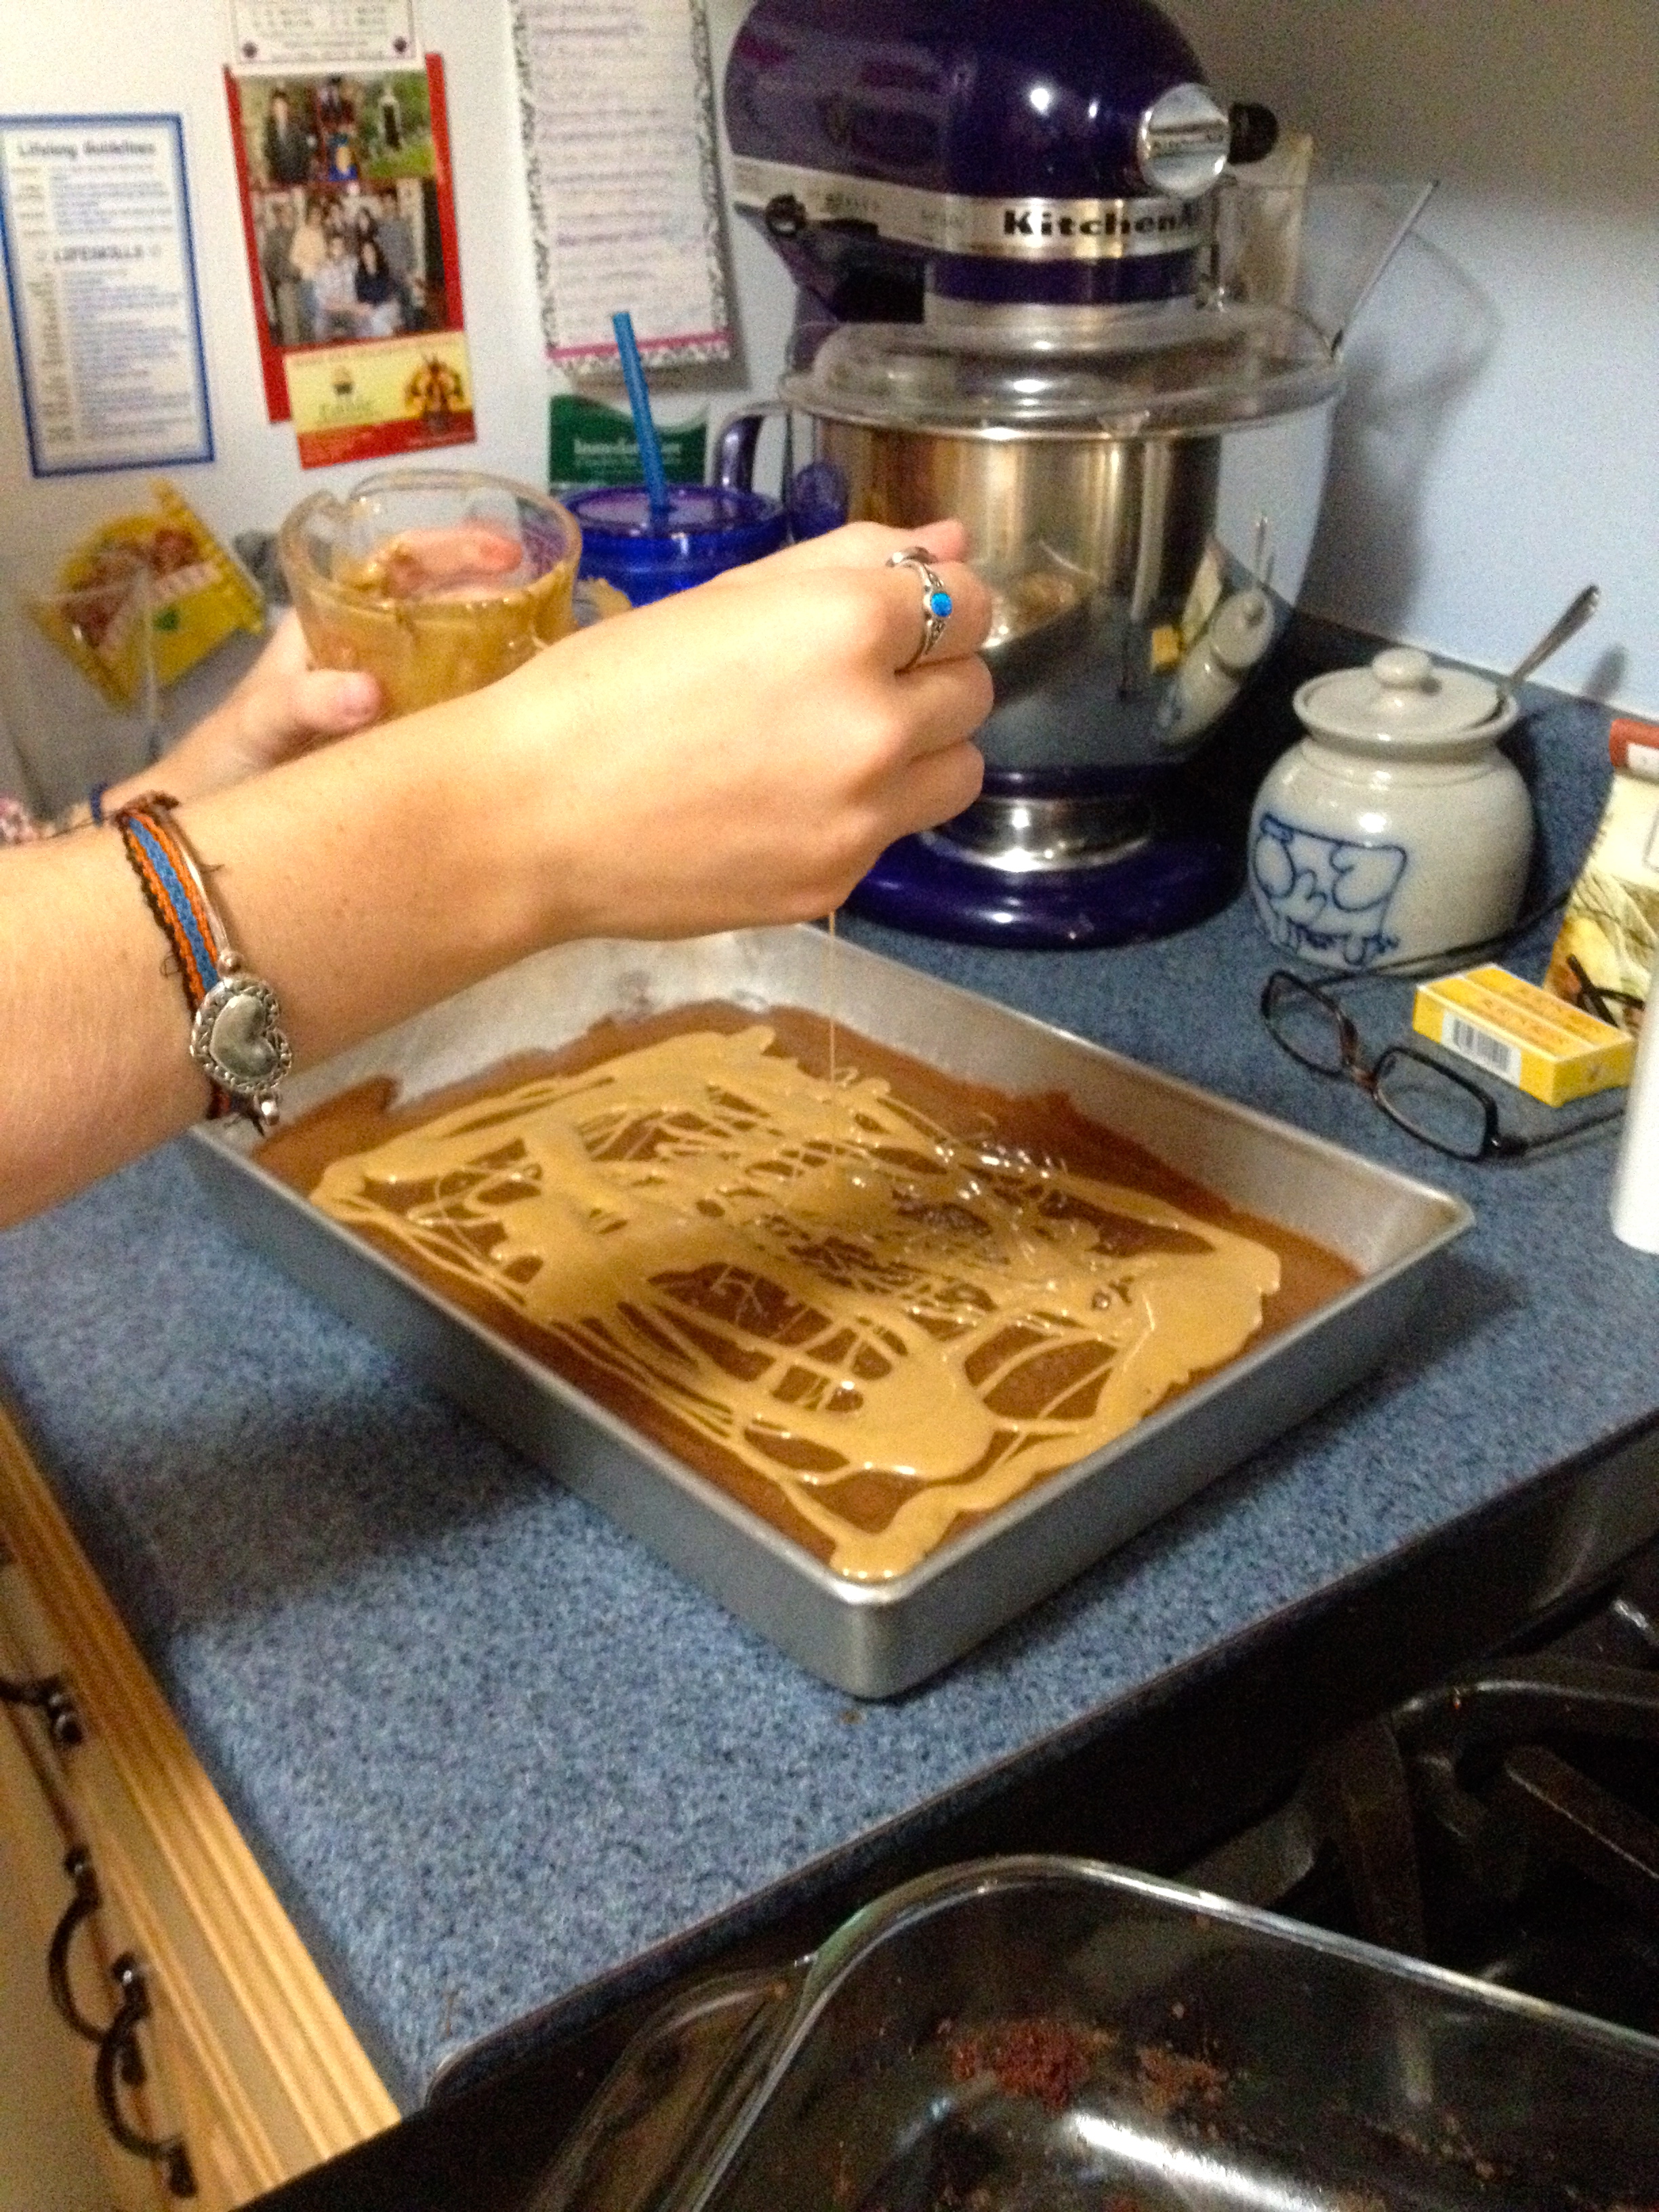
Then, using a knife or toothpick, swirl the melted peanut butter into the chocolate batter.
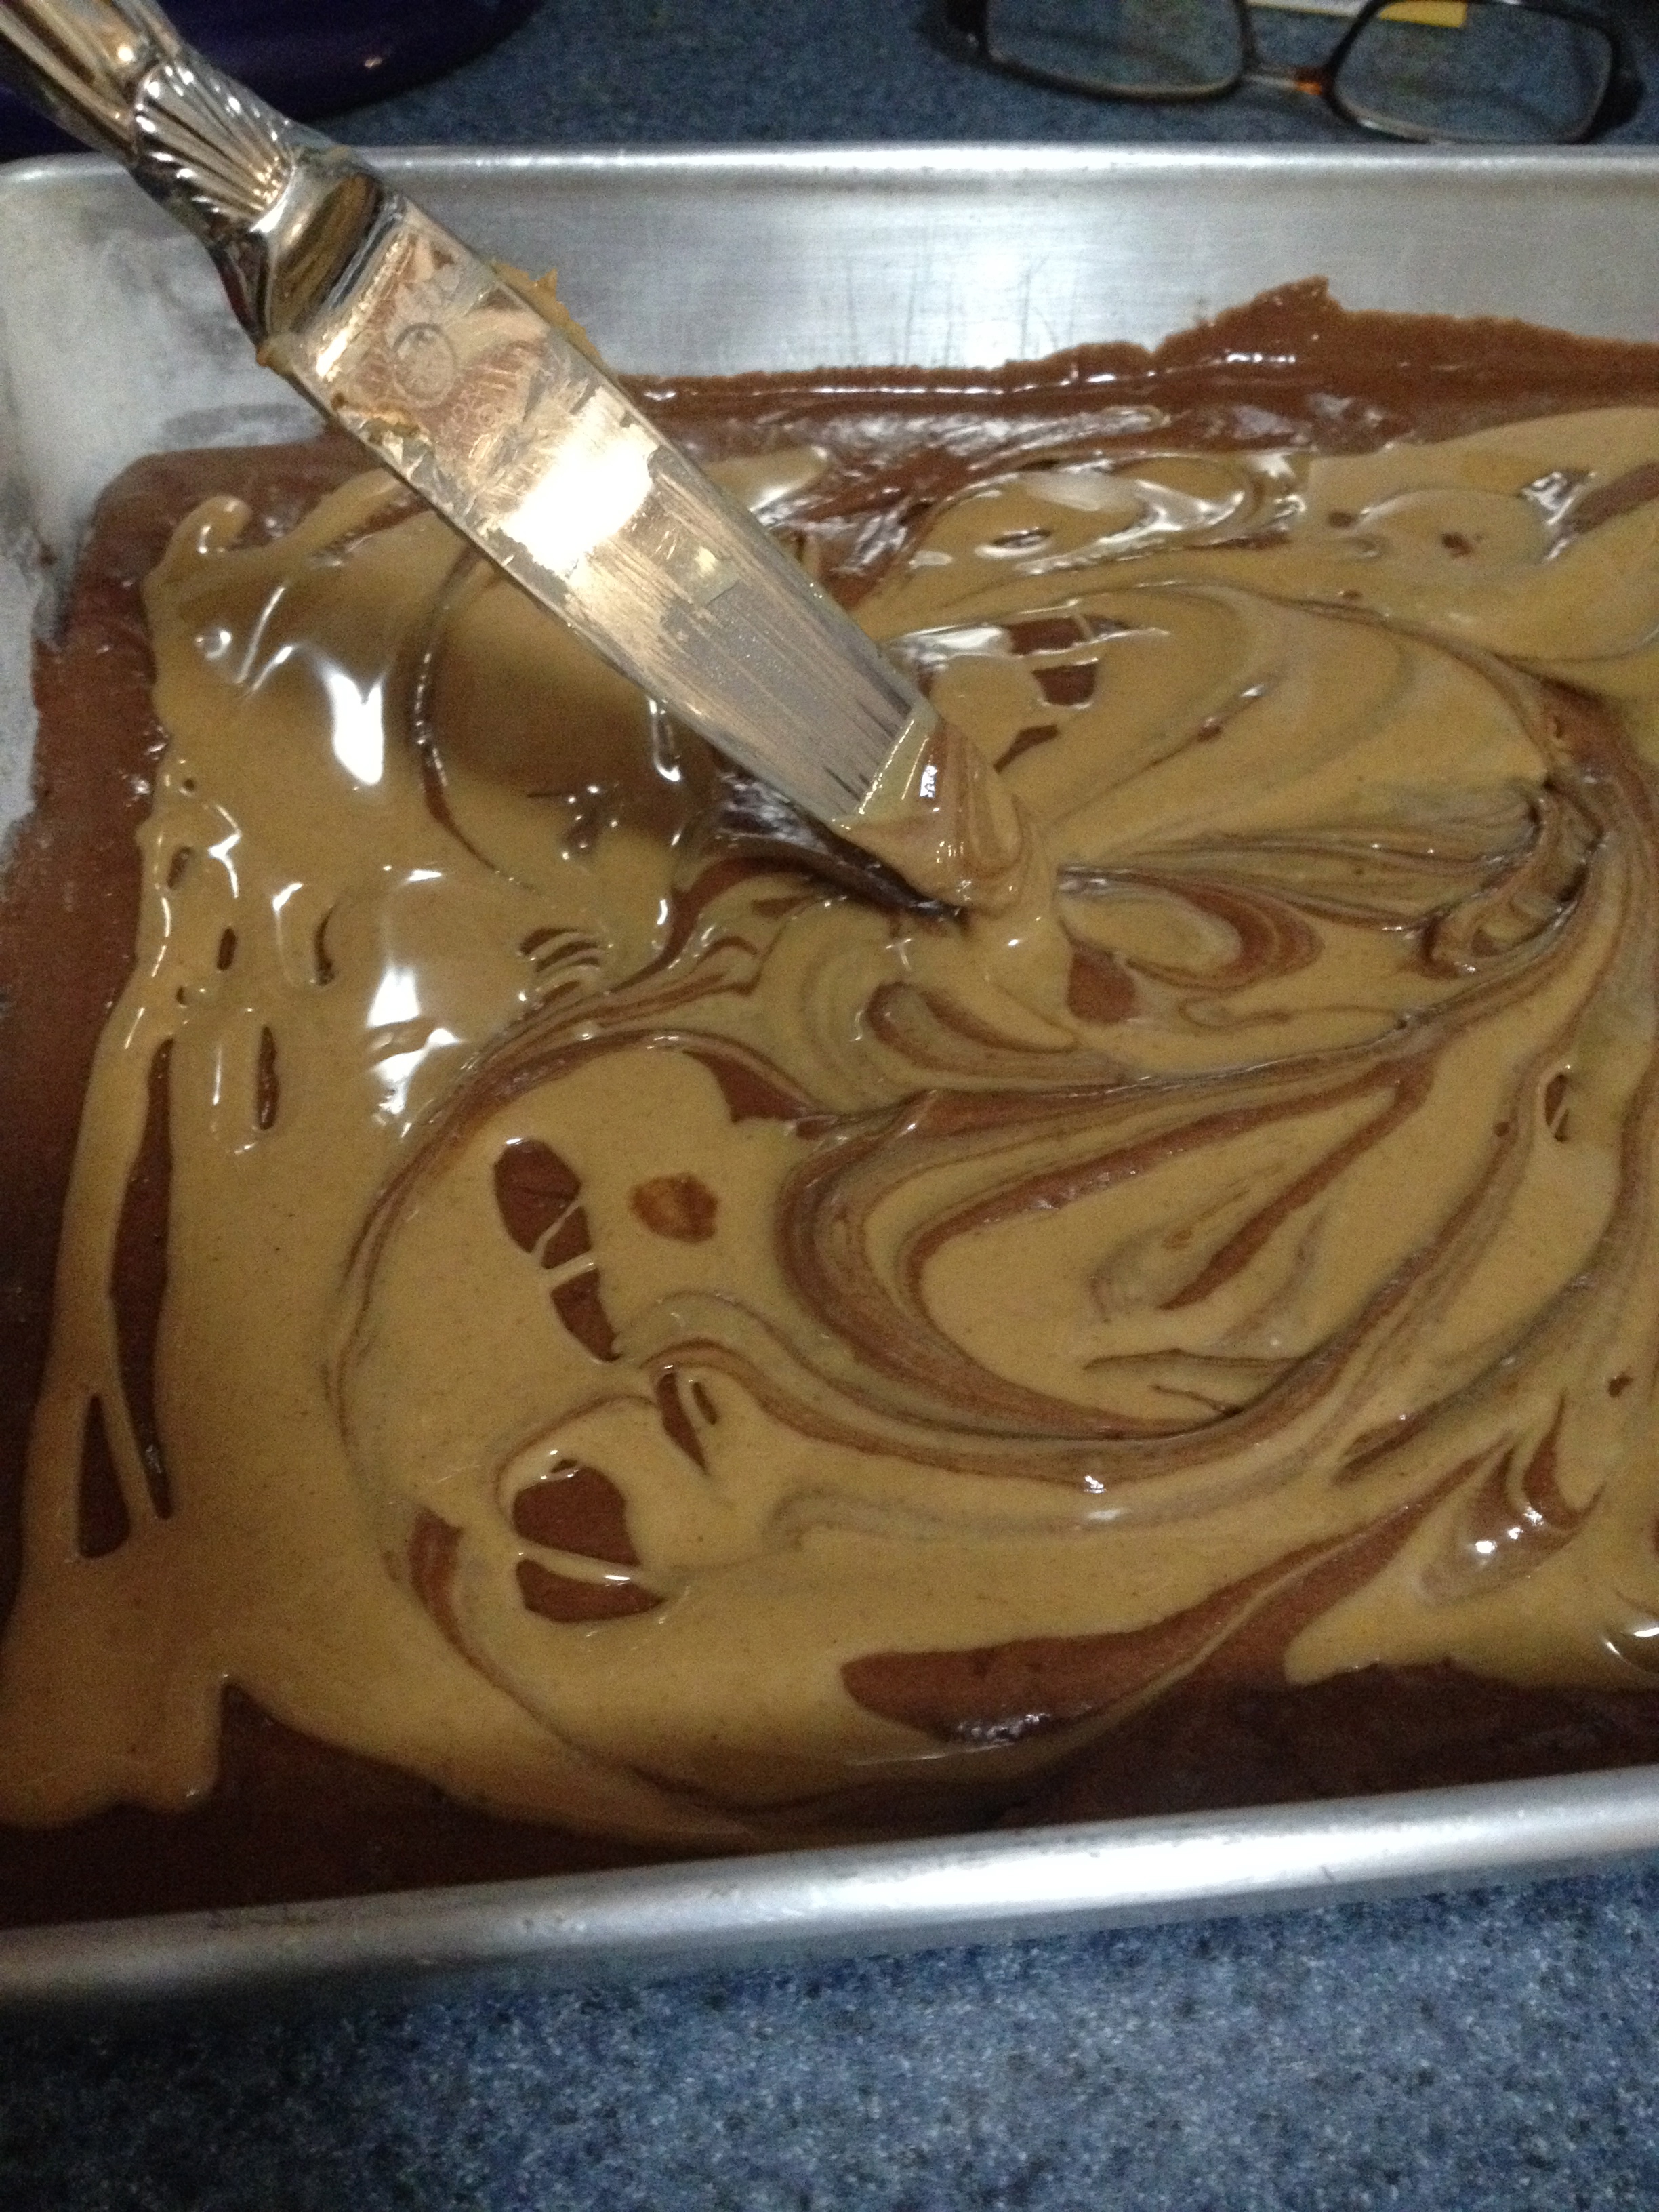
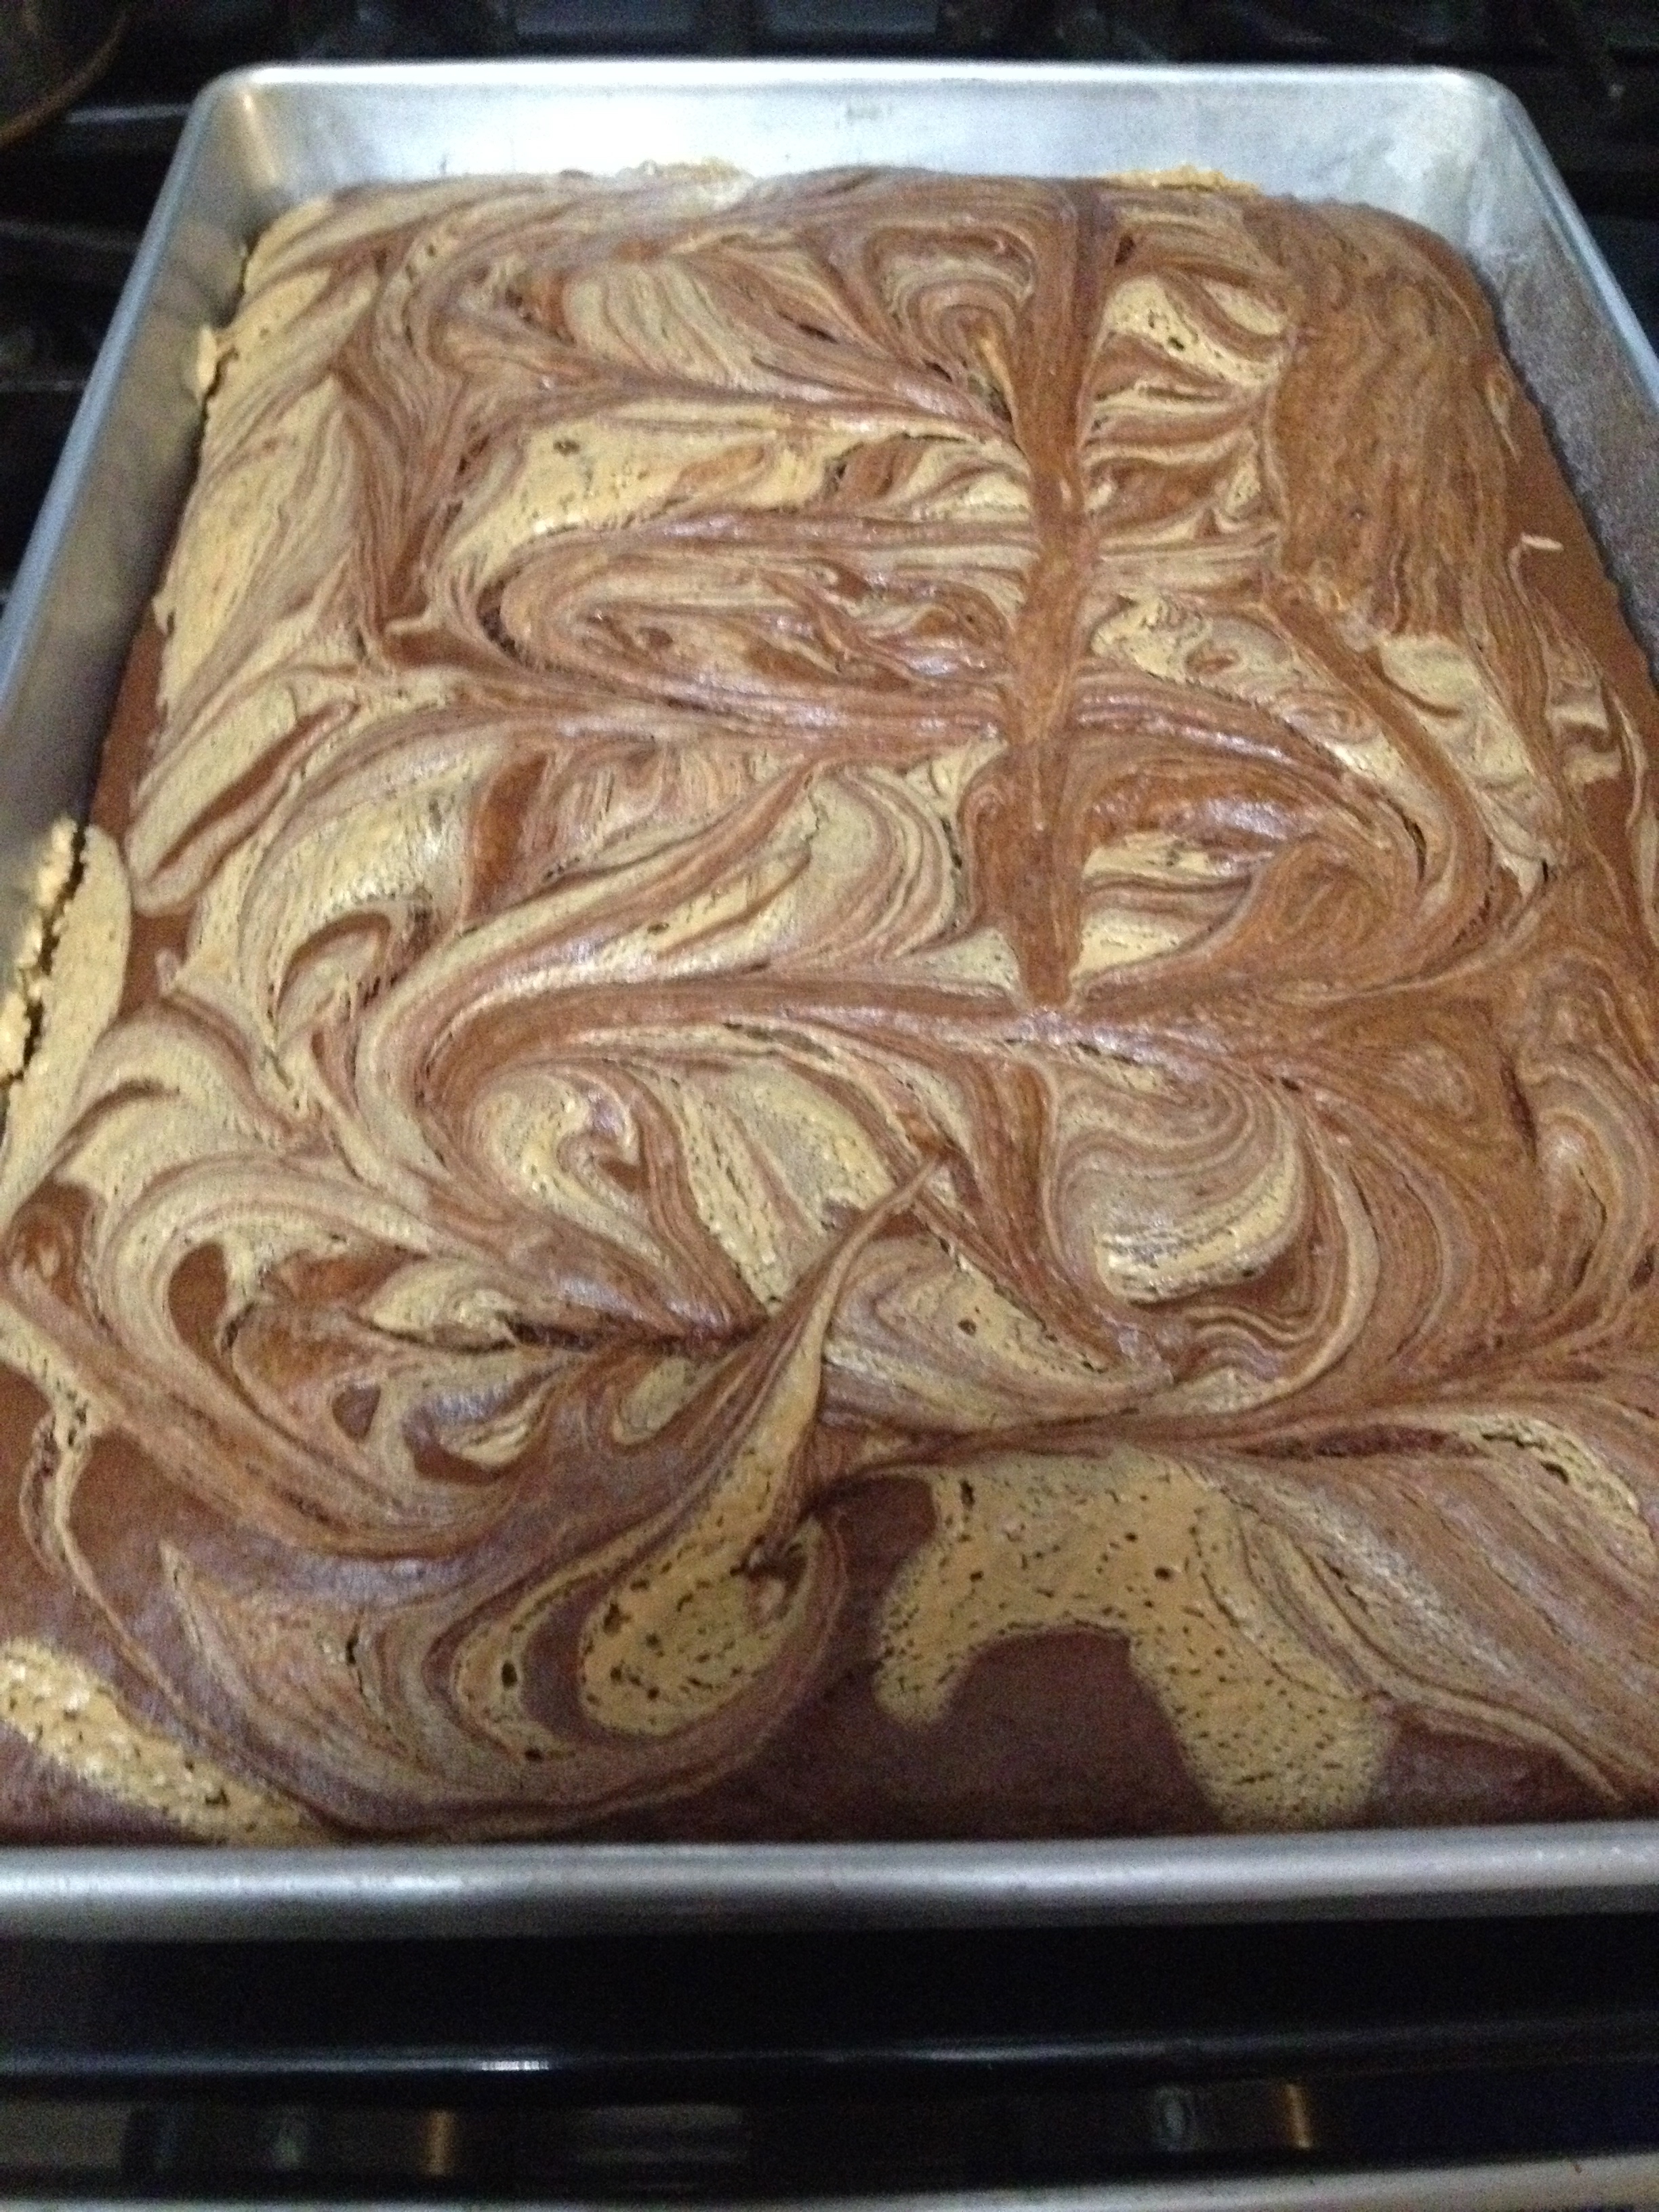
Bake the cake according to the directions for a 9×13″ pan on the cake mix box, until a toothpick inserted in the middle comes out clean. It’s super cool- it stays all swirly after it’s cooked!
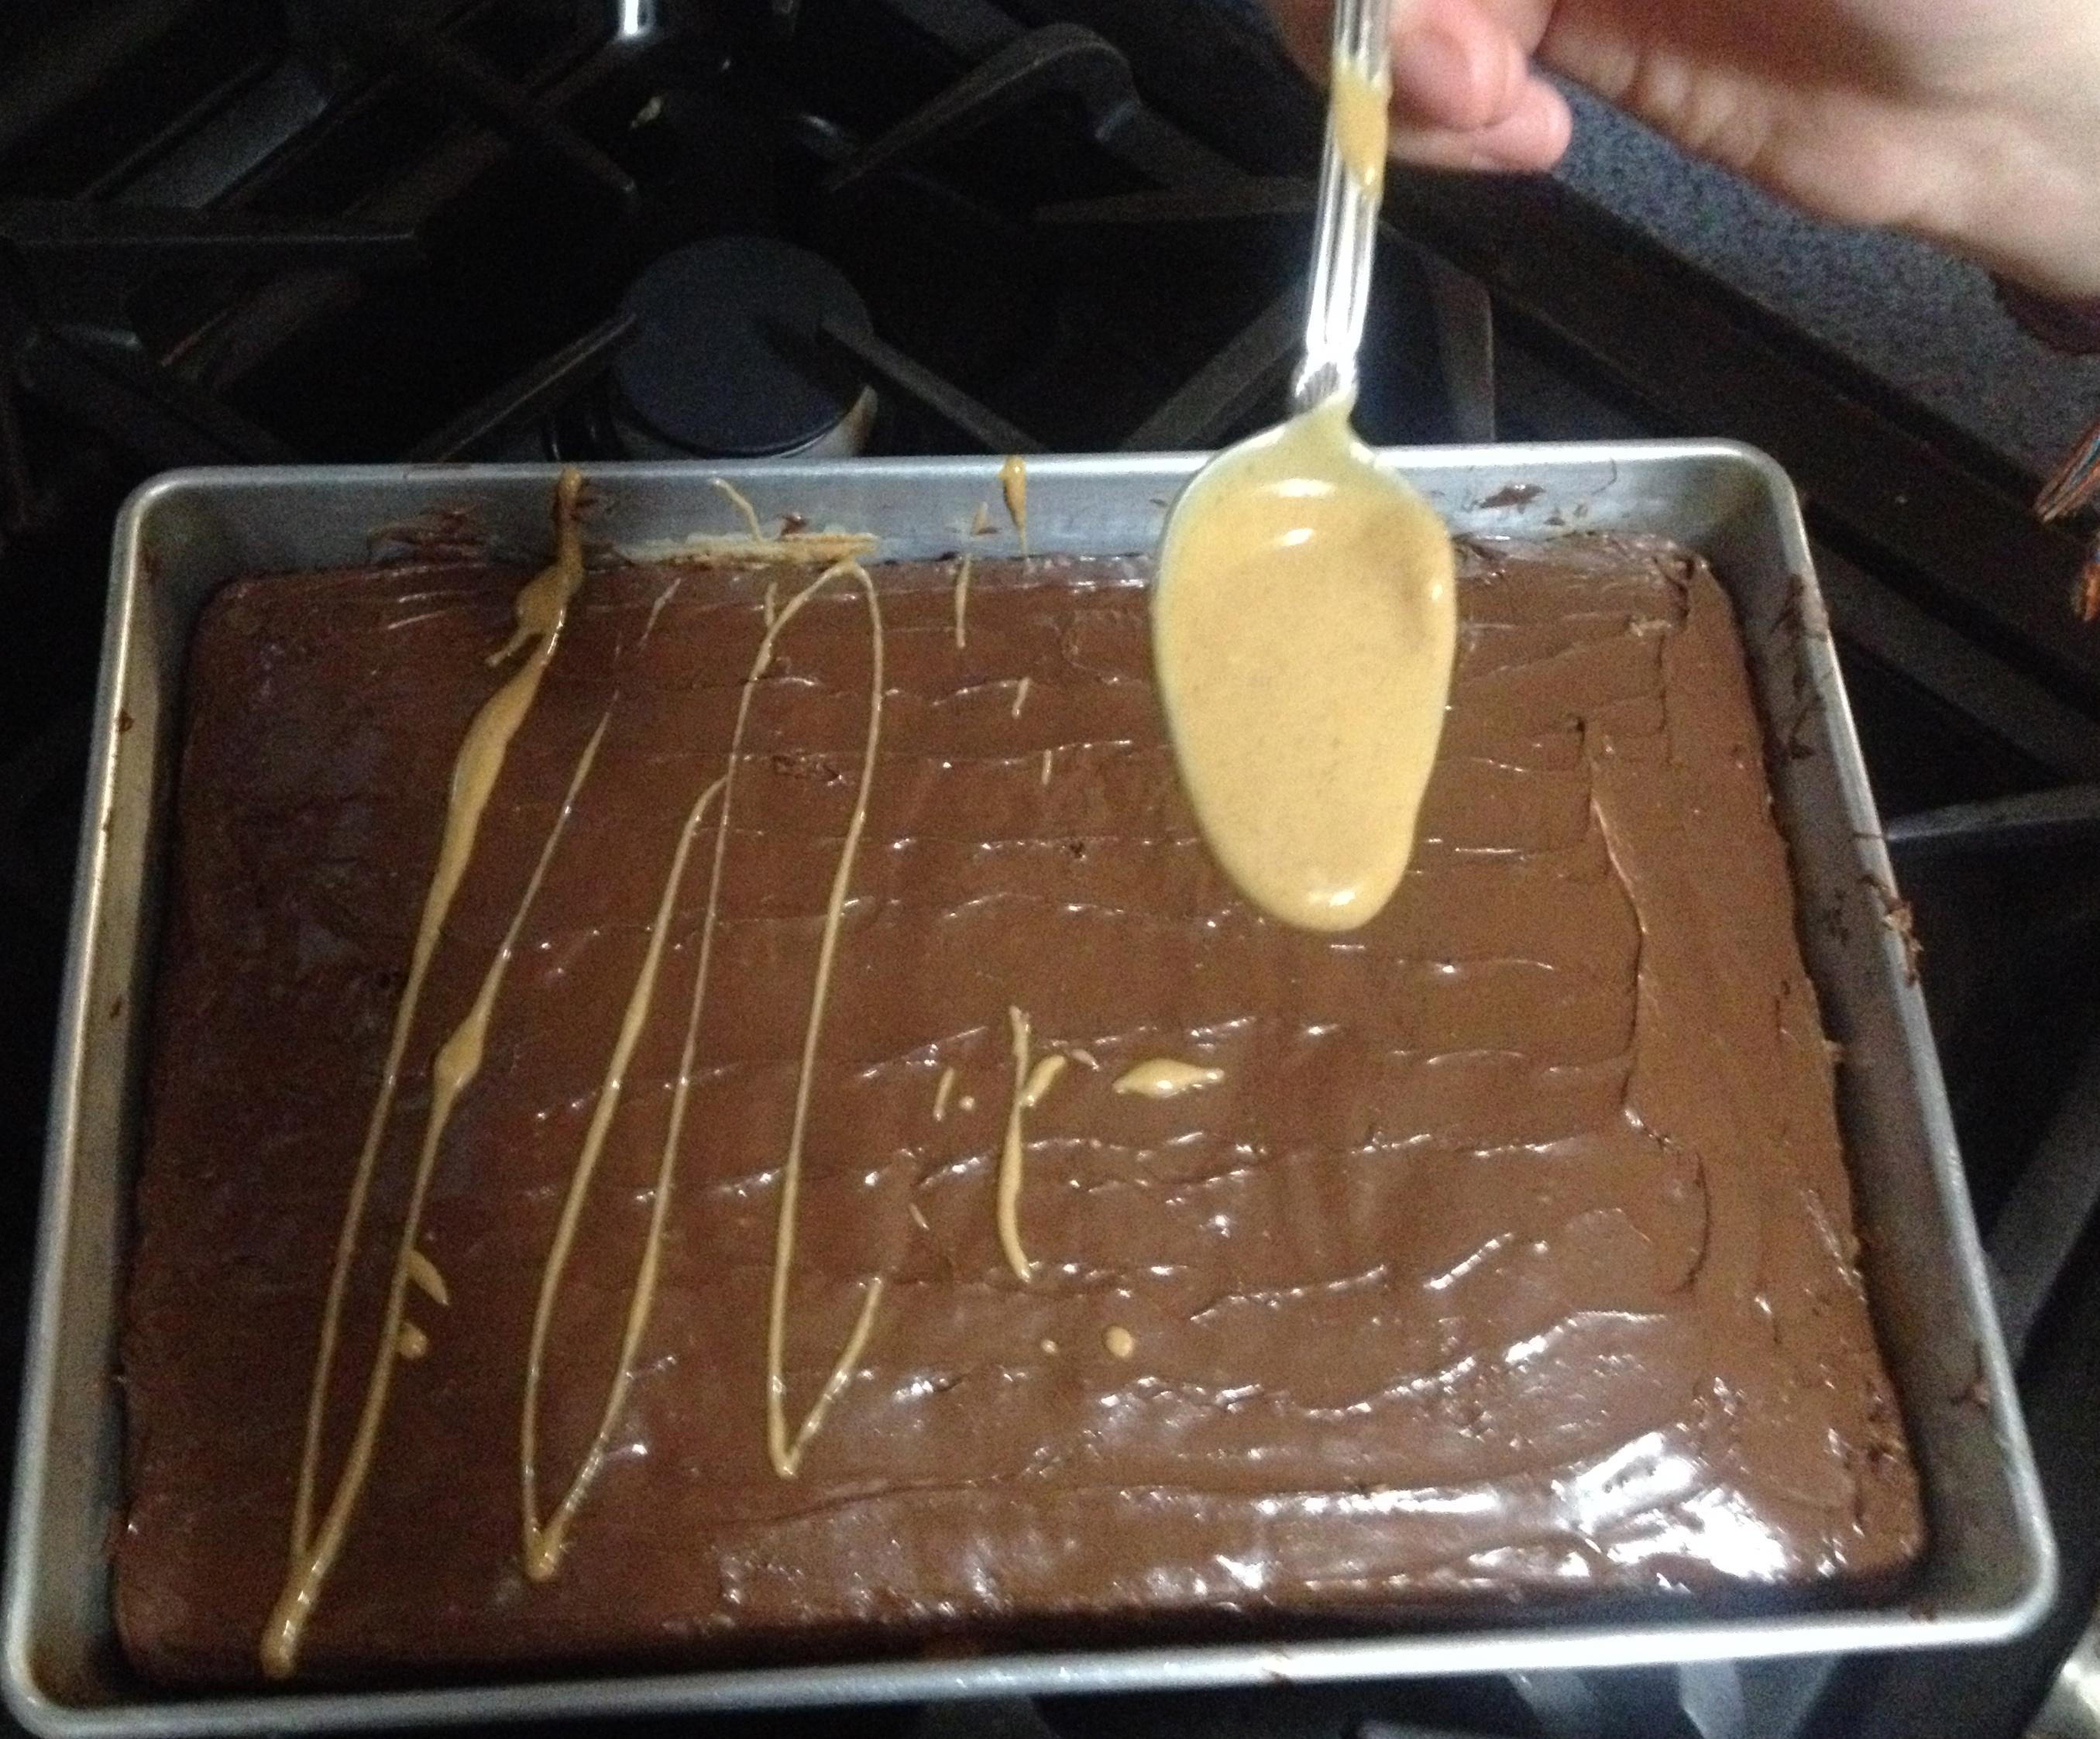
Let the cake cool completely before even thinking about frosting it, or else you’ll end up with melted frosting! When you’re positive the cake is cool and the bottom of the pan is cool, break out the Nutella. You can spread it on as thick or thin as you like! I did a fairly thin layer, because I wanted to save my Nutella for toast. After you frost the cake with Nutella, melt the other 2 tbsp of peanut butter and drizzle it over the top.
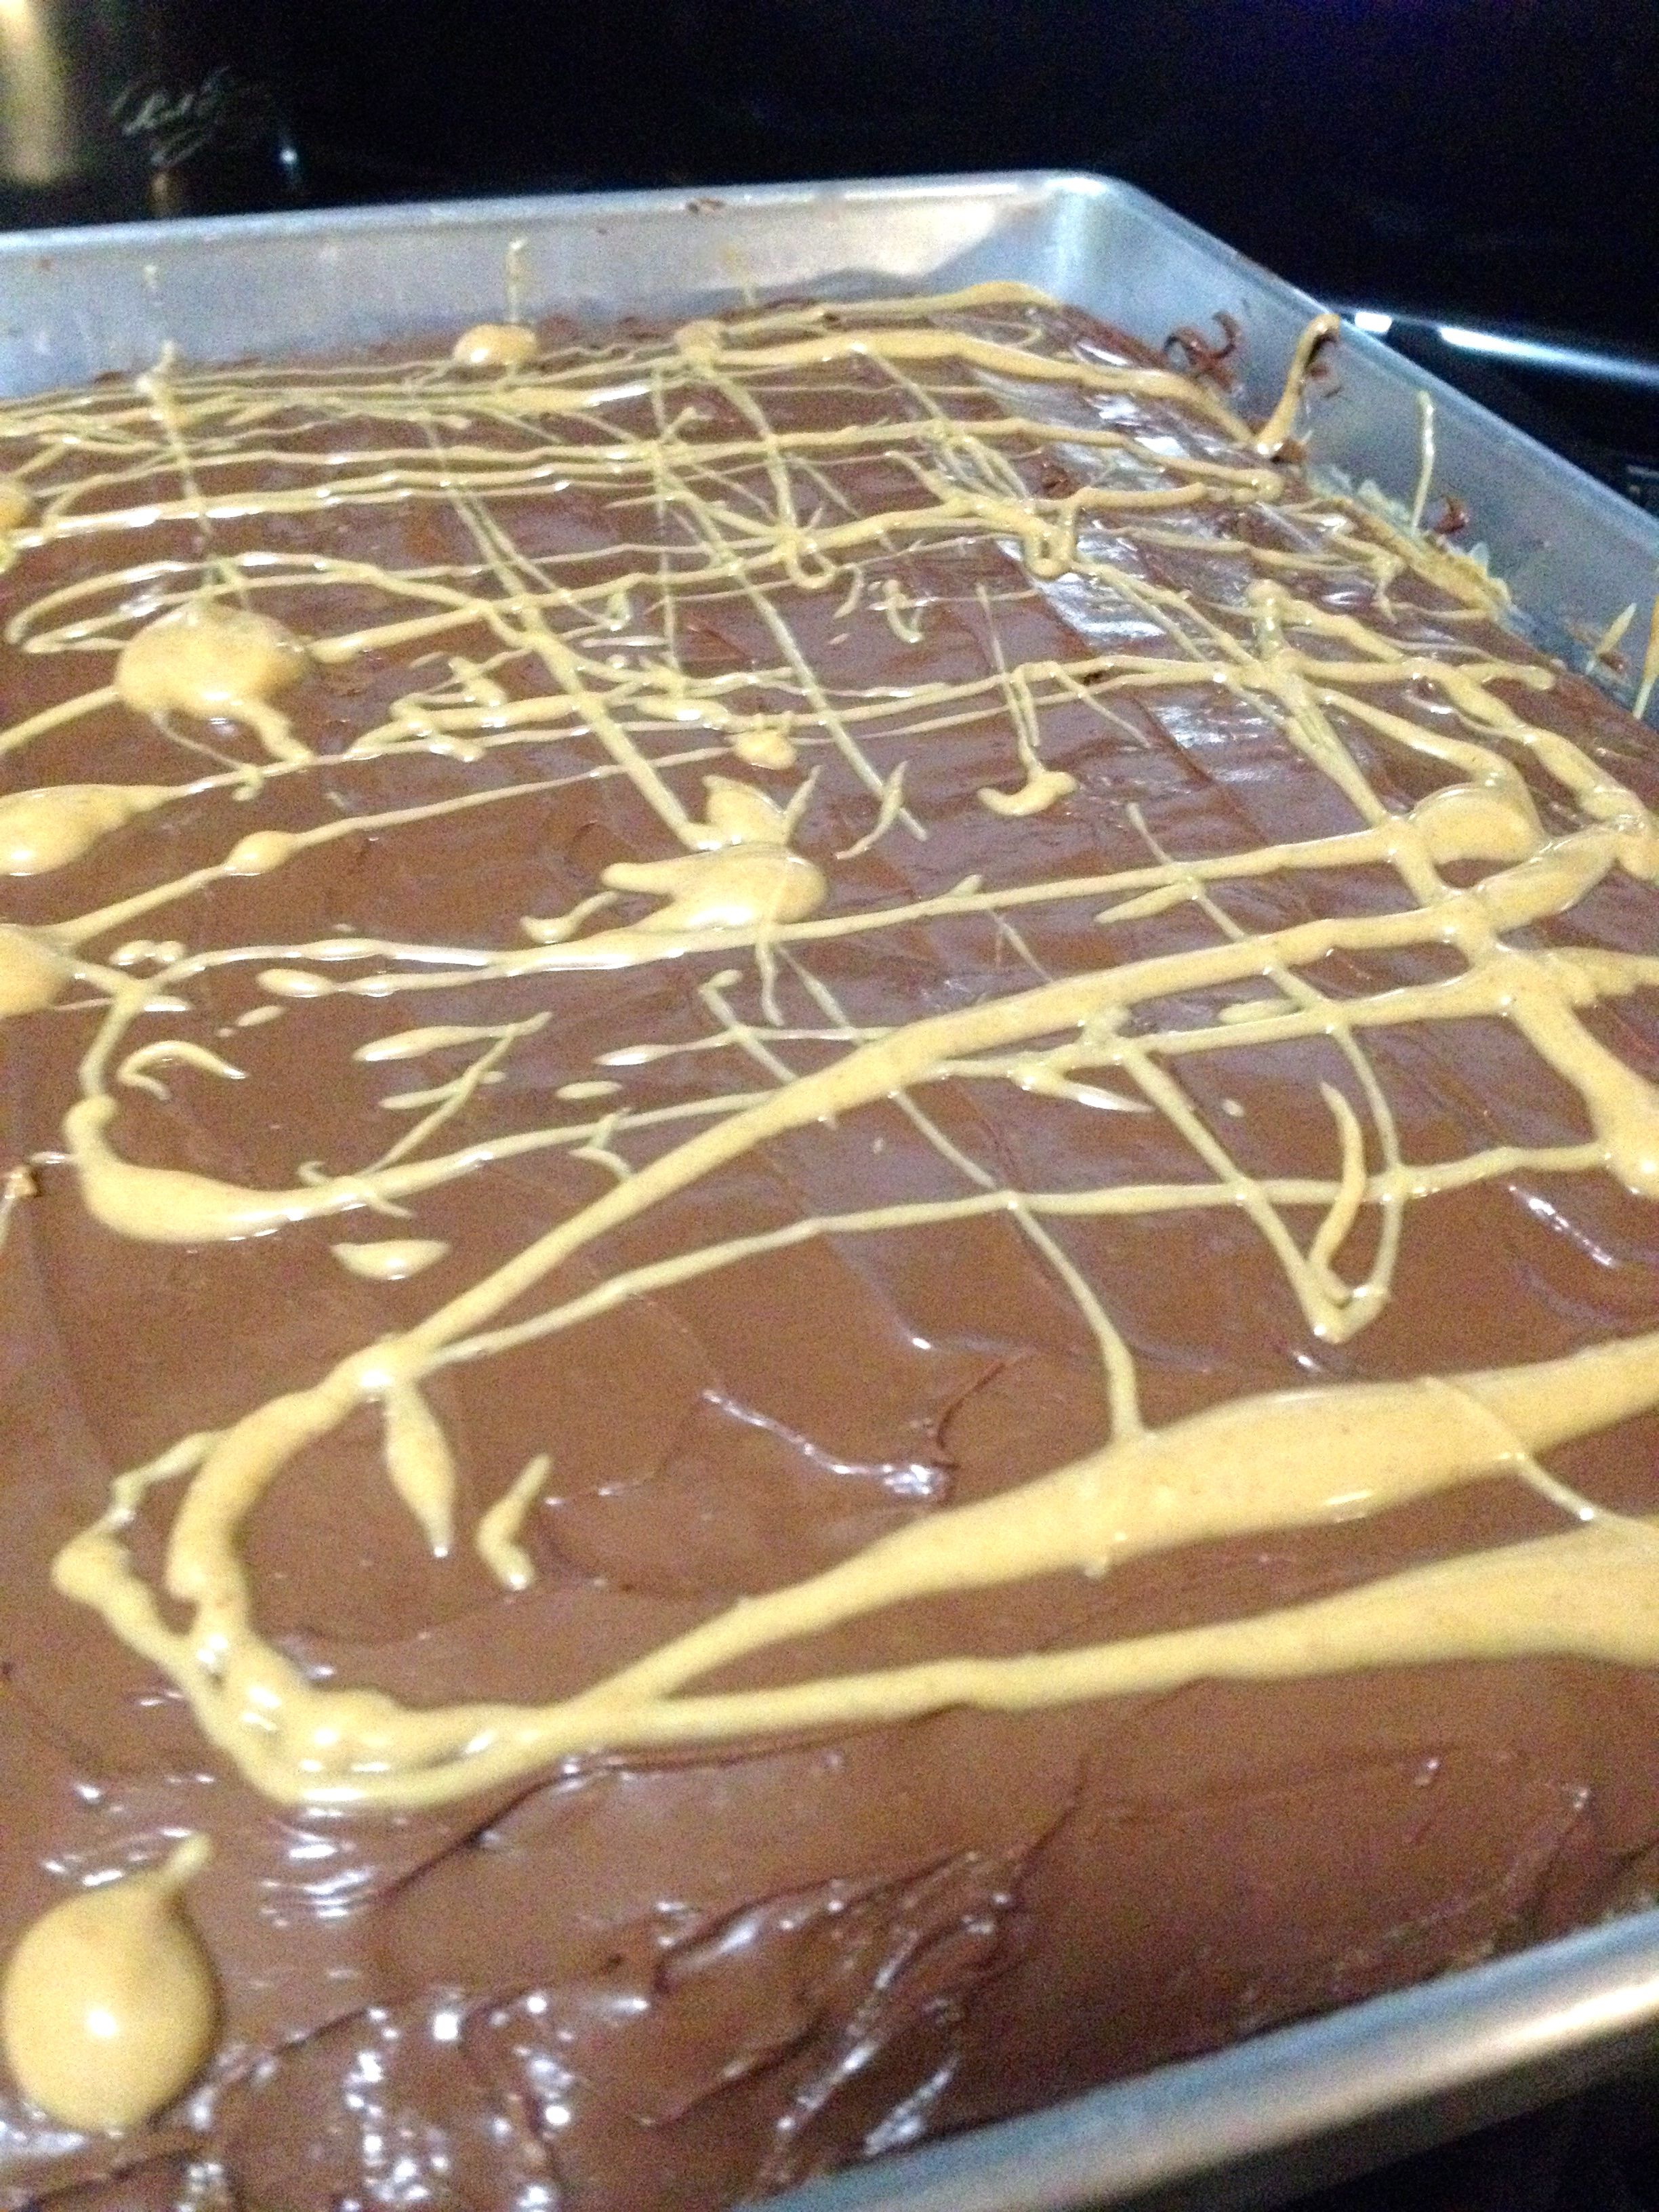
When you’re all done, it should look like this (or at least something like this):
This cake was for my boyfriend’s going-away party at his work, and it was gone in no time! The Grammy Cake got raving reviews, and my hat comes off to Grammy for such a brilliant idea. I hope you enjoy this cake as much as my family and friends did, and that the end of your summer is wonderful. For everyone going back to school, good luck and study hard!
Peppermint Hot Chocolate Cupcakes
Snowy days are pretty typical in my area of the US. Make that really typical. Snowmen and snow angels and snowball fights are great and all, but sometimes it just gets too cold for that! On those days when all I want is warmth, I love baking. I don’t have to leave my house, and the oven makes the kitchen nice and warm.
On one of our recent freezing-cold-can’t-leave-the-house days, I decided that I was craving a peppermint hot chocolate. Sadly, Starbucks is not in my house (and thus unattainable), so it turned into a peppermint hot chocolate cupcake. It was definitely every bit as good as a peppermint hot chocolate.
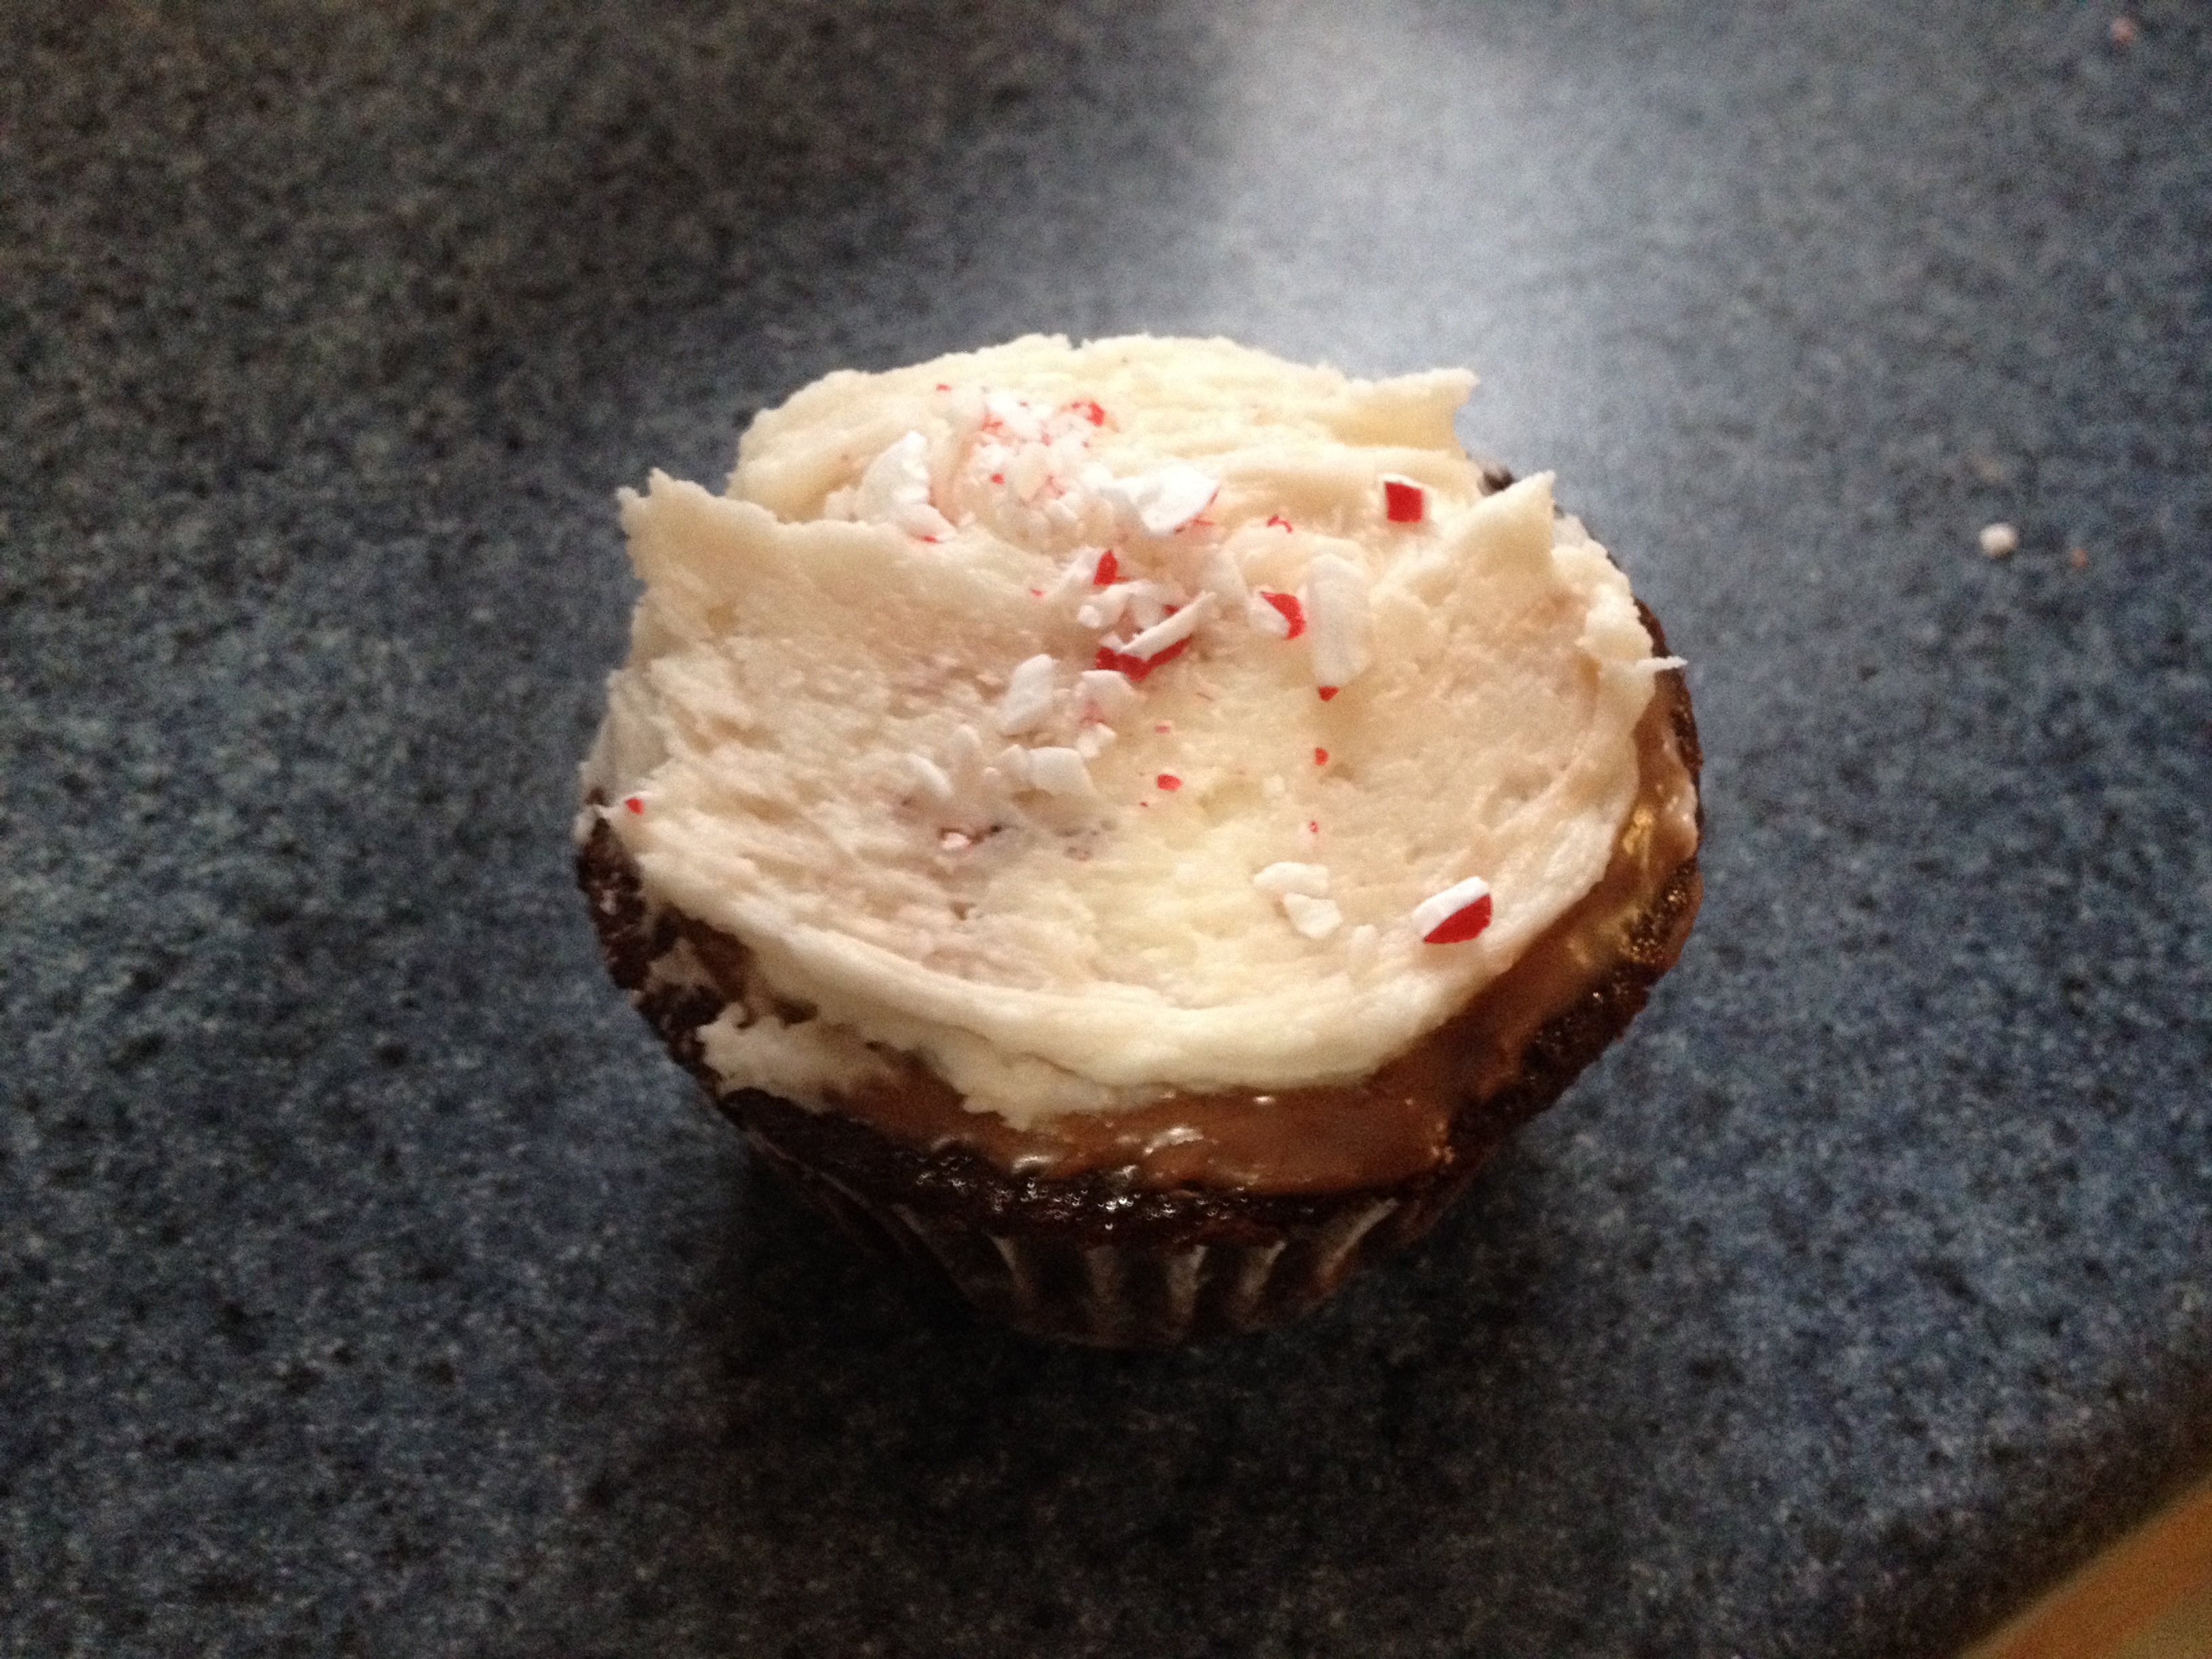
This cupcake is a delicious soft chocolate cake, coated with a cocoa peppermint glaze, and then frosted with yummy vanilla icing and sprinkled with crushed peppermint candies. Here’s the recipe for 12 cupcakes.
Chocolate Cake:
- Use any chocolate cake recipe that you like. I used the Hershey’s recipe, found here: http://www.marthastewart.com/356078/hersheys-chocolate-cupcakes
- IMPORTANT: Make sure the cupcakes are totally cooled before any glazing or frosting, or else your frosting will turn into goo.
Peppermint Chocolate Glaze:
- 1 ¼ cup powdered sugar
- 3 tbsp milk
- ½ tsp vanilla extract
- 1 tbsp cocoa powder
- 1 tsp peppermint extract
Add all the ingredients except peppermint together and blend until completely smooth with a hand mixer on medium speed, about 2 minutes. Then add the peppermint extract and mix until fully blended. Adjust the powdered sugar and milk content until your desired consistency is reached. It will be fairly runny.
Vanilla Frosting:
- 2 cups powdered sugar
- 2 tbsp salted butter, softened
- 2 tbsp milk
- ½ tsp vanilla extract
Add all the ingredients together in a large bowl. Mix on low speed with a hand mixer until blended, and then high speed until the frosting is fairly thick and holds its shape completely.
Assembly:
- Bake cupcakes, and cool them on separate cooling sheet until fully cooled
- Put peppermint glaze on top- this is pretty runny, so I used a little storage bag that I cut the corner off of, and used that to funnel the glaze right into the middle of each cupcake. Then spread the glaze around using a spoon or knife. Let it harden- it should form a little shell and be fairly firm to the touch. If you want to speed up the process, you can put them in the fridge for a little while.
- Put on vanilla frosting. You can either use a pastry bag, or a knife to just glob the frosting on. The glaze will probably break and combine with the frosting- that’s ok! The white frosting and chocolate glaze look swirly and beautiful together.
- Sprinkle crushed peppermint candies on top
Here’s the final result:
These cupcakes are so decadent and rich, and totally irresistible. Sharing them with others was such a treat, because they were a huge hit. It is so satisfying when people love your food!
Sounds yummy!
They are!