
Rhubarb, Strawberry and Apple Crisp
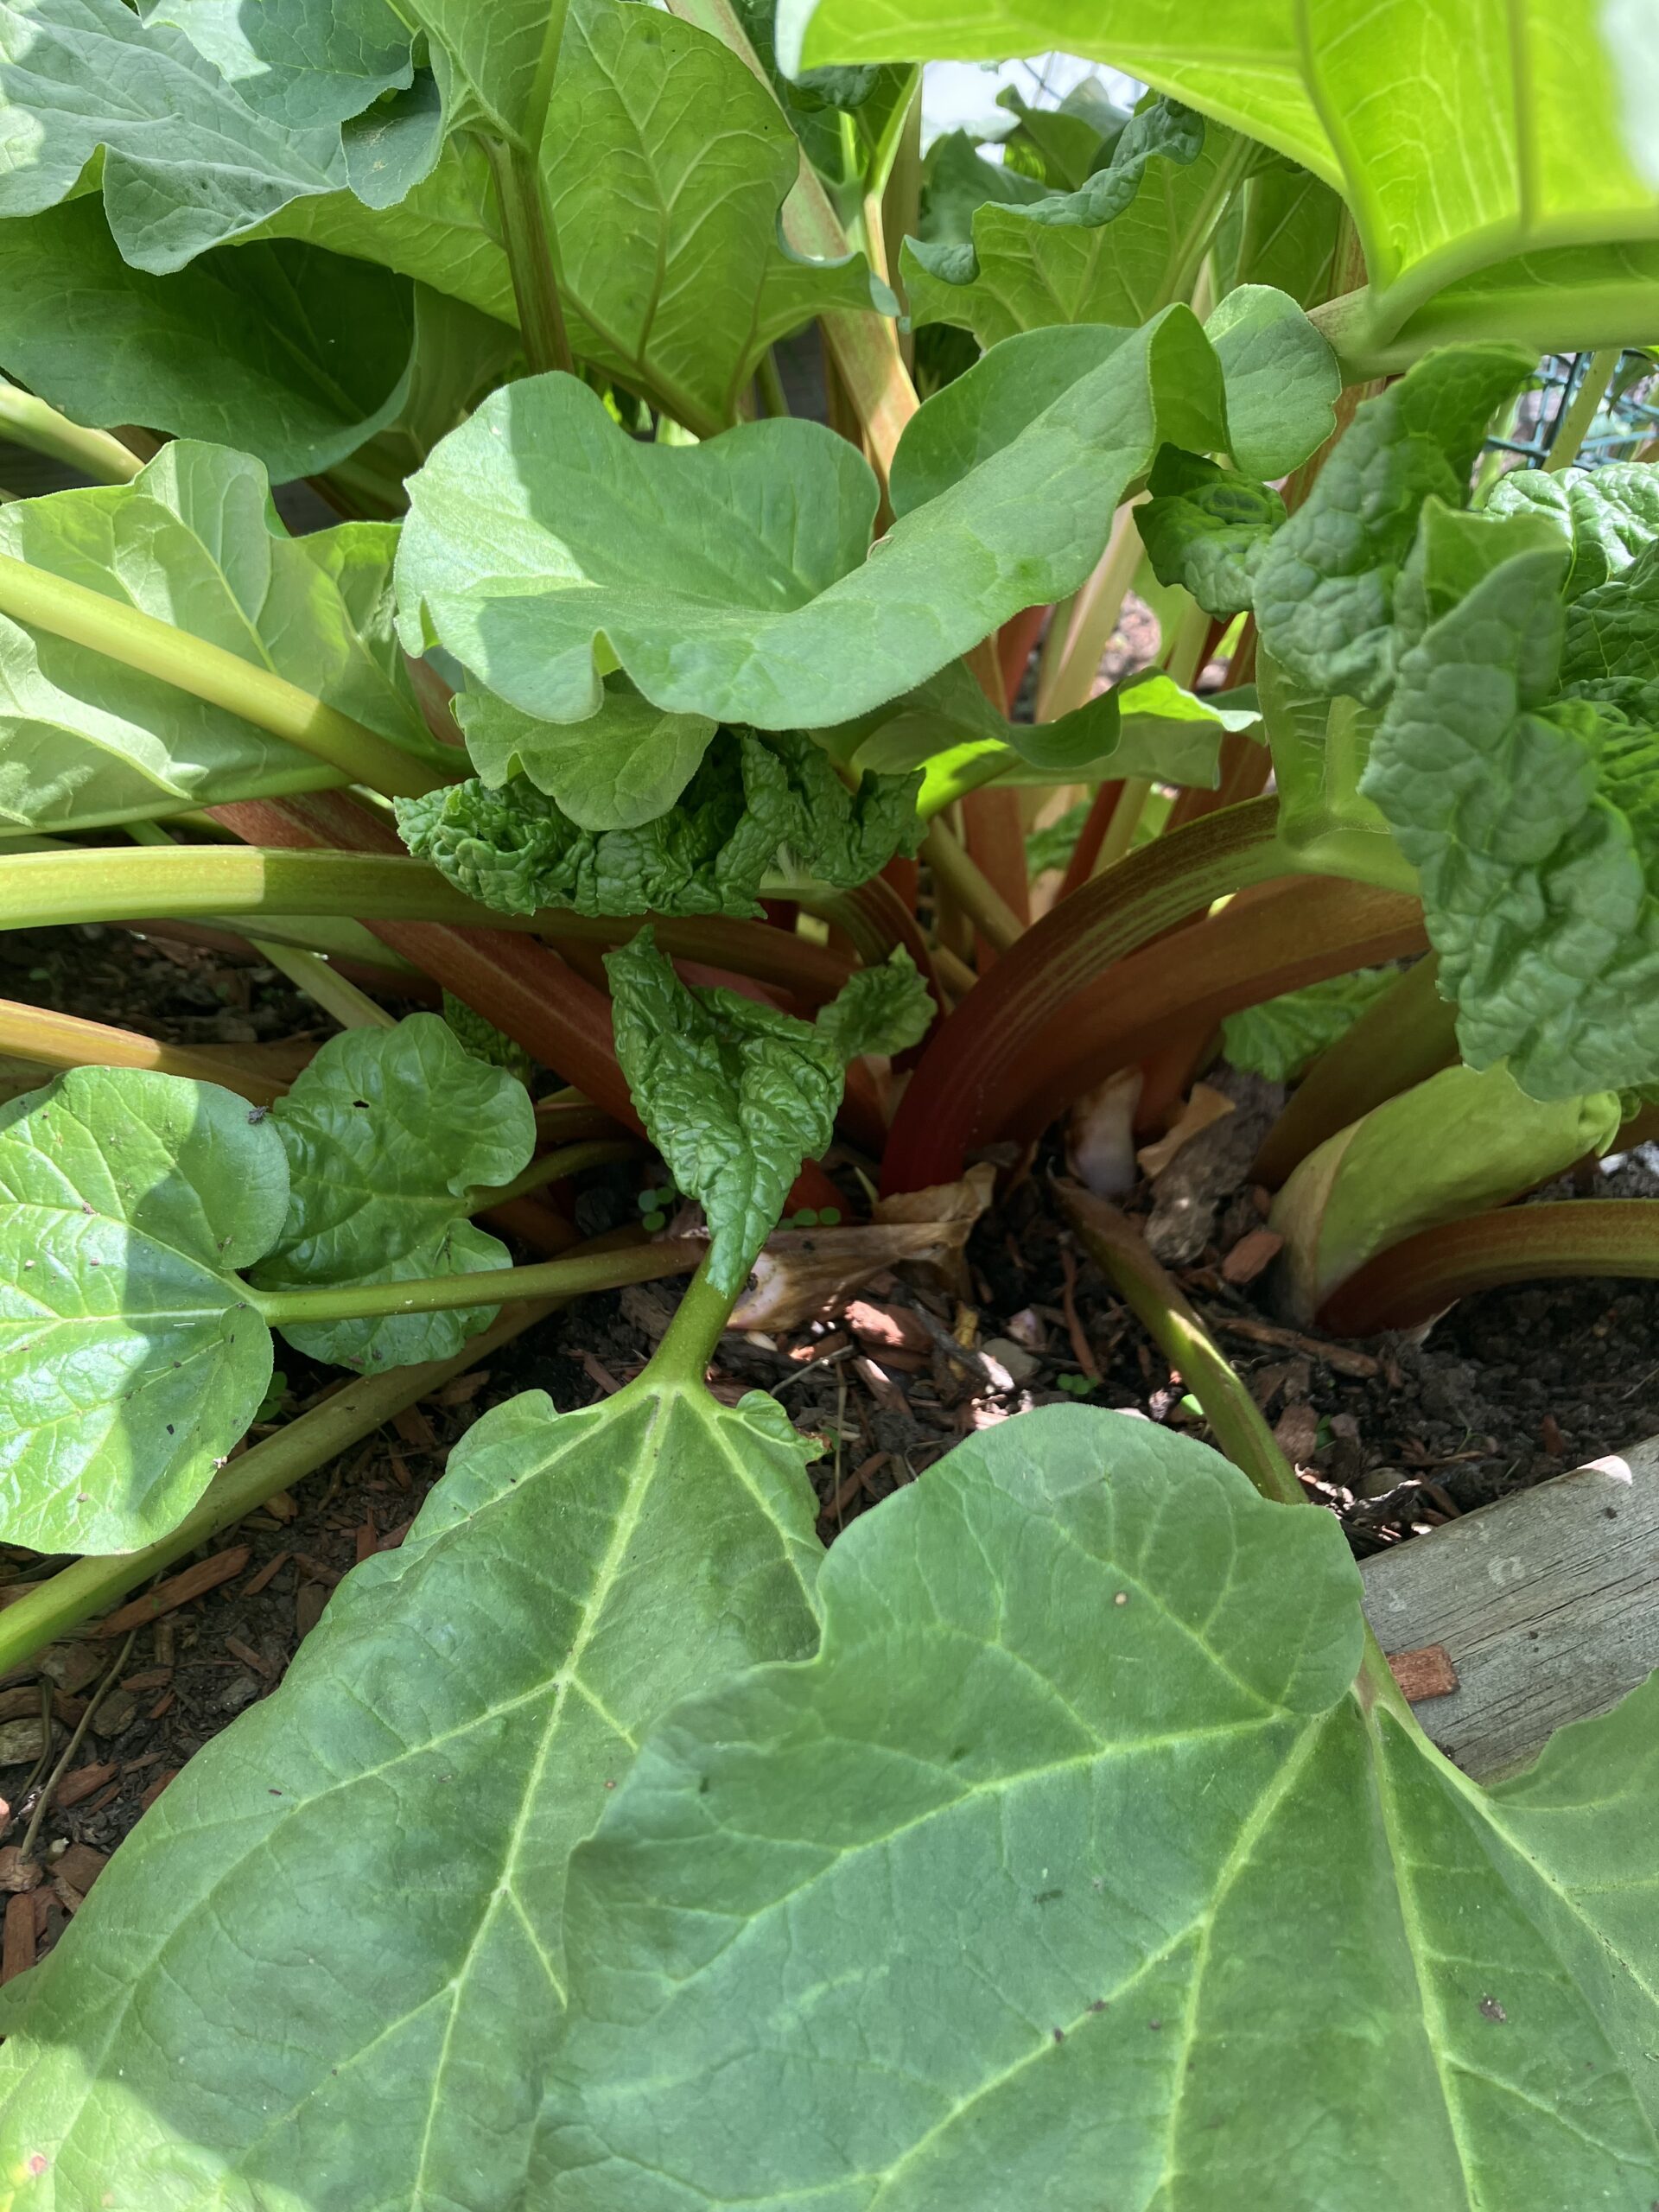
Hi, all! Happy spring! We’ve finally arrived at the time of year when plants start growing again and I can get back to cooking from the garden. The first thing that’s always ready in my garden is my rhubarb, and I took the opportunity to make a rhubarb dessert this weekend. If you’re not familiar with rhubarb, it is a plant with huge leaves (that are poisonous!) and delicious red and green stems which are edible! The stems are tart and fruity and, to me, taste a bit like a Granny Smith apple. It’s definitely worth a try.
Since rhubarb tastes like apple to me, I love pairing it with sweet apples in desserts. Strawberries compliment the tartness of rhubarb well, so I decided to try putting all three flavors together in a rhubarb, strawberry, and apple crisp. This recipe is adapted from a rhubarb crisp recipe on another blog I love: loveandlemons.com. Here are my ingredients:
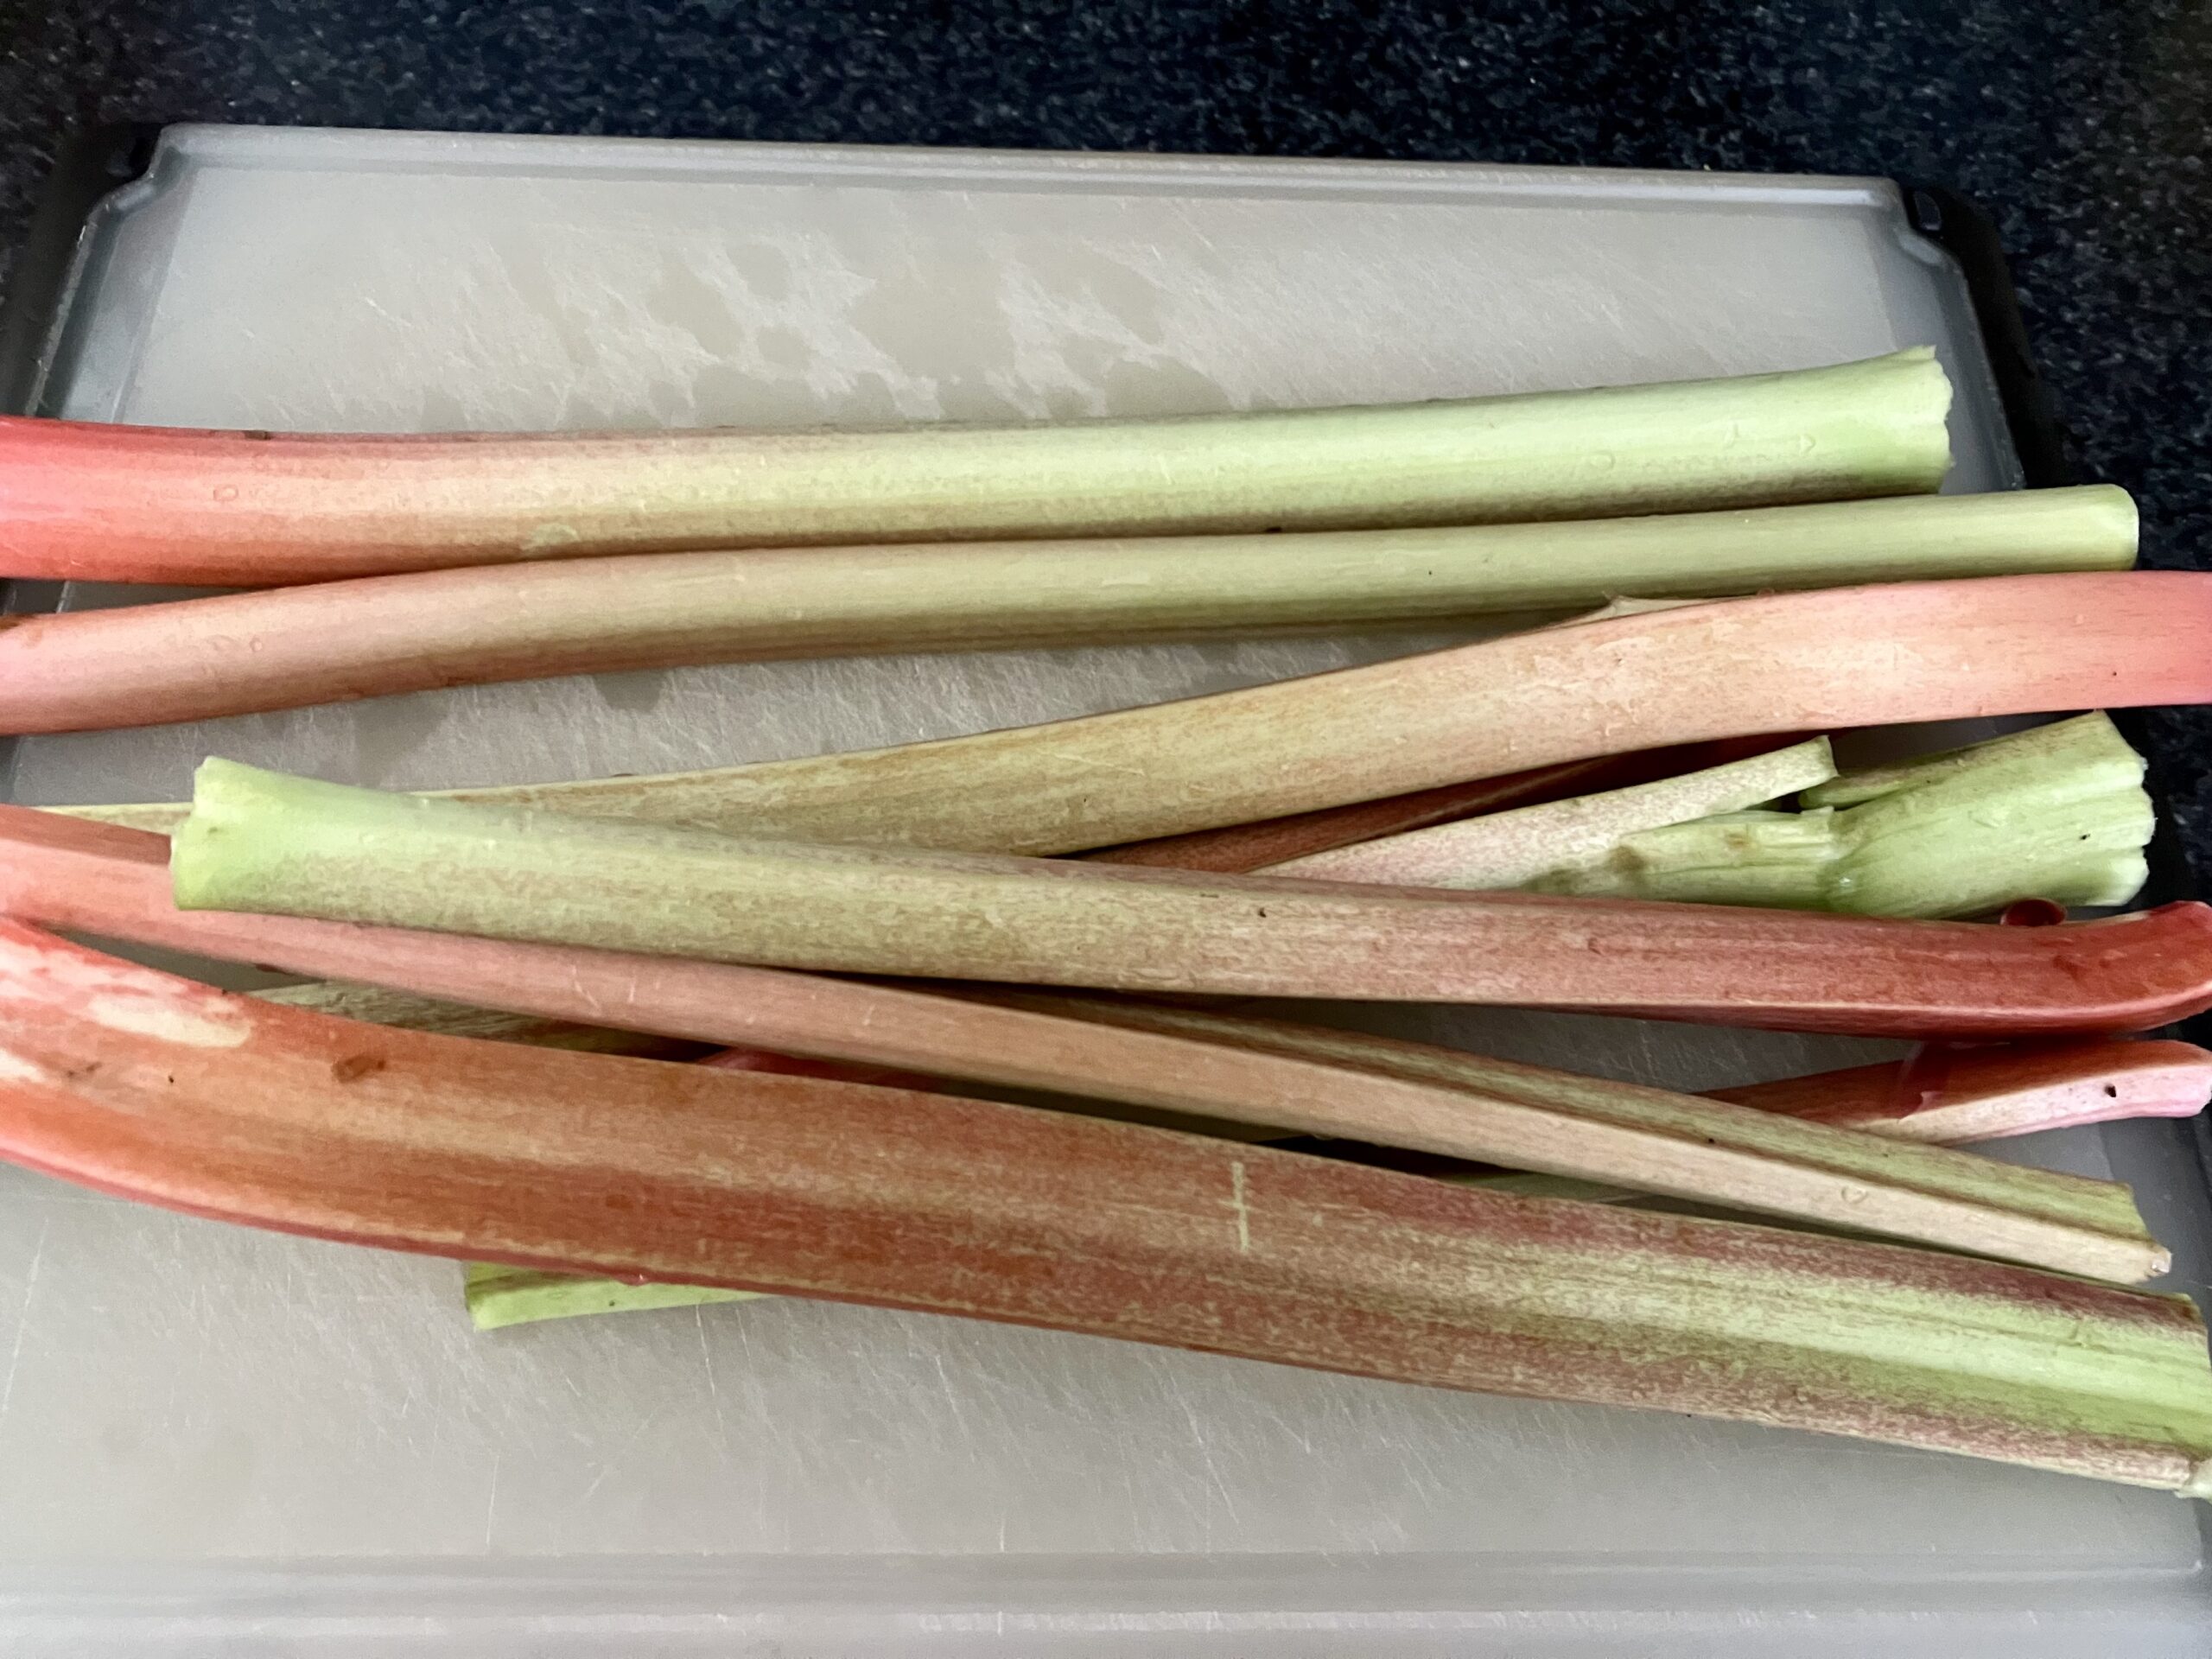
- 8 stalks rhubarb, chopped
- 1/2 cup strawberries, quartered and hulled (about 7-8 strawberries)
- 1 Pink Lady apple or another sweet apple, cored and chopped
- 1/4 cup granulated sugar
- 2 1/2 tablespoons cornstarch
- 1/2 cup almond meal
- 1/2 cup oats
- 1/2 cup brown sugar
- 1/2 cup chopped pecans
- 1/2 tsp cinnamon
- 1/4 (4 tablespoons) unsalted butter
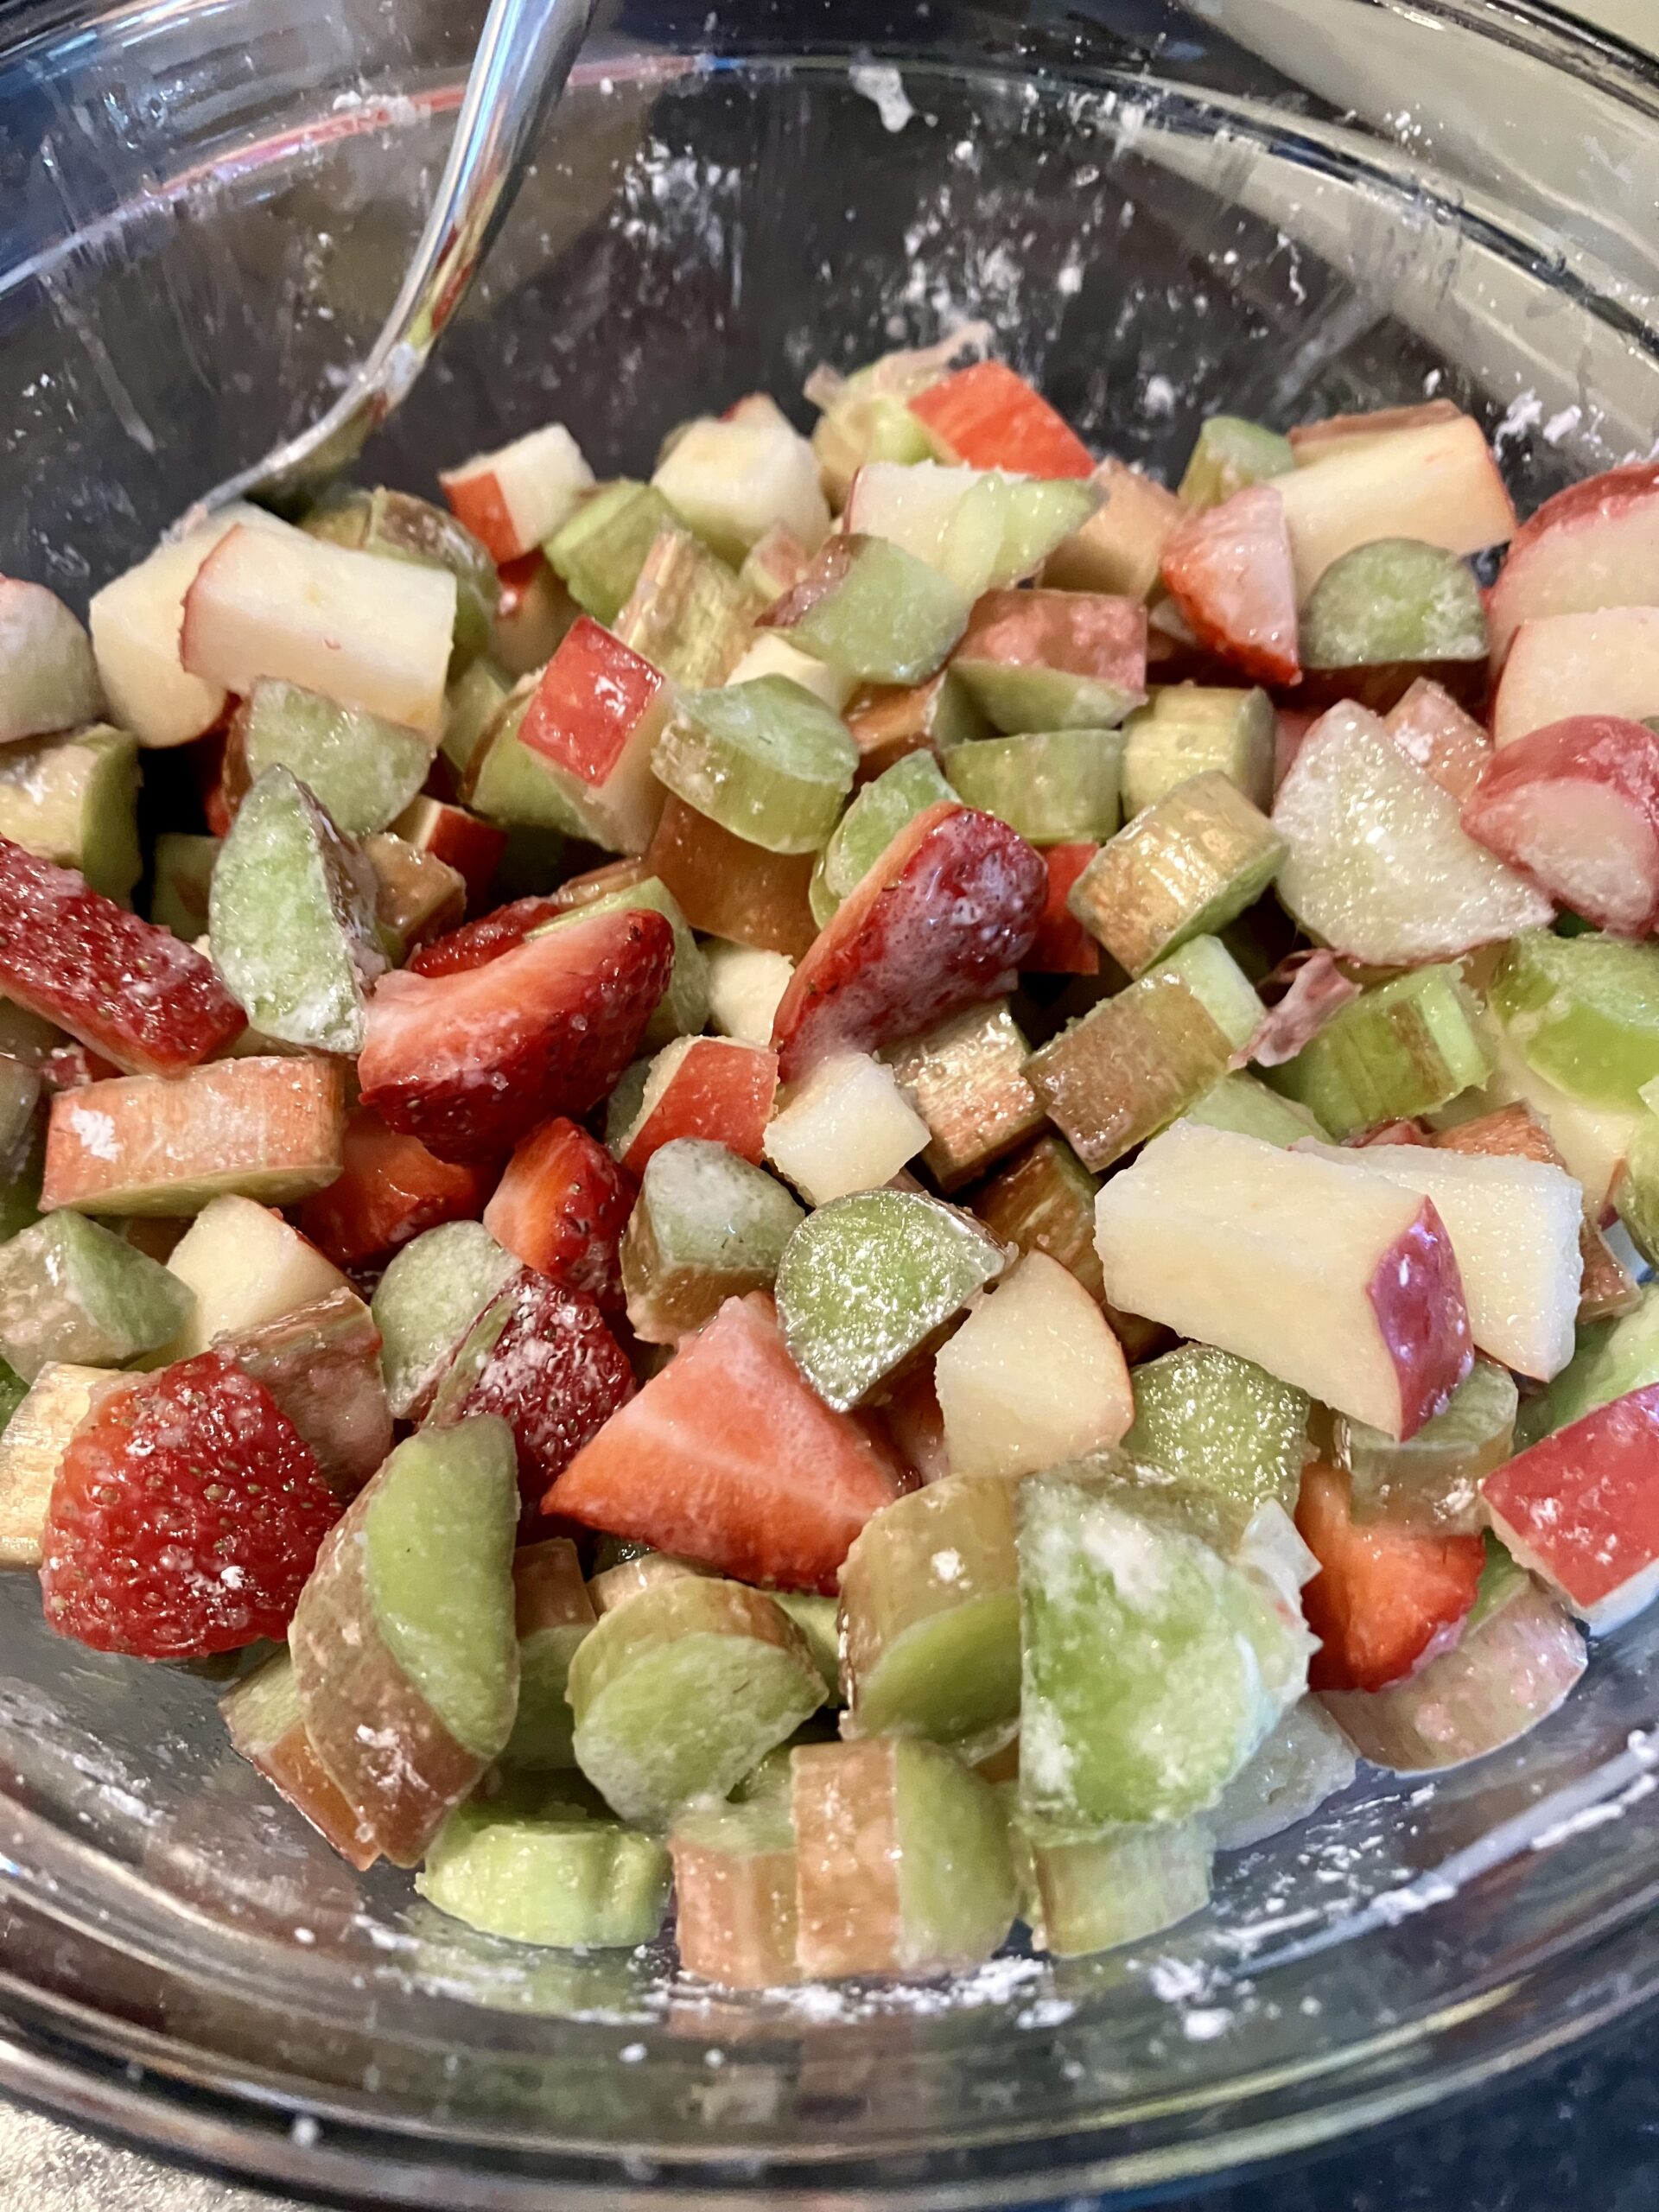
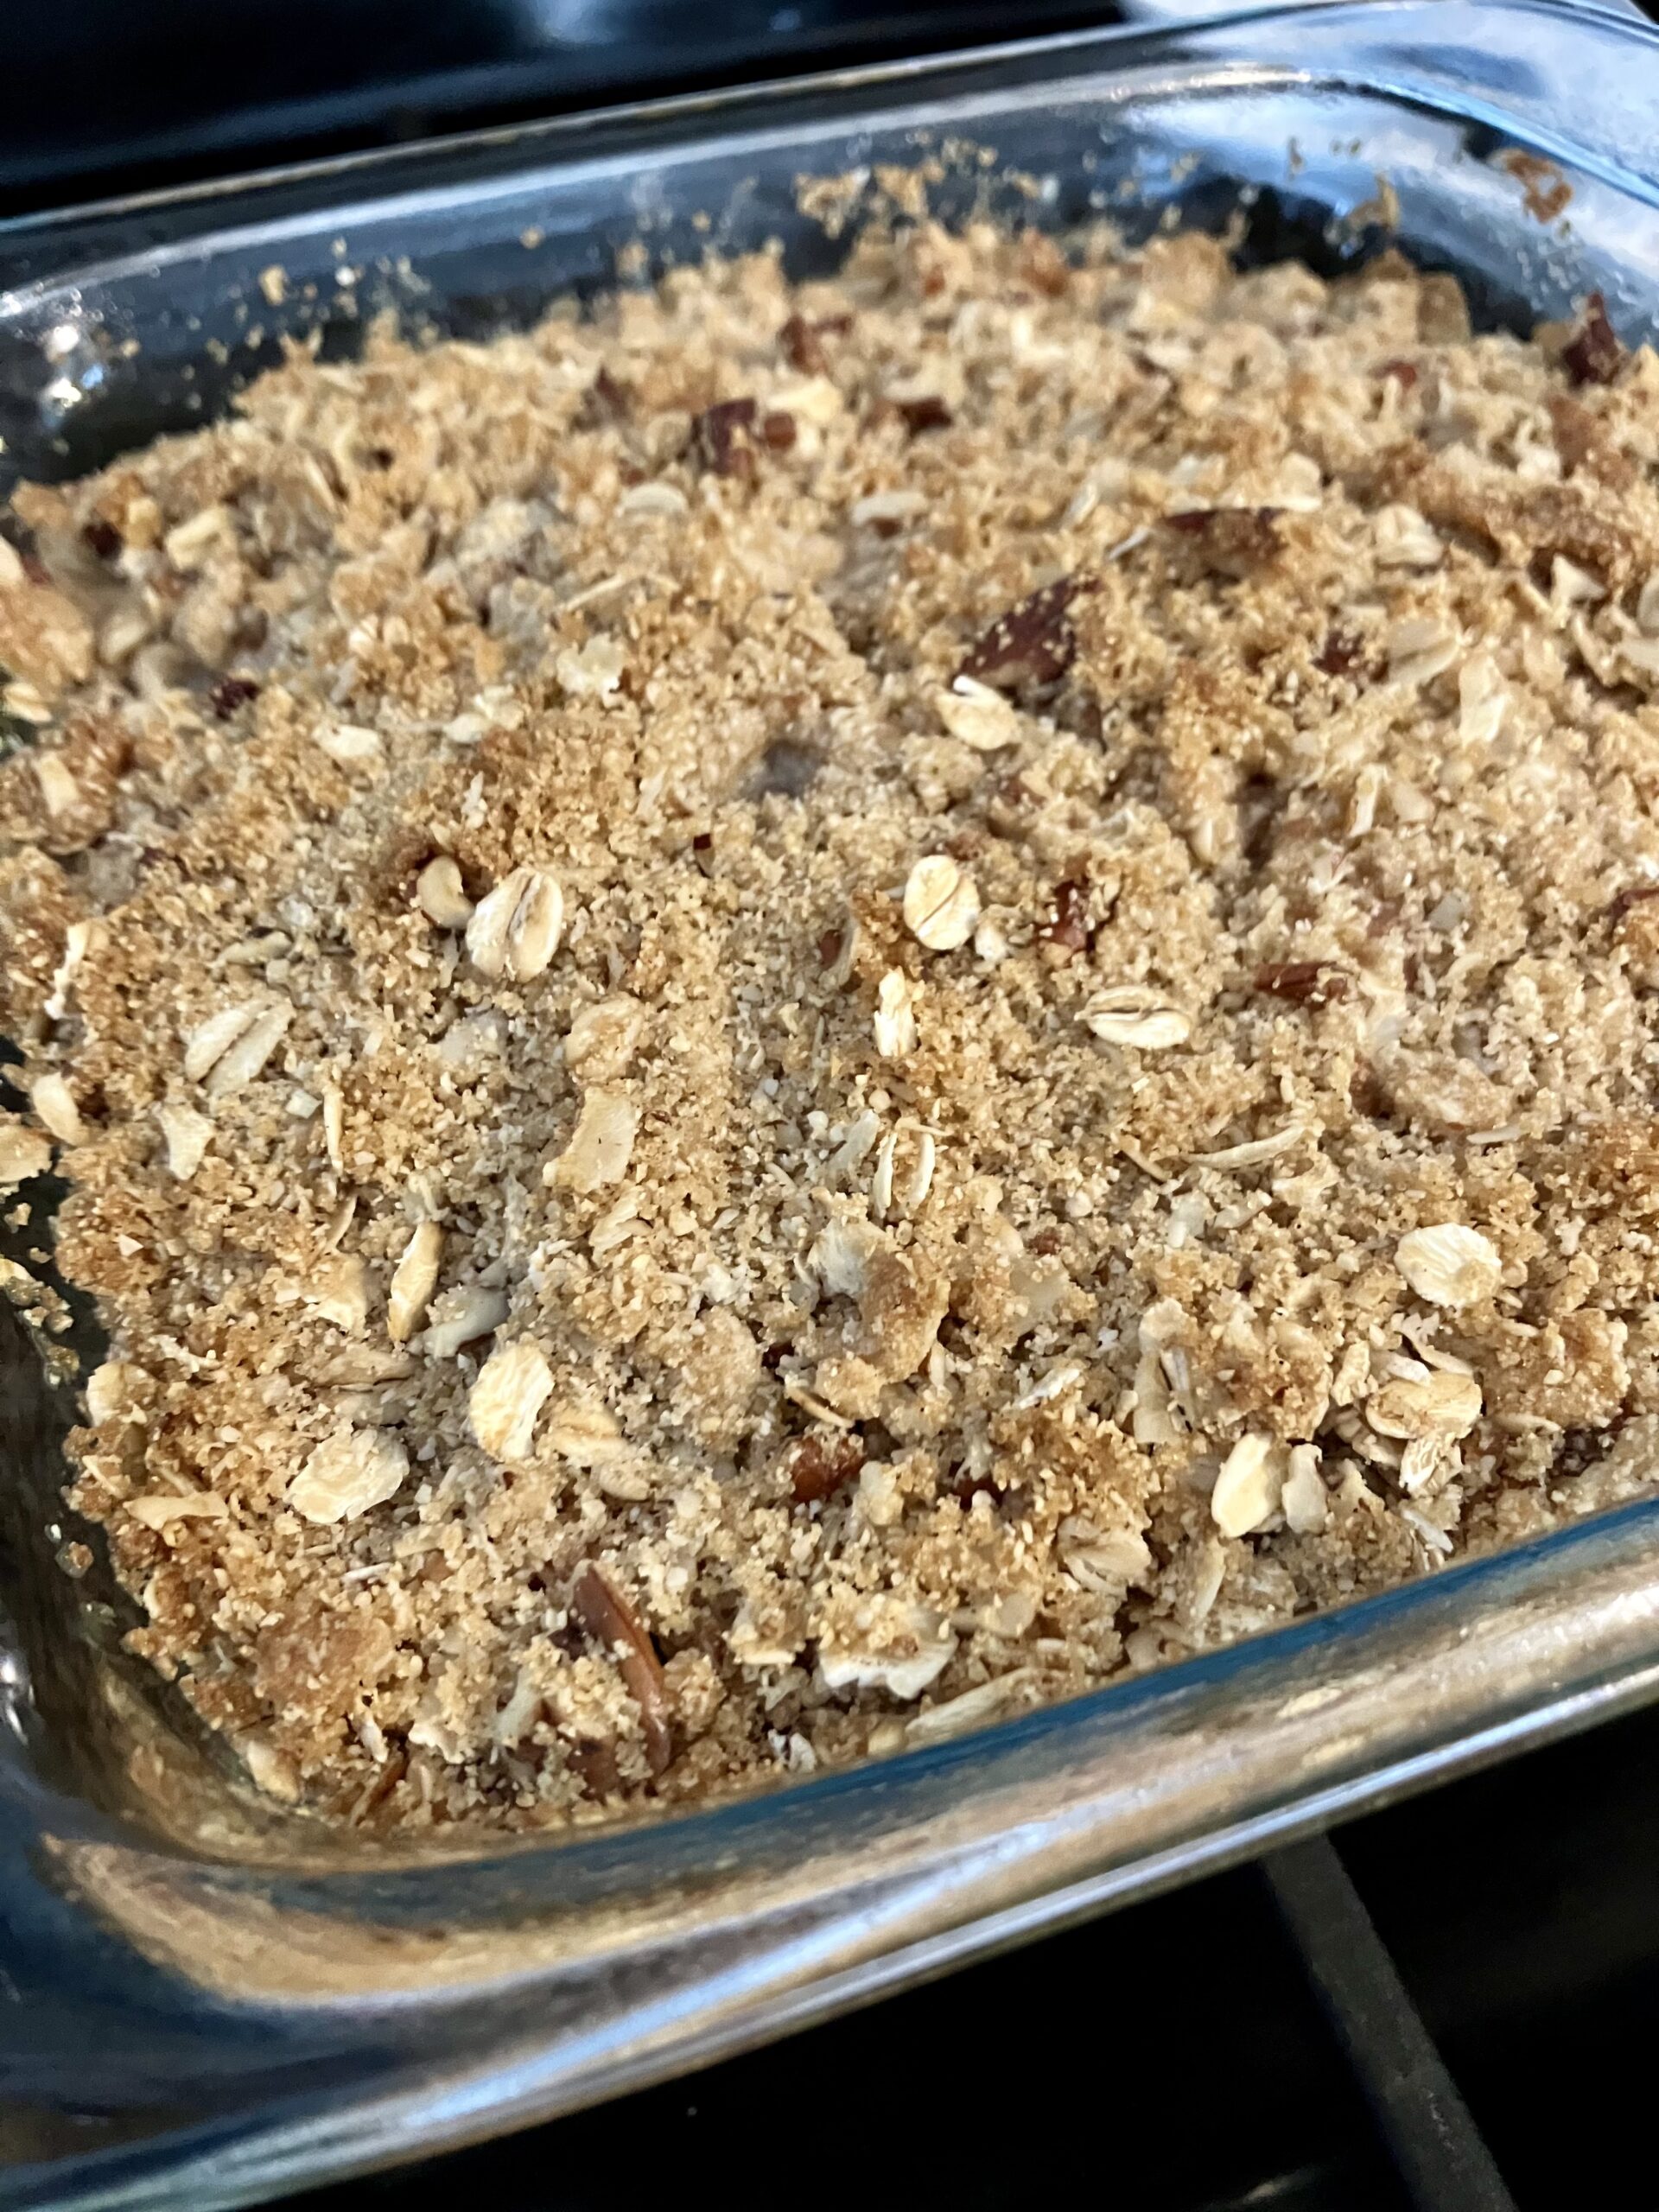
Preheat oven to 375F and spray 8×8 baking dish with cooking spray. Combine rhubarb, strawberries, and apple in a mixing bowl with 1/4 cup sugar and cornstarch and arrange in an even layer in the baking dish.
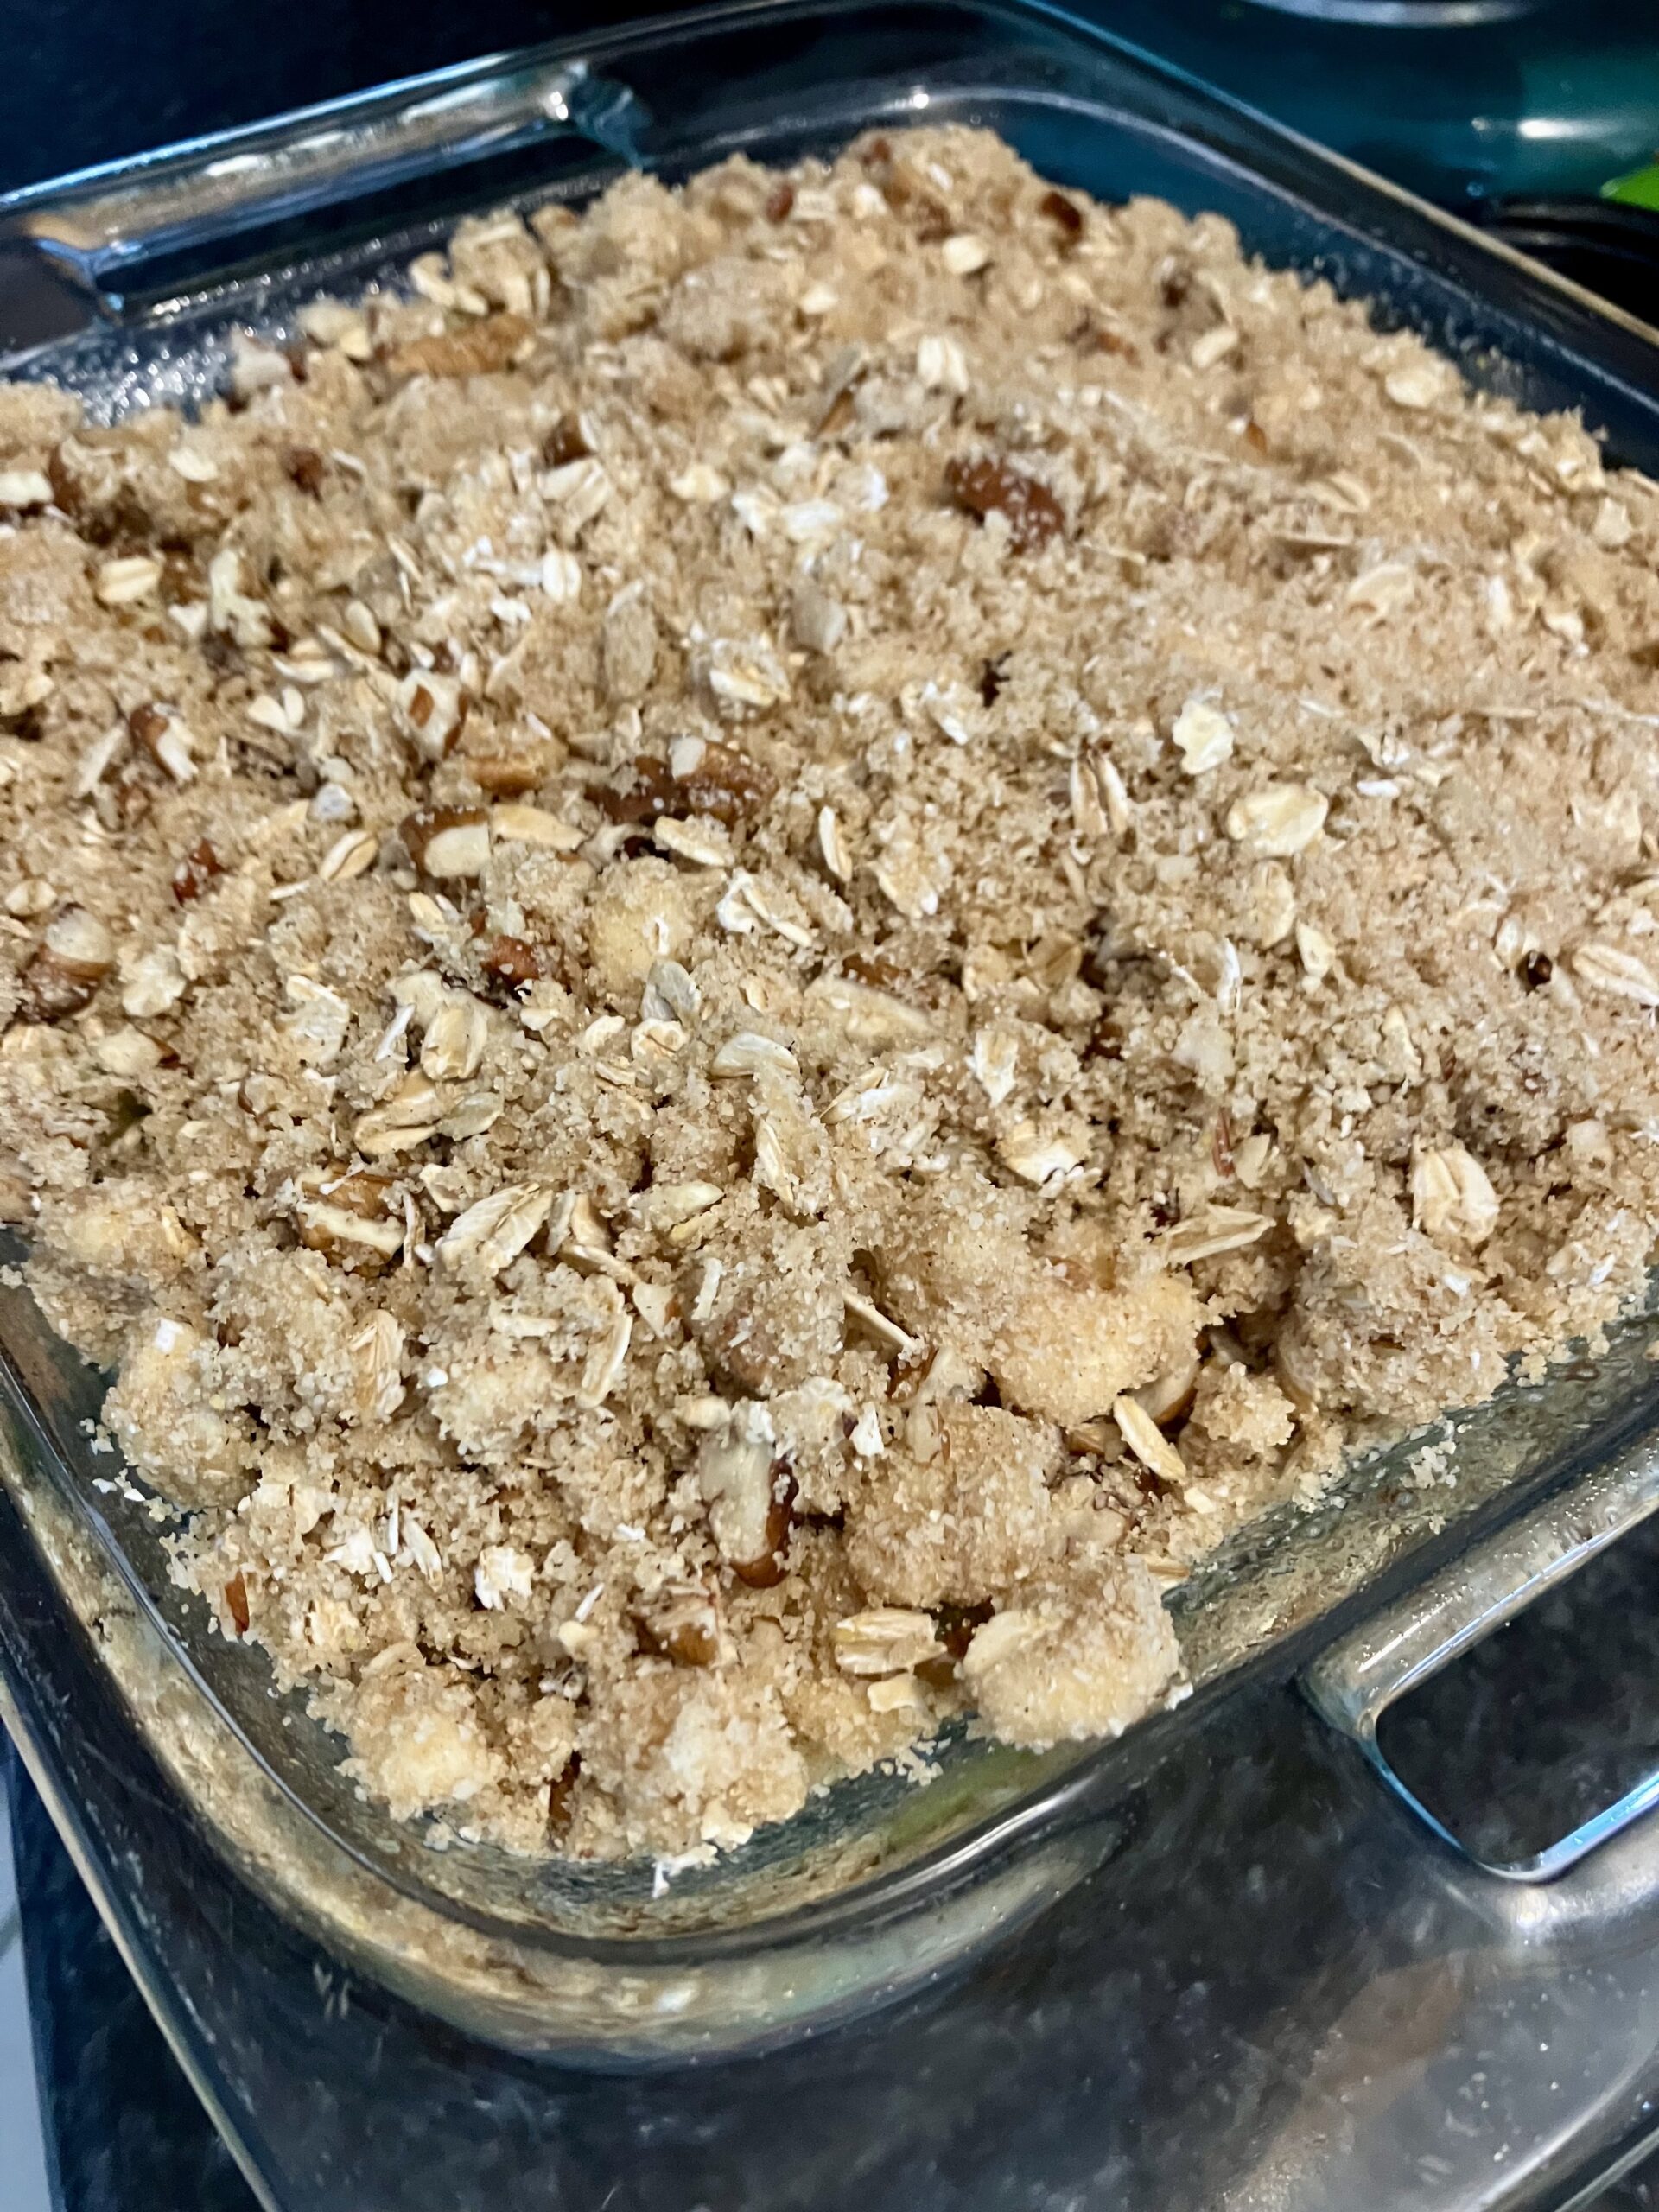
Combine almond meal, oats, brown sugar, pecans, and cinnamon in a mixing bowl. Using either your hands or a pastry cutter, cut in the butter so that it is in small chunks evenly throughout the topping mixture.

Sprinkle the topping over the fruit so that it’s in an even layer.
Bake for 25-30 minutes or until the topping is golden brown and the rhubarb is bubbling.
Let the crisp cool for at least 5 minutes. Not only does this help save you from burning your mouth, but it also helps the juices from the fruit to thicken slightly. Then serve and enjoy!
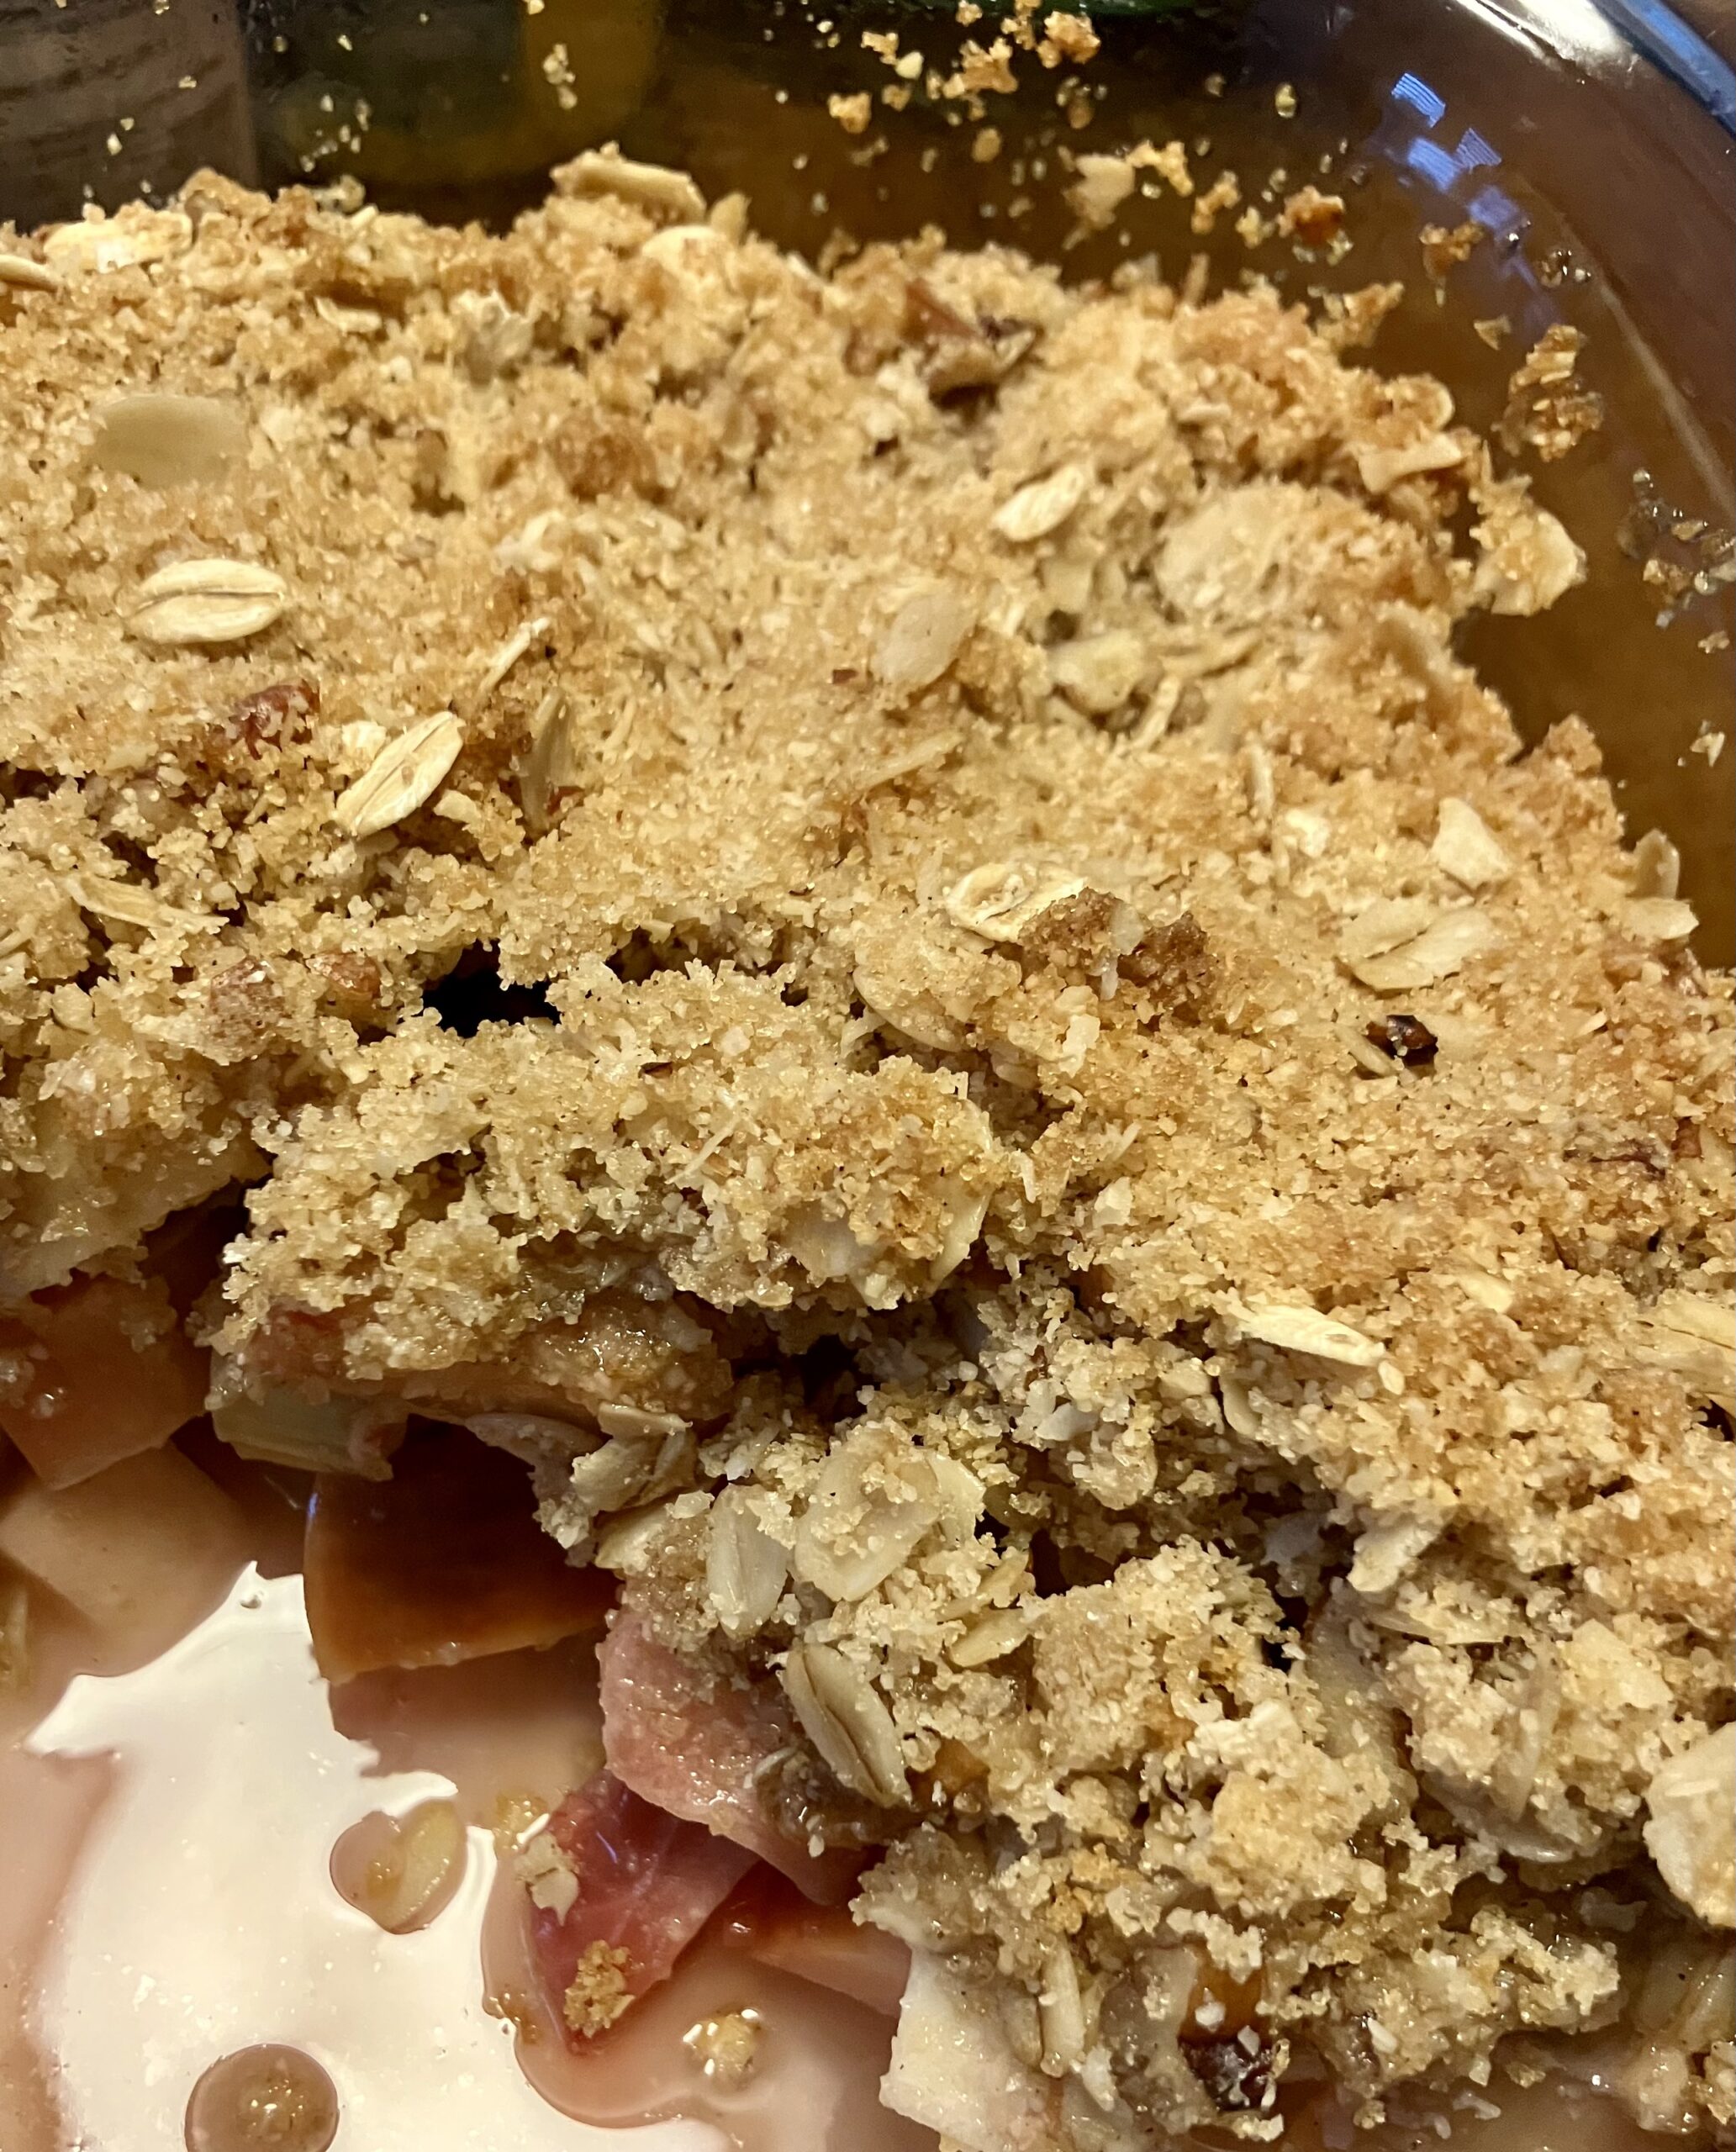
This was a lovely spring dessert with sweet and tart flavors and sweet and crispy topping. Happy baking!
Cinnamon Applesauce
Hi, all! Hope your October is off to a great start. We’ve come to my favorite time of year: harvest time! I love figuring out what to do with all the produce we get from our garden along with the produce from local farms. This post is for a fast and easy recipe for using up all those apples you picked that have gotten bruised or are starting to get really soft- cinnamon applesauce! The recipe is my Mom’s and it is a huge family favorite. Here are the ingredients:
- 1/2 peck apples, ideally Macintosh or Cortland but you can use any variety you like
- 1 cinnamon stick (or you can use powdered cinnamon at the end)
- 2 tbsp white granulated sugar (or to taste)
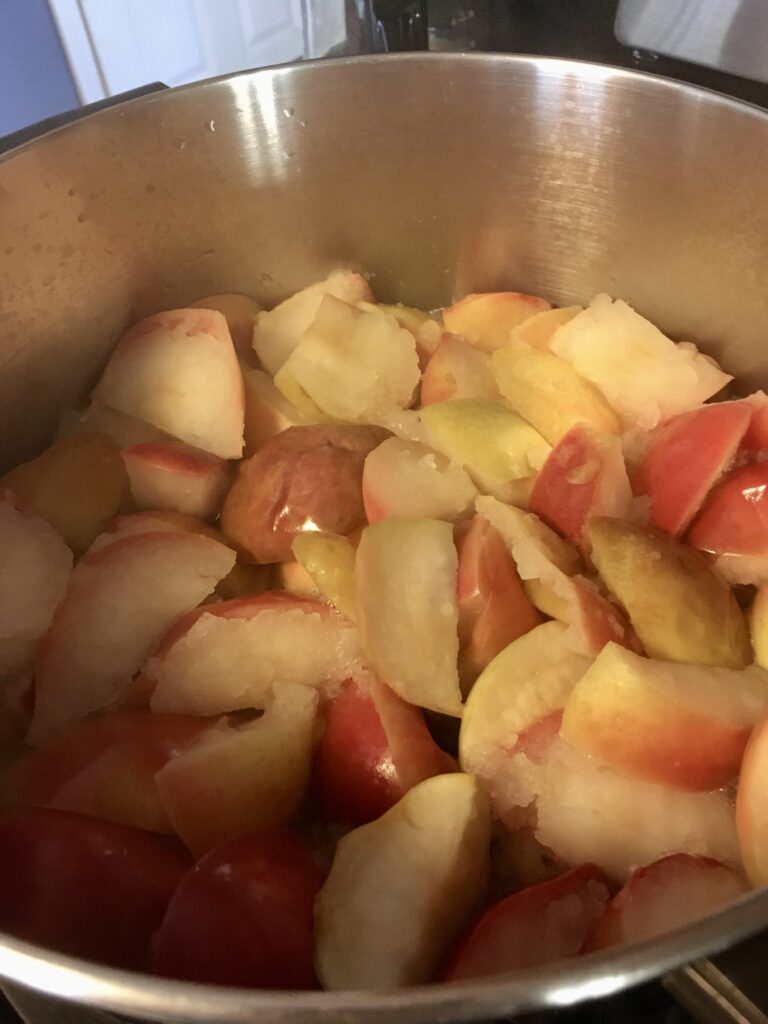
Core and quarter the apples. No need to peel them unless you want to- the skins will give our applesauce a pretty pink color! Tip: you can just cut around the core for quicker chopping! Put all the apple pieces in a large stockpot with the cinnamon stick and fill the pot with water to almost cover the apples.

Bring the water to a boil, stirring occasionally, and let the apples cook until they are very soft- usually only about 15 minutes. Some will start to break down and become mush, and that is totally normal and fine!
Drain the water from the pot. At this point if you have a food mill, feel free to use it to mash the apples. I don’t have a food mill, so I just use a potato masher and mash the apples up that way.
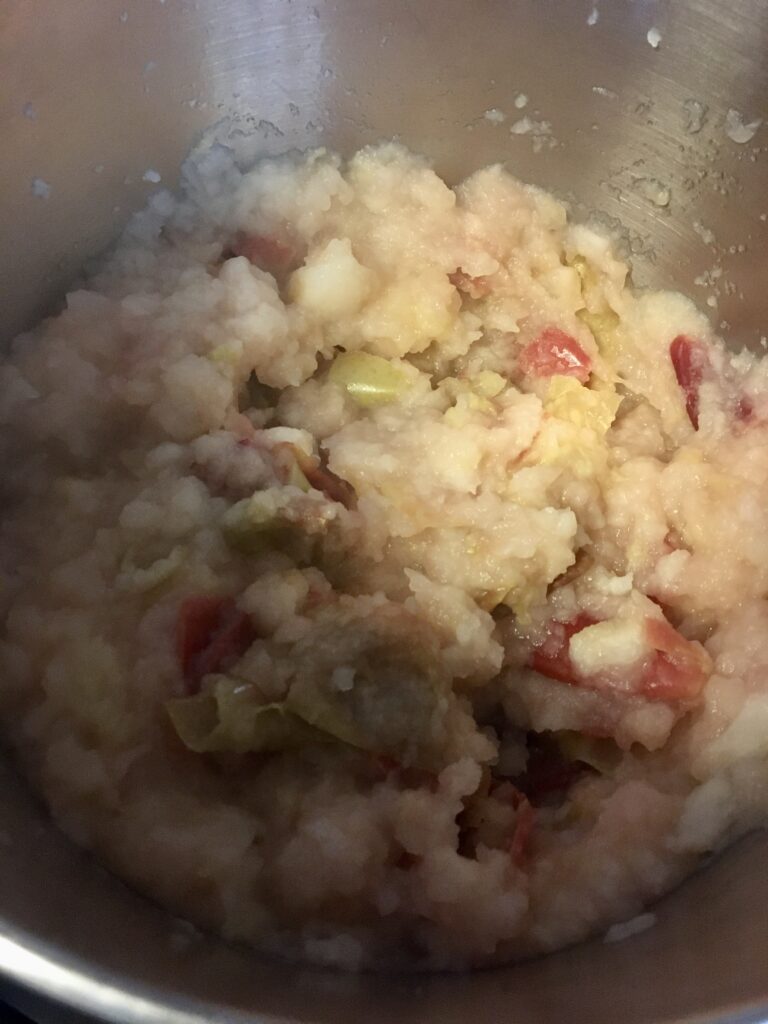
If you used a food mill, discard the apple skins that didn’t make it through the mill. If you used a potato masher and don’t want apple peel in your applesauce, just pick out the peels by hand or with a fork. Once the peels are out, add the sugar to taste. I prefer to start light on the sugar and work my way up, but I usually end up only needing about 2 tablespoons. Add more cinnamon if needed by grating the cinnamon stick or using powdered cinnamon. You could also add ginger, nutmeg, or other spices if you felt like experimenting.
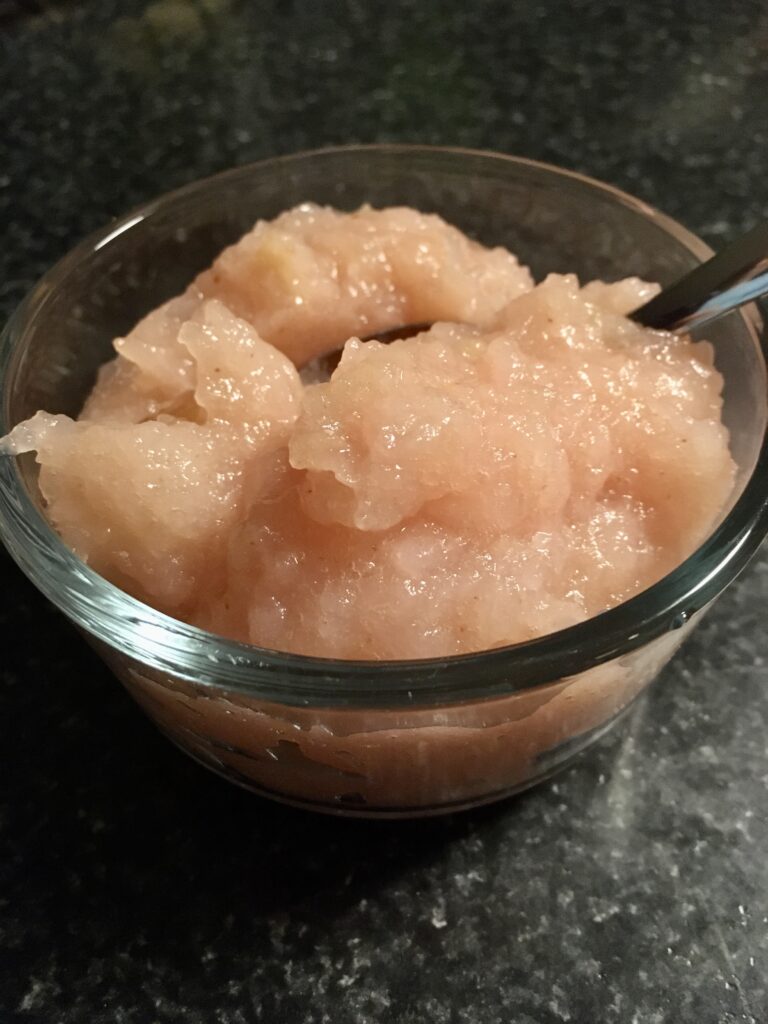
That’s it! Like I said, super fast and easy. This applesauce keeps well in the fridge for several days, but bets are that you’ll eat it long before then! It’s delicious cold, but I recommend trying it my favorite way: hot over vanilla ice cream. Happy cooking!
Baked Oatmeal Cups
Hi all! Happy September (not quite time to say happy fall yet)! Hope you’ve all been doing well! I just finished training for (and competing in) a triathlon, which is basically the origin for this recipe. I was doing lots of early morning swims before work and needed a good, healthy breakfast to eat on the way to work. I did some searching online for a healthy baked oatmeal recipe and found a few options to try. I’ll be honest, the first couple I tried were absolutely disgusting. This recipe from EatingBirdFood.com that I’m sharing with you today, though, pleasantly surprised me by how yummy the oatmeal cups were and how well it worked to freeze them, so I wanted to share it with you. Here’s the recipe:
Ingredients:
- 3 cups old fashioned rolled oats
- 1/2 tsp ground cinnamon
- 1 tsp baking powder
- 1/2 tsp salt
- 1 1/2 cups milk
- 1/4 cup maple syrup
- 2 tbsp ground flaxseed
- 1 tsp vanilla extract
- 2 tbsp peanut butter
- 2 mashed bananas (about 1/2 cup)
- 1/4 cup chocolate chips
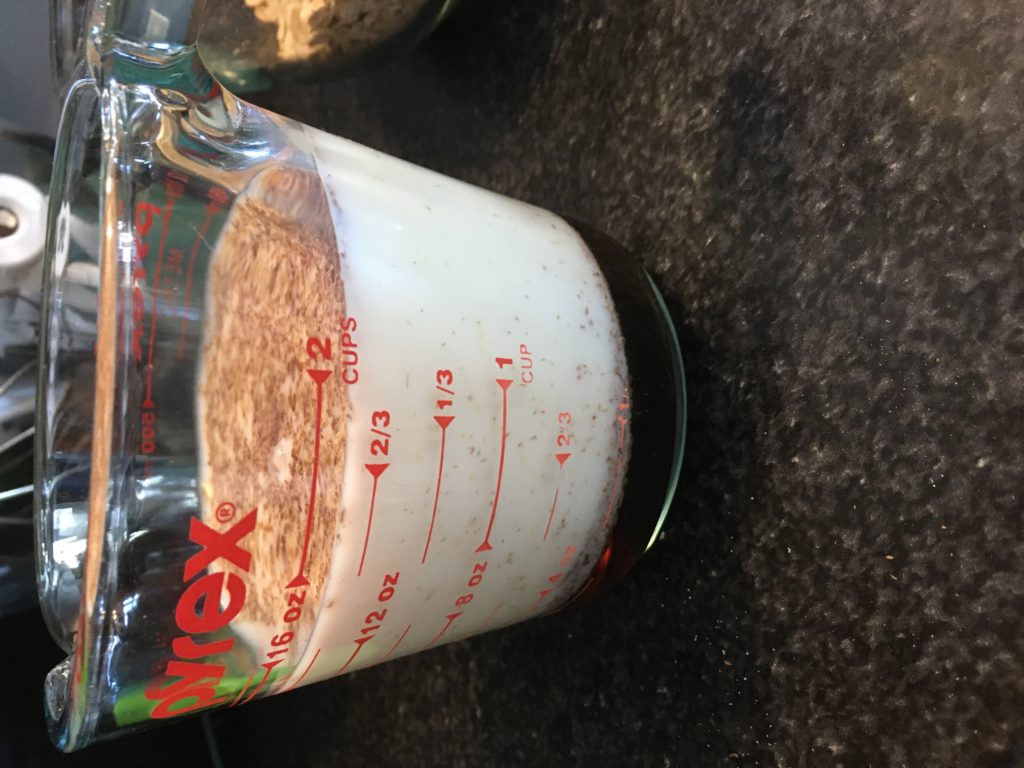
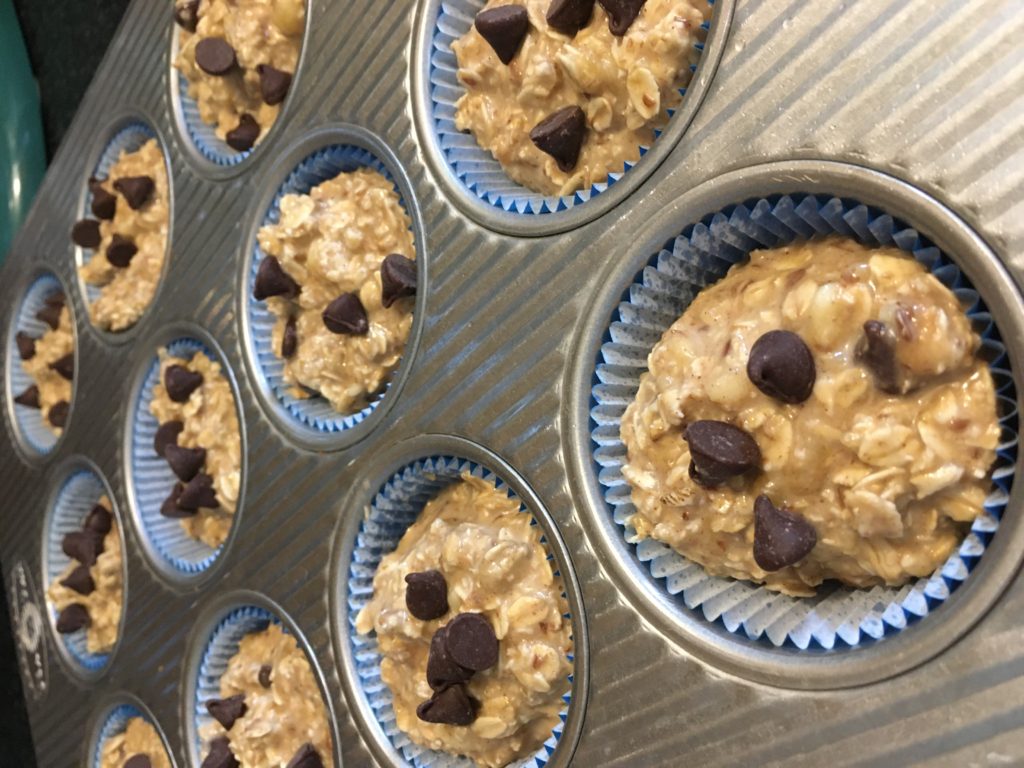
Preheat the oven to 350F and line 12 muffin cups with paper baking cups. Spray the liners with baking spray. In a medium mixing bowl, combine milk, flaxseed, maple syrup, and vanilla. Let sit for about 5 minutes.
While that mixture is sitting, combine the oats, cinnamon, baking powder, and salt.

Mix the bananas, peanut butter, and half the chocolate chips in with the wet ingredients. Add the wet ingredients to the dry ingredients and mix well.

Divide mixture evenly among the muffin cups and top with remaining chocolate chips.
Bake for 30-35 minutes or until a toothpick inserted in the middle of the cup comes out clean.
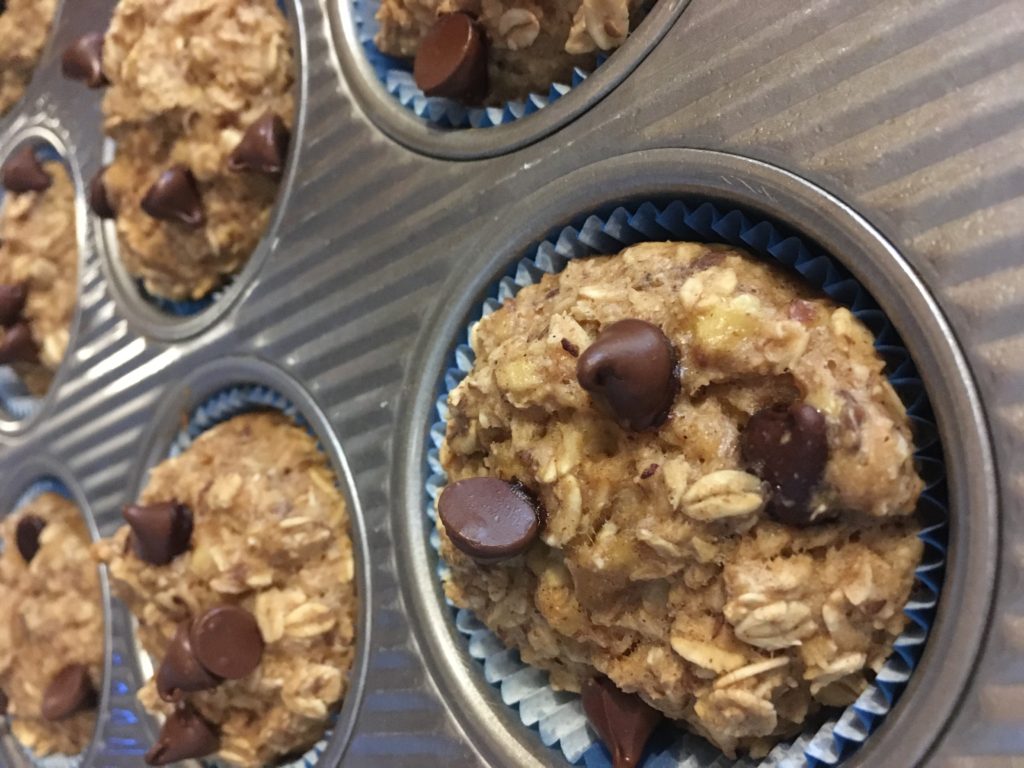
Let cool completely and then store in the fridge or the freezer. I kept mine in the freezer and just put two in the fridge the night before my swimming mornings, and they’d be perfectly thawed about 8-10 hours later.
Happy baking!
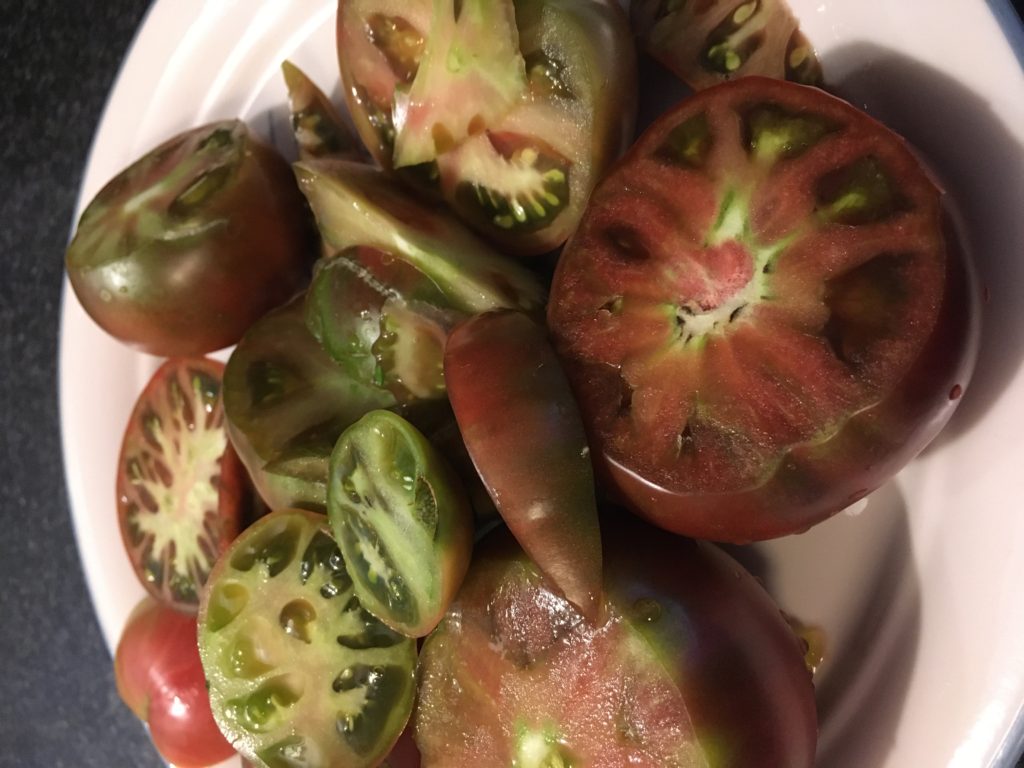
Tanner’s Favorite Salsa
Hi, all! Hope your August is going well. I’m sure many of you have started the yearly struggle of, “What am I supposed to do with all these tomatoes I grew?” now that peak tomato season is here. Luckily my way forward was clear due to the jalapenos, cilantro, green onions, and garlic that also came from my garden. I spent my afternoon yesterday cooking up all sorts of garden-related things to use up my veggies, and wanted to share this salsa recipe with you. I seriously make a huge batch almost every week because my husband, Tanner, likes it that much. We currently have four bags of tortilla chips in the cabinet that are strictly reserved for salsa dipping. This salsa is that good!
One fun thing about it is that there are no set measurements for most of the ingredients, because every vegetable is different- for example, one jalapeno could be very mild, meanwhile the one that grew next to it is crazy hot. I’ve given my usual starting quantities here, but it’s a taste-as-you-go kind of recipe!
Ingredients:
- 28oz tomatoes, roughly chopped (you can use fresh or canned unsalted diced tomatoes)
- 1/4 red onion, roughly chopped
- 2 jalapenos, roughly chopped
- 2 scallions, roughly chopped
- 3 cloves garlic, peeled and ends removed
- 1 bunch cilantro, washed and stems removed
- 1/2 tsp salt
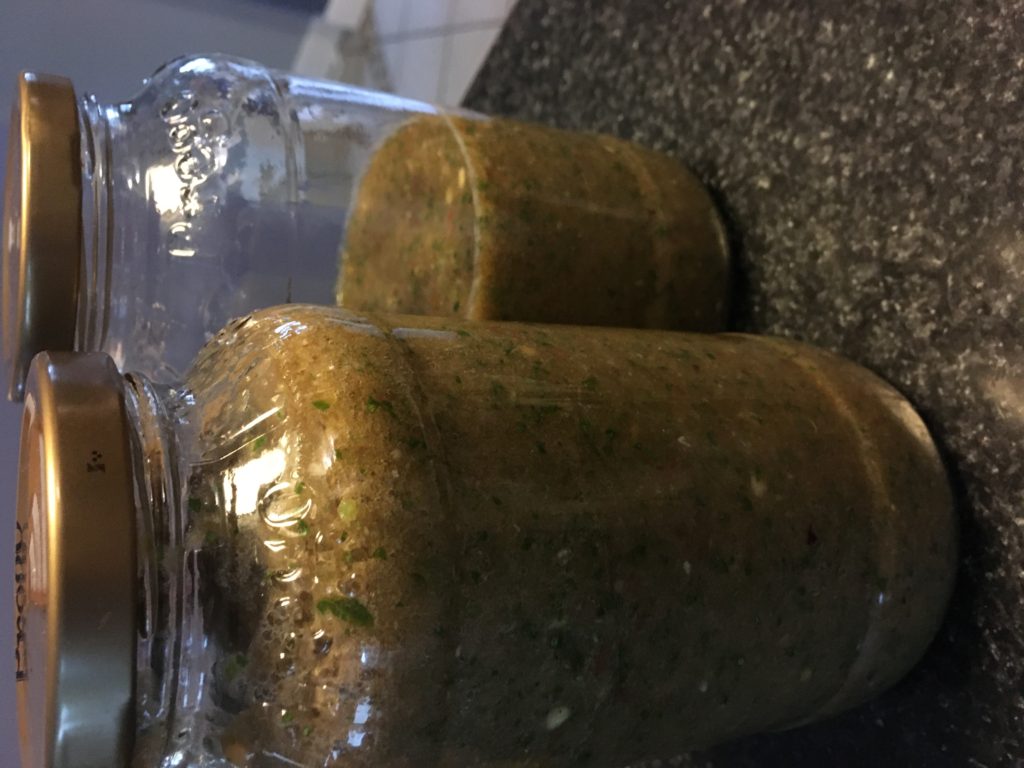
Combine all the ingredients together in a blender and blend until well combined. Taste the salsa using either a spoon or a chip (be careful sticking your hand into the blender, though!) and adjust heat and seasoning as needed. When you’re finished, pour the salsa into containers and store in the fridge for up to 2 weeks. My favorite containers for the salsa are 2 old pasta sauce jars- a good size for the batch, good pouring vessels, and dishwasher safe!
Pour yourself a bowl of salsa and pull out the tortilla chips, and enjoy! Happy cooking!

Lemon Balm Simple Syrup
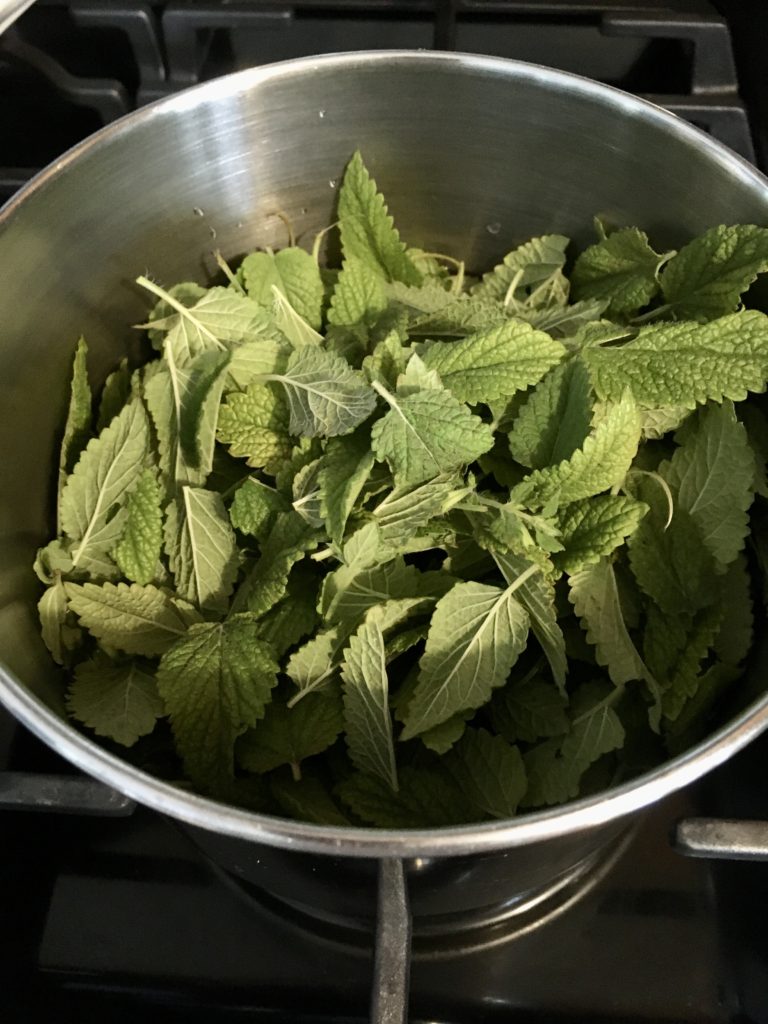
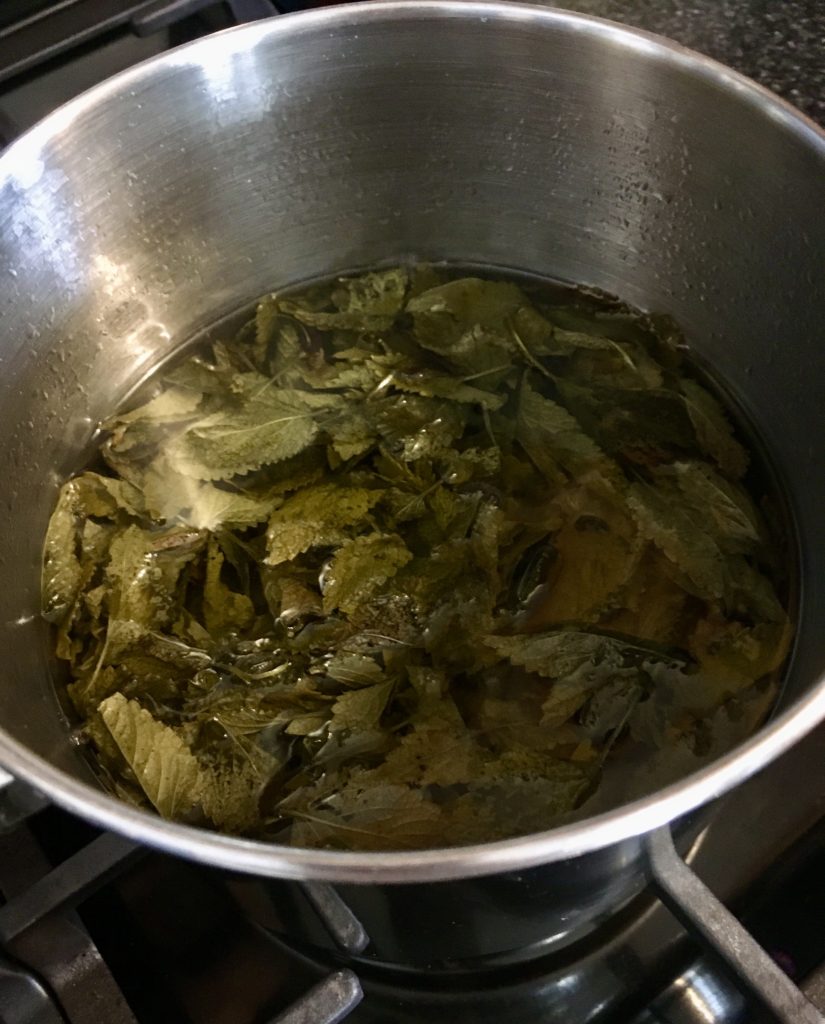
Hi, all! Hope you’re doing well and enjoying your summer! Now that the summer weather is in full swing, my garden is really starting to grow, including my lemon balm plants. What is lemon balm, you ask? It’s a lemon-flavored and scented herb from the same family as mint- meaning it’s pleasantly fragrant and deliciously flavored, but also that it grows like a weed and takes over! In the interest of keeping my plants to a reasonable size, I had to give my four plants a substantial trim today- and of course I didn’t want those trimmings to go to waste! I was trying to figure out what to do with the leaves I cut, and finally landed on the idea of making a lemon balm simple syrup. I was so happy with the results of both the syrup and the resulting drink I made that I knew I had to share it. Here’s the recipe for the syrup:
- 2 cups water
- 2 cups granulated sugar
- At least 2 cups lemon balm leaves, more if you have them
In a medium or large saucepan (depending on how many leaves you use), mix the water and sugar.
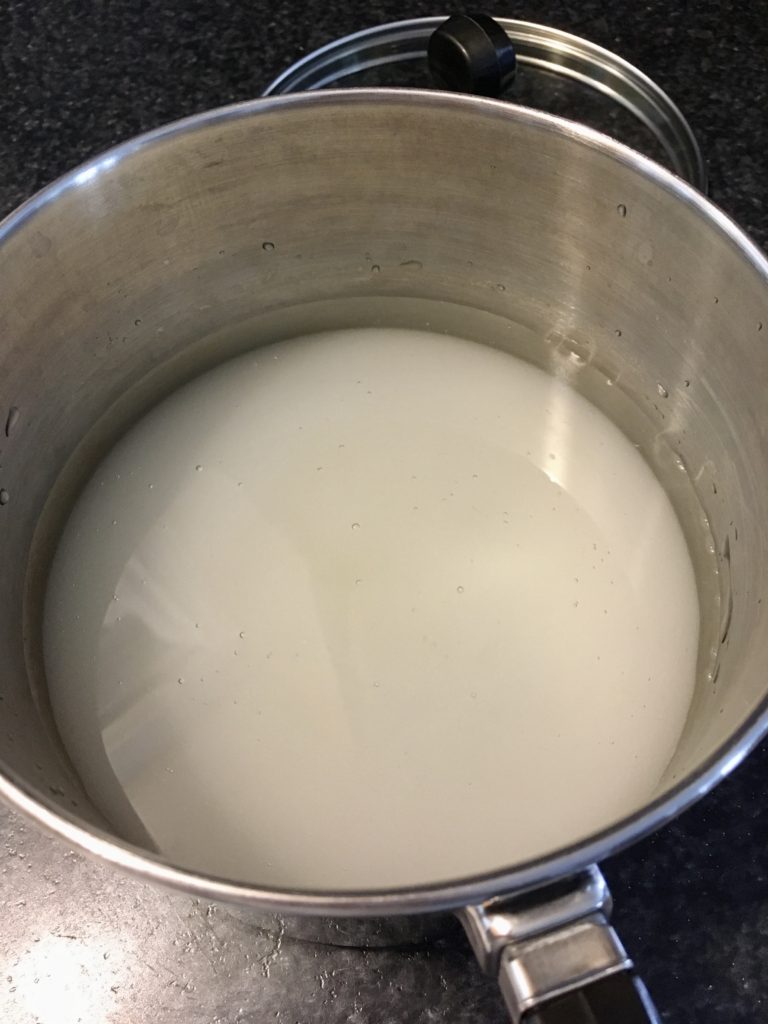
Add the lemon leaves into the pot and stir to incorporate.
Bring the mixture to a boil over medium heat. Then, reduce the heat to low and simmer for 25 minutes, or until the lemon flavor is infused to your taste, stirring occasionally.
Strain the mixture into a heatproof container and let cool. The mixture should have a slight yellow-green tint from the lemon balm leaves.
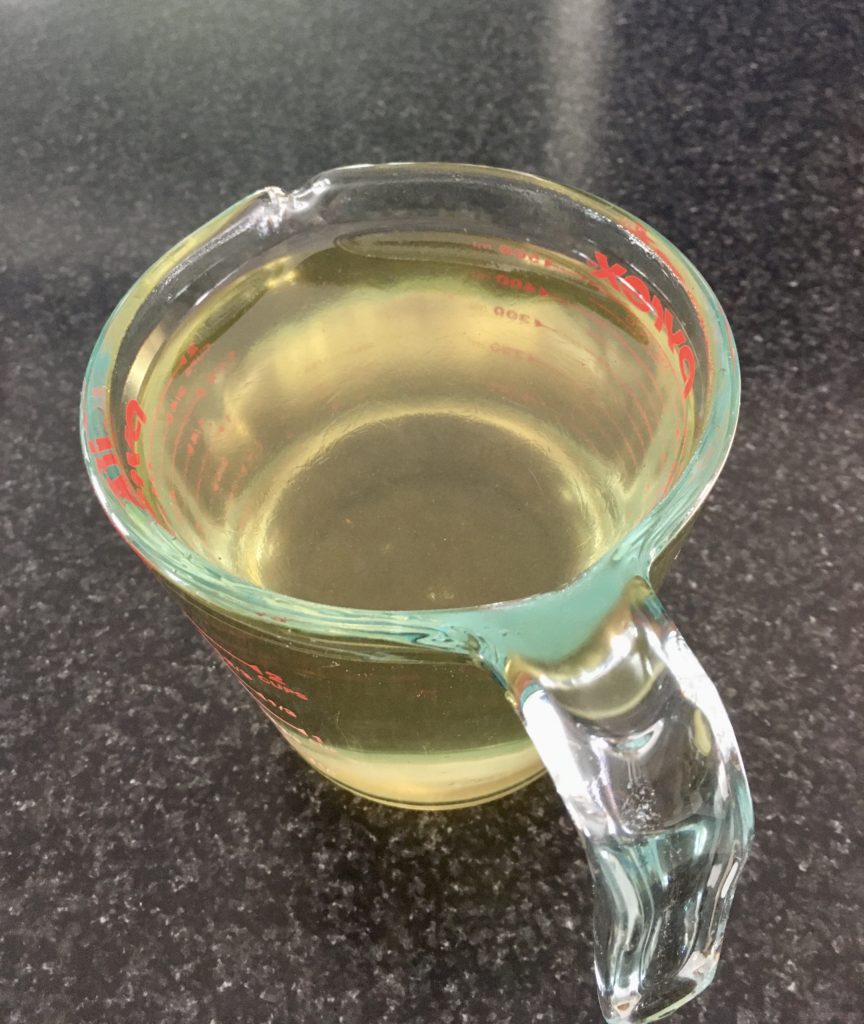
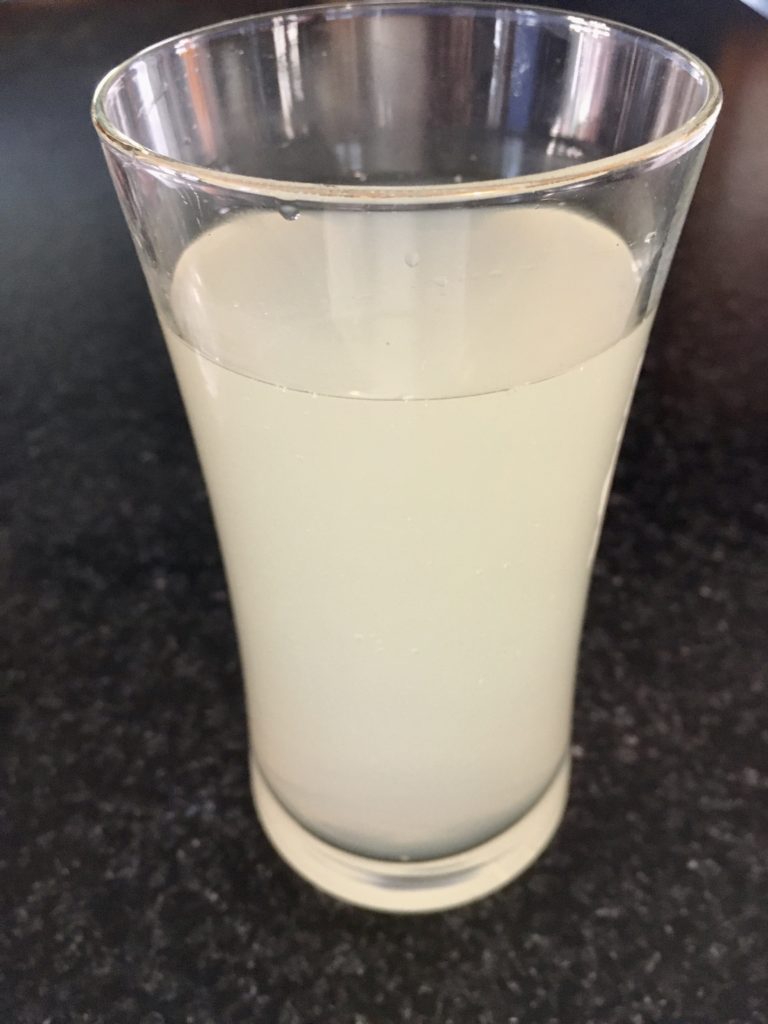
And that’s it! Bottle it up and refrigerate it, or use some right away in this yummy drink recipe:
- 2 oz lemon balm simple syrup
- 3 oz lemon juice
- 4 oz tonic water
Mix all ingredients together in a tall glass. Add ice if desired.
Both the syrup and the drink recipes would also work very well with mint. Feel free to experiment with other herbs as well- who knows what awesome combinations you could come up with!
Happy cooking and drinking!
Basil Seed Berry Jam
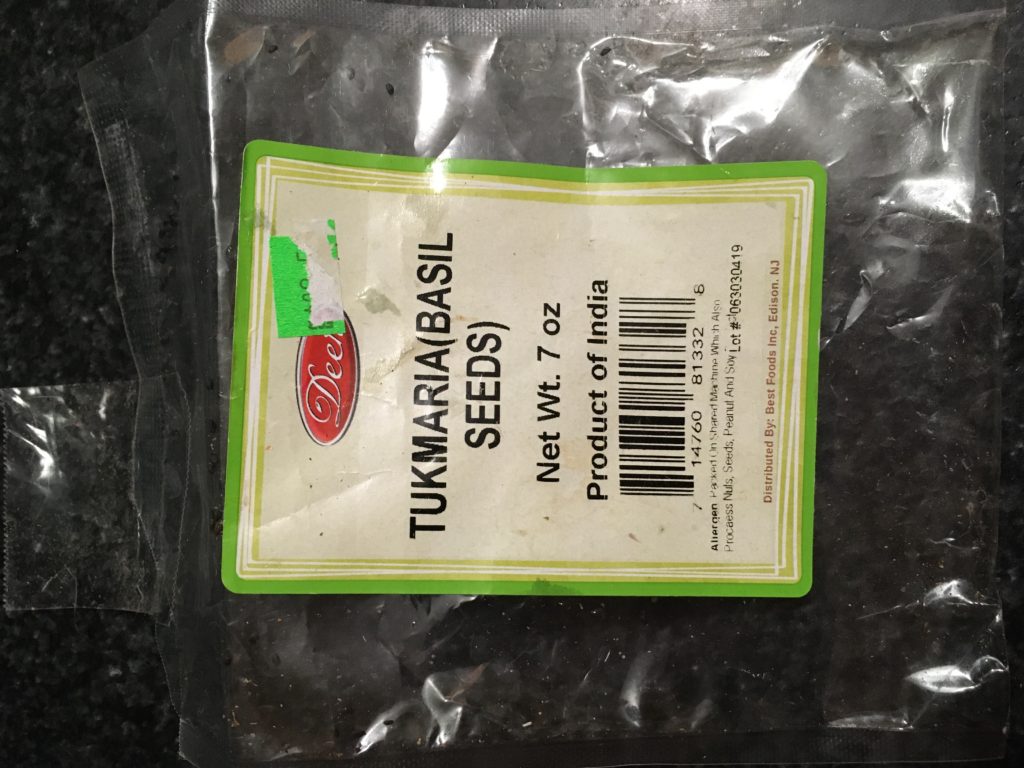
Hi, all! Hope you’re doing well and staying warm in the snowstorm! I have a fun and interesting recipe for you today- jam made with basil seeds rather than with pectin or another thickener! This came about from my work where one of my patients, a man from India, was describing to me a drink that he makes using basil seeds (known as tukmaria) and water. I started researching basil seeds a bit more, and found that they’re a lot like chia seeds: rich in soluble fiber and omega-3 fatty acids, and really good at making whatever fluid they touch turn into a gel-like substance (due to the soluble fiber they contain). My patient gave me a package of basil seeds to try, but having had the experience of drinking chia seed goo and hating it, I knew I had to go a different avenue. I remembered an episode of Great British Baking Show where a baker made a jam using basil seeds, and figured I’d give it a go! Here’s my experimental take on basil seed jam that, happily, yielded great results!
Ingredients:
- 16oz frozen or fresh strawberries
- 12 oz frozen or fresh raspberries
- 1 tbsp sugar (more or less to taste)
- 3 tbsp basil seeds (can also use chia seeds, and can adjust amount for desired thickness of jam)
First, put the fruits in a large saucepan and cook over medium heat until the fruits are really soft and cooked down. You may need to mash a couple bits of fruit, but for the most part they should cook down to a liquid on their own.
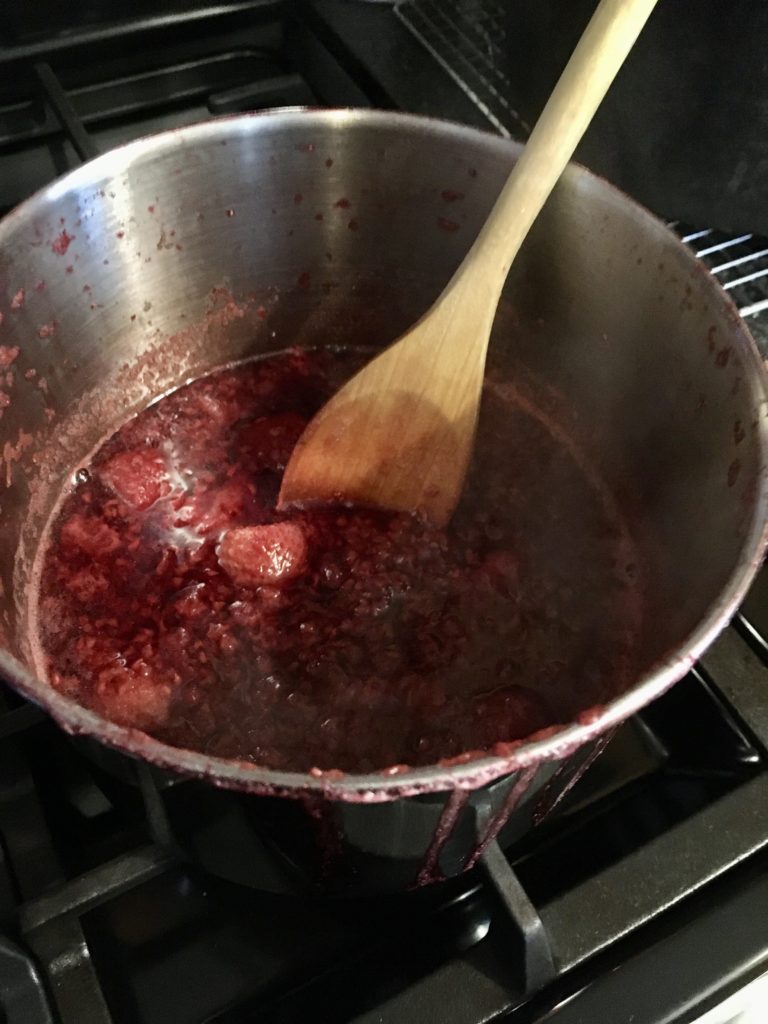
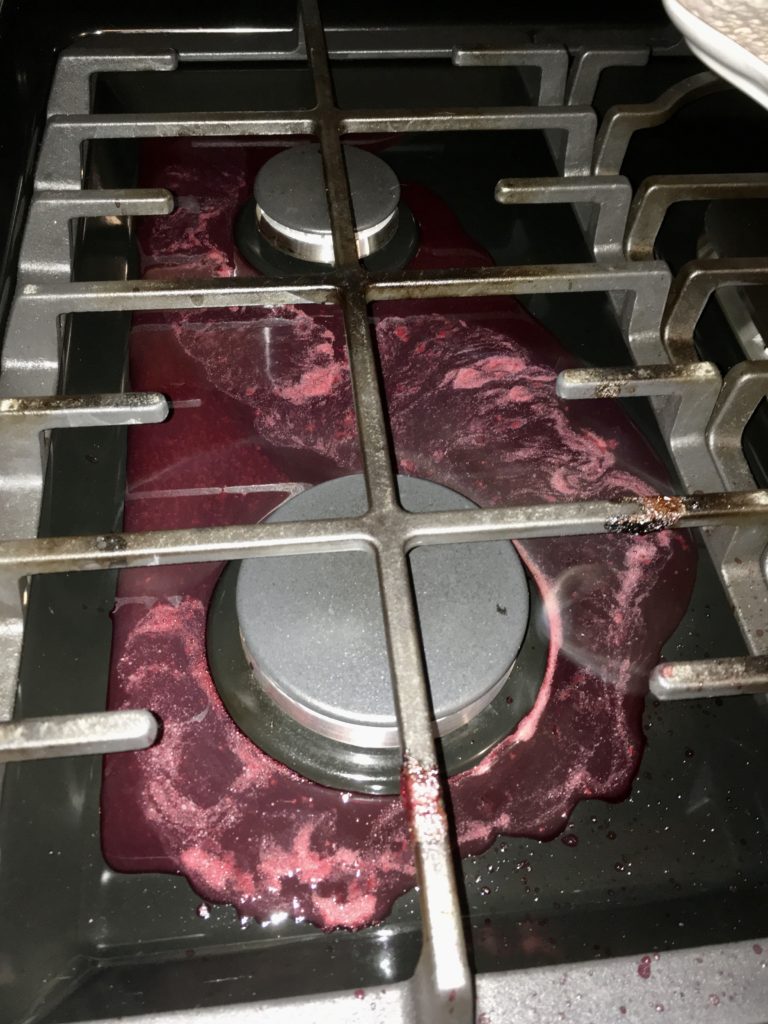
Brief pause for a word to the wise- be on the alert when your fruits are starting to really get cooking. I stepped away for several minutes to do the laundry and the pot boiled over- absolute disaster as you can see in the picture below!
Anyway, back to the recipe! Stir in the sugar and the basil seeds and remove from the heat. Wait 5-10 minutes.
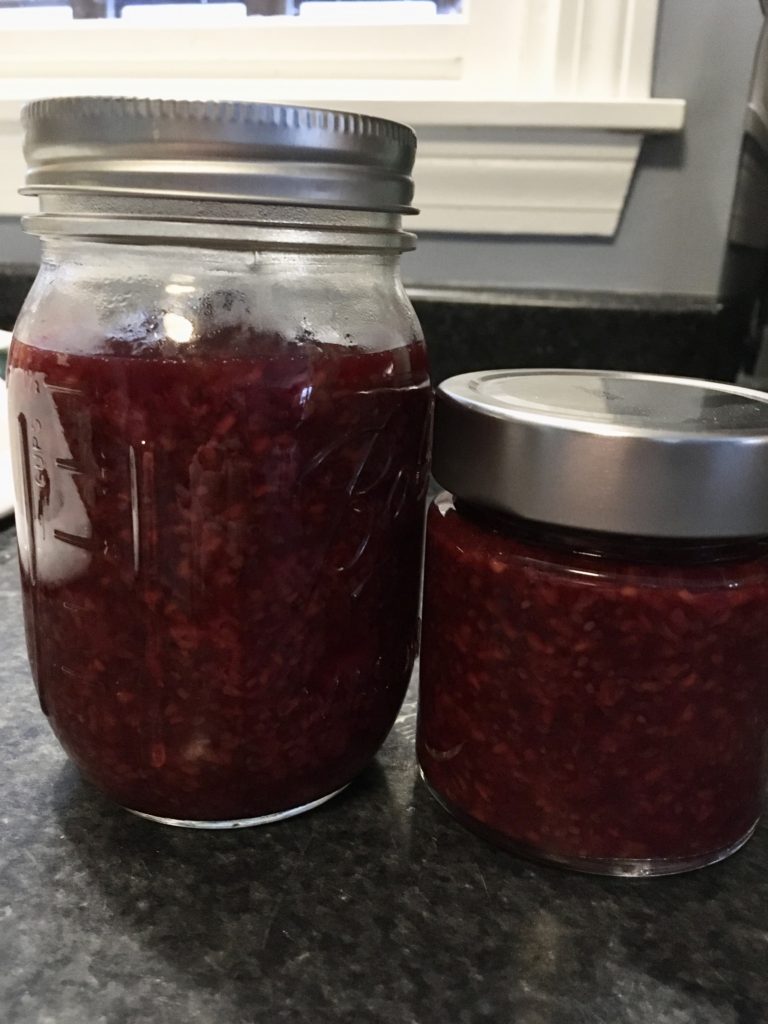
After 5-10 minutes are up, your basil seeds should have absorbed most of the liquid and turned the mixture into more of a preserve-like texture. It’s ready to be jarred and eaten! This especially struck me as something that would be AMAZING with plain or vanilla yogurt.
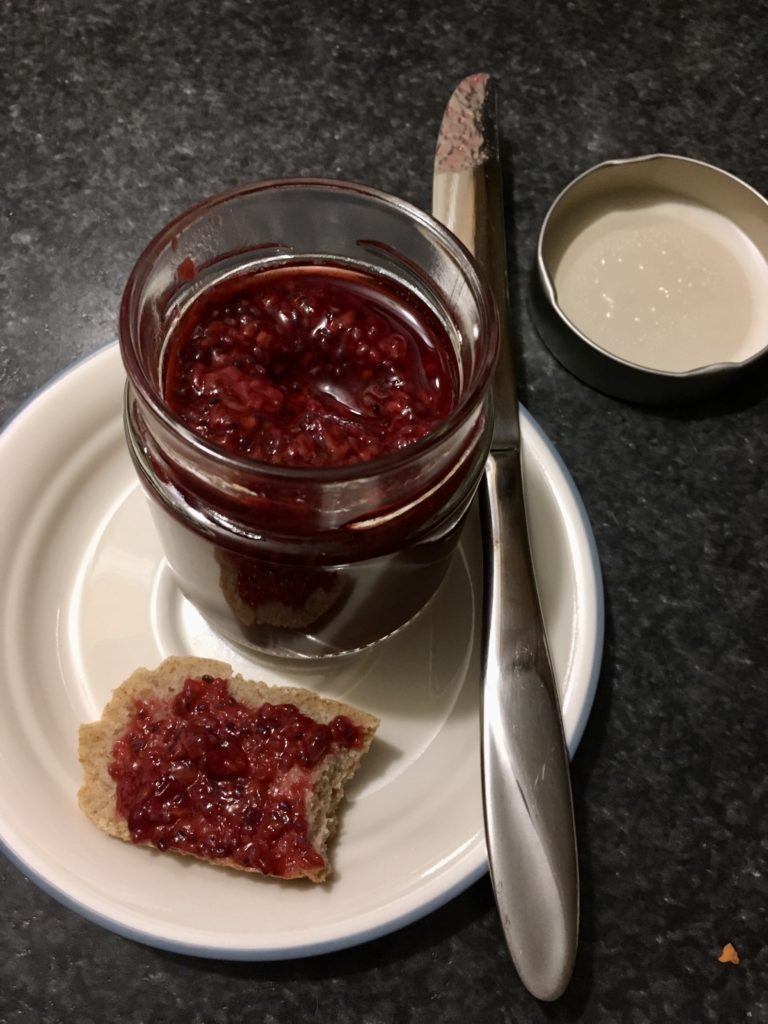
You could definitely swap the basil seeds out for chia seeds in this recipe and have fine results, and you could also use almost any other fruit that you like! I just wouldn’t use apples because they carry natural pectin and gelatinize on their own when cooked, and if you added basil seeds or chia seeds you might end up with too stiff of a gel. Have fun trying this out and using your own choice of fruits- it was a fun adventure for me and I hope it is for you as well! Happy cooking!
No-Churn Ice Cream
Hi, all! Happy summer! I hope that you’ve been able to enjoy the beginnings of summer despite the ongoing craziness of Coronavirus and whatnot. Things have been fairly quiet at my house, but I’ve been taking that opportunity to make yummy food and desserts! This recipe that I’m going to share today is perfect for right now- ice cream that you can make right at home, and you don’t even need an ice cream machine! It only takes a couple ingredients and takes hardly any time to whip up. Here’s how you make it!
Ingredients:
- 2 cups heavy whipping cream
- 1, 14oz can sweetened condensed milk
- 1 tsp flavoring extract of your choice (I used vanilla extract)
- Whatever toppings or mix-ins you want!
First, empty the can of sweetened condensed milk into a bowl.

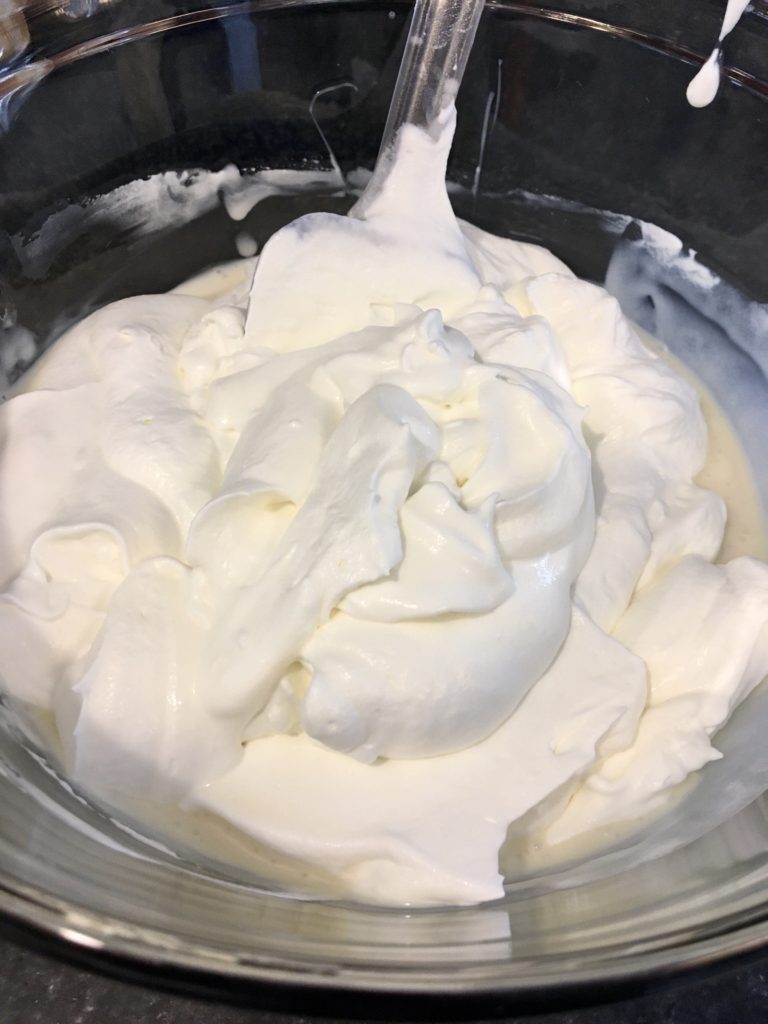
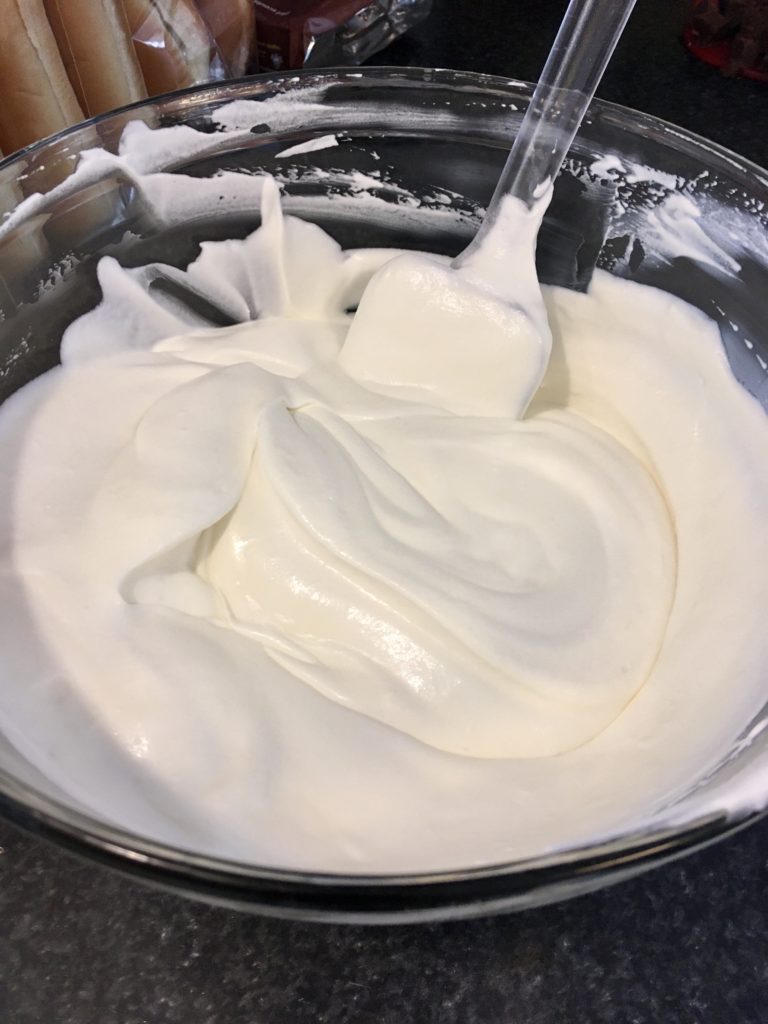
Next, pour the heavy cream into a separate large bowl. Using a hand mixer (or a whisk and some elbow grease if you’re feeling strong), whip the cream until stiff peaks form. You should be able to lift the beaters out of the cream and have peaks stay straight up in the air, without folding back over or sinking into the cream.
Fold a small amount of the whipped cream into the sweetened condensed milk to lighten the milk. This helps make it easier to fold the rest of the cream in.


Now, add the rest of the whipped cream and your chosen flavor extract to the condensed milk and fold gently until fully combined.
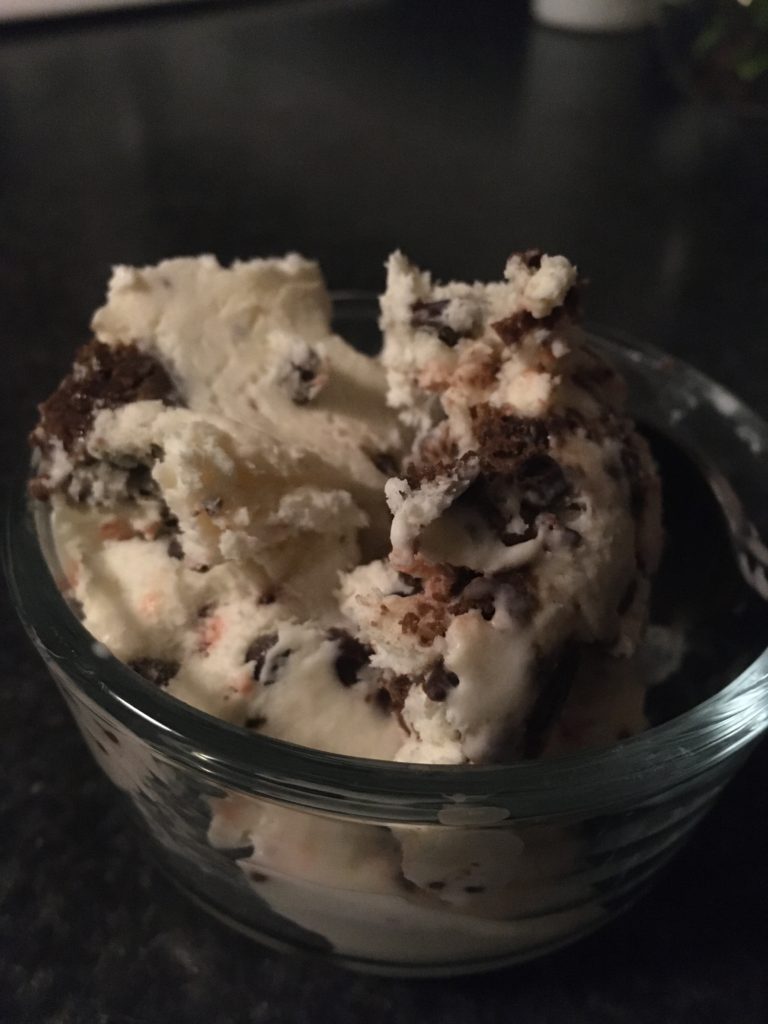
Now it’s time to stir in whatever mix-ins you want! I used chocolate sprinkles (we call them jimmies around here), chocolate chips, and some leftover chocolate-chocolate chip cookie dough that I had in the freezer from when I baked cookies. You could also do:
- Mint chocolate chip (mint extract with chocolate chips mixed in)
- Coconut almond (almond extract with sweetened coconut)
- Heavenly hash (almond extract with nuts and chocolate chips)
- Candy bar (vanilla extract with pieces of your favorite candy bar)
- Peanut butter cup (vanilla extract with fudge swirled through and peanut butter cups mixed in)
- Any other combo you think up!
Now, just spoon the mixture into a freezer-safe container and let it freeze for several hours, preferably overnight. Once it’s frozen, it’s ready to go!
And that’s it! Super quick, super easy, and definitely delicious! Happy baking!
Easy Peasy Lemon…Curd
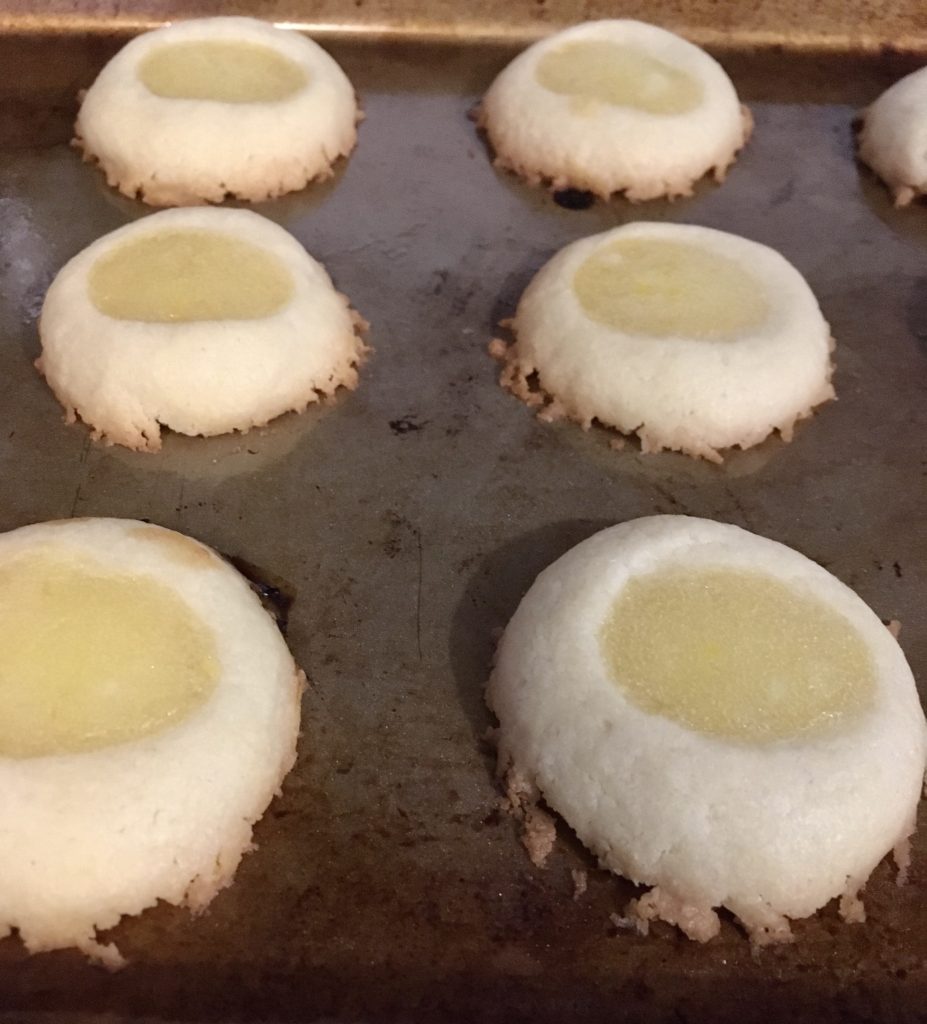
Hi, all! Happy Christmas season! If you’re anything like me, December (and even a little of late November) brings tons of holiday parties, and tons of reasons to bake treats! I recently ran across a recipe for lemon thumbprint cookies, which interested me. I already have a recipe for my Aunt Sadie’s Raspberry Thumbprint cookies and I love lemon flavor, so I figured I had to try it- and luckily I had a Christmas party last night that I happened to need a baked good for! Unfortunately (or perhaps fortunately), my grocery store only sells huge jars of lemon curd, and I only needed a little bit. I say perhaps fortunately because that prompted me to make my own curd! It’s a super easy recipe, and if you have a few lemons at home, then you probably have all the ingredients you’ll need to make it. Here’s the recipe:
Ingredients:
- 3/4 cup fresh squeezed lemon juice
- 1 tbsp lemon zest
- 3/4 cup granulated sugar
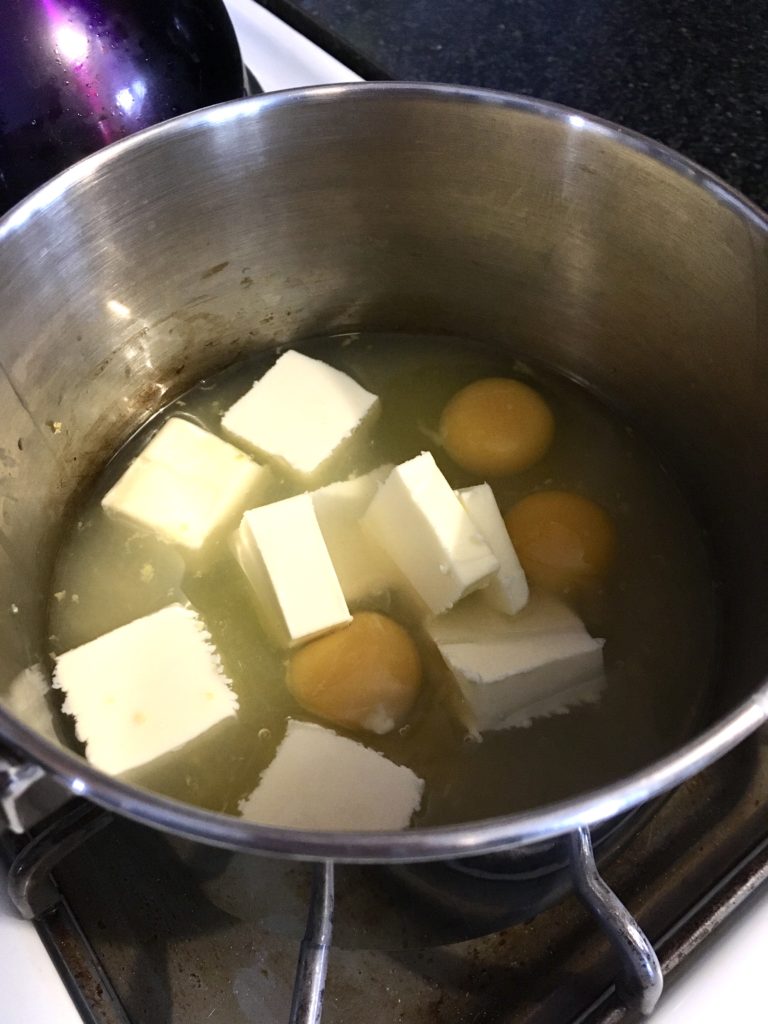
- 3 eggs
- 1/2 cup (1 stick) unsalted butter, cubed
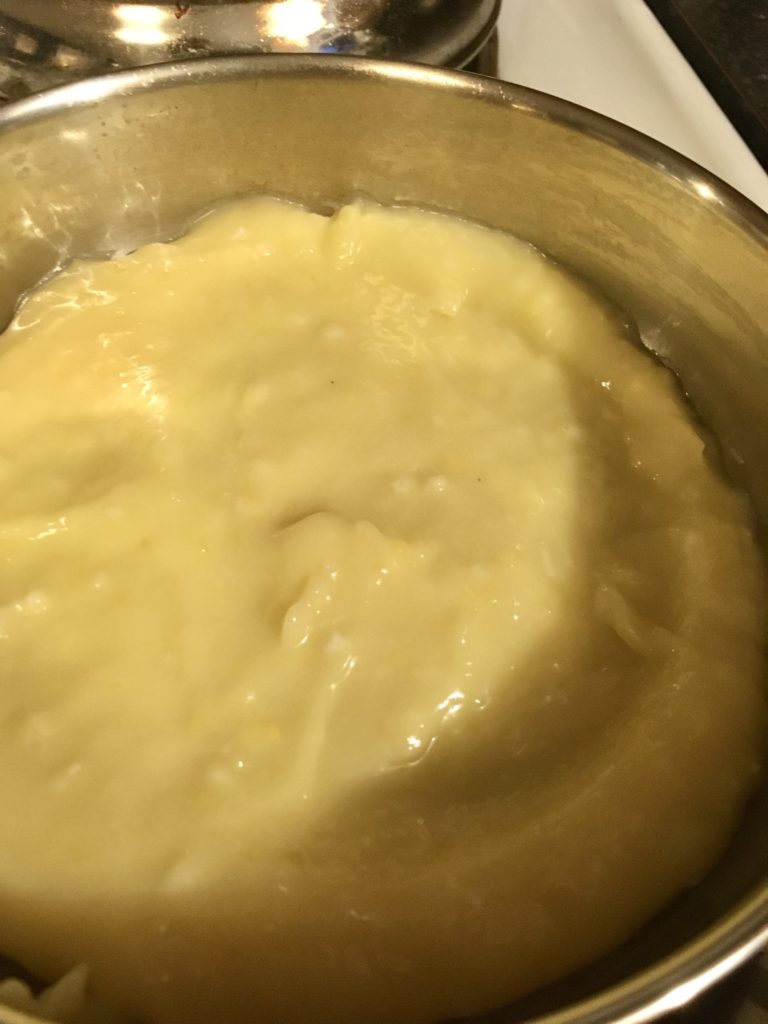
Put all the ingredients into a 2-qt saucepan over medium-low heat.
Let the mixture cook together, stirring frequently, until the ingredients are fully combined and the mixture is just starting to bubble. Turn the heat off and let the curd sit in the saucepan, stirring occasionally, until slightly cooled. It will continue to thicken to a jam consistency as it cools.
And that’s it! You can use this as a jam on fresh bread or scones, a light topping for a cheesecake or ice cream, or use it as the jelly in my Aunt’s thumbprint cookies as I’ve shown below. This recipe makes approximately 1 1/2 cups of curd.
Happy baking!
Caramel Sauce Recipe
Ingredients:
- 1 package soft caramels, unwrapped
- 3 tbsp milk
Put all the unwrapped caramels in a microwave safe bowl with the milk. Microwave them for 30 seconds, and then stir them. Put them in for another 30 seconds, and then stir them again. Repeat this process until they are fully melted, smooth, and pourable. Tip: the reason you have to continue heating them for 30 seconds is so that nothing burns, and the milk doesn’t cook. Also, don’t be worried if the caramel foams- that’s normal!
Fried Okra
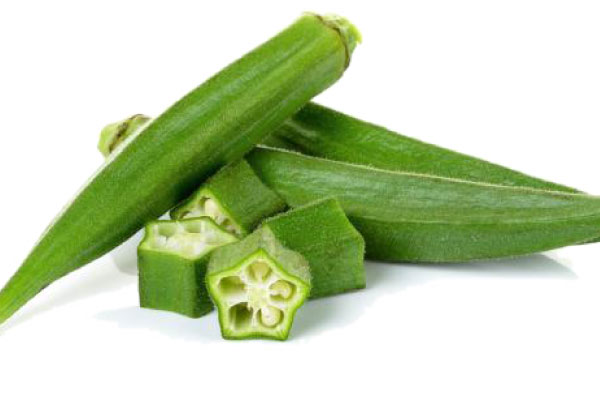
Hello, all! I can’t believe it’s September already- the summer absolutely flew by! Obviously now that it’s getting to be Fall, it’s time for me to start making my trips to the farmstand for apples, apple cider, apple cider donuts… really everything apple. And lots and lots of pumpkins. But this time as I was browsing through their produce, I found some okra! I’ve never had it before, but my husband grew up eating fried okra and loves it. I decided to try making it for him (a little skeptically, I’ll admit) and was very pleasantly surprised. The slimy-when-raw odd little vegetable transforms into really crispy crunchy yummy goodness! So- for those who are wondering what the heck okra looks like, it looks like this:
Now, onto the recipe!
Ingredients:
- 7-10 okra pods, cut into thin slices (about 1/4″ thick)
- 1 cup cornmeal
- 1/4 tsp salt
- 1/4 tsp pepper
- 1/4-1/2 tsp garlic powder (to taste)
- 1/4-1/2 tsp onion powder (to taste)
- 1 egg, beaten
- vegetable oil for frying
- garlic salt and dried parsley for garnish
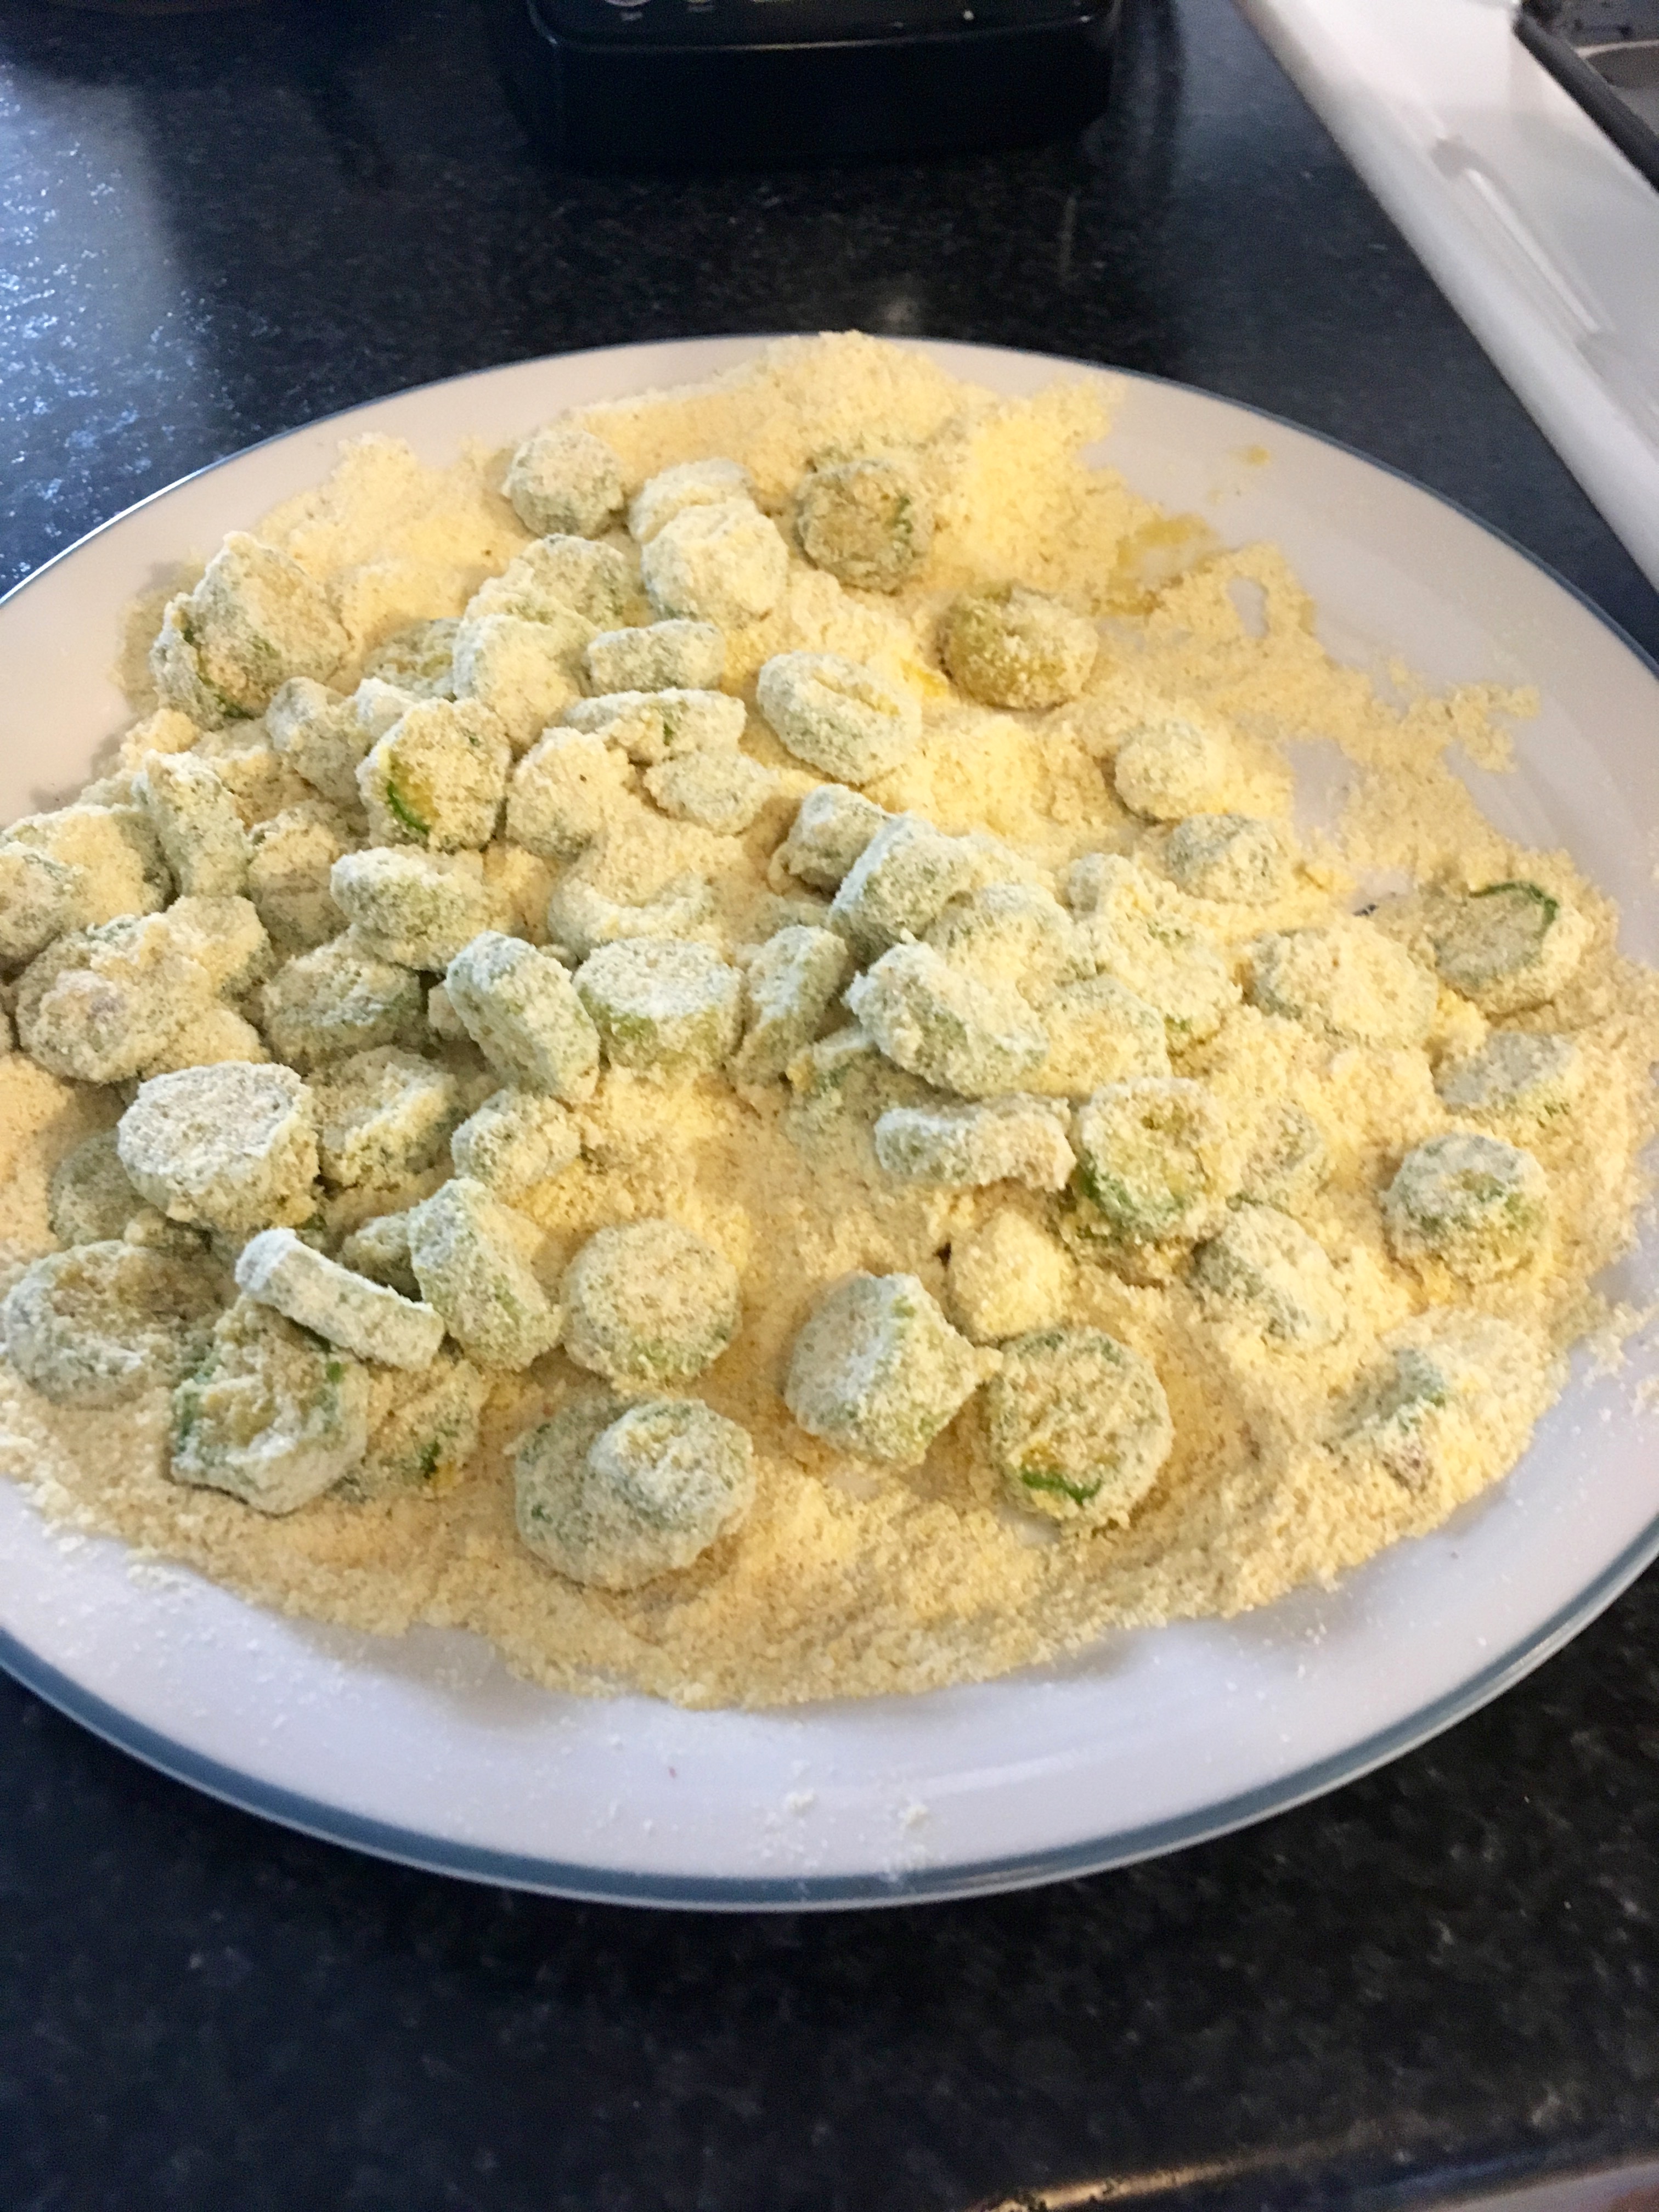
First, soak your okra slices in the beaten egg for 5-10 minutes. Warning: this part is really slimy/sticky, so use a fork to toss the okra or be prepared to get your hands dirty!
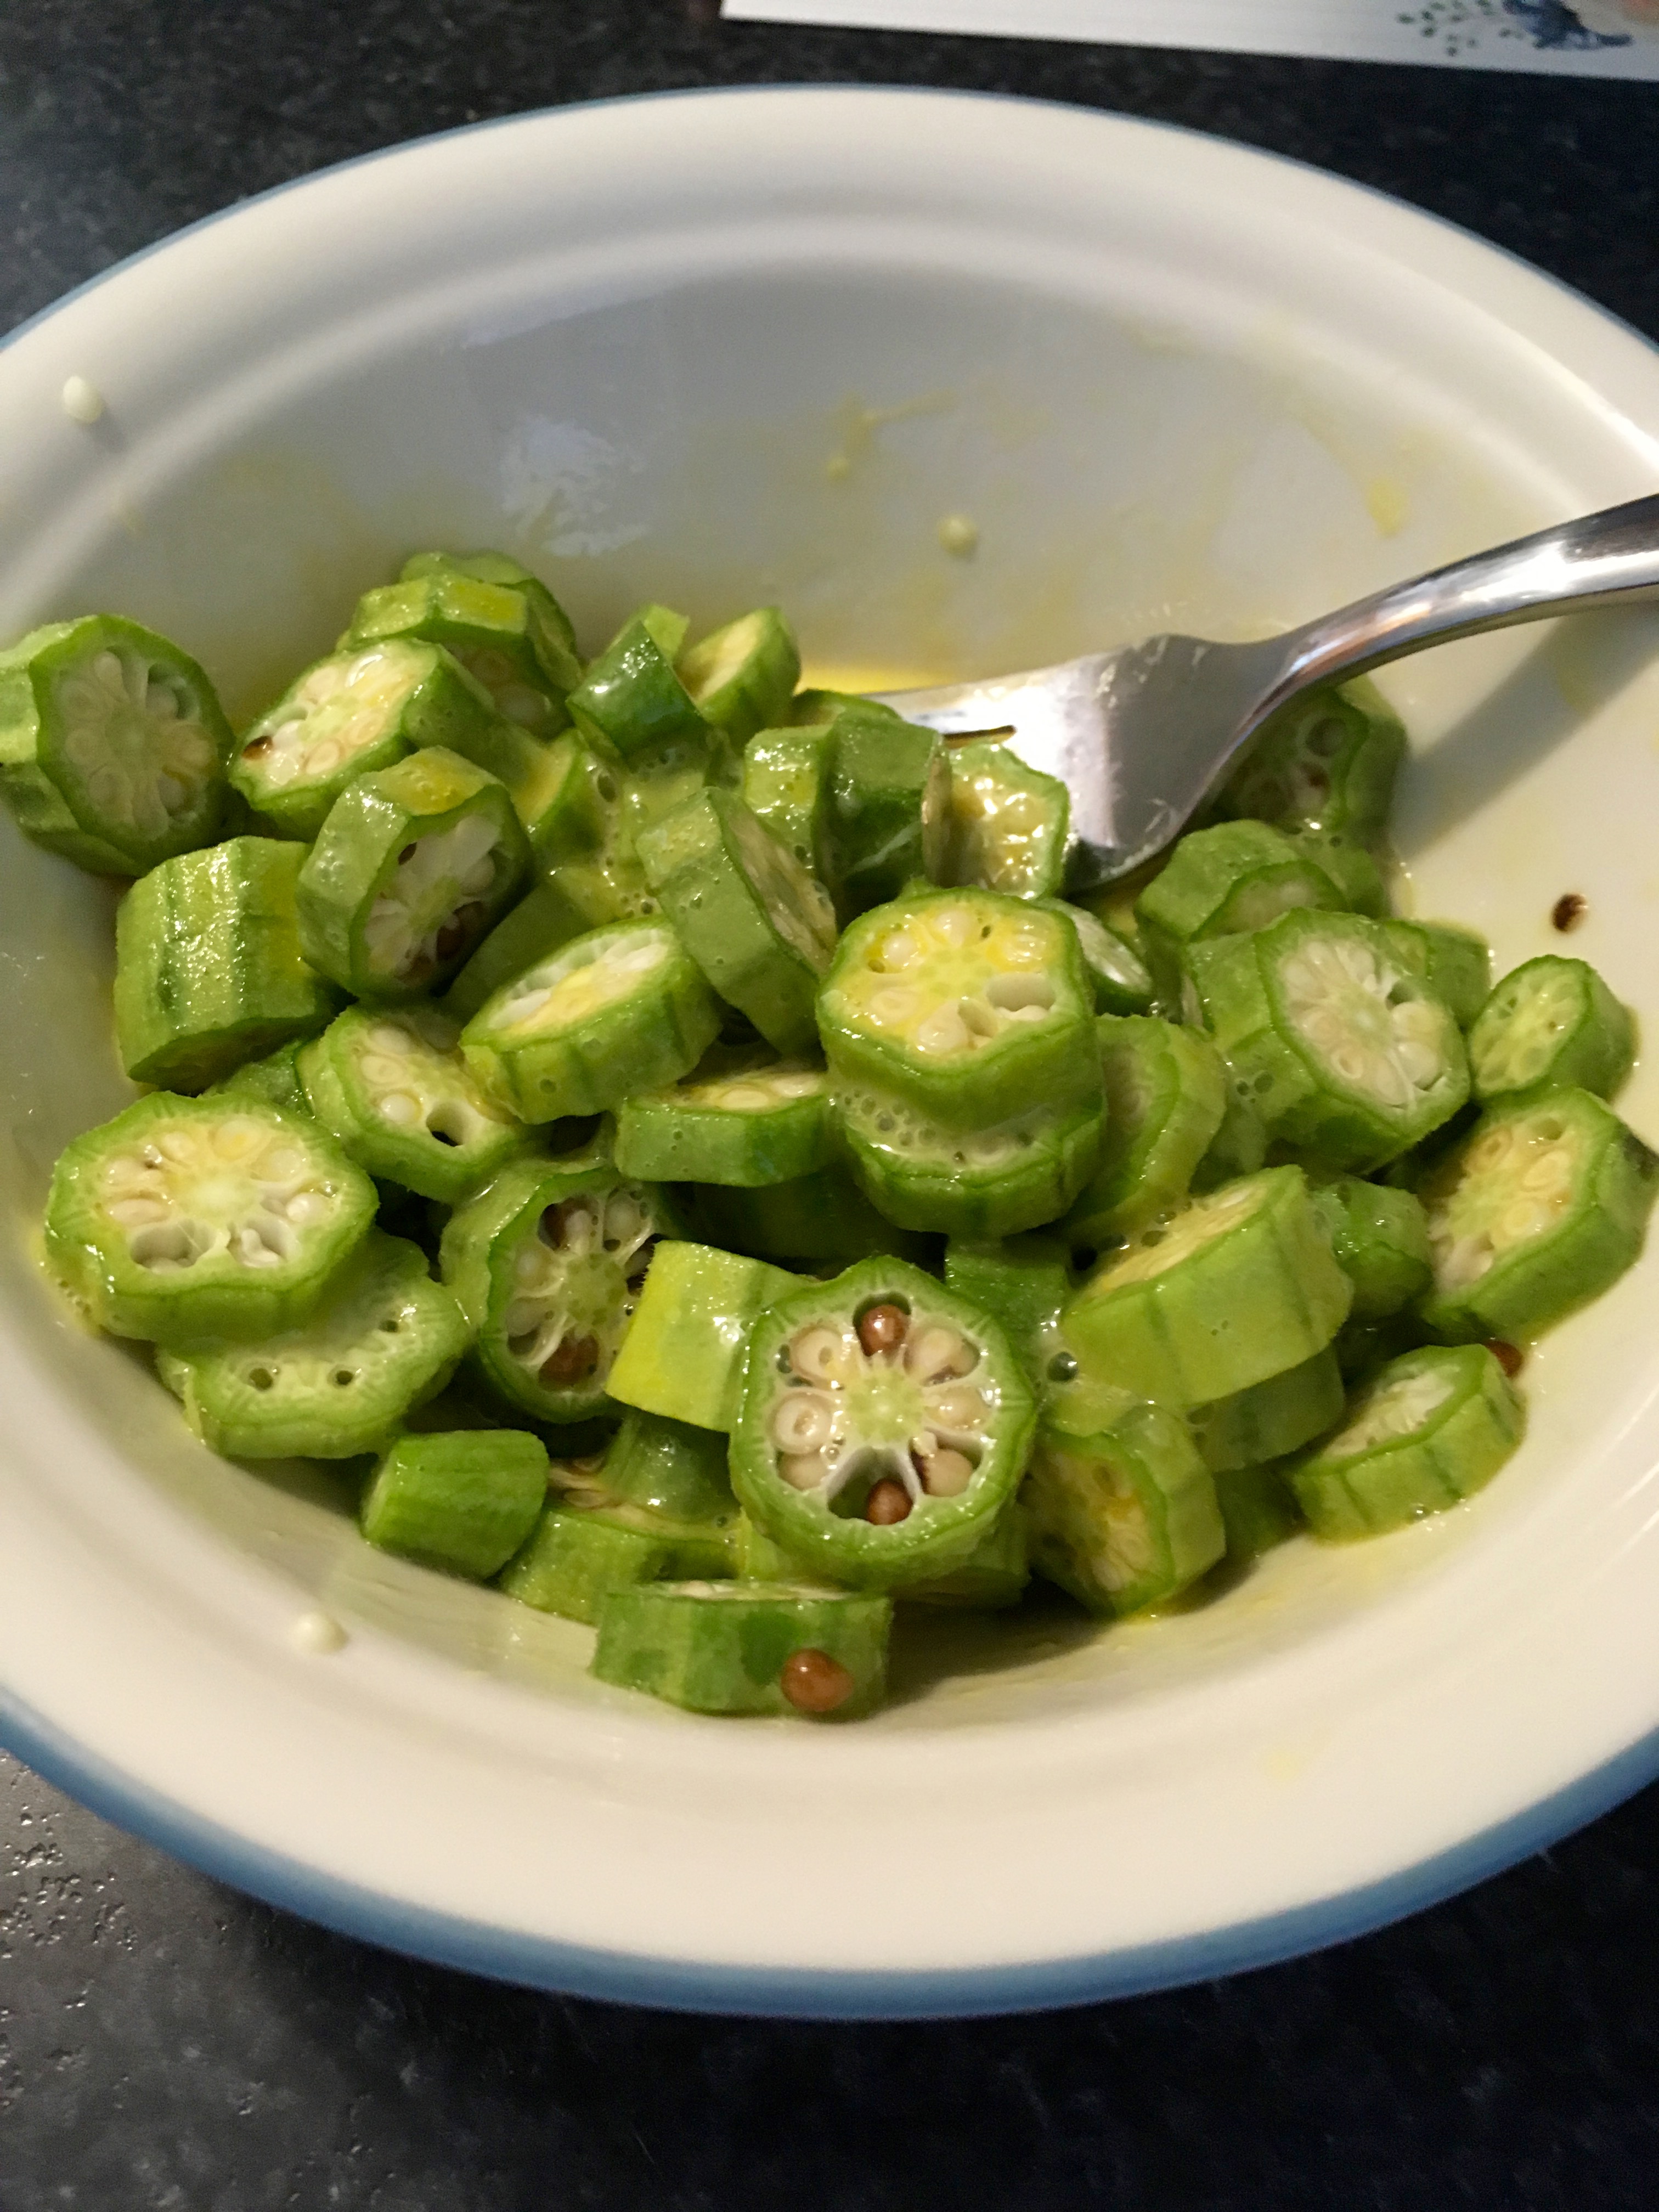
While the okra soaks, mix the cornmeal and the spices together. I prefer to put them on a plate instead of in a bowl so that I have more room to work with when I’m tossing things in the dredge.
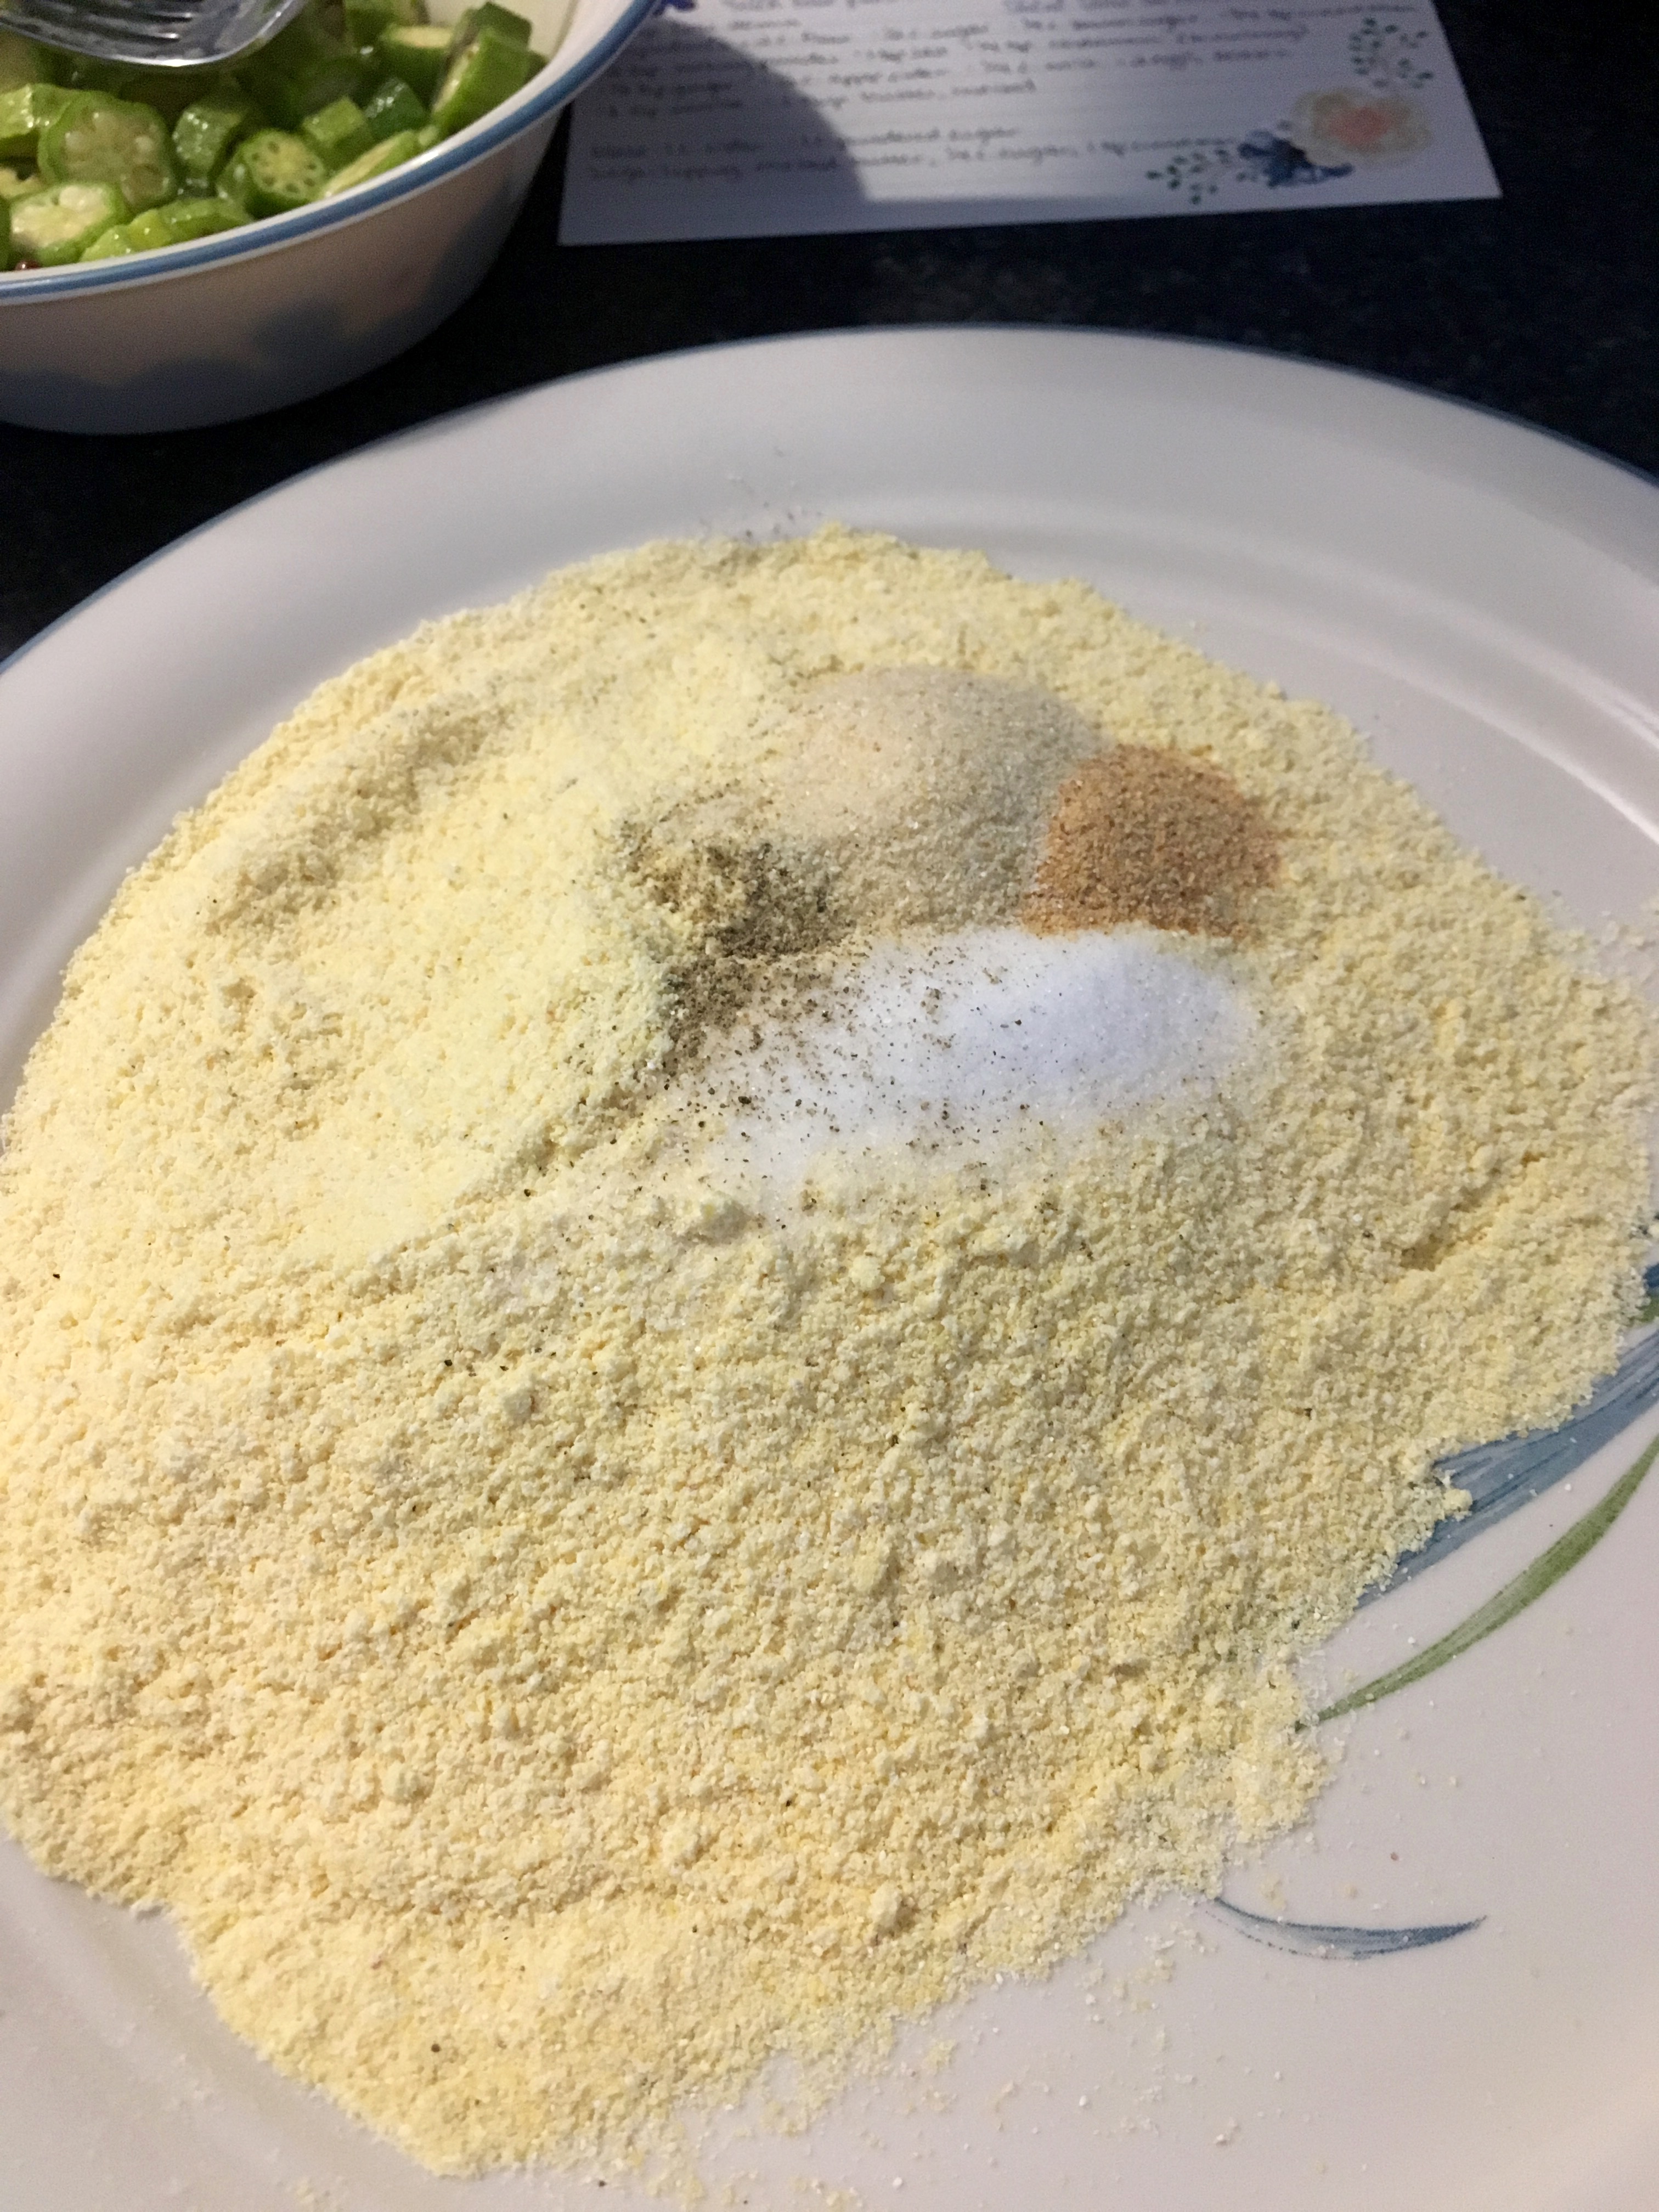
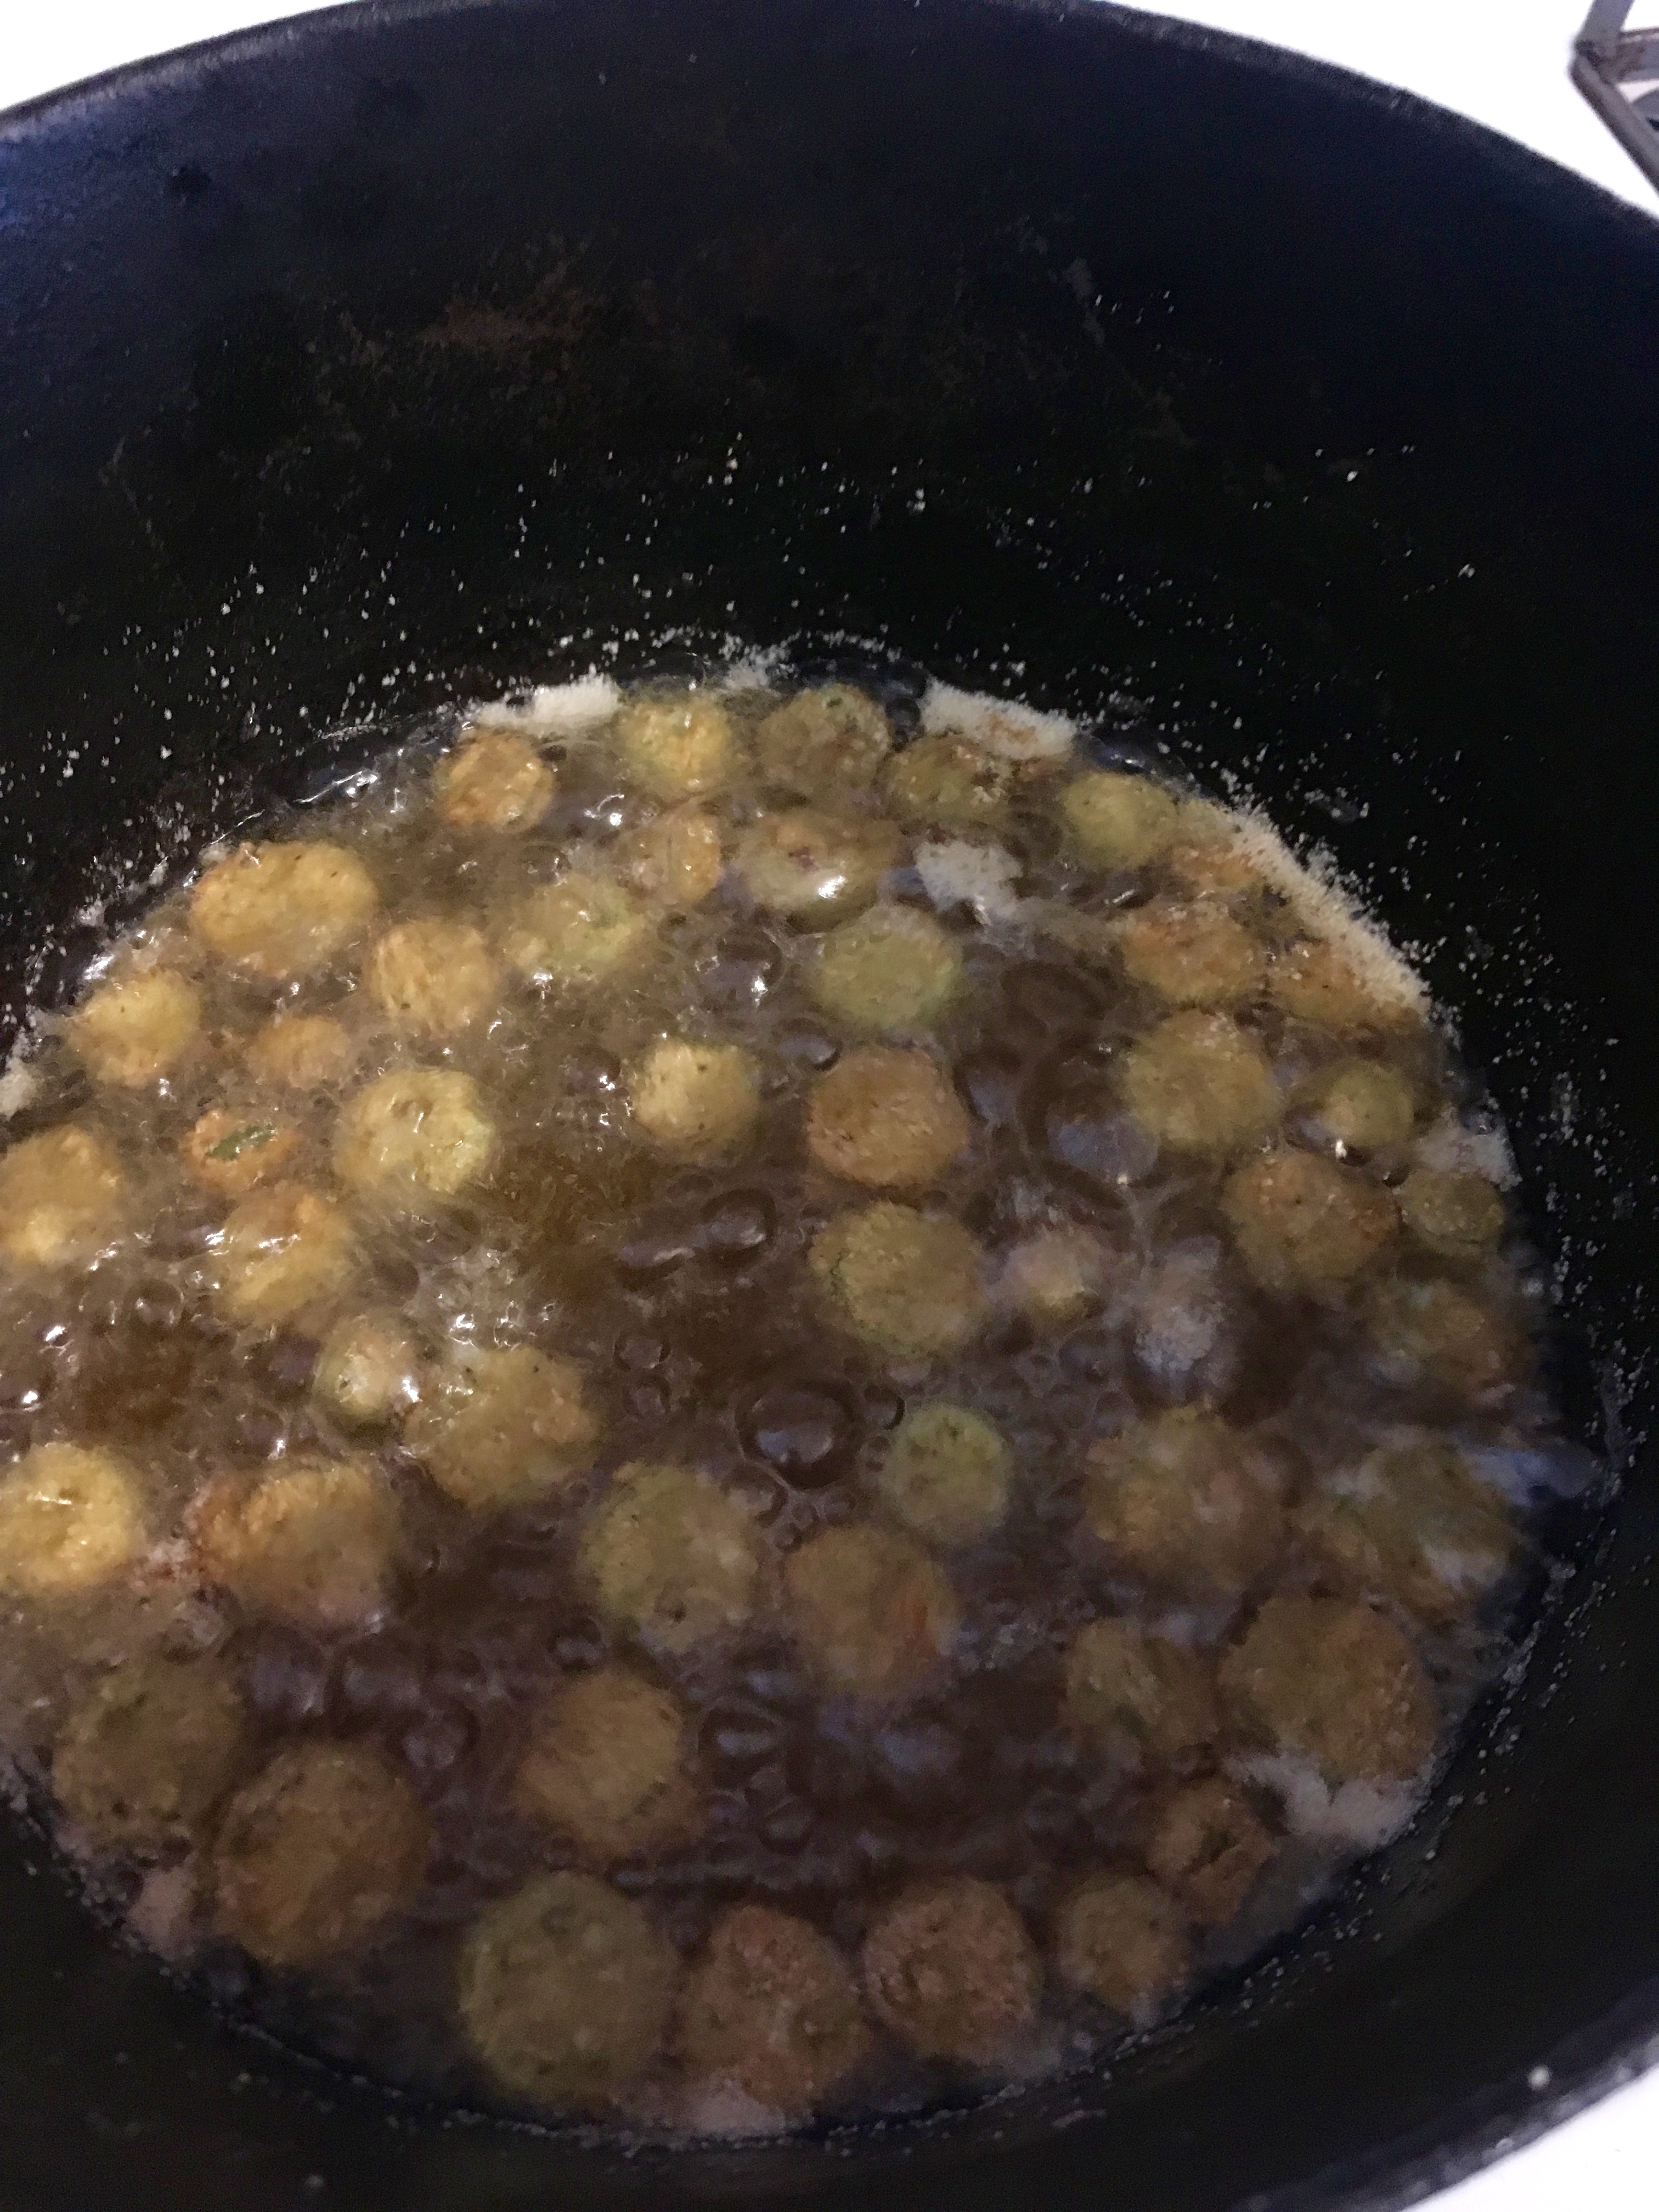
At this point, you can also get your oil heating. Put 1-2″ of vegetable oil in a Dutch oven or a heavy bottomed frying pan. I prefer the Dutch oven because it has really high sides so I get less splattered with oil! Heat the oil to about 350°F. When you put a piece of the dredged okra in, it should immediately start bubbling and frying- if it just sits in the oil, the oil isn’t hot enough yet (and you should remove that piece of okra and try again when the oil is hotter).
Once your oil is hot and the okra has soaked in the egg, toss the okra in the cornmeal dredge.
Fry the pieces in the oil in batches- the most you want at once is enough to form a single layer in the pan. If there are too many, they won’t fry properly.
Once the okra are dark golden brown, take them out of the oil using a slotted spoon and lay them on a paper towel-lined plate to drain. While they’re still hot, sprinkle them with garlic salt and parsley to taste.
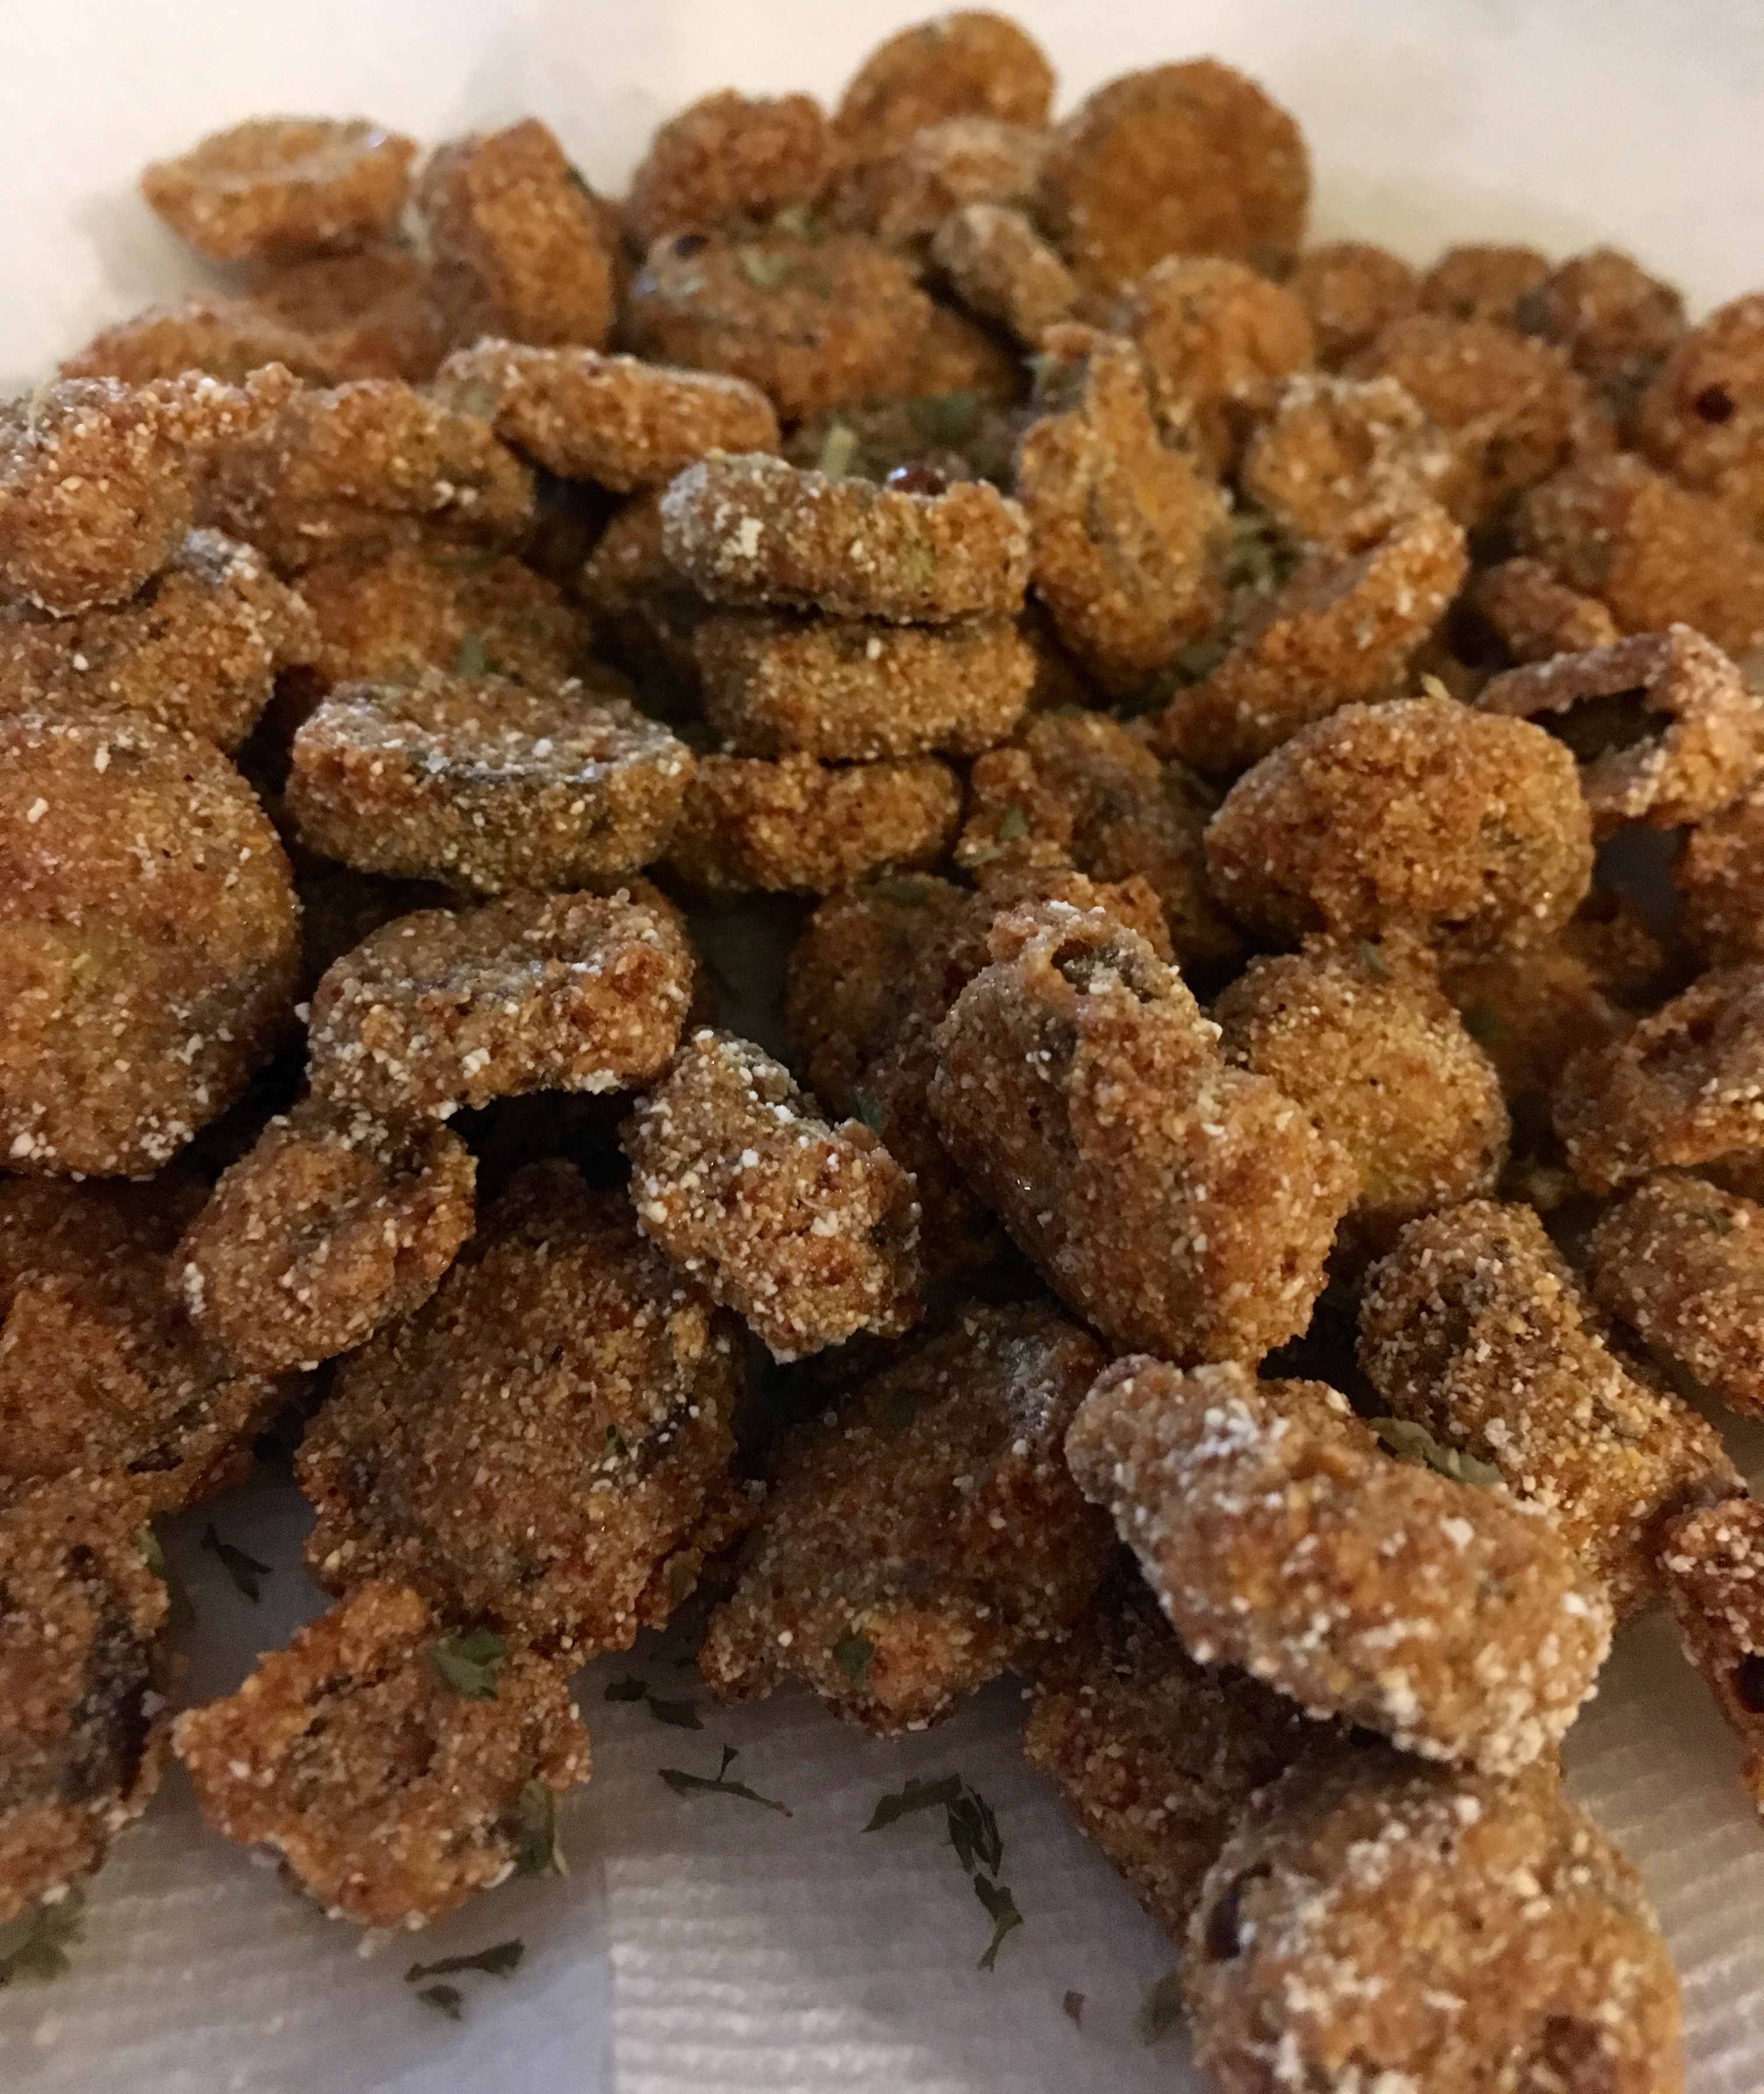
And then, enjoy! These are surprisingly delicious and flavorful- if you get a chance, give these funky veggies a try! Happy cooking!
Game Day Sopapillas
Hi all! Hope you all enjoyed your SuperBowl Sunday- or at least enjoyed spending time with friends and family, regardless of the outcome of the game! My husband and I invited my family over to watch the game together, and I decided to try out an old recipe that my Mom had from when we lived in Papua New Guinea: homemade sopapillas. Super simple and delicious! Here’s the recipe:
Ingredients:
Tortillas:
- 2 cups flour
- 2 tsp baking powder
- 1/2 tsp salt
- 2 tbsp butter or margarine (keep it cold!)
- 2/3-3/4 cup cold water
- lots of vegetable oil for frying
Toppings:
- 1/4 cup granulated sugar mixed with 2 tsp cinnamon
- Honey
- Powdered sugar
In a large bowl, combine the flour, baking powder, and salt. Cut in the butter using a pastry cutter until the mixture resembles coarse meal.
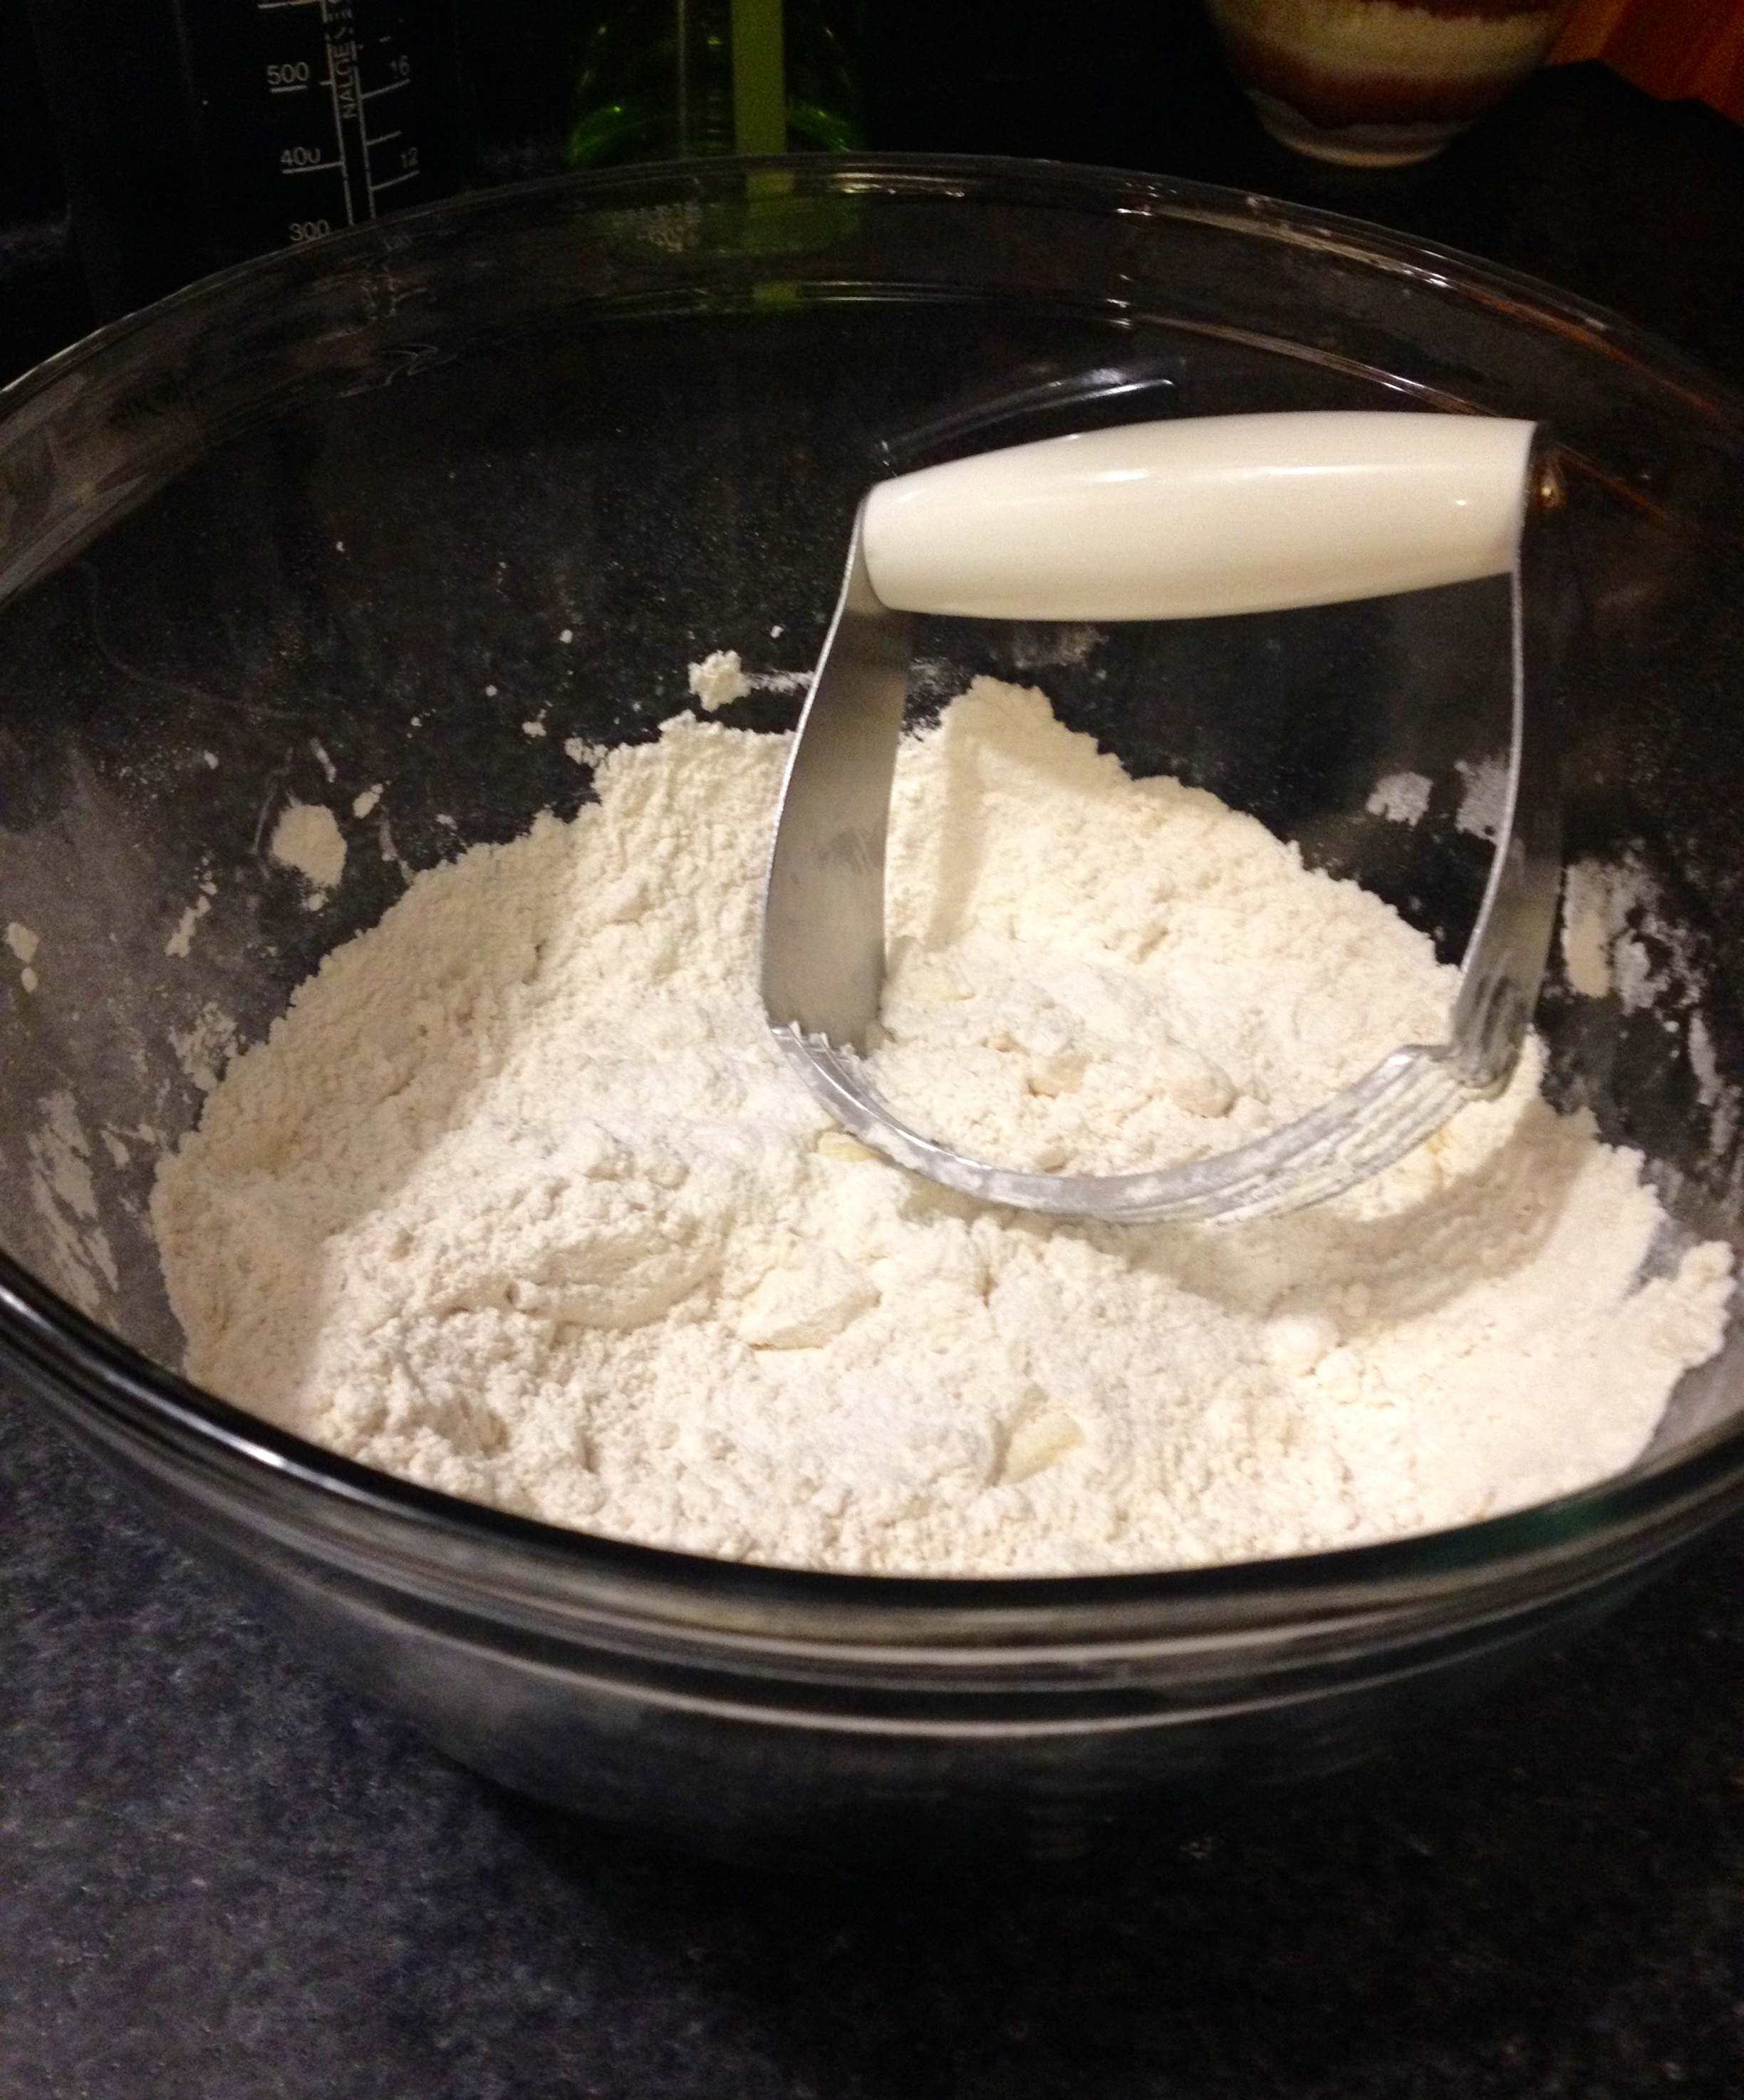
Sprinkle in the water a little at a time, tossing with a fork until the dough is just moistened and still crumbly.
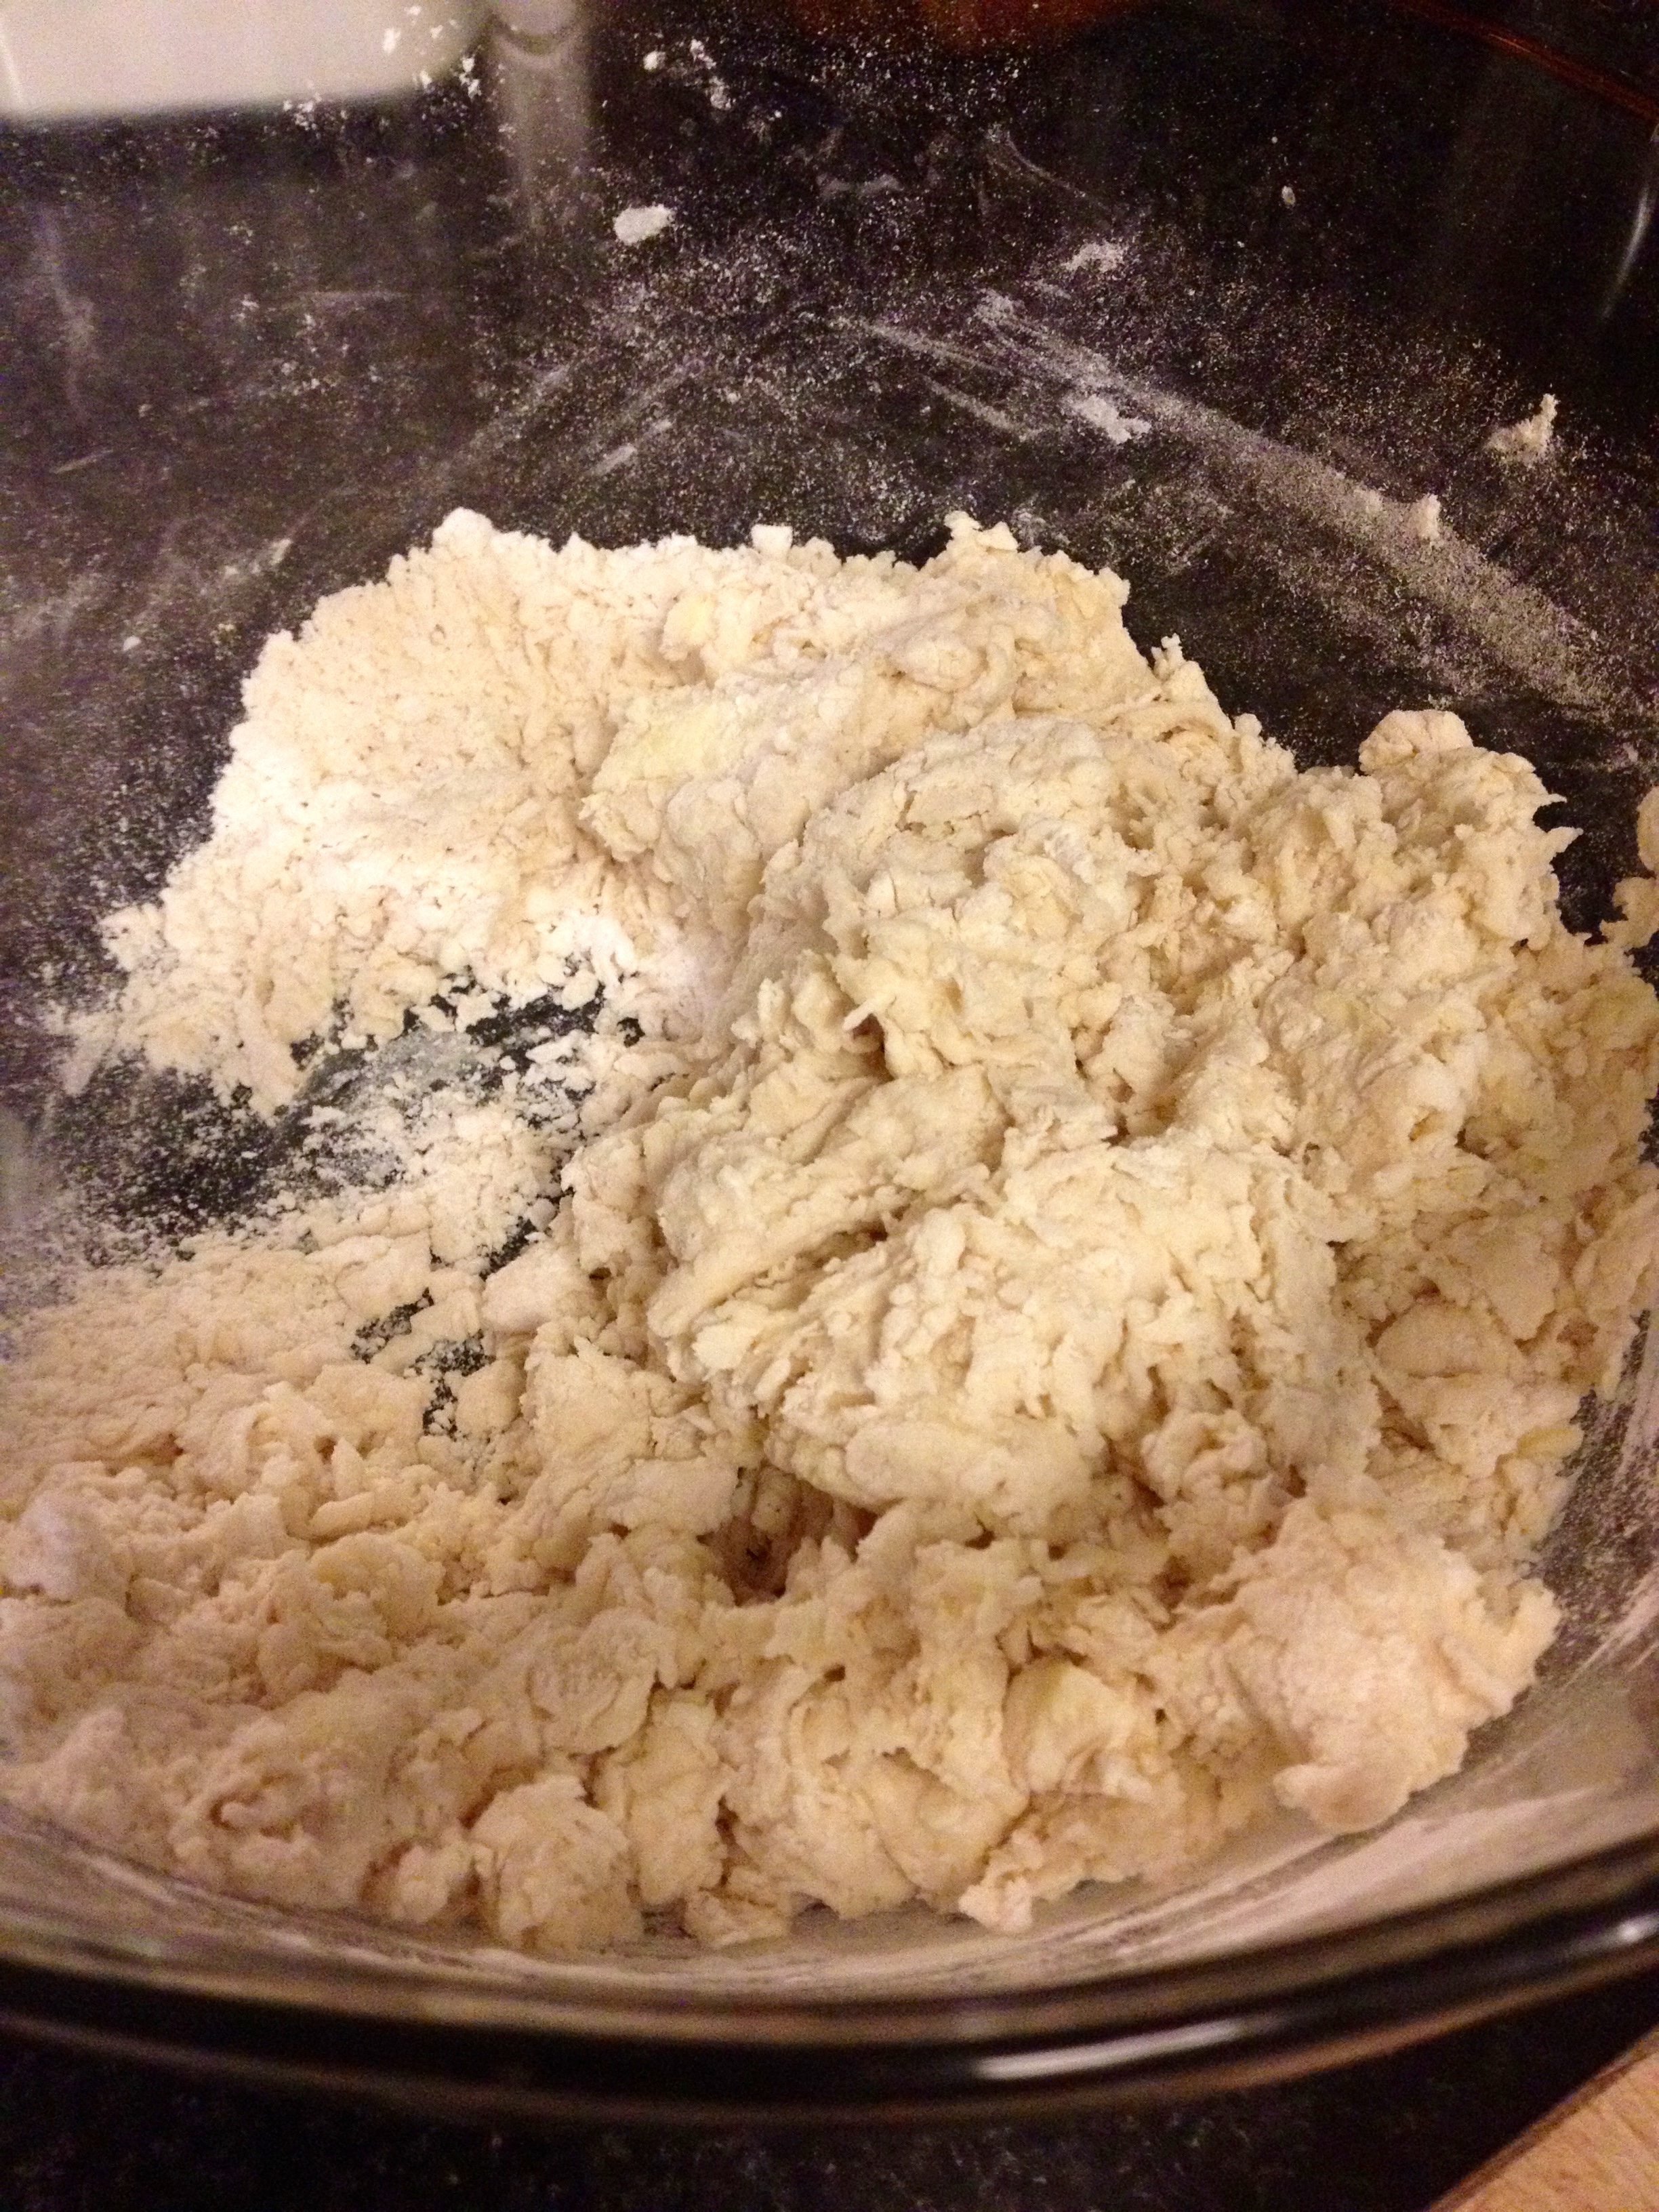
Turn the dough out onto a floured surface (I kneaded it in the bowl a bit first so it made less of a mess).
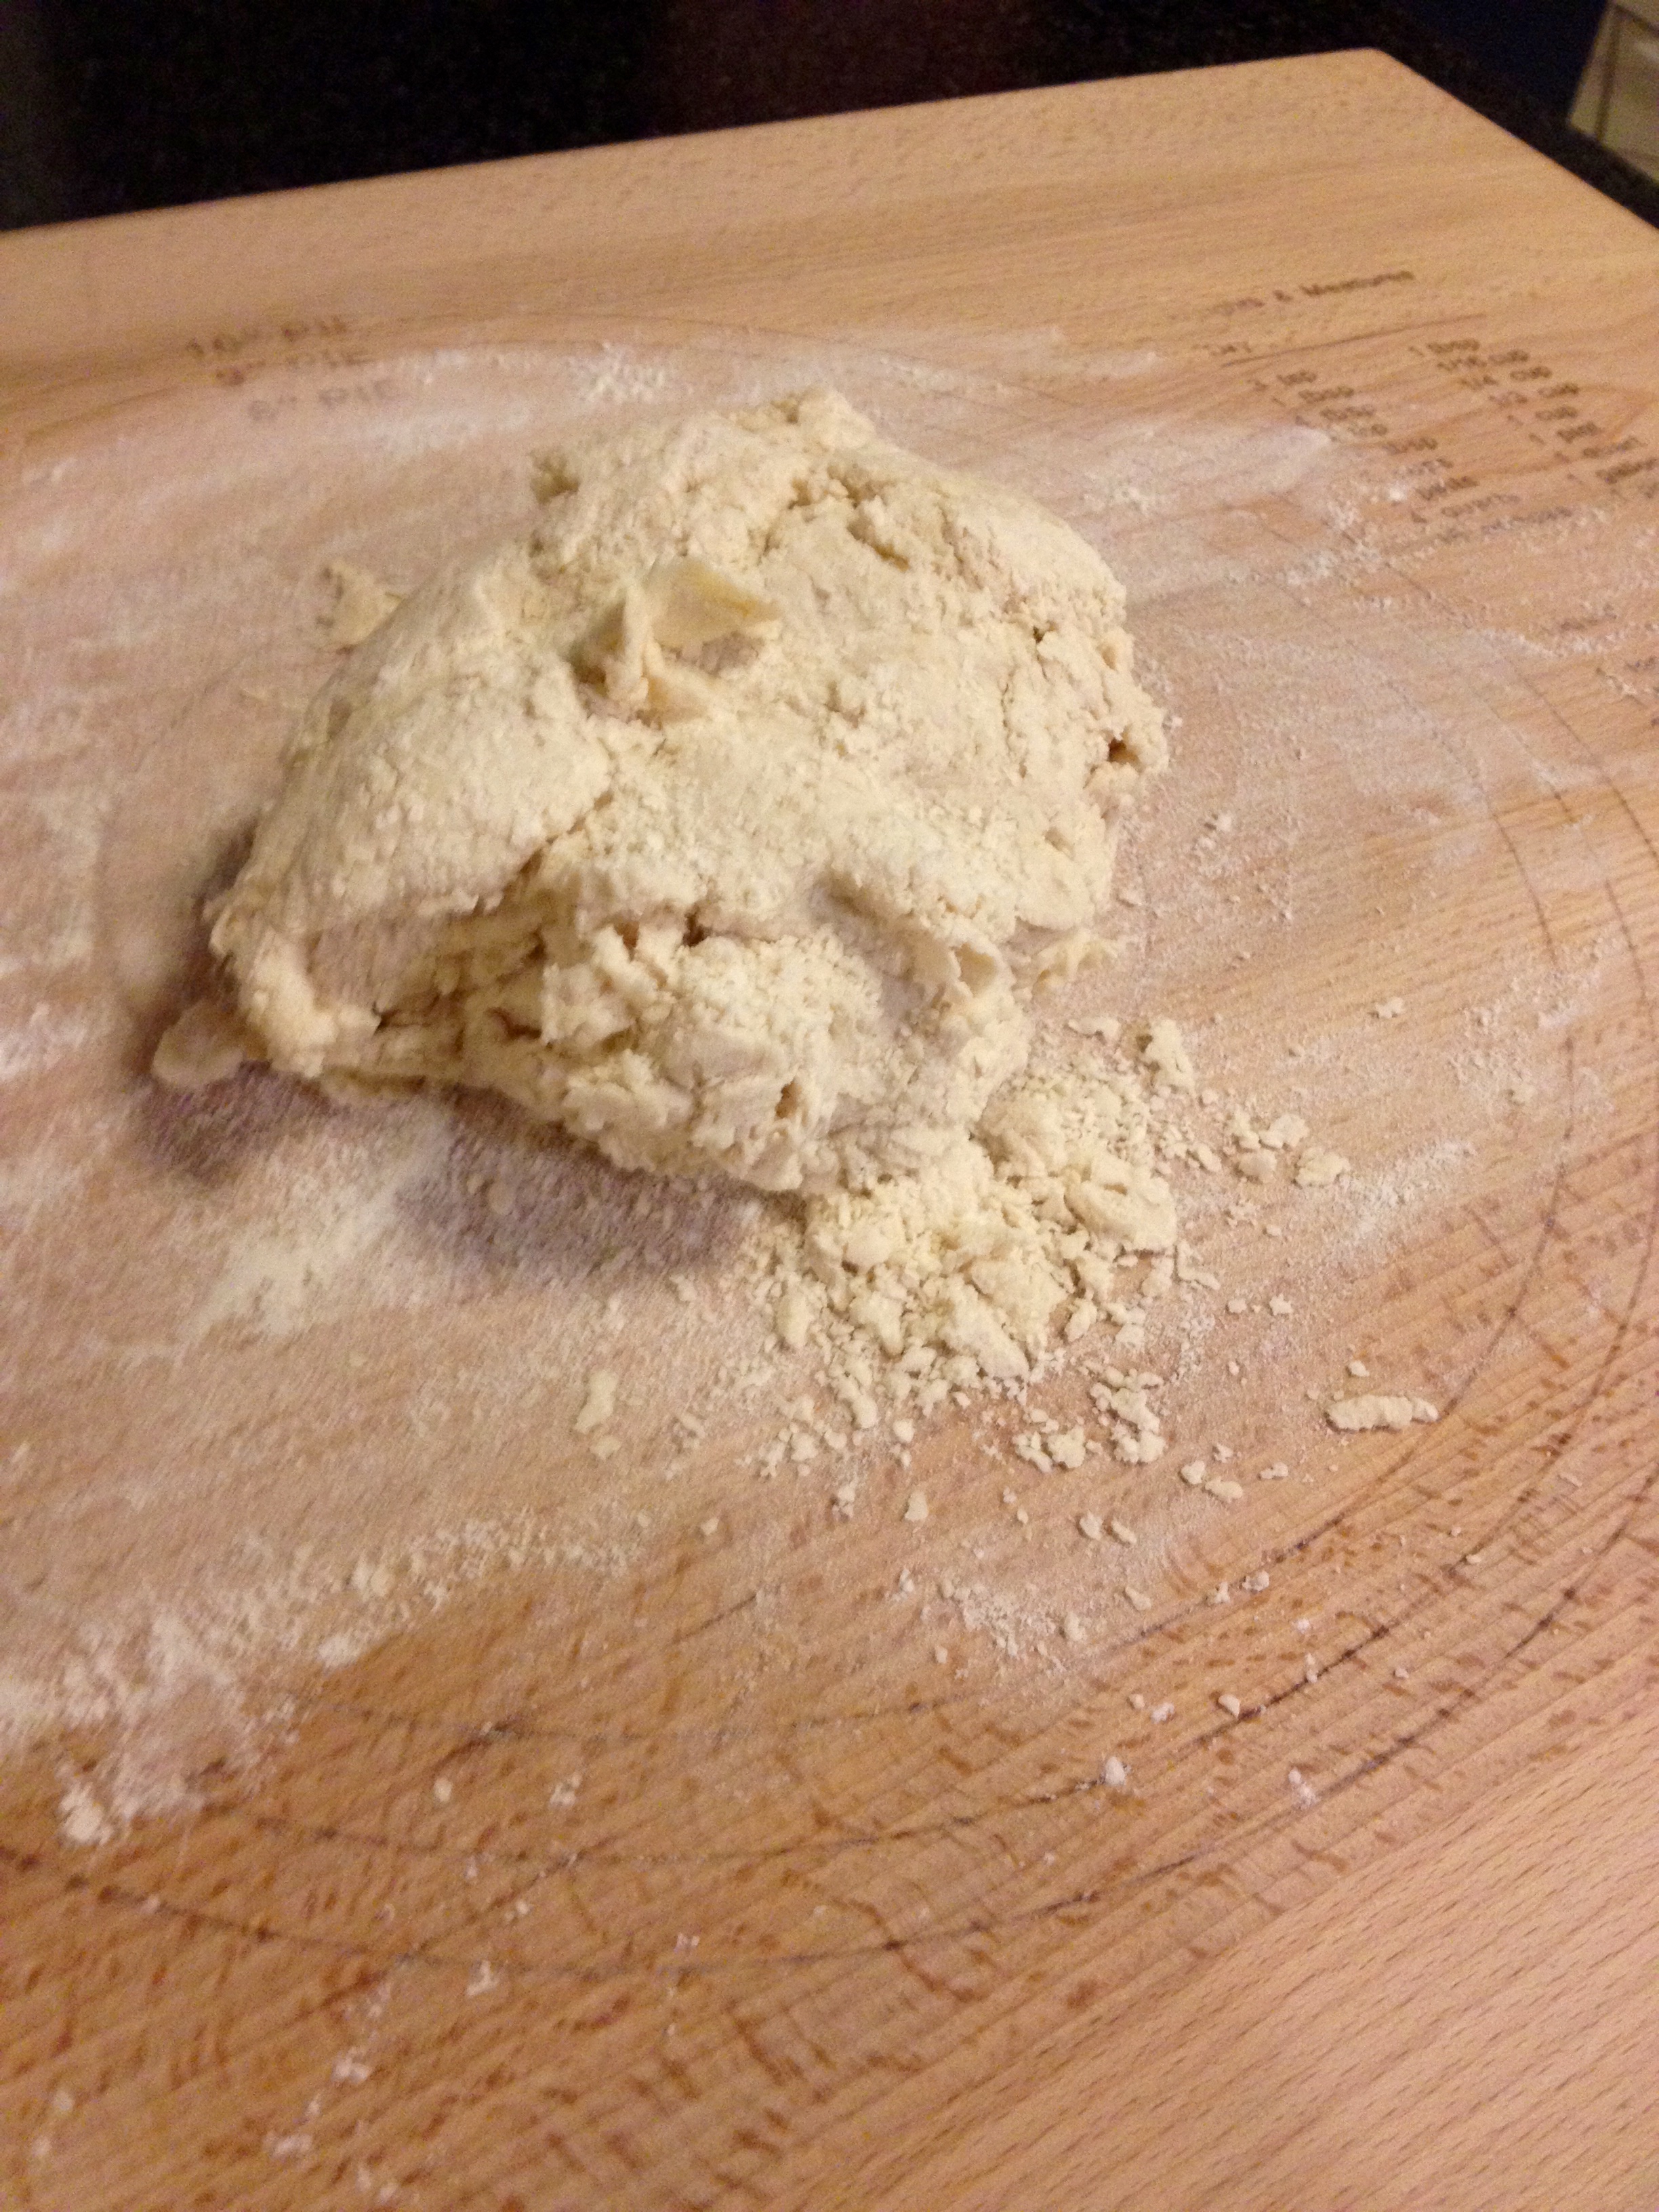
Knead the dough until it’s smooth. You don’t want to feel lumps of butter or flour.

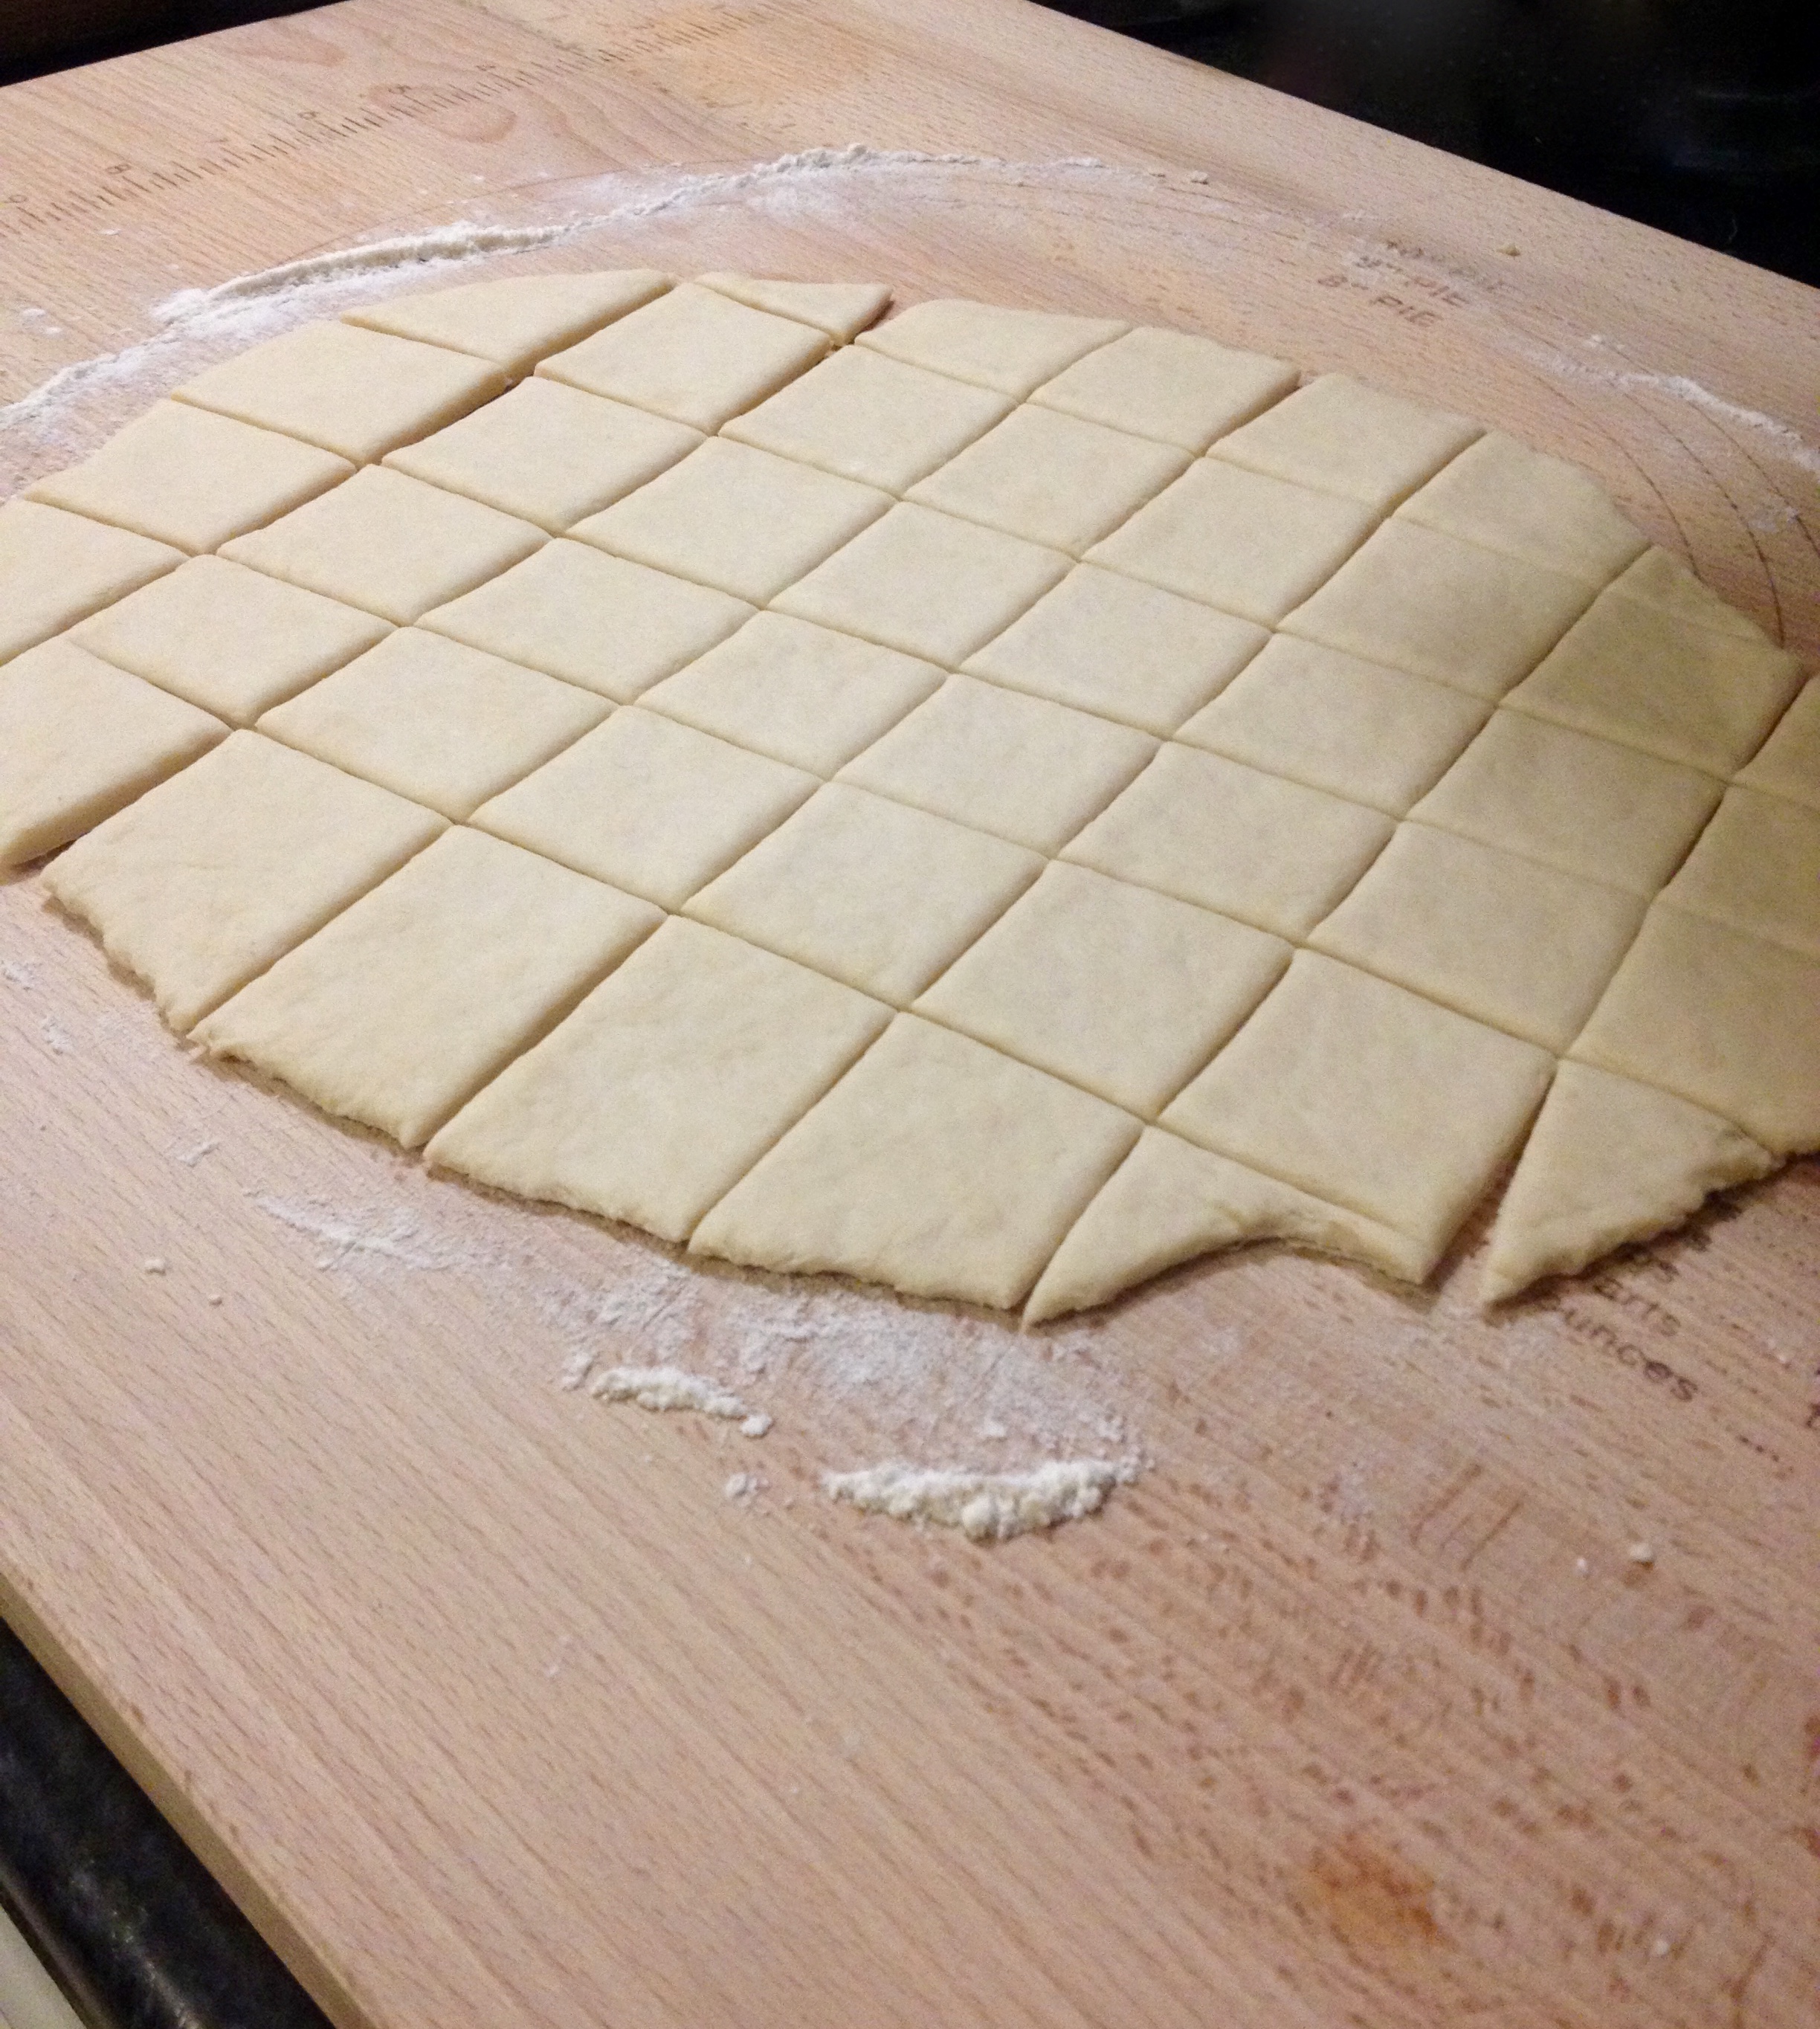
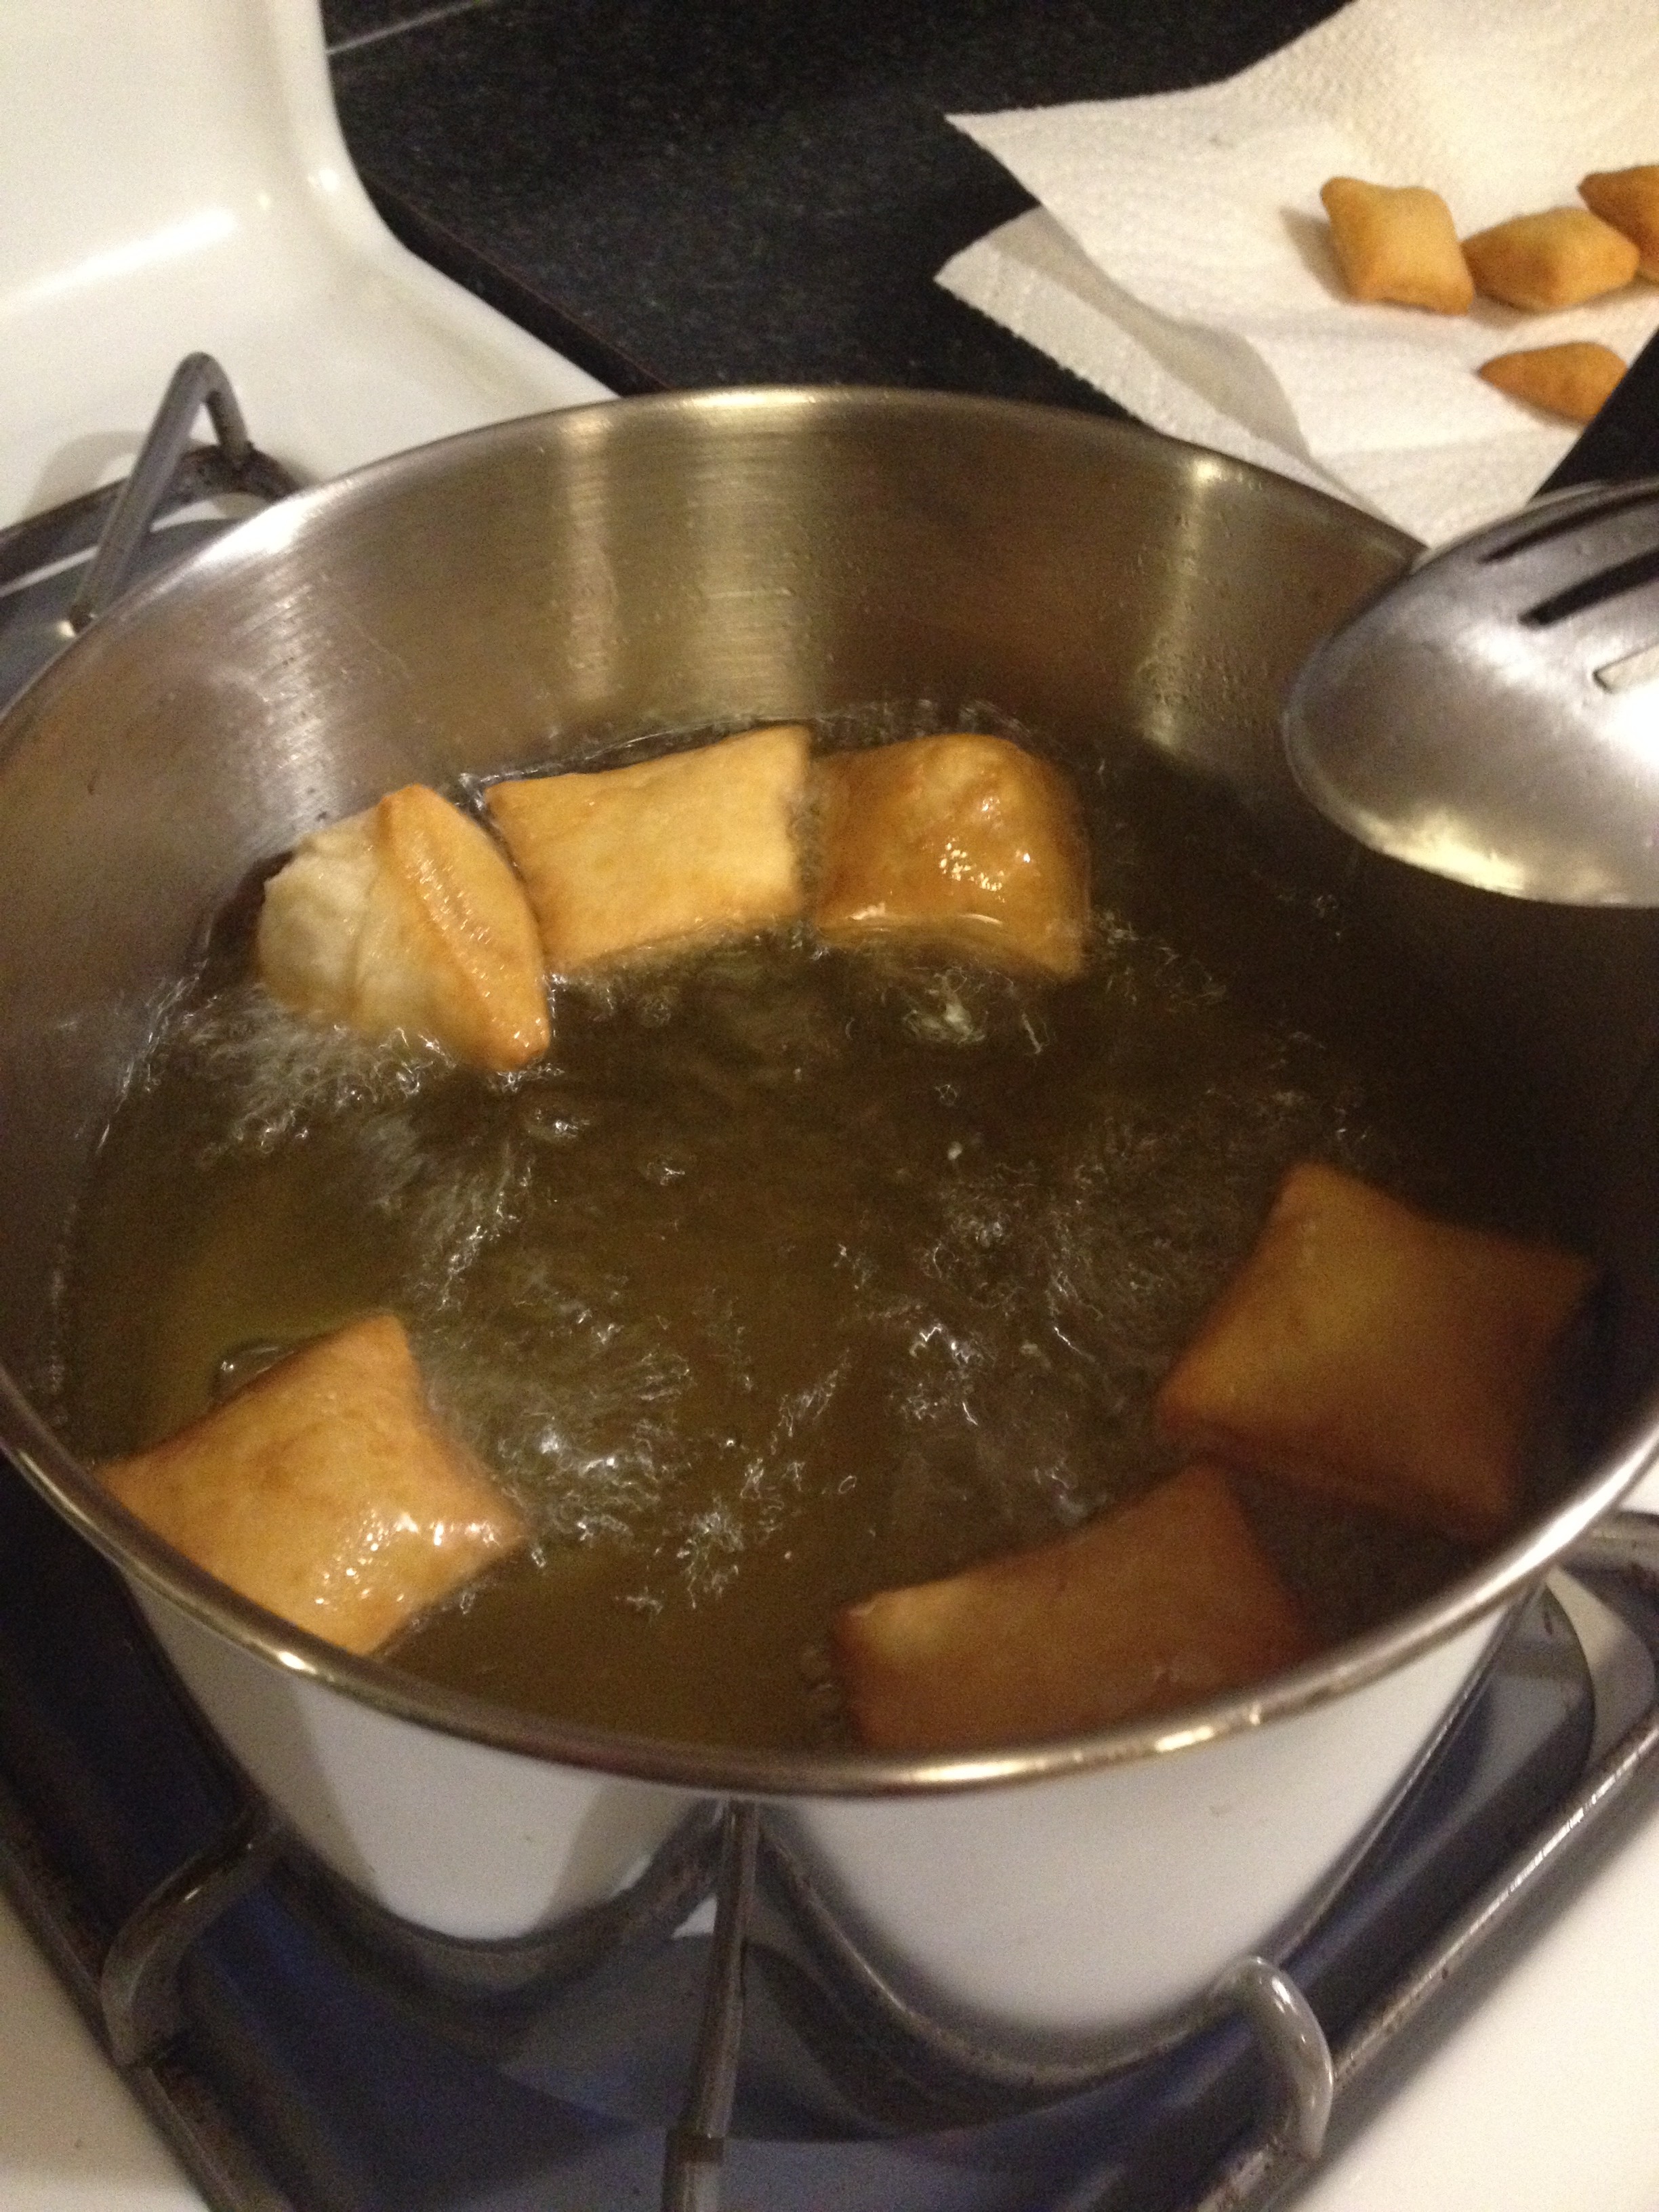
Form the dough into a ball and set it aside for 10 minutes. Meanwhile, in a large saucepan, heat 3 inches of oil over medium heat (I heated mine to about 300° before I started frying). Roll the dough out into a 1/4″ thick rectangle (or rectangle-ish thing) and cut it into 2″ squares.
Drop one square into the oil to test the temperature. The square should float to the top and the oil should start bubbling right away. When the oil is the right temperature, drop 5-6 squares into the oil and fry, gently turning them with a slotted spoon to brown evenly until they’re puffed and golden, about 2-4 minutes. Continue frying in small batches.
Drain the sopapillas on a paper towel to remove any excess oil.
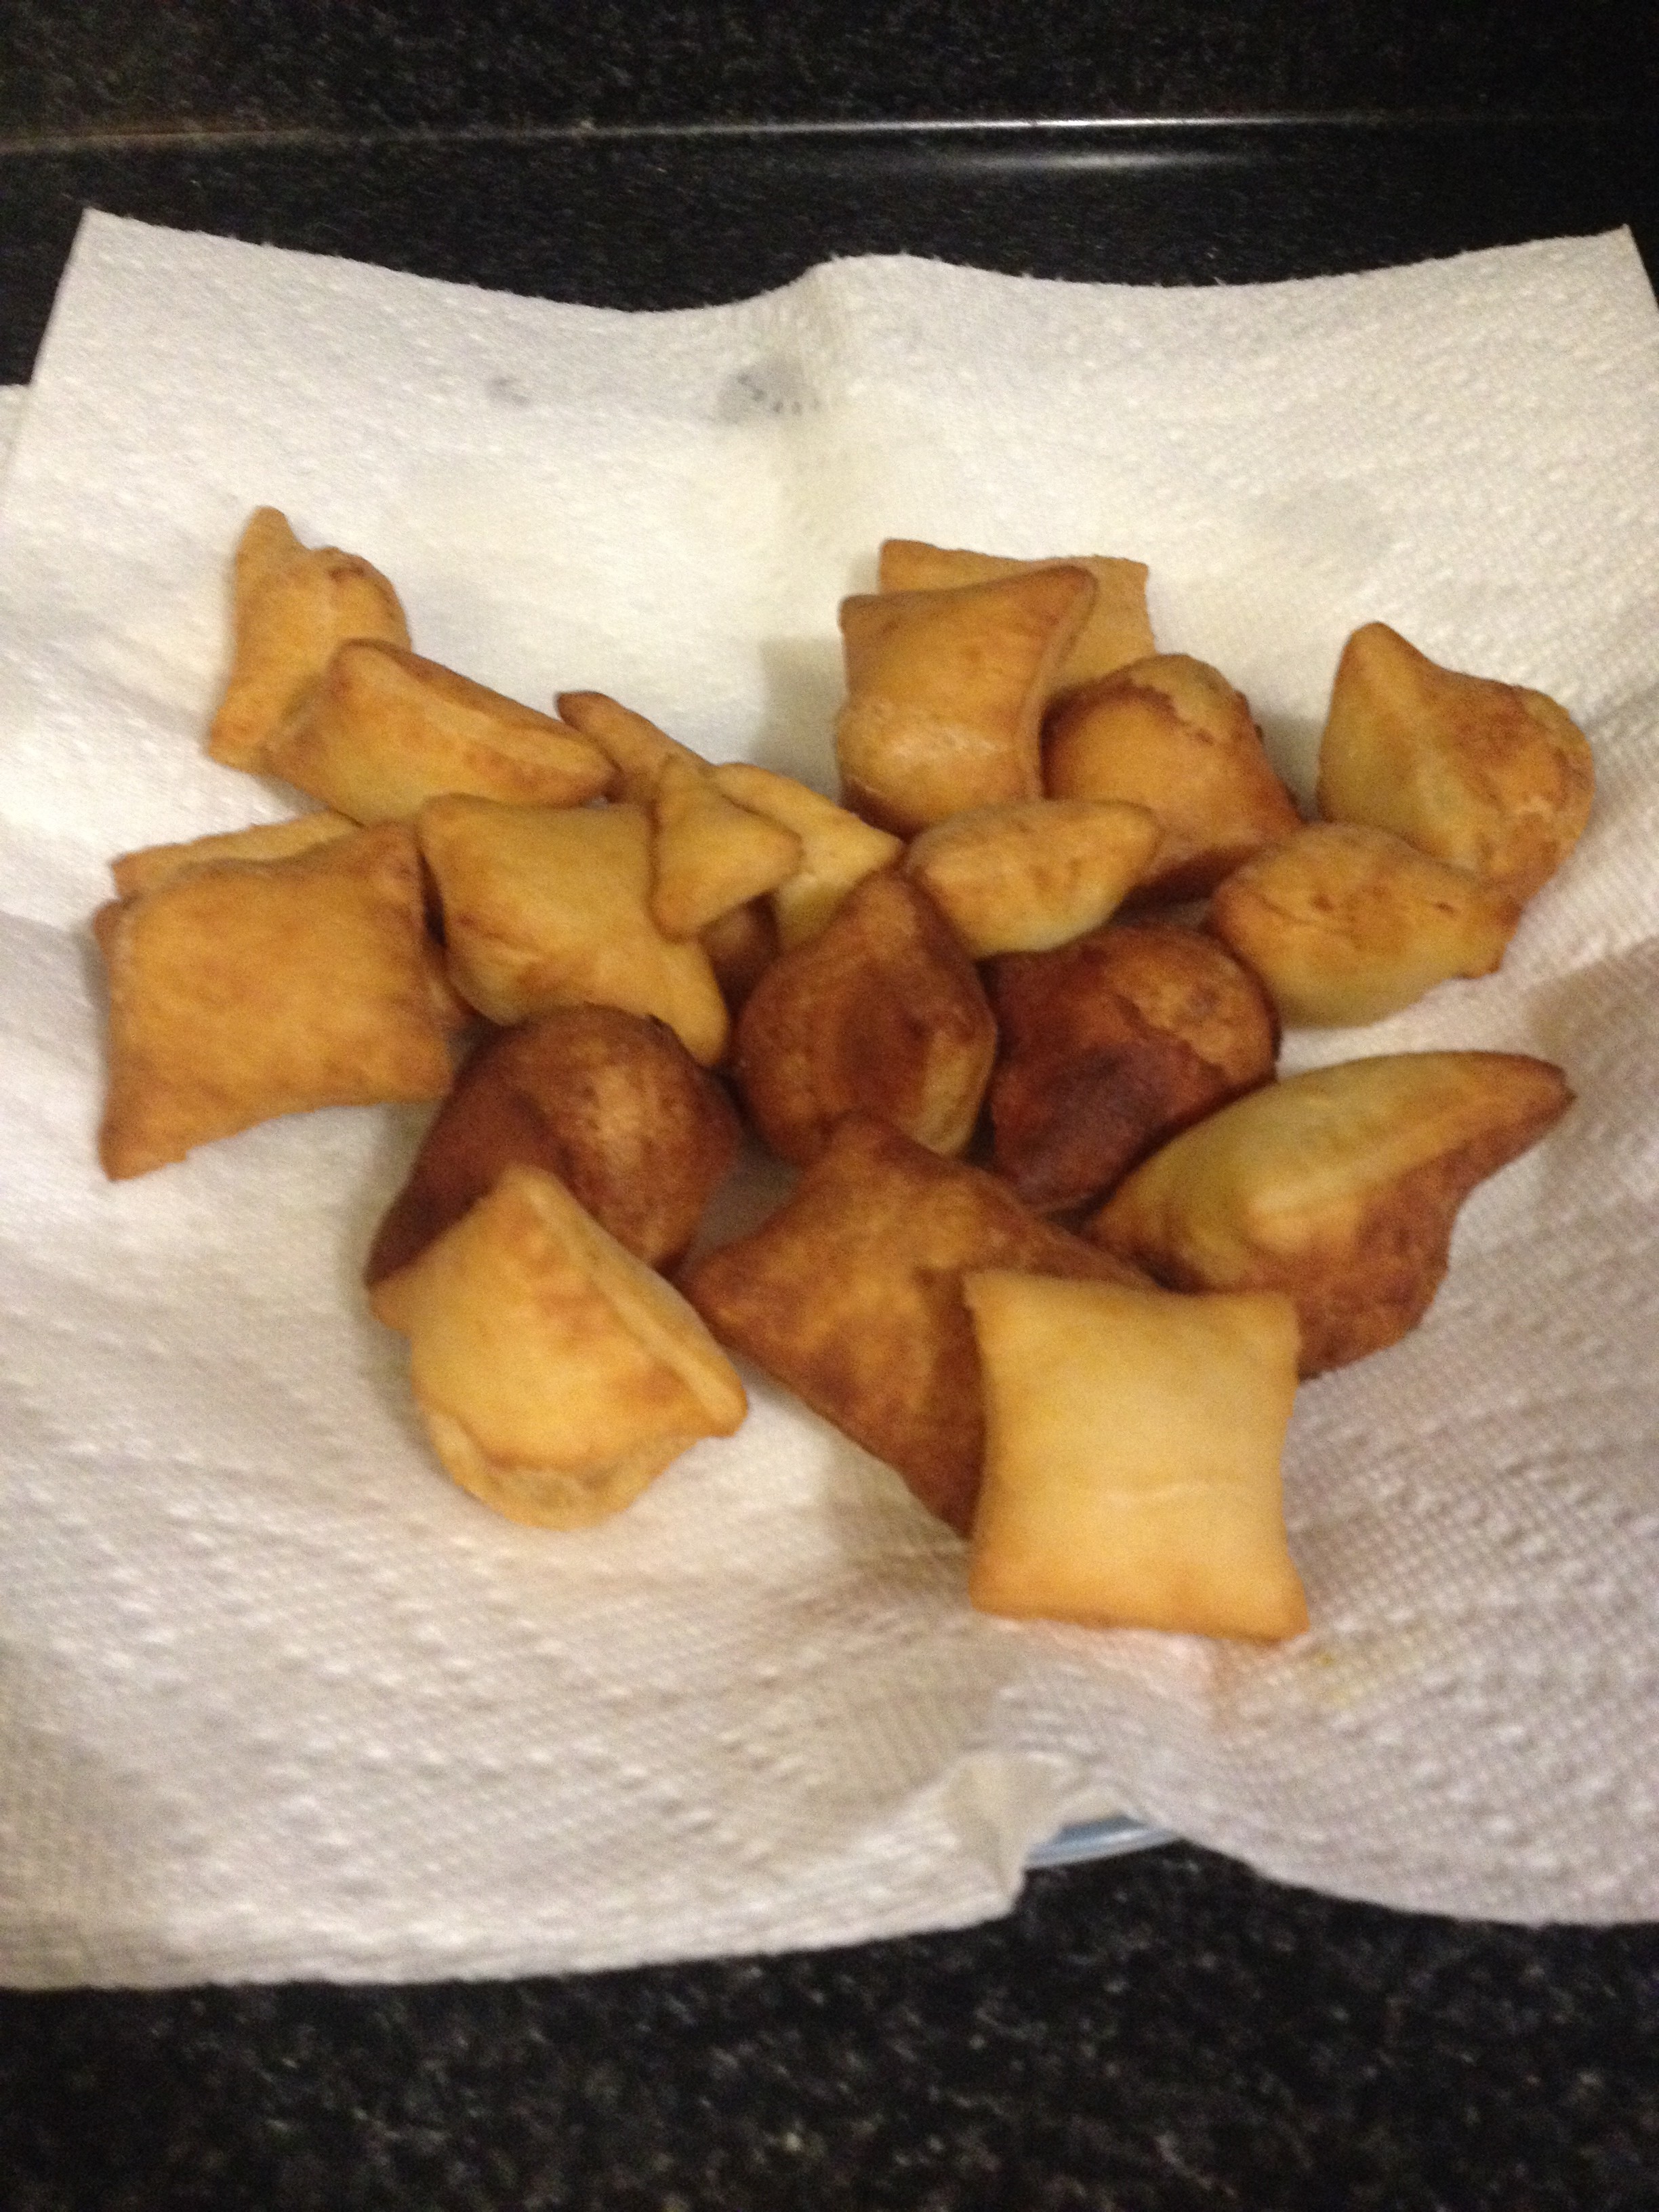
While they’re still hot, dredge them in the cinnamon and sugar mixture, or top with honey, cinnamon and sugar, and powdered sugar to taste.
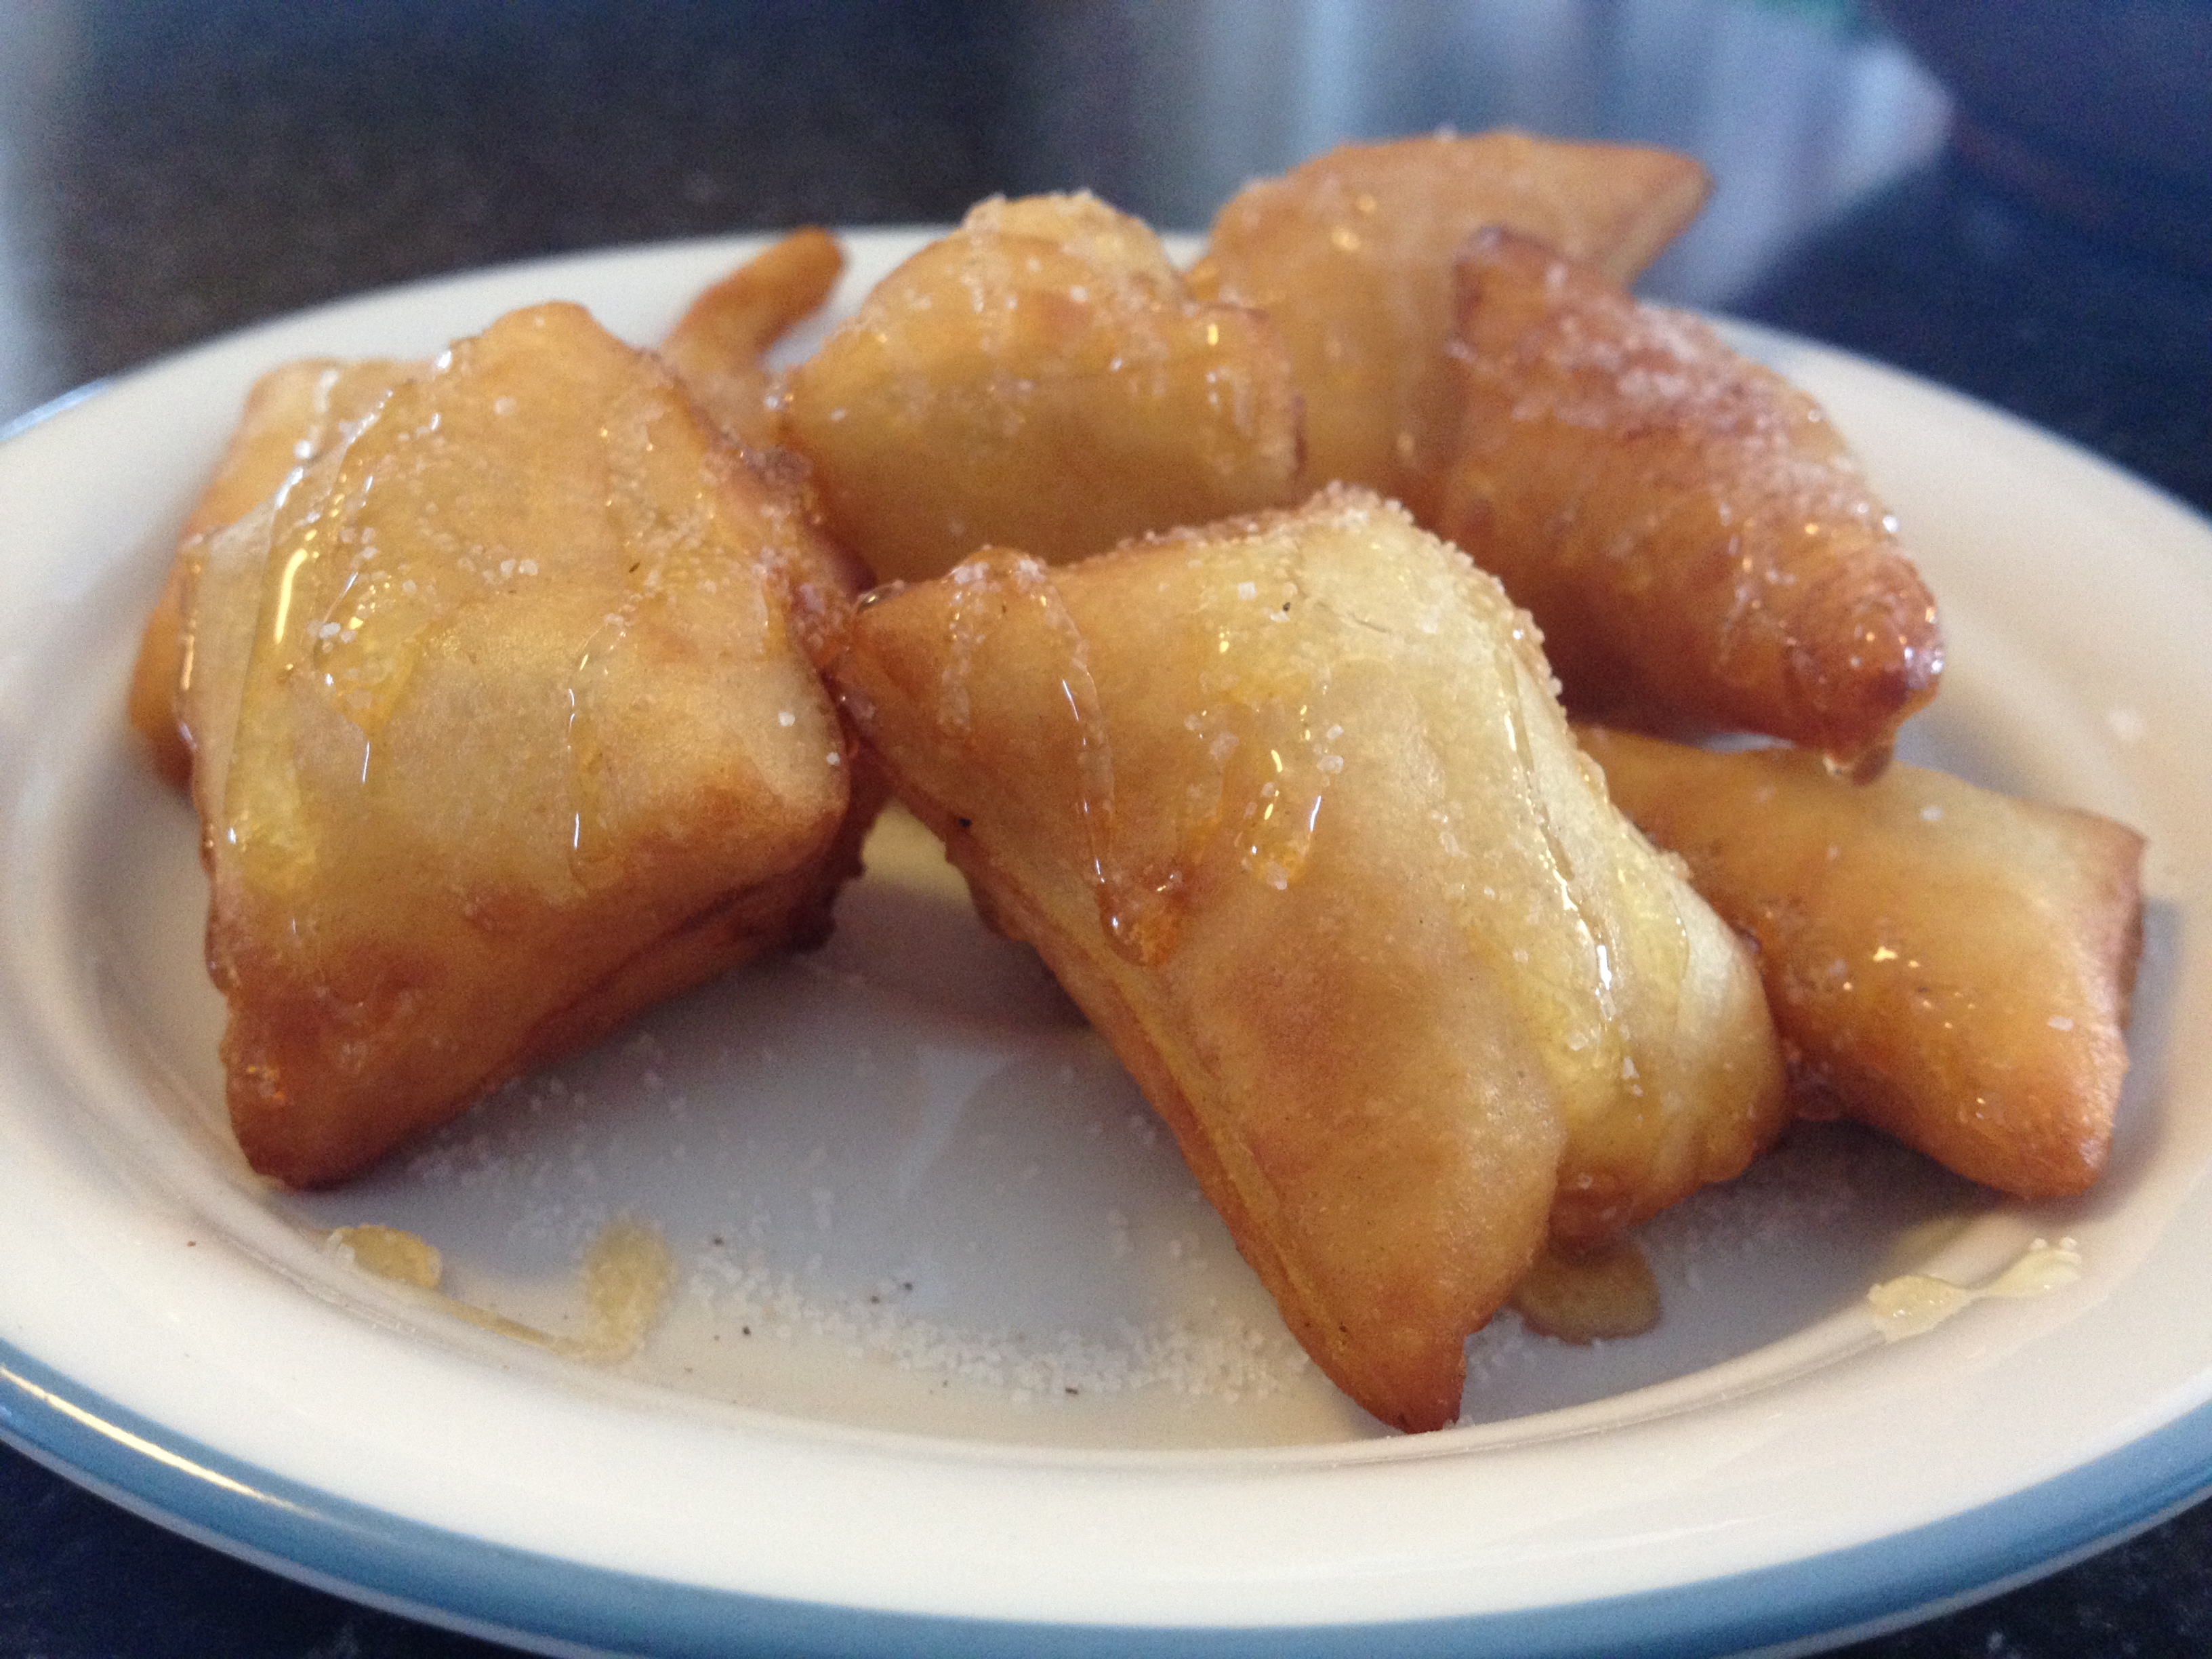
Enjoy, everyone!
Apple Everything
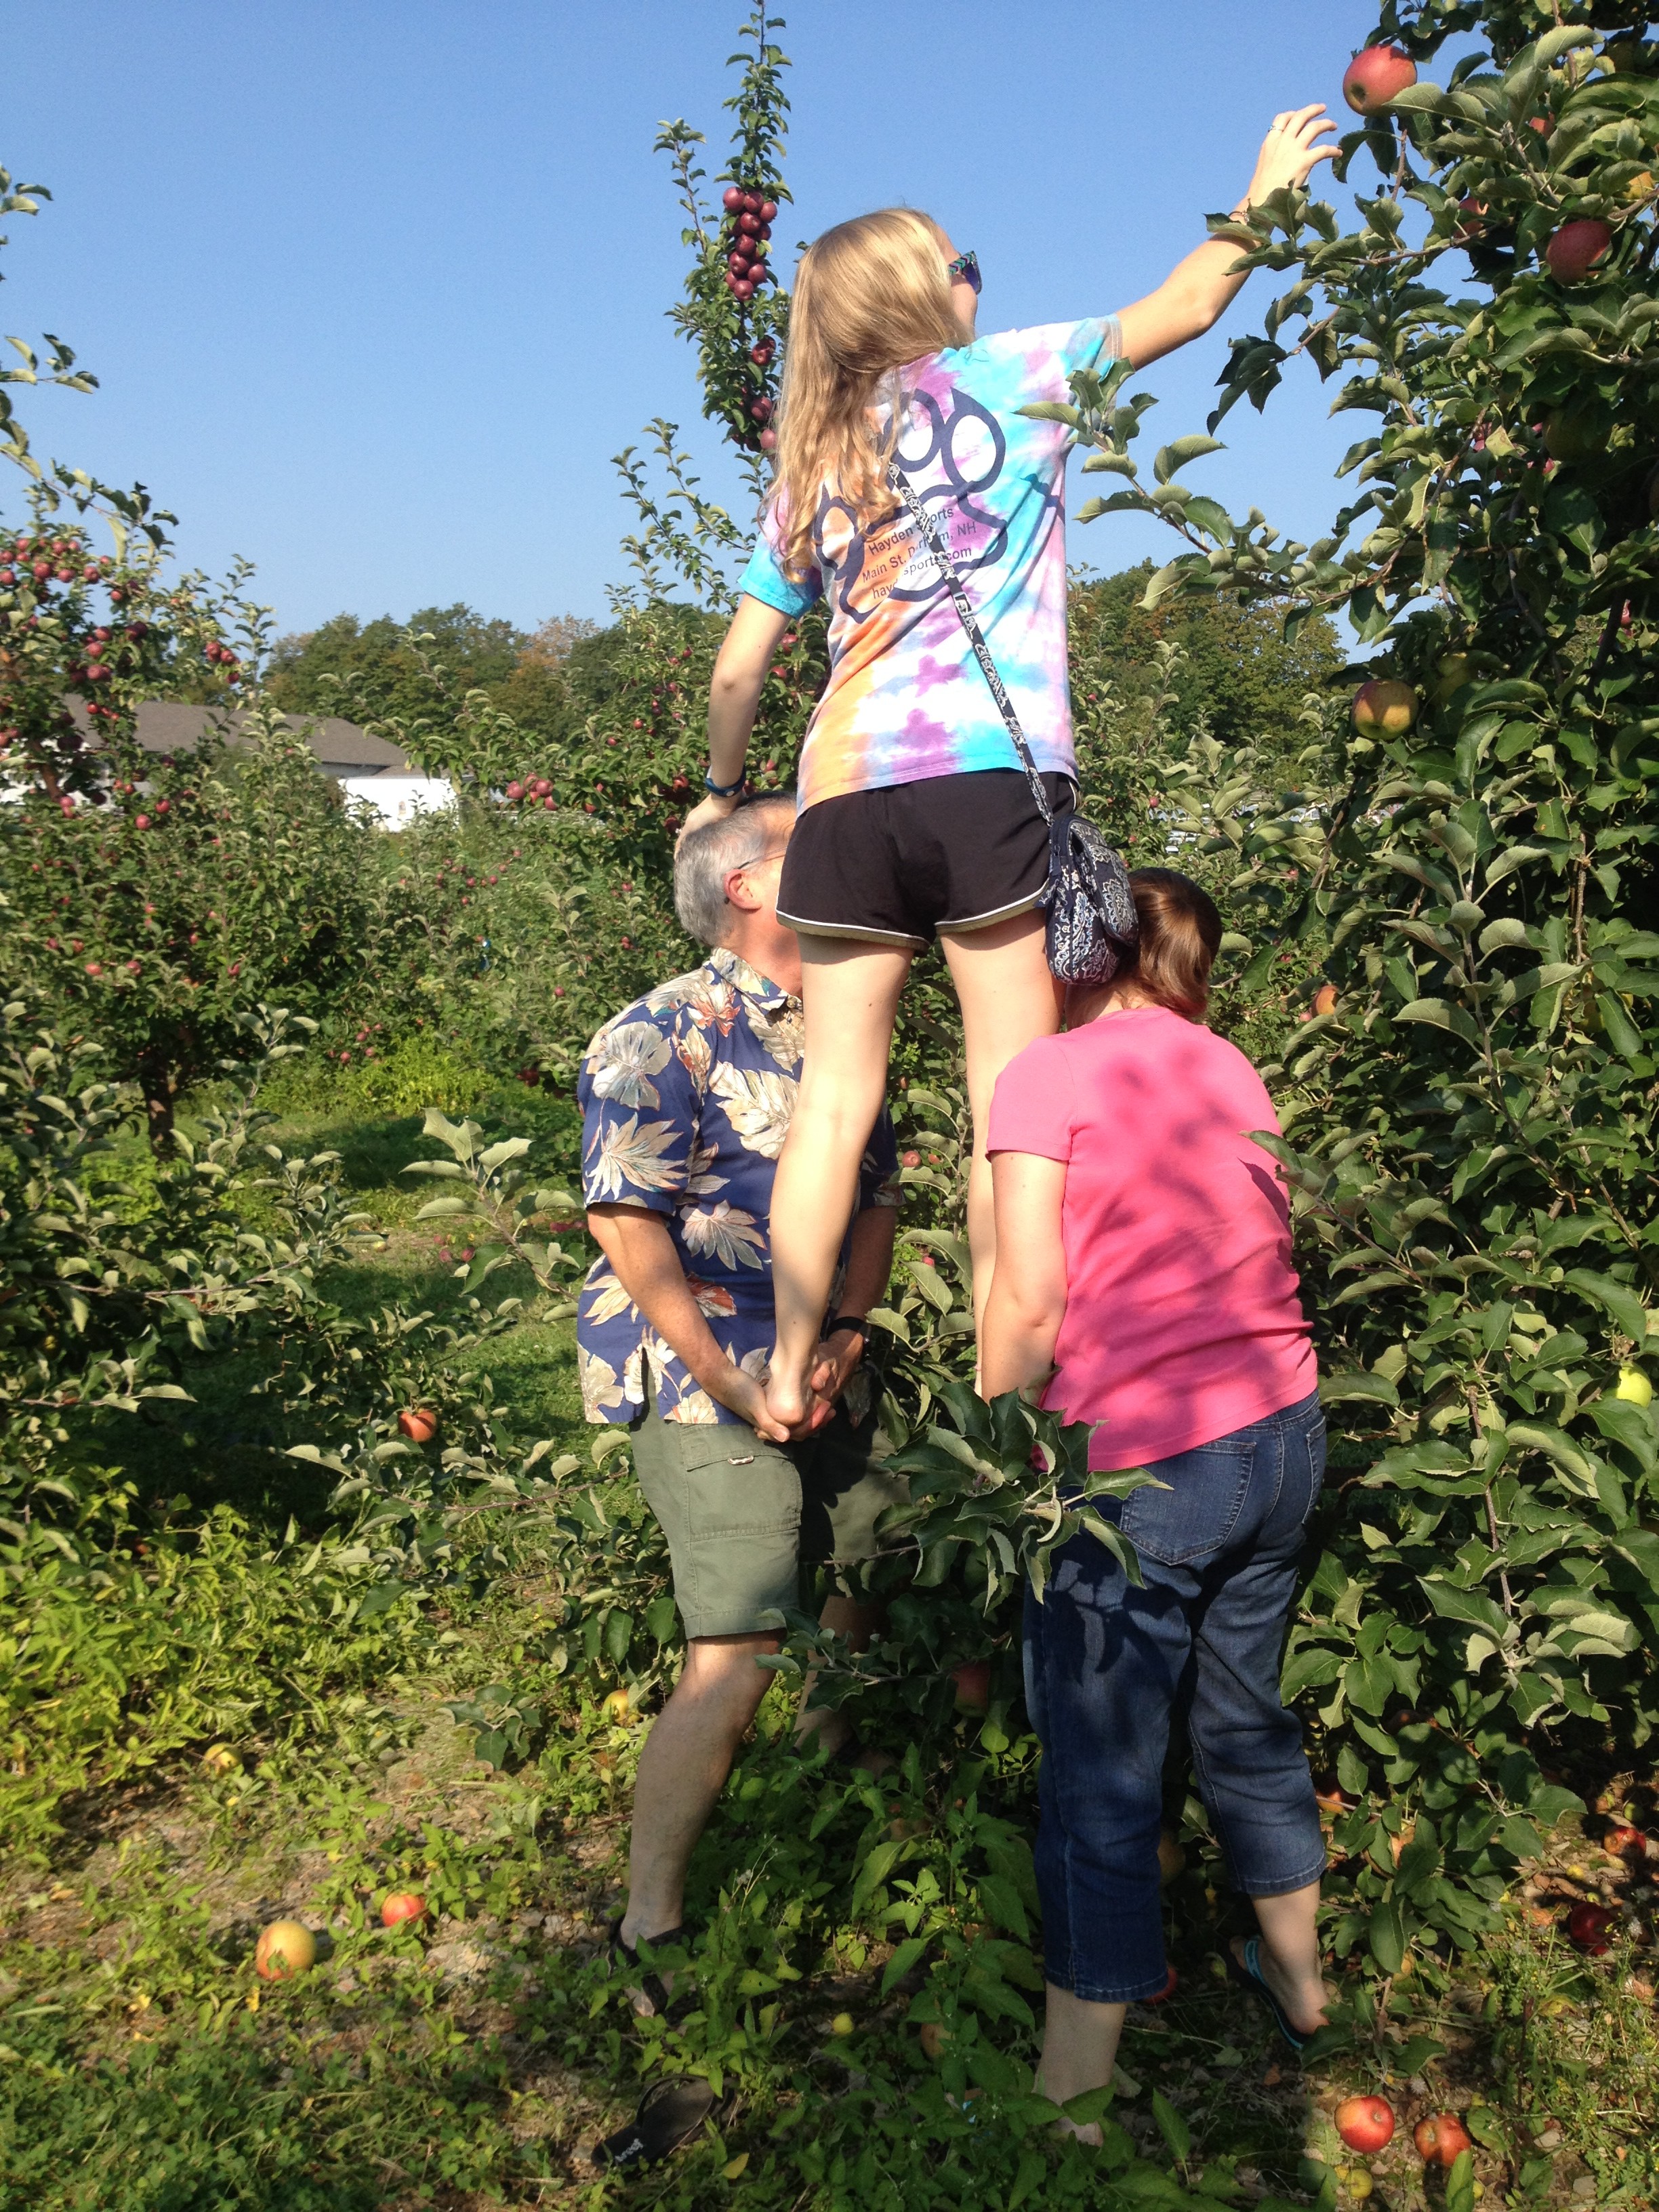
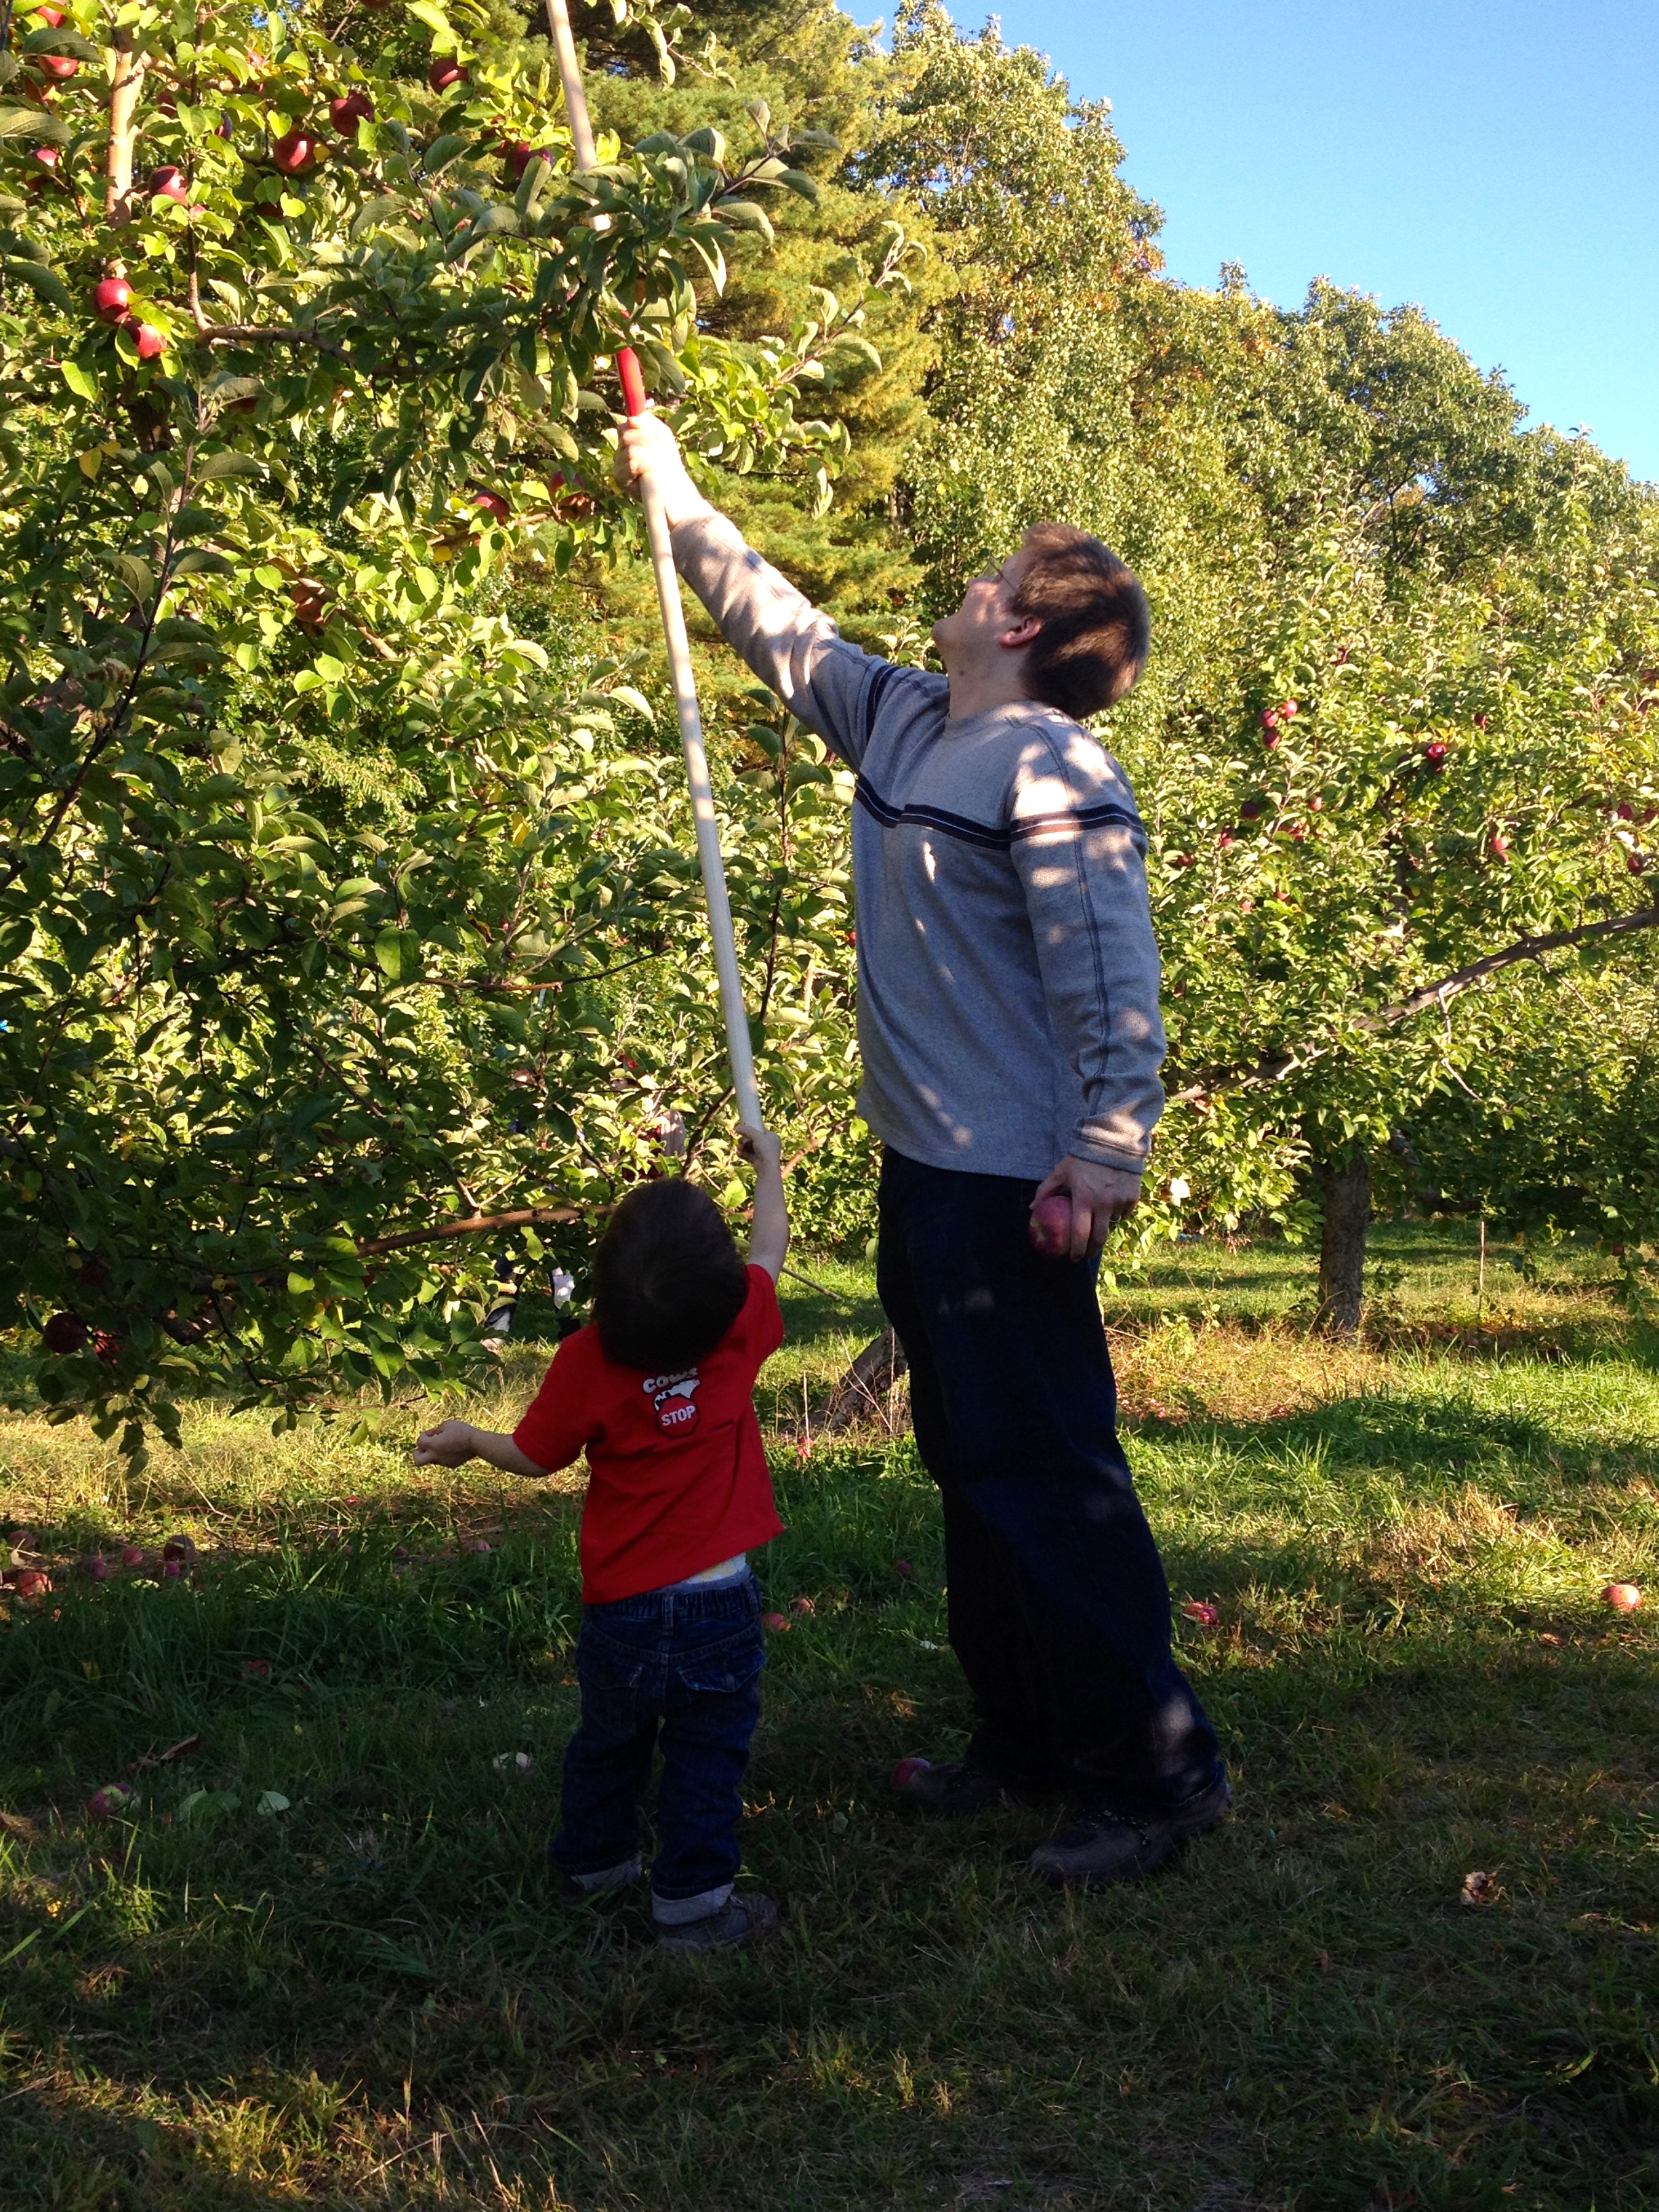
Hi all! Time for fall blogging part two. We covered pumpkin goodies last time, so today we’re talking about everything to do with apples. My sister was in town this weekend to run an inflatable 5k race with me (it was awesome, by the way!), and my nephew wanted to go apple picking with her, so it was a perfect excuse for me to share some new apple recipes.


We visited our local farm stand and walked through sunflower fields, some very sincere pumpkin patches (if you don’t get the reference, you should go watch “It’s the Great Pumpkin, Charlie Brown”), and then headed for the apple trees. The farm somehow managed to trim the trees to grow straight up instead of out this year to discourage tree climbing… I guess they’re on to me. My family had to improvise to get the higher apples since we’re all on the shorter side, but we made it work!
Once we finished our apple picking, we got fresh apple cider at the farm stand and headed home to make some delicious food. First, we decided to make apple crisp, using my great-grandma’s recipe with a small change.
Apple Crisp Ingredients:
- 6-8 apples, cored and sliced
- 1/2 cup butter, chilled
- 1/2 cup granulated sugar
- 1/2 cup brown sugar
- 3/4 cup flour
- 1 tsp ground cinnamon
- 1/2 cup oats (not in Grammy’s original recipe, but I think the oats make it so much better)
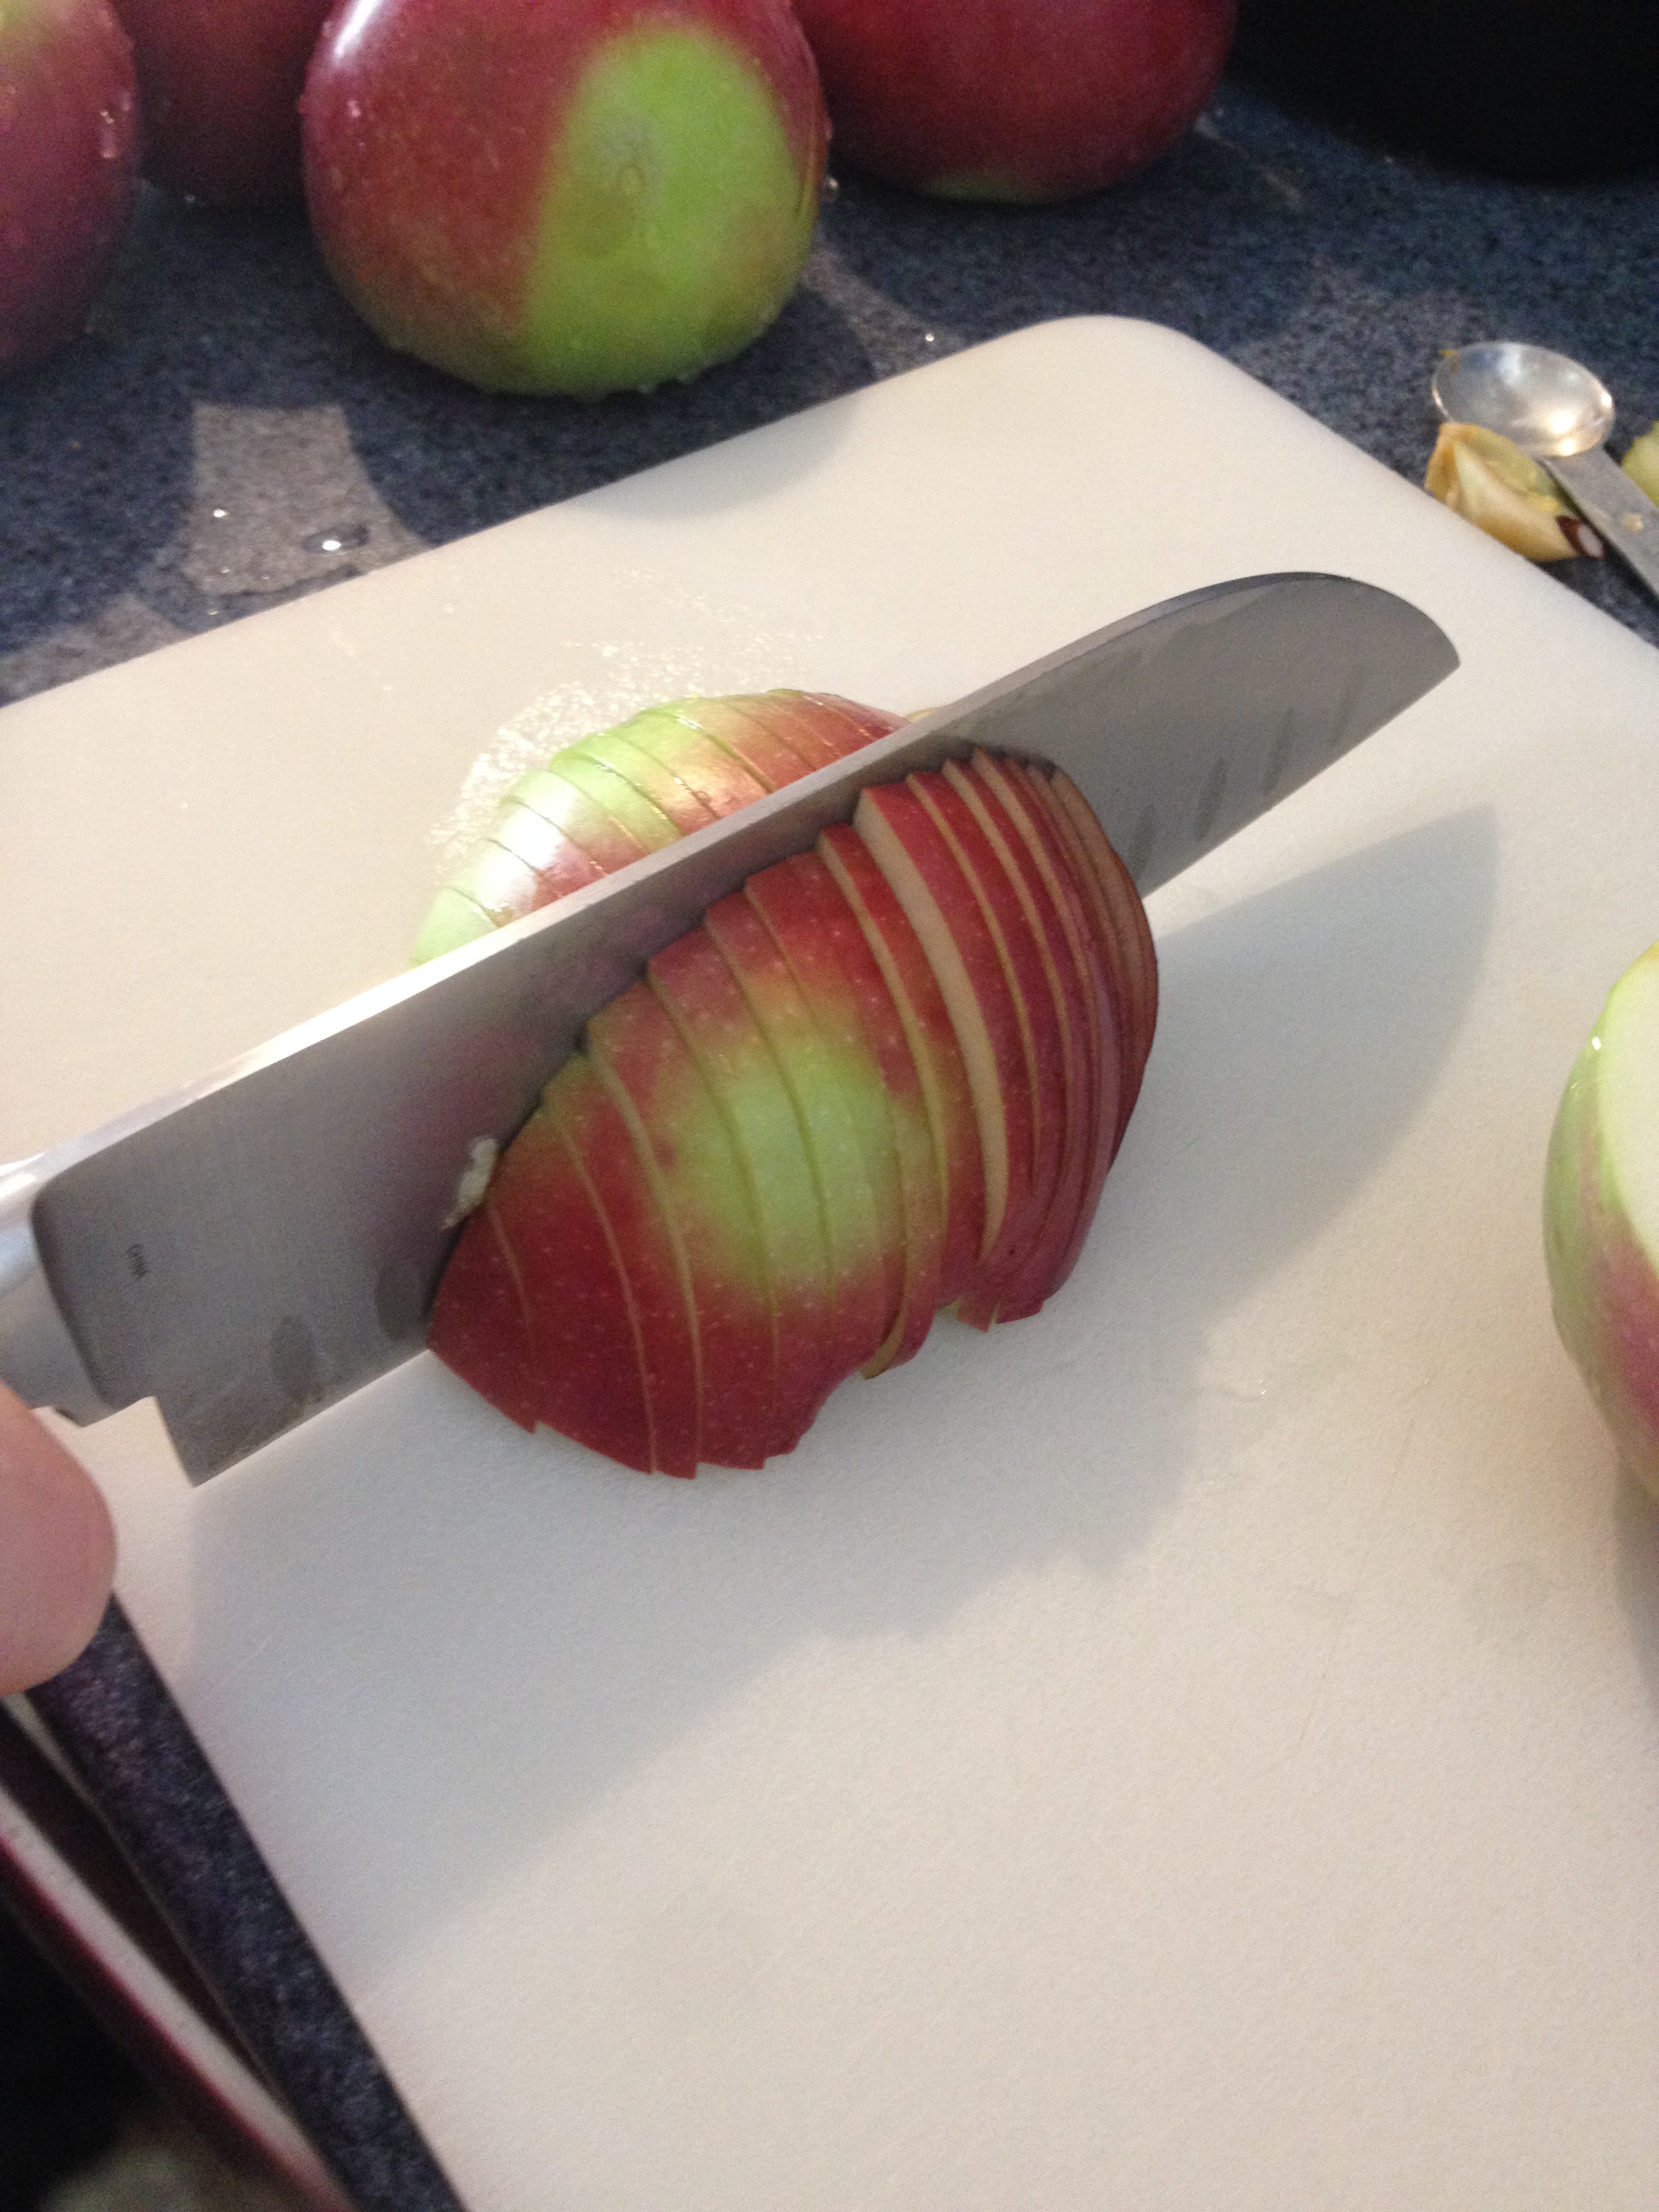
Preheat the oven to 375°F. Slice the apples fairly thin and small, so that it’s easy to scoop them out of the dish when serving. You can also dice the apples if you prefer. We left the skins on because I think it gives the apple mixture a great color, but you can peel the apples if you like.
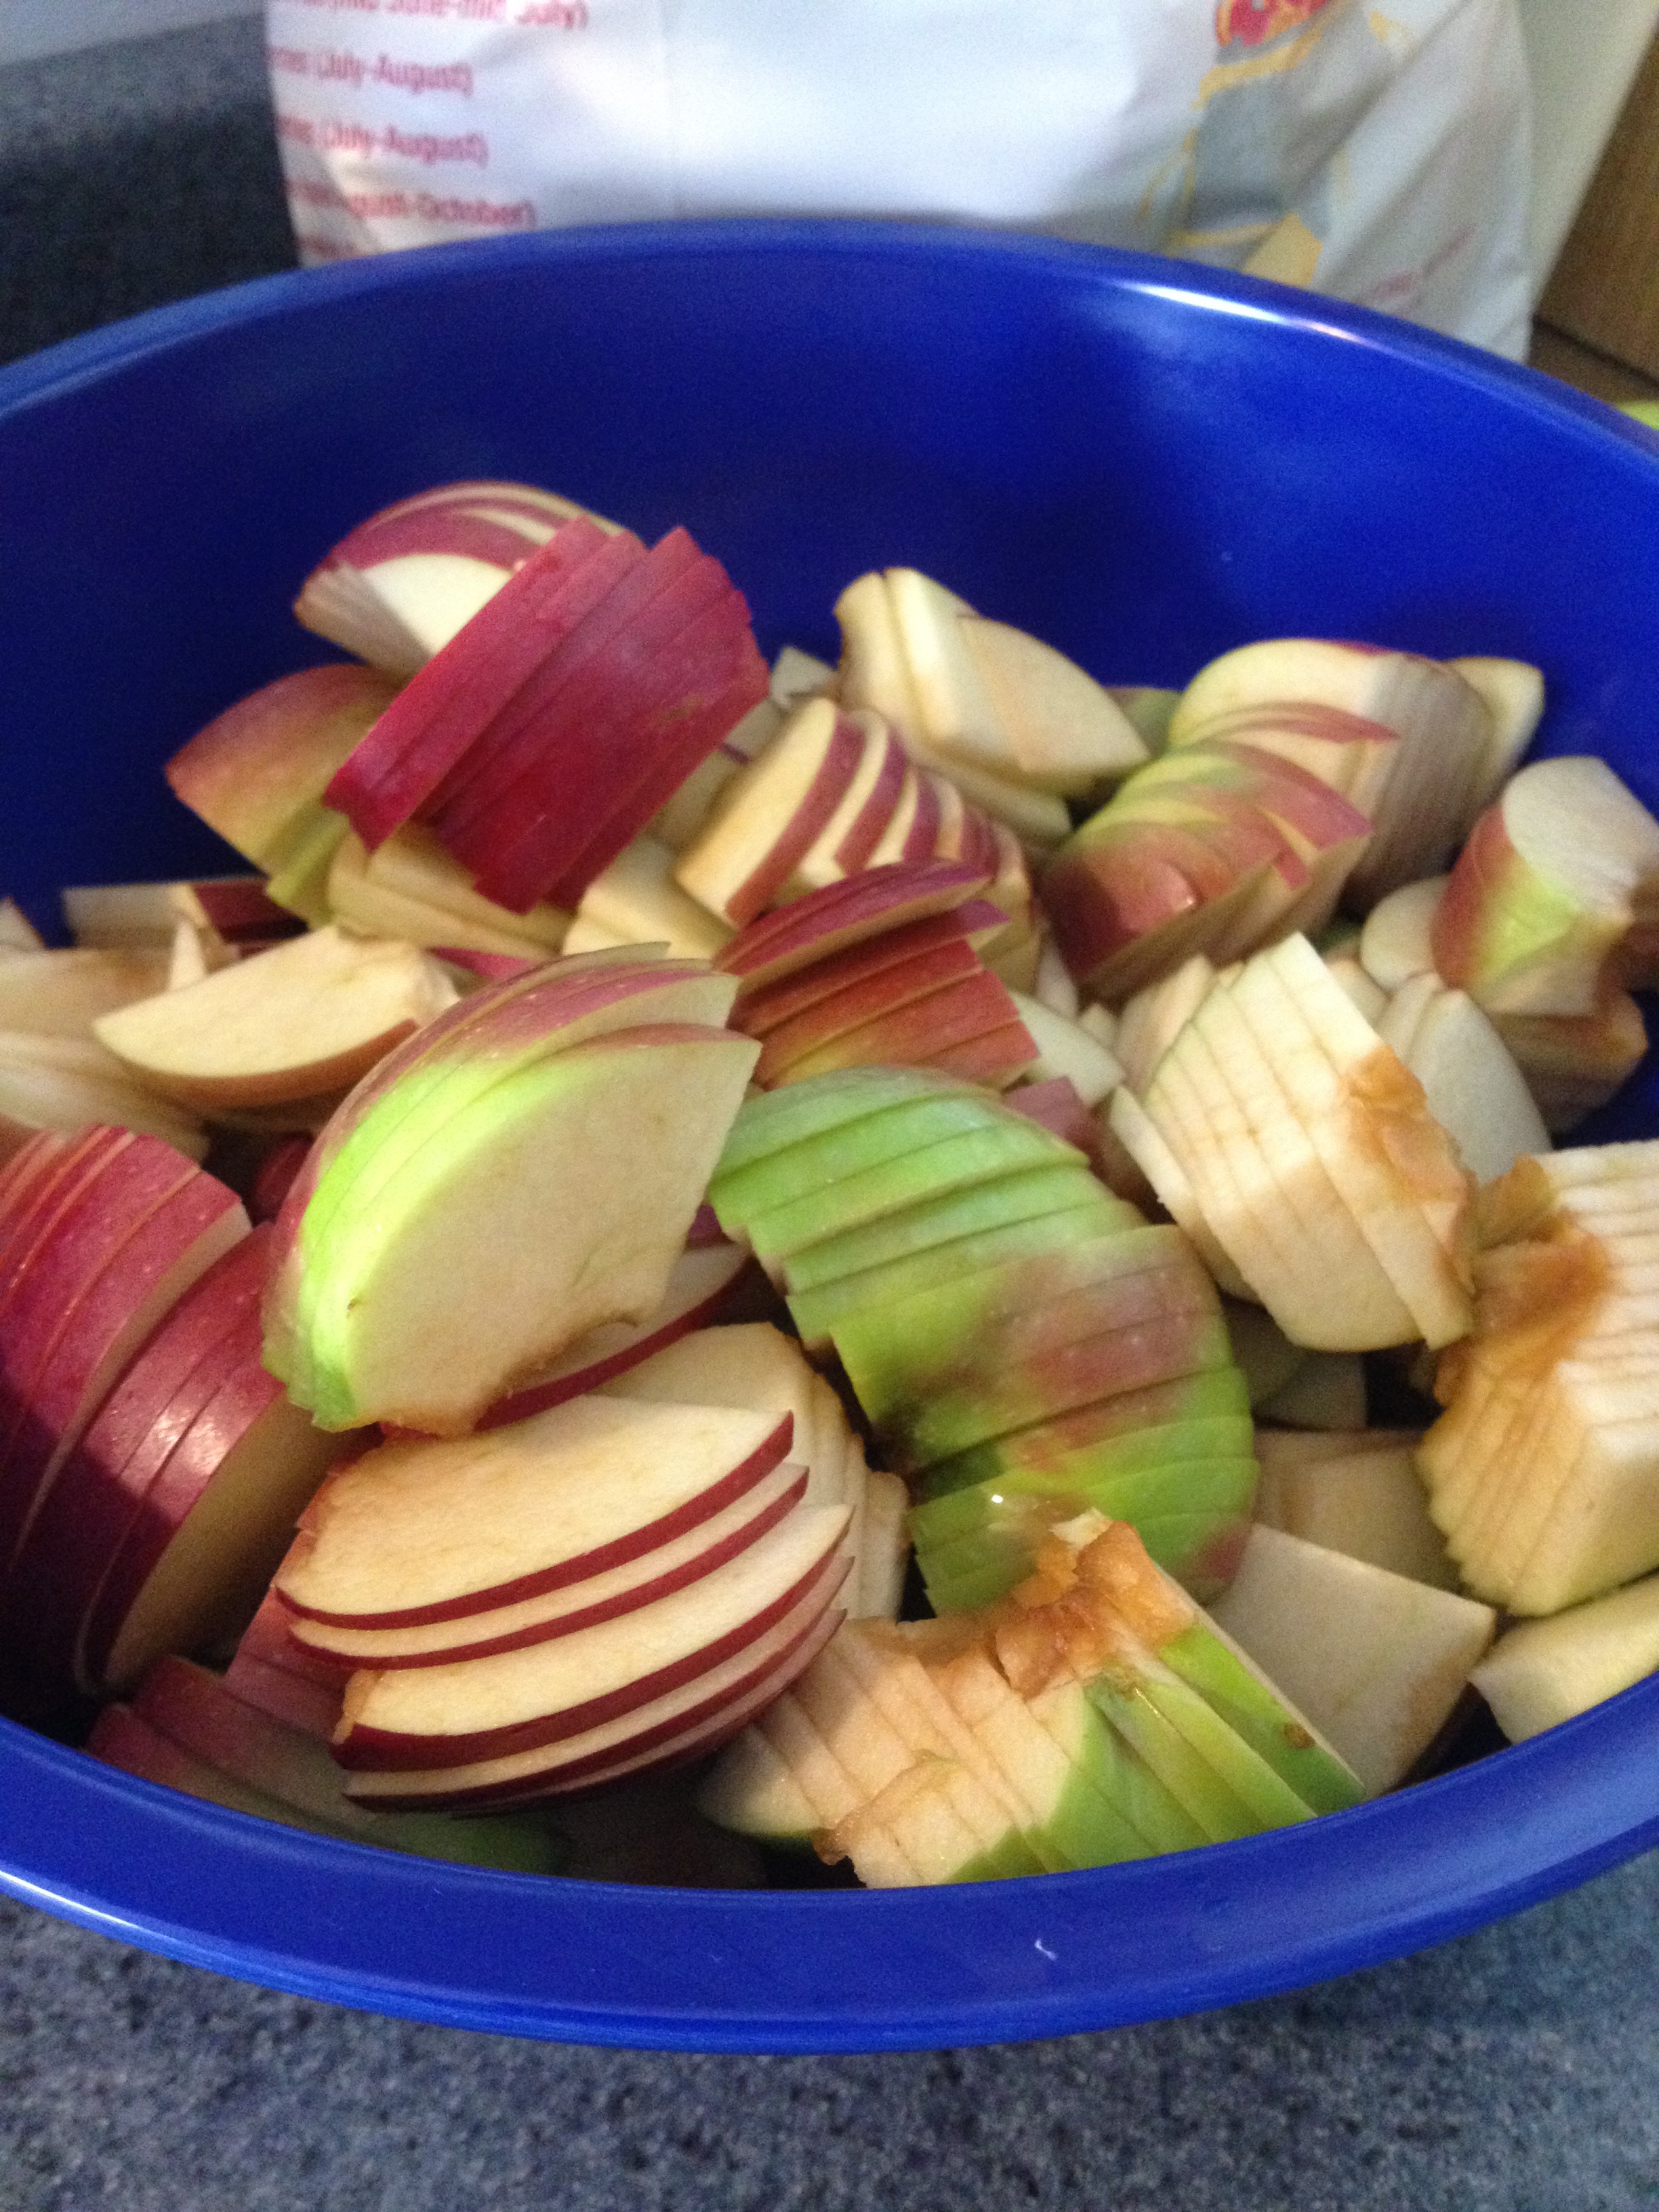
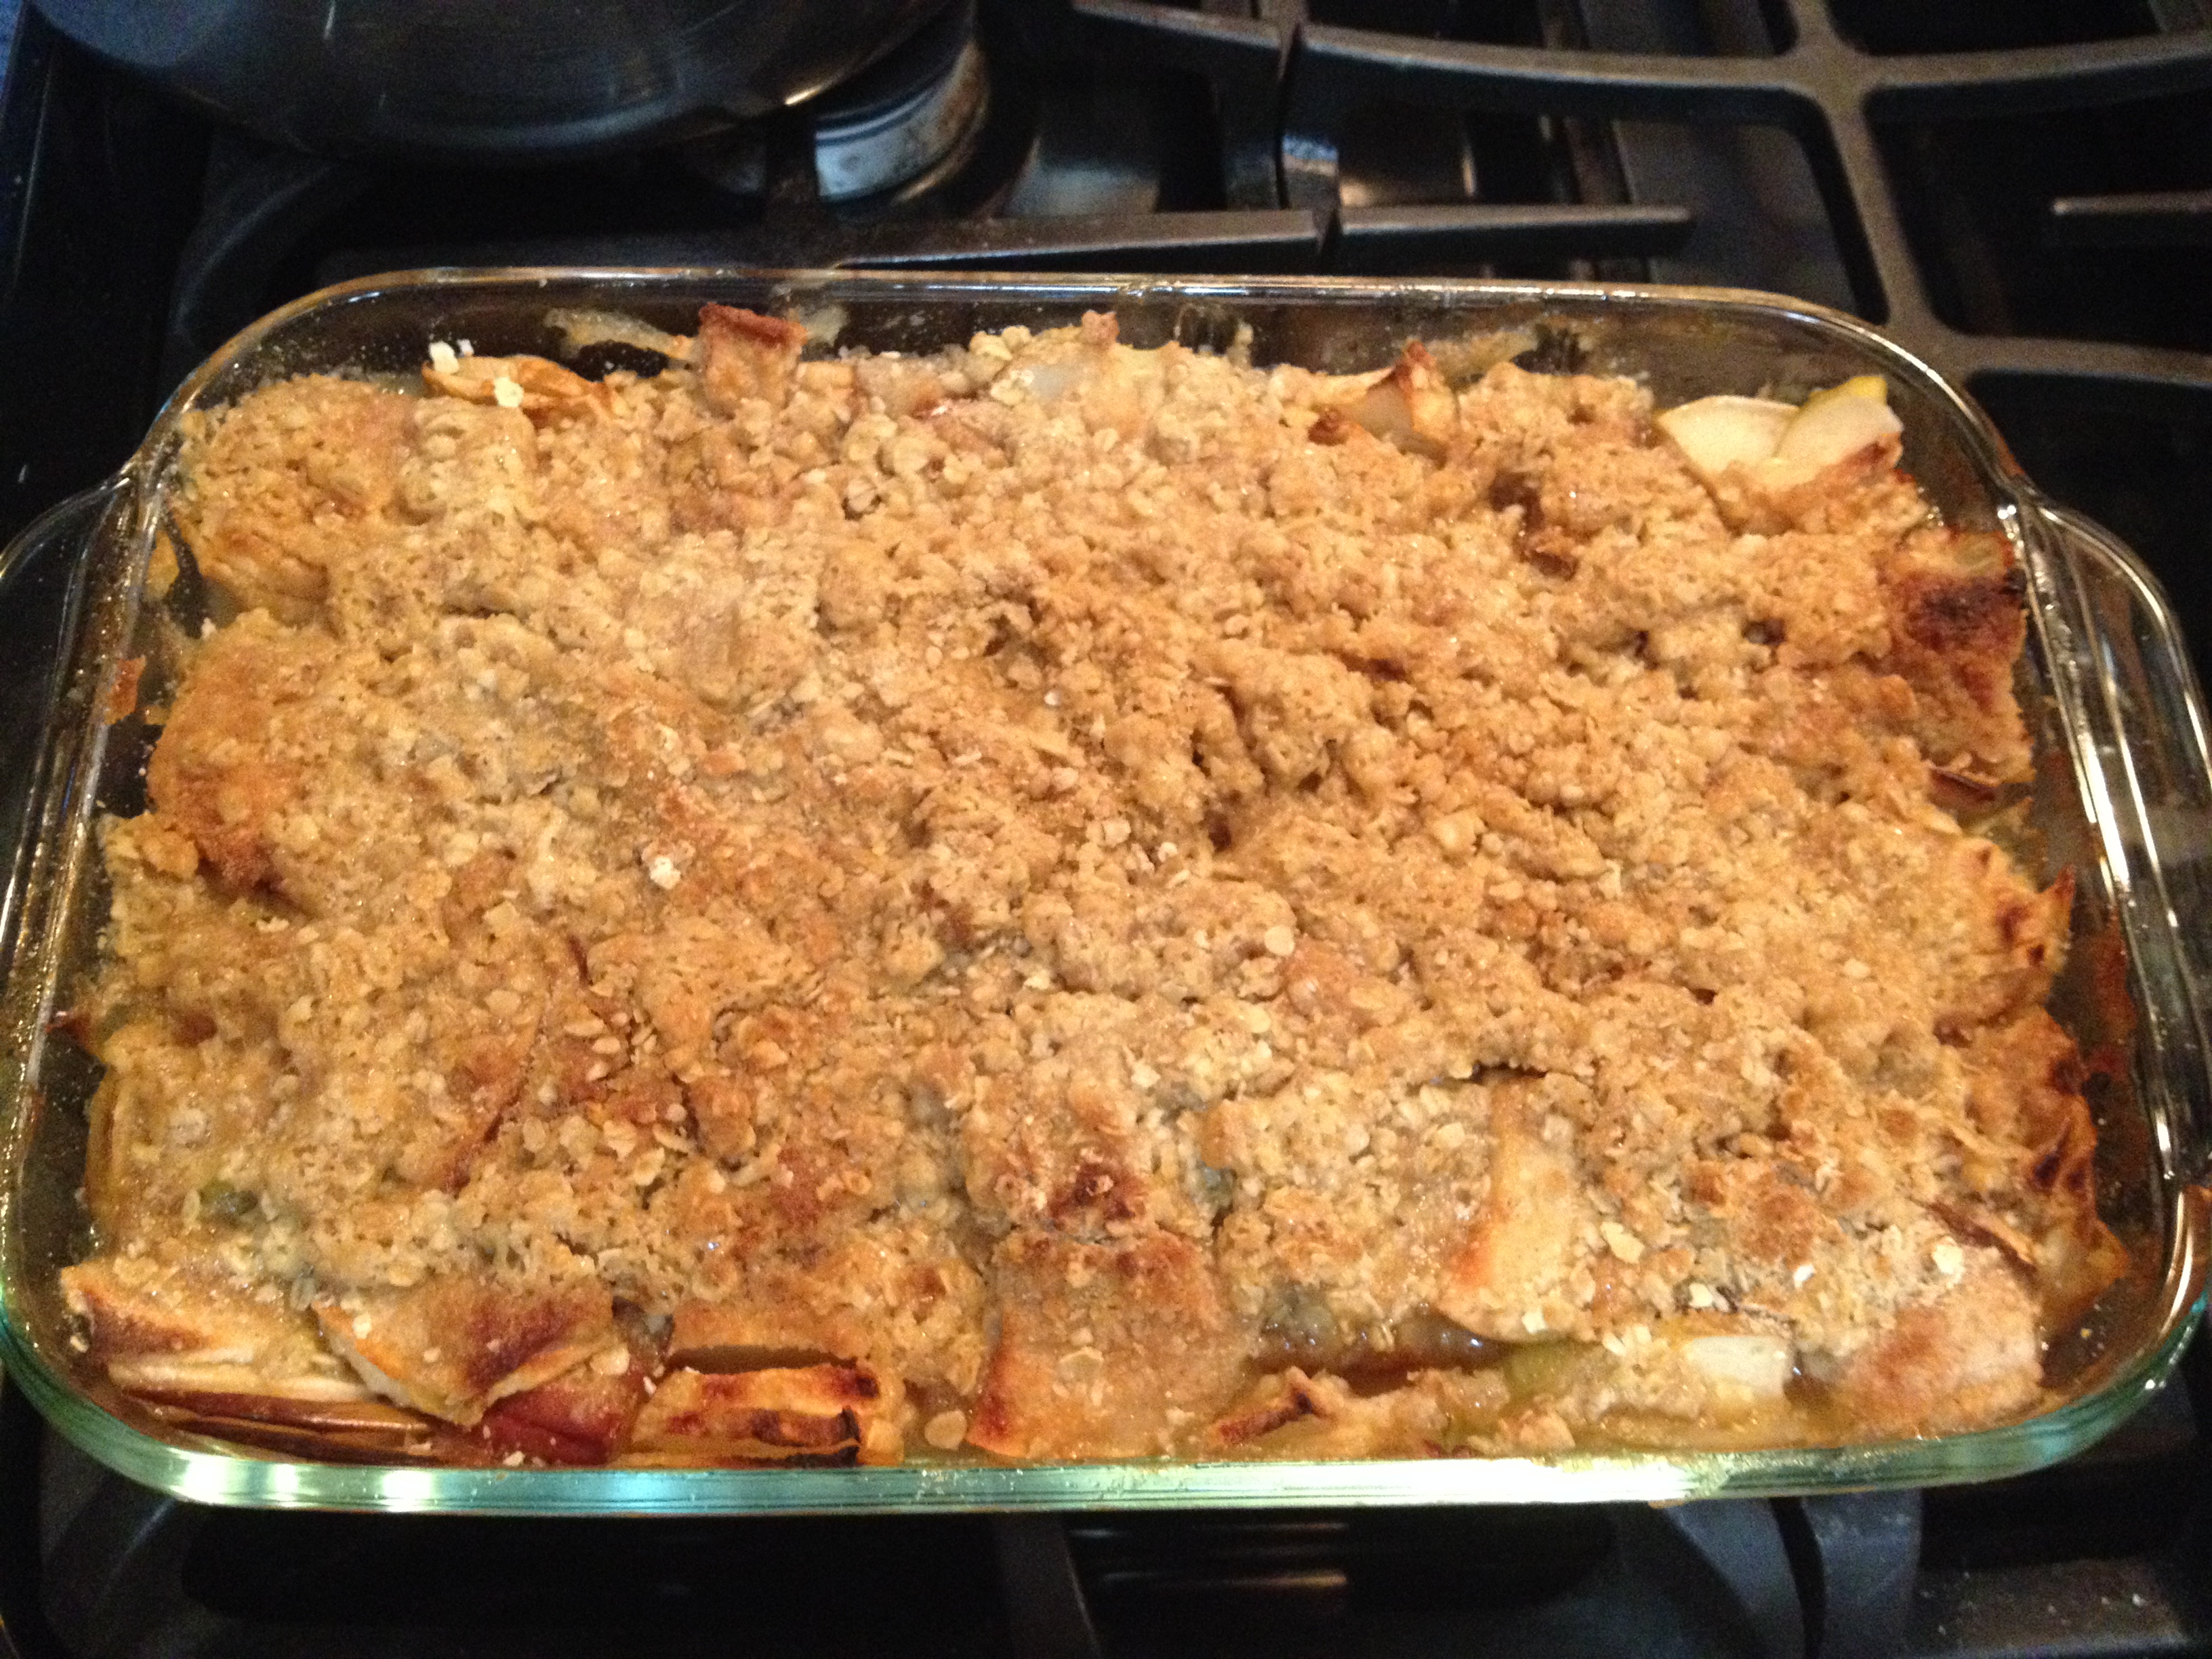
Arrange the apples in a baking dish. Depending on how many people you’re serving and how many apples you use, the size of the dish can vary. I usually use an 8×8″ dish, but this time we used an 8×10″ dish since we were feeding more people.
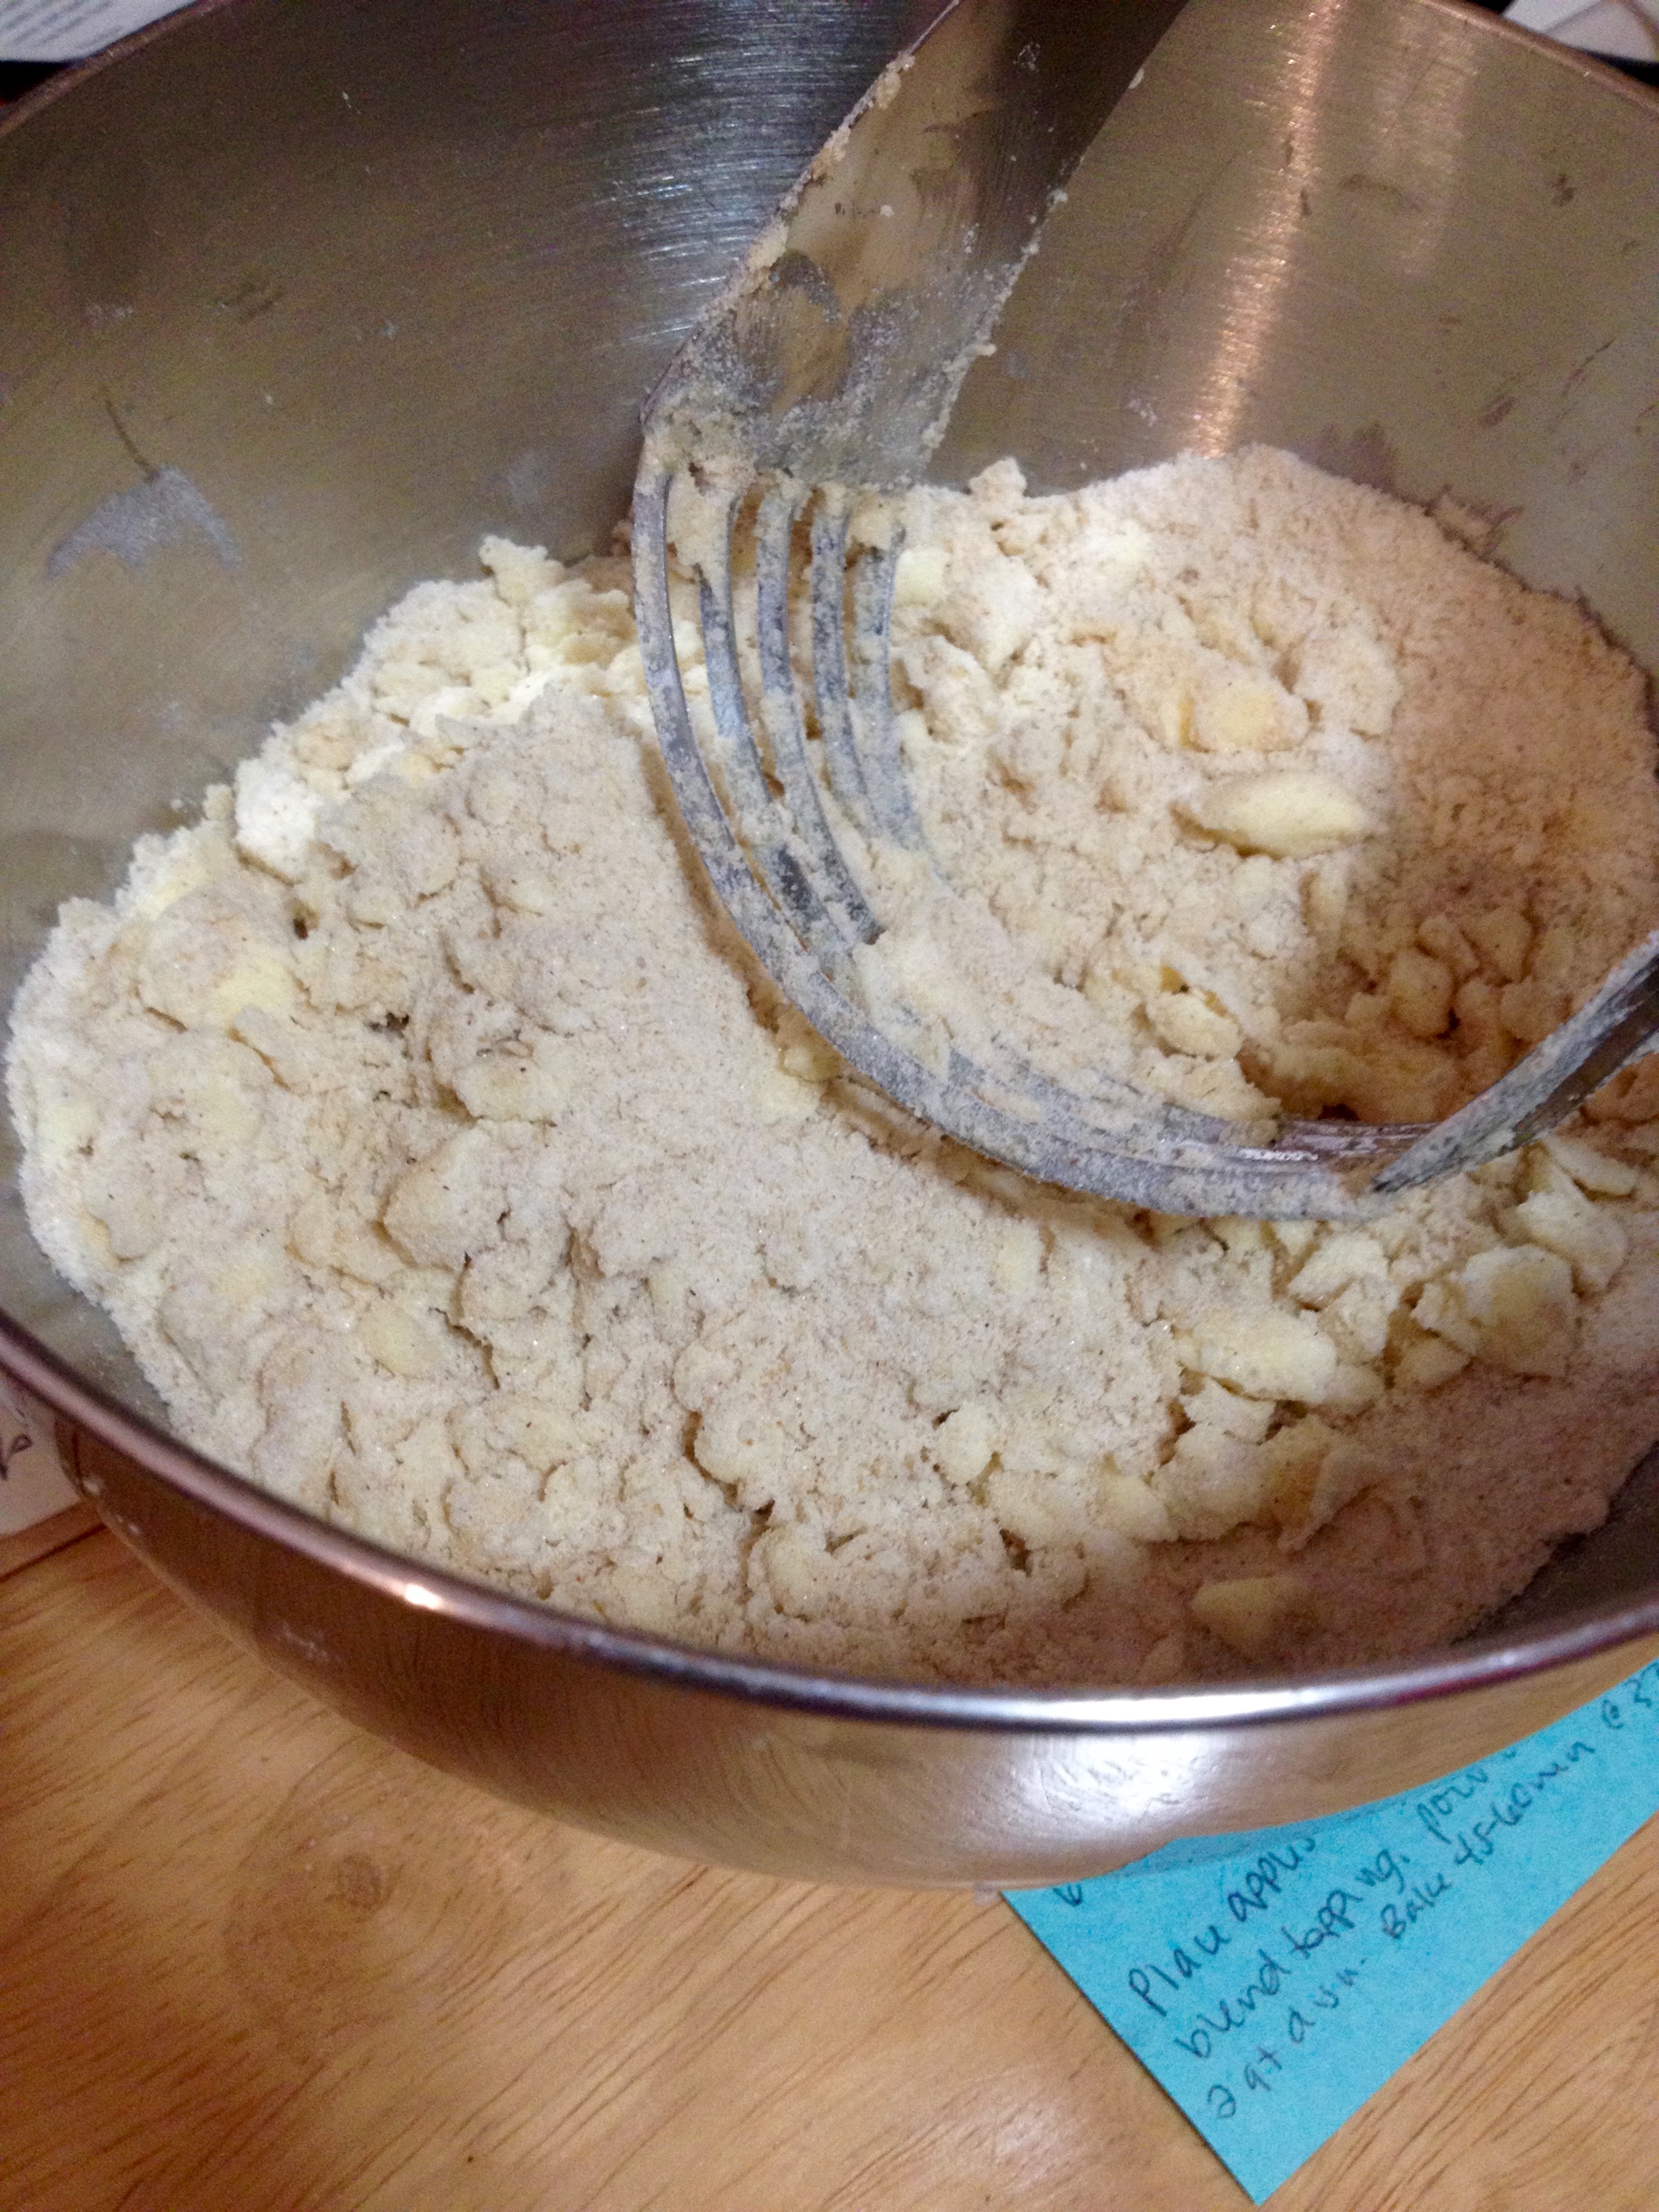
Using a pastry cutter, combine the rest of the ingredients to make the topping mixture. The pastry cutter will help ensure that you get small chunks of butter evenly mixed in with the topping, which will melt in the oven and create a delicious topping.
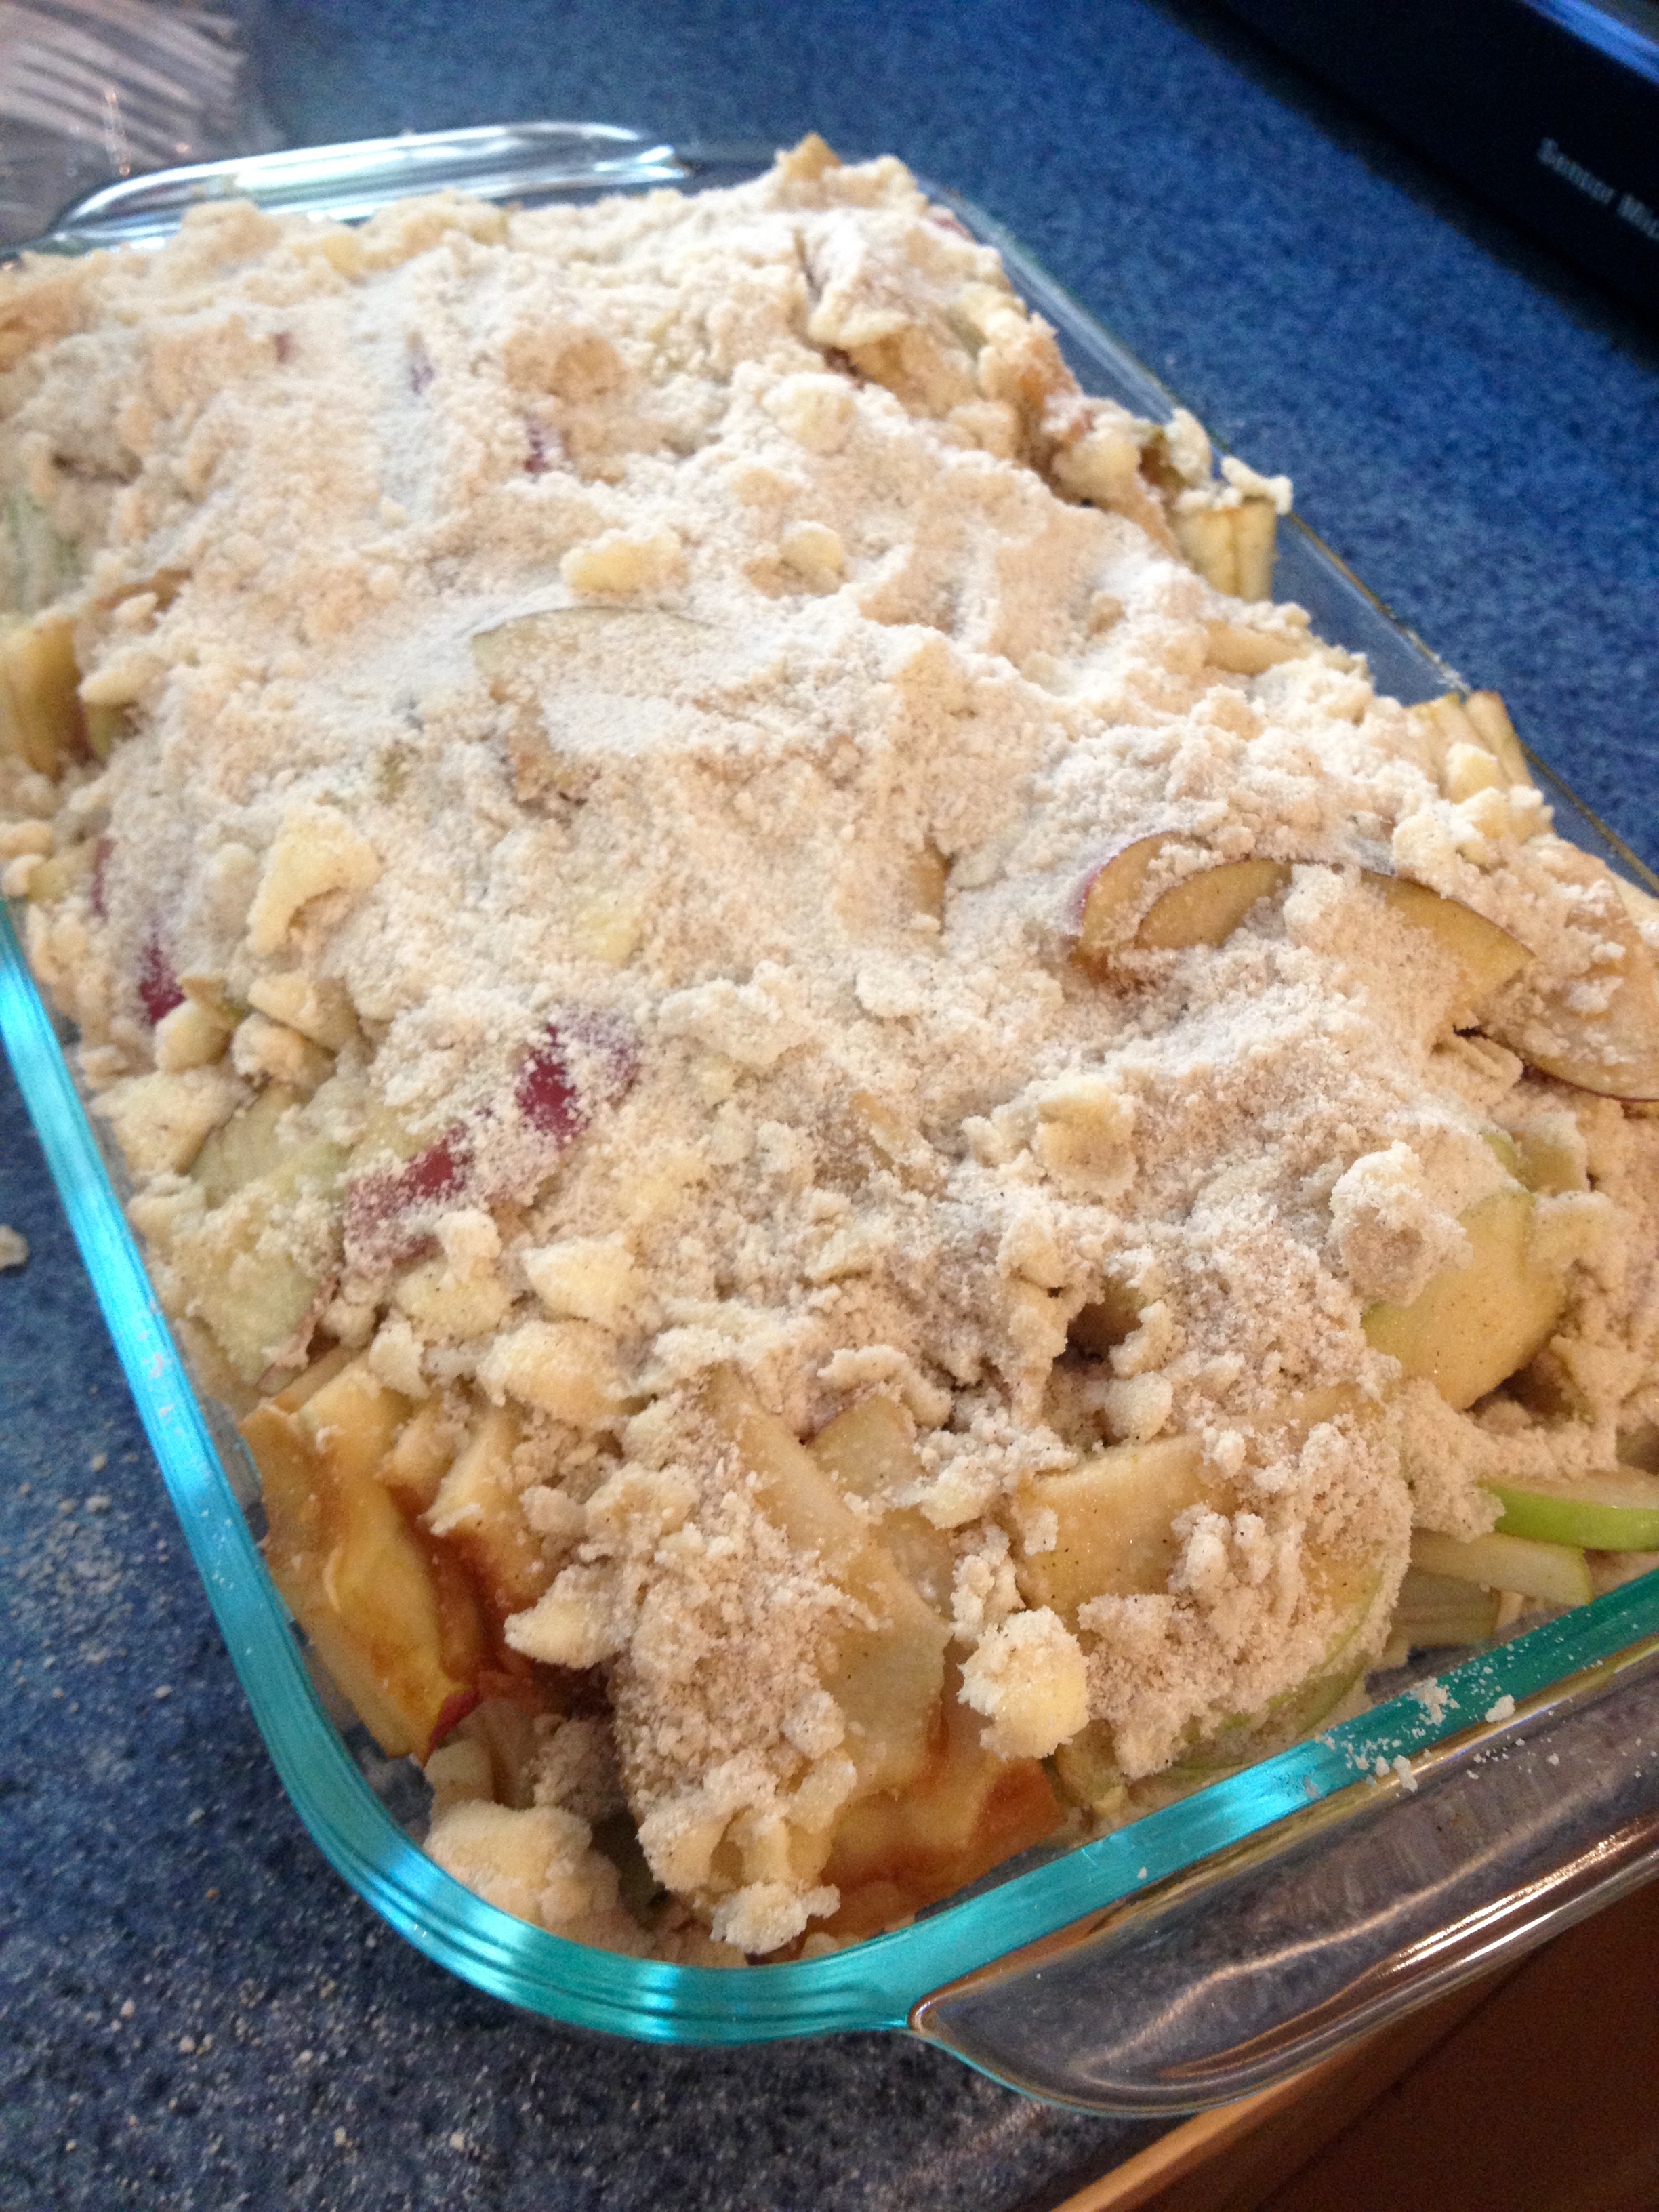
Sprinkle the topping over the apples, and bake for 45-60 minutes or until the topping is golden brown.
Serve the crisp with ice cream or whipped cream, and enjoy!
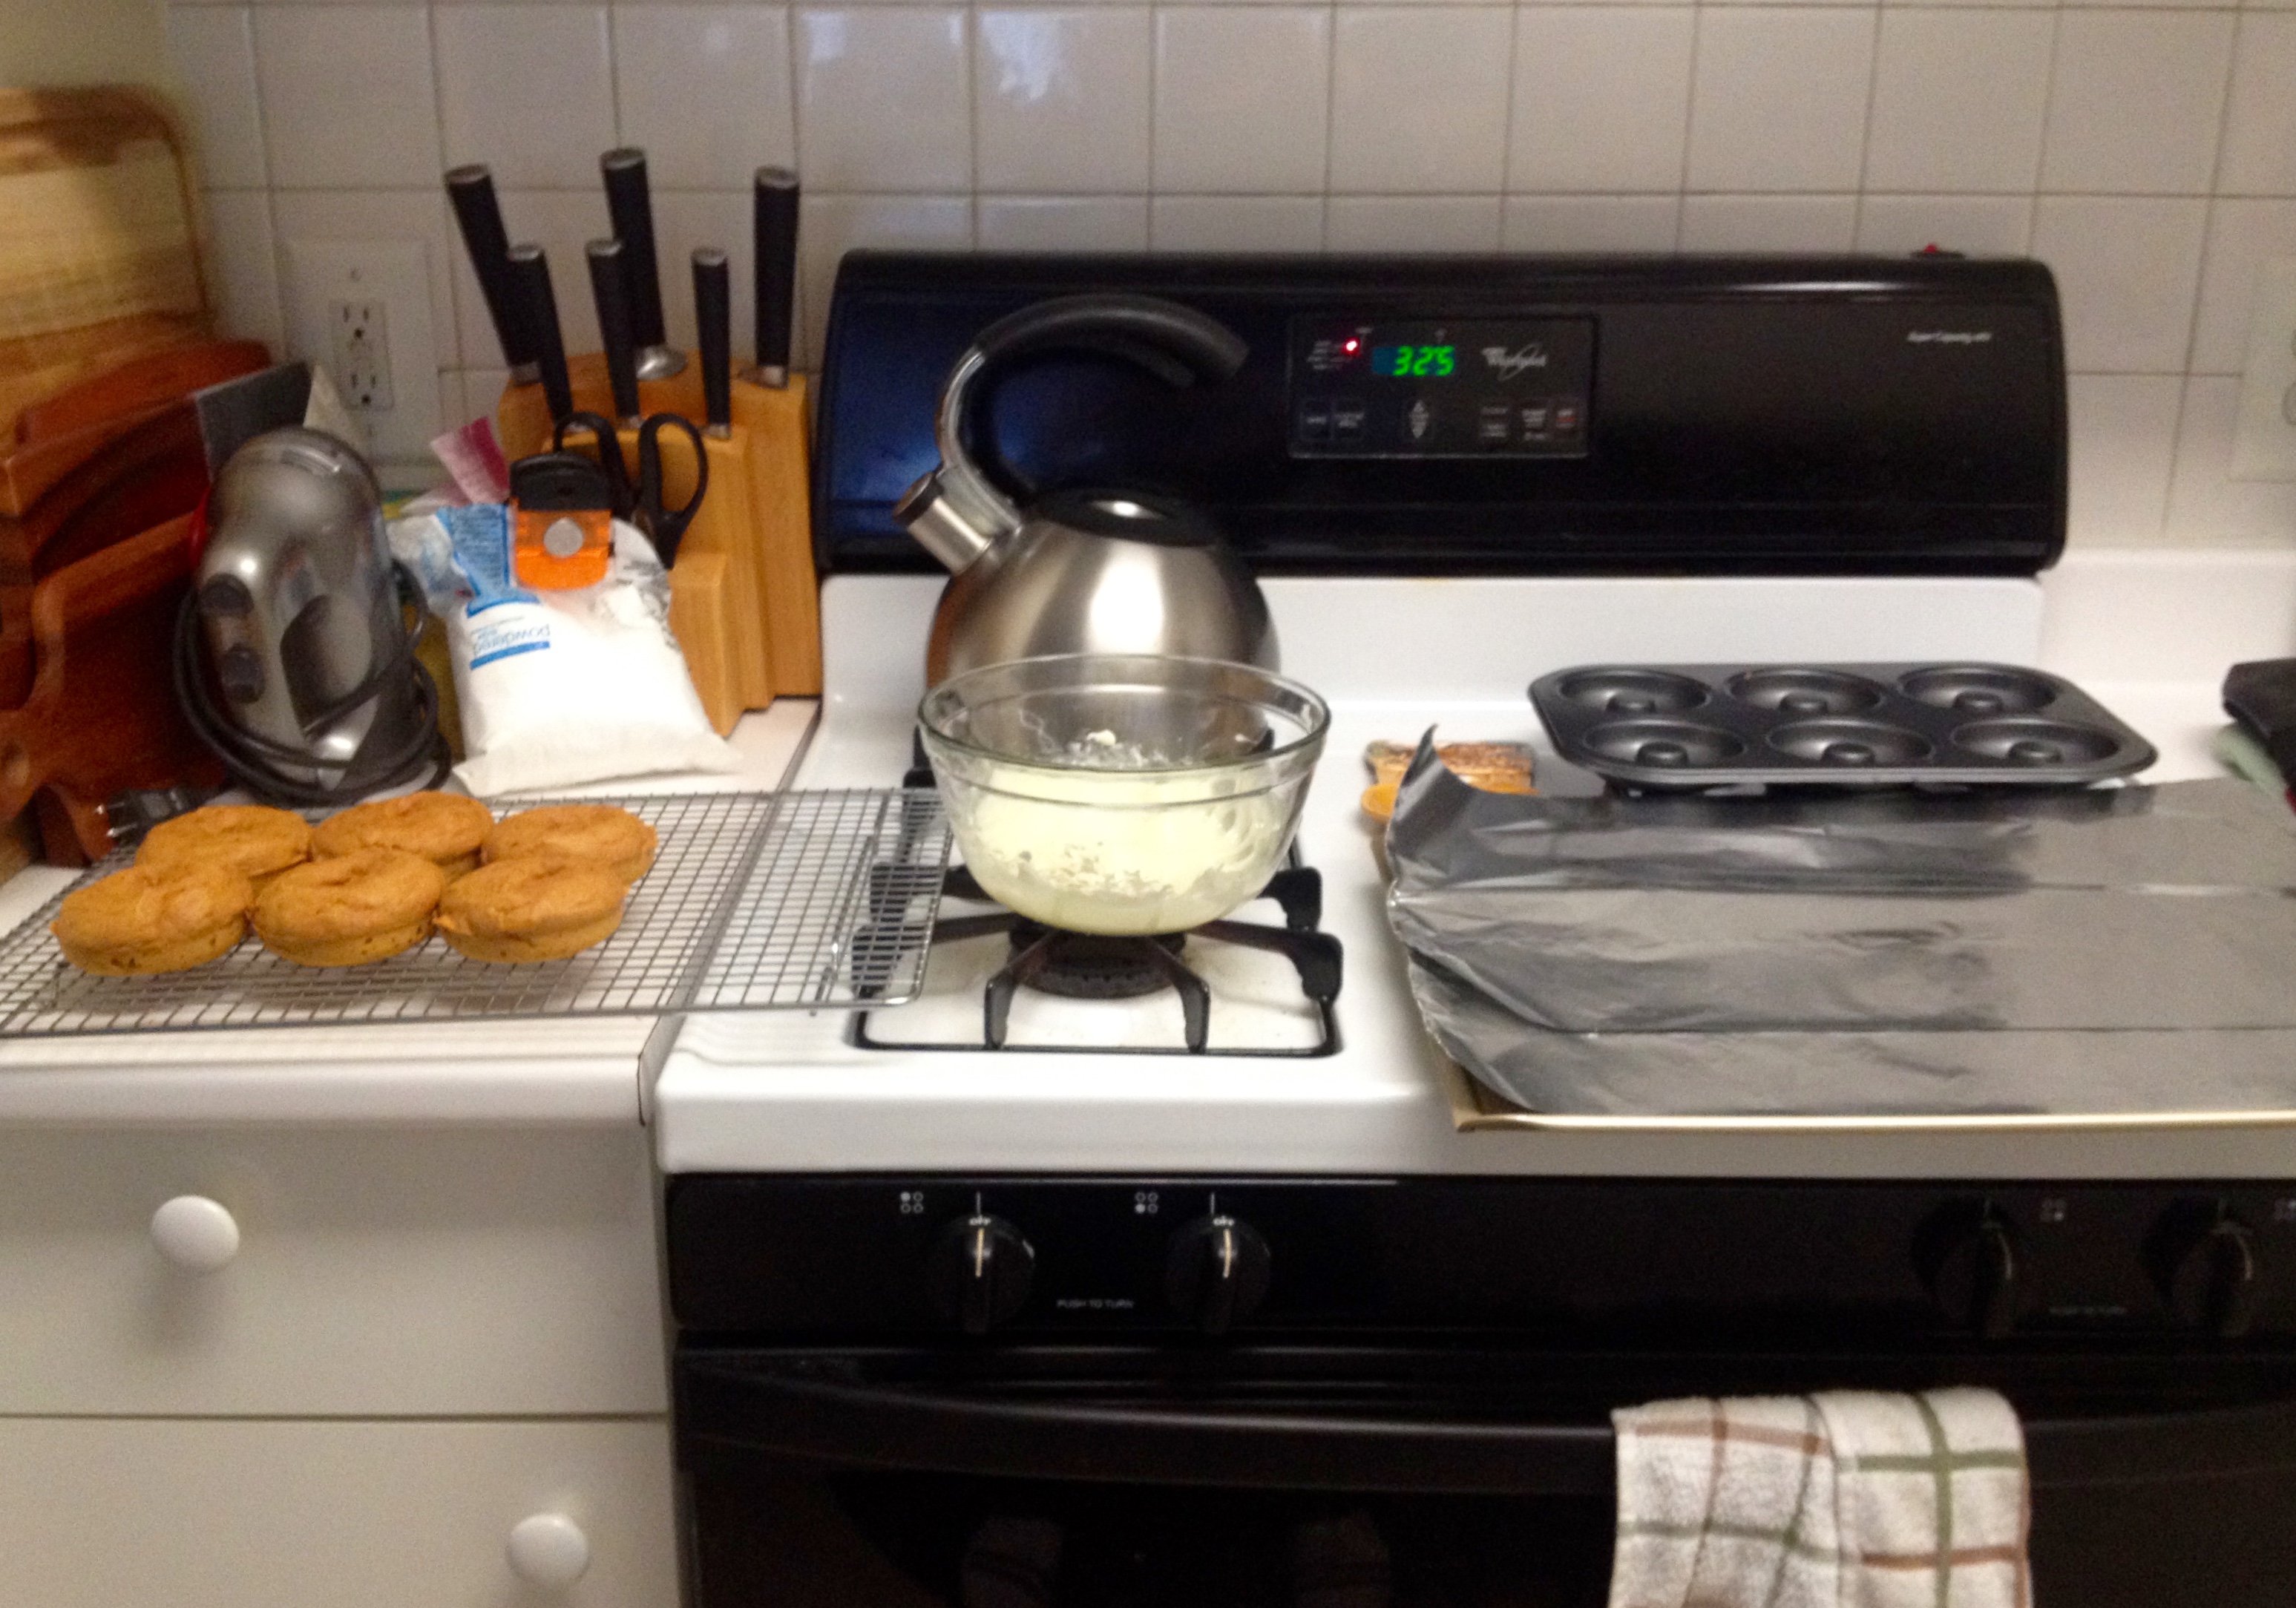
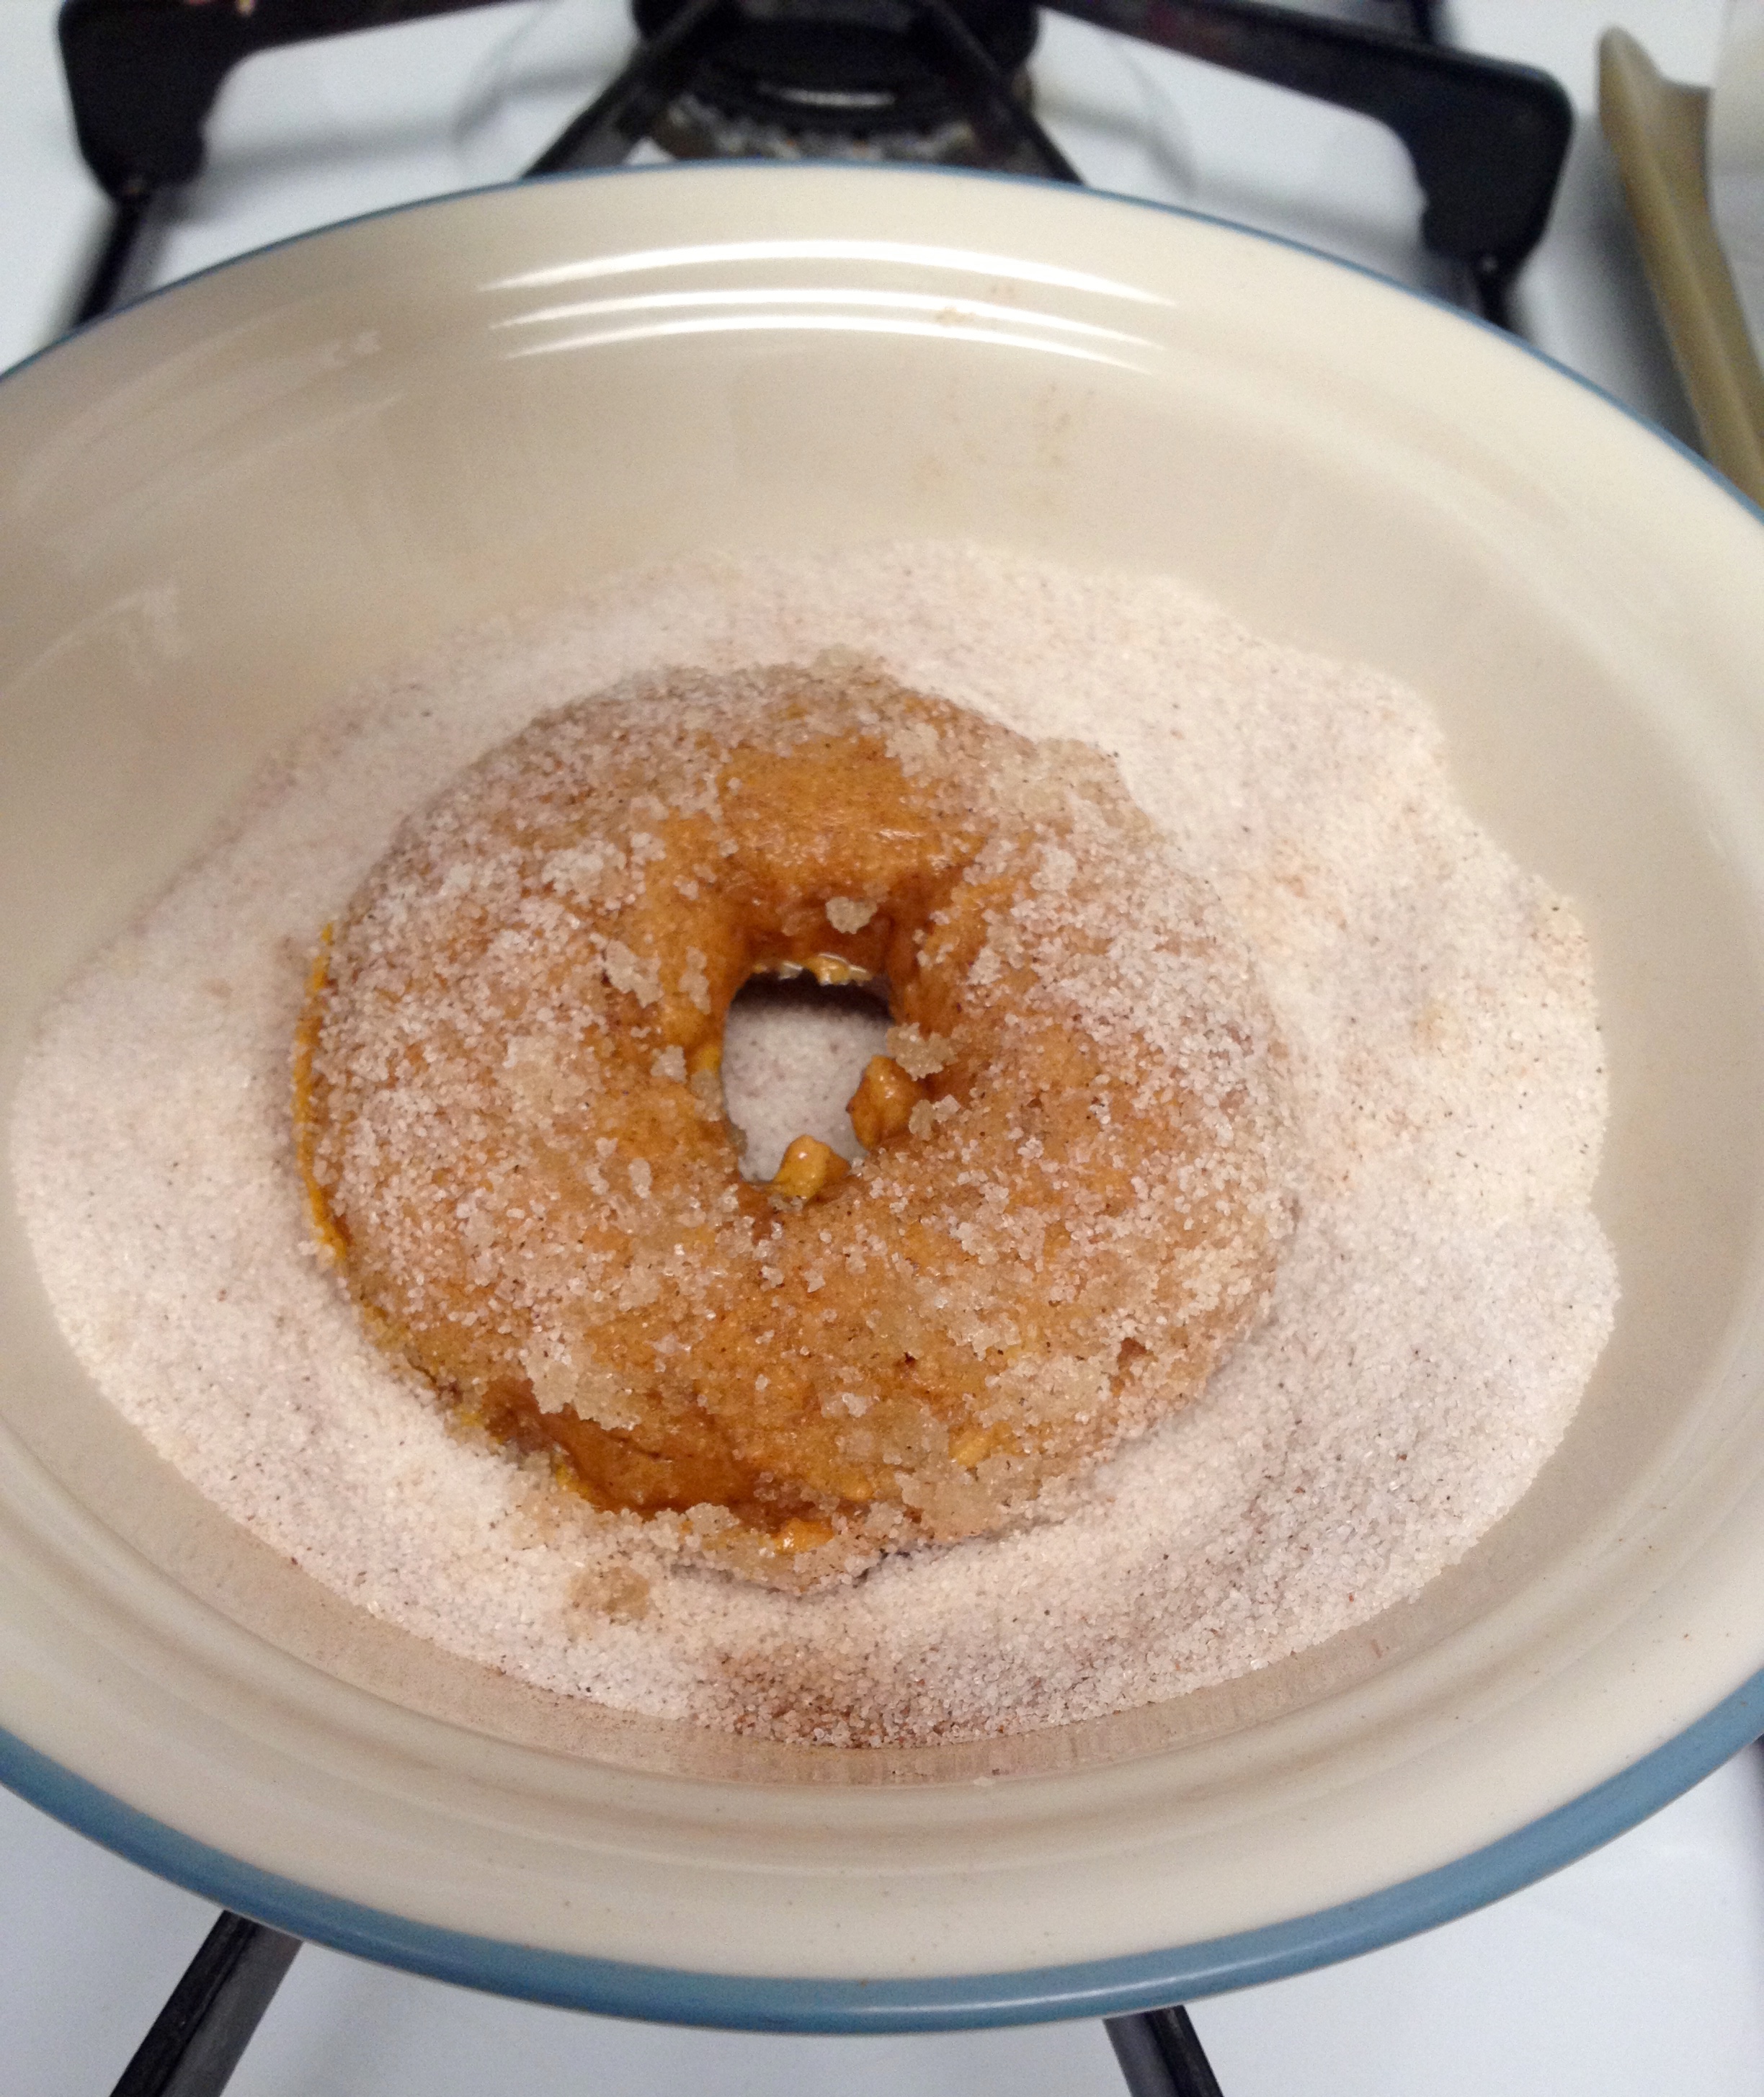
Next up, I tried my hand at making apple cider donuts. The farm stand where we go for apple picking always serves yummy apple cider donuts sprinkled with cinnamon and sugar, so it was a bit of a competition to see if I could make my donuts at least as good as the farm stand donuts. I’m happy to say they turned out to be delicious- I’m probably biased, but I actually preferred them over the farm stand donuts. Here’s the recipe:
Ingredients:
- 2 cups flour
- 1/2 cup granulated sugar
- 1/4 cup brown sugar
- 3/4 tsp ground cinnamon
- 2 tsp baking powder
- 1 tsp salt
- 1/4 tsp cardamom
- ground ginger to taste (I used ~1/8 tsp)
- 1/2 cup apple cider
- 1/4 cup milk
- 2 eggs, beaten
- 1 tsp vanilla
- 1 tbsp butter, melted
Preheat the oven to 325°F and grease your donut pan. Combine the dry ingredients in a large bowl. Then, add the wet ingredients and mix with a hand mixer until fully combined.
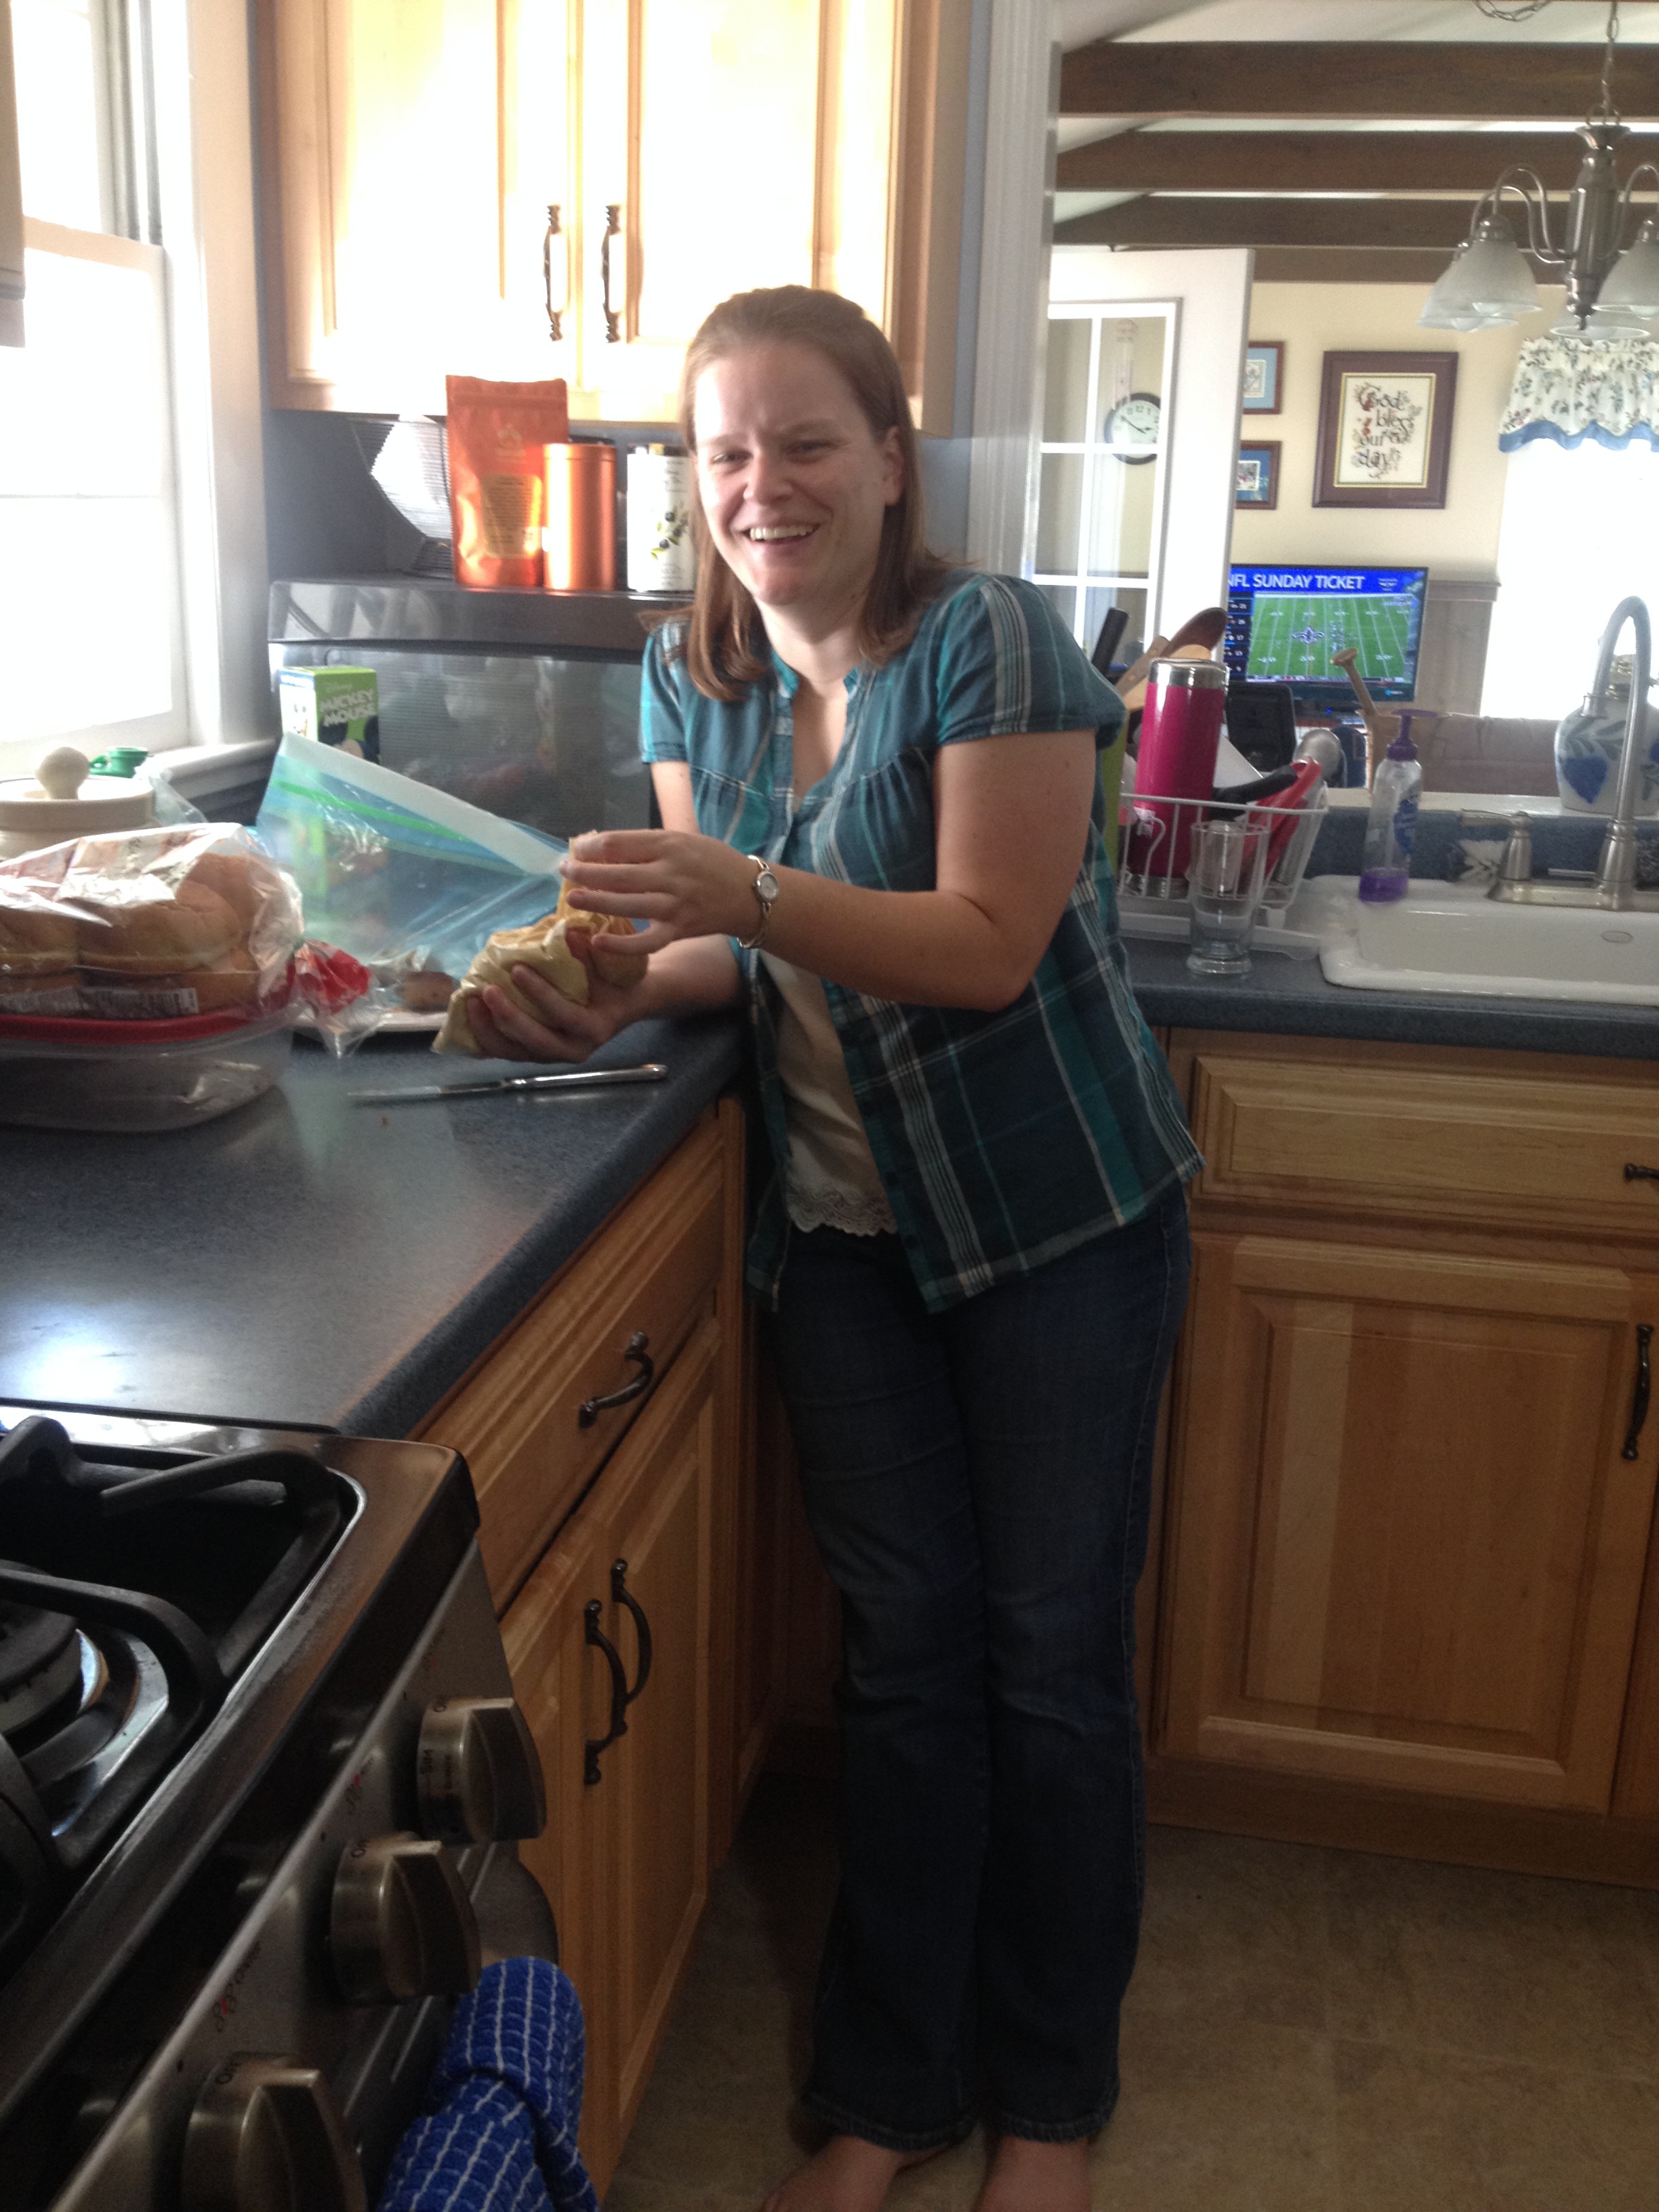
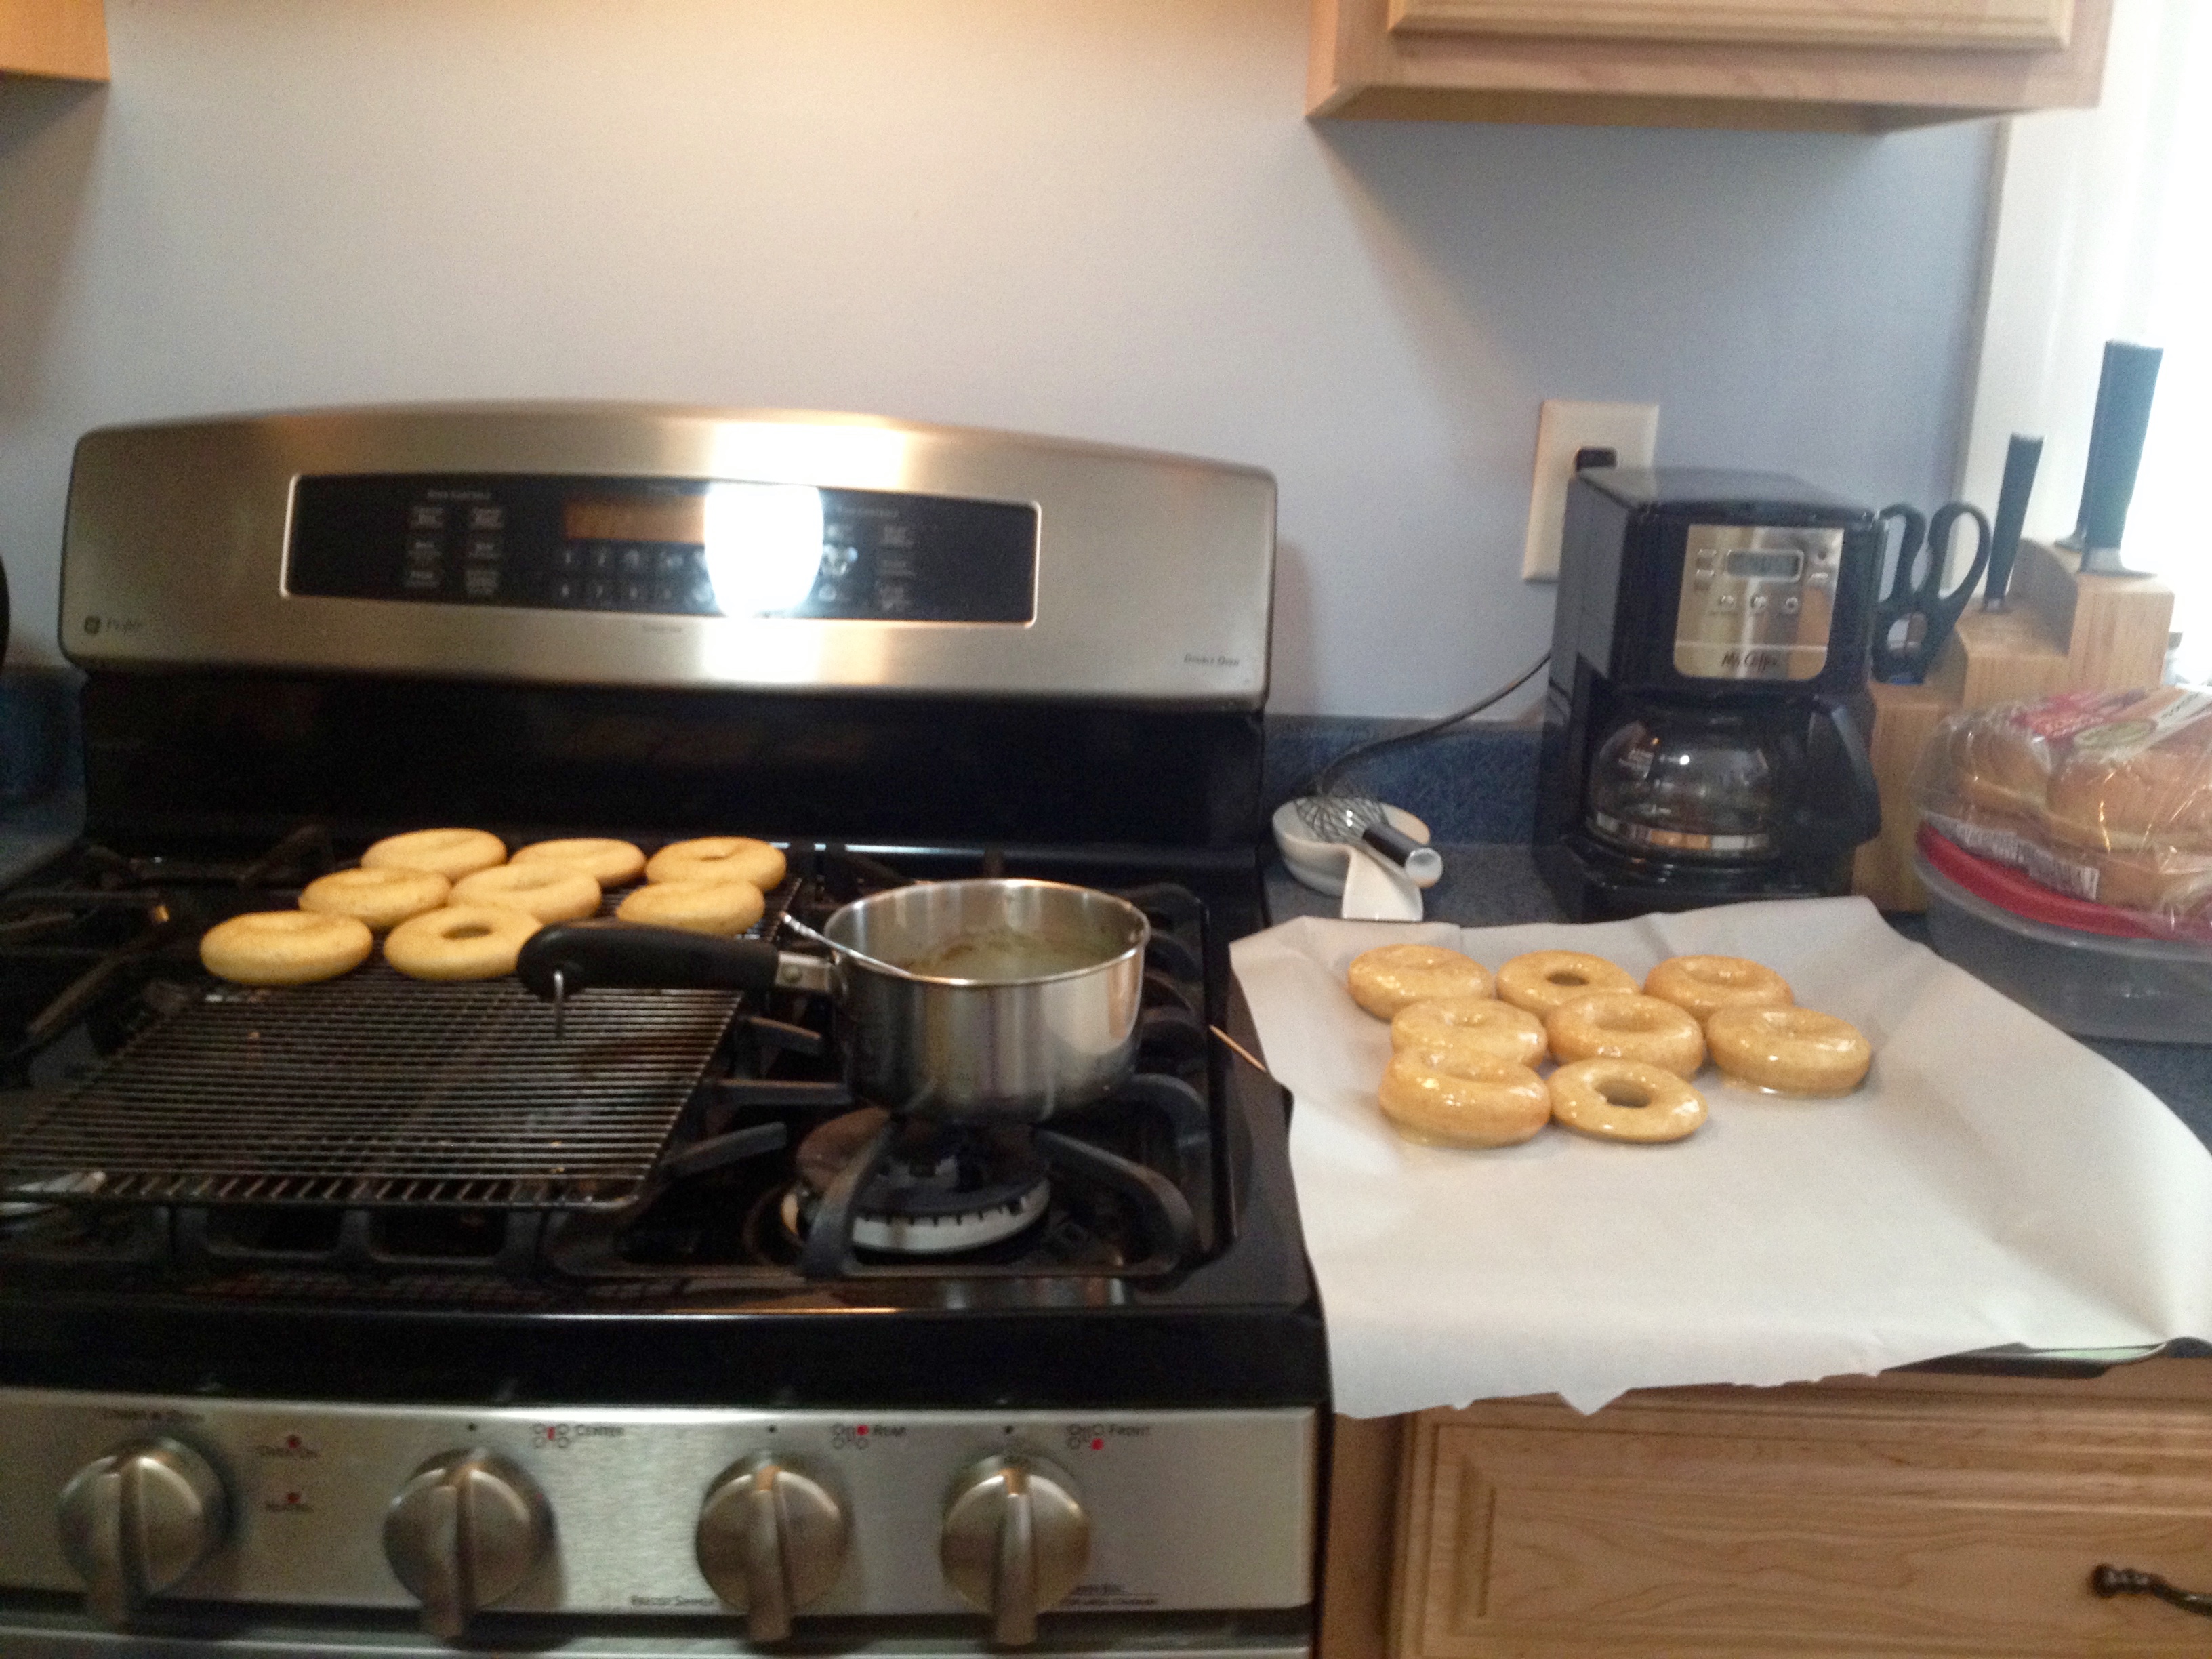
I learned from my previous experience making donuts that it’s easier to pipe the batter into the donut pan to get more even-sized donuts, so my sister was in charge of piping batter into the donut pan.
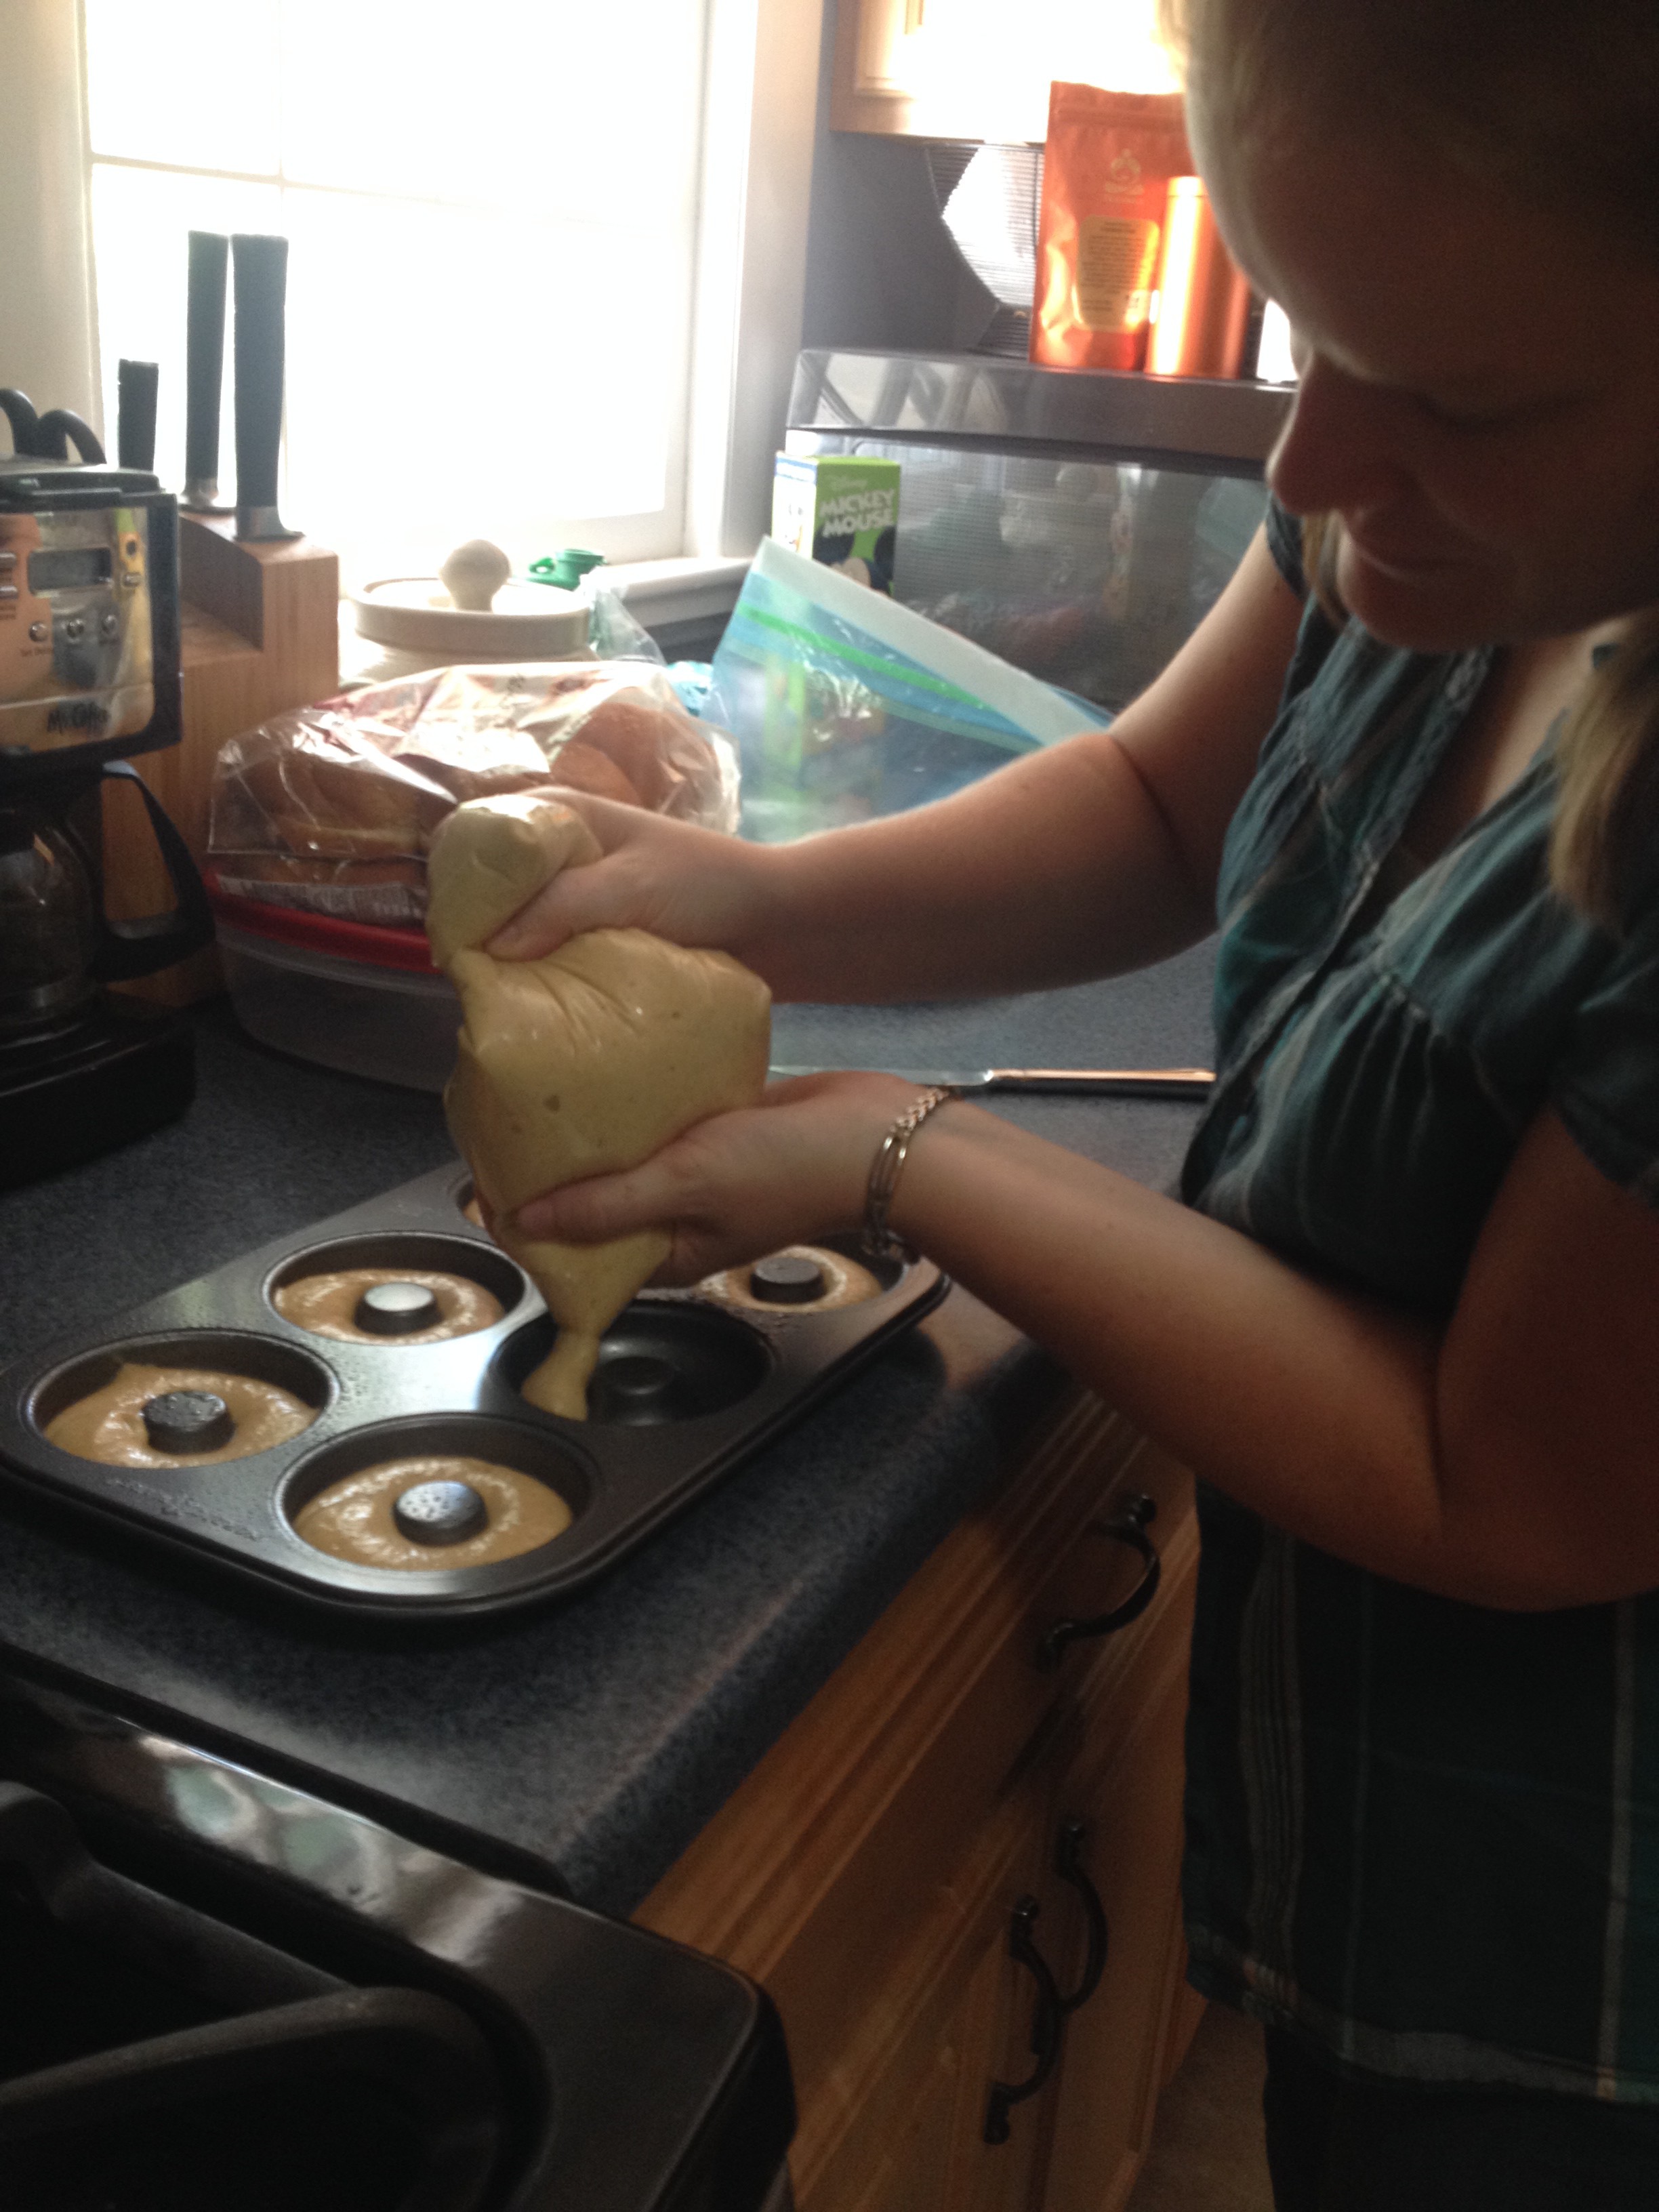
She was also in charge of holding the bag of batter while the donuts cooked!
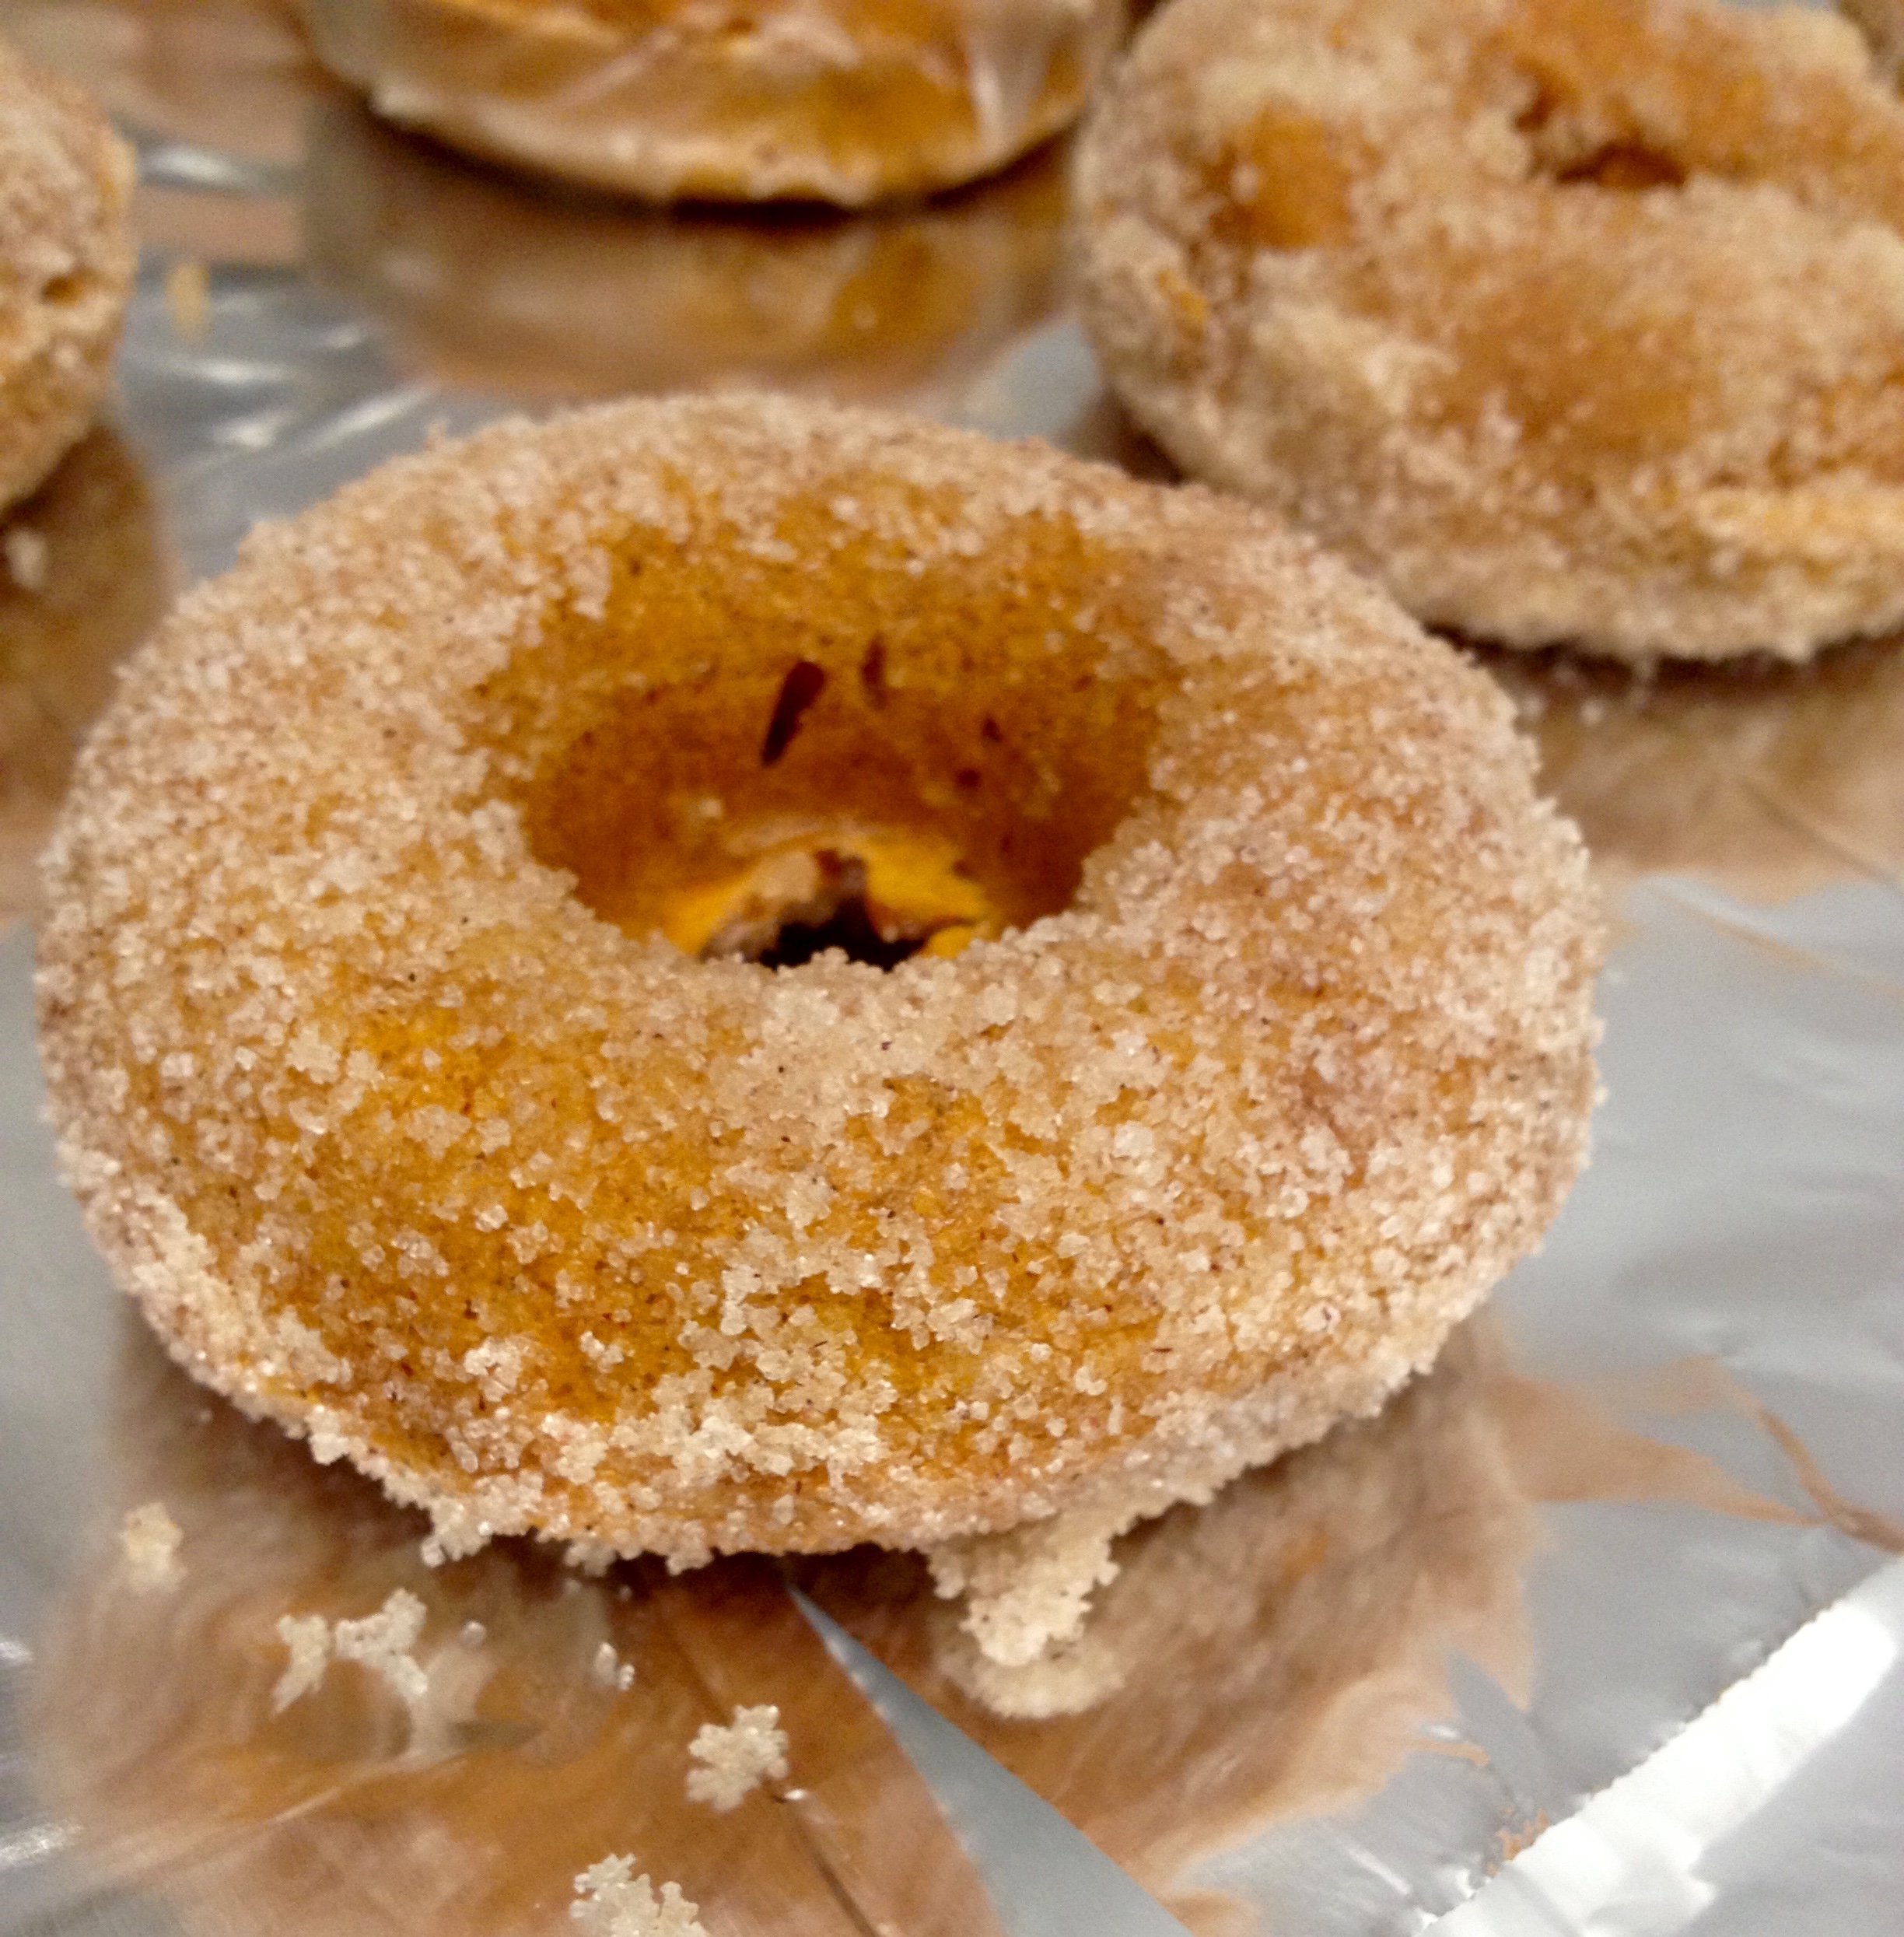
Bake for ~10 minutes, or until a toothpick inserted in the donut comes out clean. Hint: The donuts stayed a fairly pale color, so don’t wait for them to get brown or else they’ll probably be very overcooked. Let the donuts cool in the pan for 3-5 minutes, then turn them out onto a cooling rack to finish cooling. These donuts were so good, even without topping. You could taste the cinnamon right off the bat, but then the cardamom came through after a few seconds, and during the whole bite, you had the warm spice from the ginger- all complementing the tart flavor of the apple cider. So good.

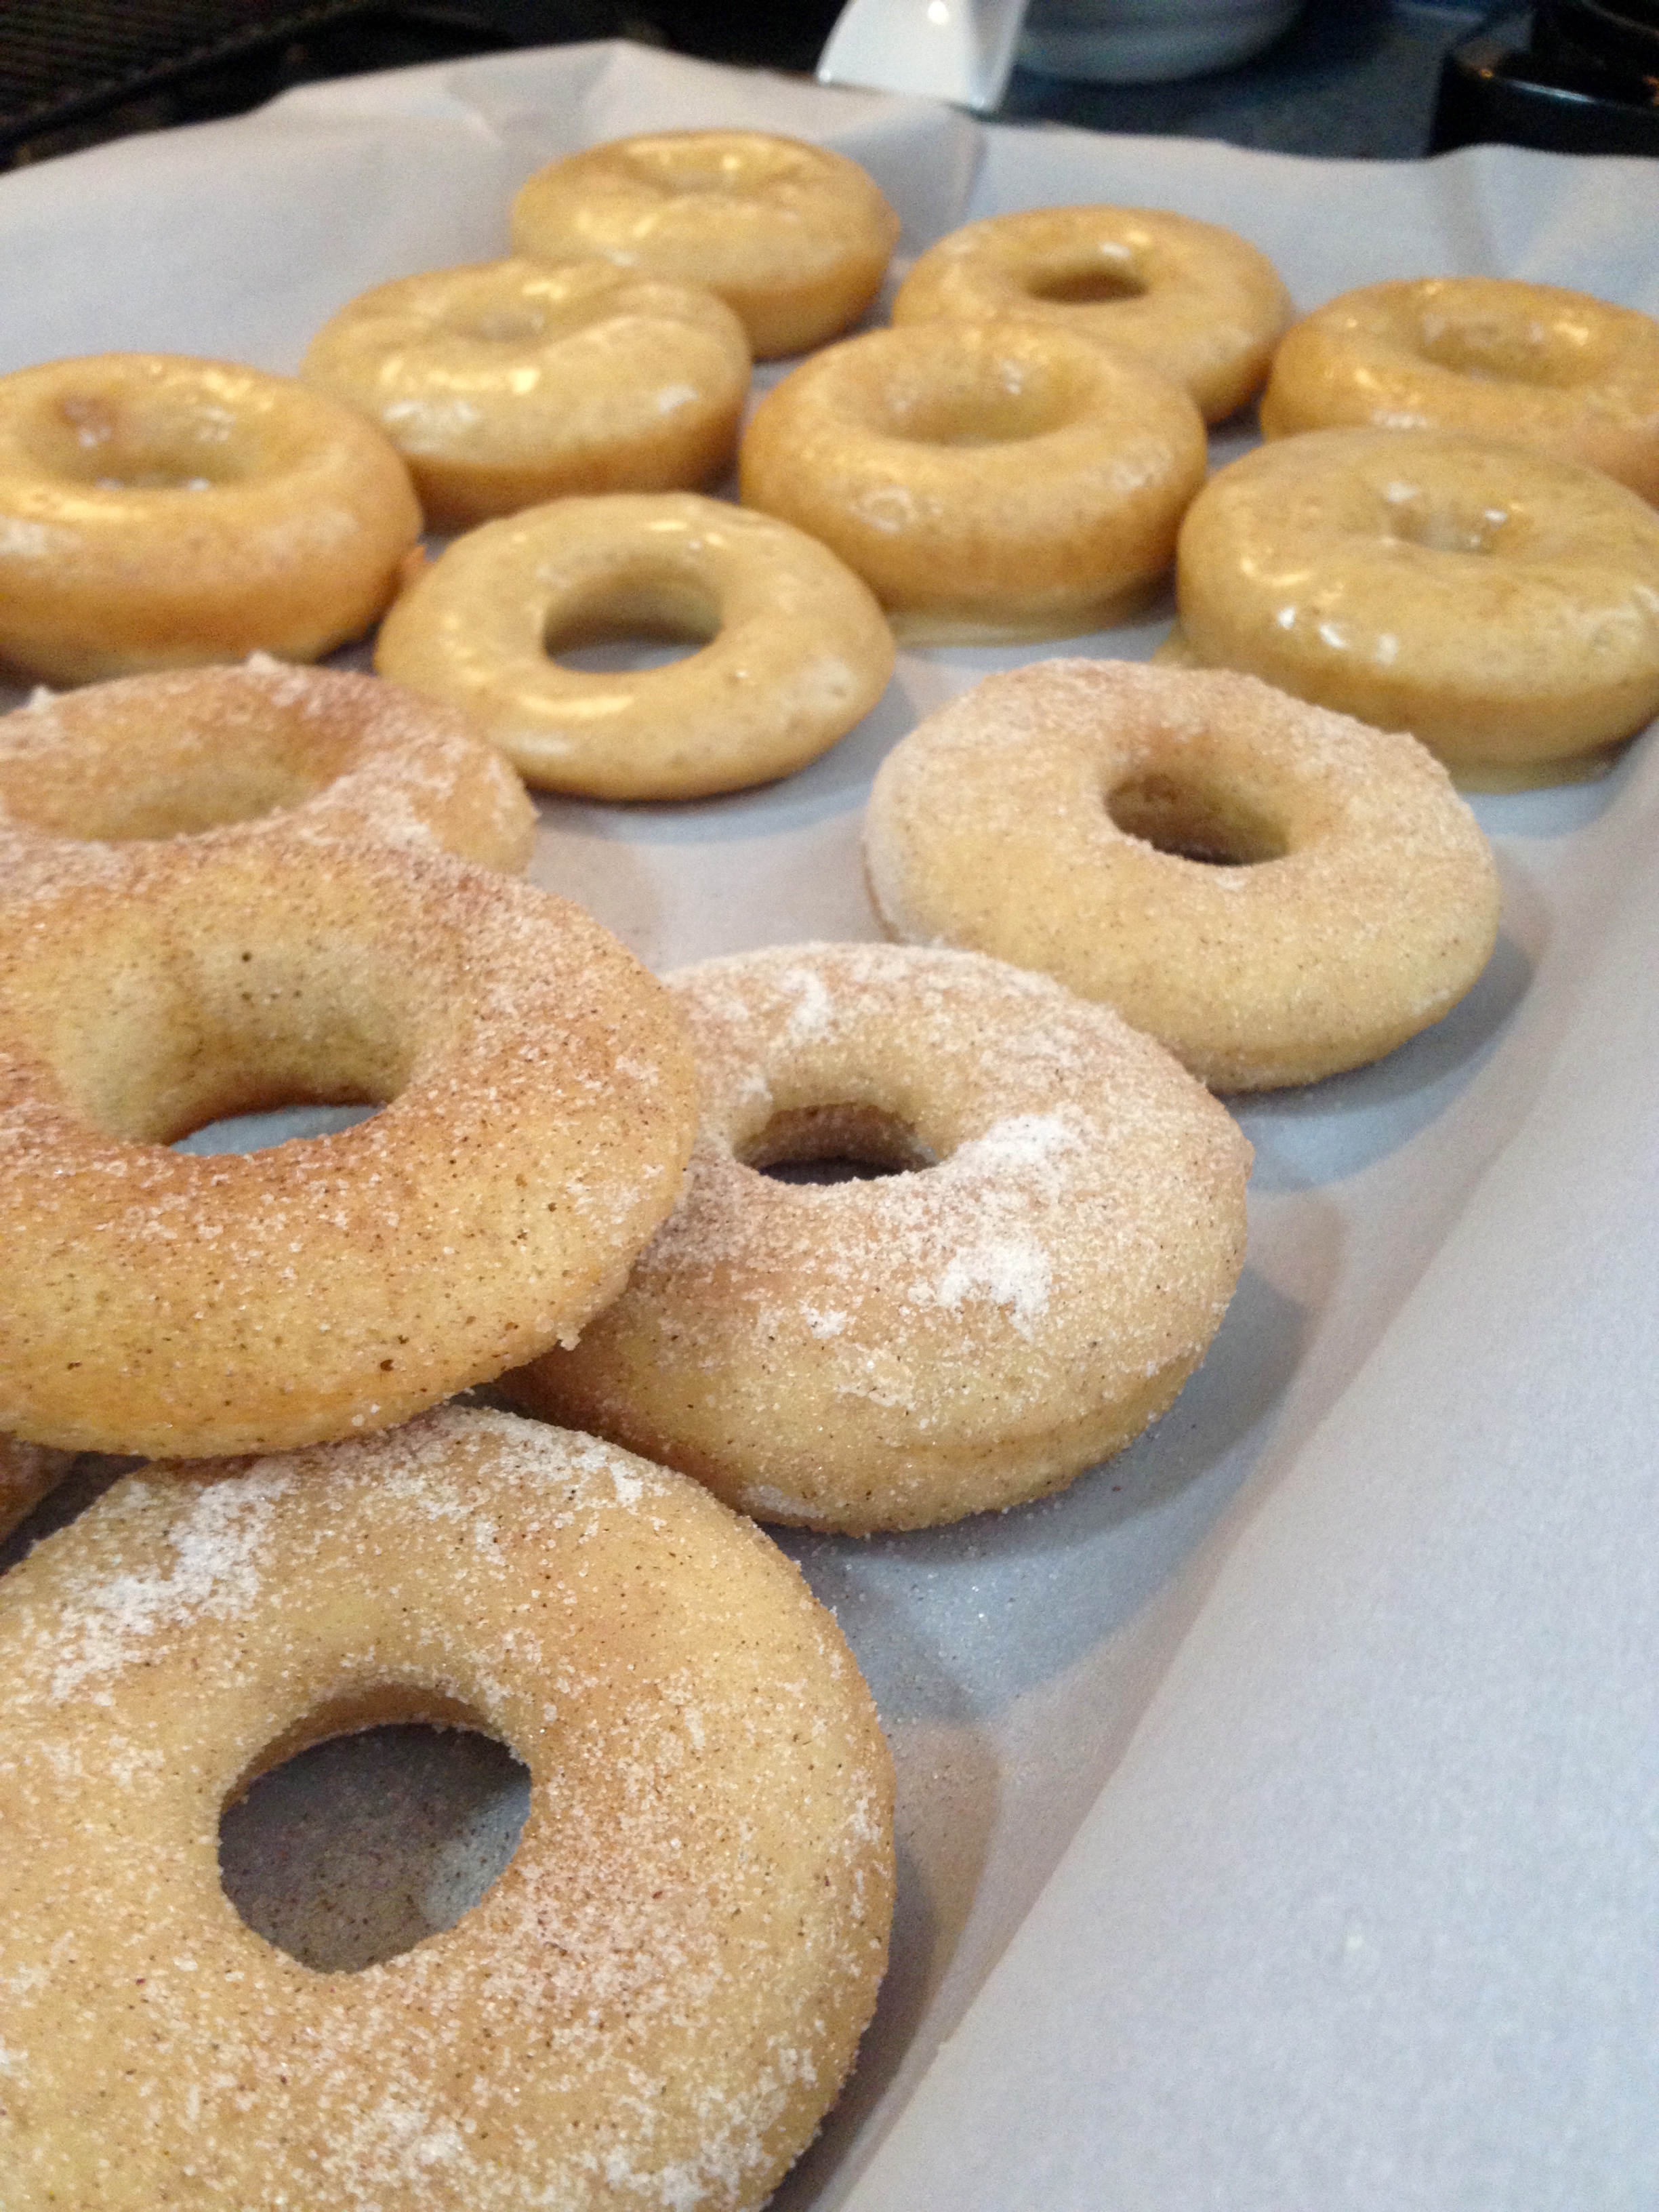
Now for the toppings. We definitely had to make a cinnamon and sugar topping for some of them to copy the farm stand topping, and I also decided to make an apple cider glaze for some, just because I thought it sounded delicious.
Apple Cider Glaze:
- 1 cup cider
- 1 cup confectioner’s sugar
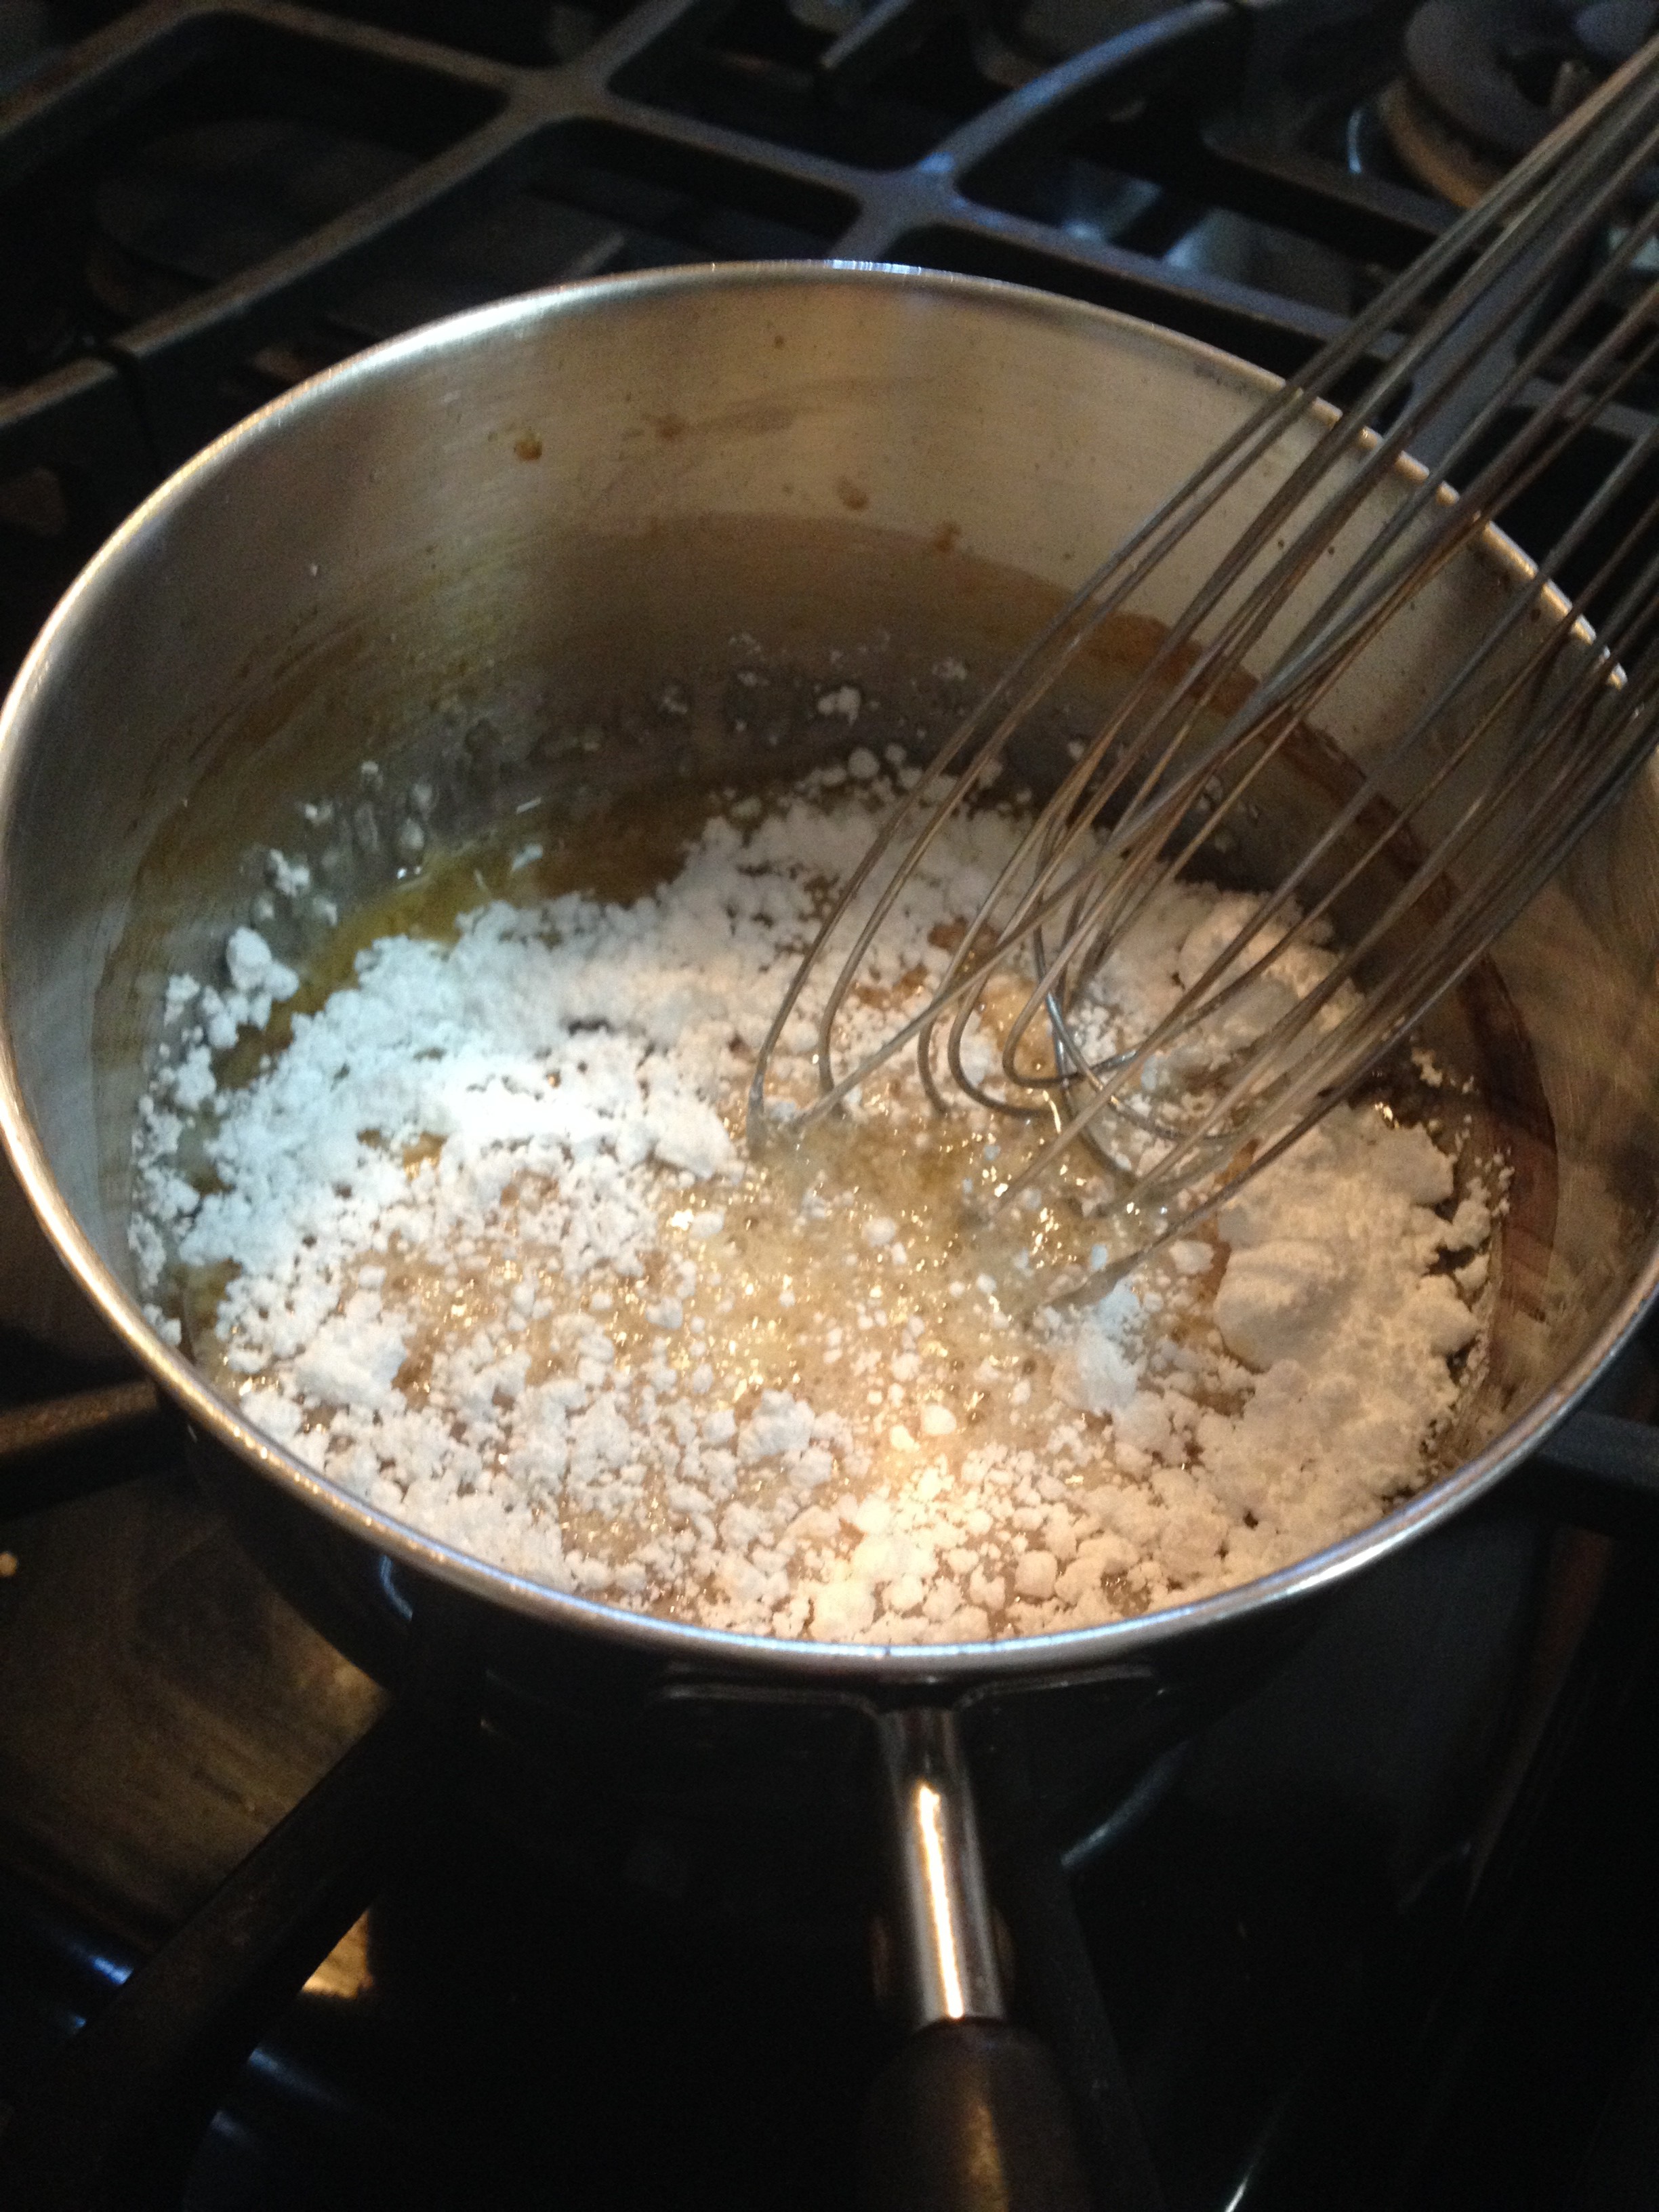
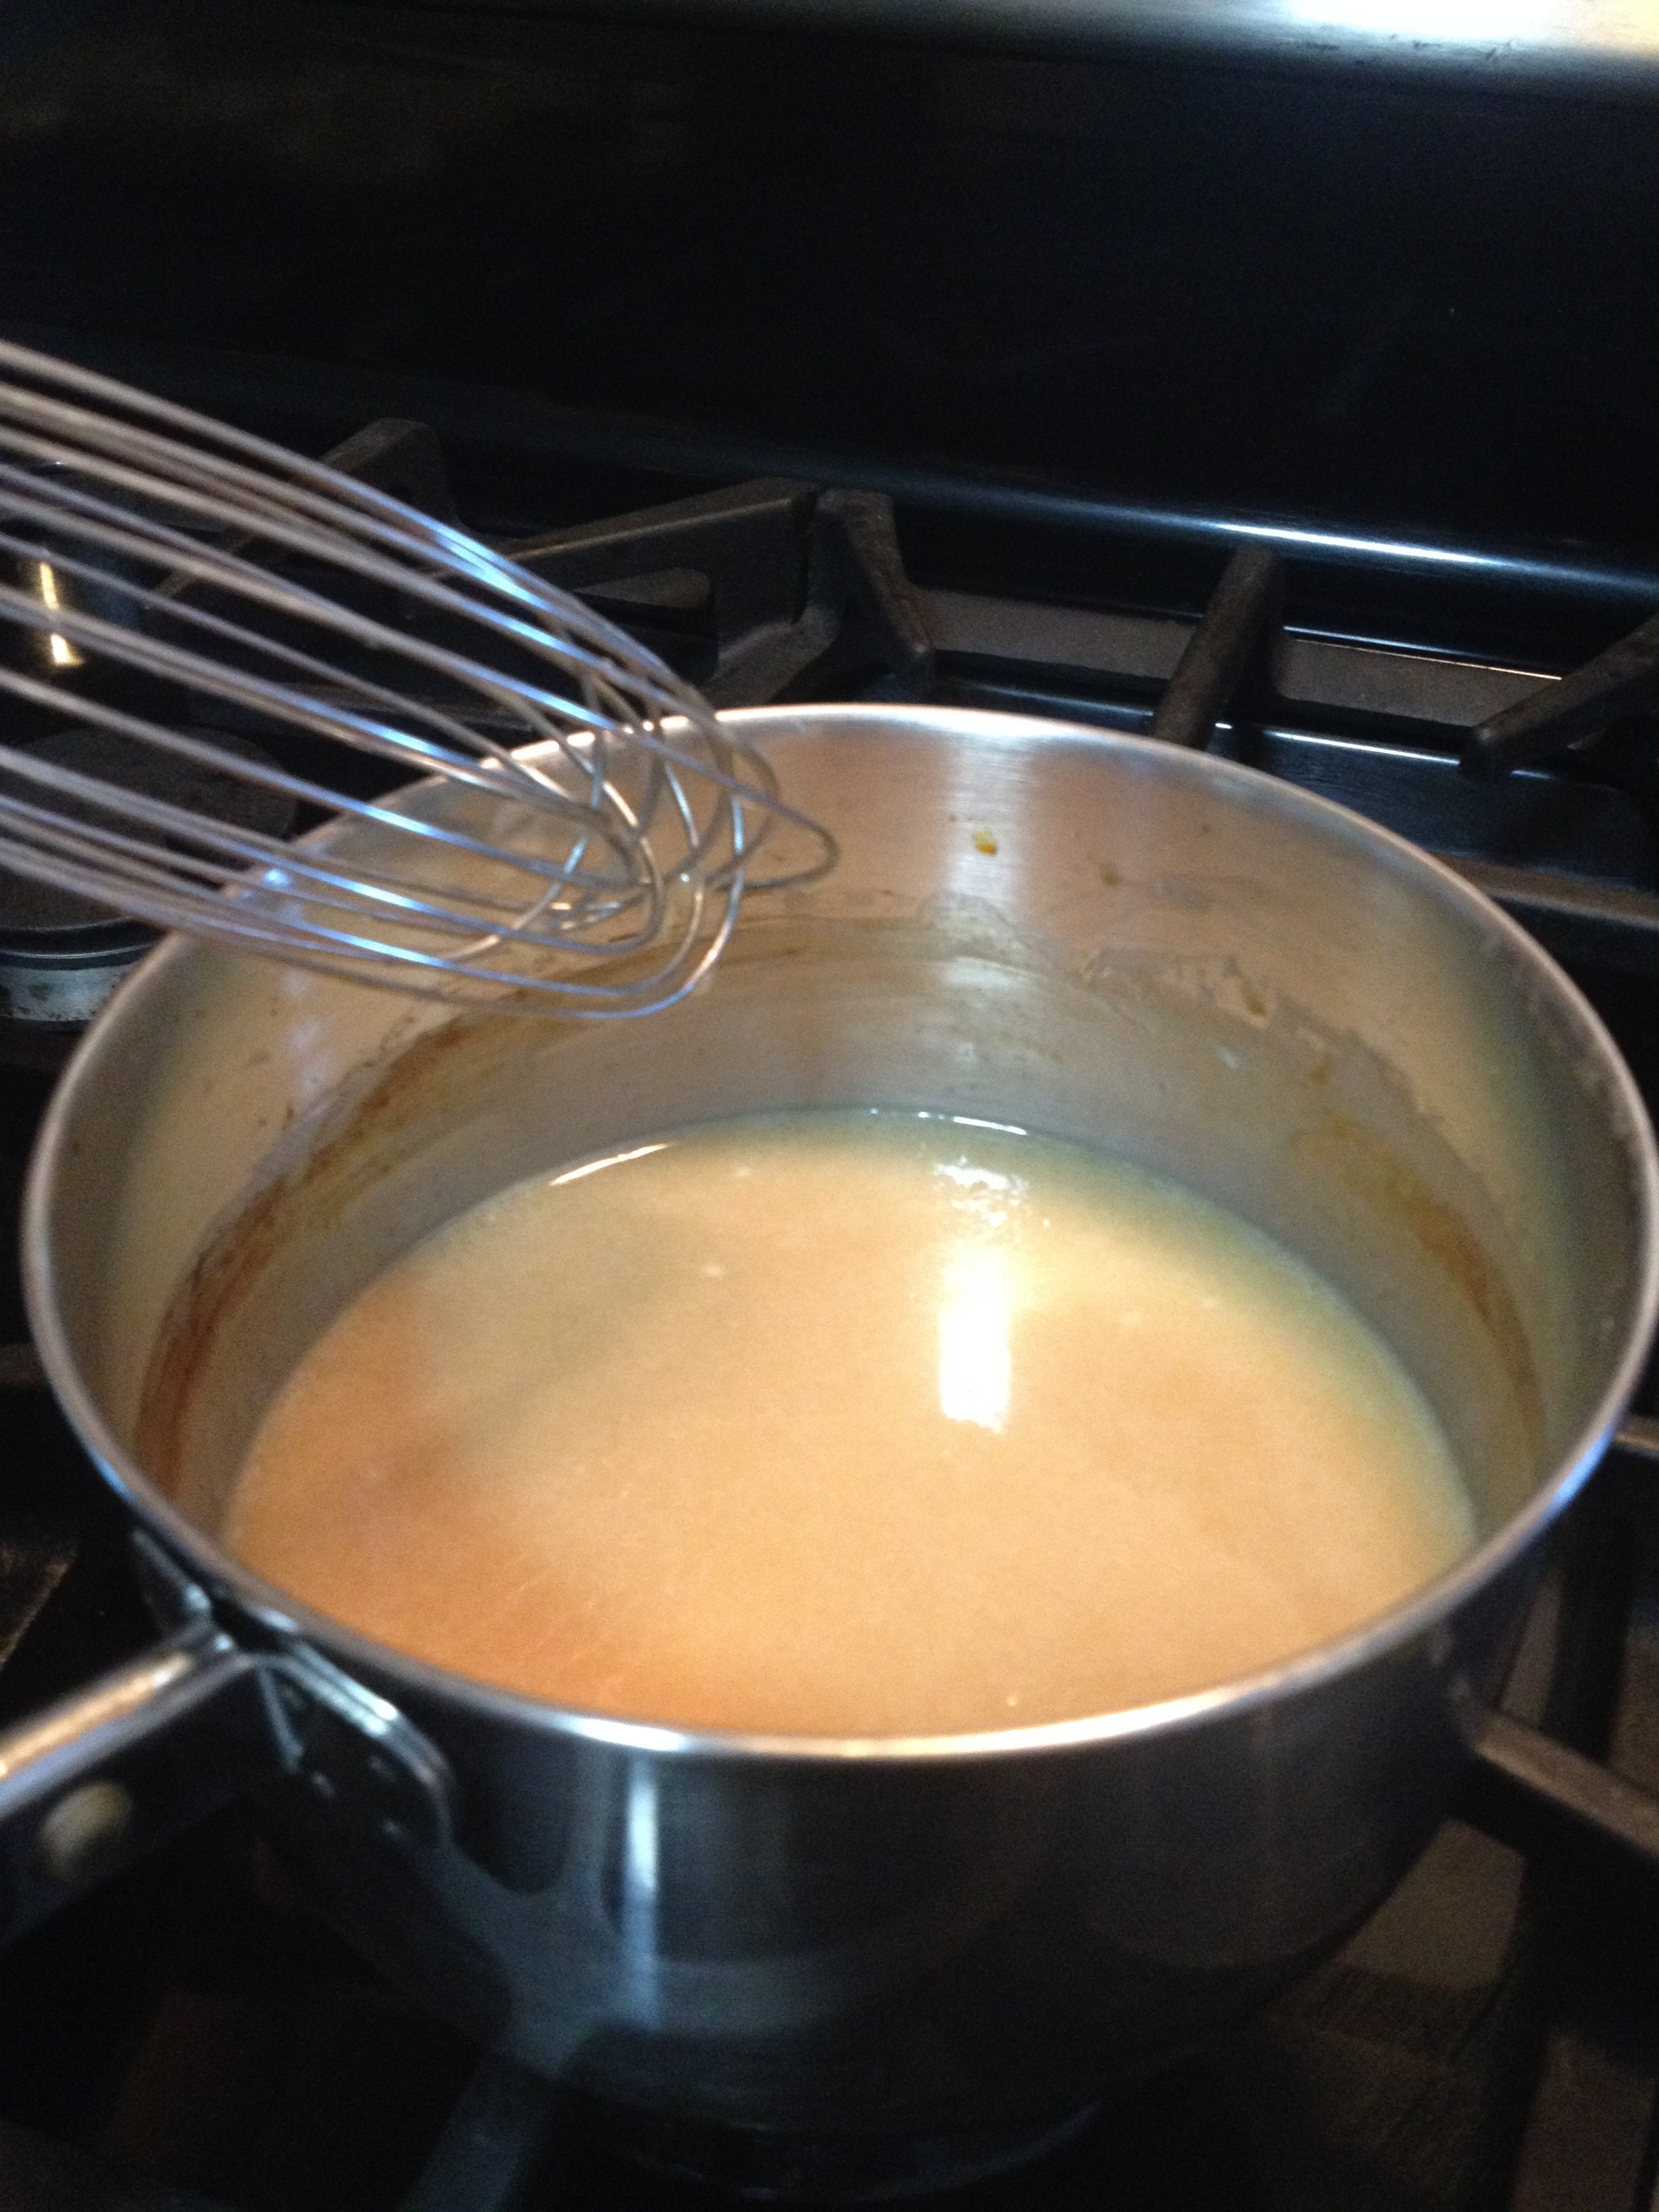
Boil the cider in a small saucepan until it’s reduced down to 1/4 cup. Hint: it doesn’t really thicken, so don’t be looking for a specific consistency- if you think it’s done, just pour it into a small measuring cup to confirm that it’s down to 1/4 cup.
Whisk in the powdered sugar until it’s completely dissolved.
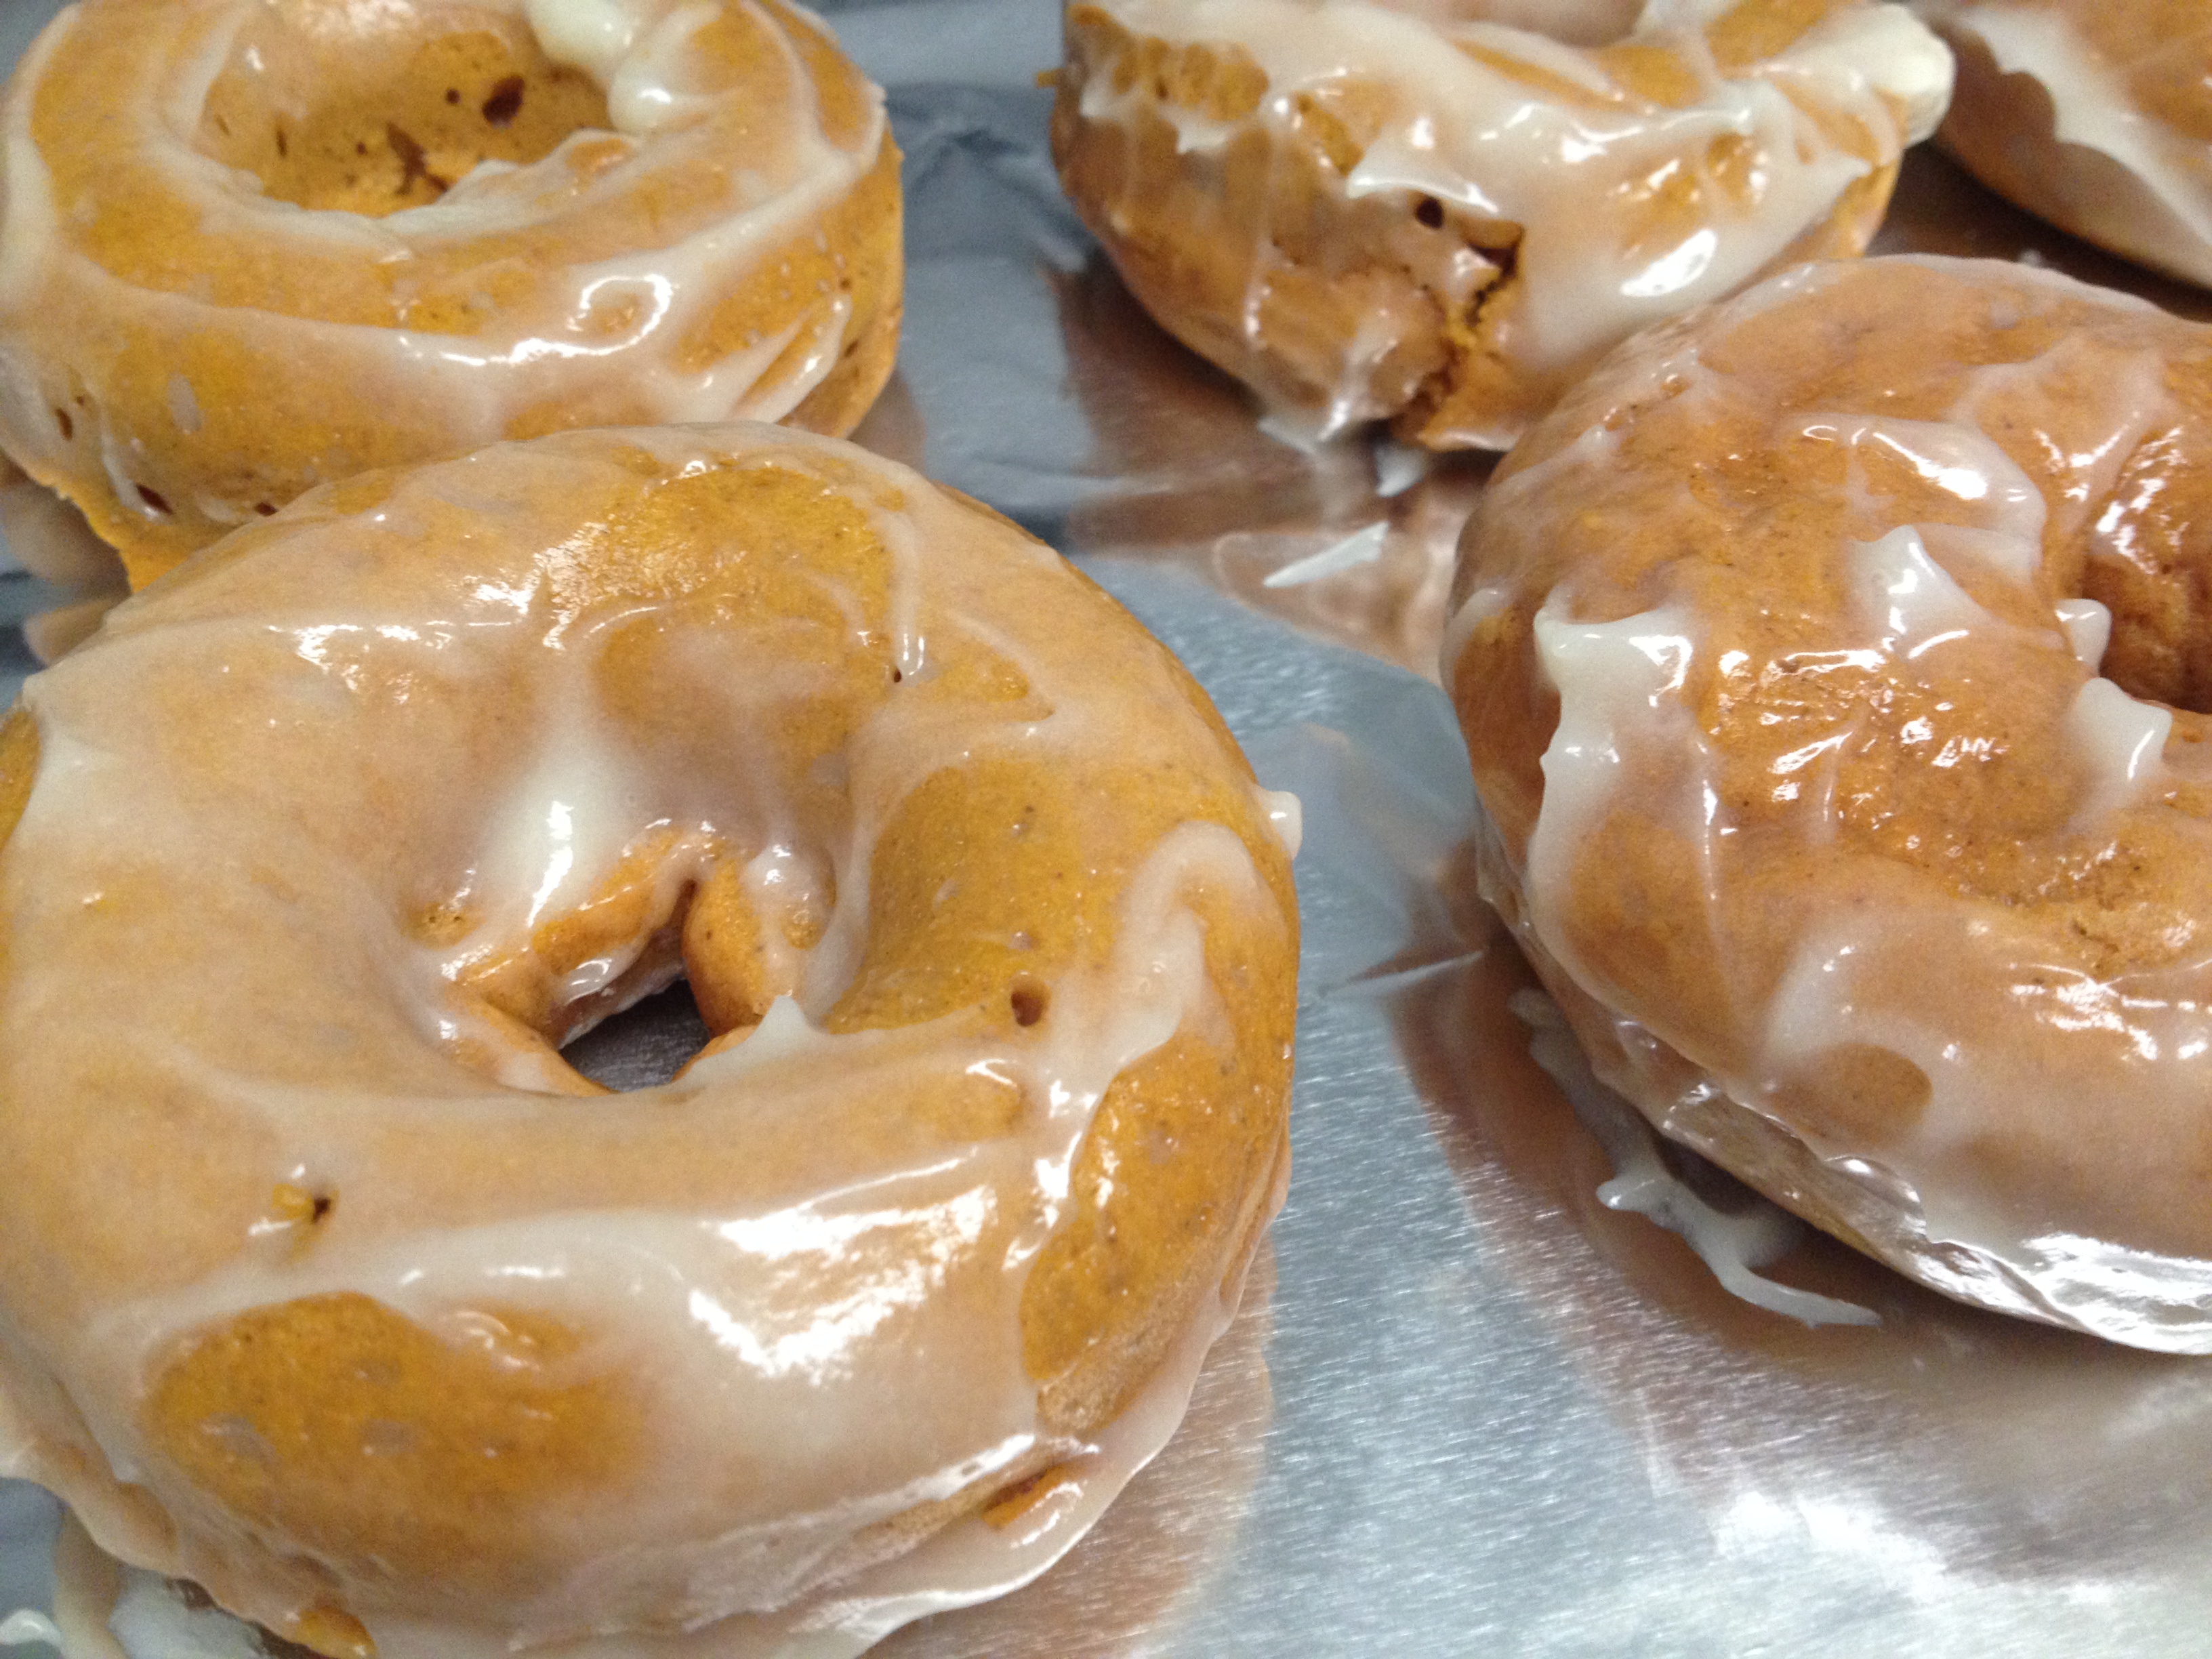
And now, it’s assembly line time. Much like the pumpkin donuts from the last blog, I set up my line so that there would be minimal dripping and overall messiness. Dunk the donuts in the glaze so that they’re covered, then remove them from the glaze with a fork or your fingers, letting excess glaze drip back into the pan, and lay them on a baking sheet covered with wax or parchment paper. This glaze recipe made enough to cover 12 donuts. It was absolutely delicious- it had a tart taste at first which really accented the flavor of the apples, but then had a sweet finish.
Cinnamon and Sugar Topping:
- 4 tbsp butter, melted
- 1/4 cup granulated sugar
- 1 tsp cinnamon
Melt the butter in a small bowl. Combine the cinnamon and sugar in a different bowl. Dunk the donuts in the butter, making sure that the whole donut is covered, and then roll the donuts in the cinnamon and sugar mixture. This mixture made enough to cover 8 donuts, so if you’re planning to top more donuts with this, I would make 1.5 times more of this recipe, or even double it.
And now it’s time to eat! These donuts went really fast- there were no leftovers at all! I hope you guys give these recipes a try, since they were seriously delicious. Happy baking!
Homemade Pumpkin Donuts
Hi, friends! Happy September! Even though it’s still technically summer, I’m getting really excited about all of the fun that fall brings. Apple picking, pumpkin carving, corn mazes… the list goes on! Right around this time of year is when all the “pumpkin flavored ____” starts being offered, and I am not complaining even a little about it. I have my pumpkin spice coffee creamer in the fridge and my pumpkin Kleenex boxes sitting in the bathroom right now (no shame!). As my husband and I were thinking about what to do with our day, I suggested apple picking and getting some apple cider donuts, but he came up with a WAY better idea- making my own pumpkin donuts! I’ve never made my own donuts before, so that made the idea doubly exciting. Off we rushed to Target to pick up the last donut pan in stock, and then headed back home for me to try my hand at it. I’m pretty excited about how they turned out, so I had to share the recipe!
This recipe makes 12 donuts. The glaze recipe makes enough to cover about 8 donuts, and the sugar mixture recipe makes enough to cover all 12.
Ingredients:
- 2 cups all-purpose flour
- 1/2 cup light brown sugar
- 1 1/2 tsp baking powder
- 1/4 tsp baking soda
- 1/2 tsp salt
- 1 1/2 tsp pumpkin pie spice
- (Hint: if you don’t have pumpkin pie spice in your pantry, as I don’t, use this conversion instead: for 1 tsp pumpkin pie spice, use 1/2 tsp cinnamon, 1/4 tsp ginger, 1/8 tsp nutmeg, 1/8 tsp allspice. For this recipe, since you need 1.5 tsp of the mix, I just put a little extra of each spice in).
- 1 cup (8oz) pureed pumpkin
- 2 large eggs
- 1/4 cup milk
- 1/4 cup (1/2 stick) butter, softened
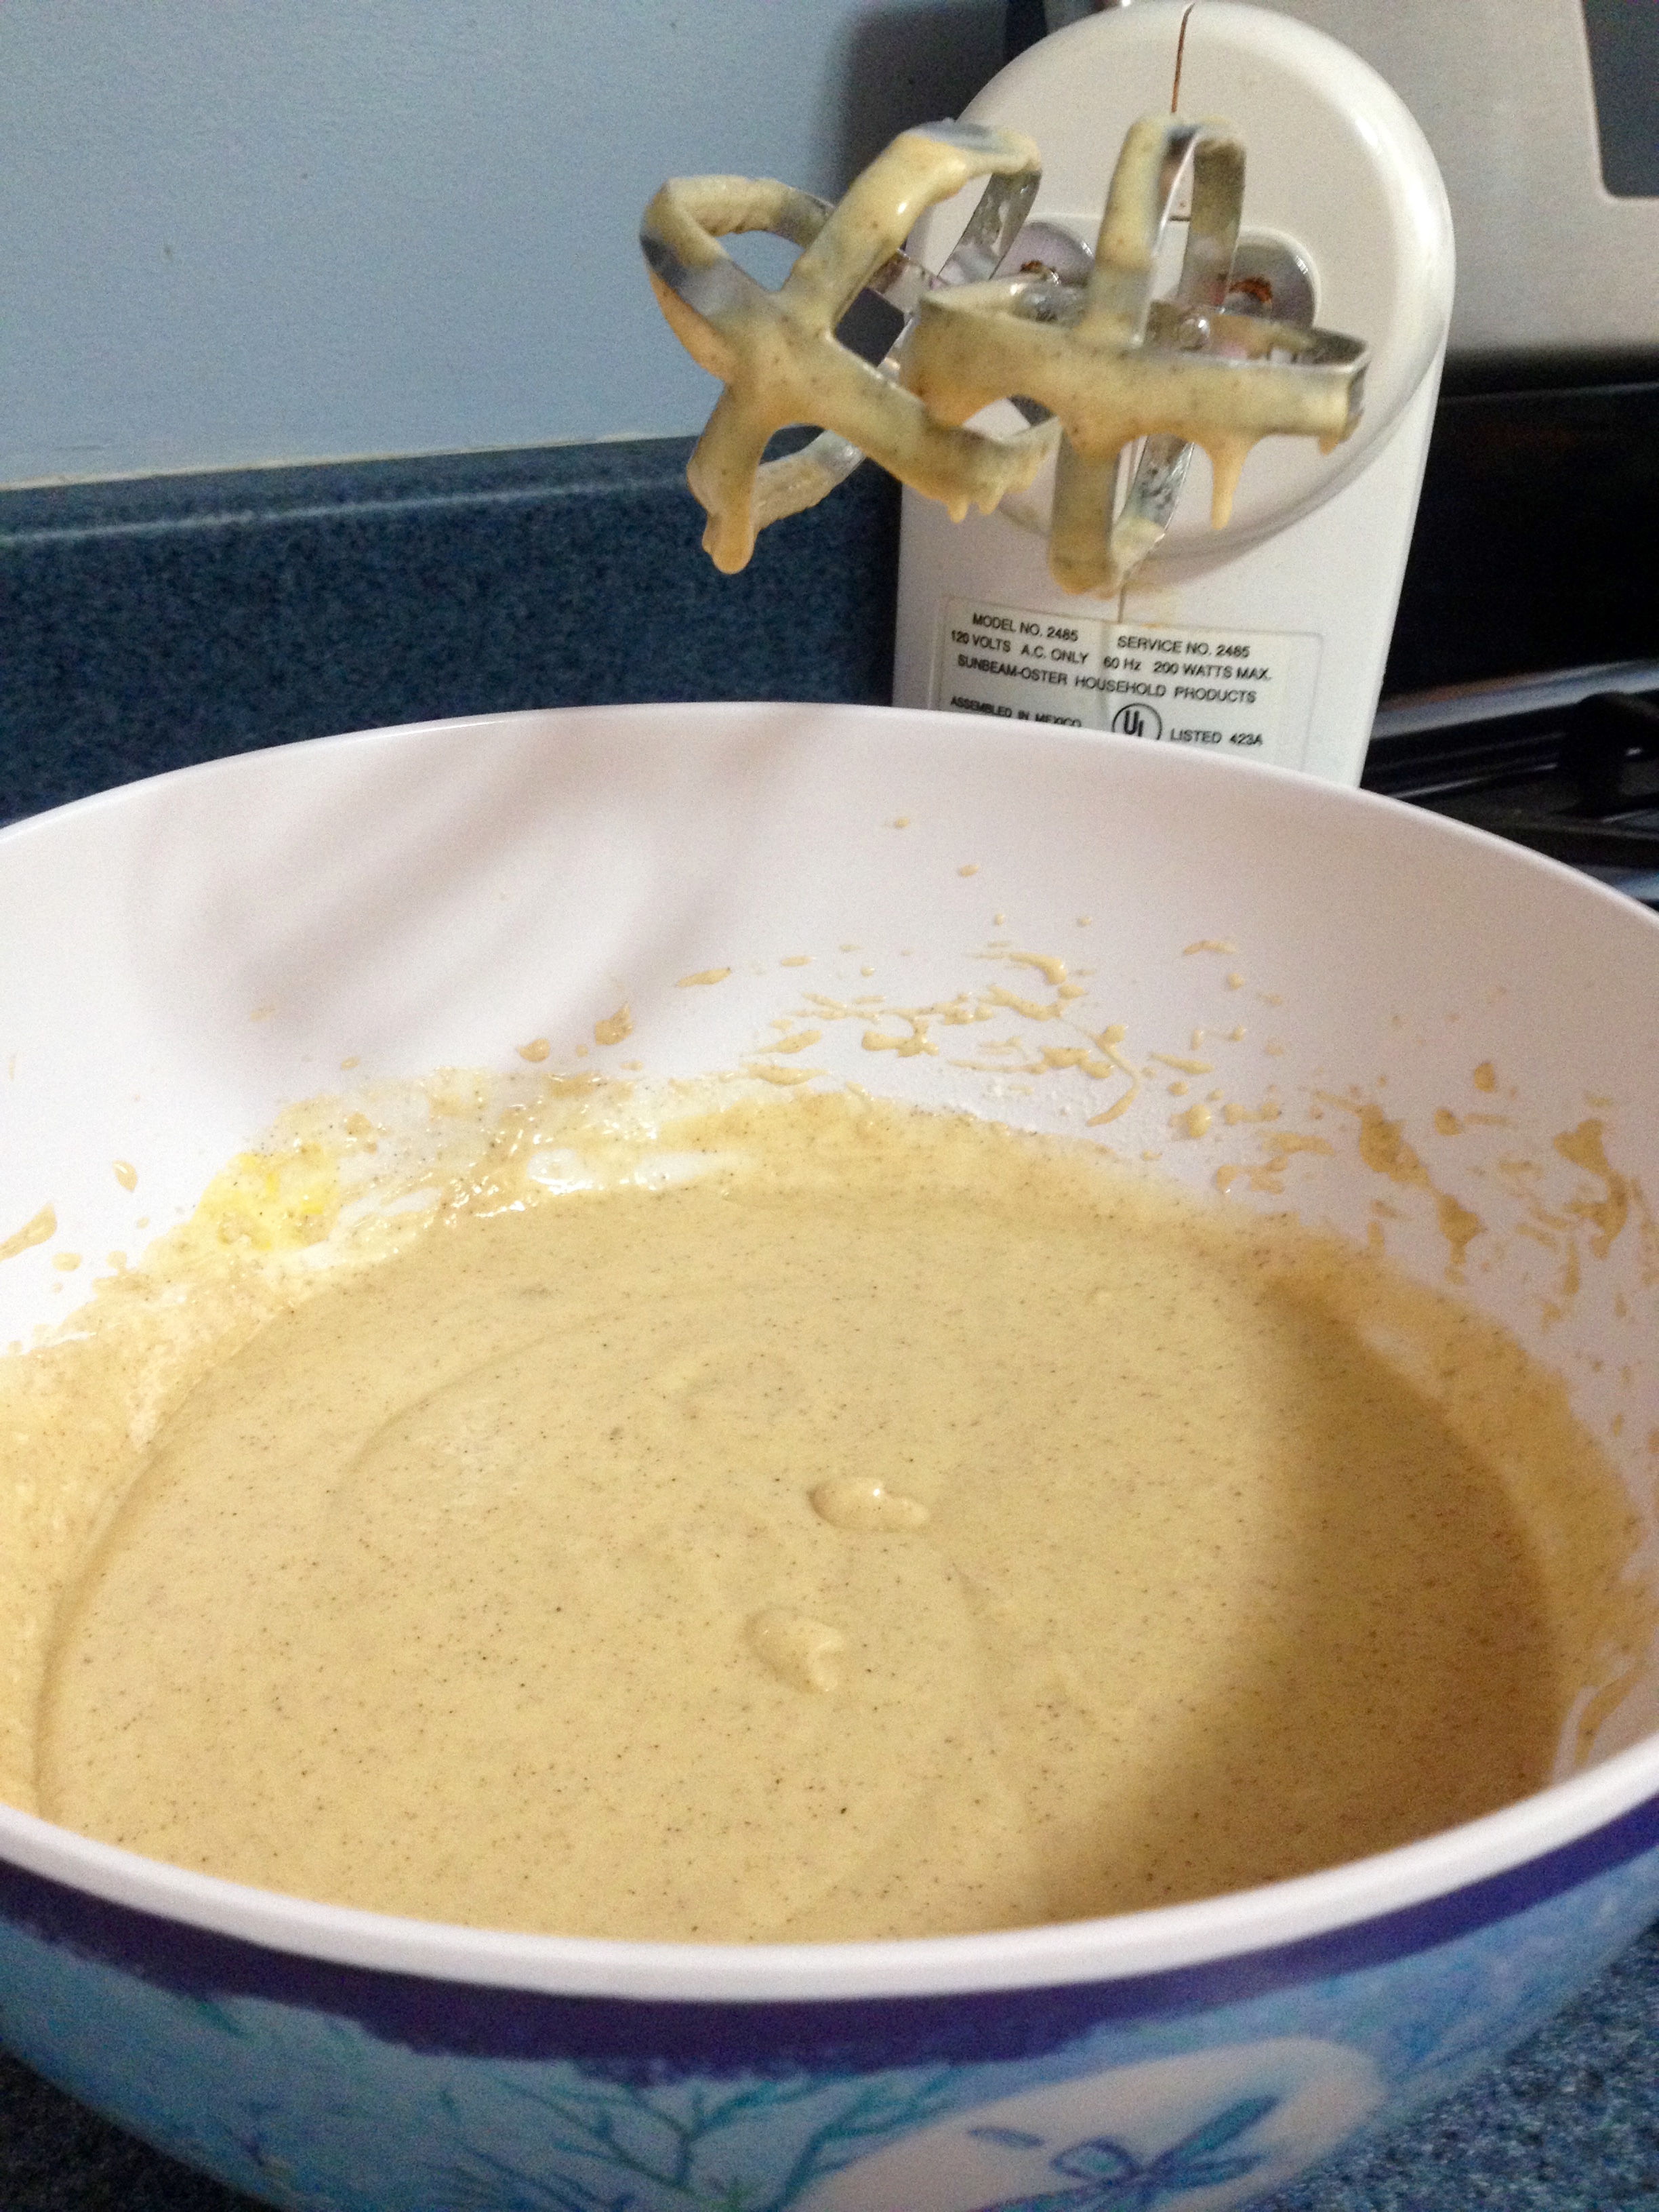
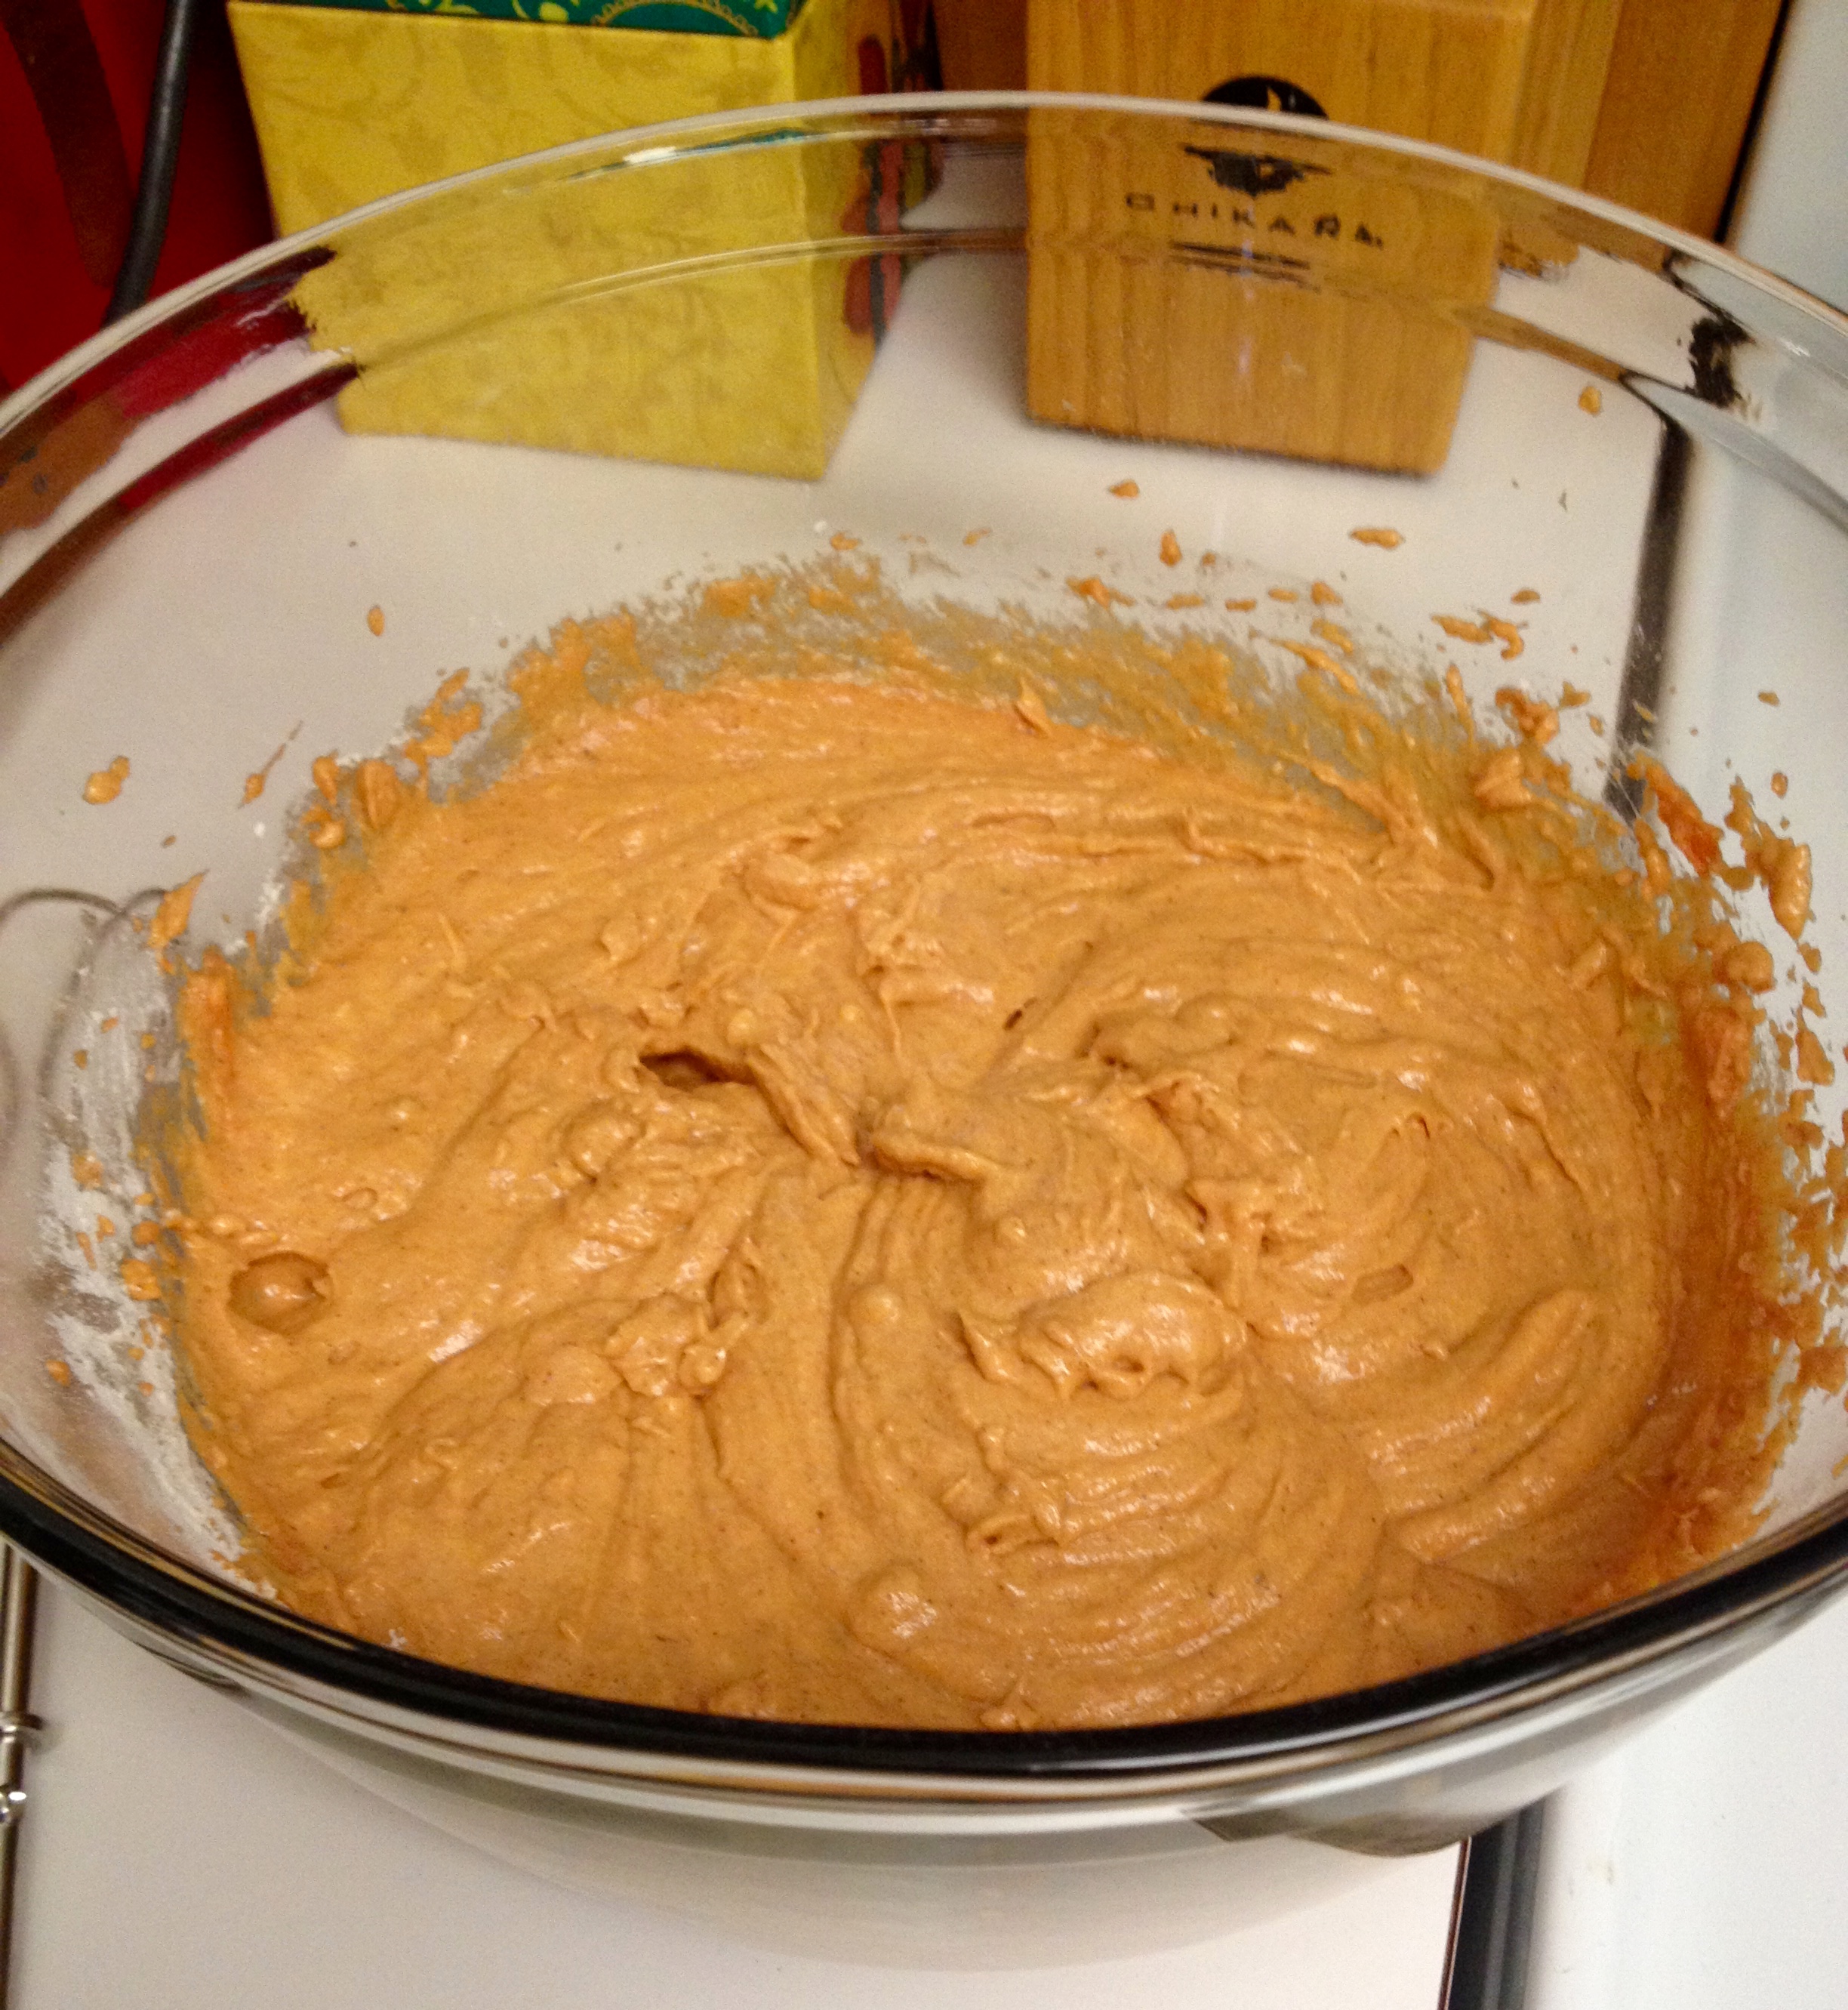
Preheat the oven to 325°. Line a baking sheet with aluminum foil or parchment paper and set it aside (this will be for putting hot, freshly topped donuts on). In a large bowl, mix the flour, brown sugar, baking soda and baking powder, salt, and pumpkin pie spice until there are no clumps. Then, add in the pumpkin puree, eggs, milk, and butter. Mix with a hand mixer on low speed until it’s fully mixed. You’ll end up with a lovely orange colored batter.
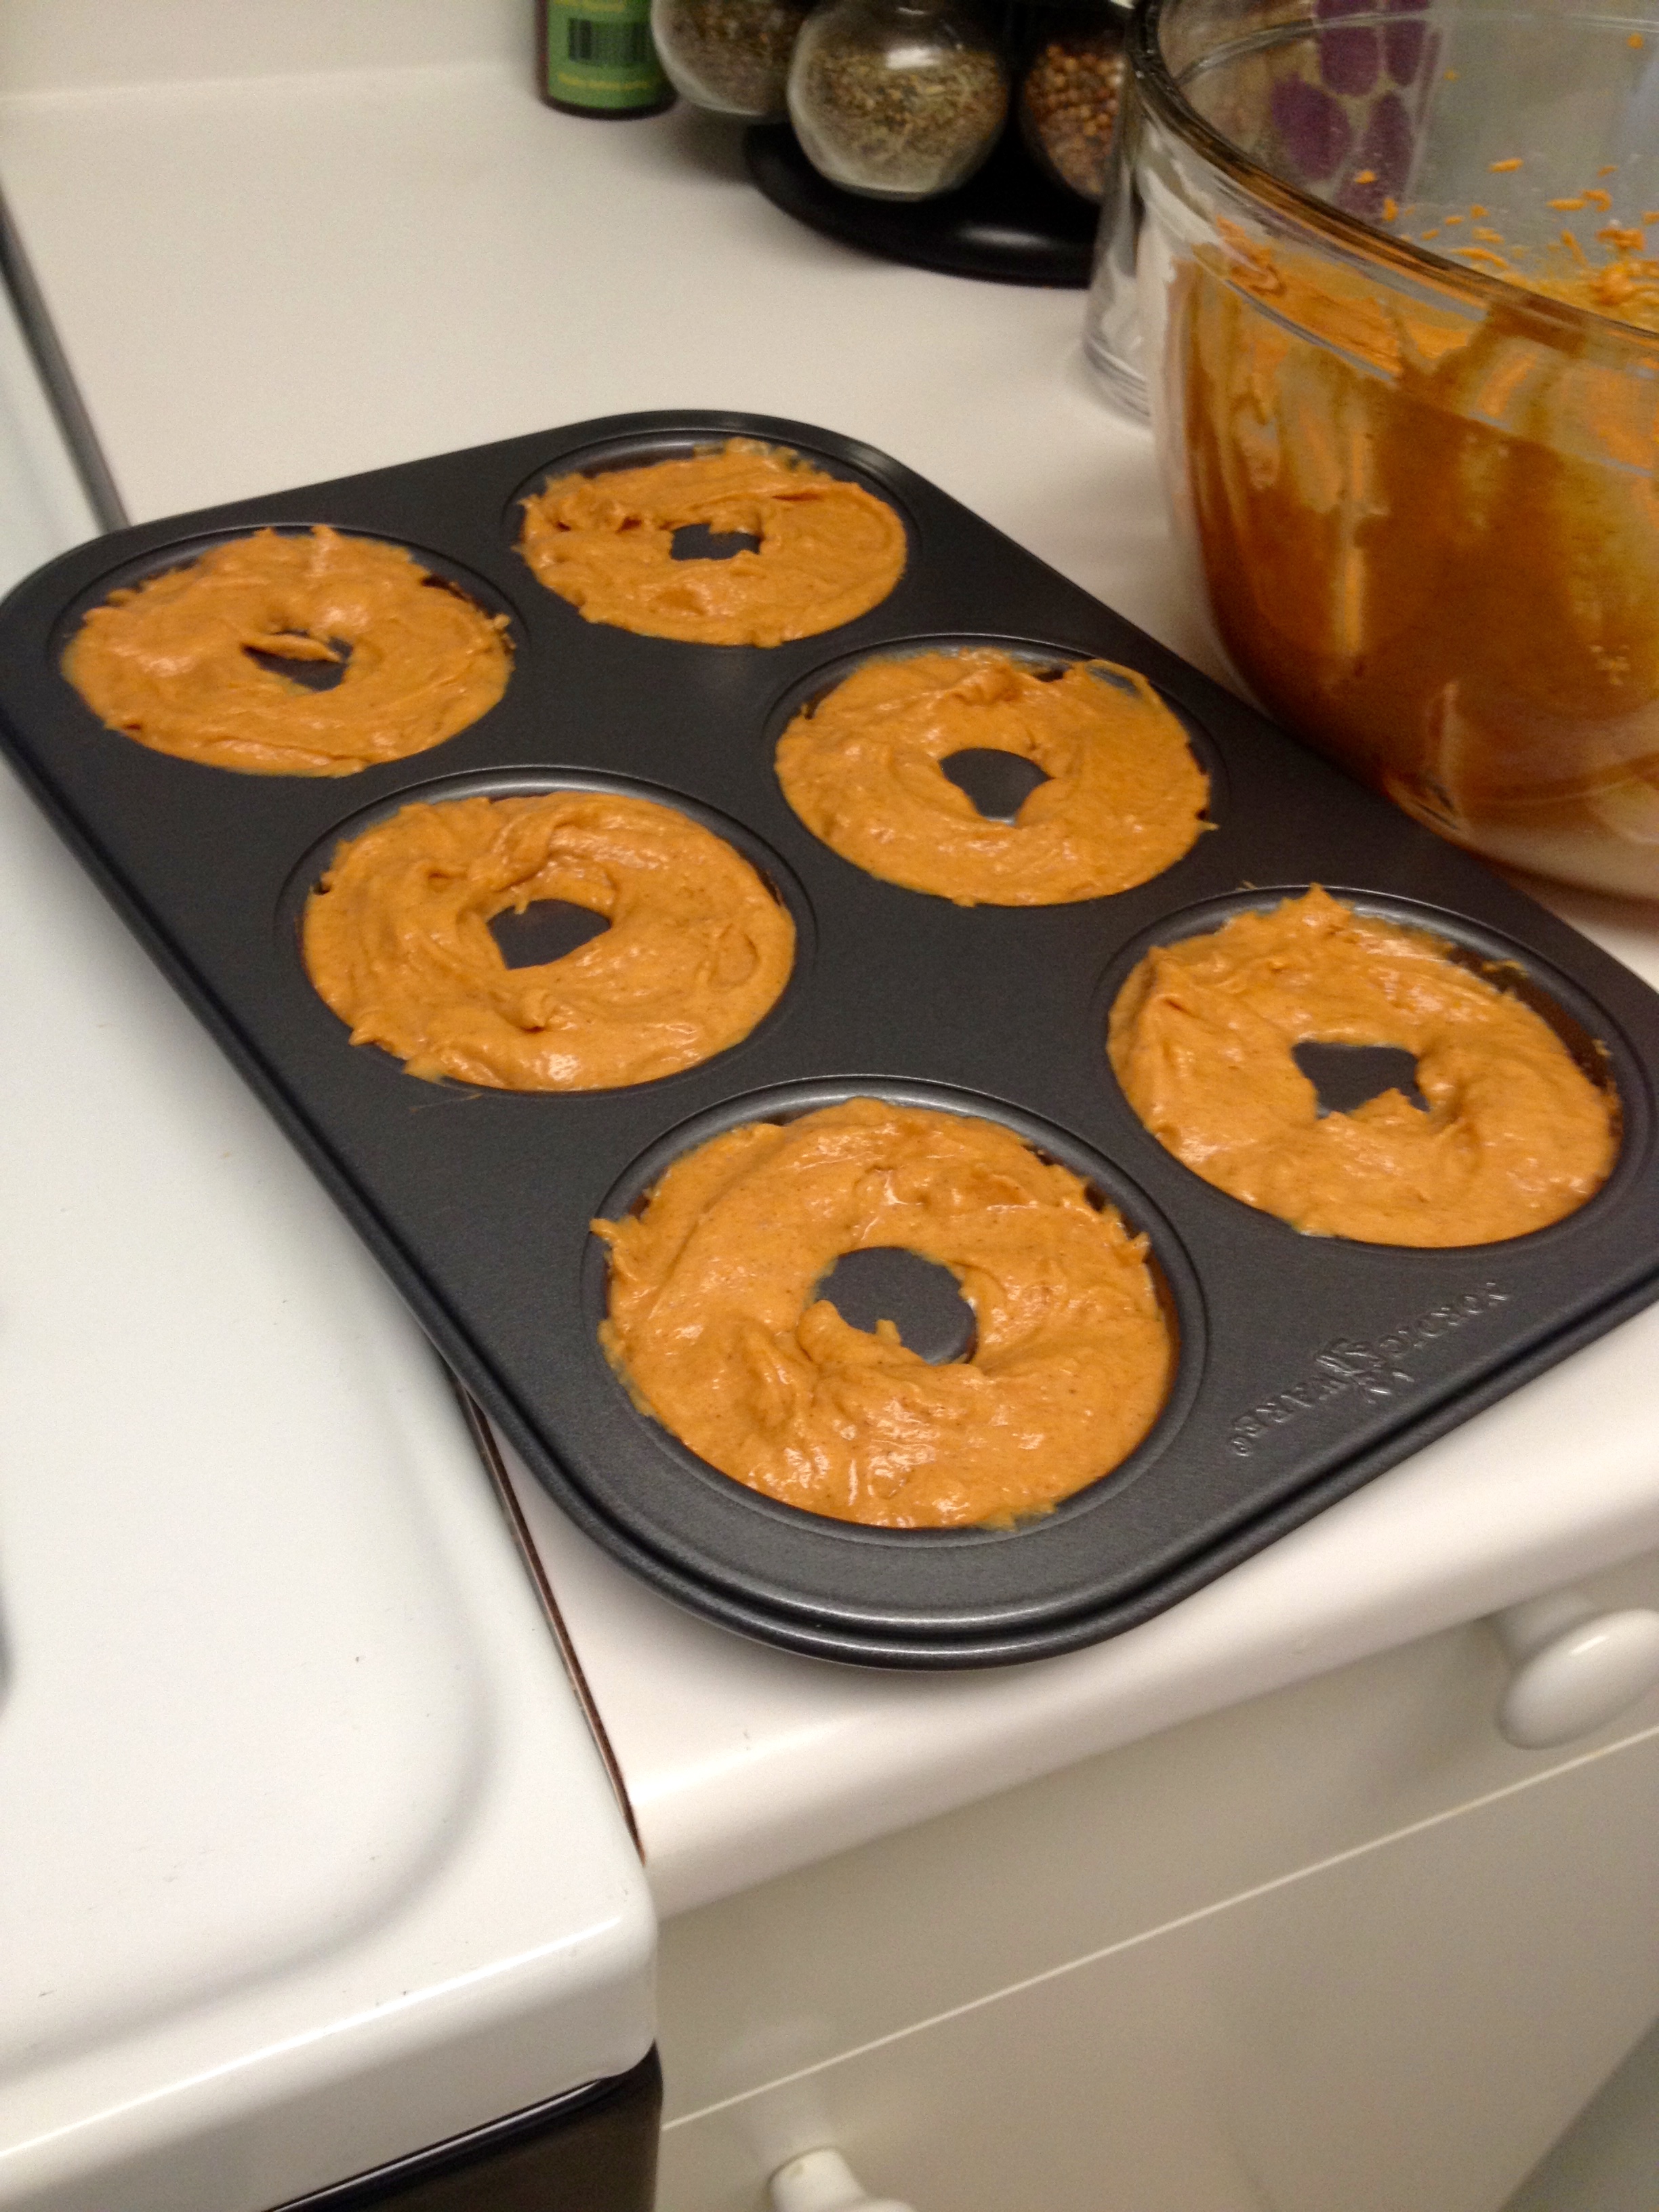
NOTE: be warned that one can of pumpkin is usually 15 ounces, rather than the 8oz that you need. Don’t use the whole can or else you’ll have way too much pumpkin and a really wet dough!
Now, it’s time to fill the donut pan! On my first go with filling the pan, I think I filled them a little too full- you want the batter to be a little lower than level with the surface of the donut pan.
Bake 13-15 minutes, until the donuts spring back when you gently touch them, or until a toothpick inserted in the donut comes out clean.
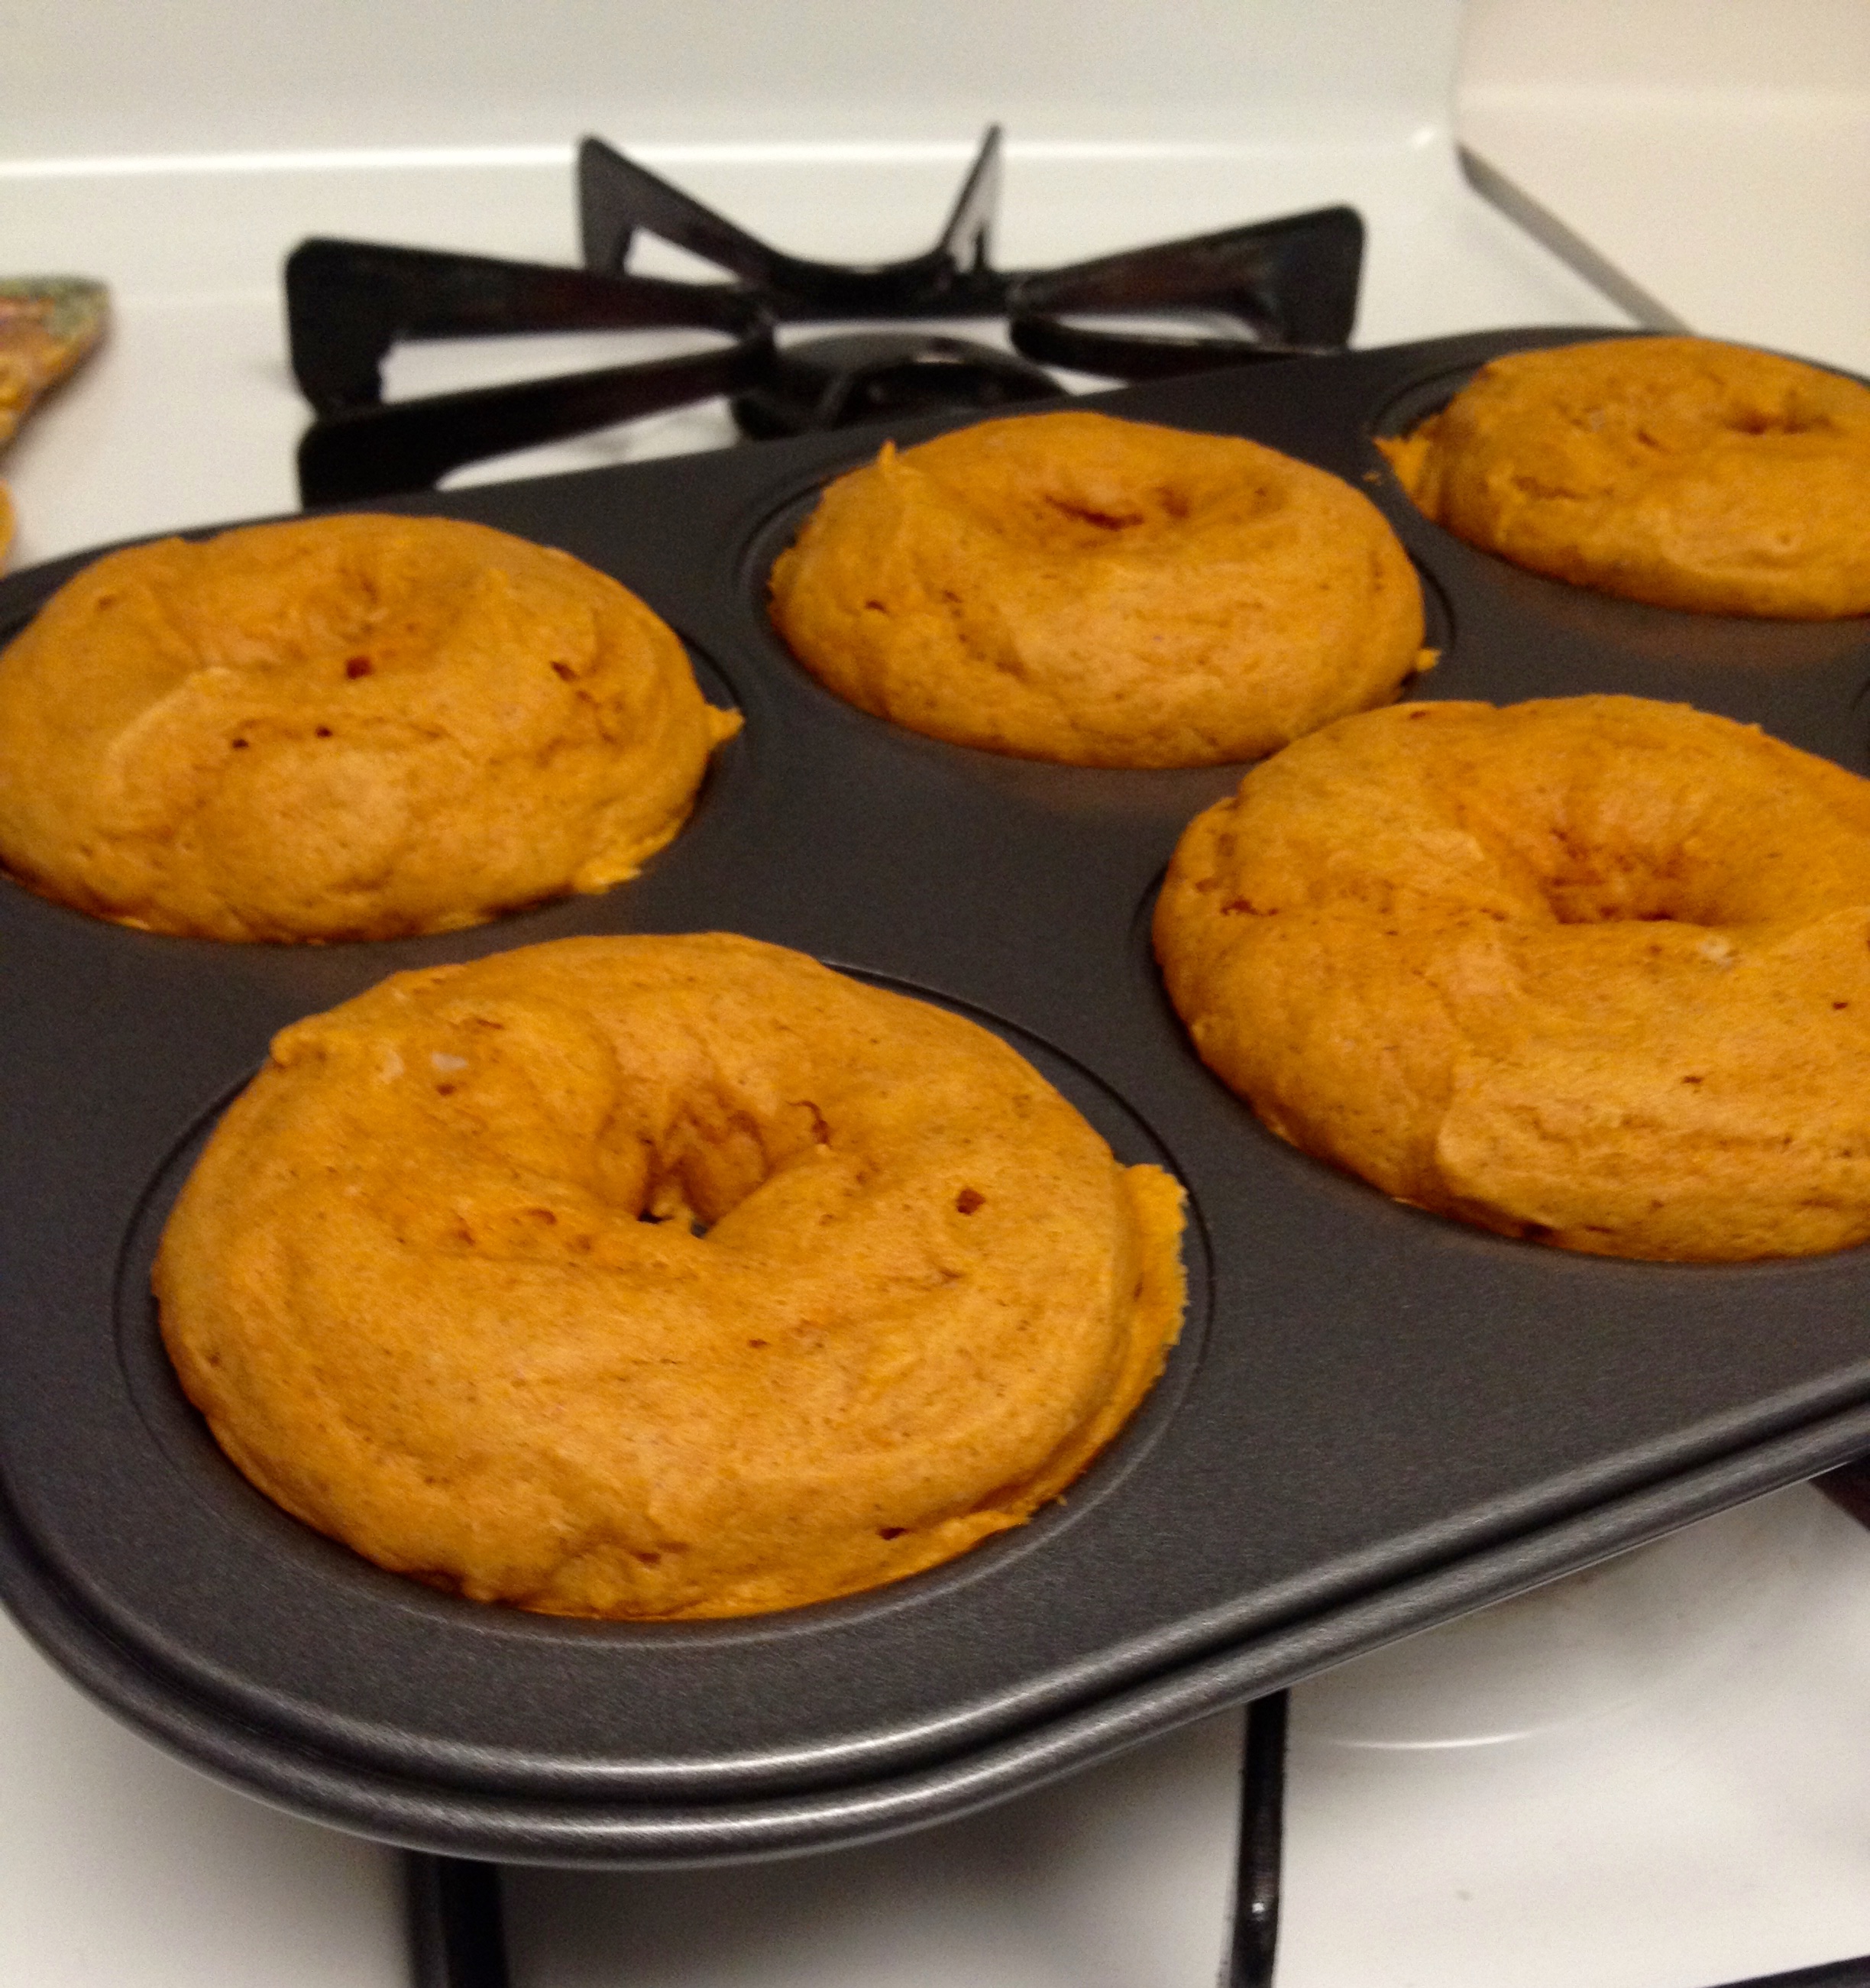
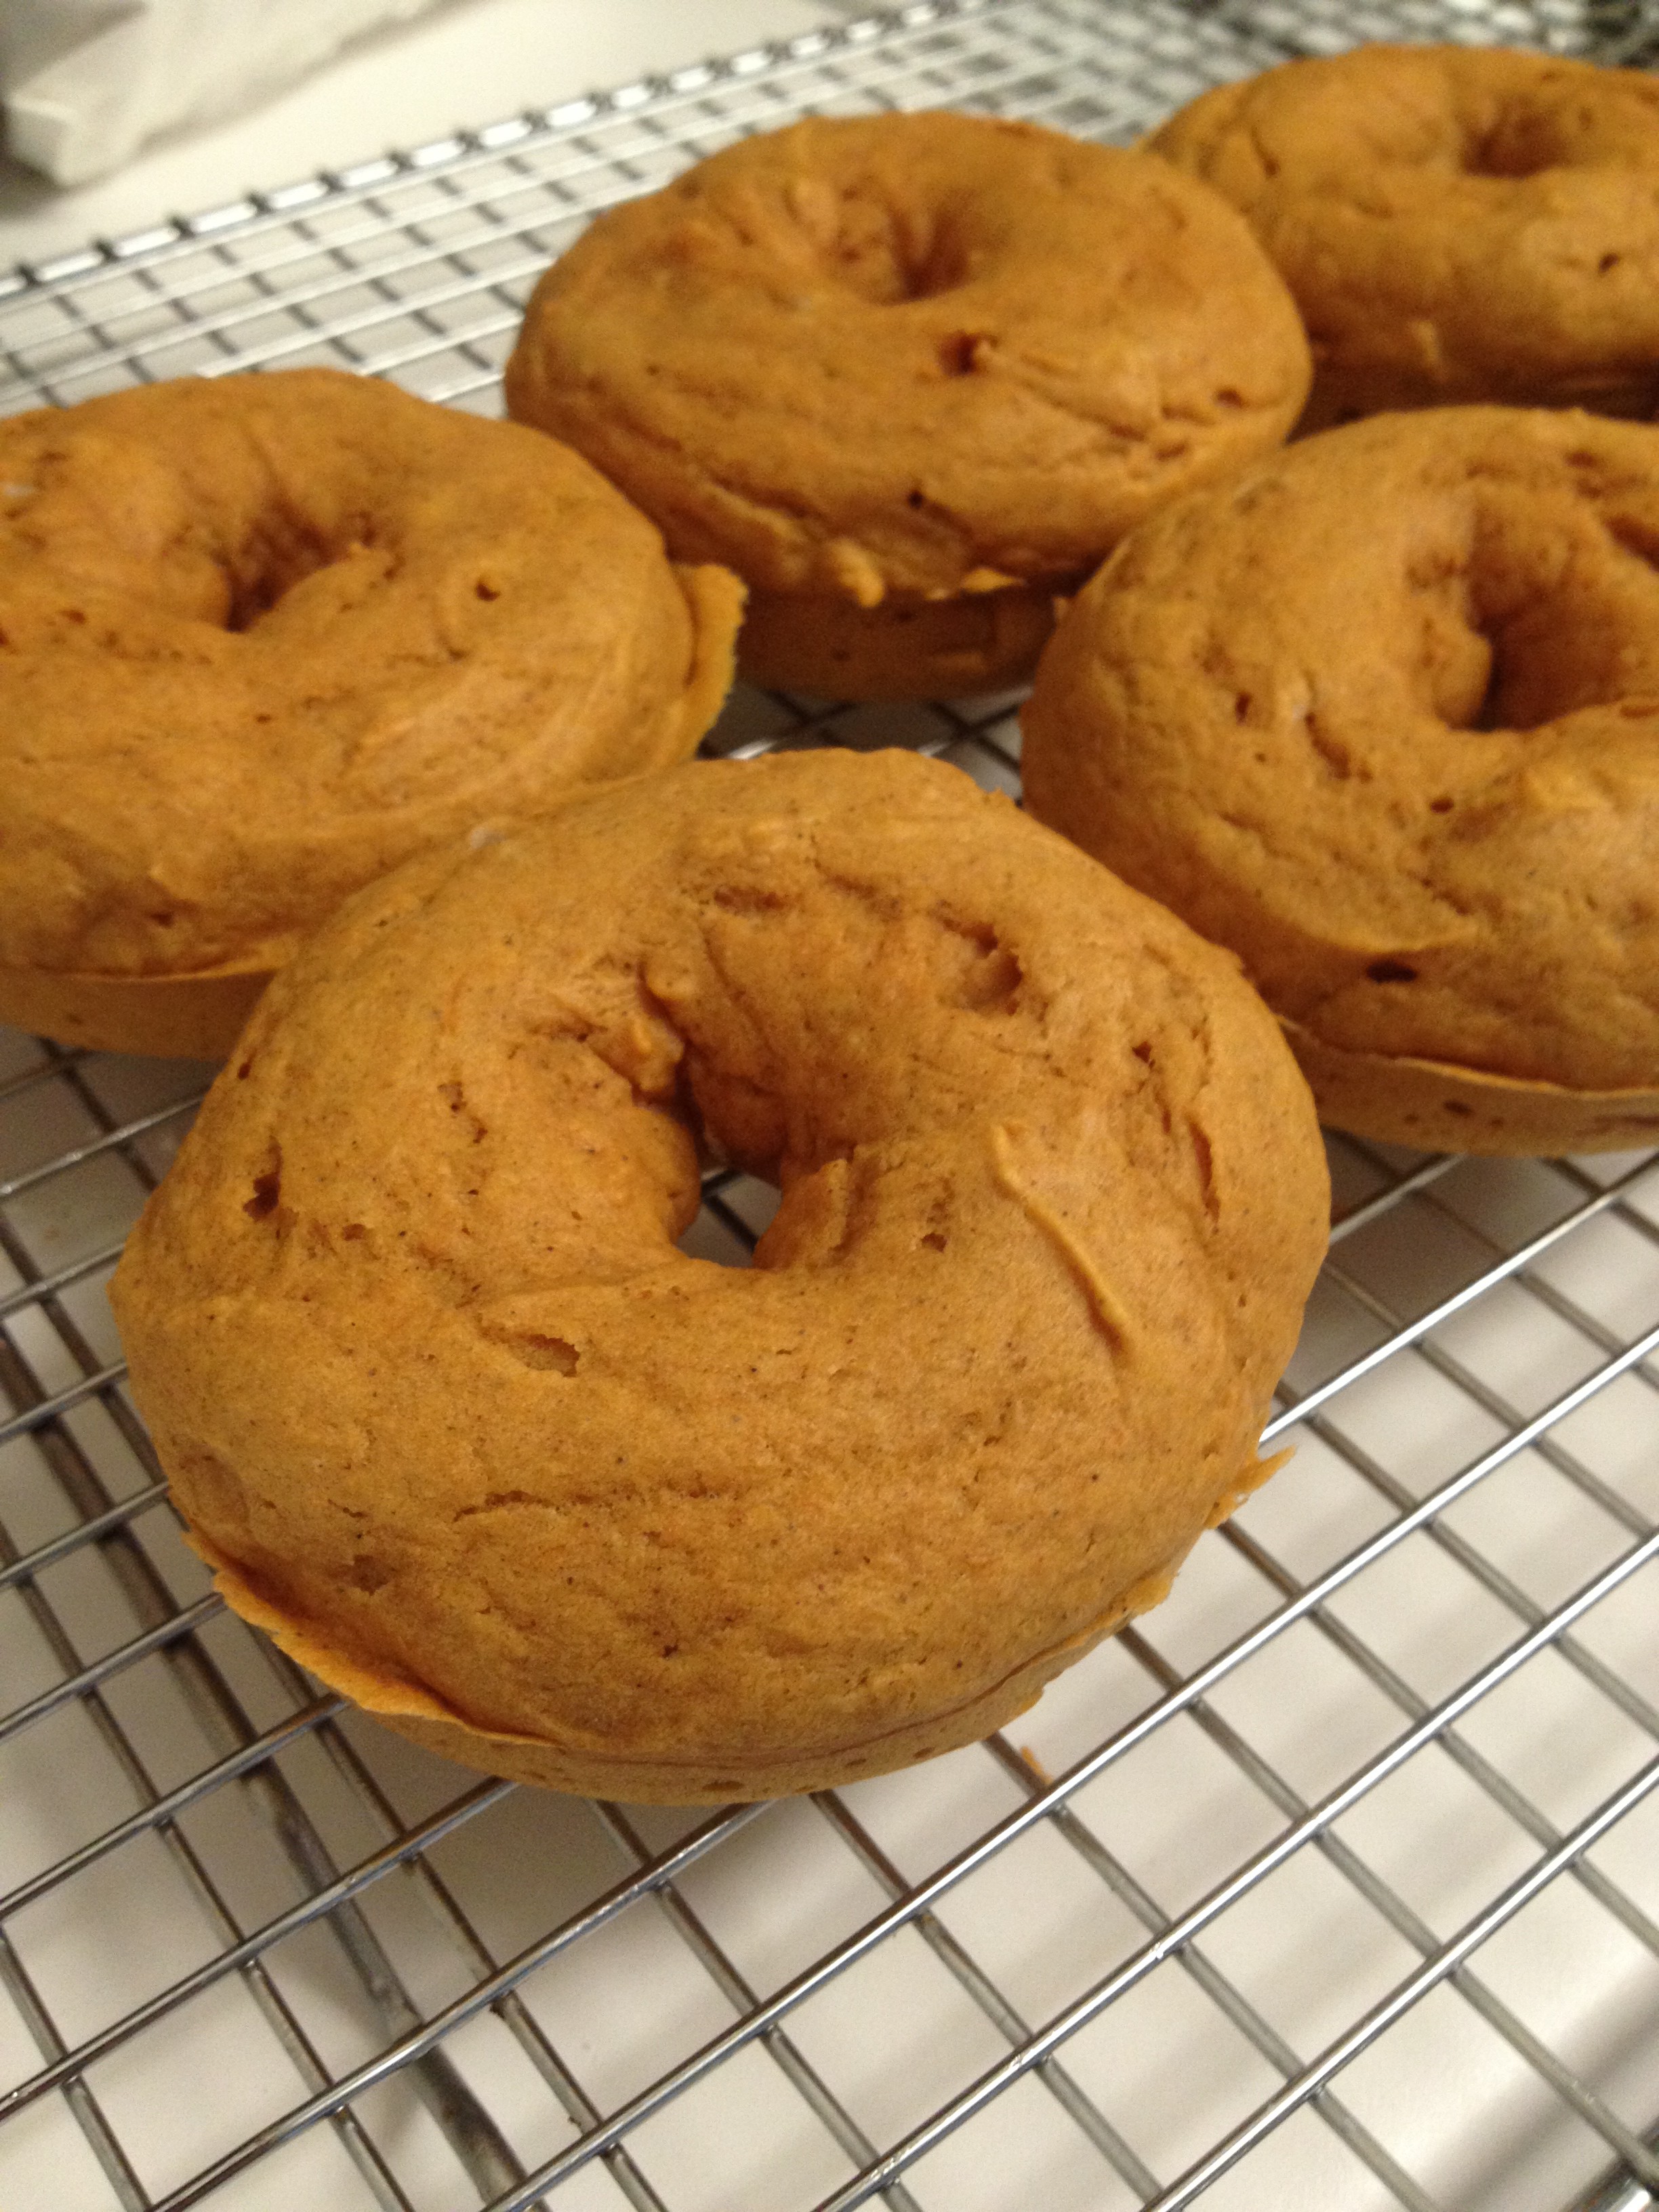
These come out of the pan super easily, so while the donuts are still piping hot you can flip the pan upside down and turn the donuts out onto a cooling rack.
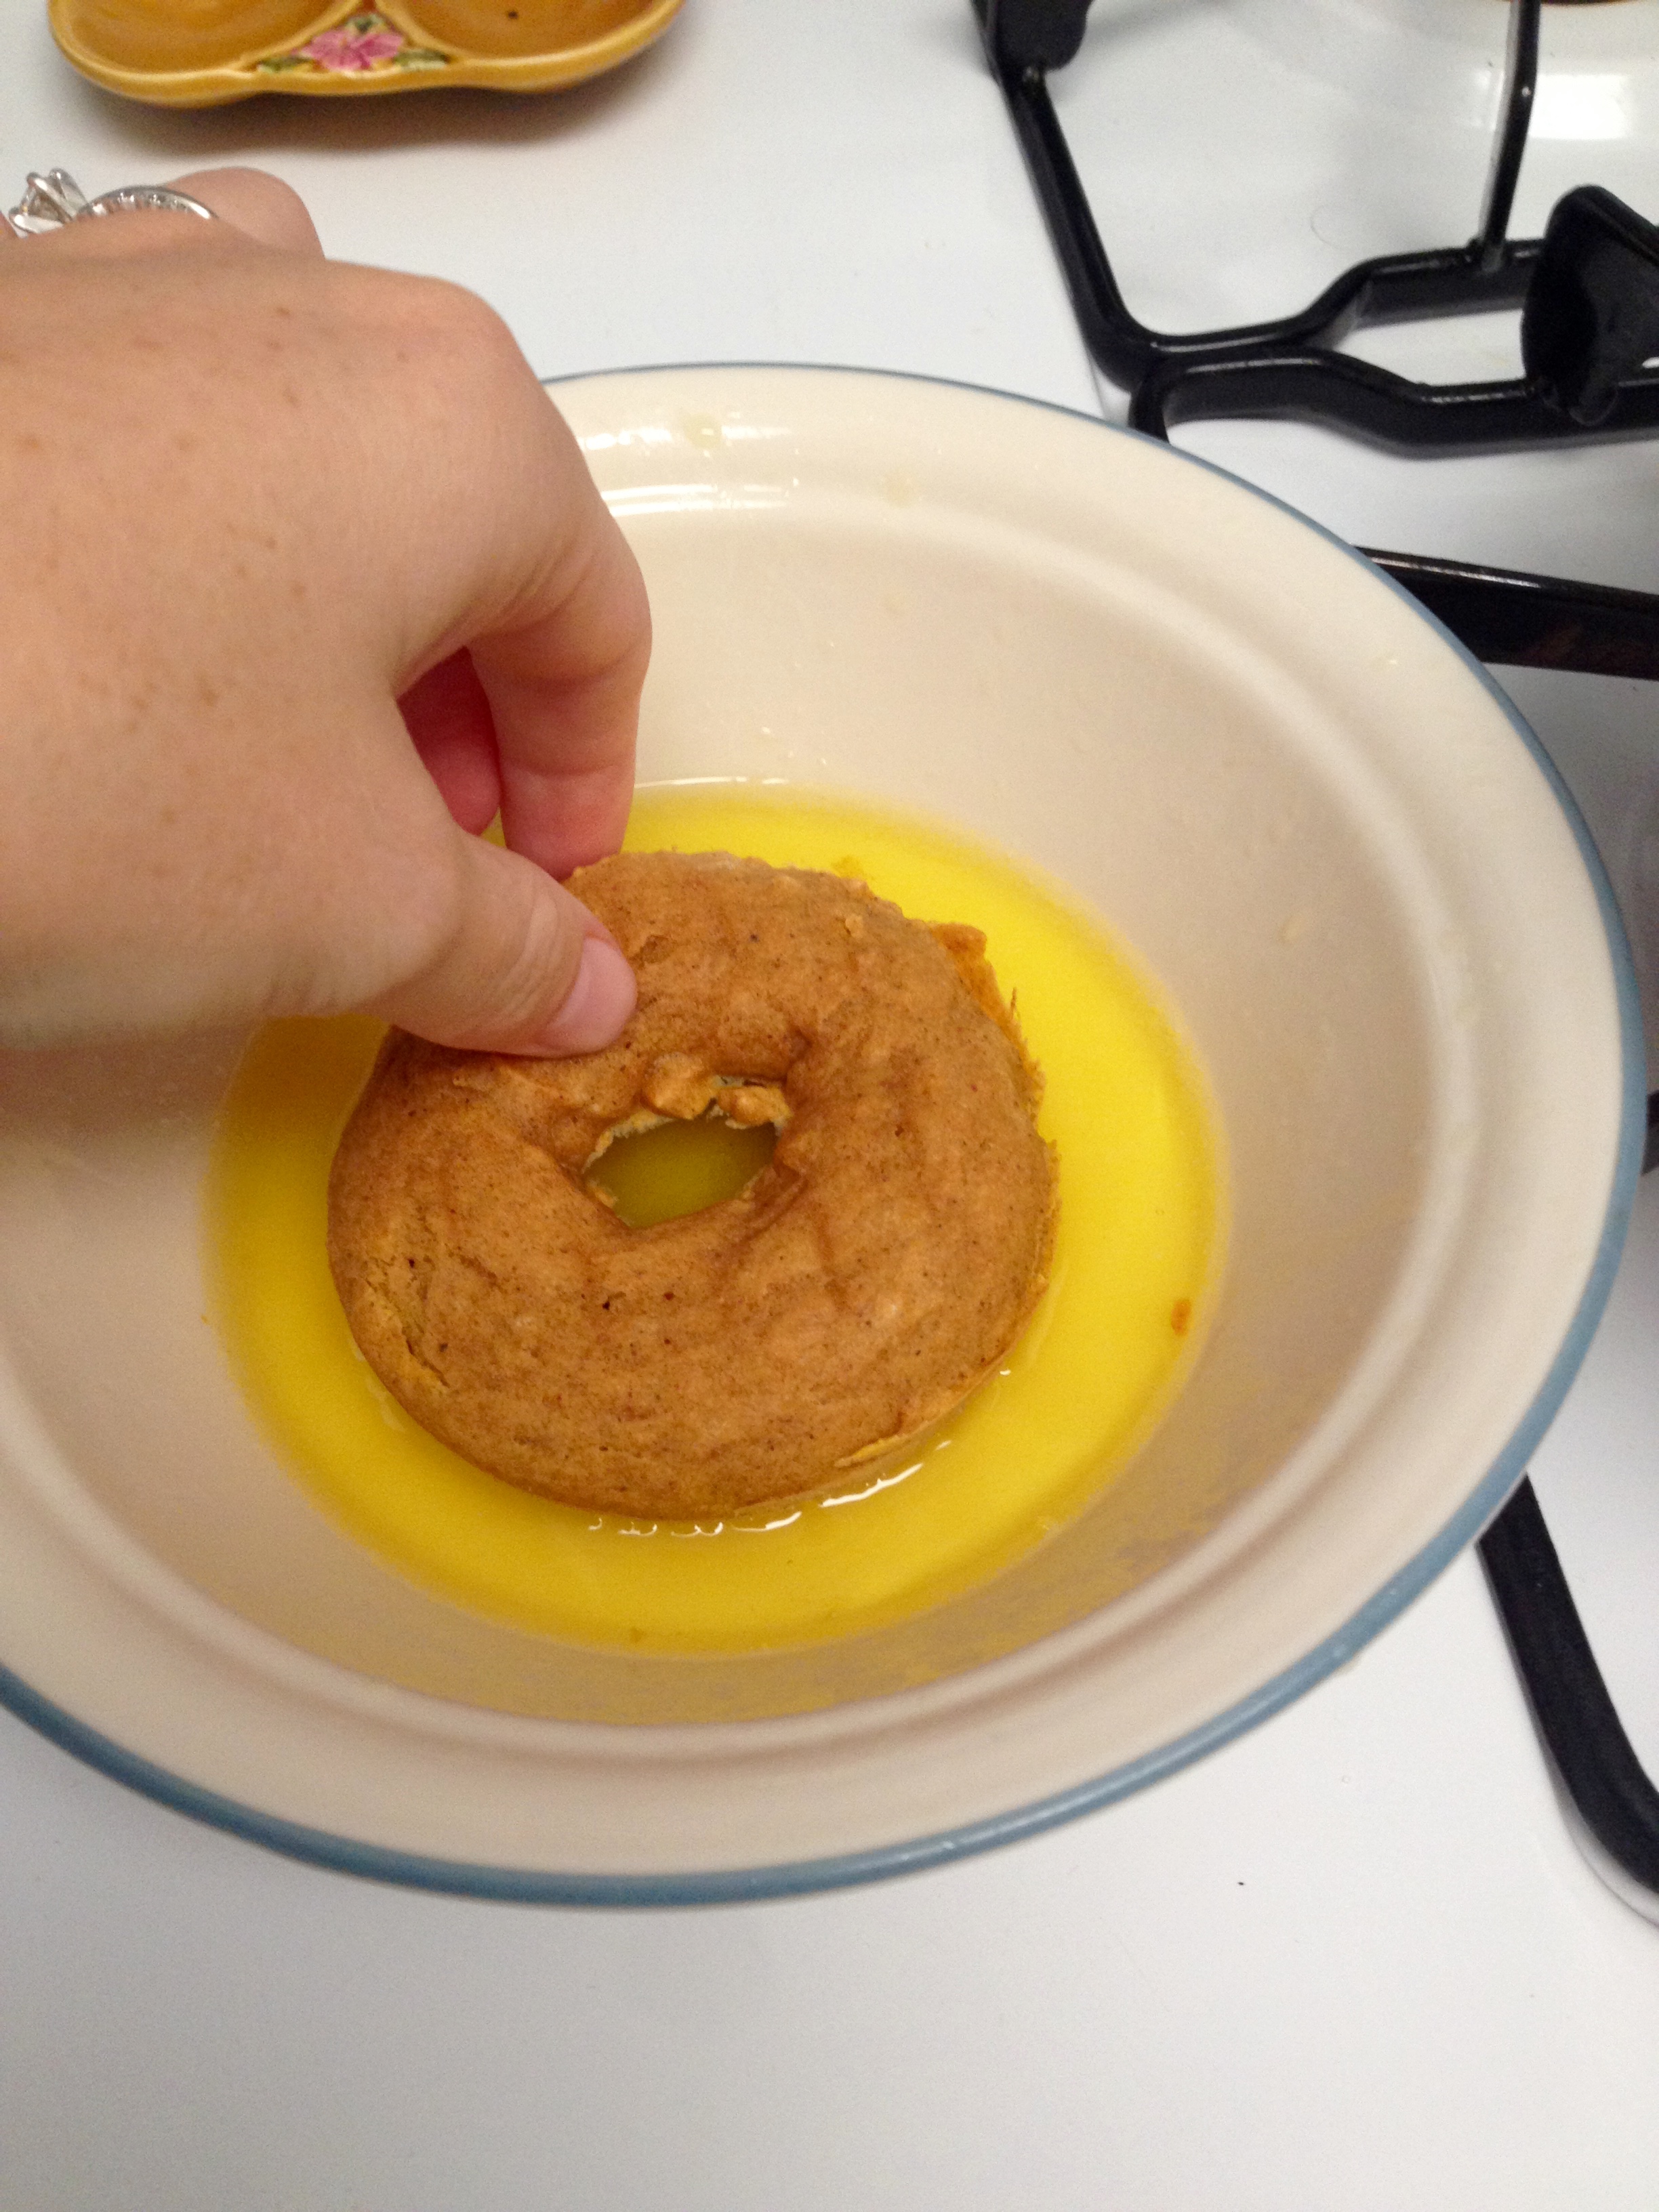
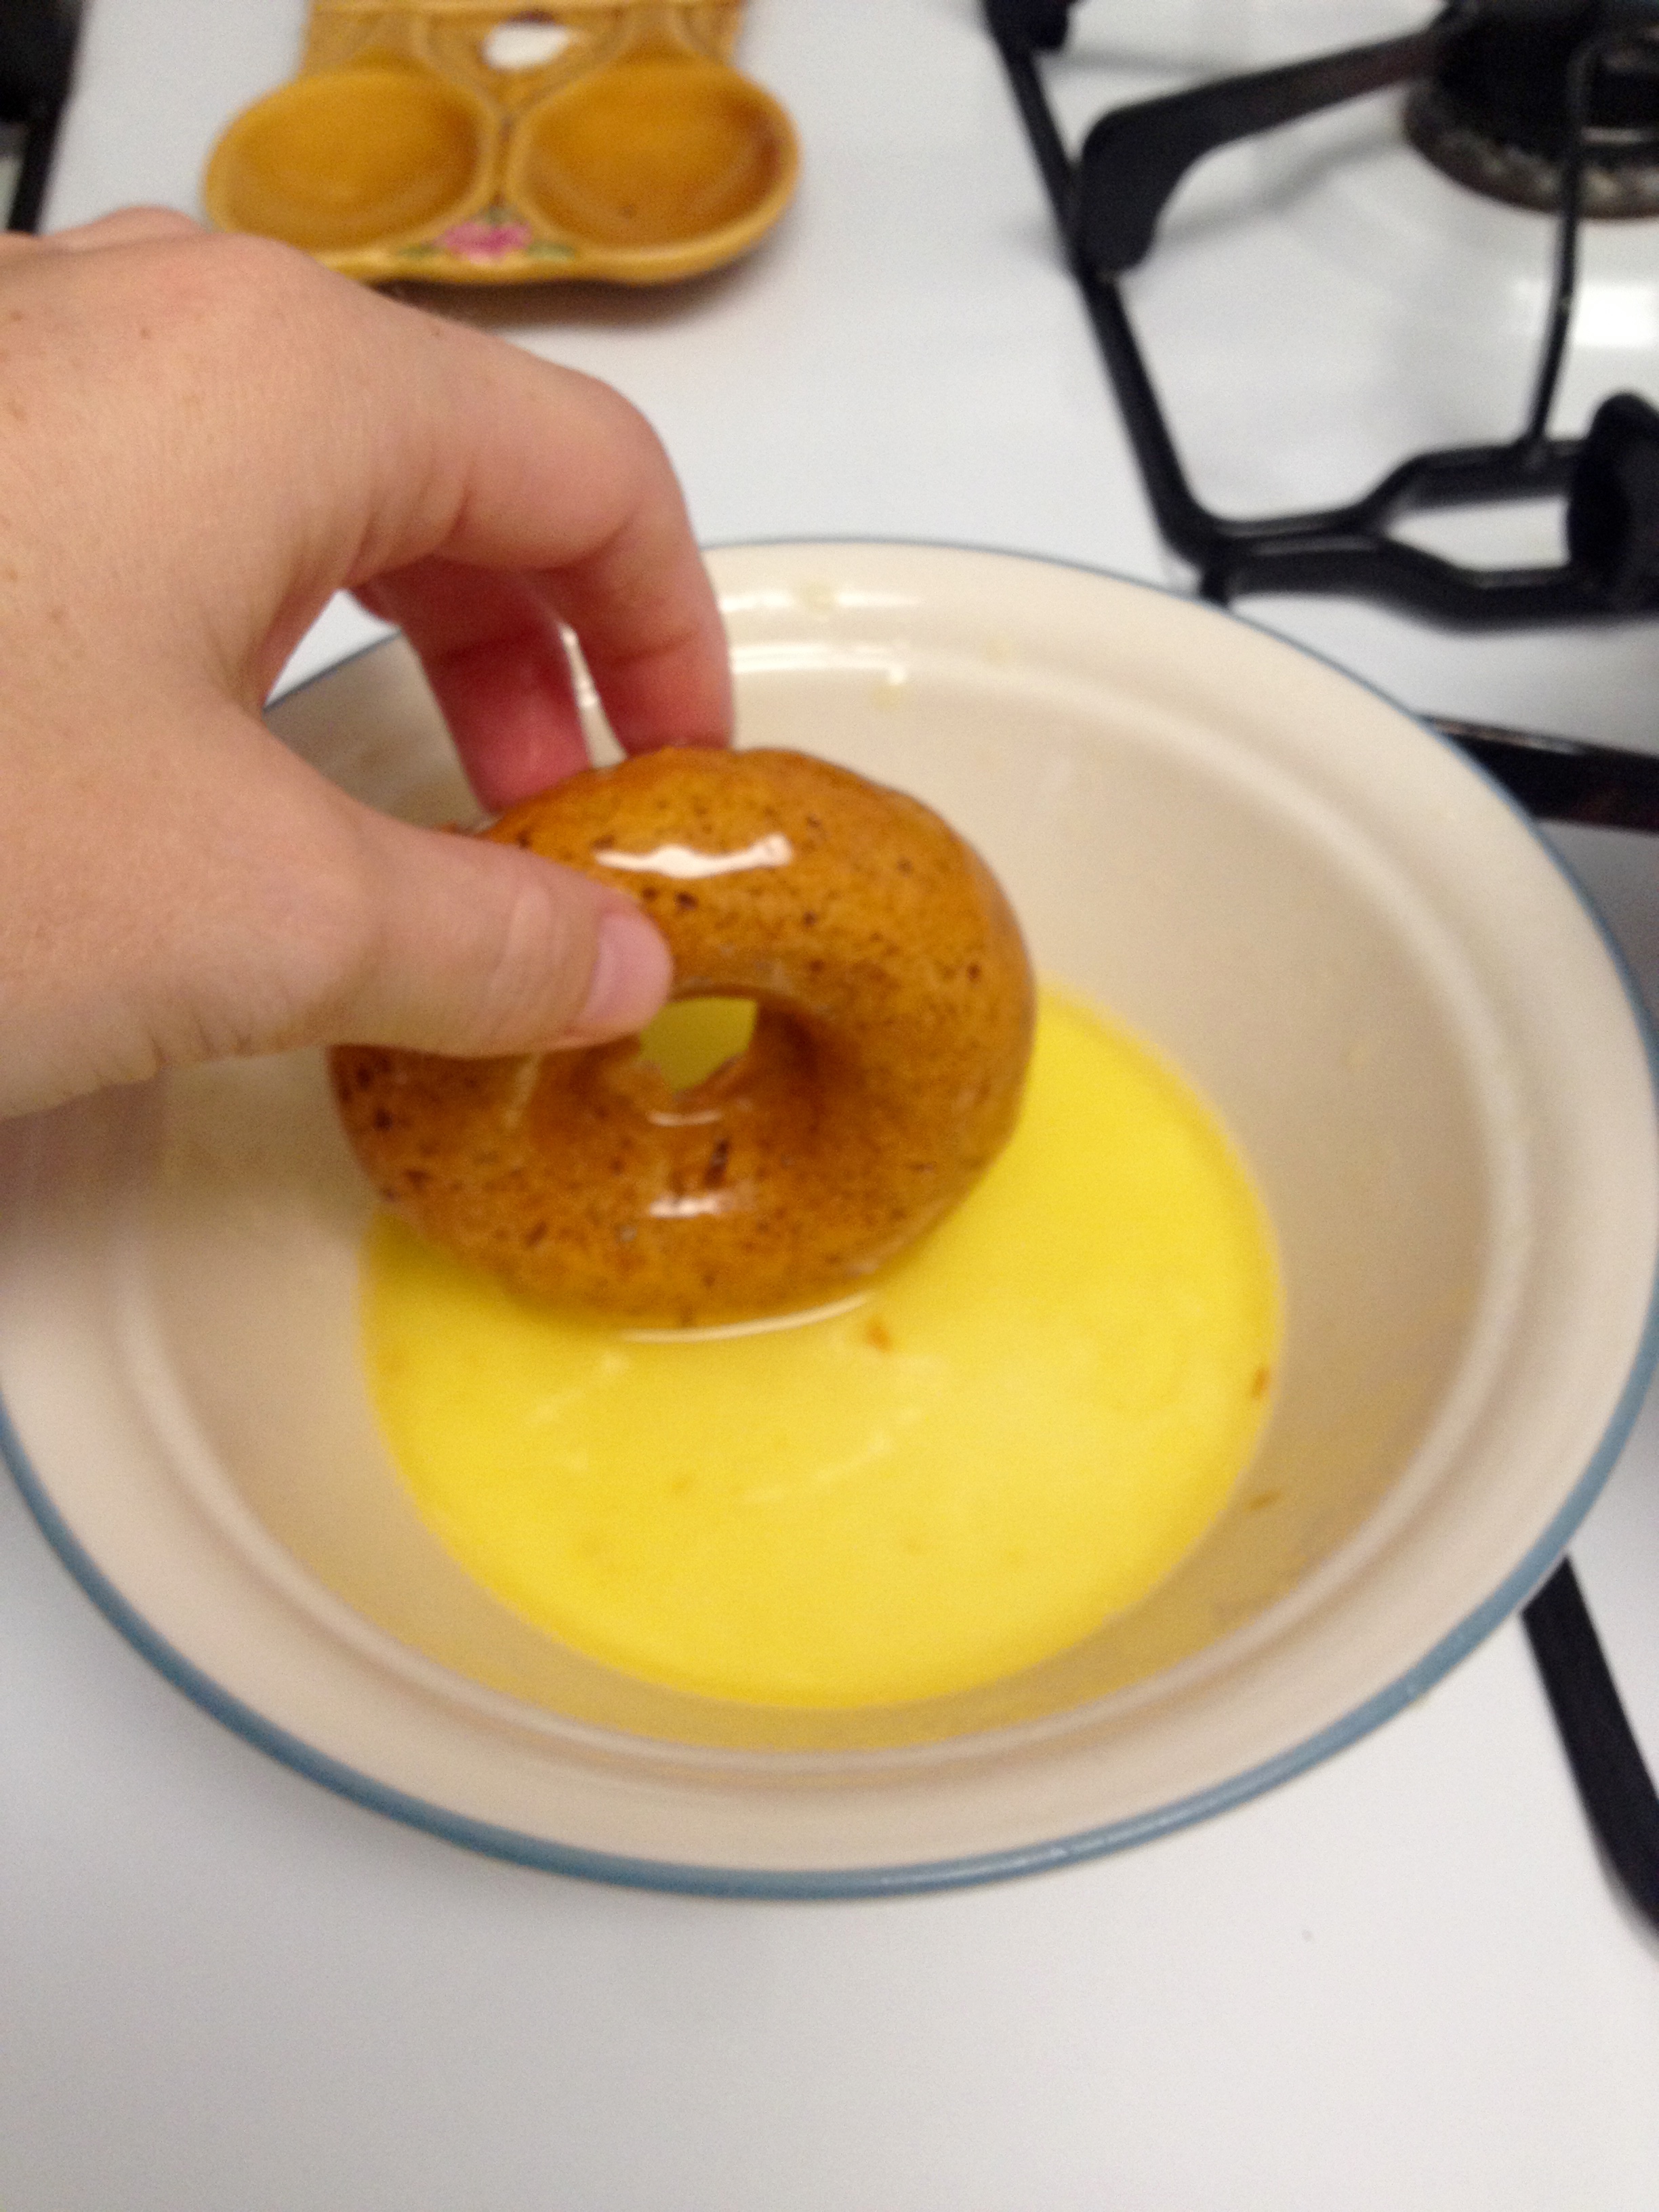
Now for the toppings! For both my glazed donuts and my sugared ones, I had an assembly line going: first the donuts, then the dips, and then the lined baking sheet so that I could dip and place the donuts without too much back-and-forth action. The glaze assembly line is shown below.
Cream Cheese Glaze ingredients:
- 4 oz cream cheese, softened
- 1 cup confectioner’s sugar
- 1 tsp milk
Mix all the ingredients together using a hand mixer, starting on low speed and increasing to high speed to incorporate air, until all ingredients are well mixed. If you want the glaze to be firmer, you can add more confectioner’s sugar- if you want it to be looser, you can add more milk. Be careful with the amount of milk you add, though. A little milk goes a long way in changing the consistency of these glazes!

Dip as many donuts as you want into the glaze. You can dip only one side in so that it’s like a frosted donut (this glaze doesn’t harden, so it really is like frosting!), or you can do what I did, and coat the whole donut in the glaze. I will say, since the glaze stays soft, it makes the donuts a little harder to eat if they’re totally covered in the glaze… but who cares. It’s delicious, and you can lick your fingers after.
Cinnamon and Sugar Topping:
- 1/4 cup (1/2 stick) butter
- 1/2 cup granulated sugar
- 1 Tbsp ground cinnamon
Melt the butter in a small bowl. In a separate bowl, combine the cinnamon and sugar. Dip as many donuts as you want in the melted butter. Make sure to get the sides of the donut, too, so that the cinnamon/sugar mixture sticks to the sides of the donut. Then, toss the donuts in the cinnamon and sugar mix until they’re fully coated.
And that’s it! You can eat the donuts hot, or you can let them cool and set a little bit. They’re delicious either way! I can say first-hand, a donut pan is a worthwhile purchase, and I highly recommend giving these a try! Happy fall!

S’mores Dip… Yeah, I Said It
Hi friends! I hope you’re all having a stellar June, and congratulations to all the high school graduates! Today, the recipe is a remake of a favorite summer dessert- s’mores! I’ve been seeing this recipe pop up all over Facebook, and I knew I had to give it a try and share it with my non-Facebook readers. This is seriously one of the simplest recipes you’ll find. Let’s dig in!
Ingredients:
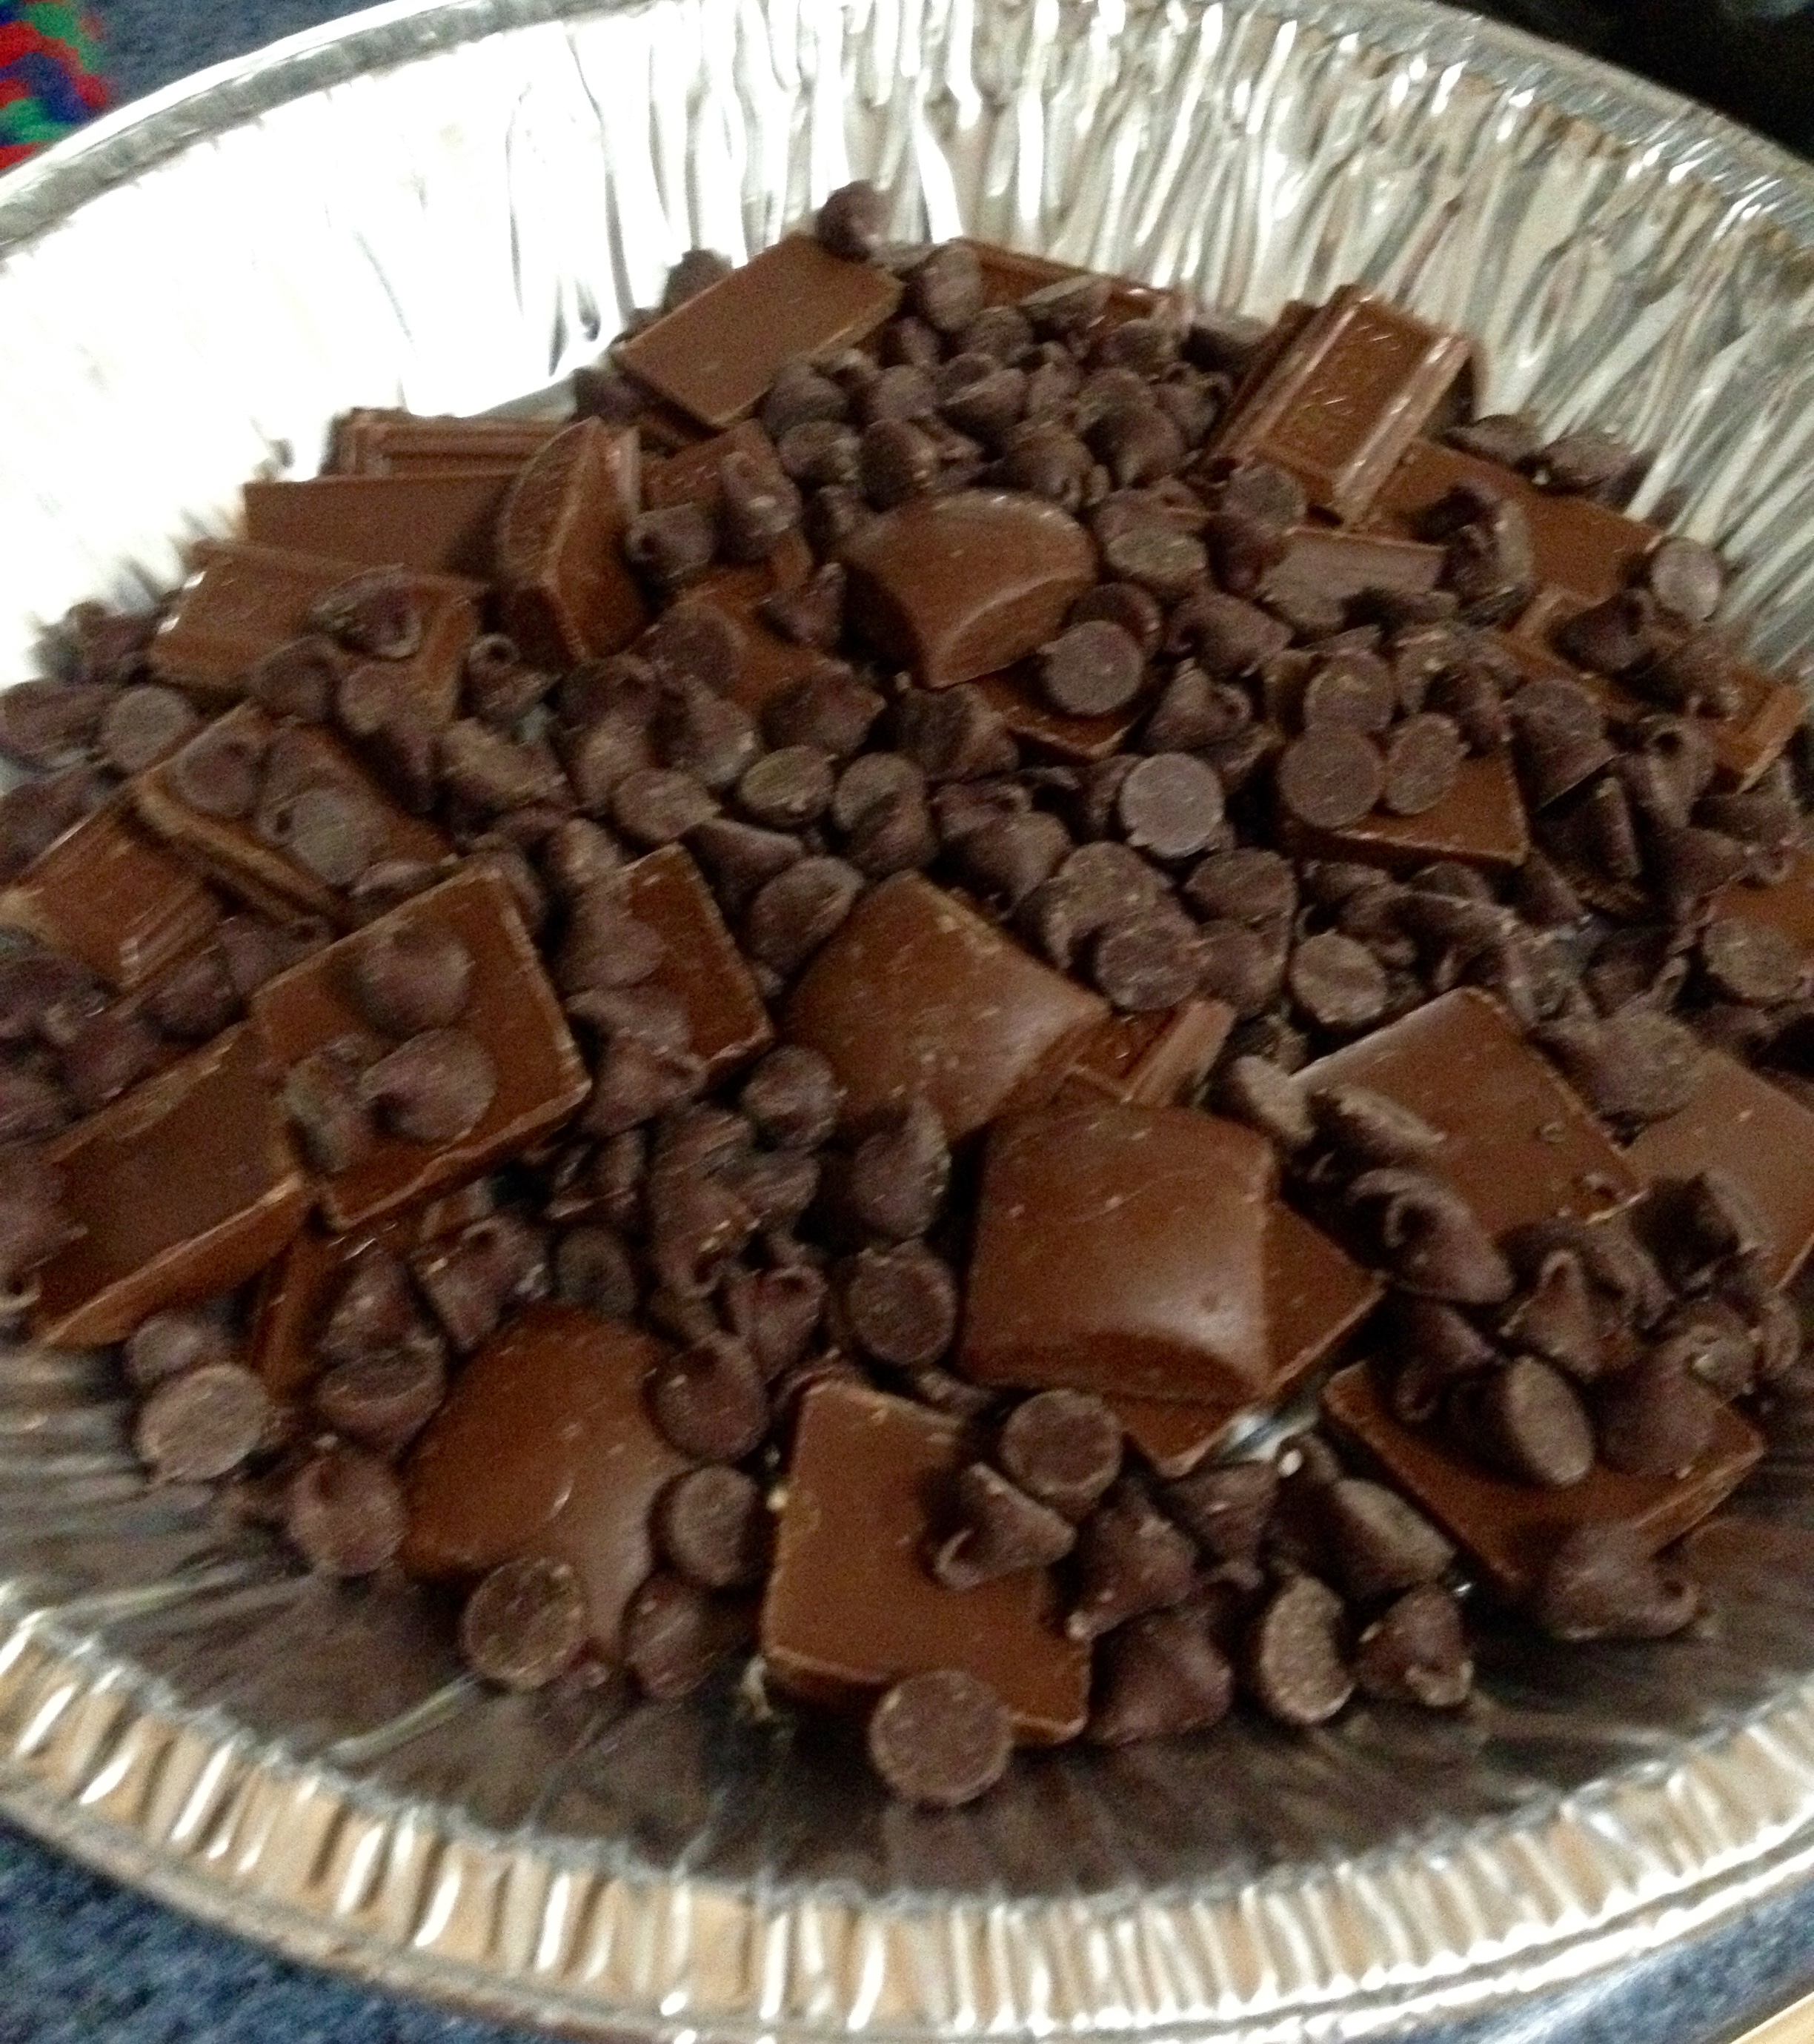
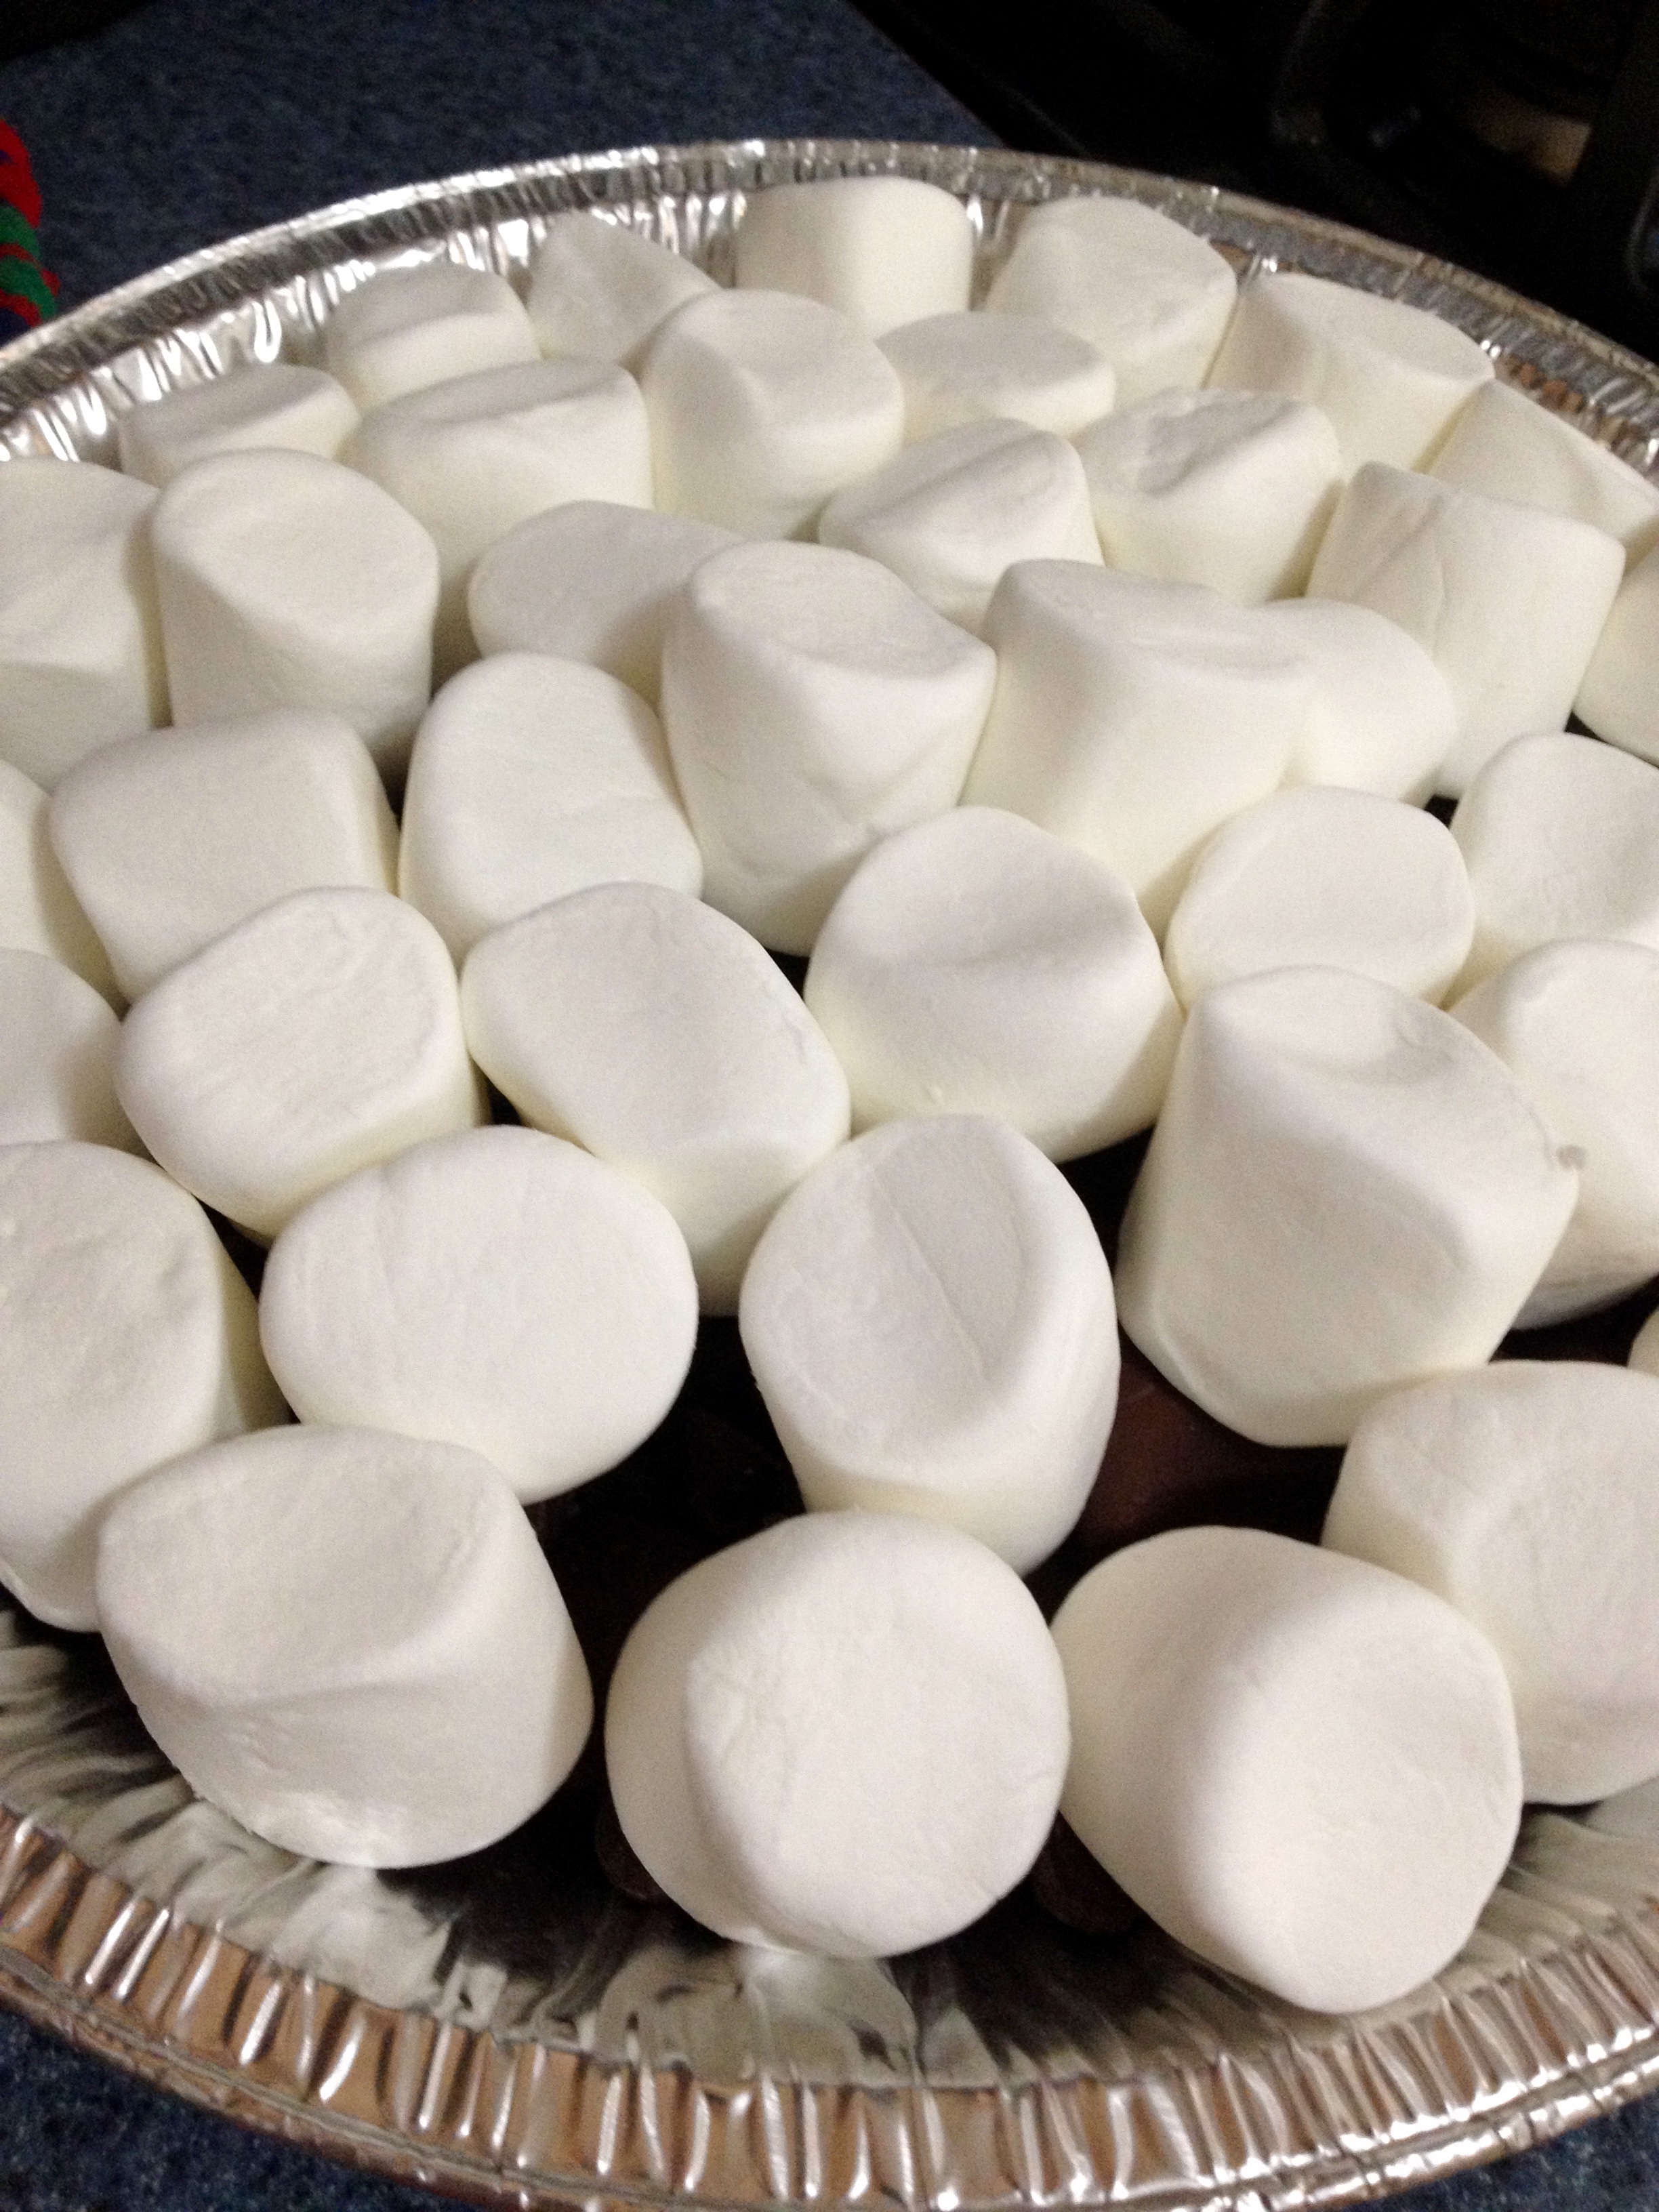
- 10 oz bag of marshmallows (the medium/large marshmallows work well)
- 1 cup semi-sweet chocolate chips
- 3 bars Hershey milk chocolate
- Any other chocolate you have on hand and want to use
- 1 package Graham crackers
A note about the chocolate- it really doesn’t matter what type you use. I used a mixture of three different chocolates (Hershey milk chocolate, Hershey Bliss milk chocolate, and semisweet chips), and it was delicious because the flavors mixed into a really yummy deep chocolate. If you only have chocolate chips on hand, that will work well too! This is a flexible recipe.
Pour the chocolate into the bottom of an aluminum pie dish, or another pie dish that you may have on hand. Arrange the chocolate into a single layer so that it evenly melts.
Arrange the marshmallows in concentric circles on top of the chocolate.
Now, put the dish in the oven to broil. I used a low broil setting to simulate slow toasting over a fire! After the marshmallows are toasted nicely, turn the oven onto 350°F and leave the dish in just until the chocolate is melt-y. You’ll be able to see if it’s melted through the marshmallows, so no worries about that! When you’re satisfied with the condition of your chocolate and marshmallows, take it out of the oven and… voilà!
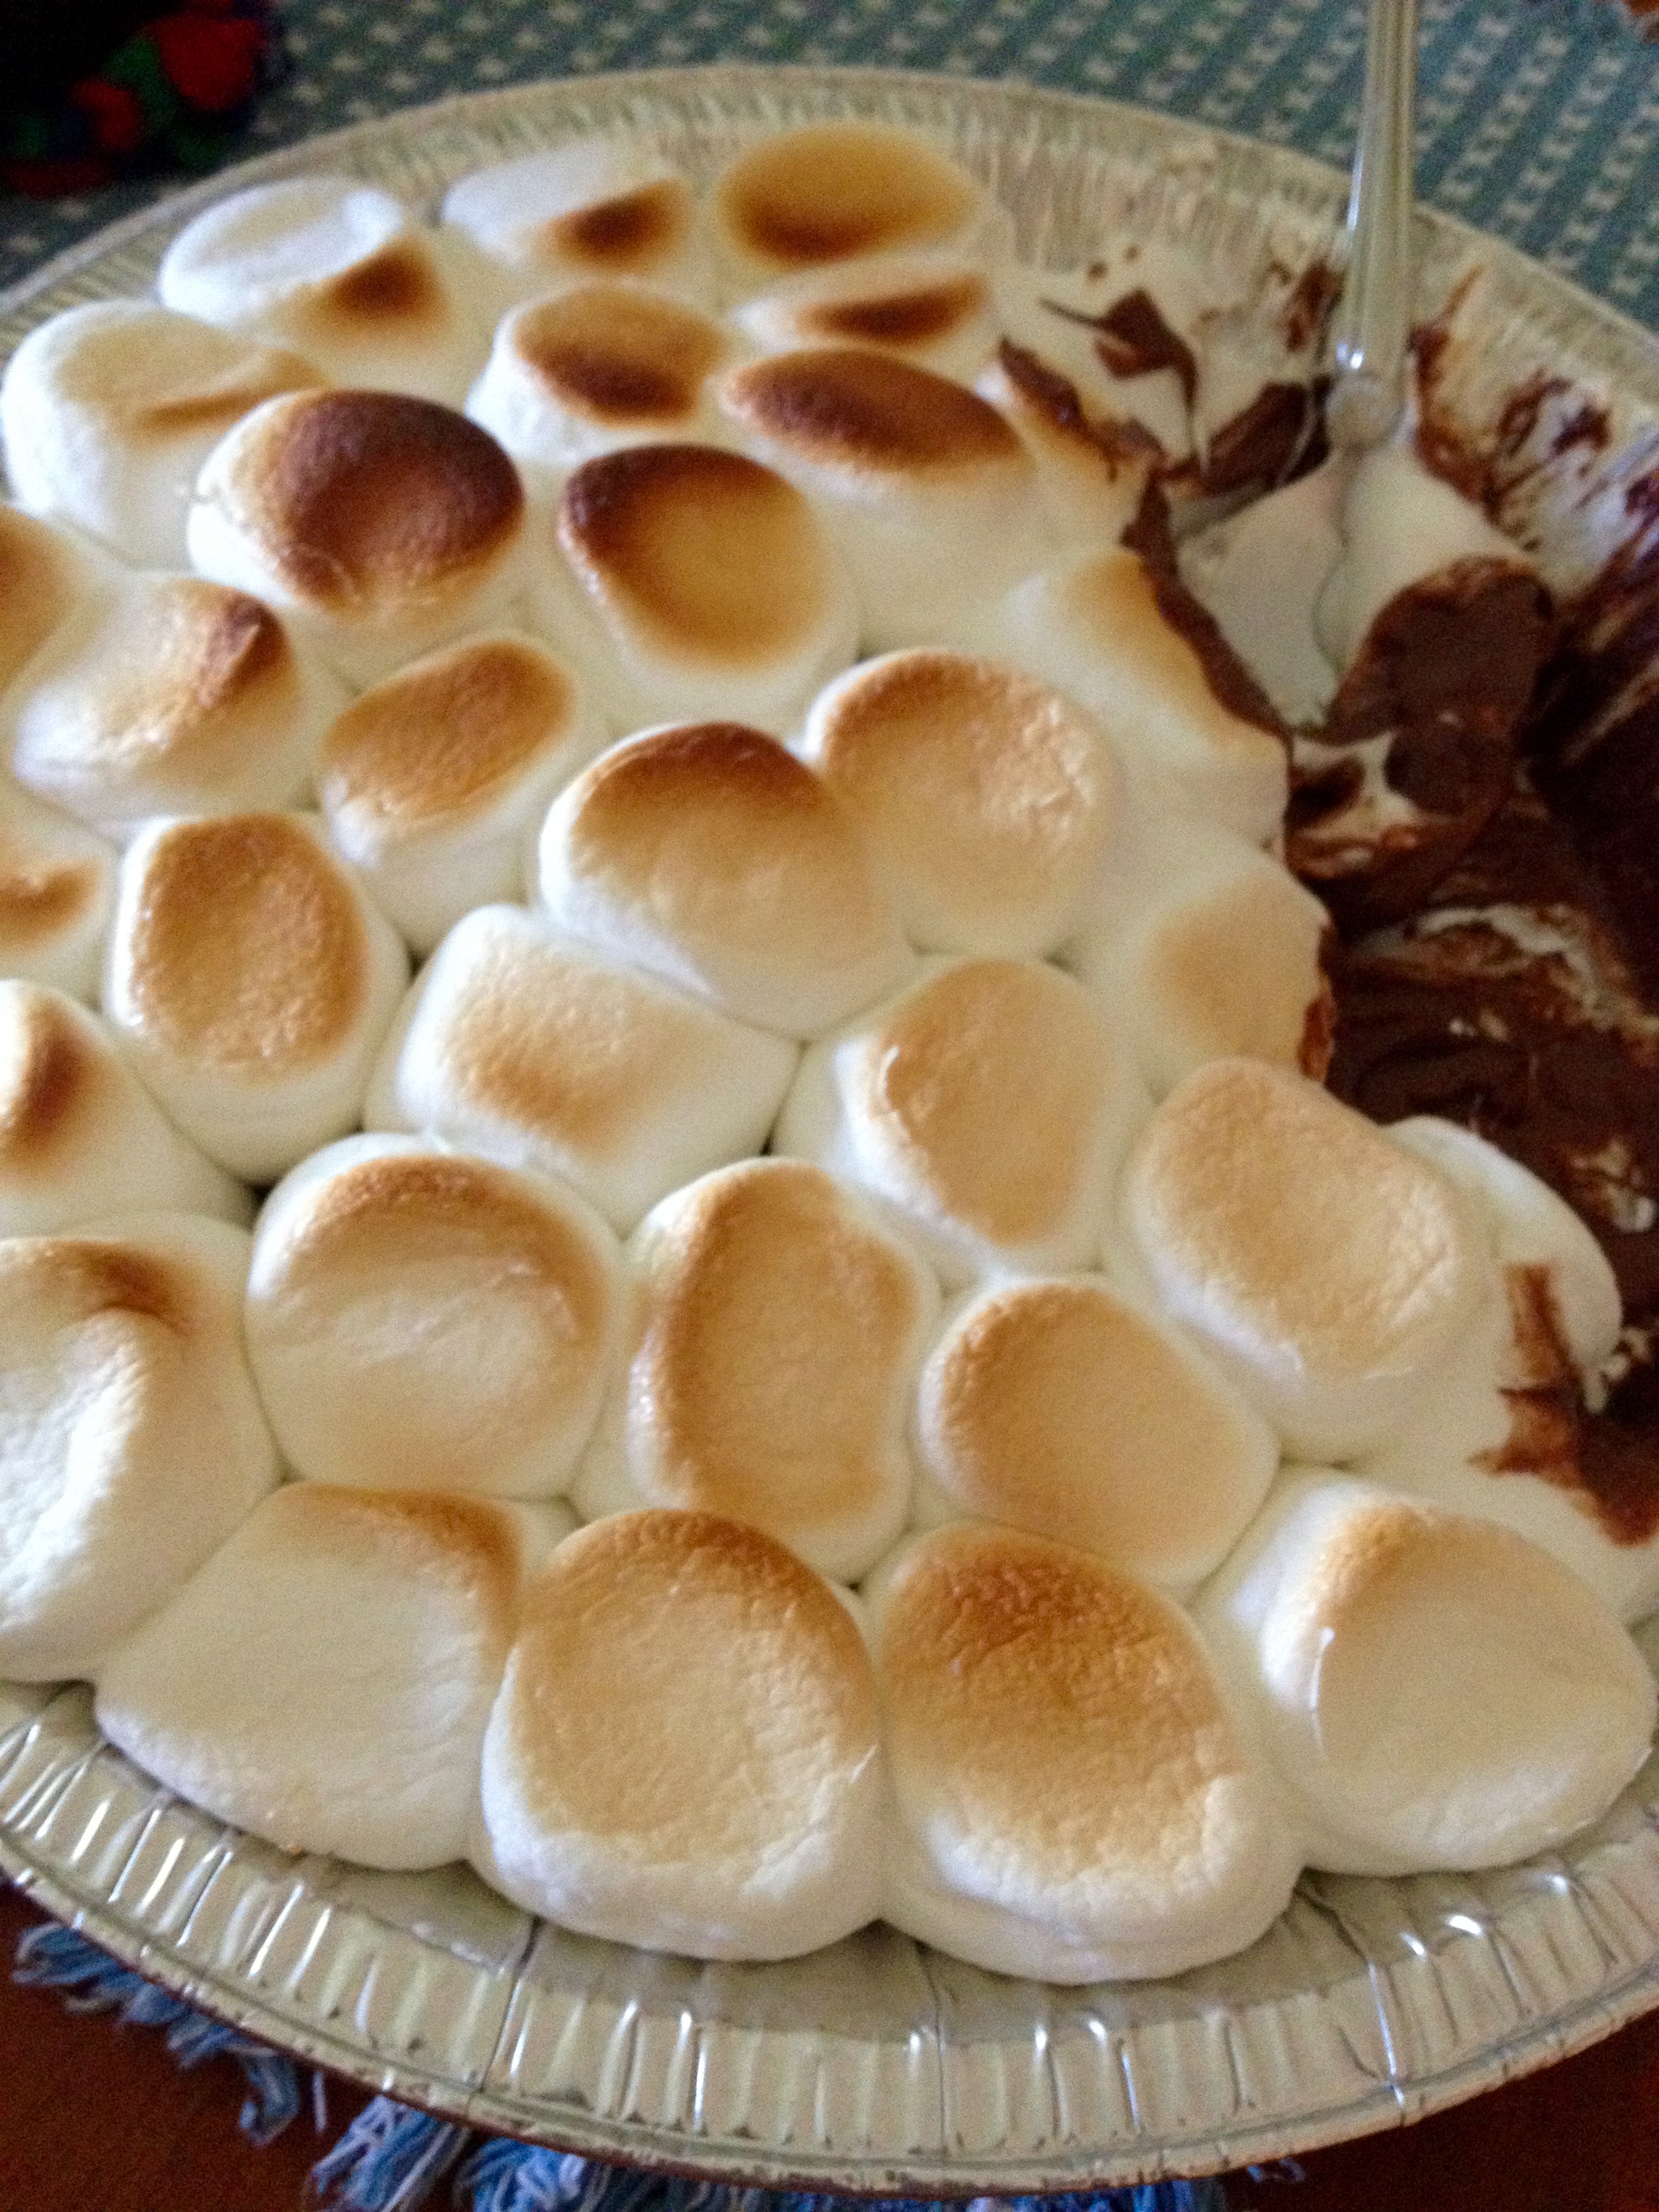
Use your Graham crackers (or a spoon, whatever!) to scoop the yummy dip, and enjoy! This serves a ton of people, so this is a great dish for a summer party! Just a note, this dip also keeps well for a few days. The chocolate does re-harden, but you can melt it again or just eat it with hardened chocolate. I did both, and it was delicious! I hope you give this summer fun recipe a try. Happy baking!
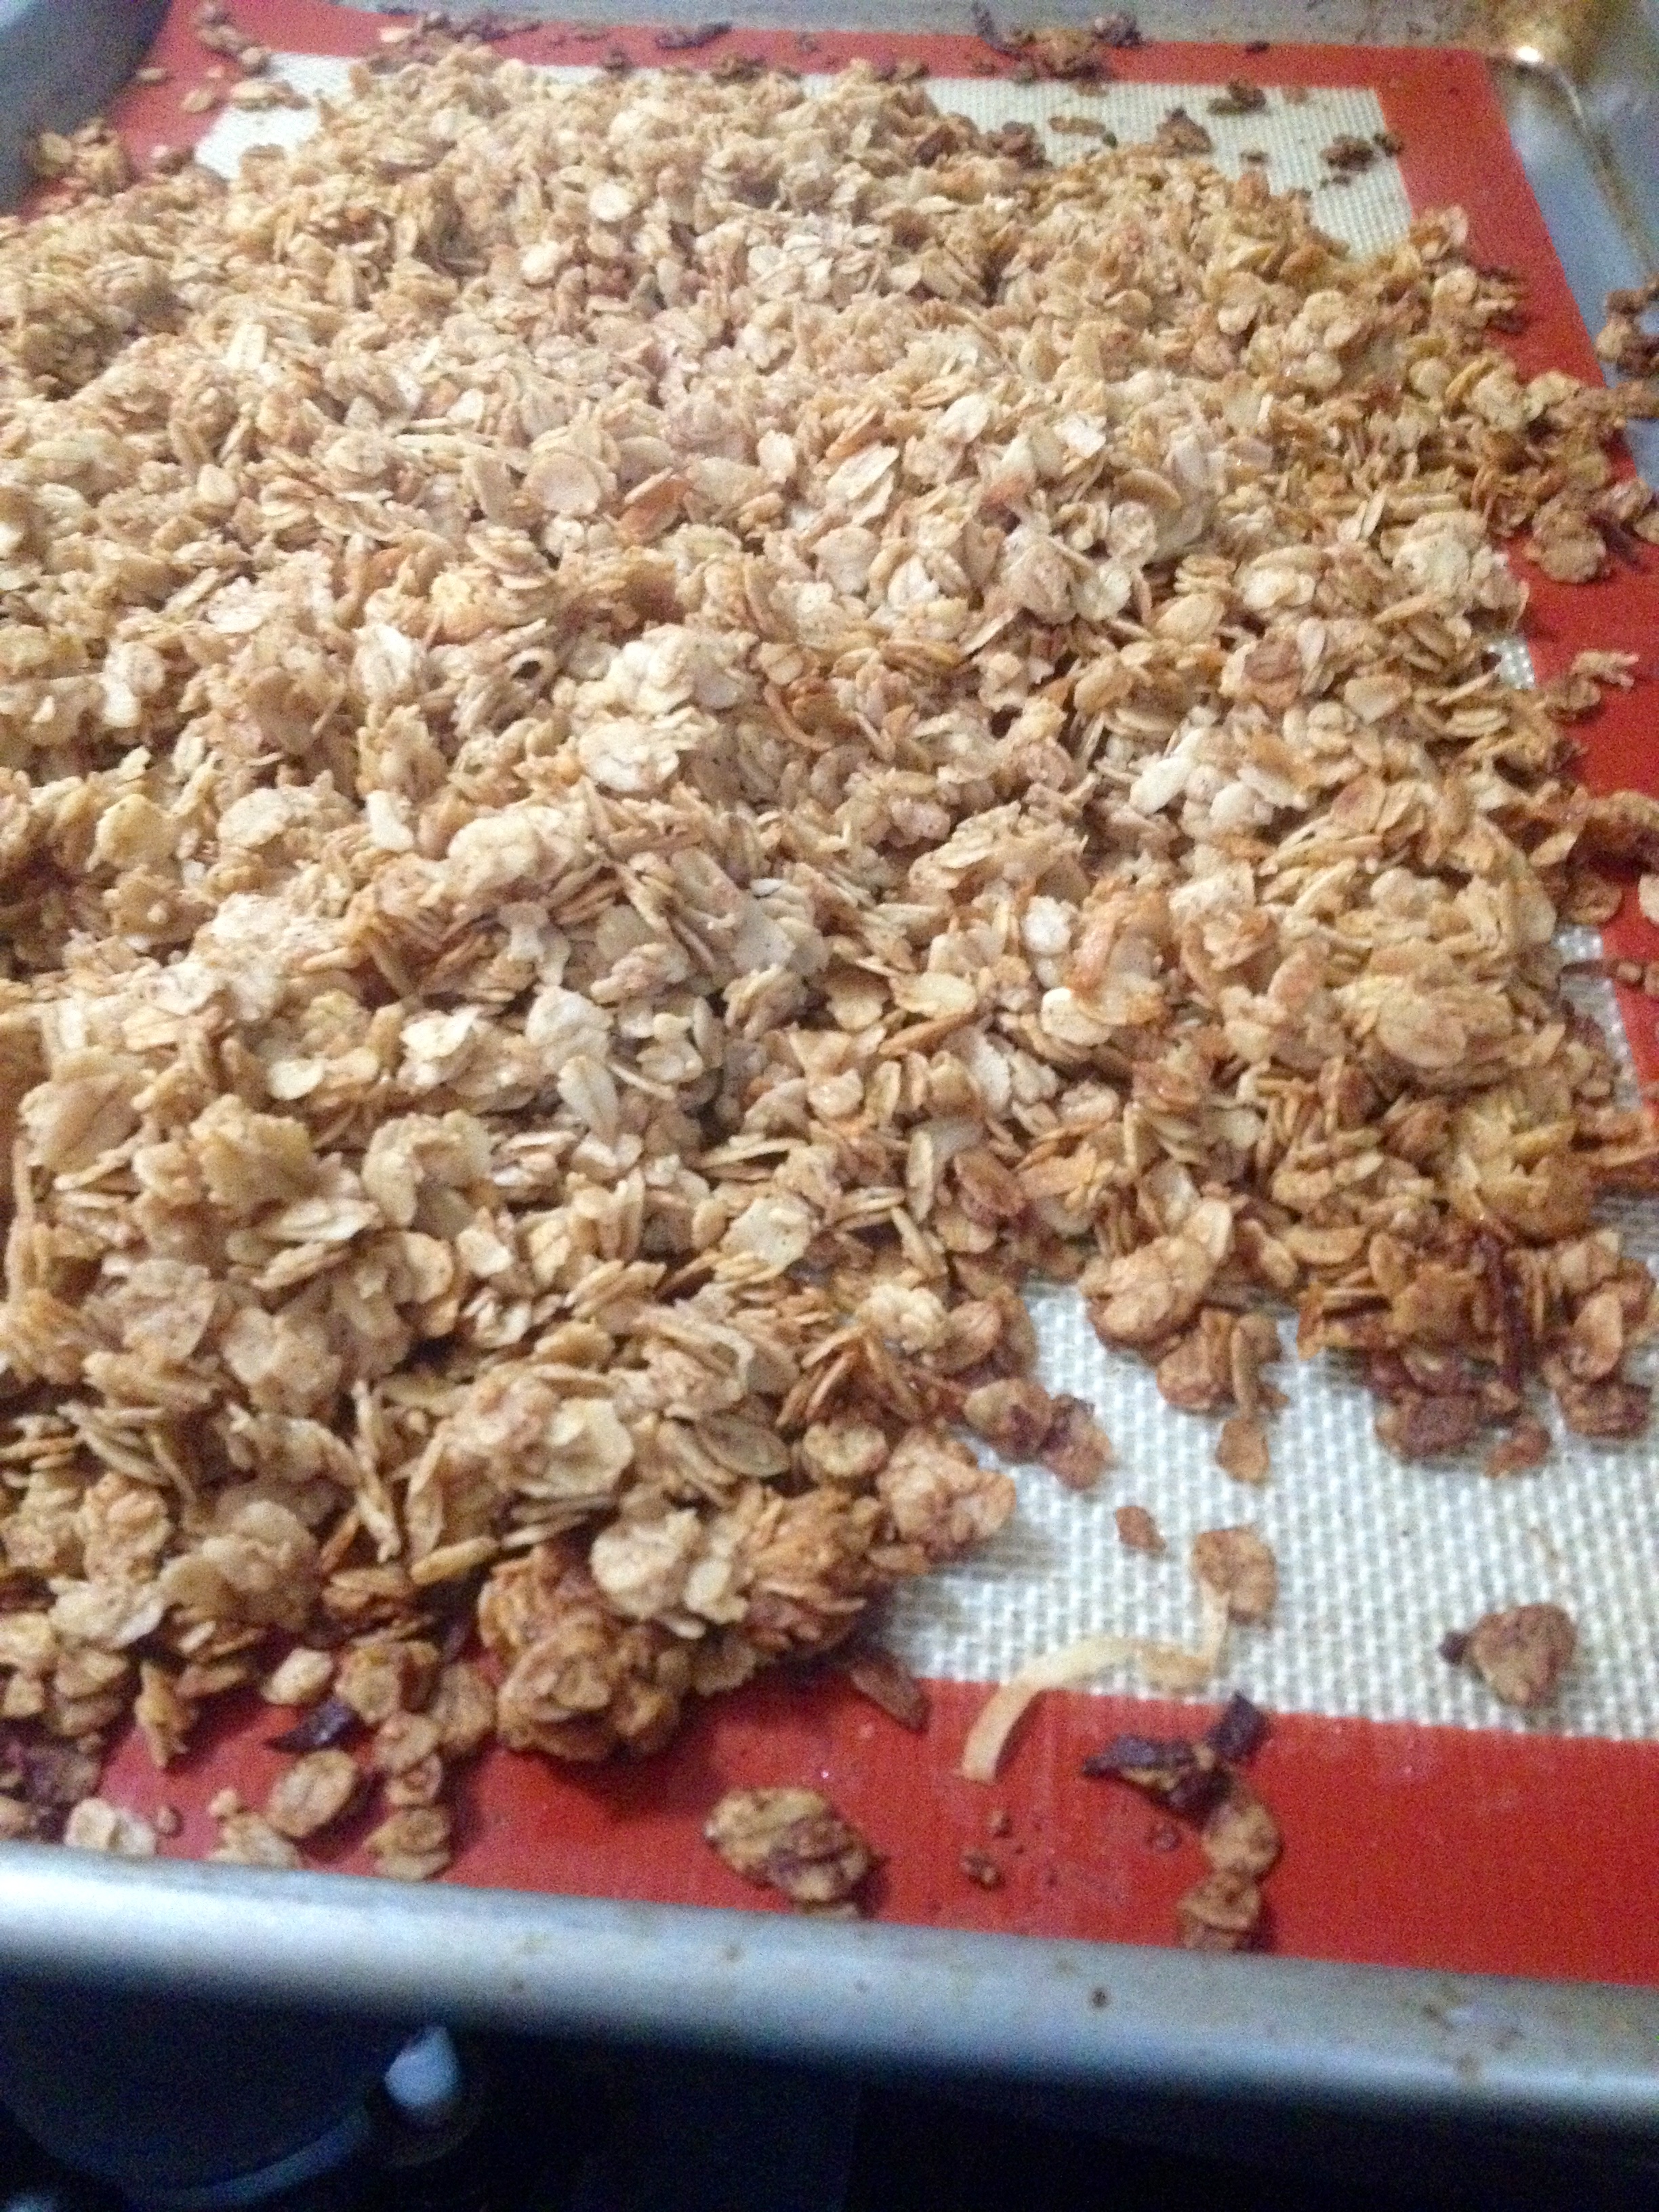
My Hiking Fuel
Hey friends! Happy summer! I hope you’re all out enjoying some gorgeous June weather! Last week, my fiancé and I headed to Mt. Monadnock for some hiking. First, however, we made some delicious granola trail mix to keep us going the whole way up the mountain! Here are the ingredients for the baked granola:
Ingredients:
- 4 cups old-fashioned oats
- 1/4 cup sweetened coconut
- 3/4 tsp salt
- 1 tsp cinnamon
- 1/2 tsp cocoa powder
- 1/4 cup honey
- 1/4 cup smooth peanut butter
- 1/3 cup vegetable oil
- 1/2 tsp vanilla
First, preheat the oven to 350ºF. Combine all of the dry ingredients in a large bowl.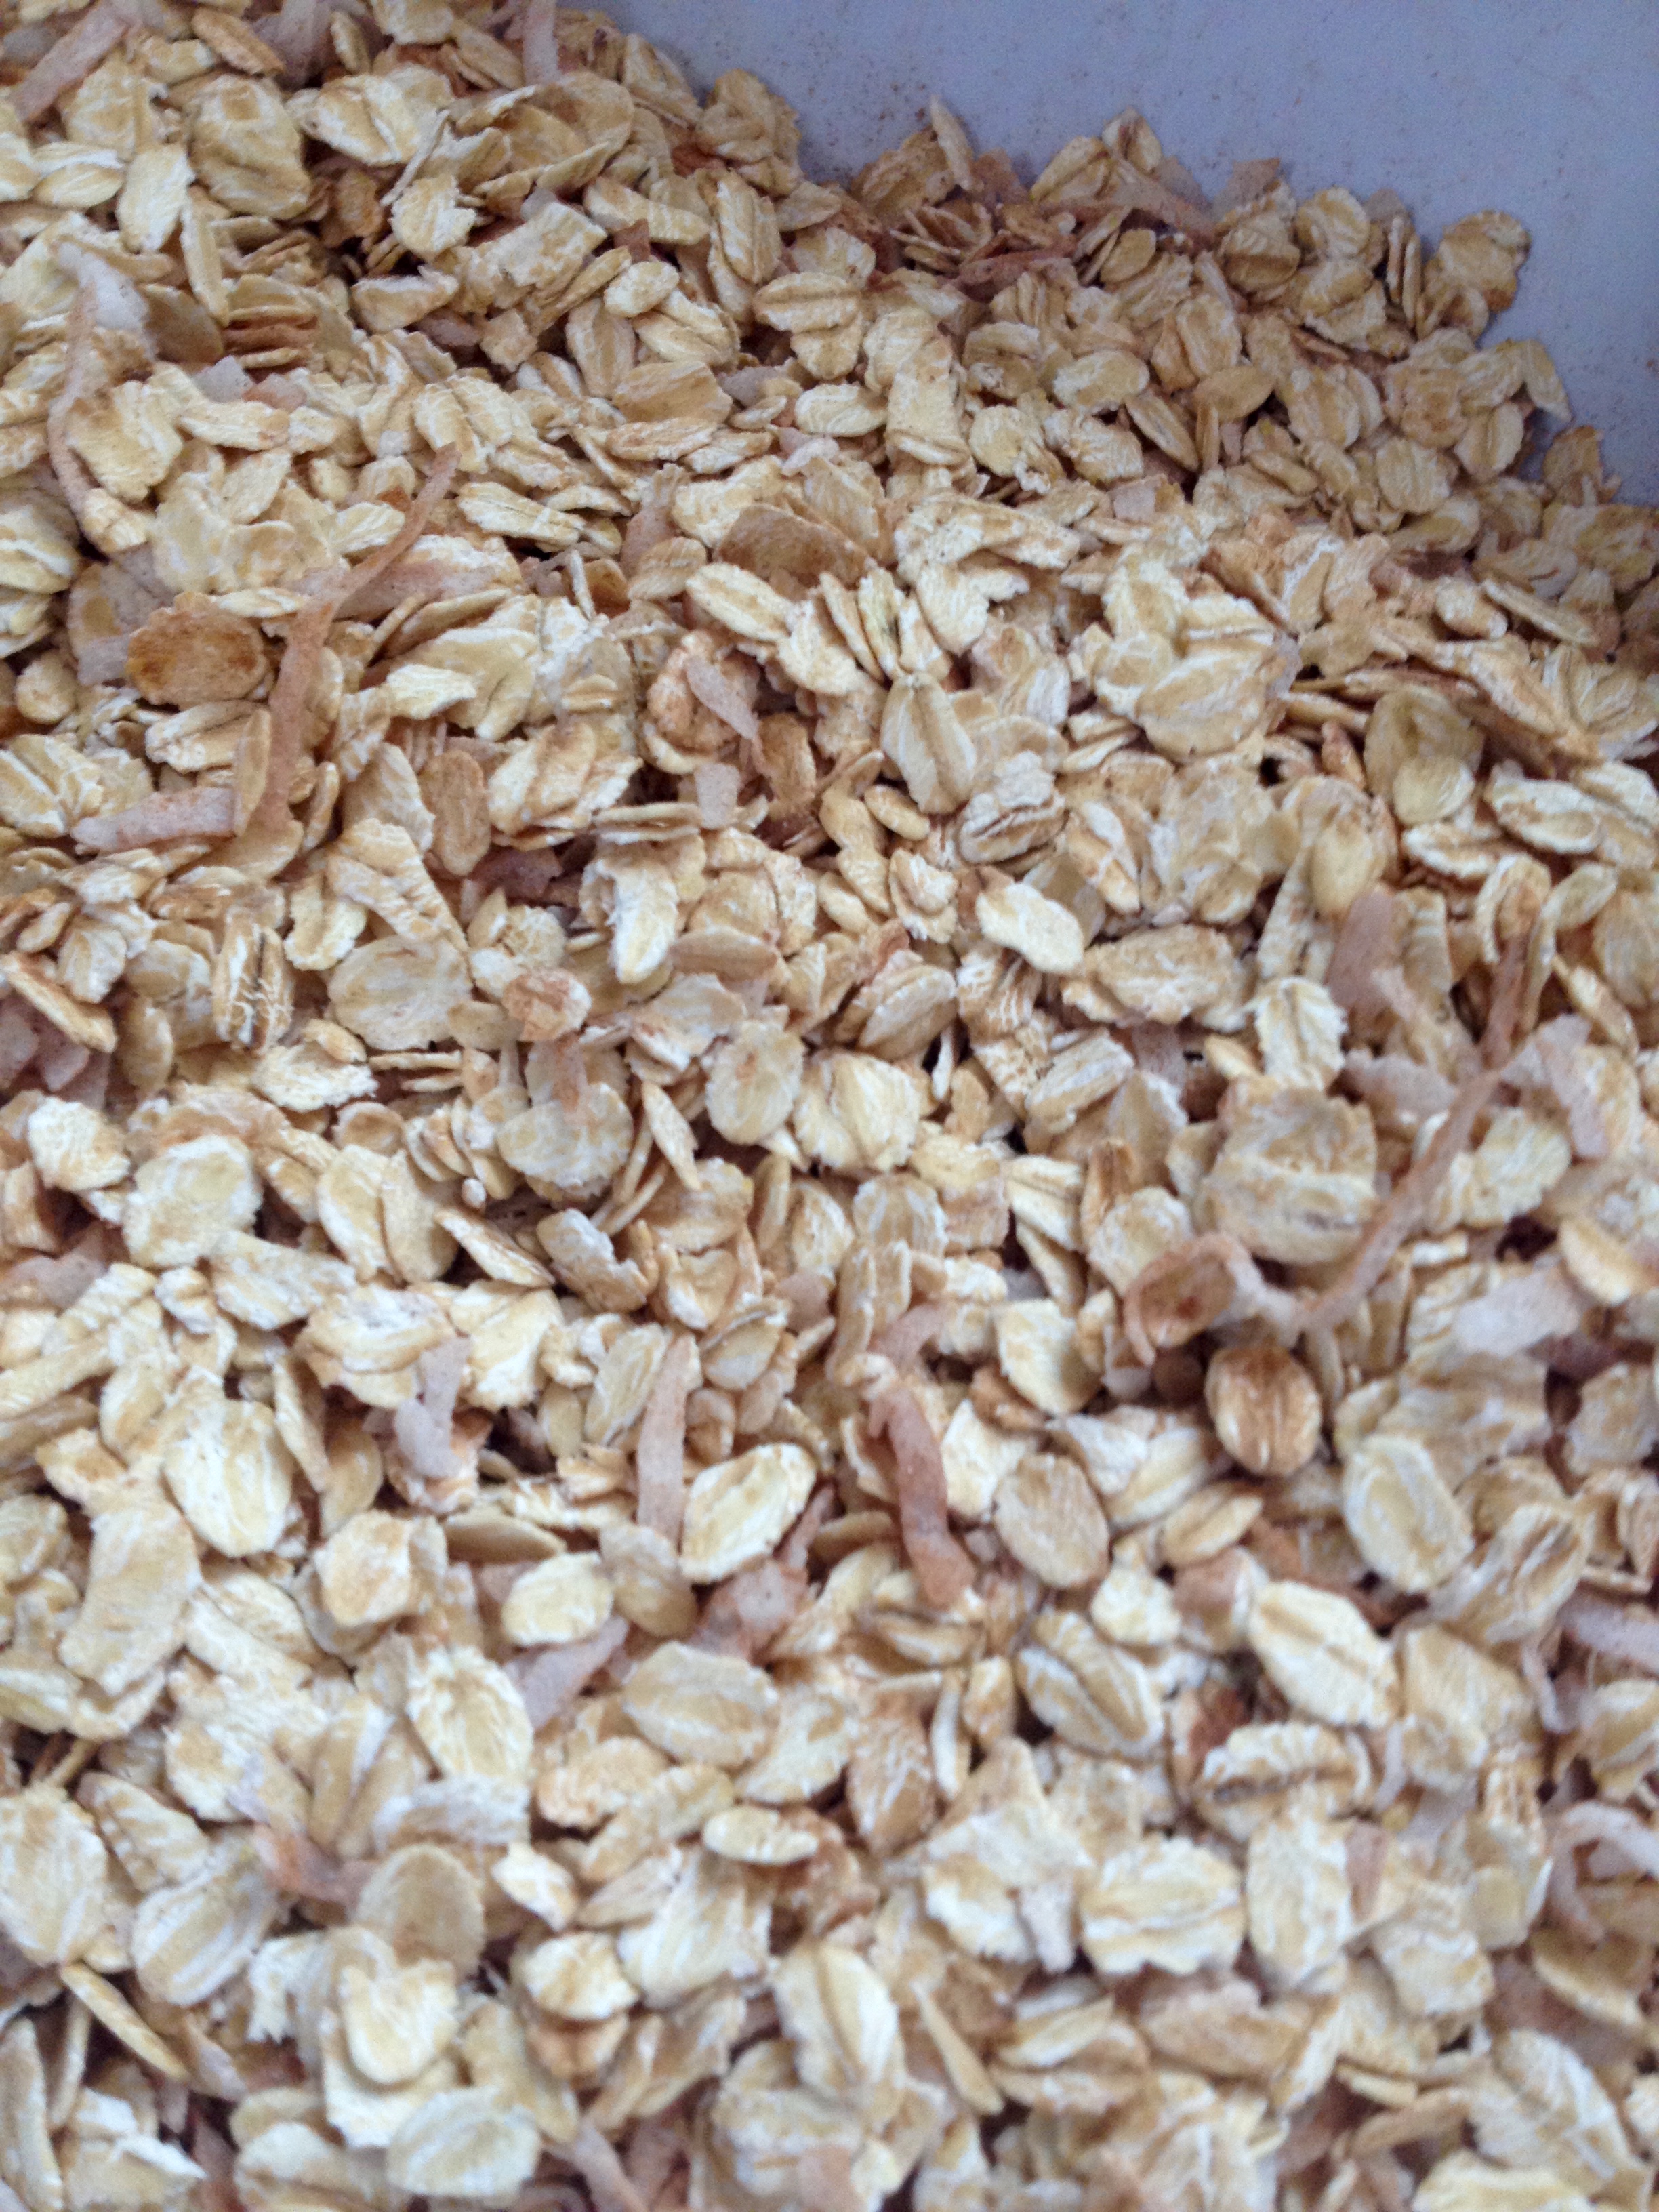
Now, mix the wet ingredients together in a smaller bowl and pour them over the dry ingredients. Mix the wet and the dry ingredients together until they’re fully combined.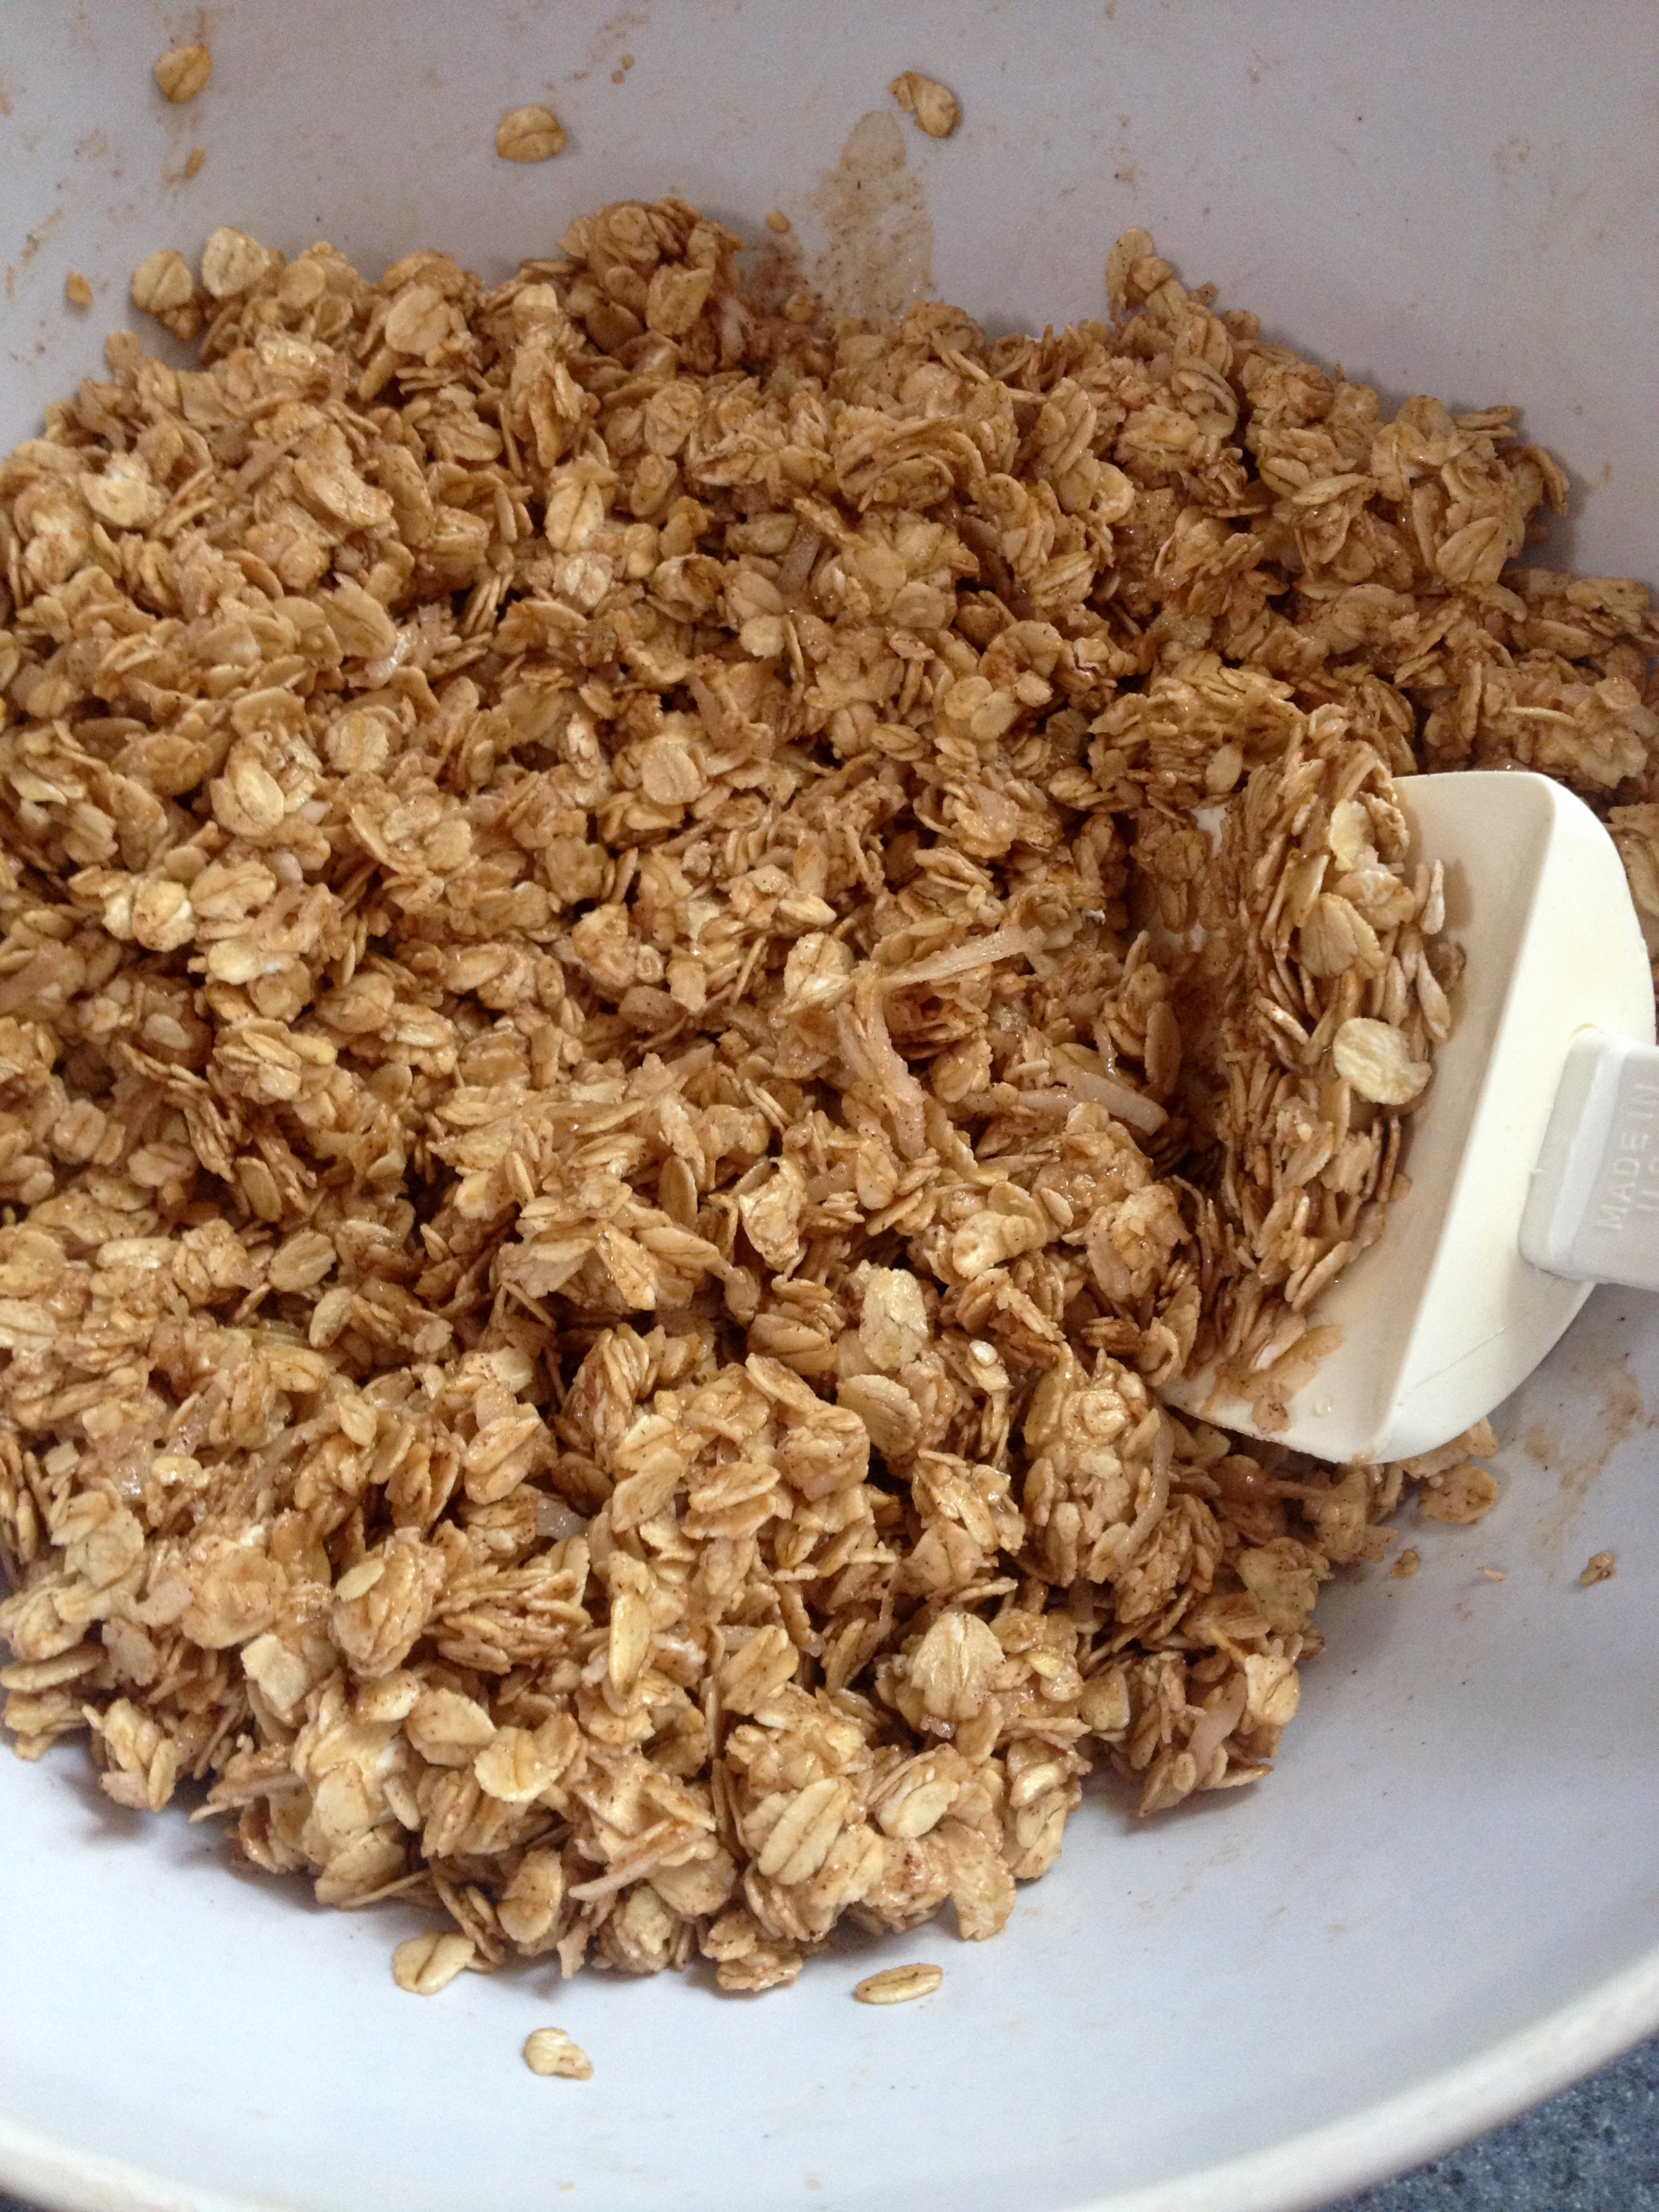
Pour the mixture onto a large baking sheet lined with wax paper or a silicone baking mat, so that the mixture is in a single layer.

Bake the granola at 350ºF for 20 minutes, tossing the granola with two forks (or whatever you want to use) every 5 minutes so that it all browns evenly.
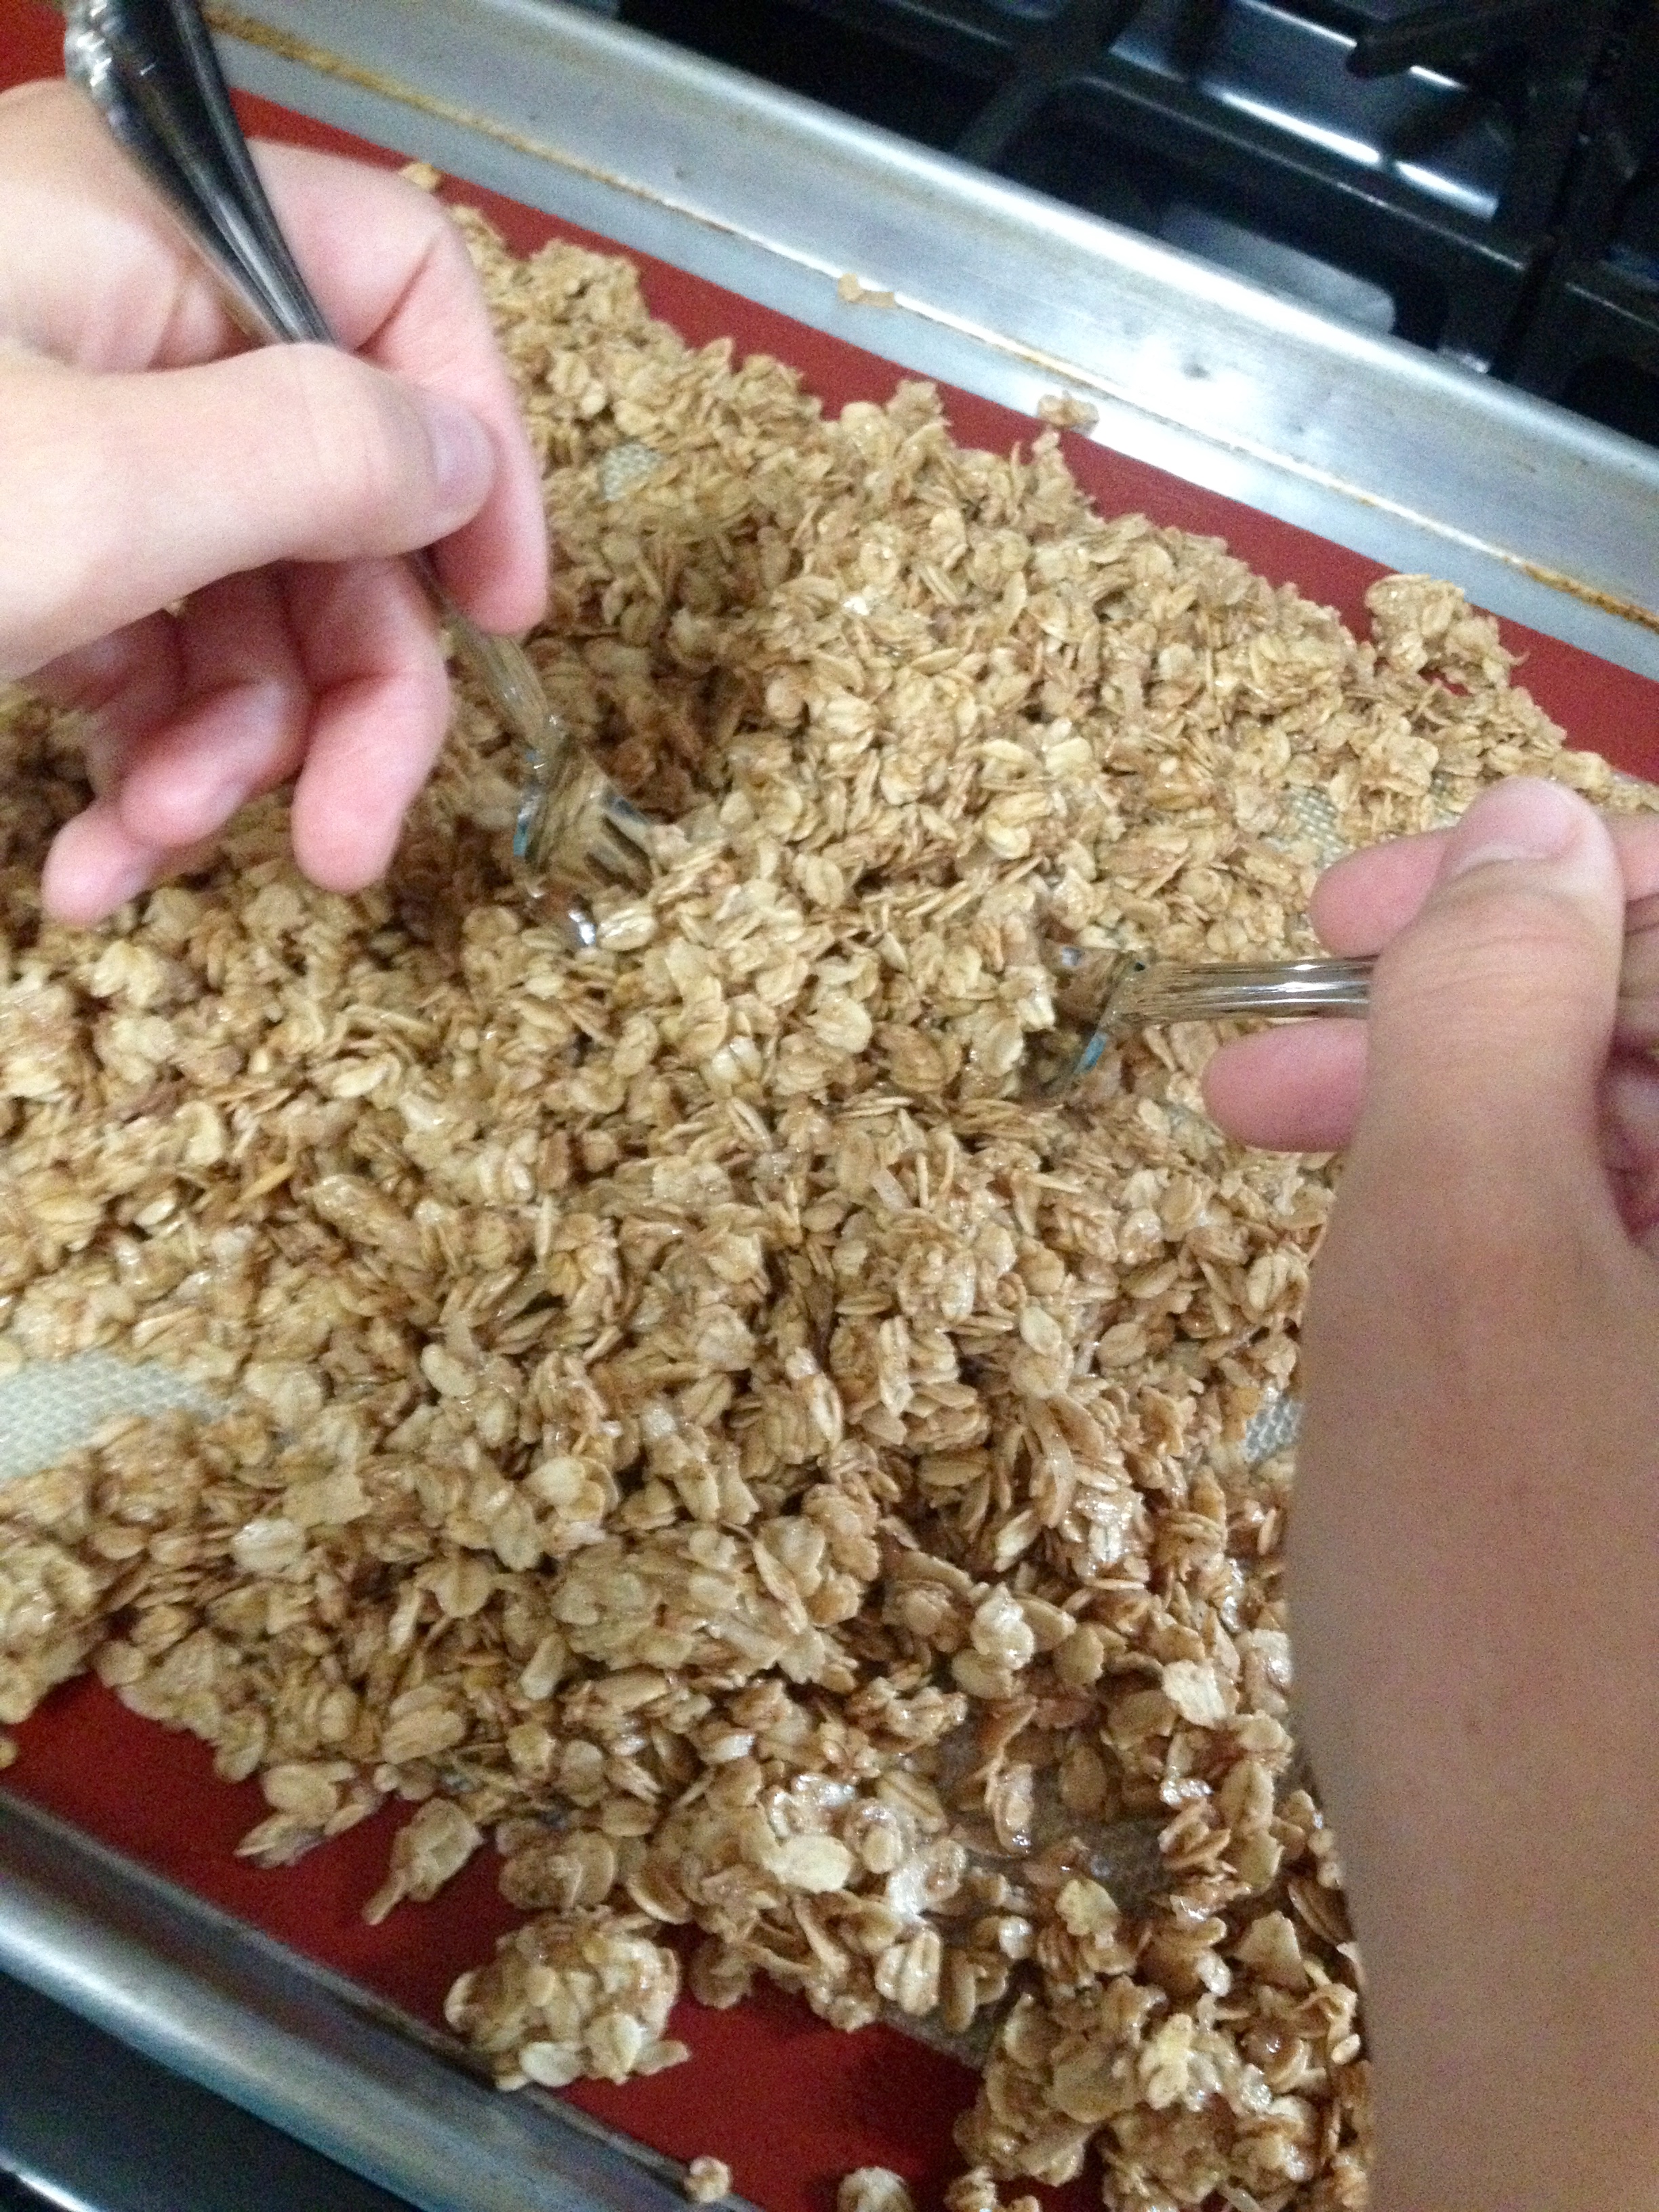
After 20 minutes, the granola should be delicious and golden brown!
Let the granola cool, and then you can mix it with whatever other trail mix goodies you enjoy! We mixed ours with dried sweetened cranberries and M&Ms, but it would also be delicious with raisins, chocolate chips, peanuts, pretzels…the list goes on!
And for your viewing pleasure, here are pictures from the top of Mt. Monadnock.


I’d say it was worth the climb! I hope you all enjoy your summer, and give this recipe a try! Happy baking!
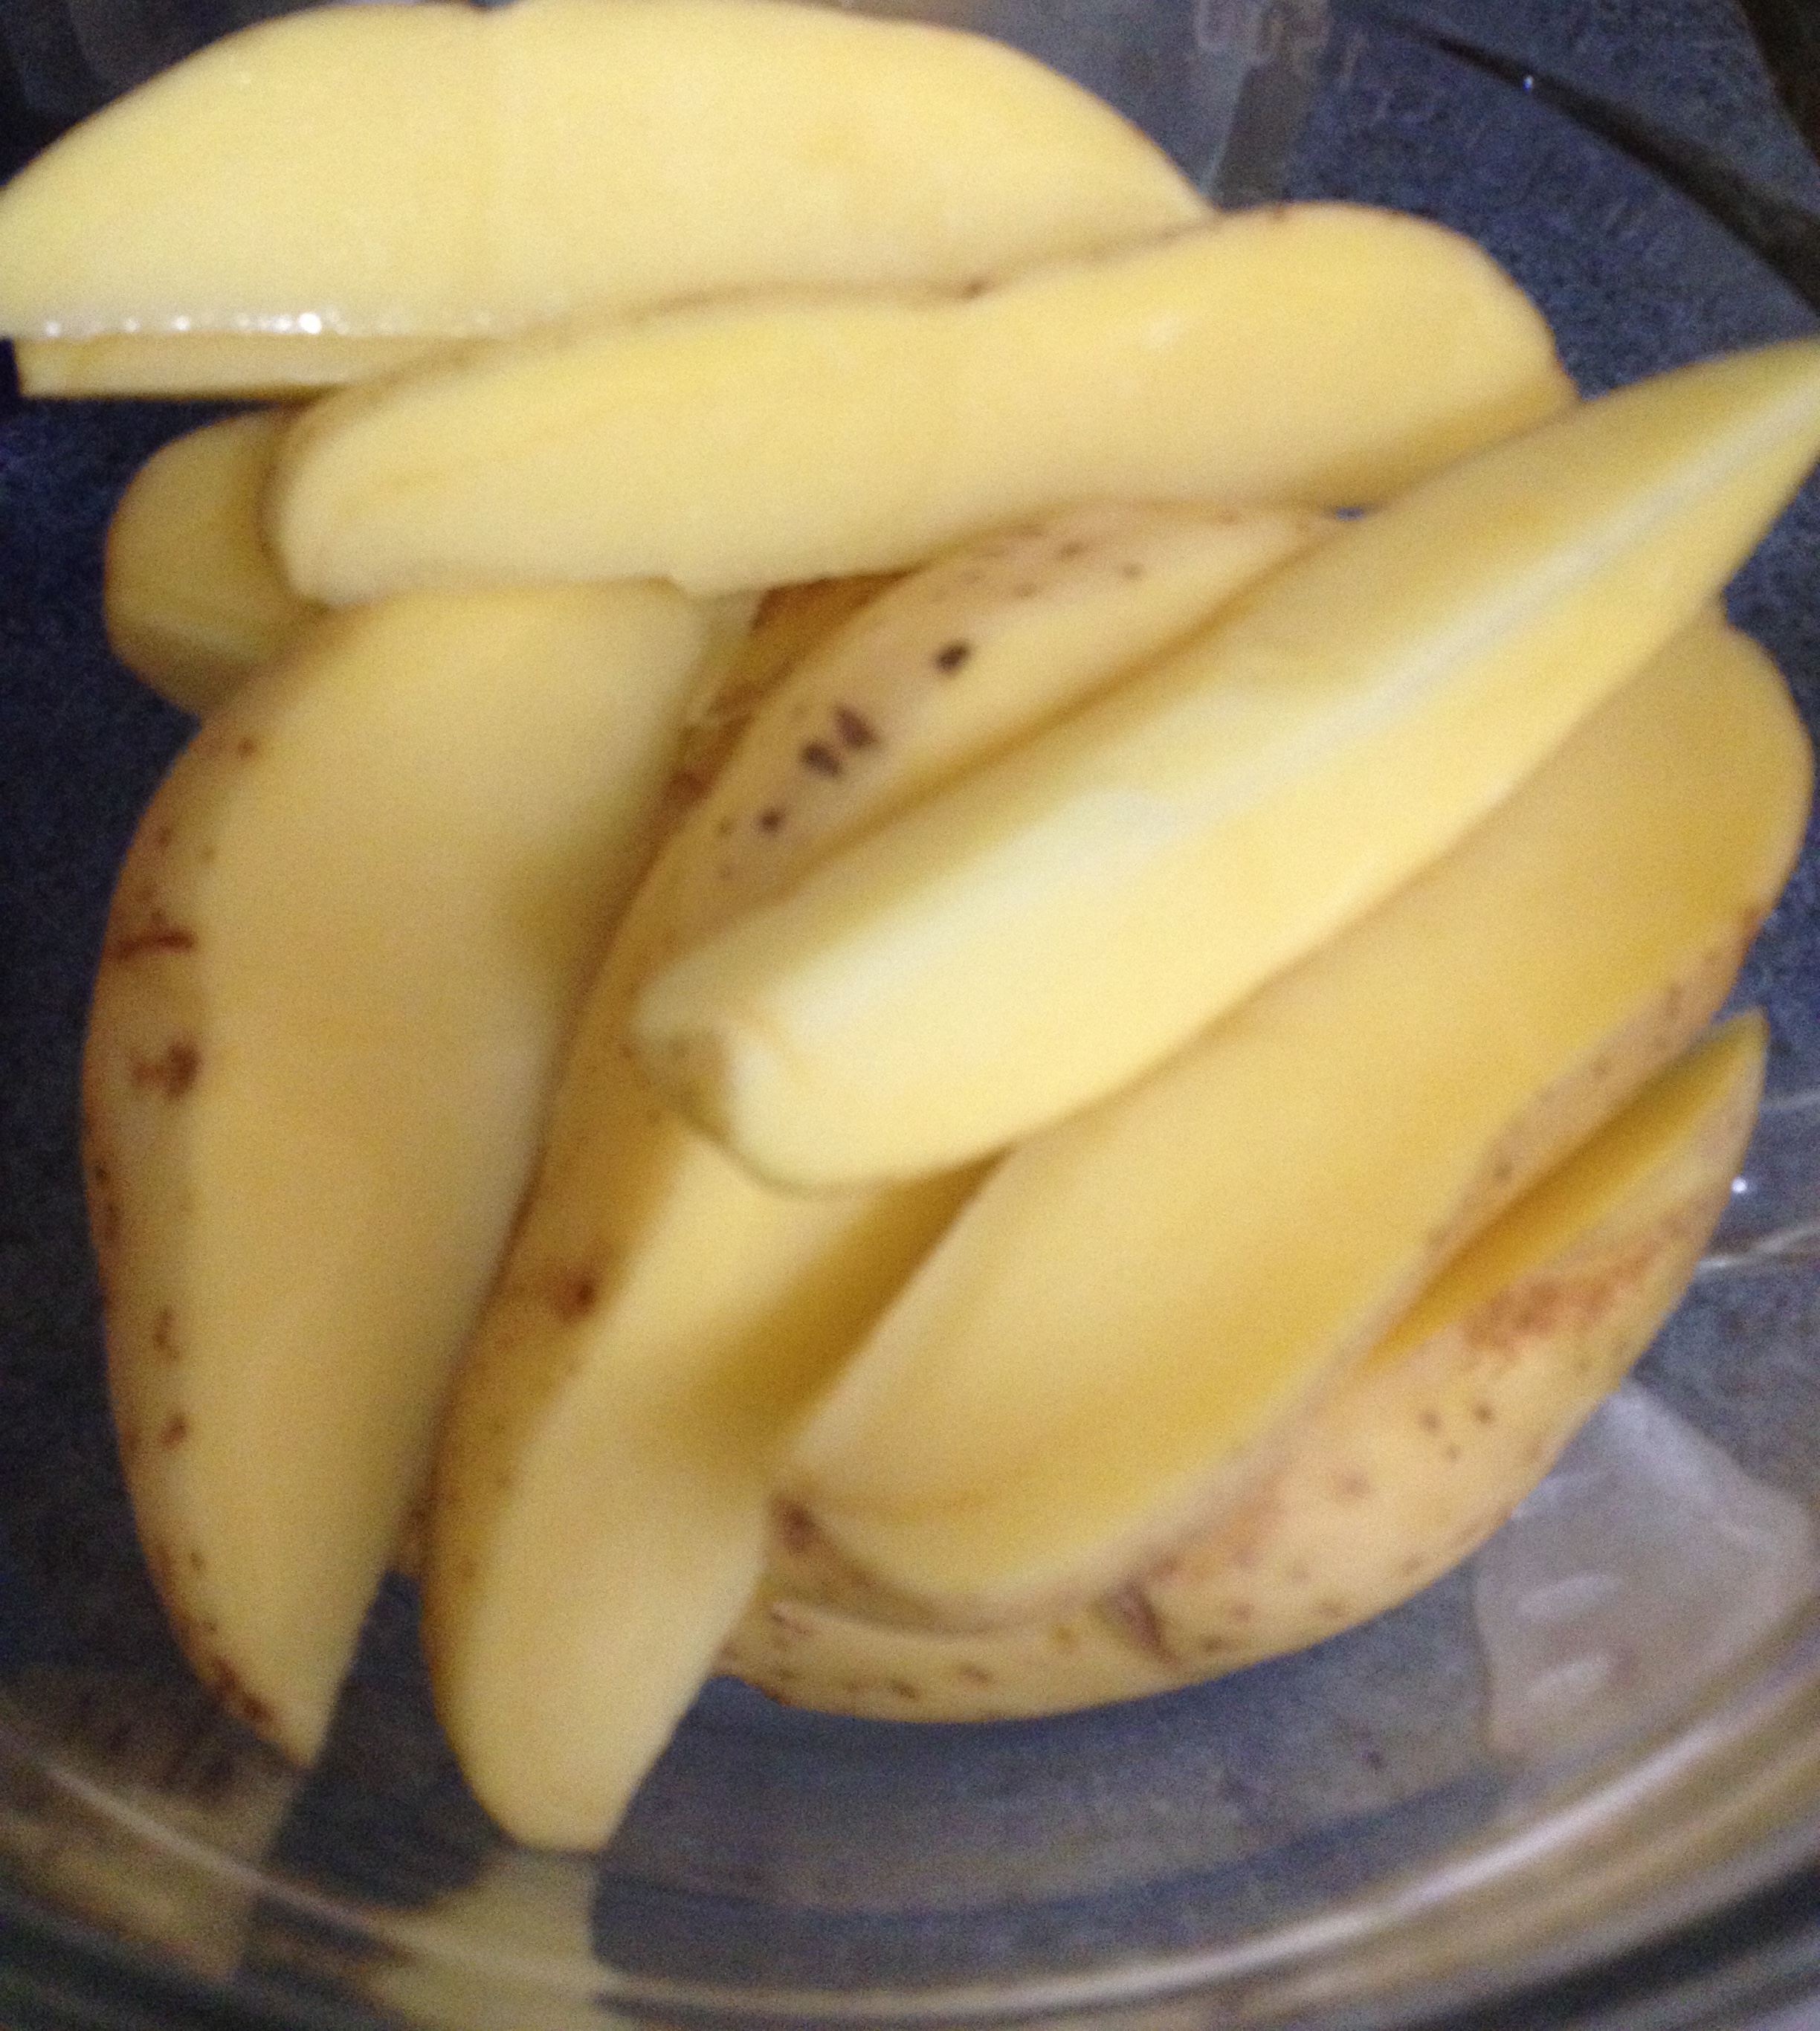
Oven Roasted Fancy Fries
Hi friends! Happy May, and happy college graduation to my friends! I have a super simple but delicious recipe for you today, for gourmet roasted French Fries! Here are the ingredients:
Ingredients:
- 4 white potatoes, washed
- 1/4 cup extra virgin olive oil
- 1 clove garlic, minced
- juice of 1/2 lemon
- 1 tsp rosemary, finely chopped
- salt and pepper to taste
First, preheat the oven to 450ºF. Cut the potatoes into wedges (you should get about 8 wedges per potato).
Combine all of the other ingredients into a simple sauce, and toss the potatoes in the sauce until they are fully coated.
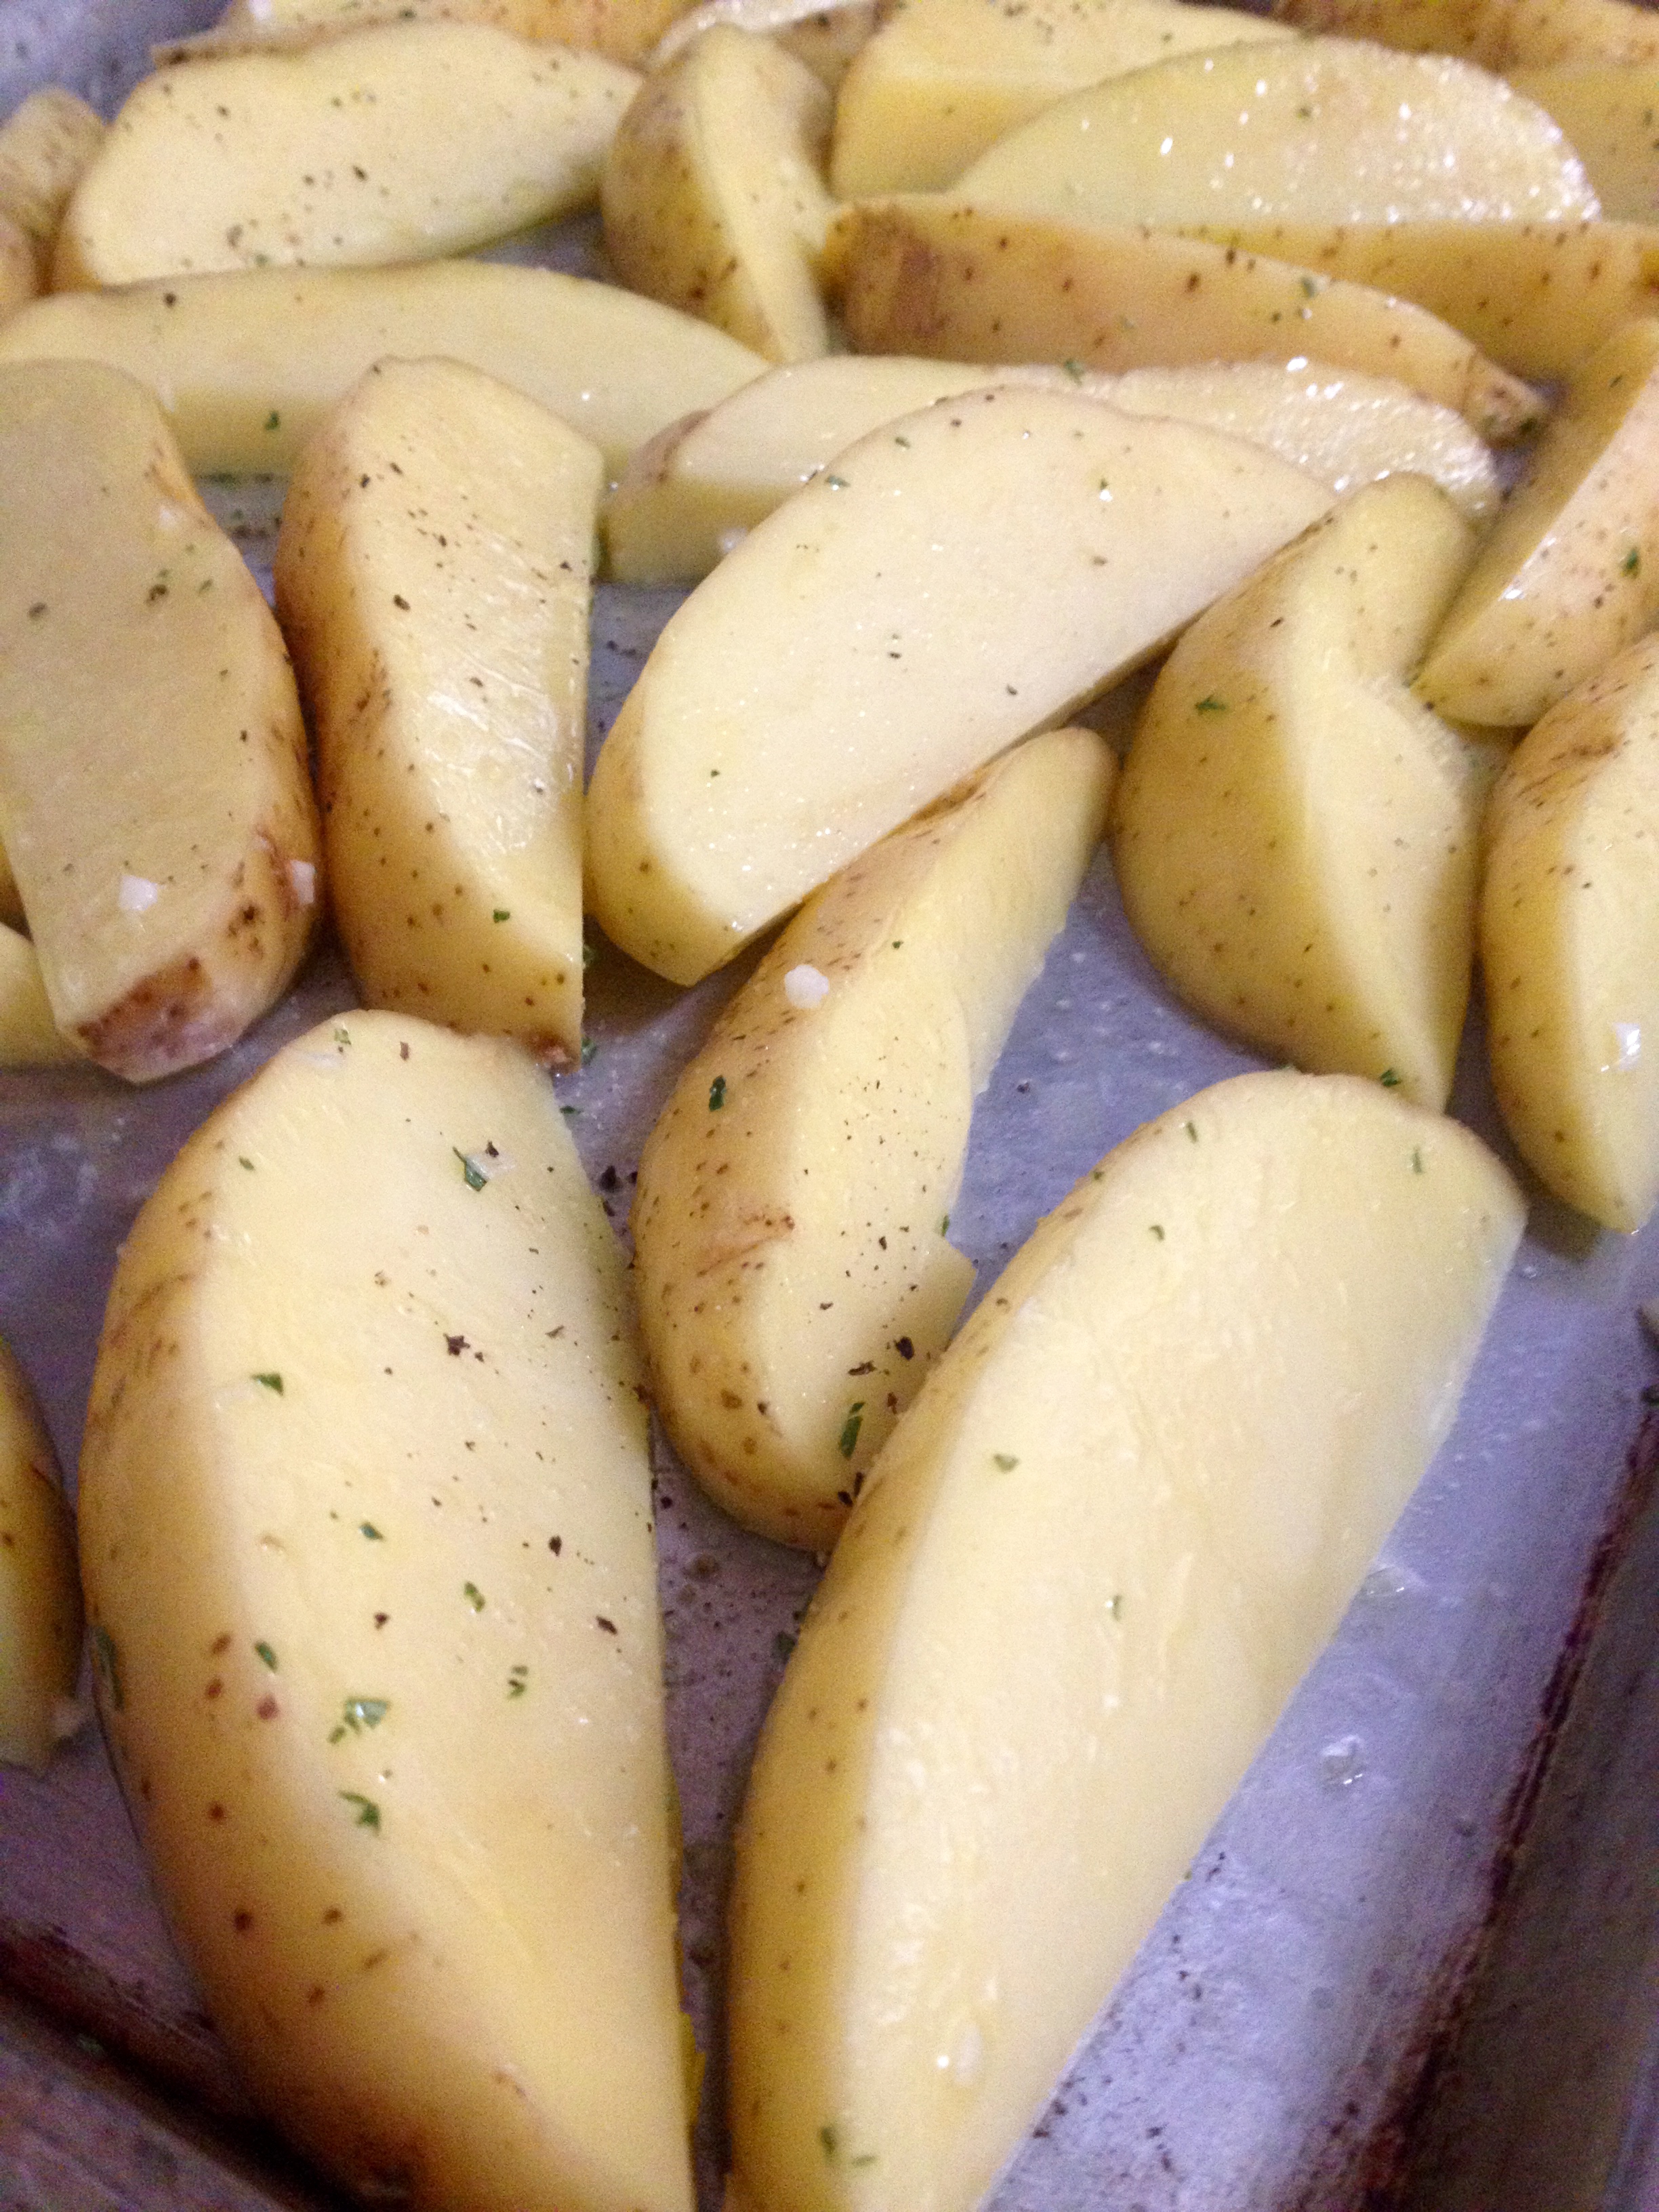
Arrange the wedges on a baking sheet so that they are all on one side. Bake them in the oven on one side for 20 minutes, and then flip all of the wedges onto the other side. Put the baking sheet back in the oven, and bake the flipped wedges for another 10 minutes. When they come out, they should be crispy and browned!
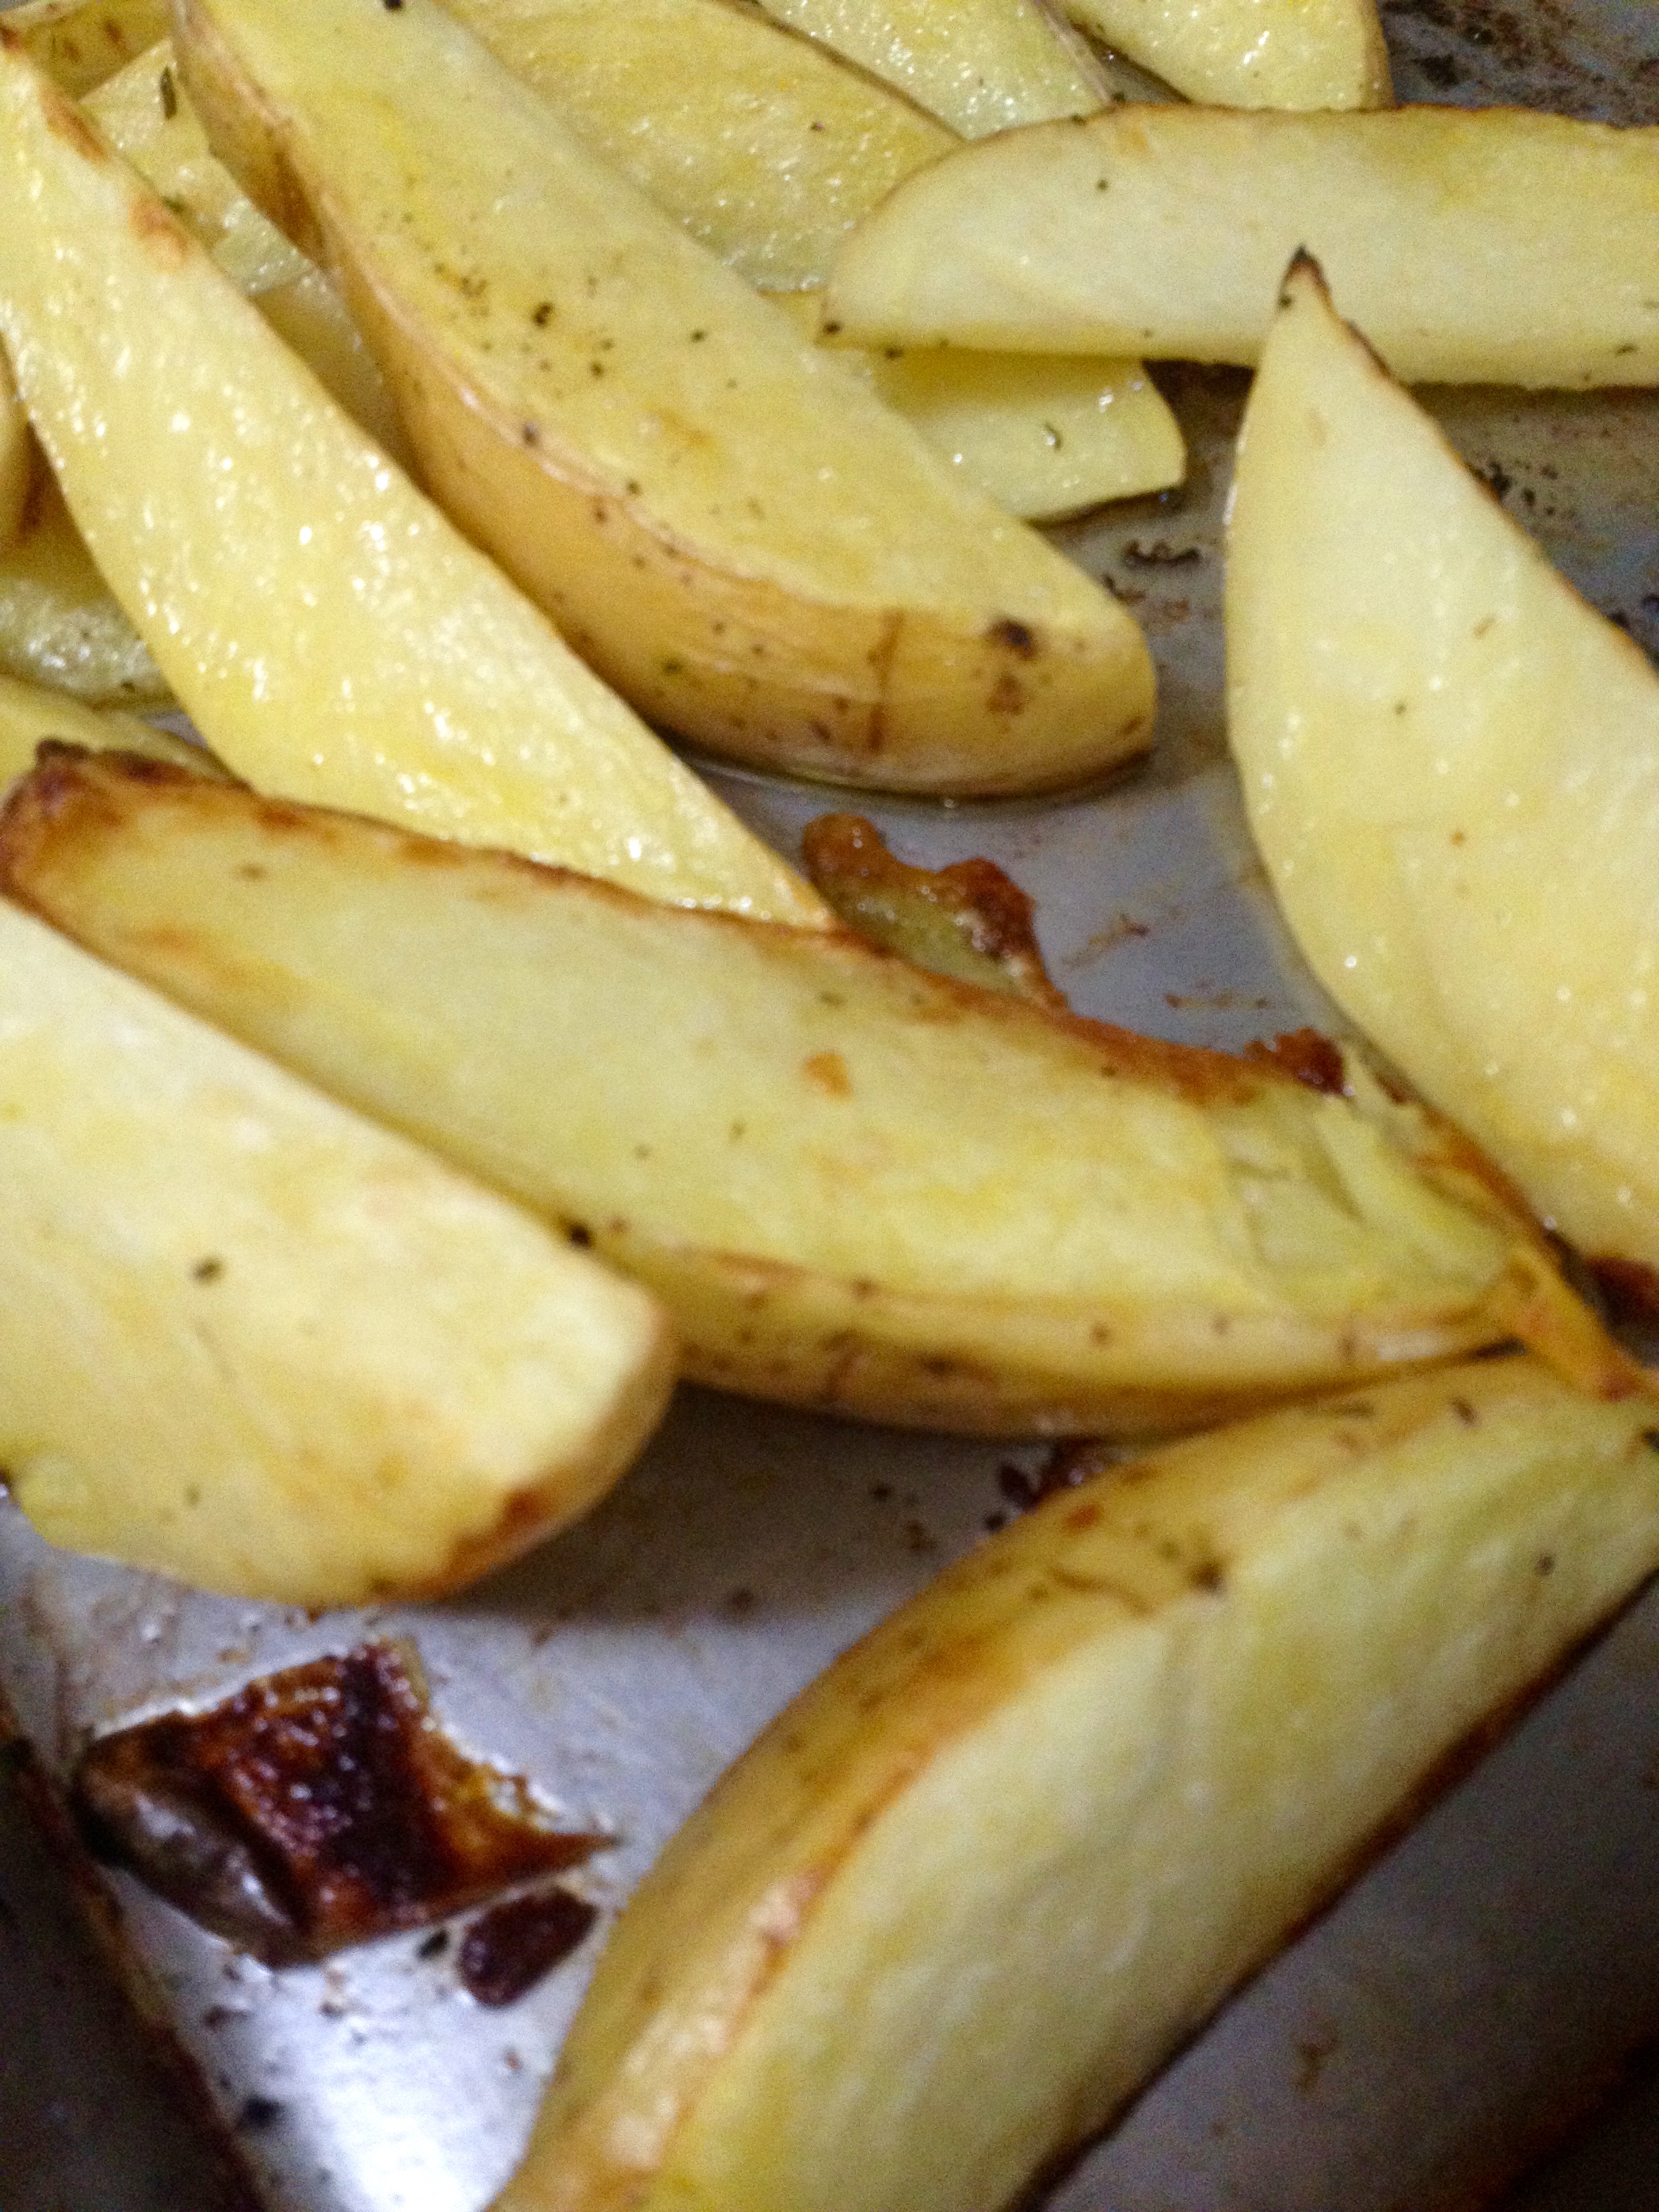
Even though this recipe is really quick and simple, it’s absolutely delicious! These fries are great on their own, and also stand up nicely to condiments like ketchup and mustard. We had these with salmon for dinner, and are also having them with a roasted chicken- they really are a nice side dish for just about any meal! Enjoy!
Gameday Sweets and Savories
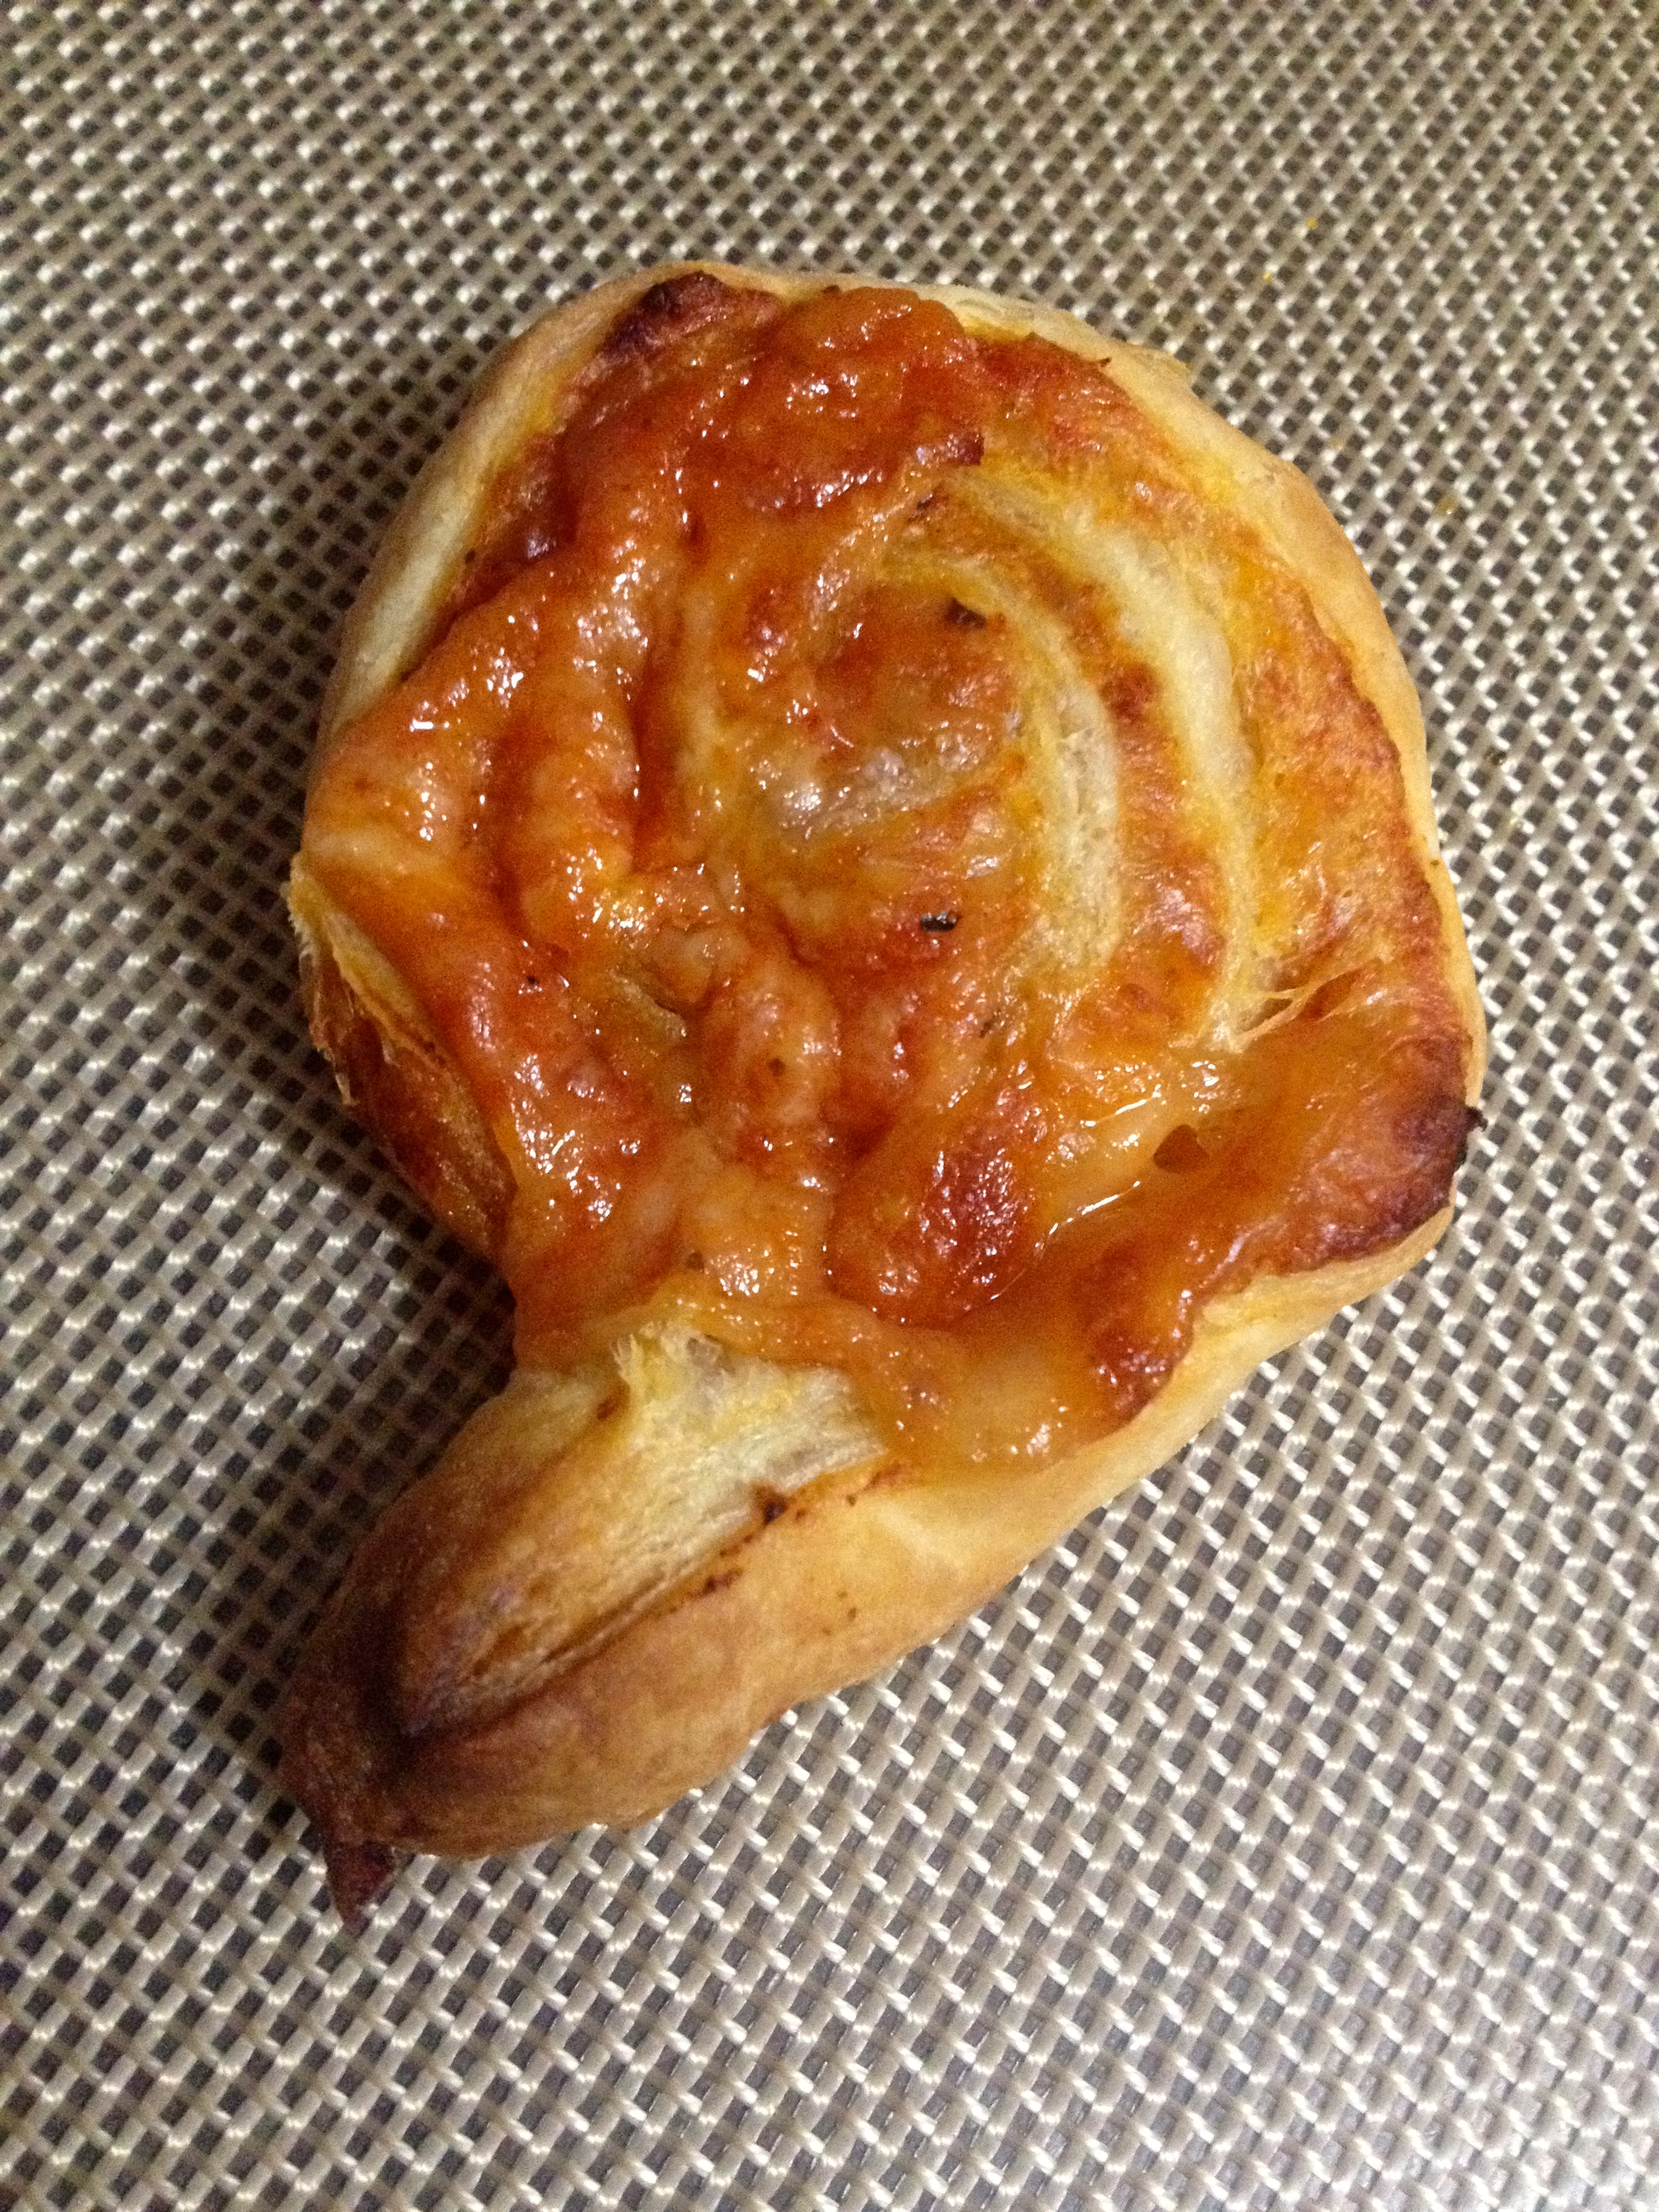
Hey all! Who’s excited for the Superbowl?!? I know I am (although my favorite team isn’t in it this year)! I’m also really excited for the Superbowl snacks– and this year I have two fantastic gameday recipes for you! This is a double recipe post, with a great recipe for quick cinnamon rolls and easy pizza rolls! Here are the ingredients:
Cinnamon Rolls
- 1 cup light brown sugar
- 1/2 cup granulated sugar
- 1/2 tsp ground cinnamon
- 1 sheet puff pastry, very cold (you can find this in the freezer section at the store)
- Butter or margarine, to spread over pastry
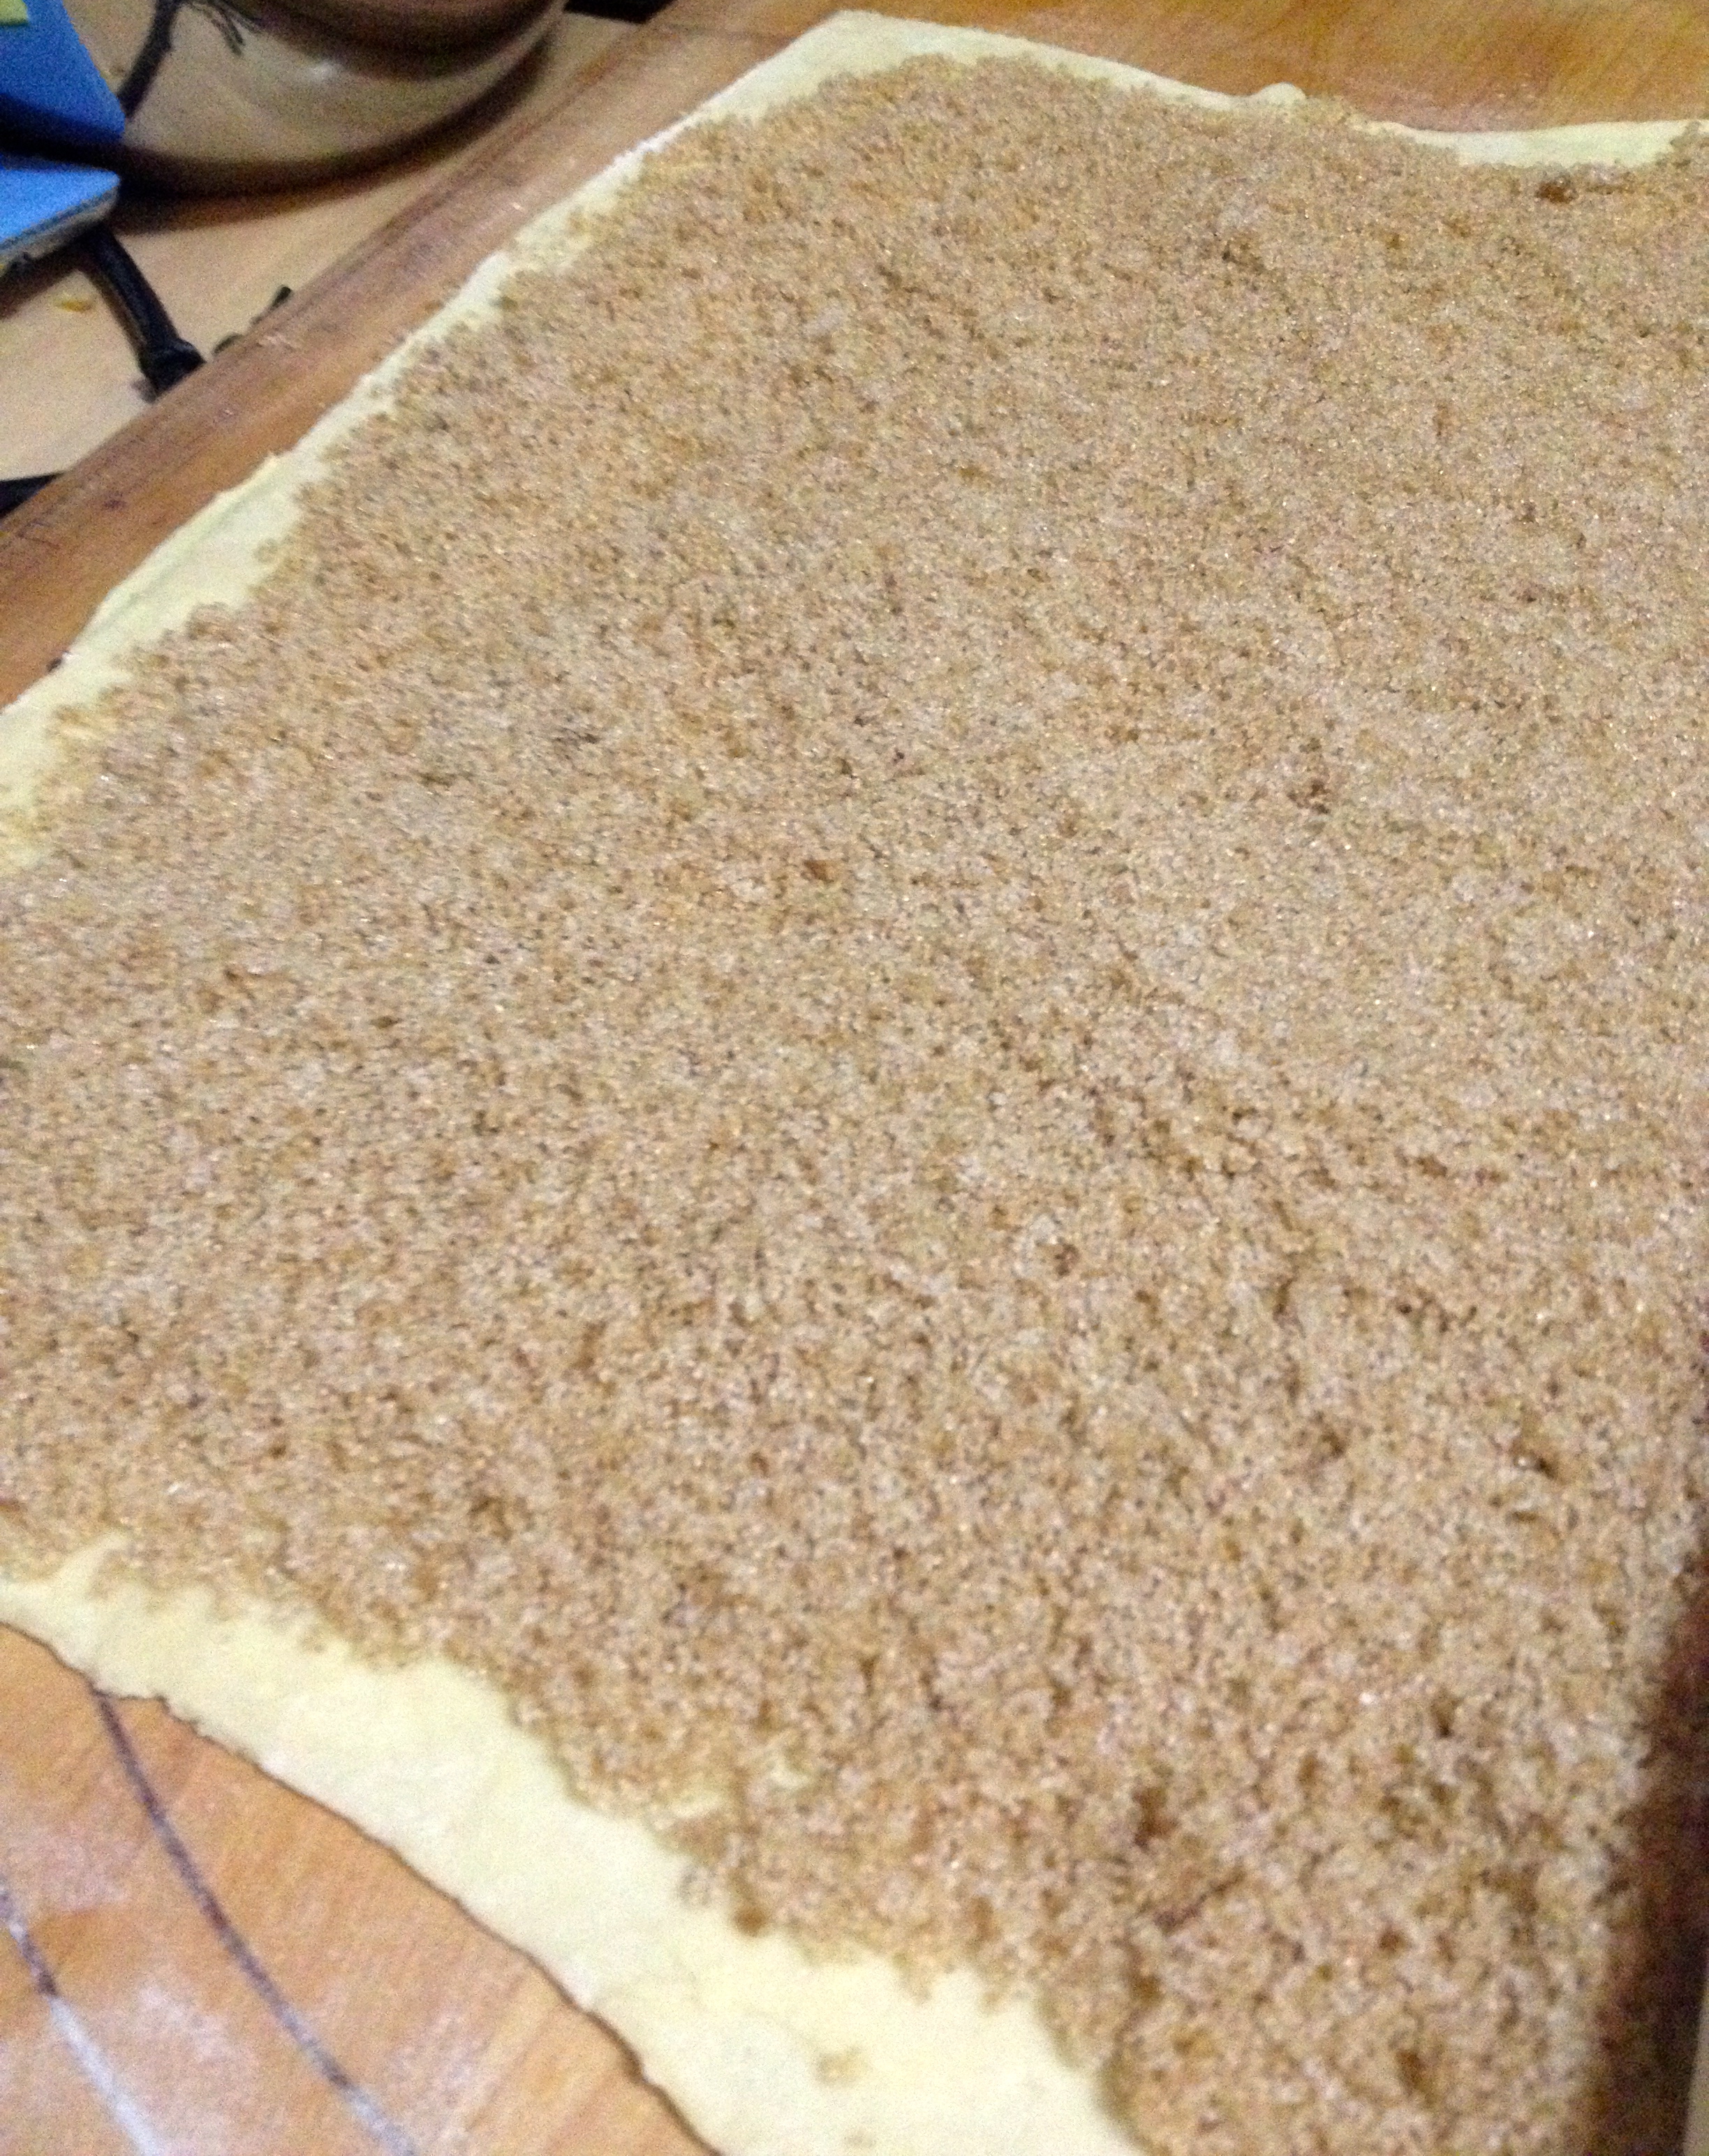
First, combine the brown sugar, sugar, and cinnamon in a mixing bowl. Unfold the puff pastry and roll it out on a floured pastry board until it’s about 18 inches long and wide. Then, butter the pastry lightly. Pack the brown sugar mixture onto the pastry.
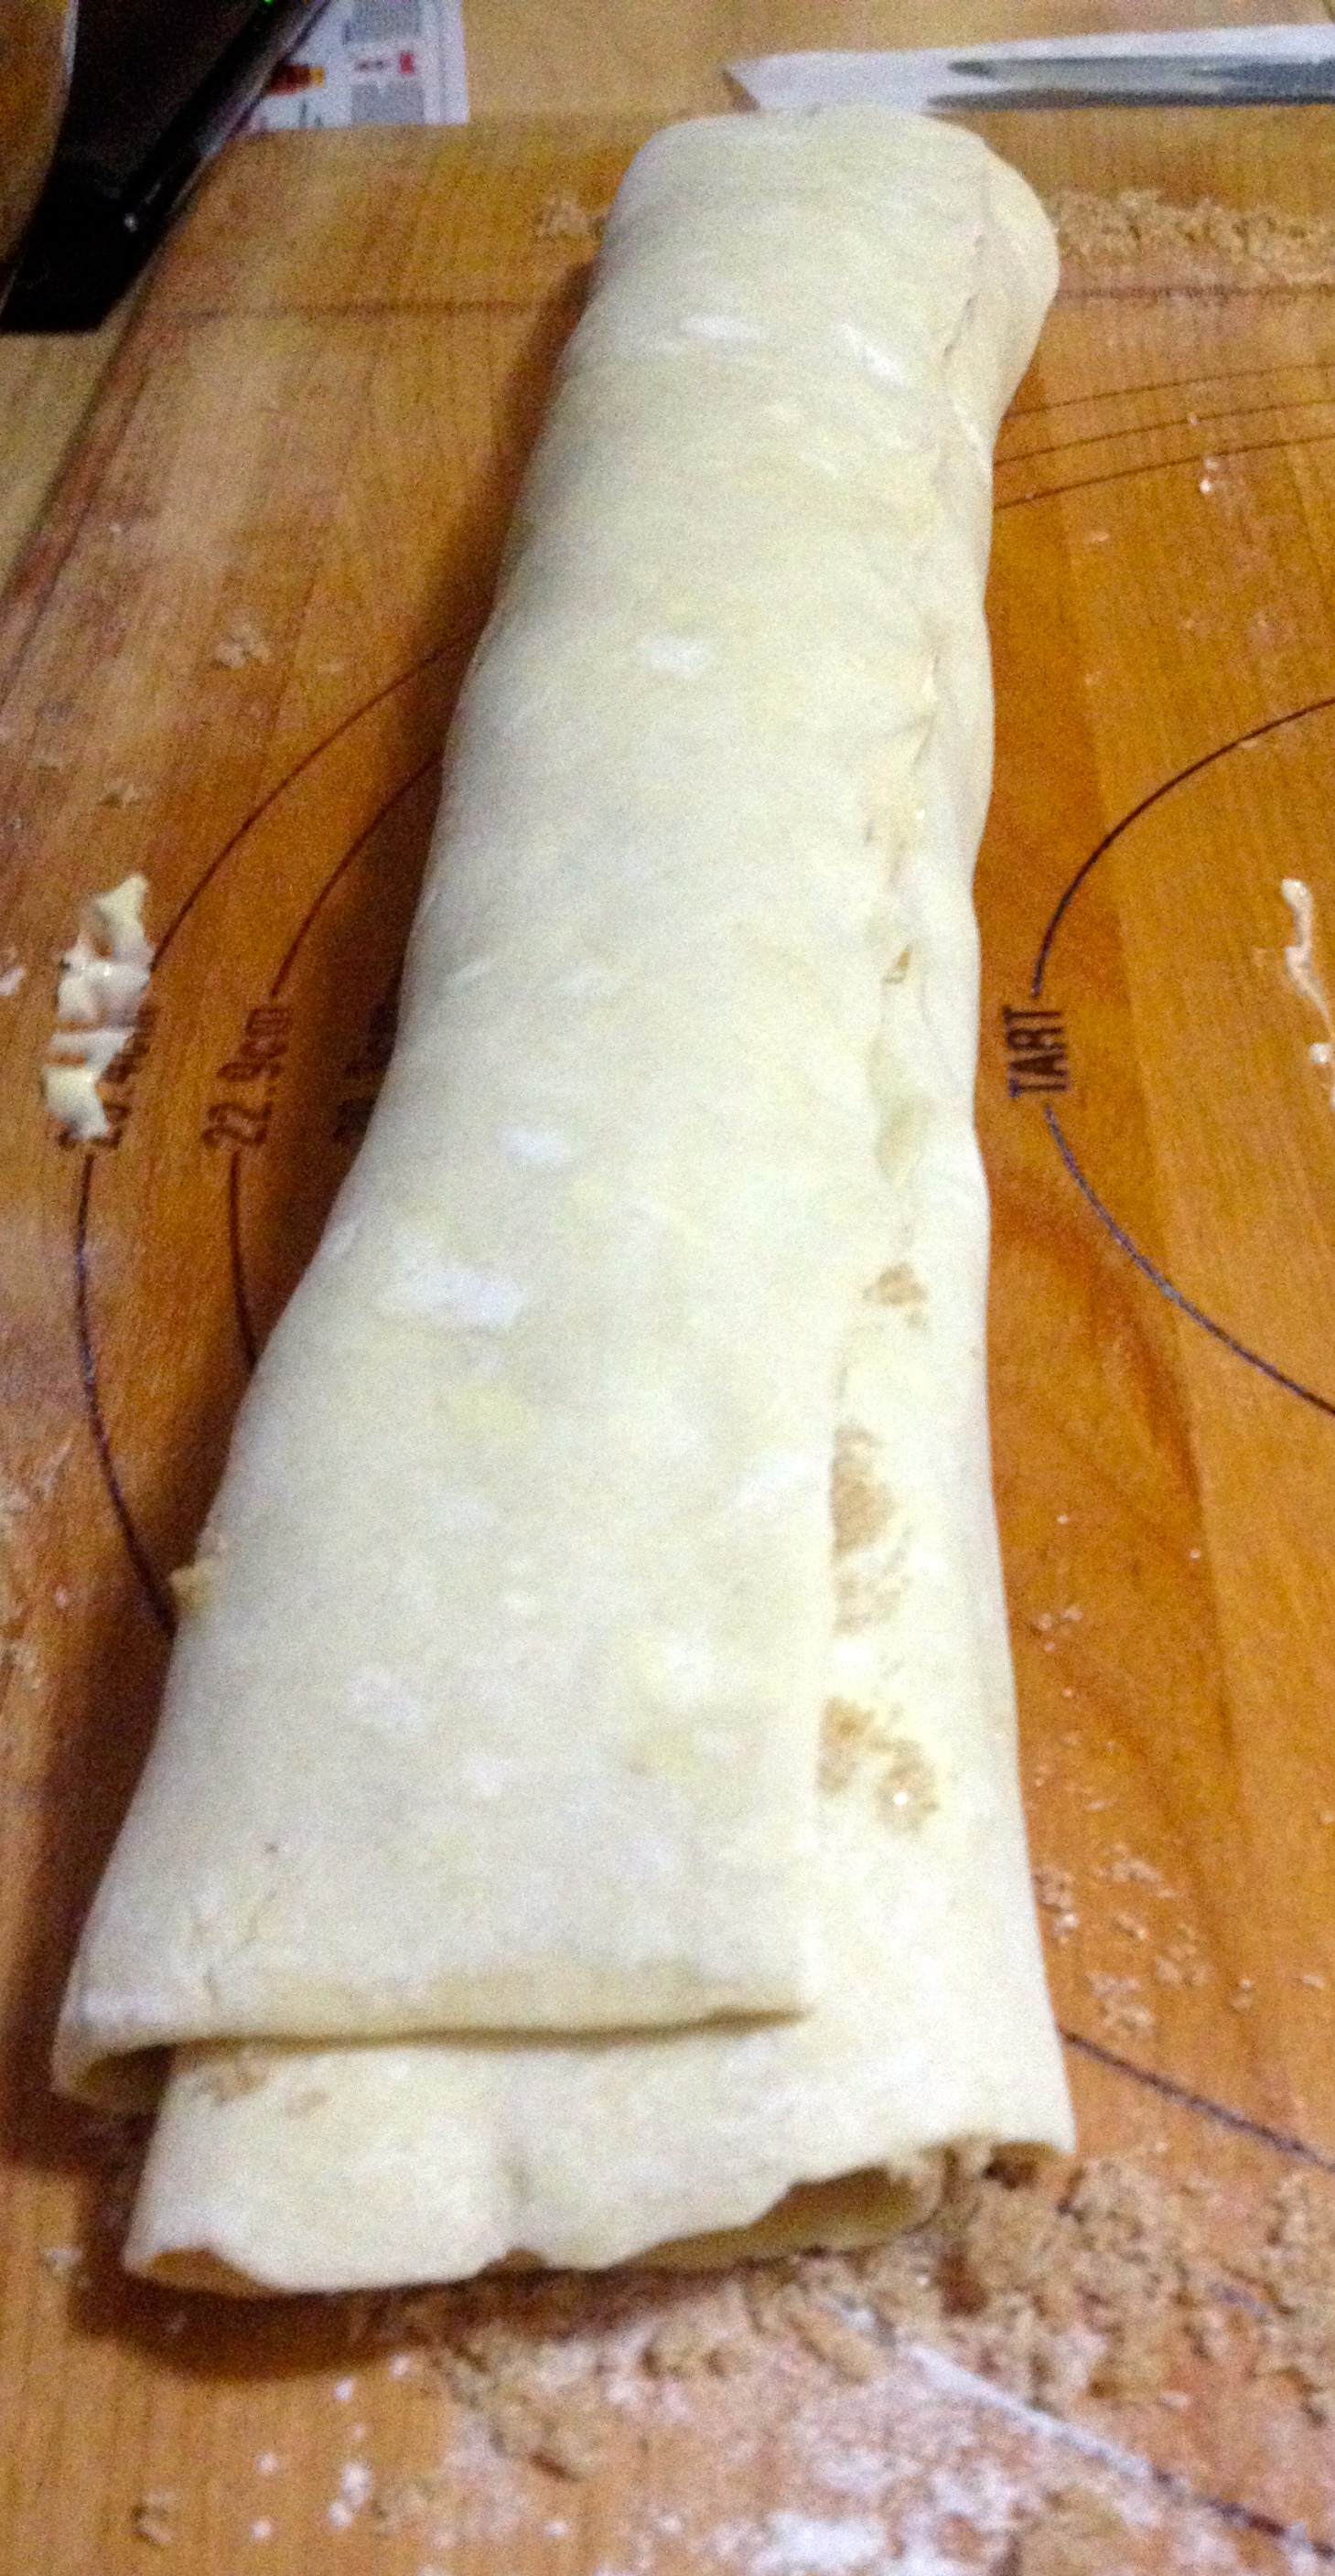
Gently, roll the pastry into a log.

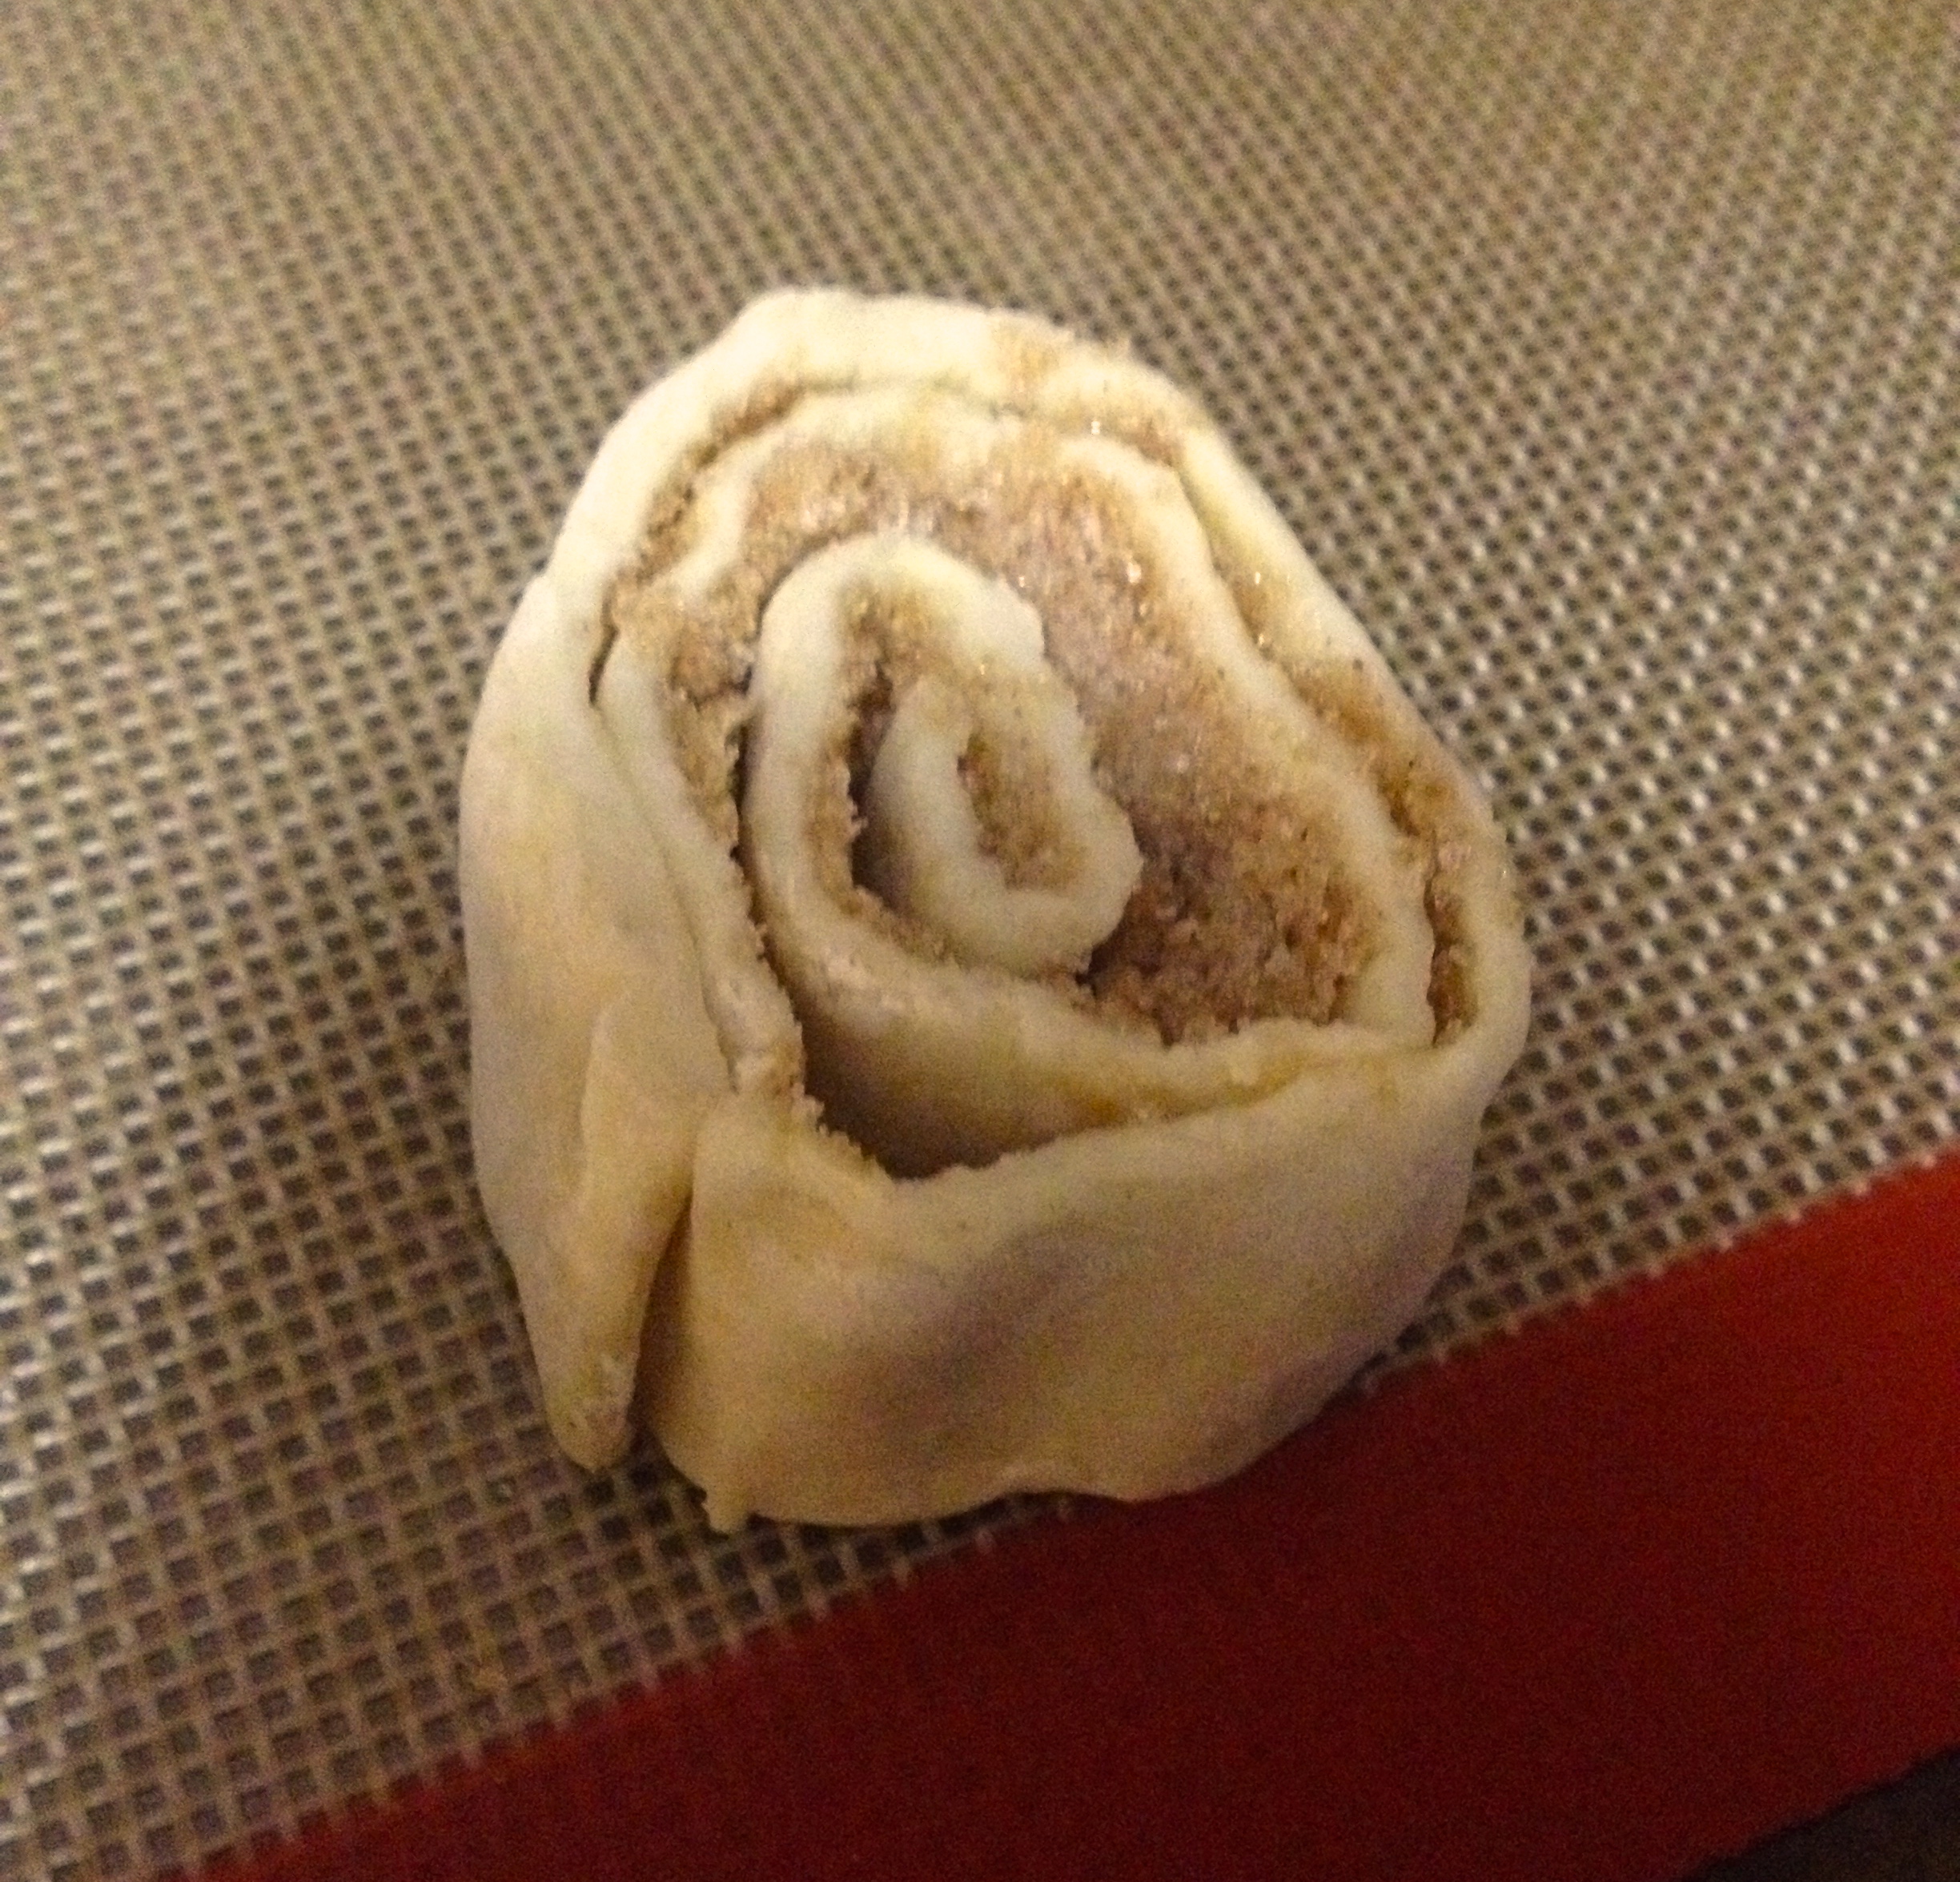
Cut the log into small circles, and lay the circles down on a greased baking sheet (or a silicon baking mat, like I did). Hint: Make sure the pastry is super cold while you’re doing this, or else it will fall apart. If it gets warm, stick the log in the freezer wrapped in plastic wrap for a few minutes until it’s cold and firm again.
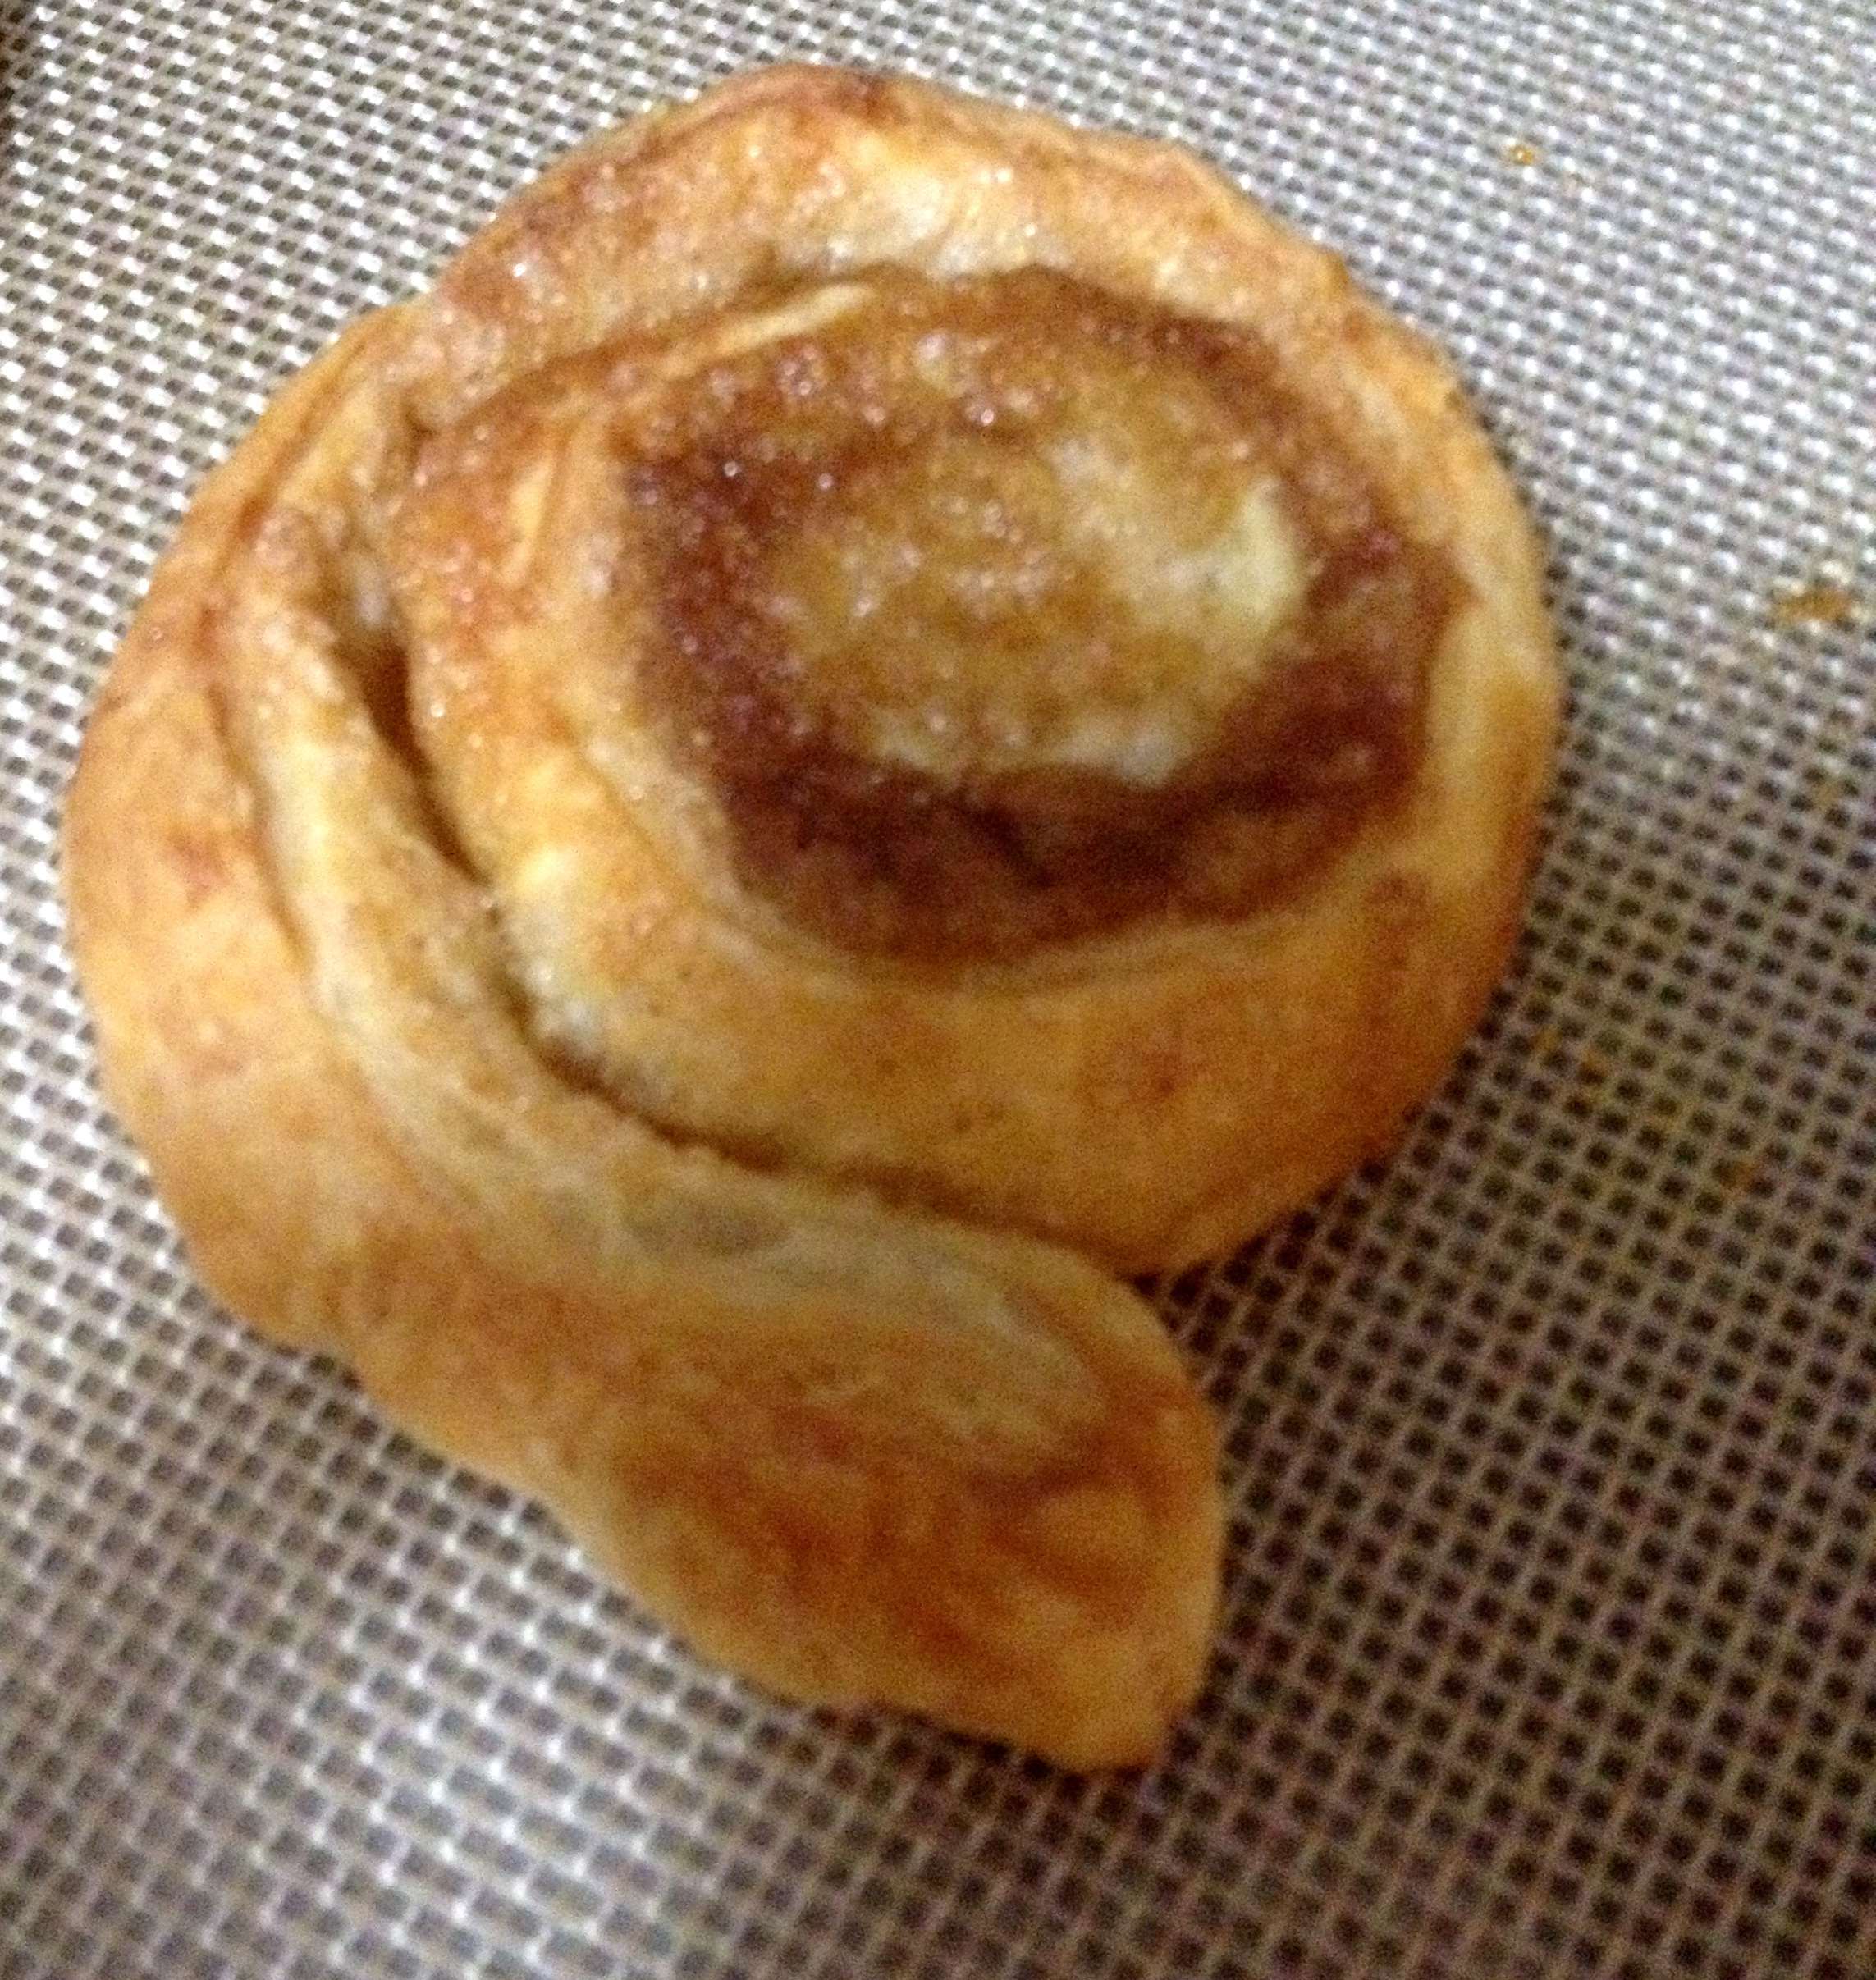
Bake in a 400ºF oven for 15 minutes or until the pastry is golden brown. Then, let the pastry cool on the baking sheet.
Now for the pizza rolls!
Pizza Rolls:
- 1 sheet puff pastry, very cold
- 3/4 cup marinara sauce
- 2 cups shredded mozzarella cheese
- 1/2 cup grated Parmesan cheese
- Chopped pepperoni, to taste (I used turkey pepperoni)
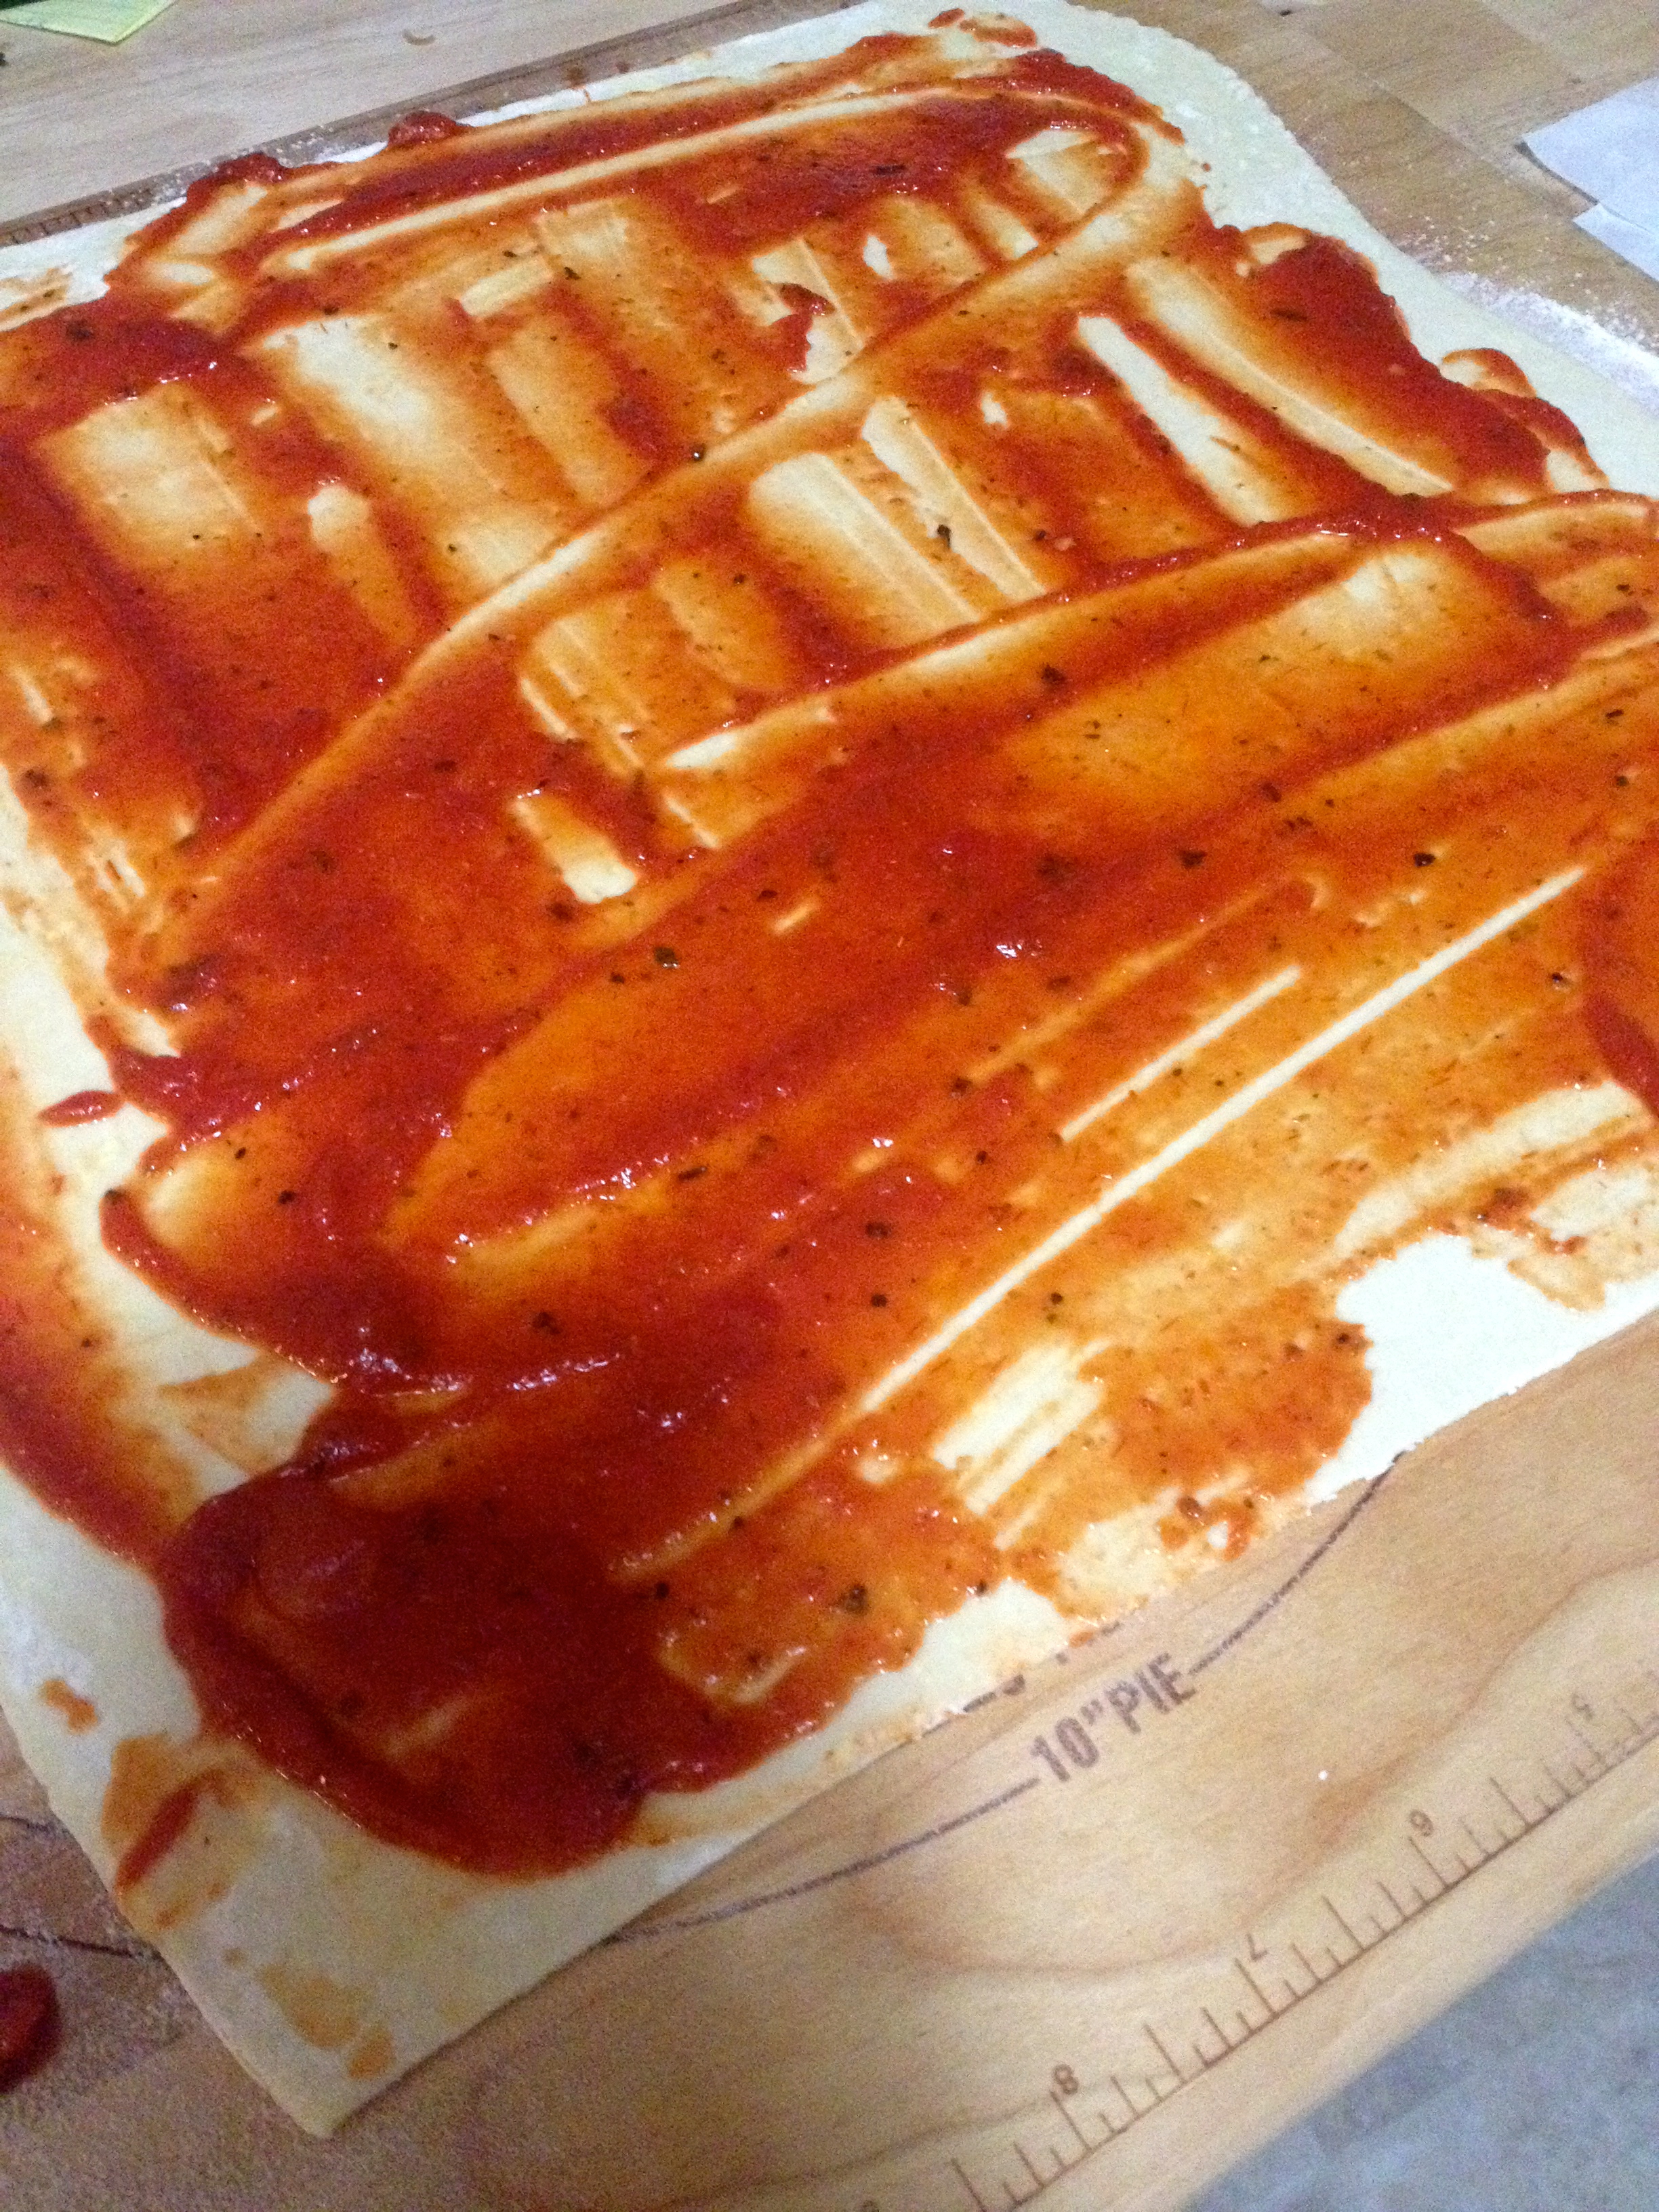
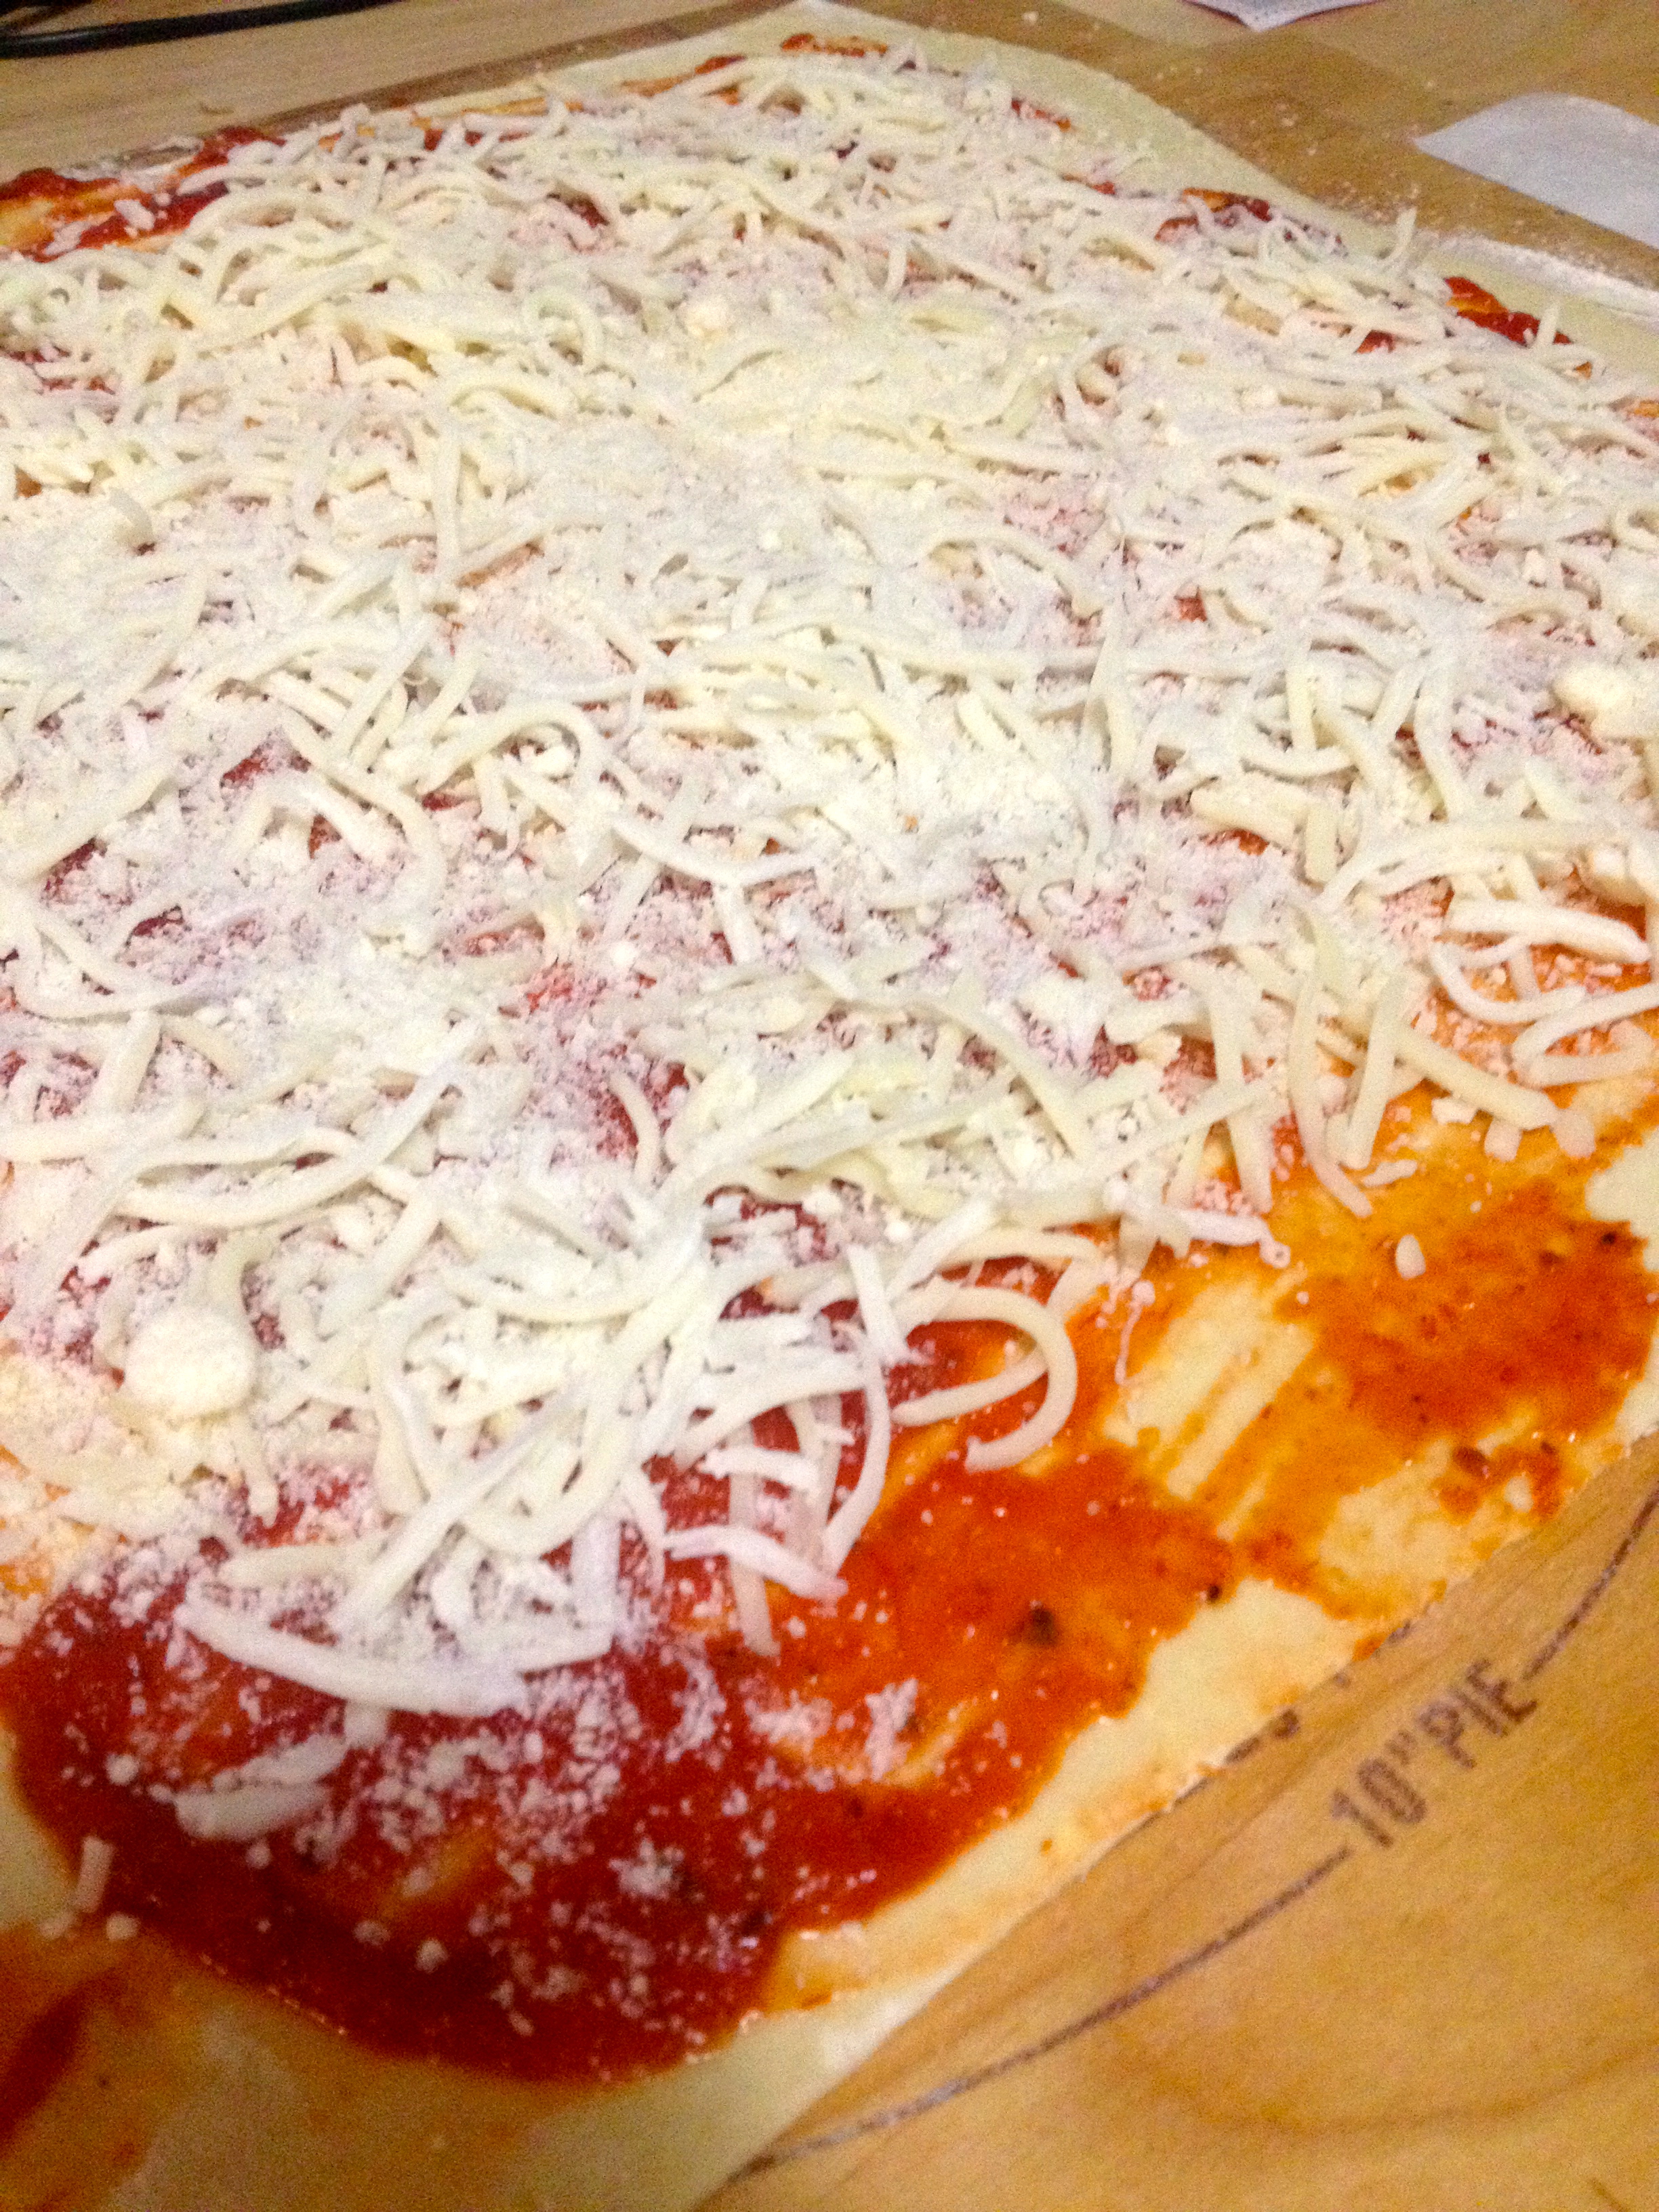
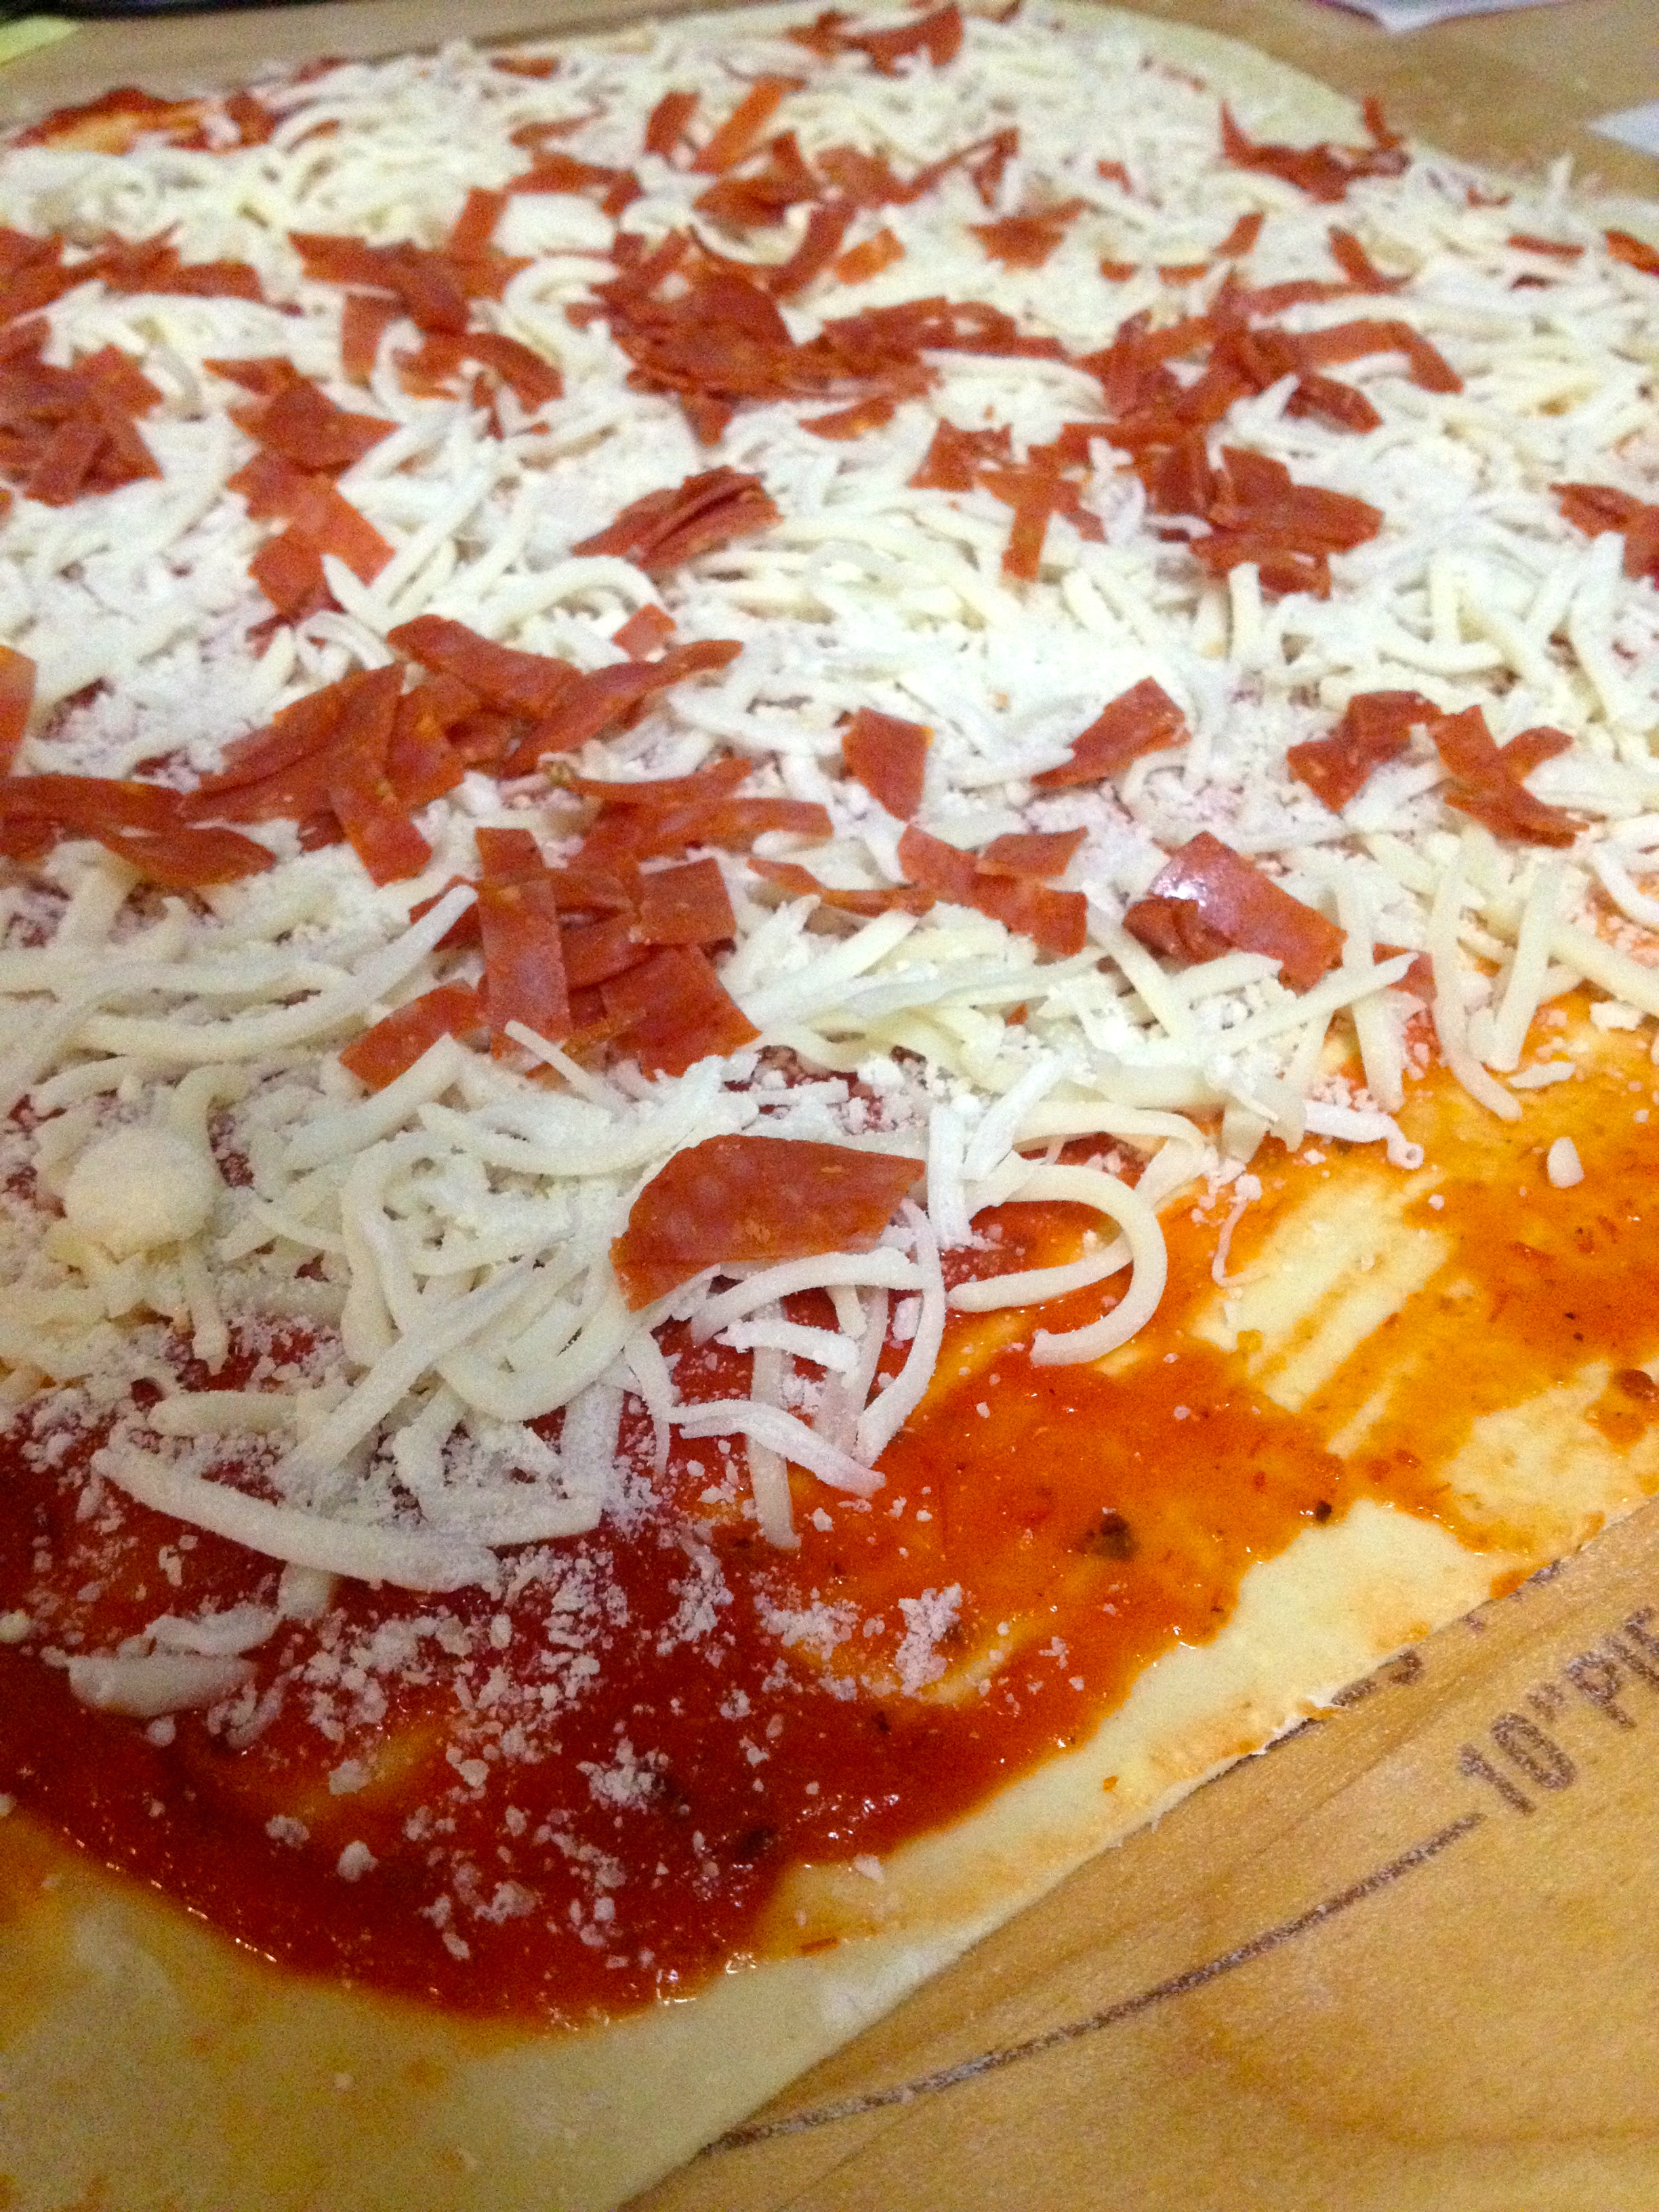
Basically, same drill as the cinnamon rolls. Roll out the pastry on a floured board, and then spread the marinara sauce the sheet. Sprinkle the cheeses on top of the sauce, and then sprinkle the pepperoni on top.
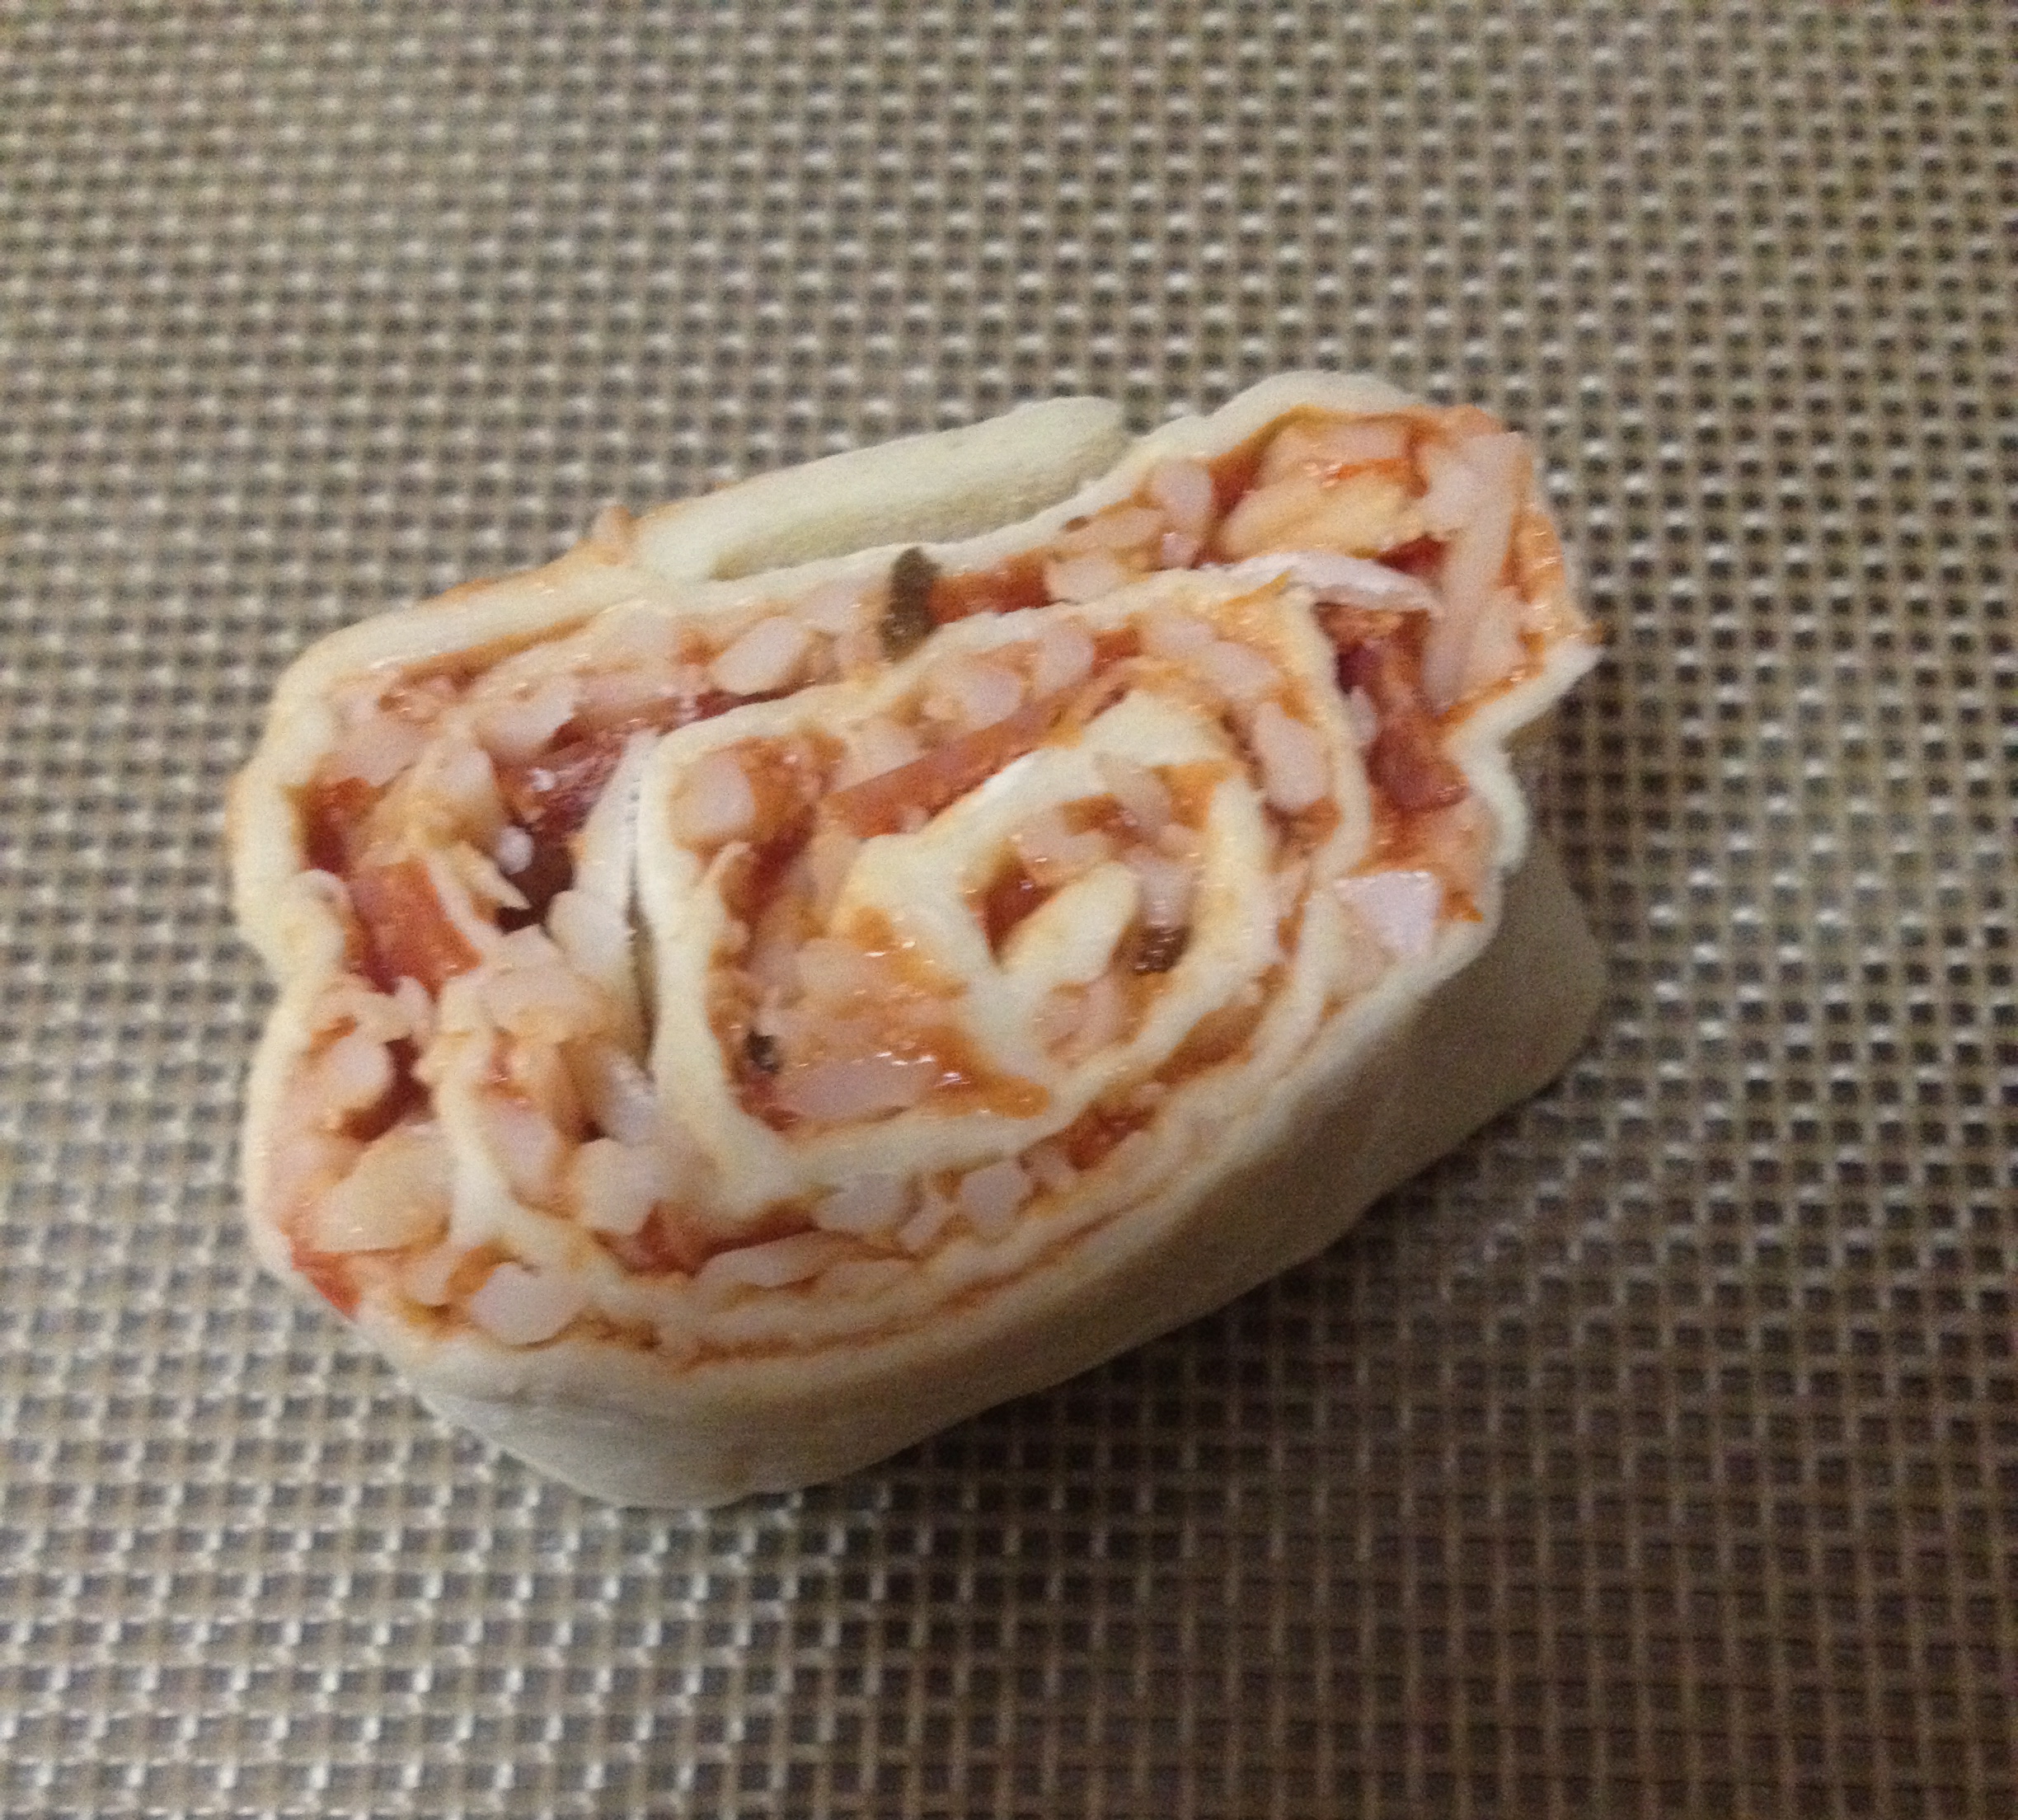
Roll the pastry up. Warning, this log will be much thicker than the cinnamon one! Cut the log into small circles, and bake in a 400ºF oven for 15 minutes or until the pastry is golden brown. Then, let the pastry cool on the baking sheet.
And there you have it! Two delicious snacks that are huge crowd-pleasers, just in time for the big game! I would recommend serving these fresh and hot, so pop them in the oven just a few minutes before the guests show up and you’ll be all set. Happy baking, and may the best team win!
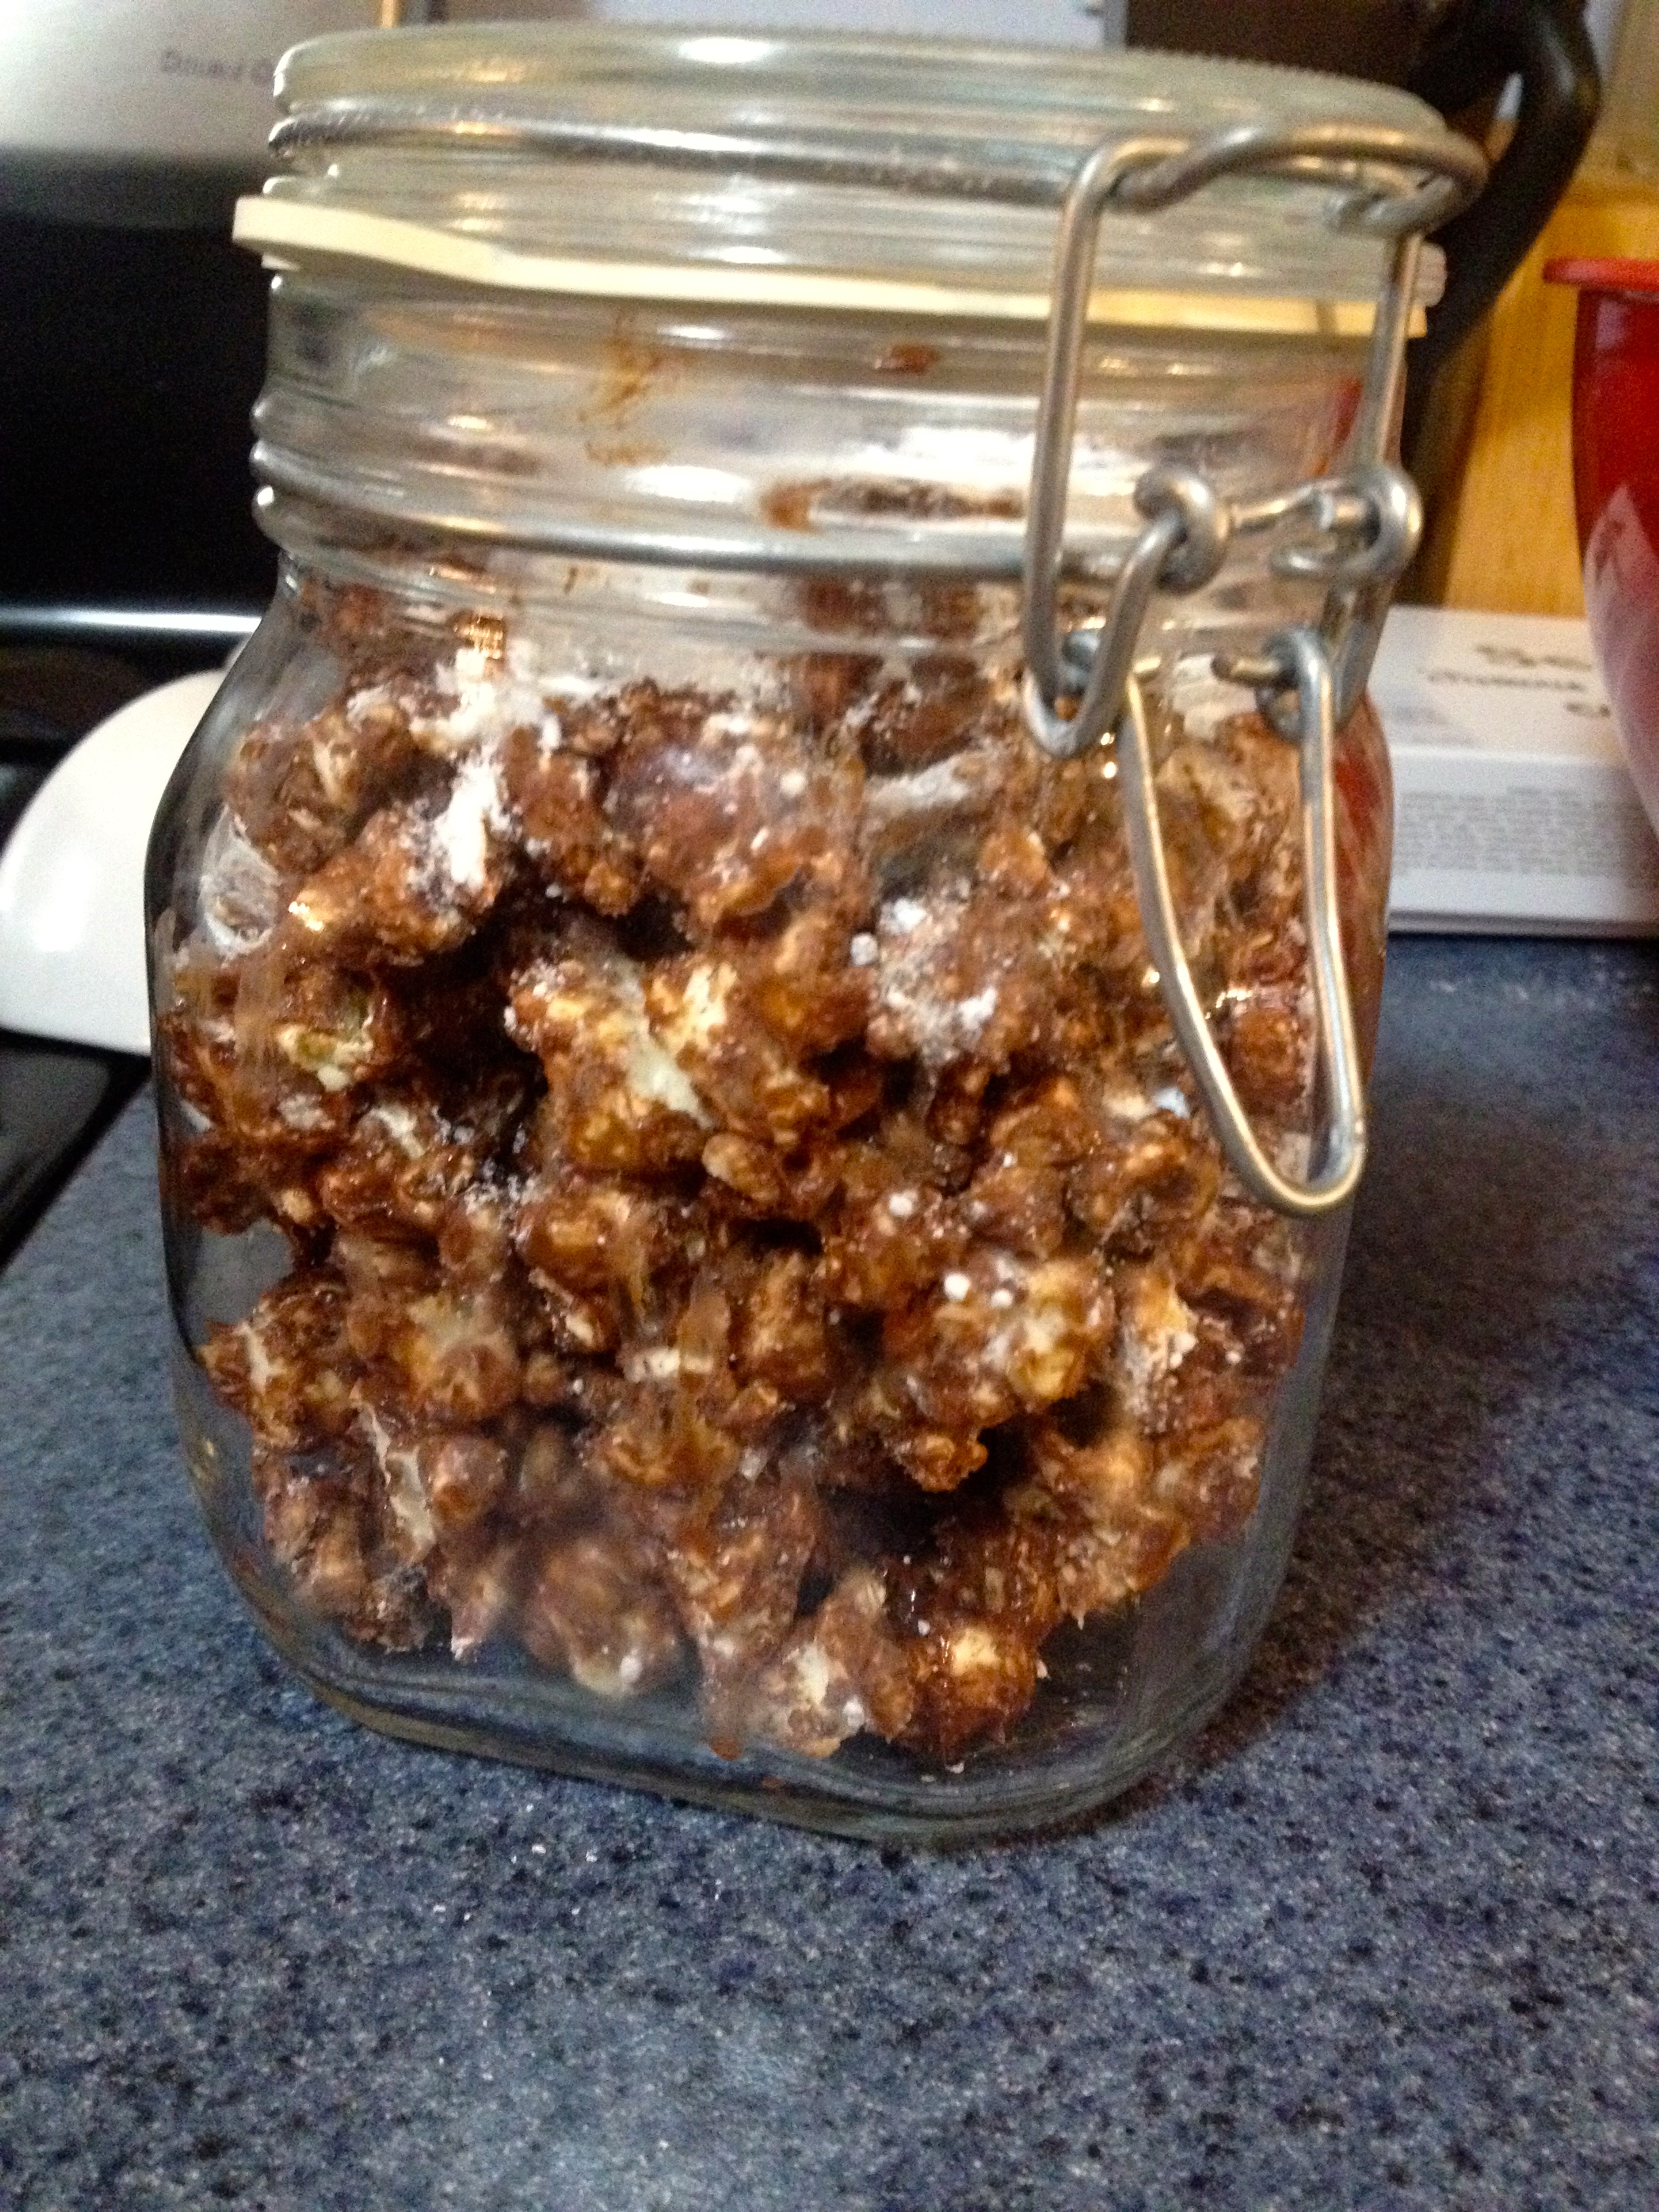
Santa’s Coal
Hi friends! Merry Christmas Eve! I have some awesome news for everyone- I’m engaged! That’s right, the same guy who has appeared in a few of my posts put a ring on it!

That kept me occupied for several days, but I finally have some time to post, just in time for Christmas. If you’re strapped for a snack to bring to the holiday party tomorrow, I’ve got the perfect, quick, easy, DELICIOUS snack! It’s Muddy Buddy Popcorn (aka Puppy Chow Popcorn, aka “coal”). Here’s the recipe!
Ingredients
- 1/4 cup unpopped popcorn kernels
- 3/4 cup smooth peanut butter
- 3/4 bag semisweet chocolate chips
- Powdered sugar
First, pop the kernels, either in an air popper or in a pan on the stove. Then, melt the peanut butter for about 30 seconds in the microwave, and pour it over the popcorn. With a spoon or spatula, toss the popcorn so that the peanut butter coats the kernels

Now, melt the chocolate chips, 30 seconds at a time, stirring between each 30 seconds. Pour the melted chocolate over the popcorn and toss again until the popcorn is completely coated in chocolate.
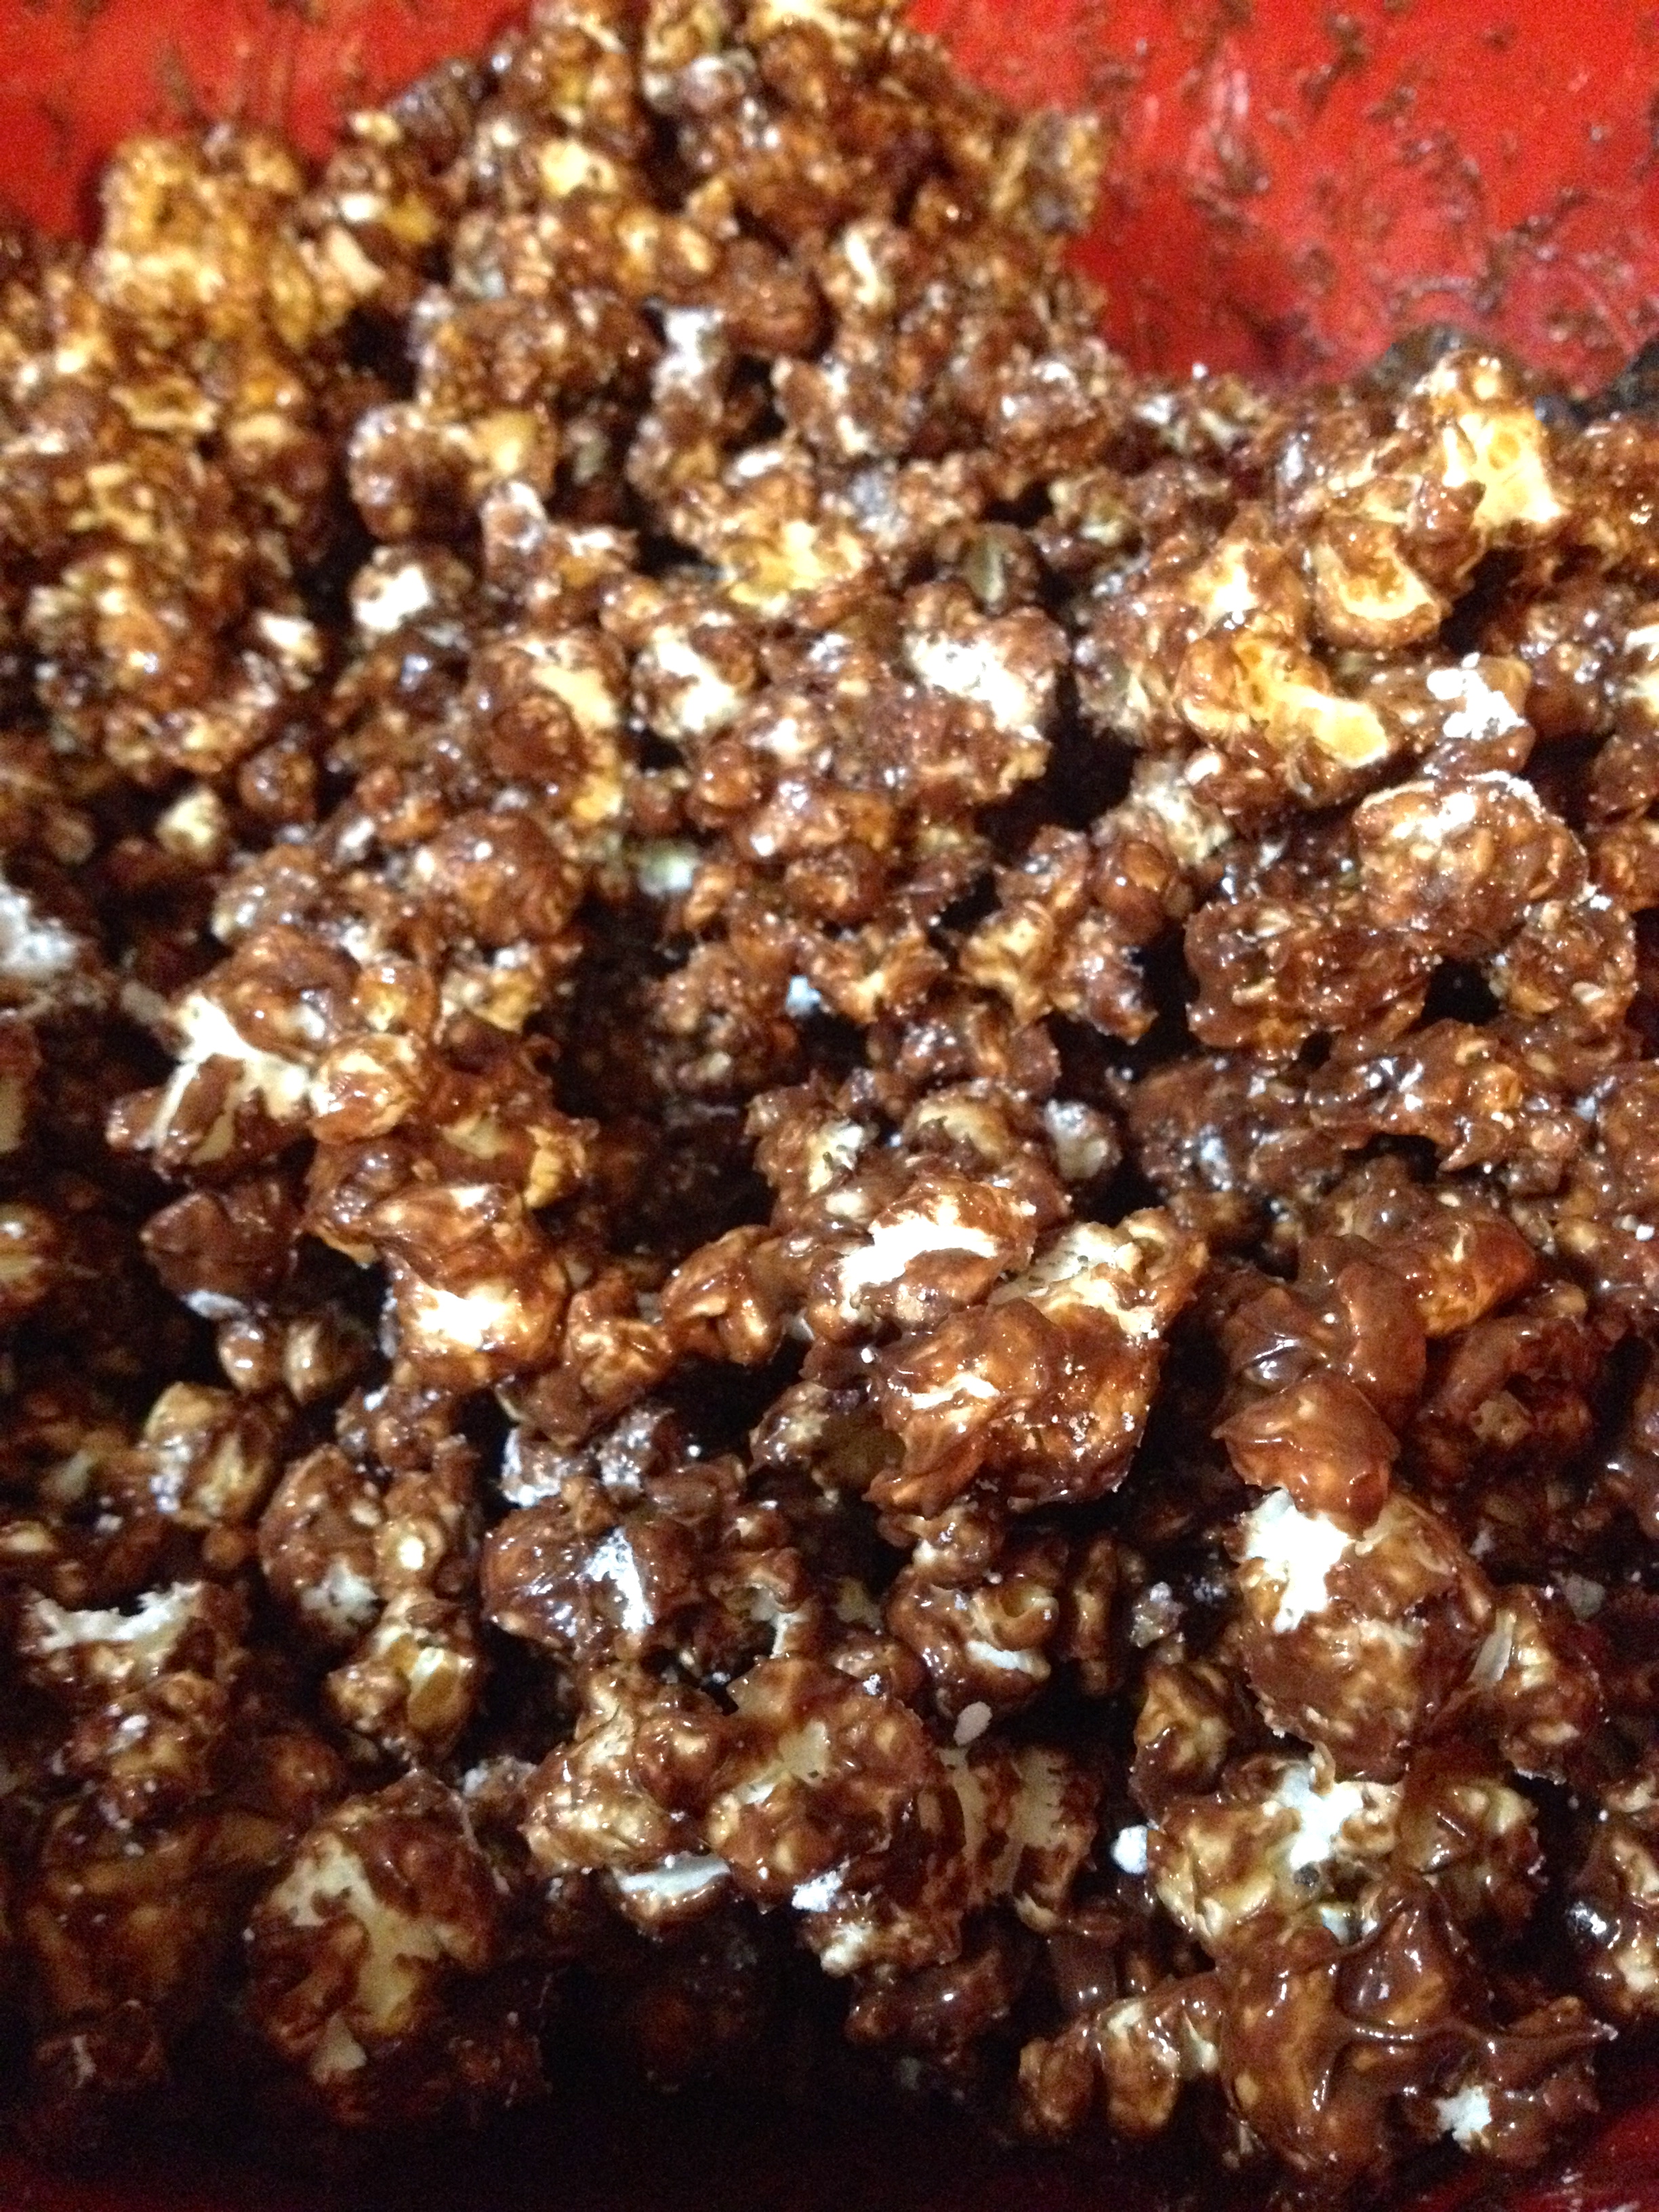
Now, sprinkle powdered sugar over the entire bowl and toss so that each piece of popcorn has some powdered sugar on it. If you want the popcorn to become white, it’ll take a lot of powdered sugar, so I just added about two cups.
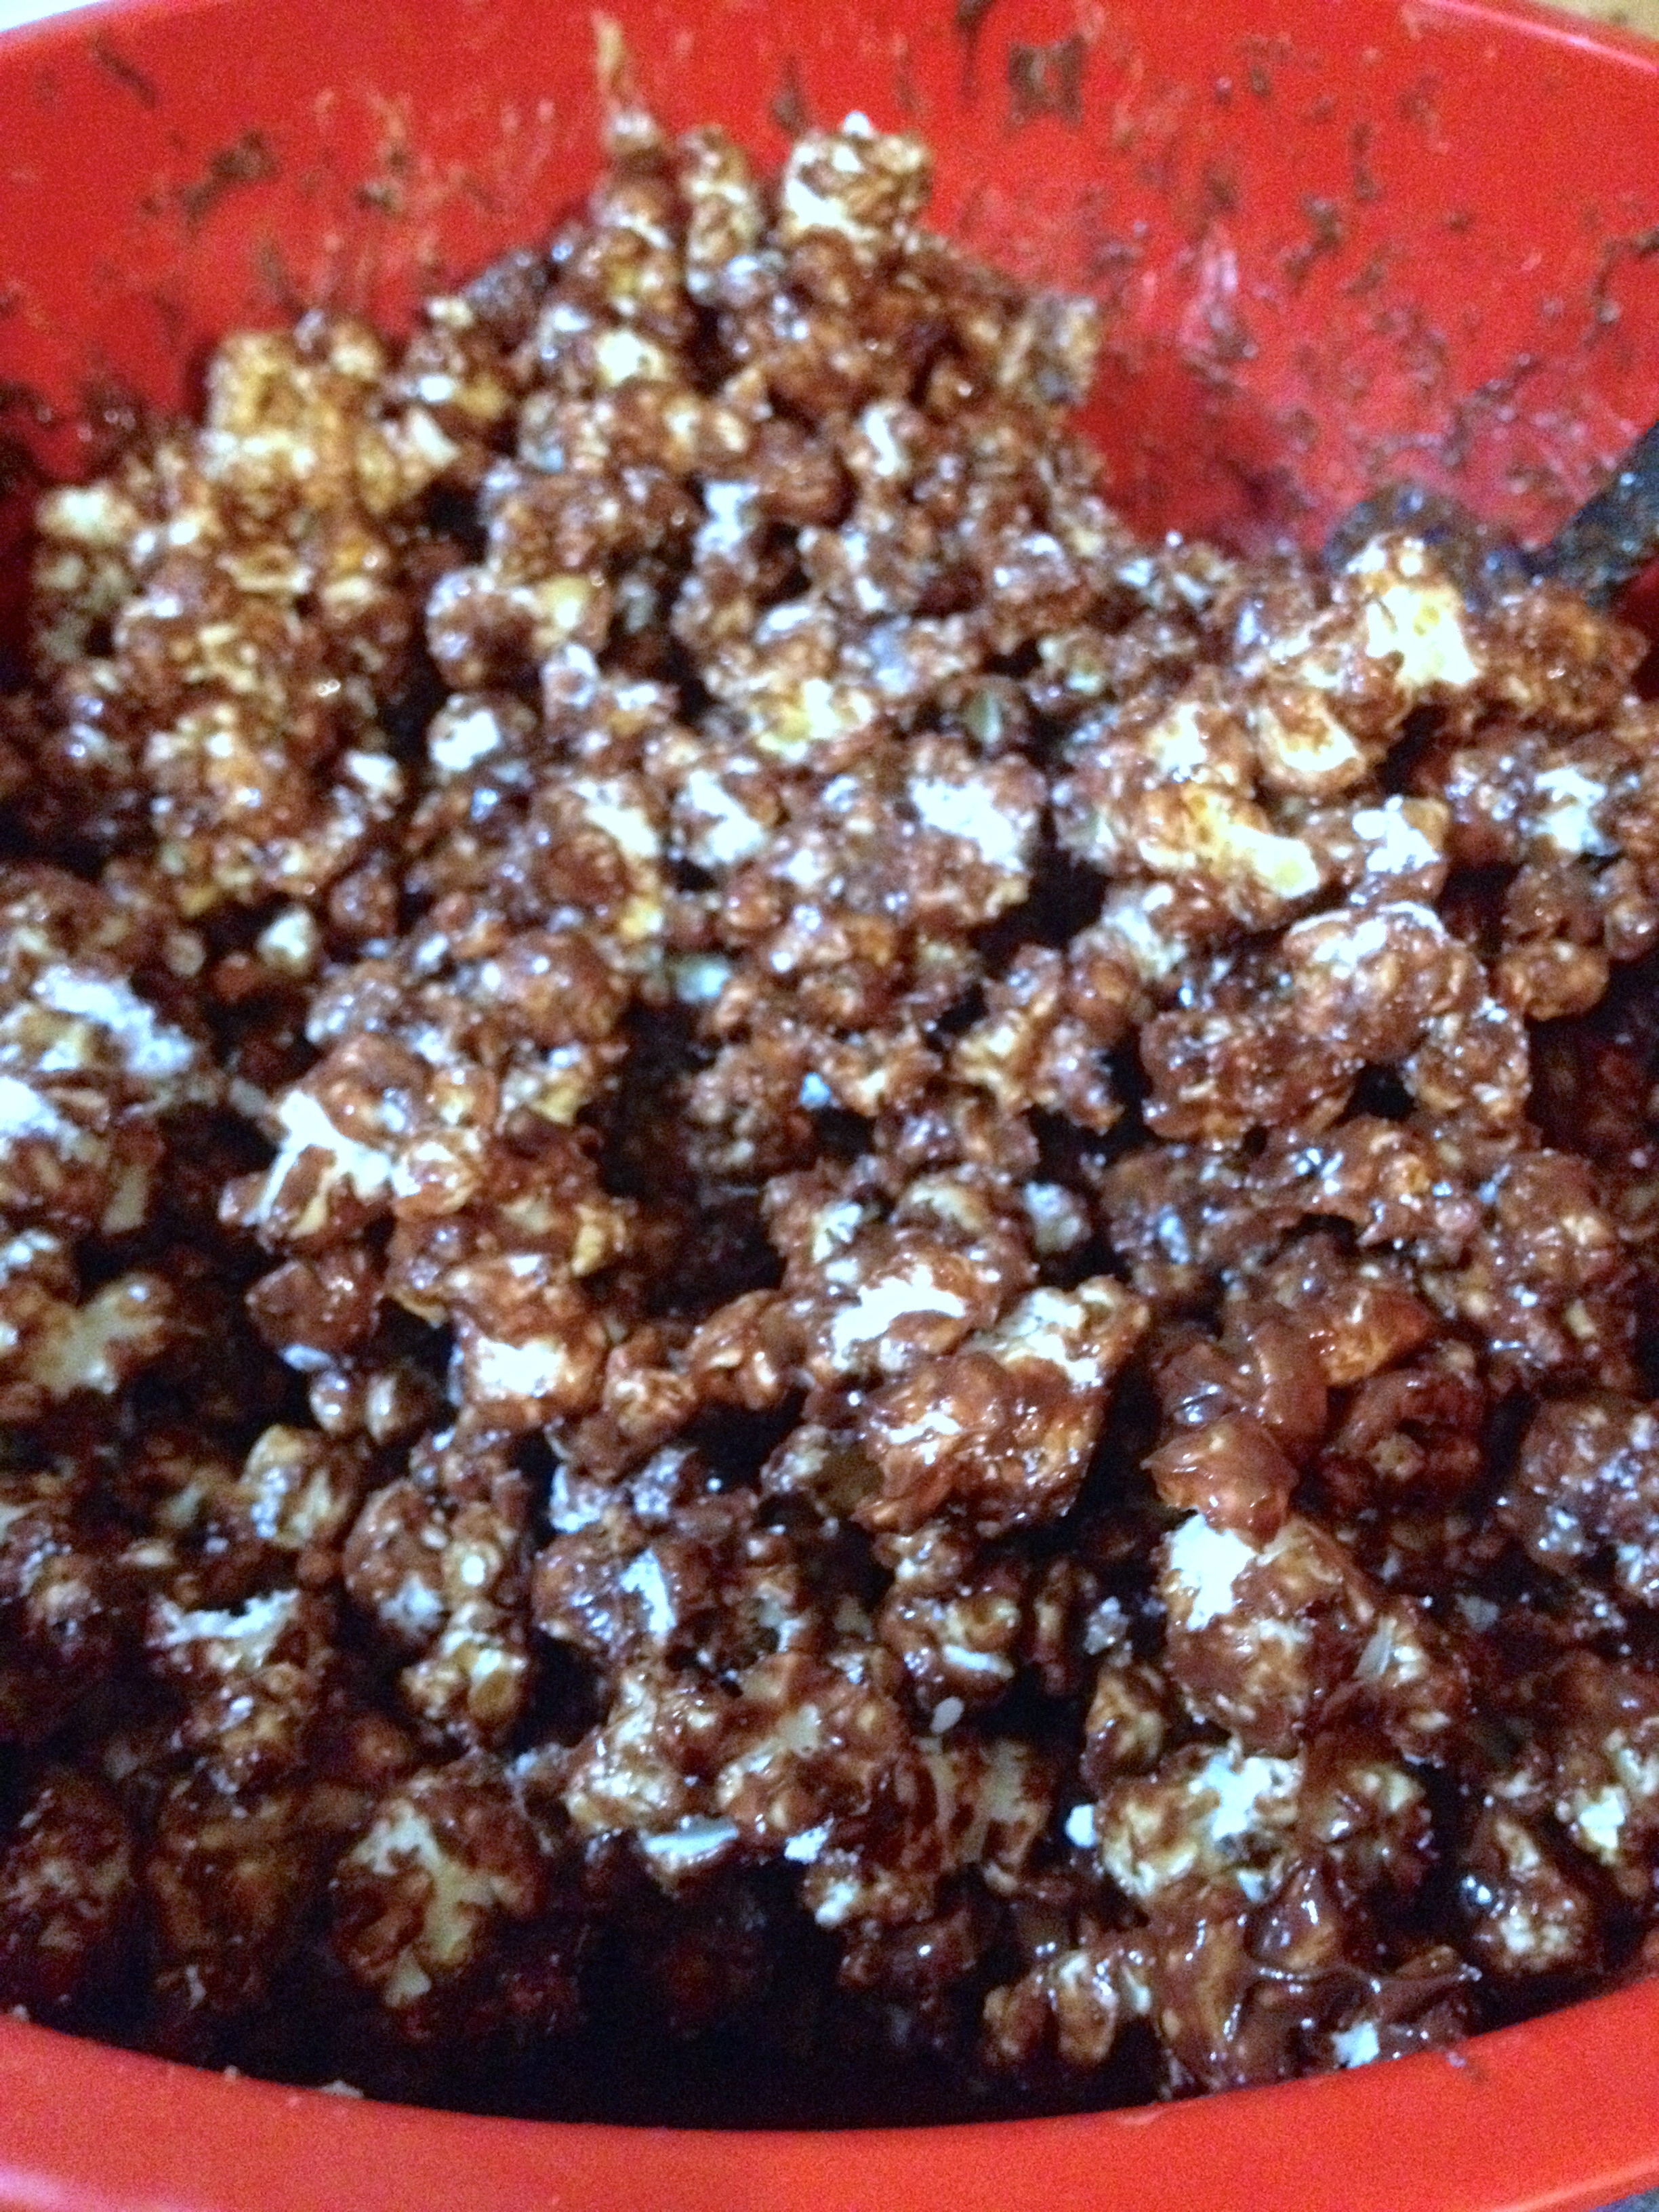
At this point, you can either eat it, or bake it to make it crispier. Bake it in an even single layer on a baking sheet covered with wax paper at 350ºF for about 5 minutes. Now, eat it or package it to make a cute little party favor or gift! I gave this to my future in-laws (!!!), and I really liked how the little jar favor looked! Enjoy!
I hope you all have a very Merry Christmas, and that you remember the true reason for Christmas. God bless you!
It’s All In the Apples!
Hello everyone! Happy autumn! Today’s post is all about the joys of fall and the delicious food that can be made- particularly baked apples! I went apple picking with my family this past weekend, and decided to make my own recipe for baked apples, so I seriously just winged it and threw a bunch of ingredients together. The results were nothing short of awesome, I have to say. True to my style, this recipe is ridiculously simple but so scrumptious. Here’s the recipe:
Ingredients:
- 4 fresh apples (I used Macintosh, but I think any variety would work fairly well)
- 1/2 cup old-fashioned oats
- 1/2 cup brown sugar
- 1/3 cup granulated sugar
- 1/2 tsp vanilla
- 1/4 tsp ground cinnamon
- 1/8 tsp ground cloves (for aromatics, not really taste)
- 1/4 tsp lemon juice
- 1 tbsp cold butter, cubed
- Pinch salt (a little less than 1/8 tsp)
You will also need an 8×8″ baking dish and 1 cup of water for later.
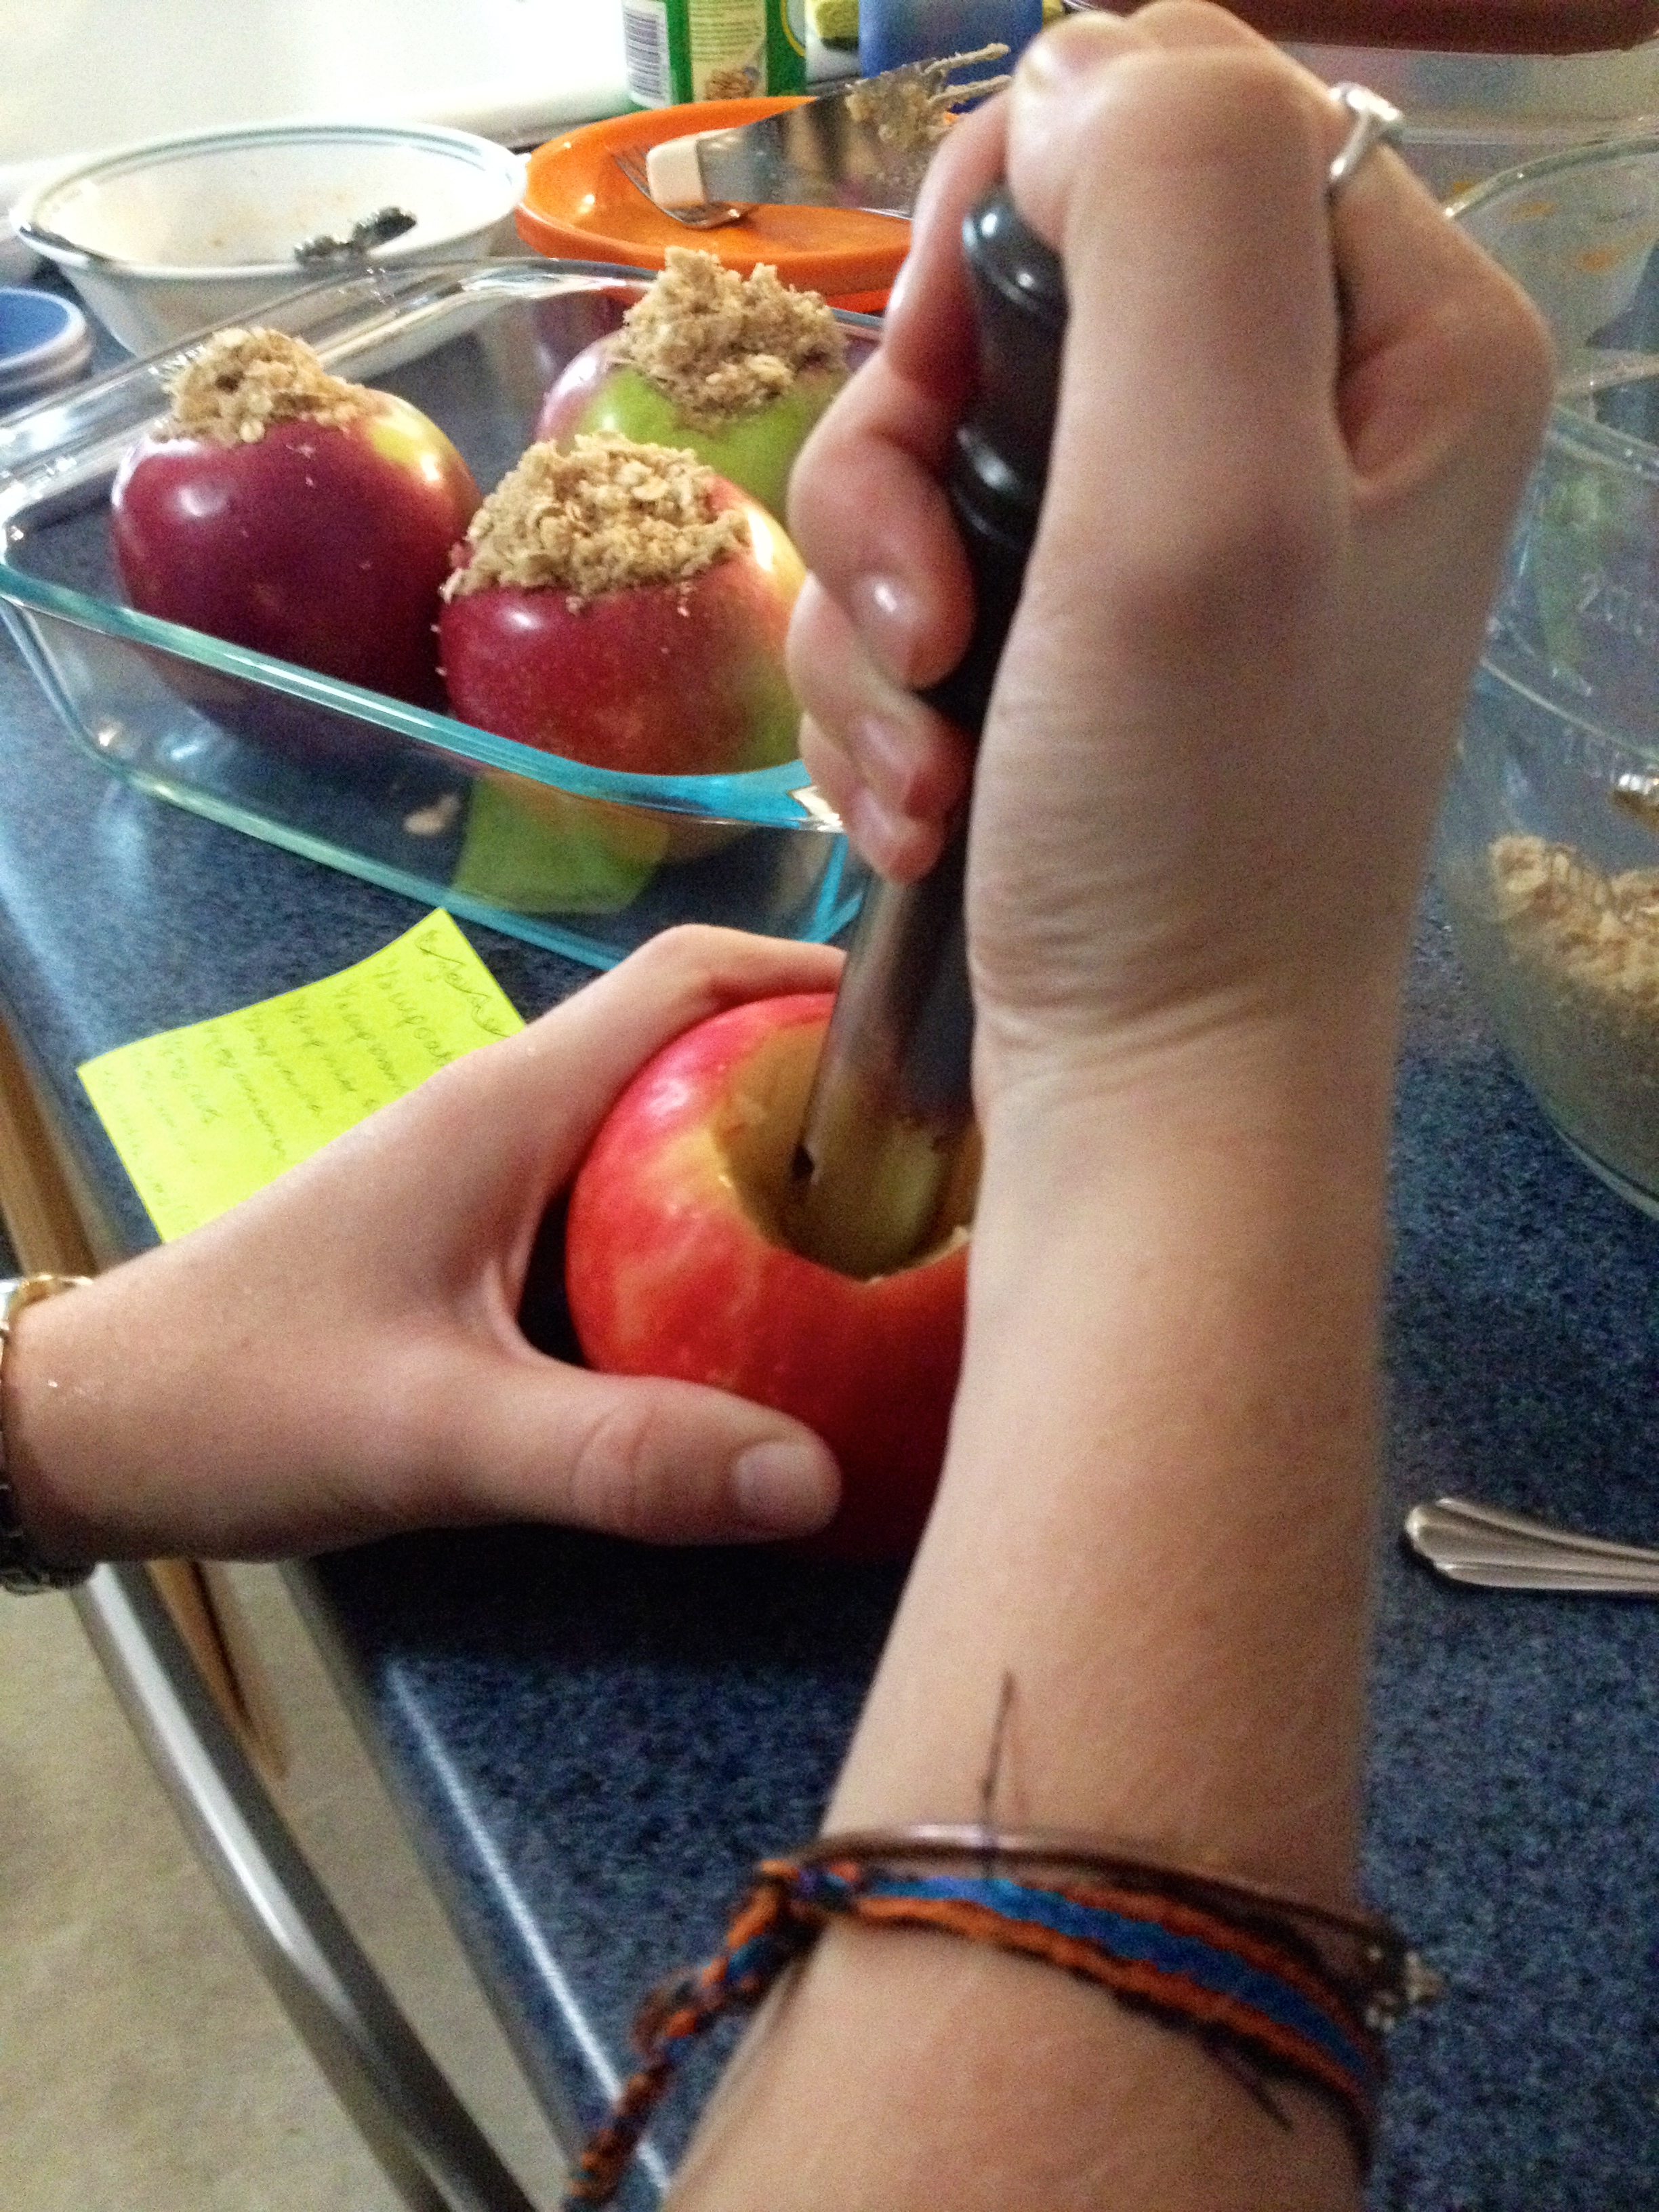
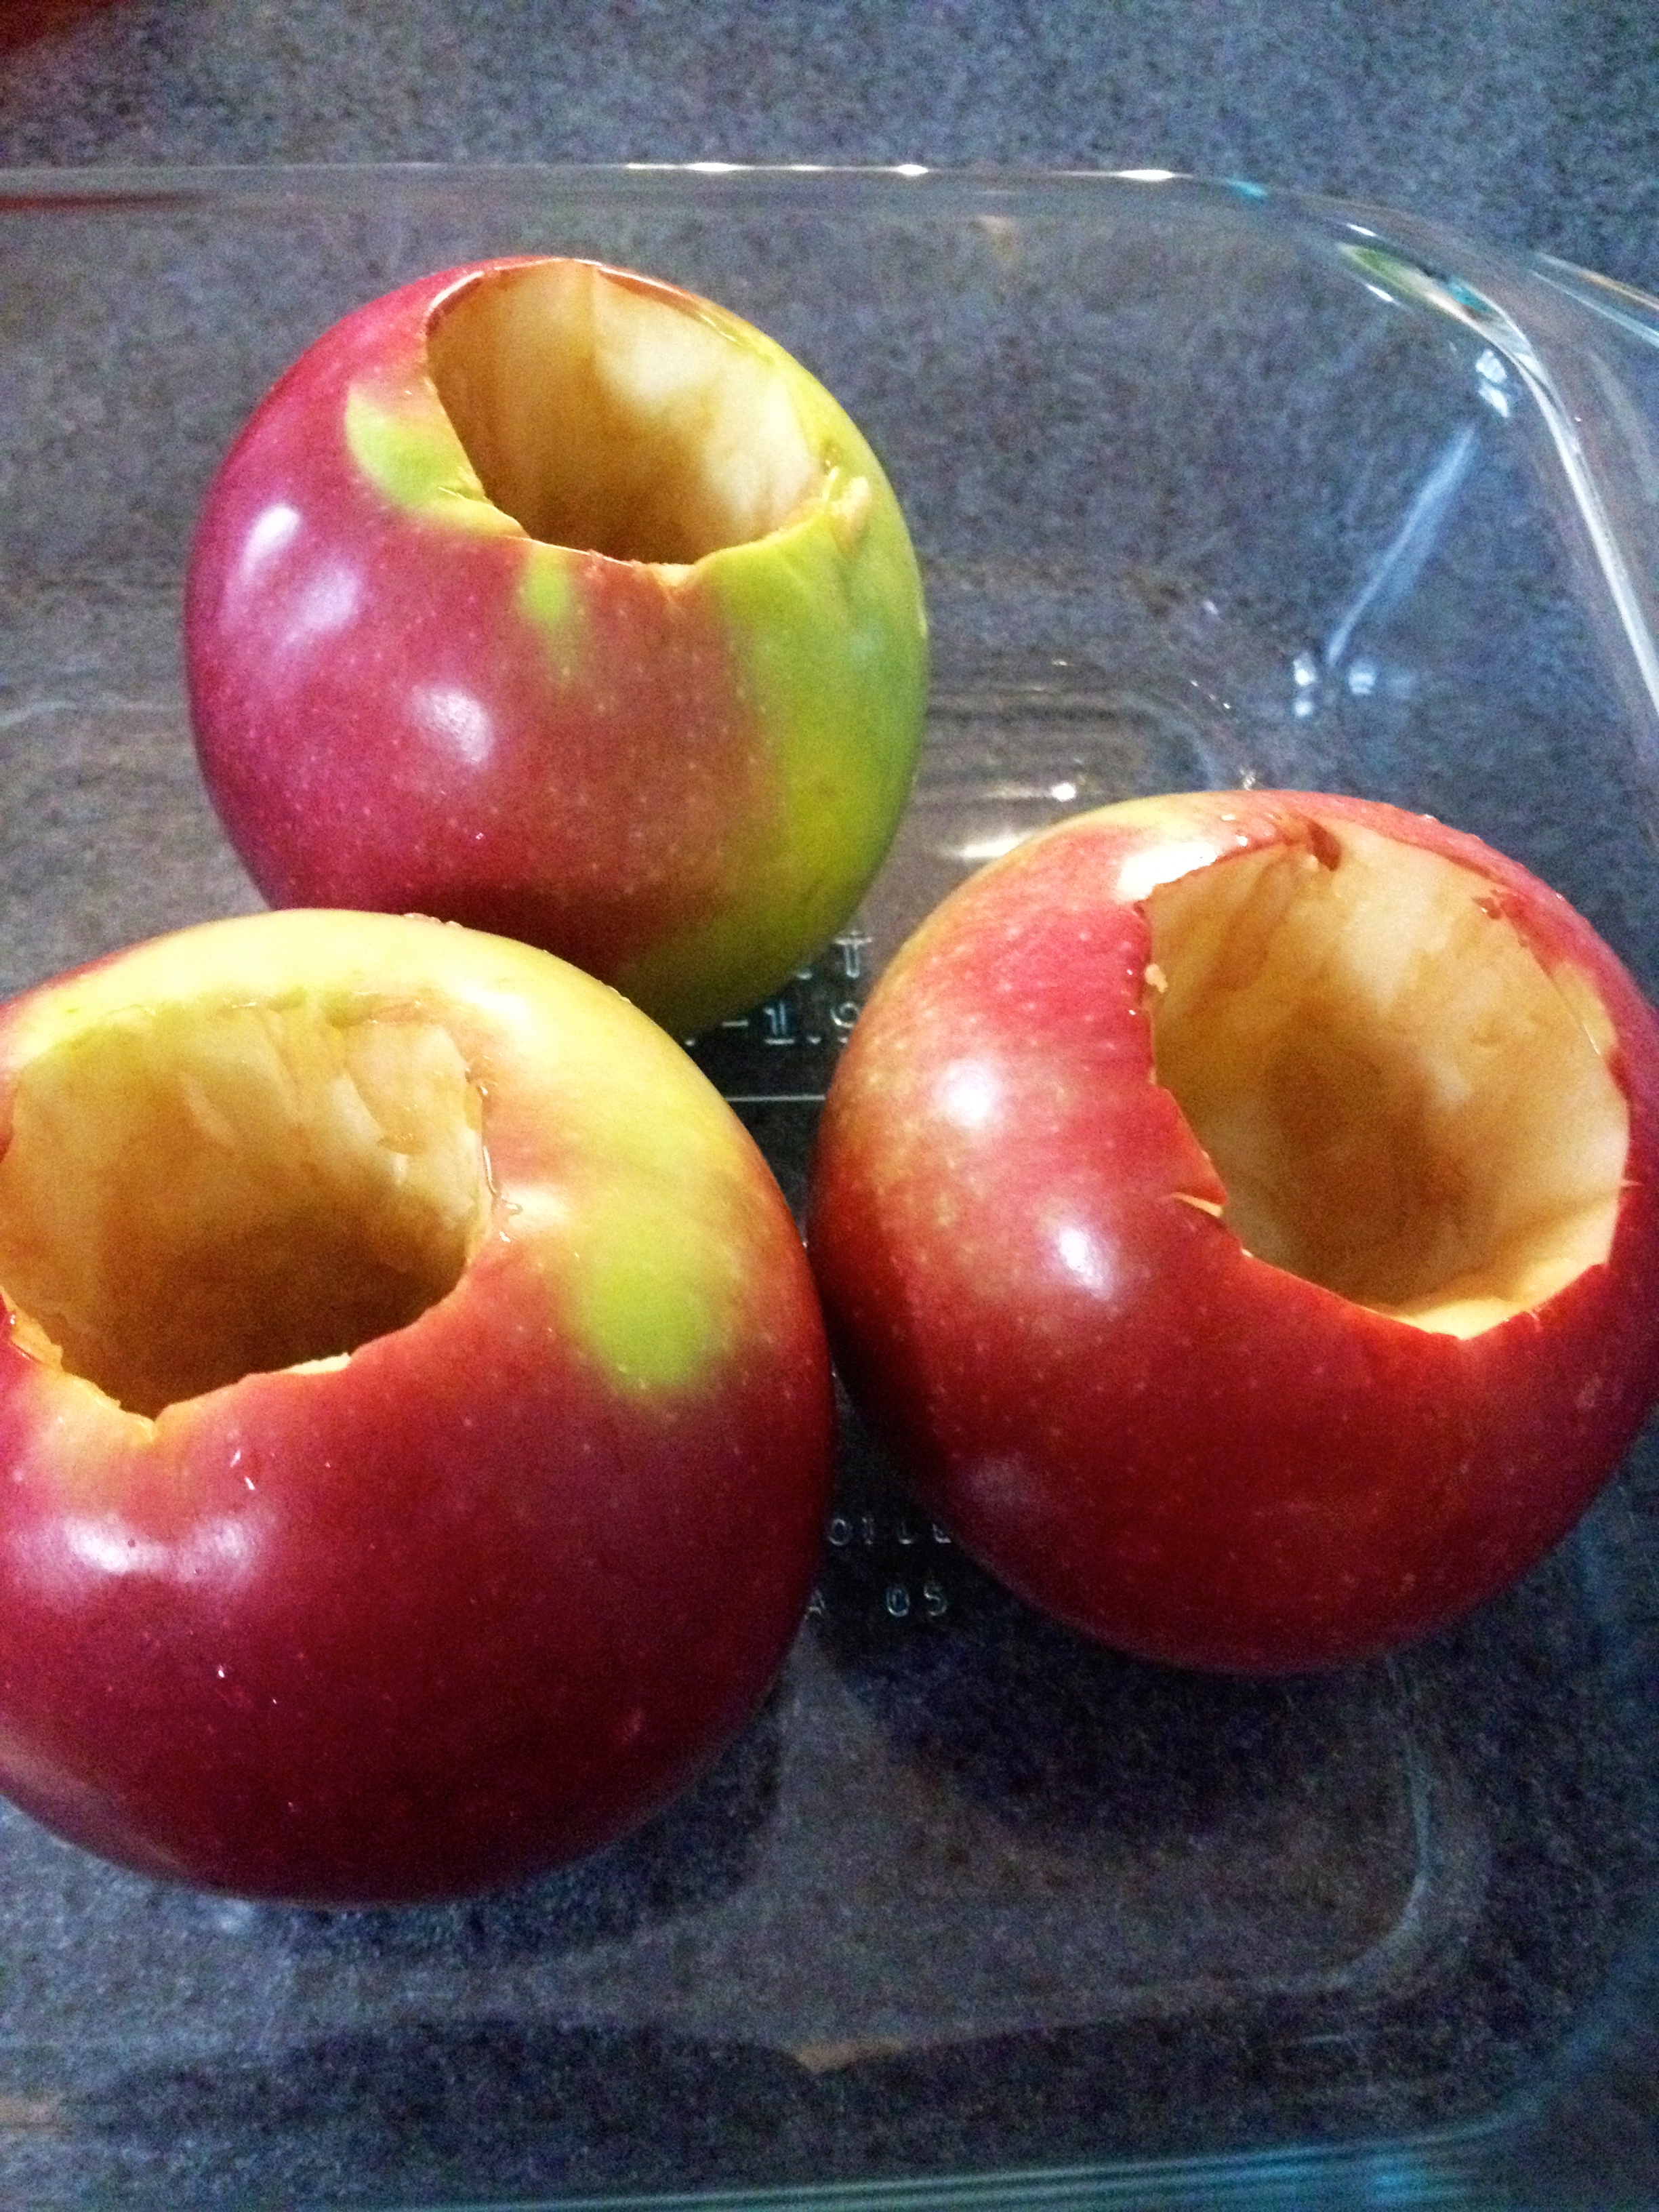
First, core the apples, but DO NOT core them all the way through. You’ll need the bottom of the apple to remain intact or else your filling will fall out. Partial coring is a process, but once you get the hang of it, you can whip through those apples! Here’s how I did it:
First, take a paring knife and run it in a wide circle around the stem part of the core. Then, take a spoon and, using the cut circle, scoop out the top part of the core. This will require some force, but when you hear the core cracking, you’ll know it’s ready to be removed.
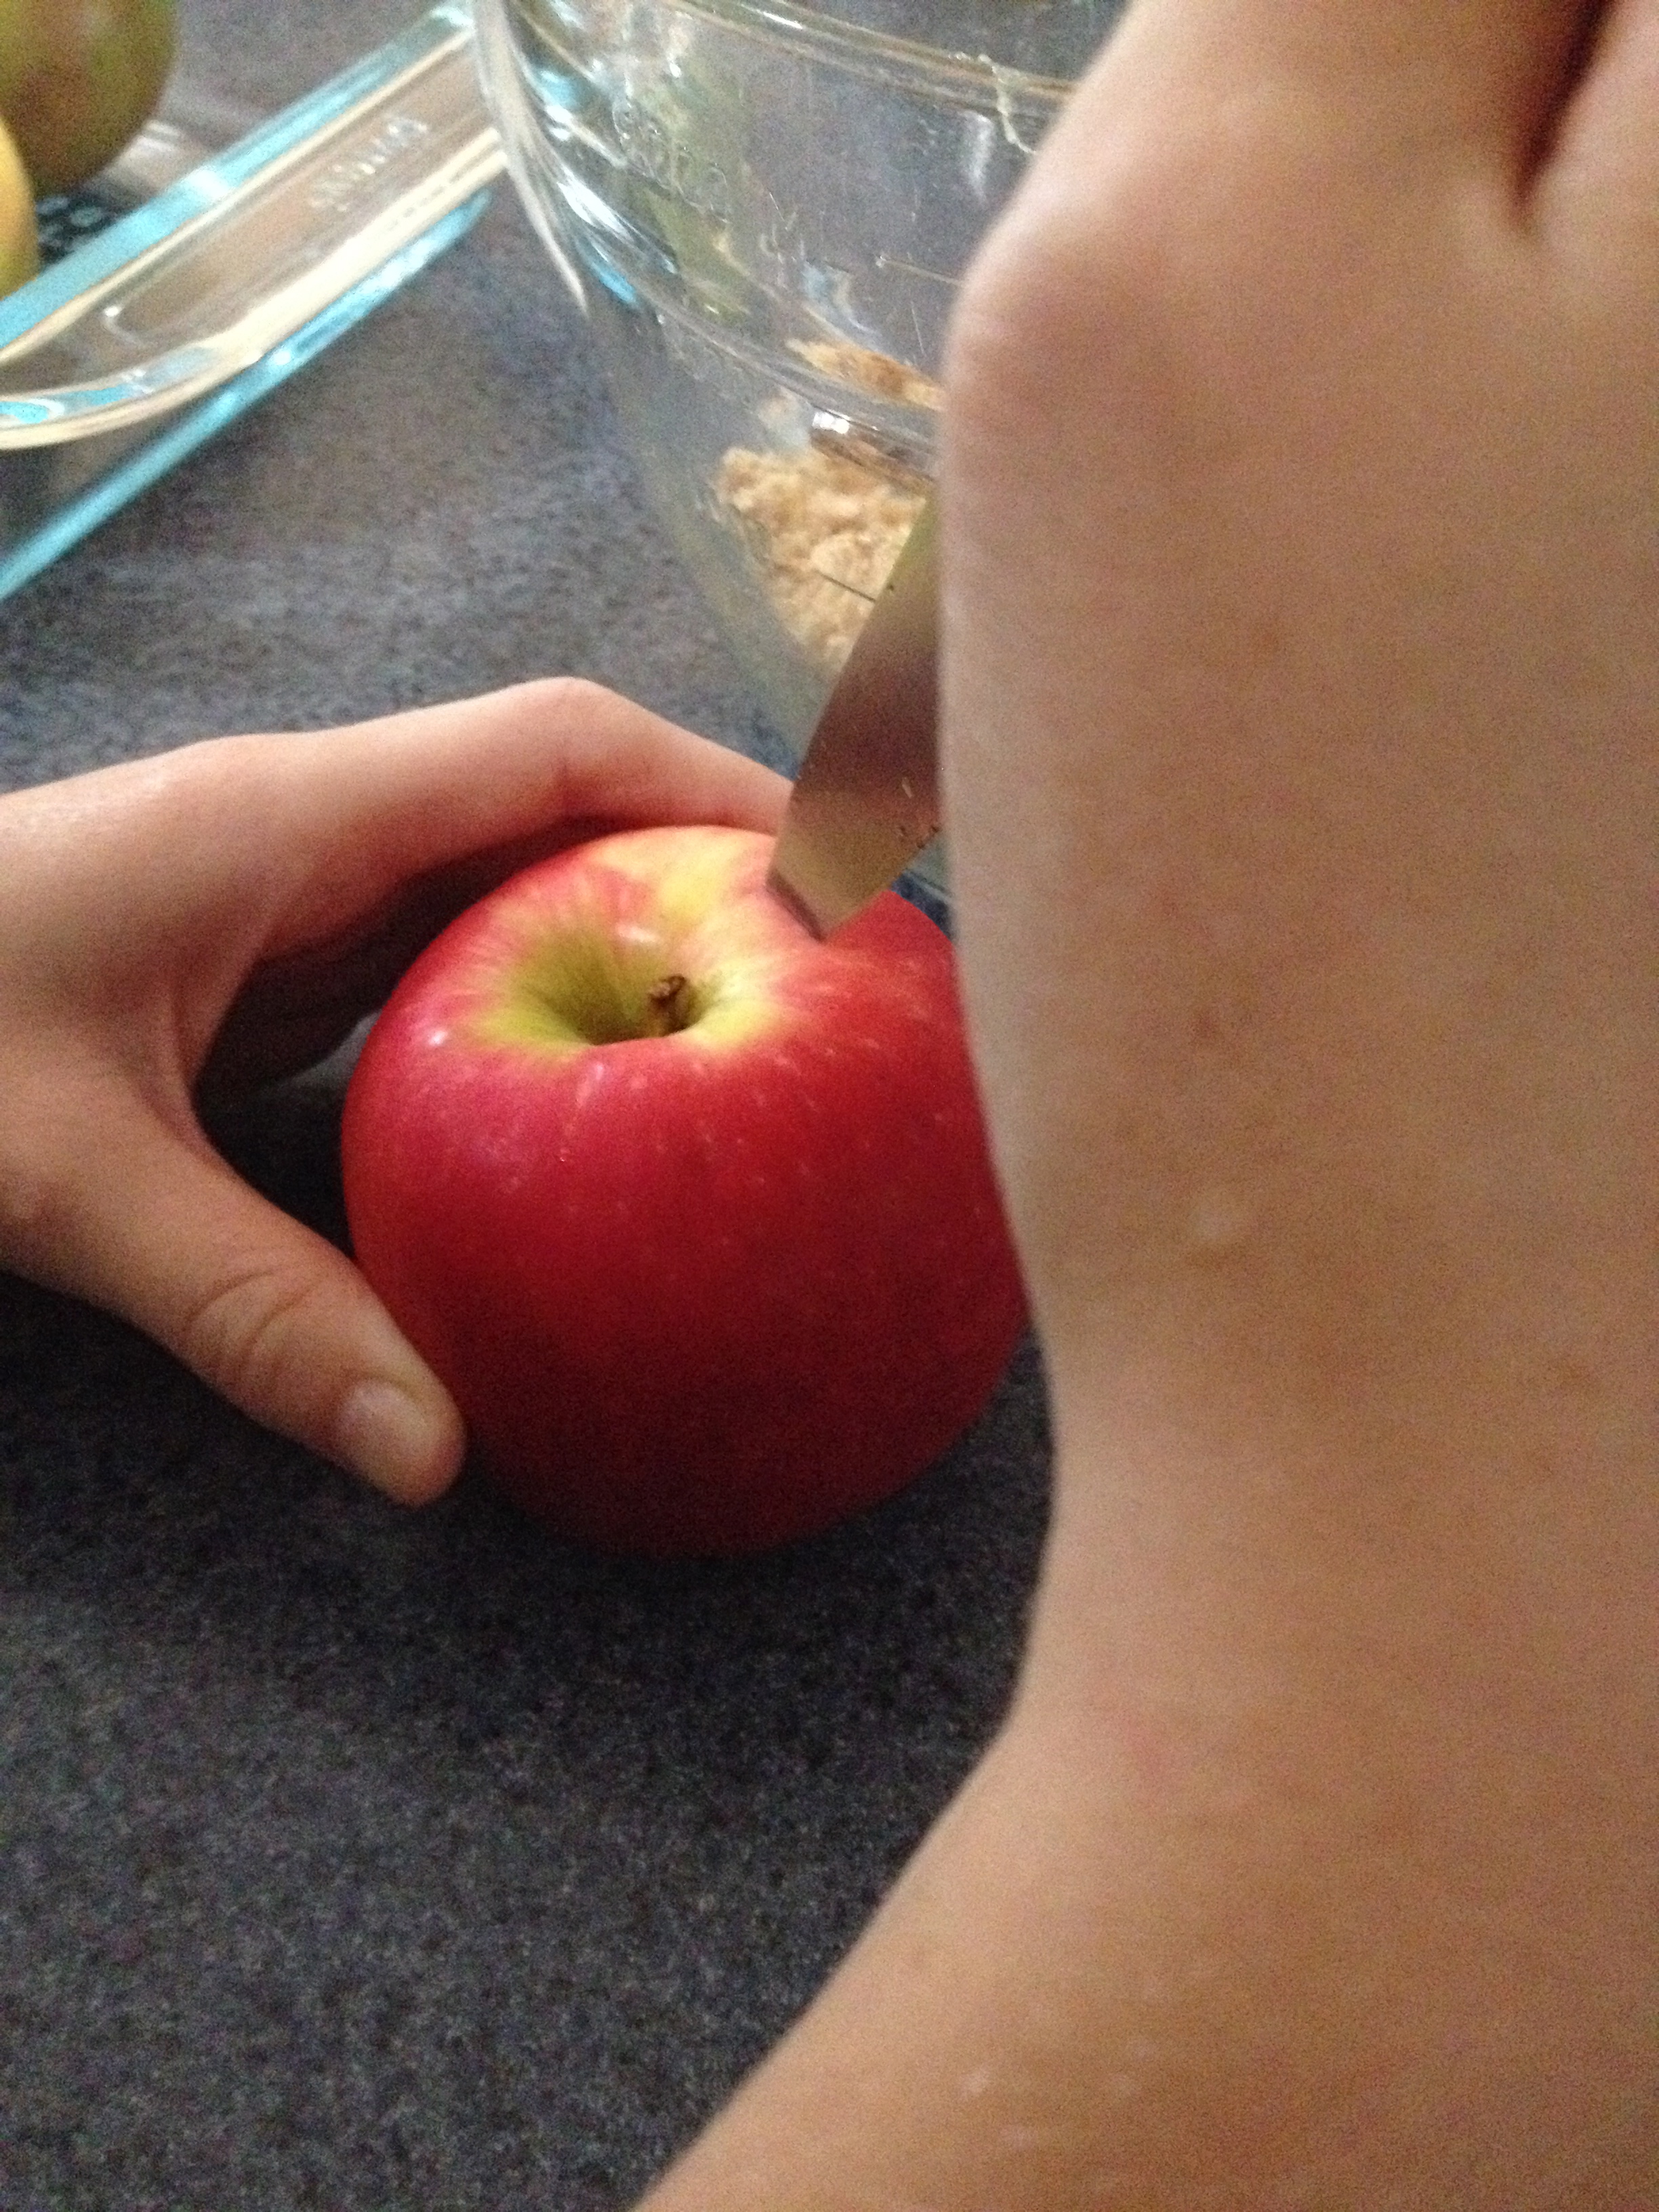
Once you have that top part of the core cut out, you can either use a knife for the next layer of the apple, or an apple corer. Remember, only cut down part of the way! After you’ve made another guideline circle with your knife or corer, go back in with the spoon and scoop out the rest of the core.
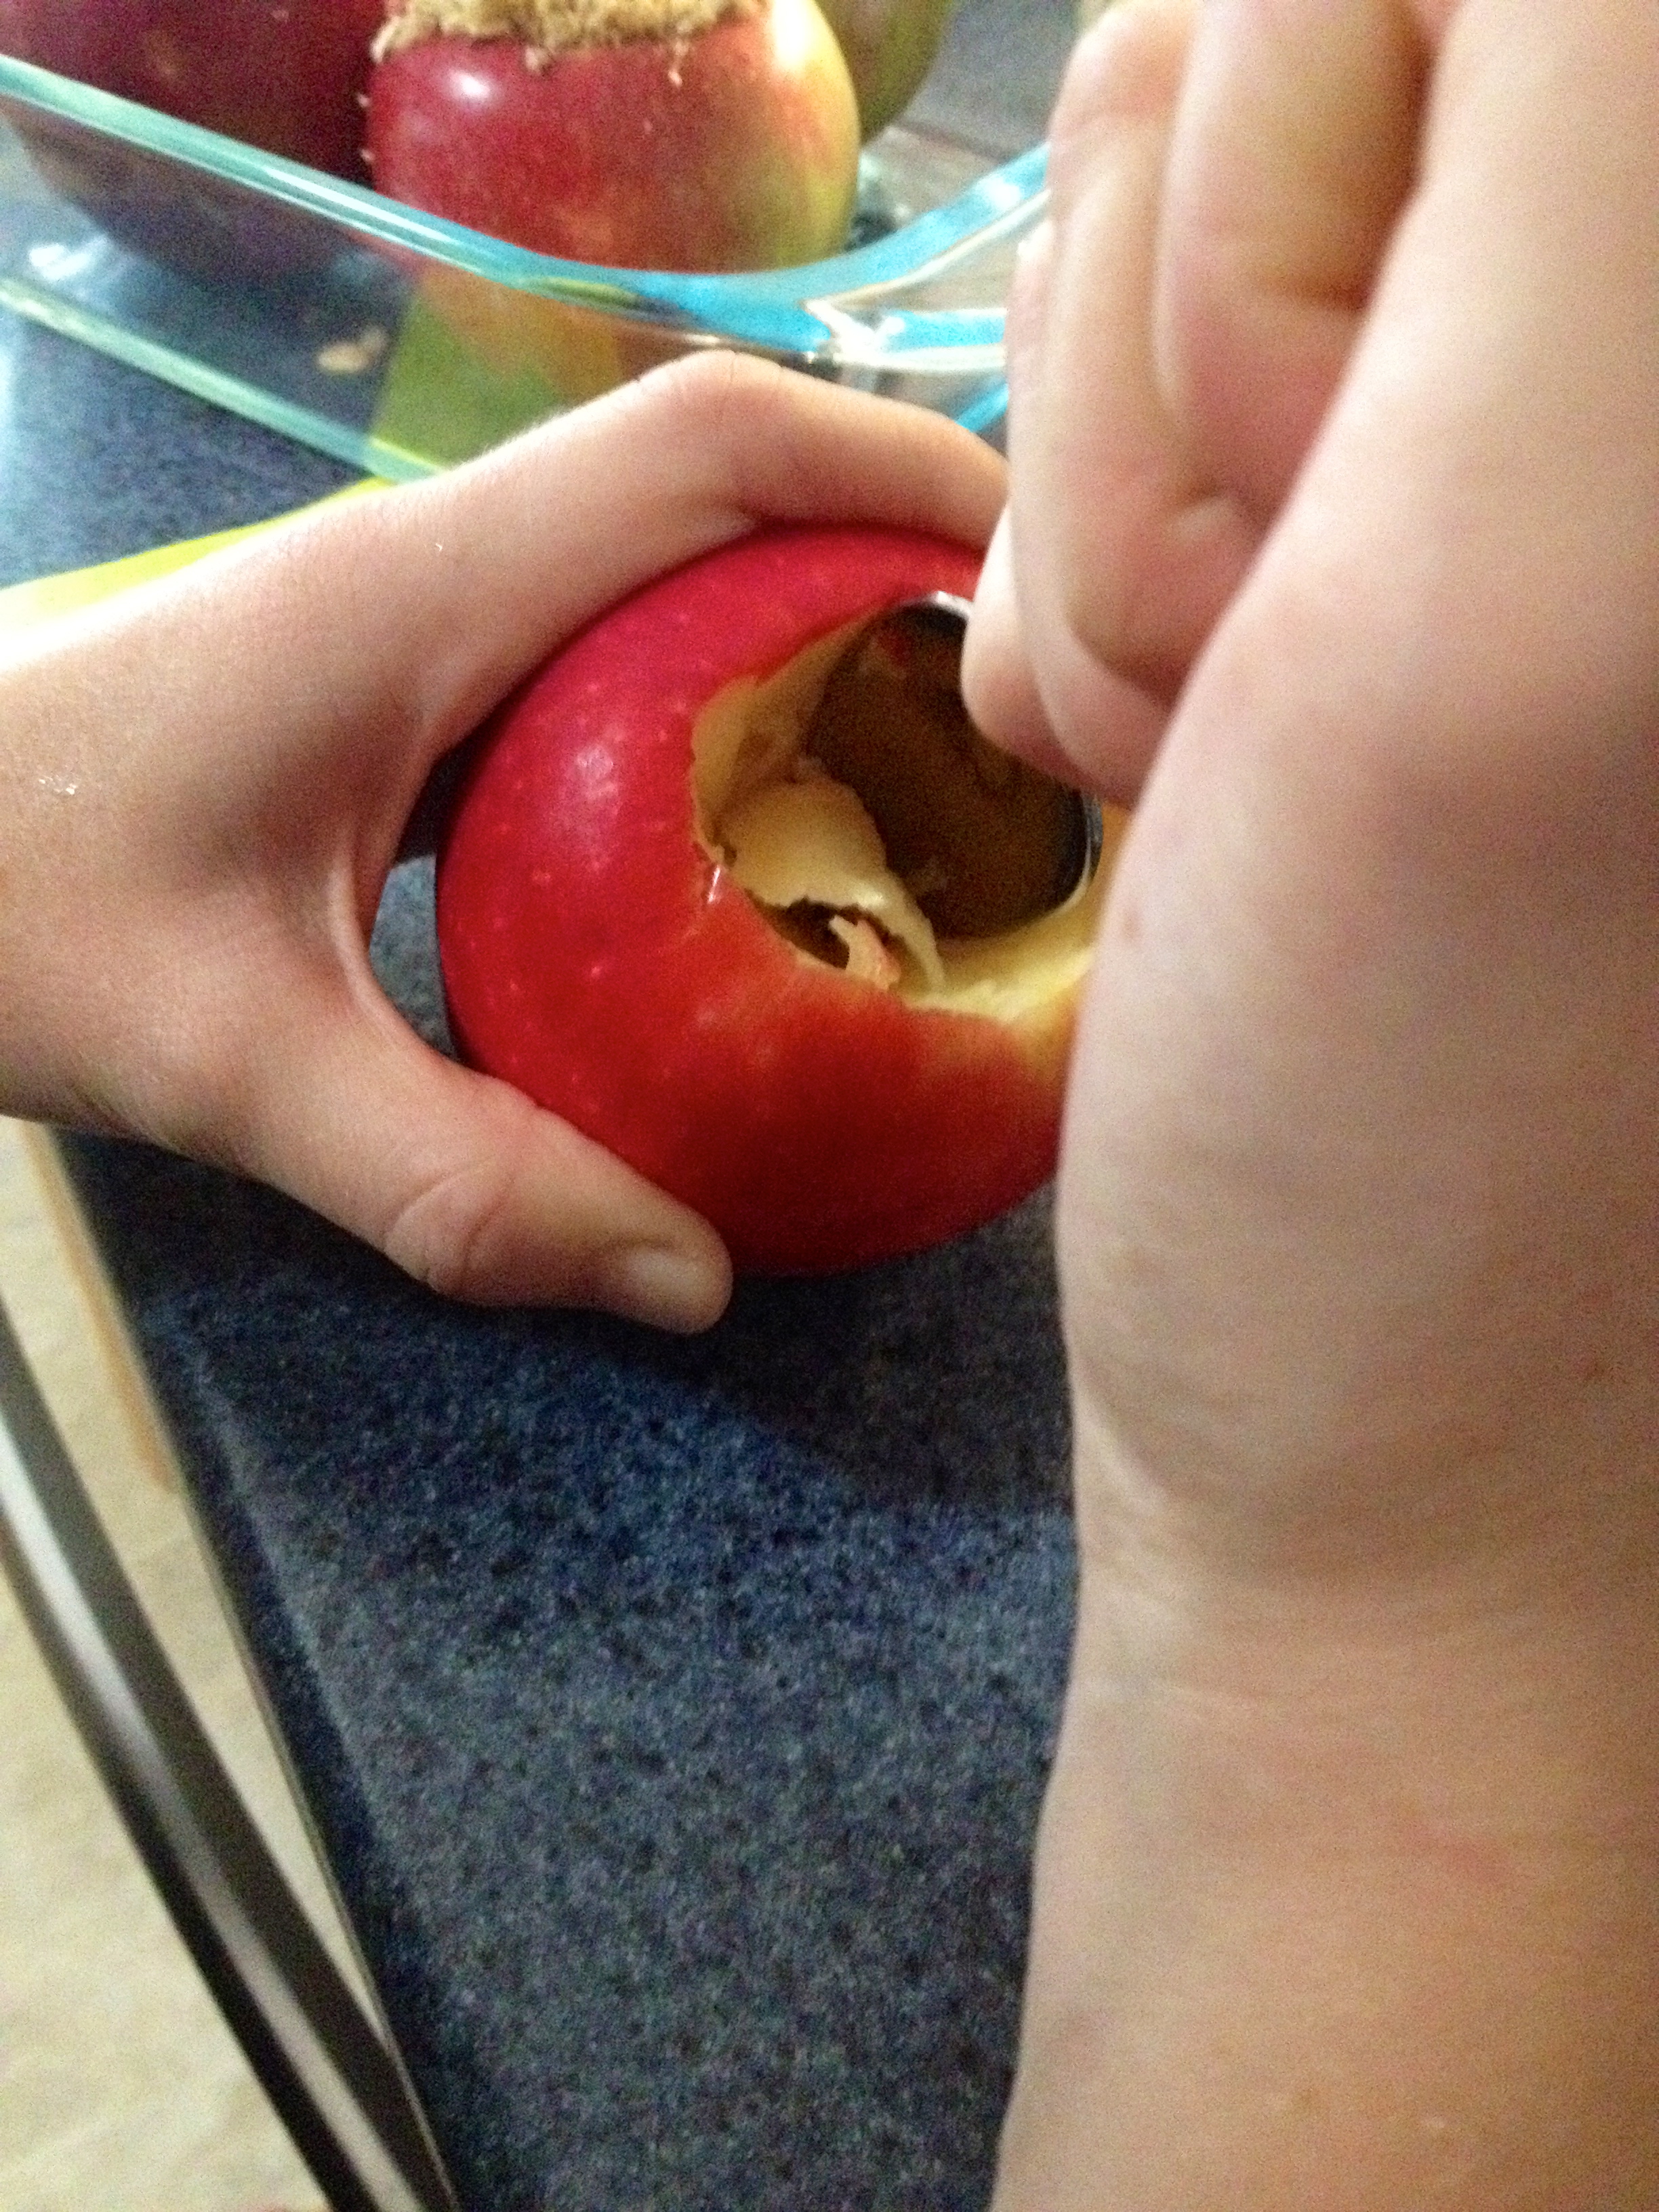
Your finished product should look something like this (by they way, it’s very rewarding when you finish coring those apples!):
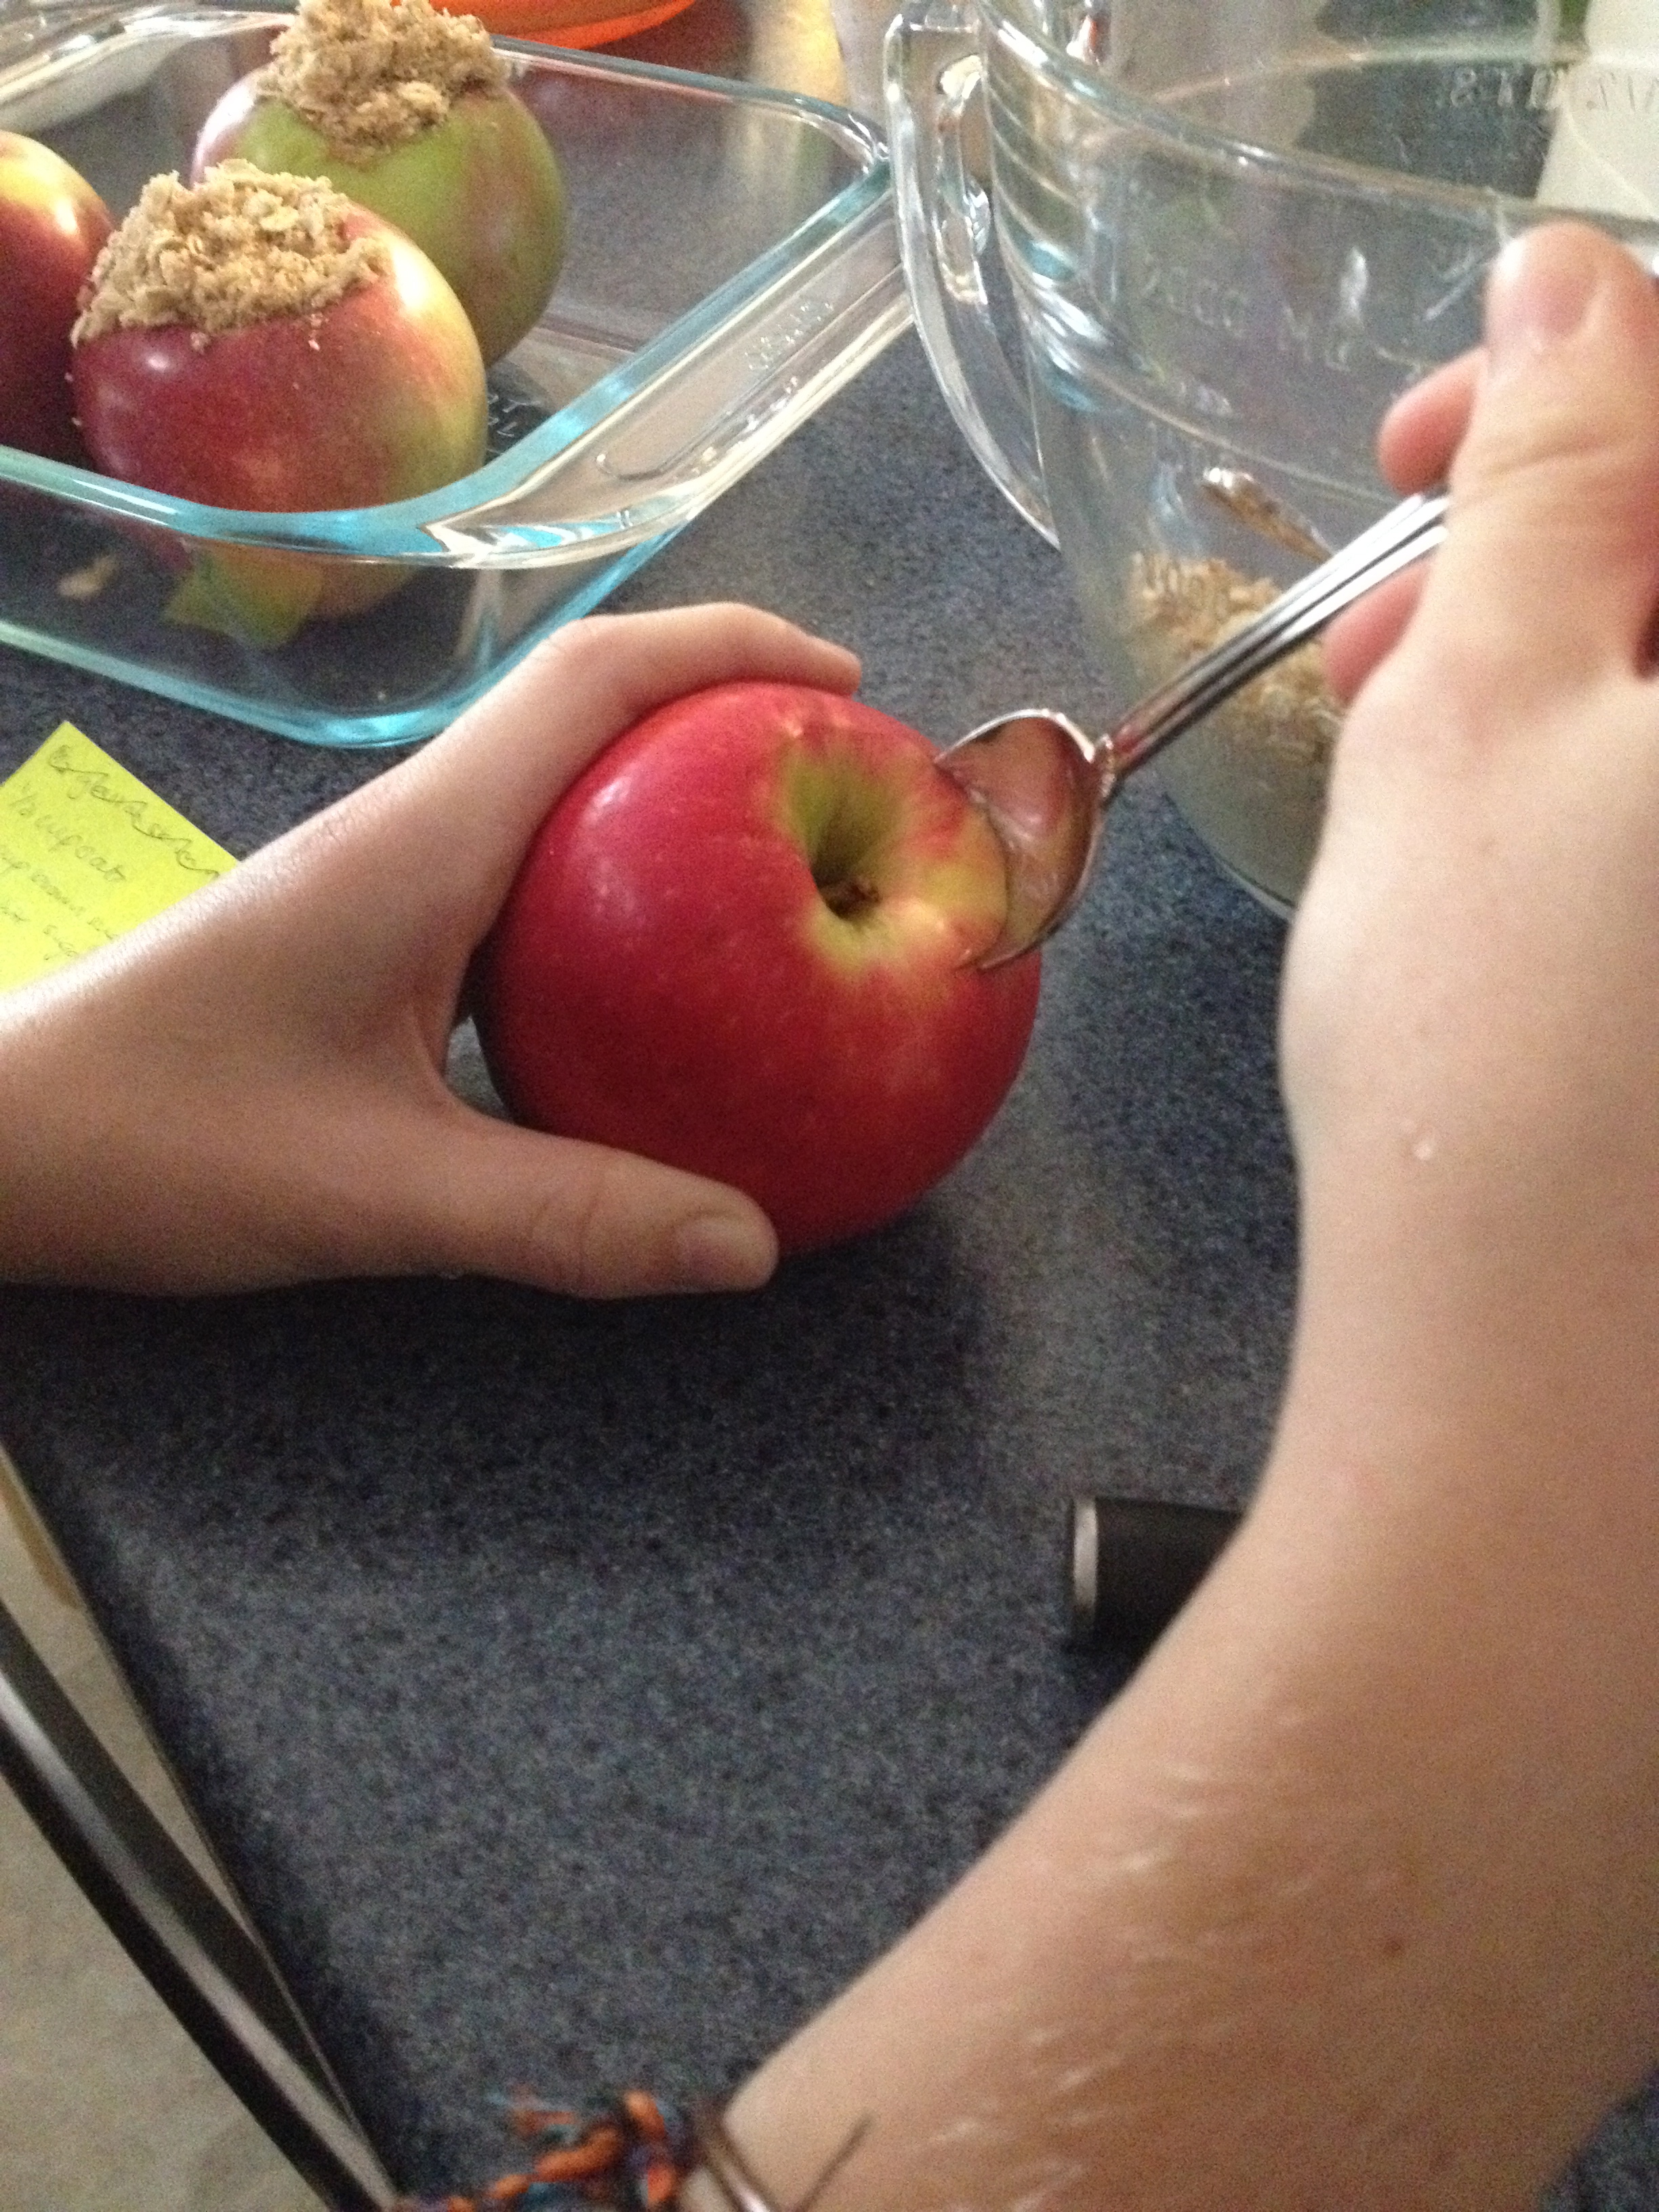
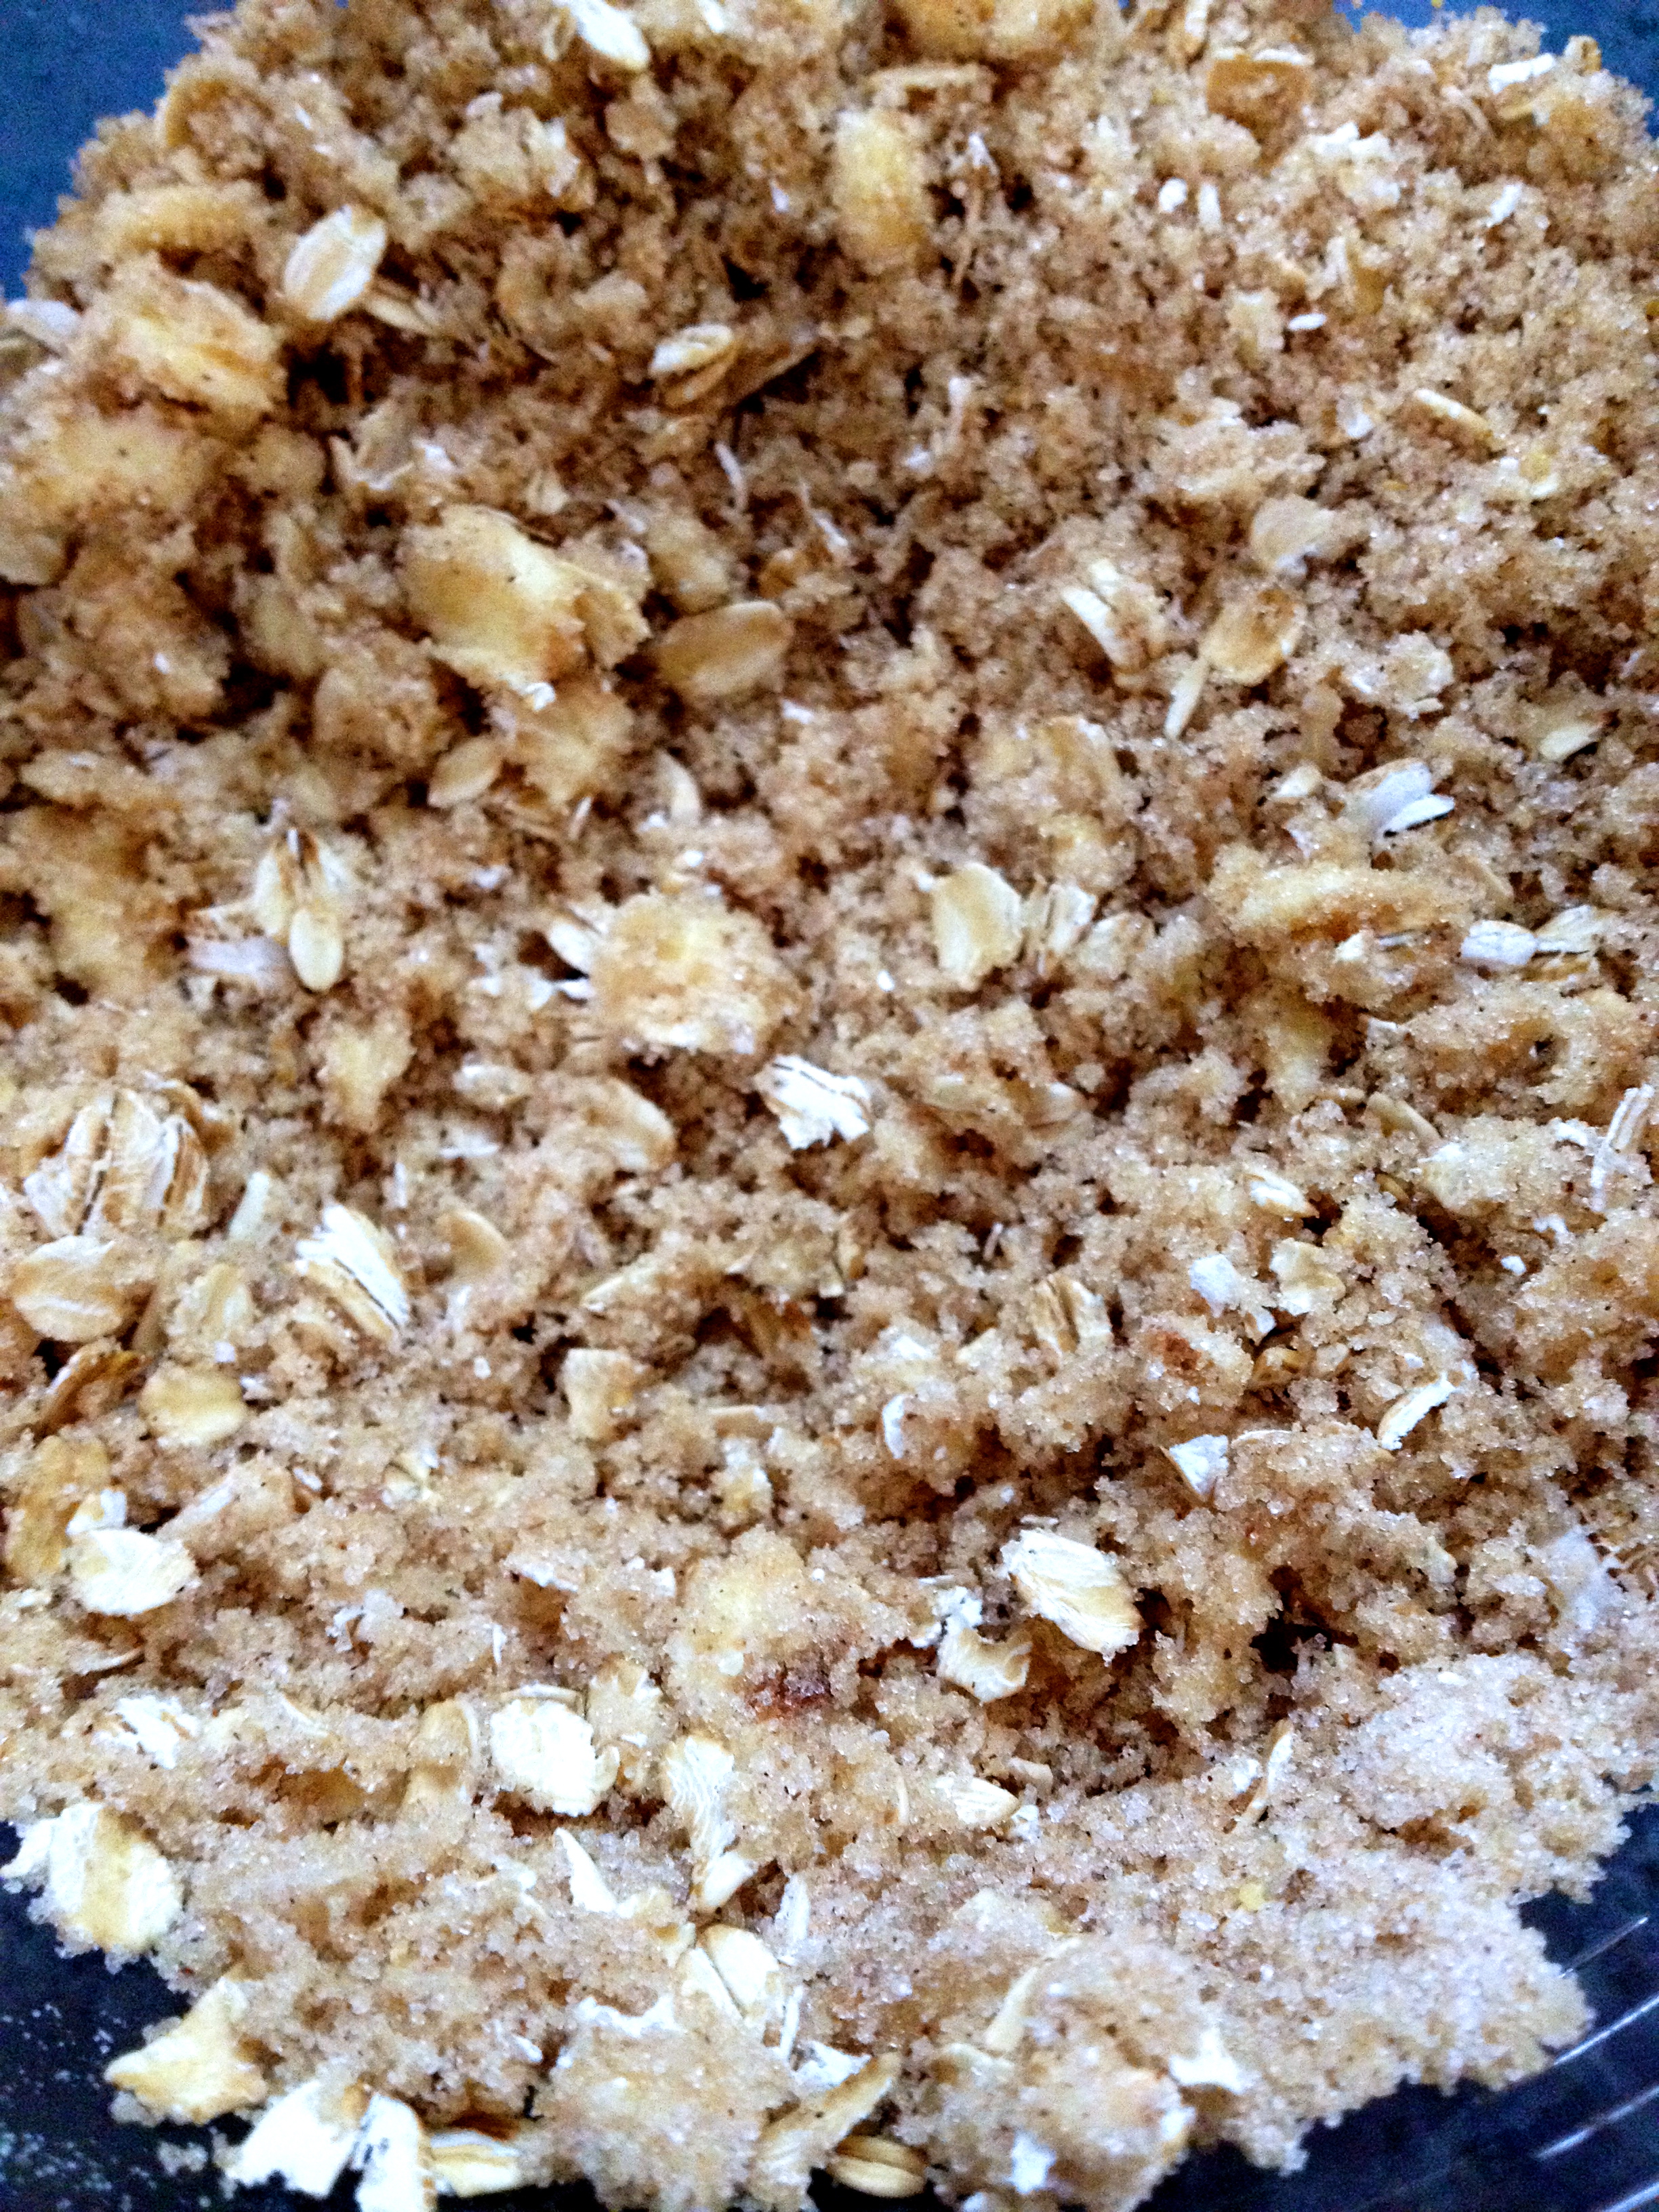
Now it’s time to make the filling! Combine all of the listed ingredients in a mixing bowl, and mix them with a pastry cutter (a spoon works too, but I wanted to crumble the cold butter so that it would delicious and melty in every apple, instead of clumping and being stuck in just one apple). If you use a spoon, make sure that your butter becomes crumbly- this is why having cold butter is so crucial! It’s much easier to break up cold butter than room temperature butter. Your hands are a pretty fail-safe tool, too! When your filling is done, it should look like this:
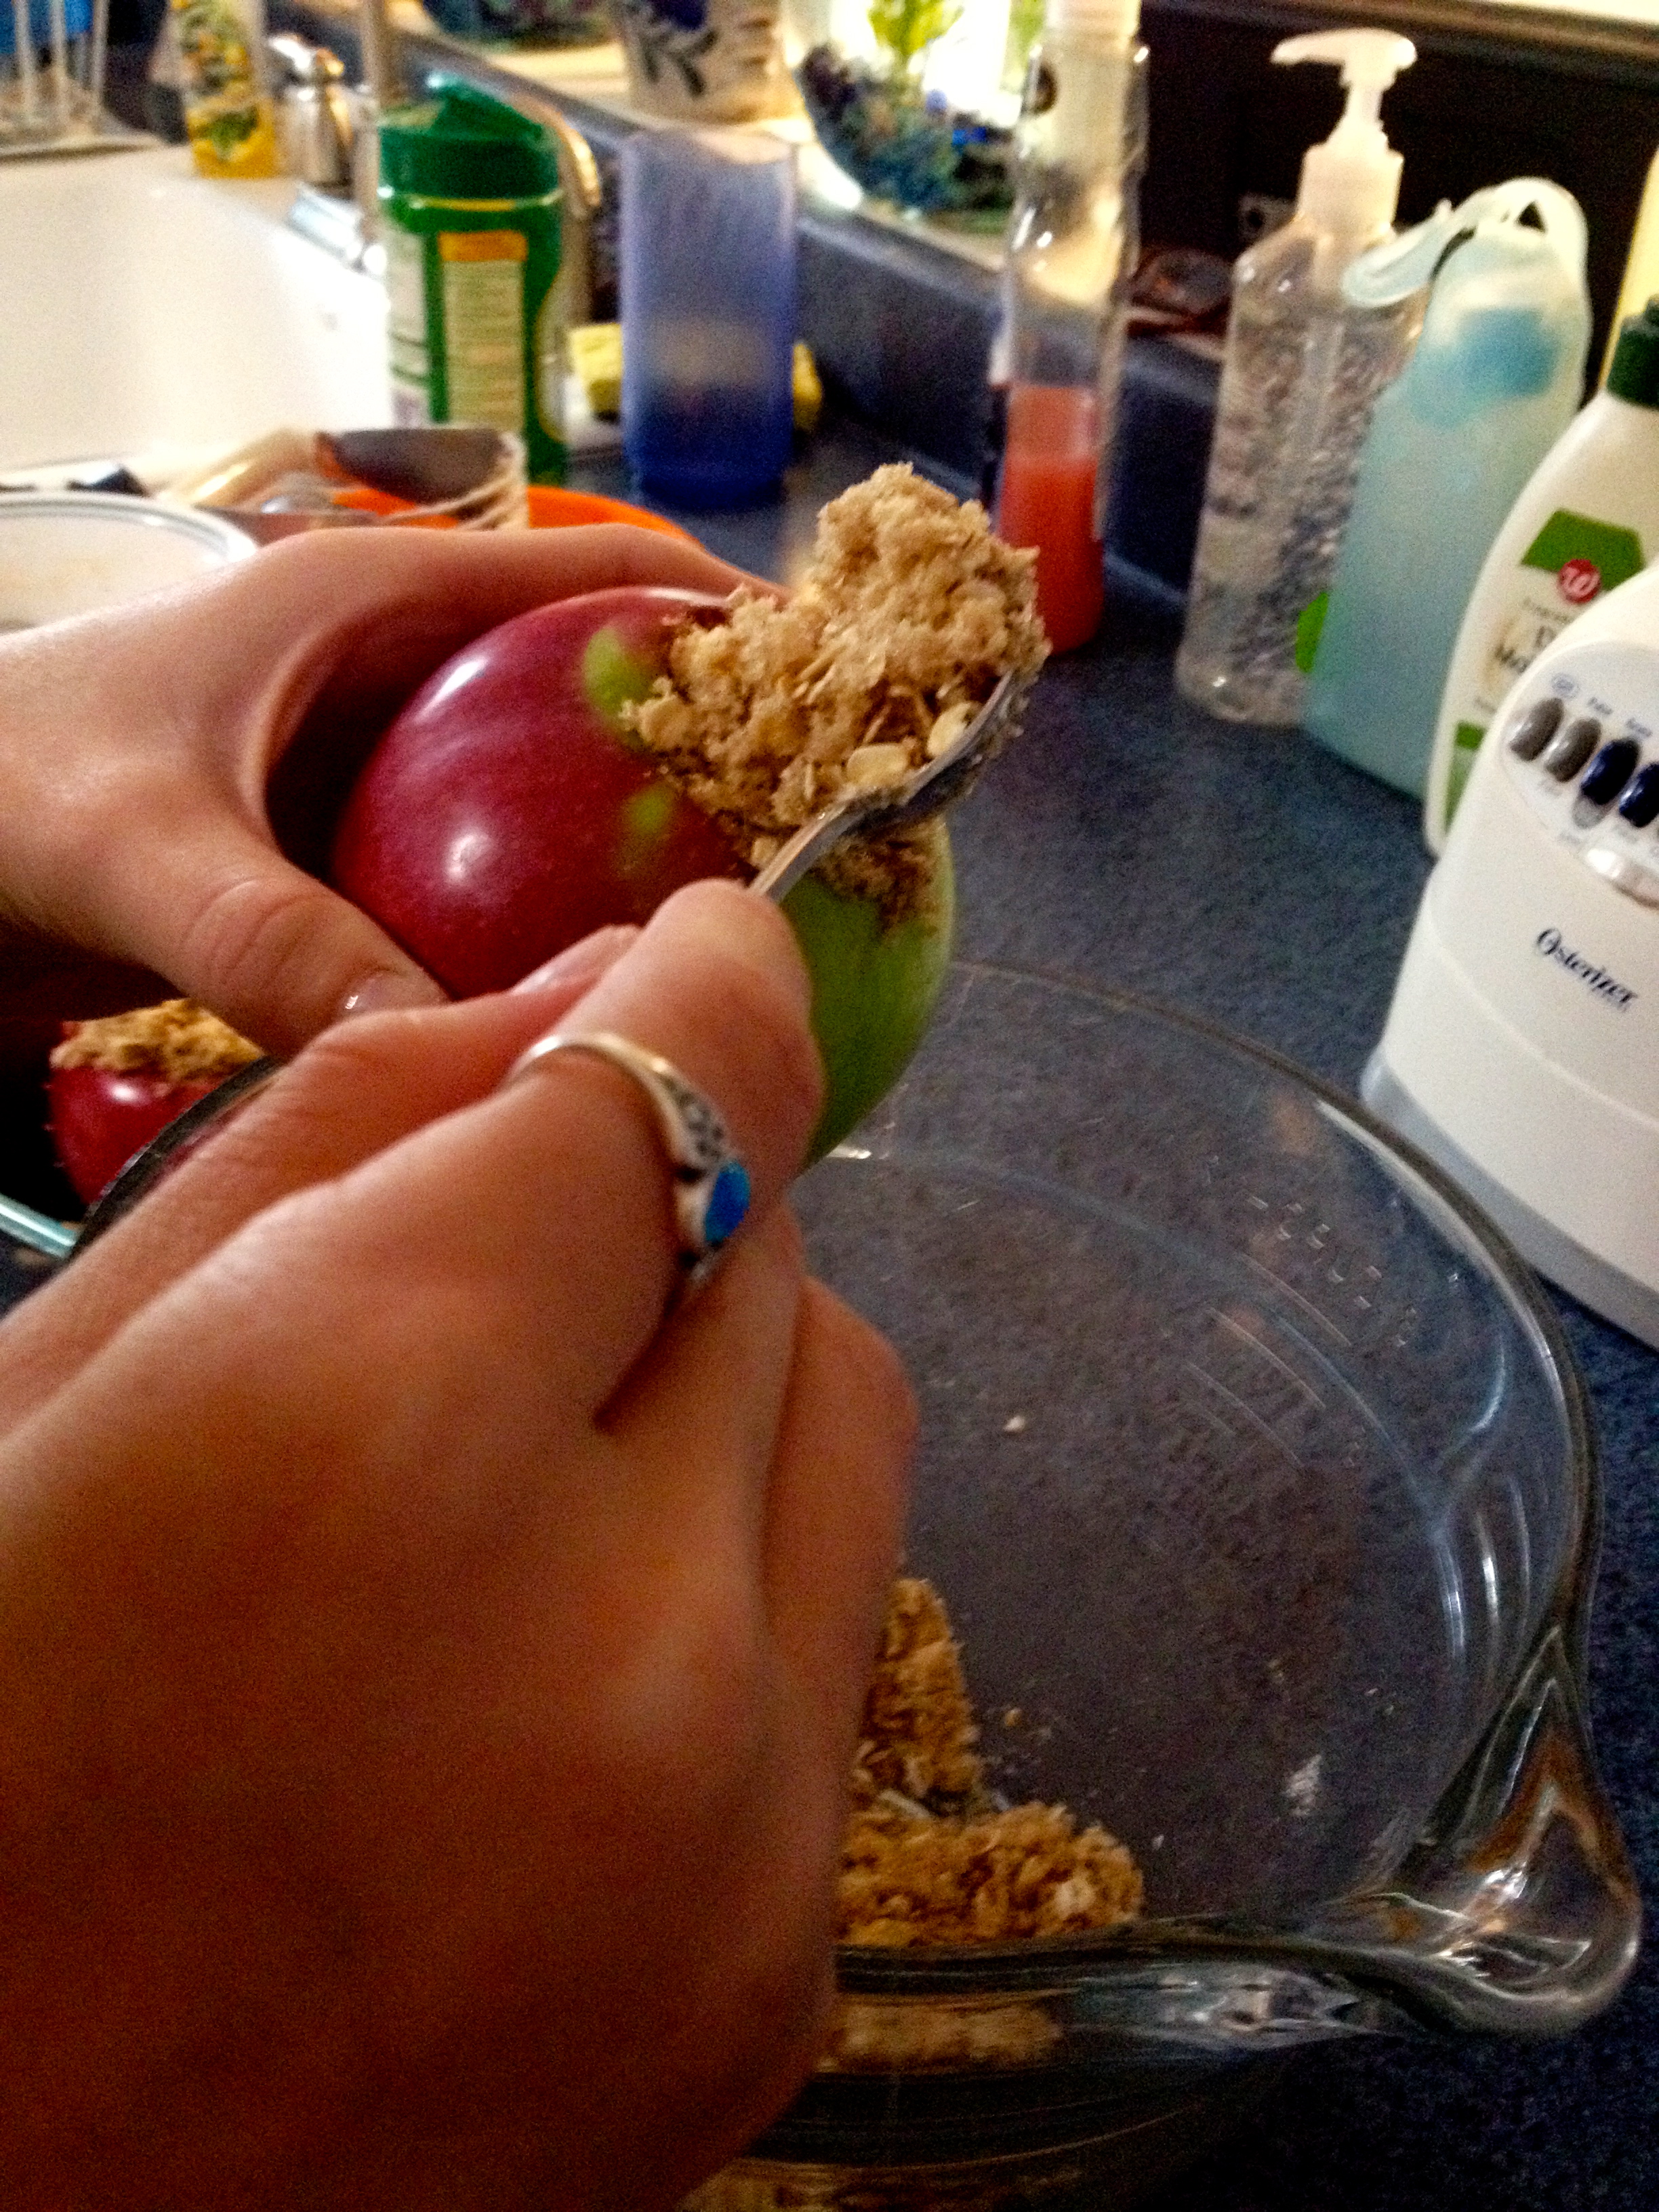
Now it’s time to stuff the apples! At this point, just put the filling in and smush it down with a spoon, packing as much of the filling in as possible. Here’s why: the filling tastes like the topping on apple crisp, a.k.a. the best part of the apple crisp. So, why wouldn’t you want to get as much of that goodness into each apple as possible? You will probably have a little topping left over, depending on the size of your apples, so feel free to either make more apples or sprinkle the leftovers over your baked apples!
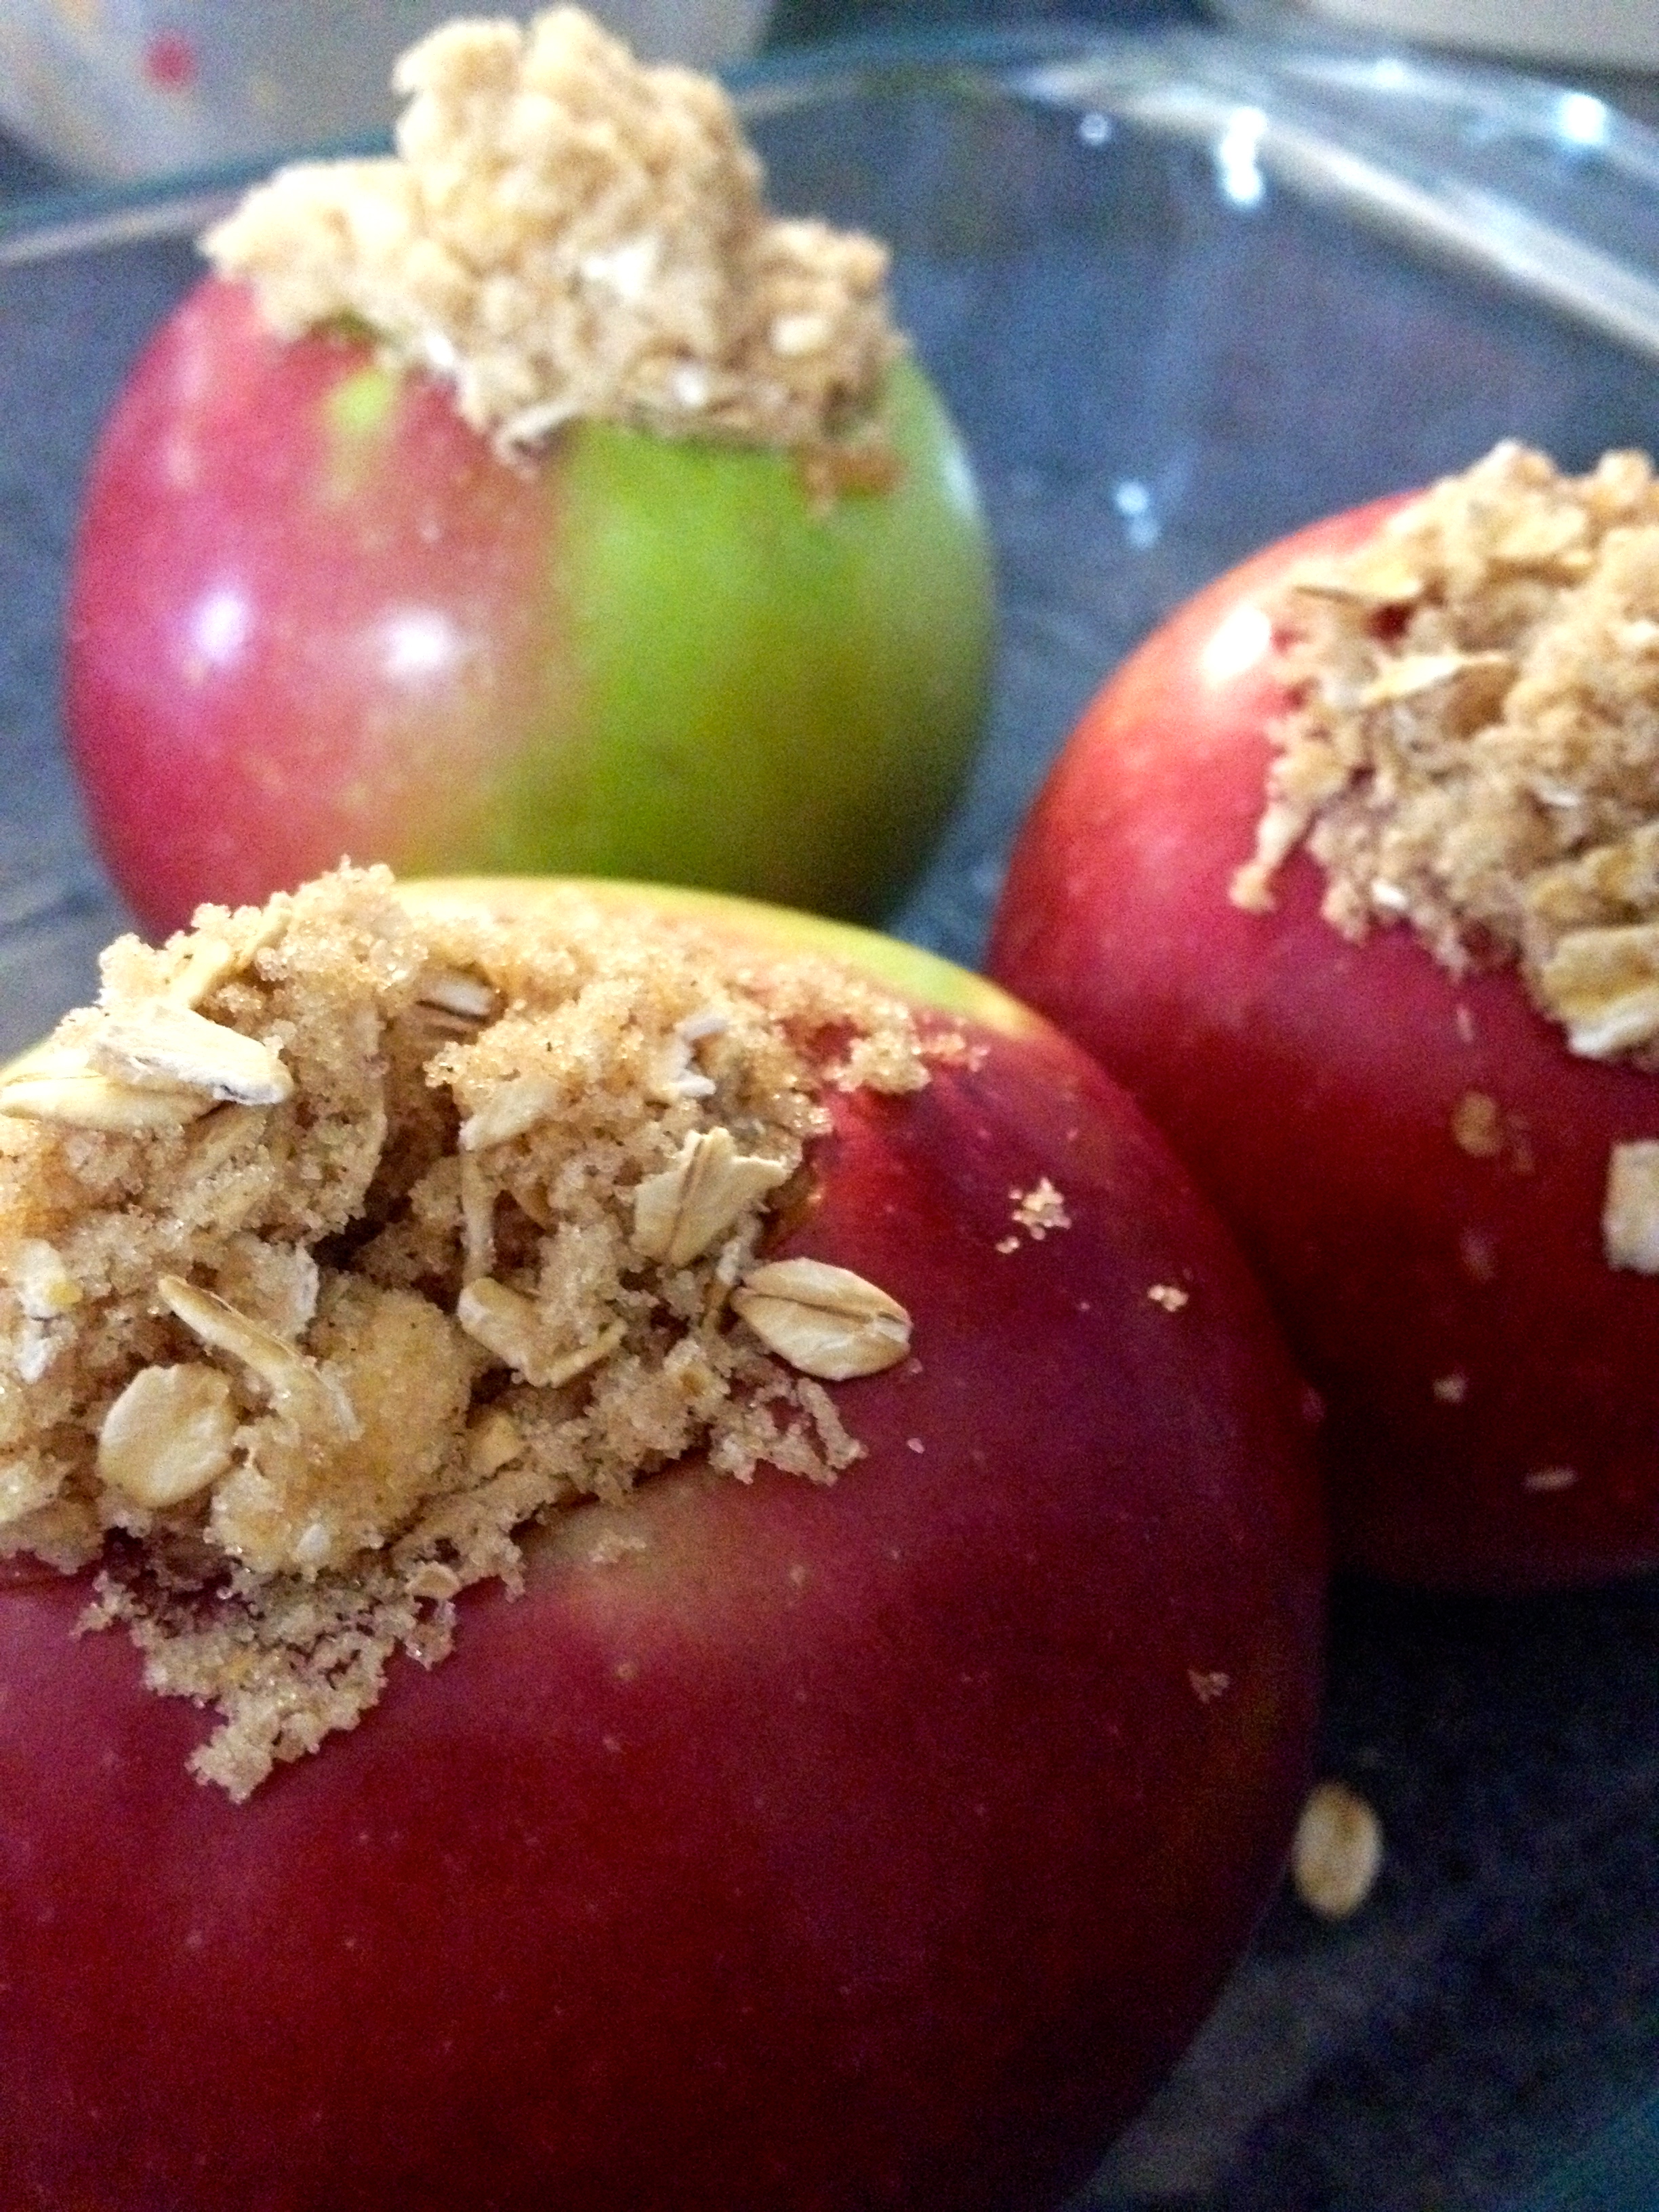
Place the stuffed apples in the baking dish and pour 1 cup of water around the base of the apples. This will help the apples to steam and bake, instead of roasting and drying out.
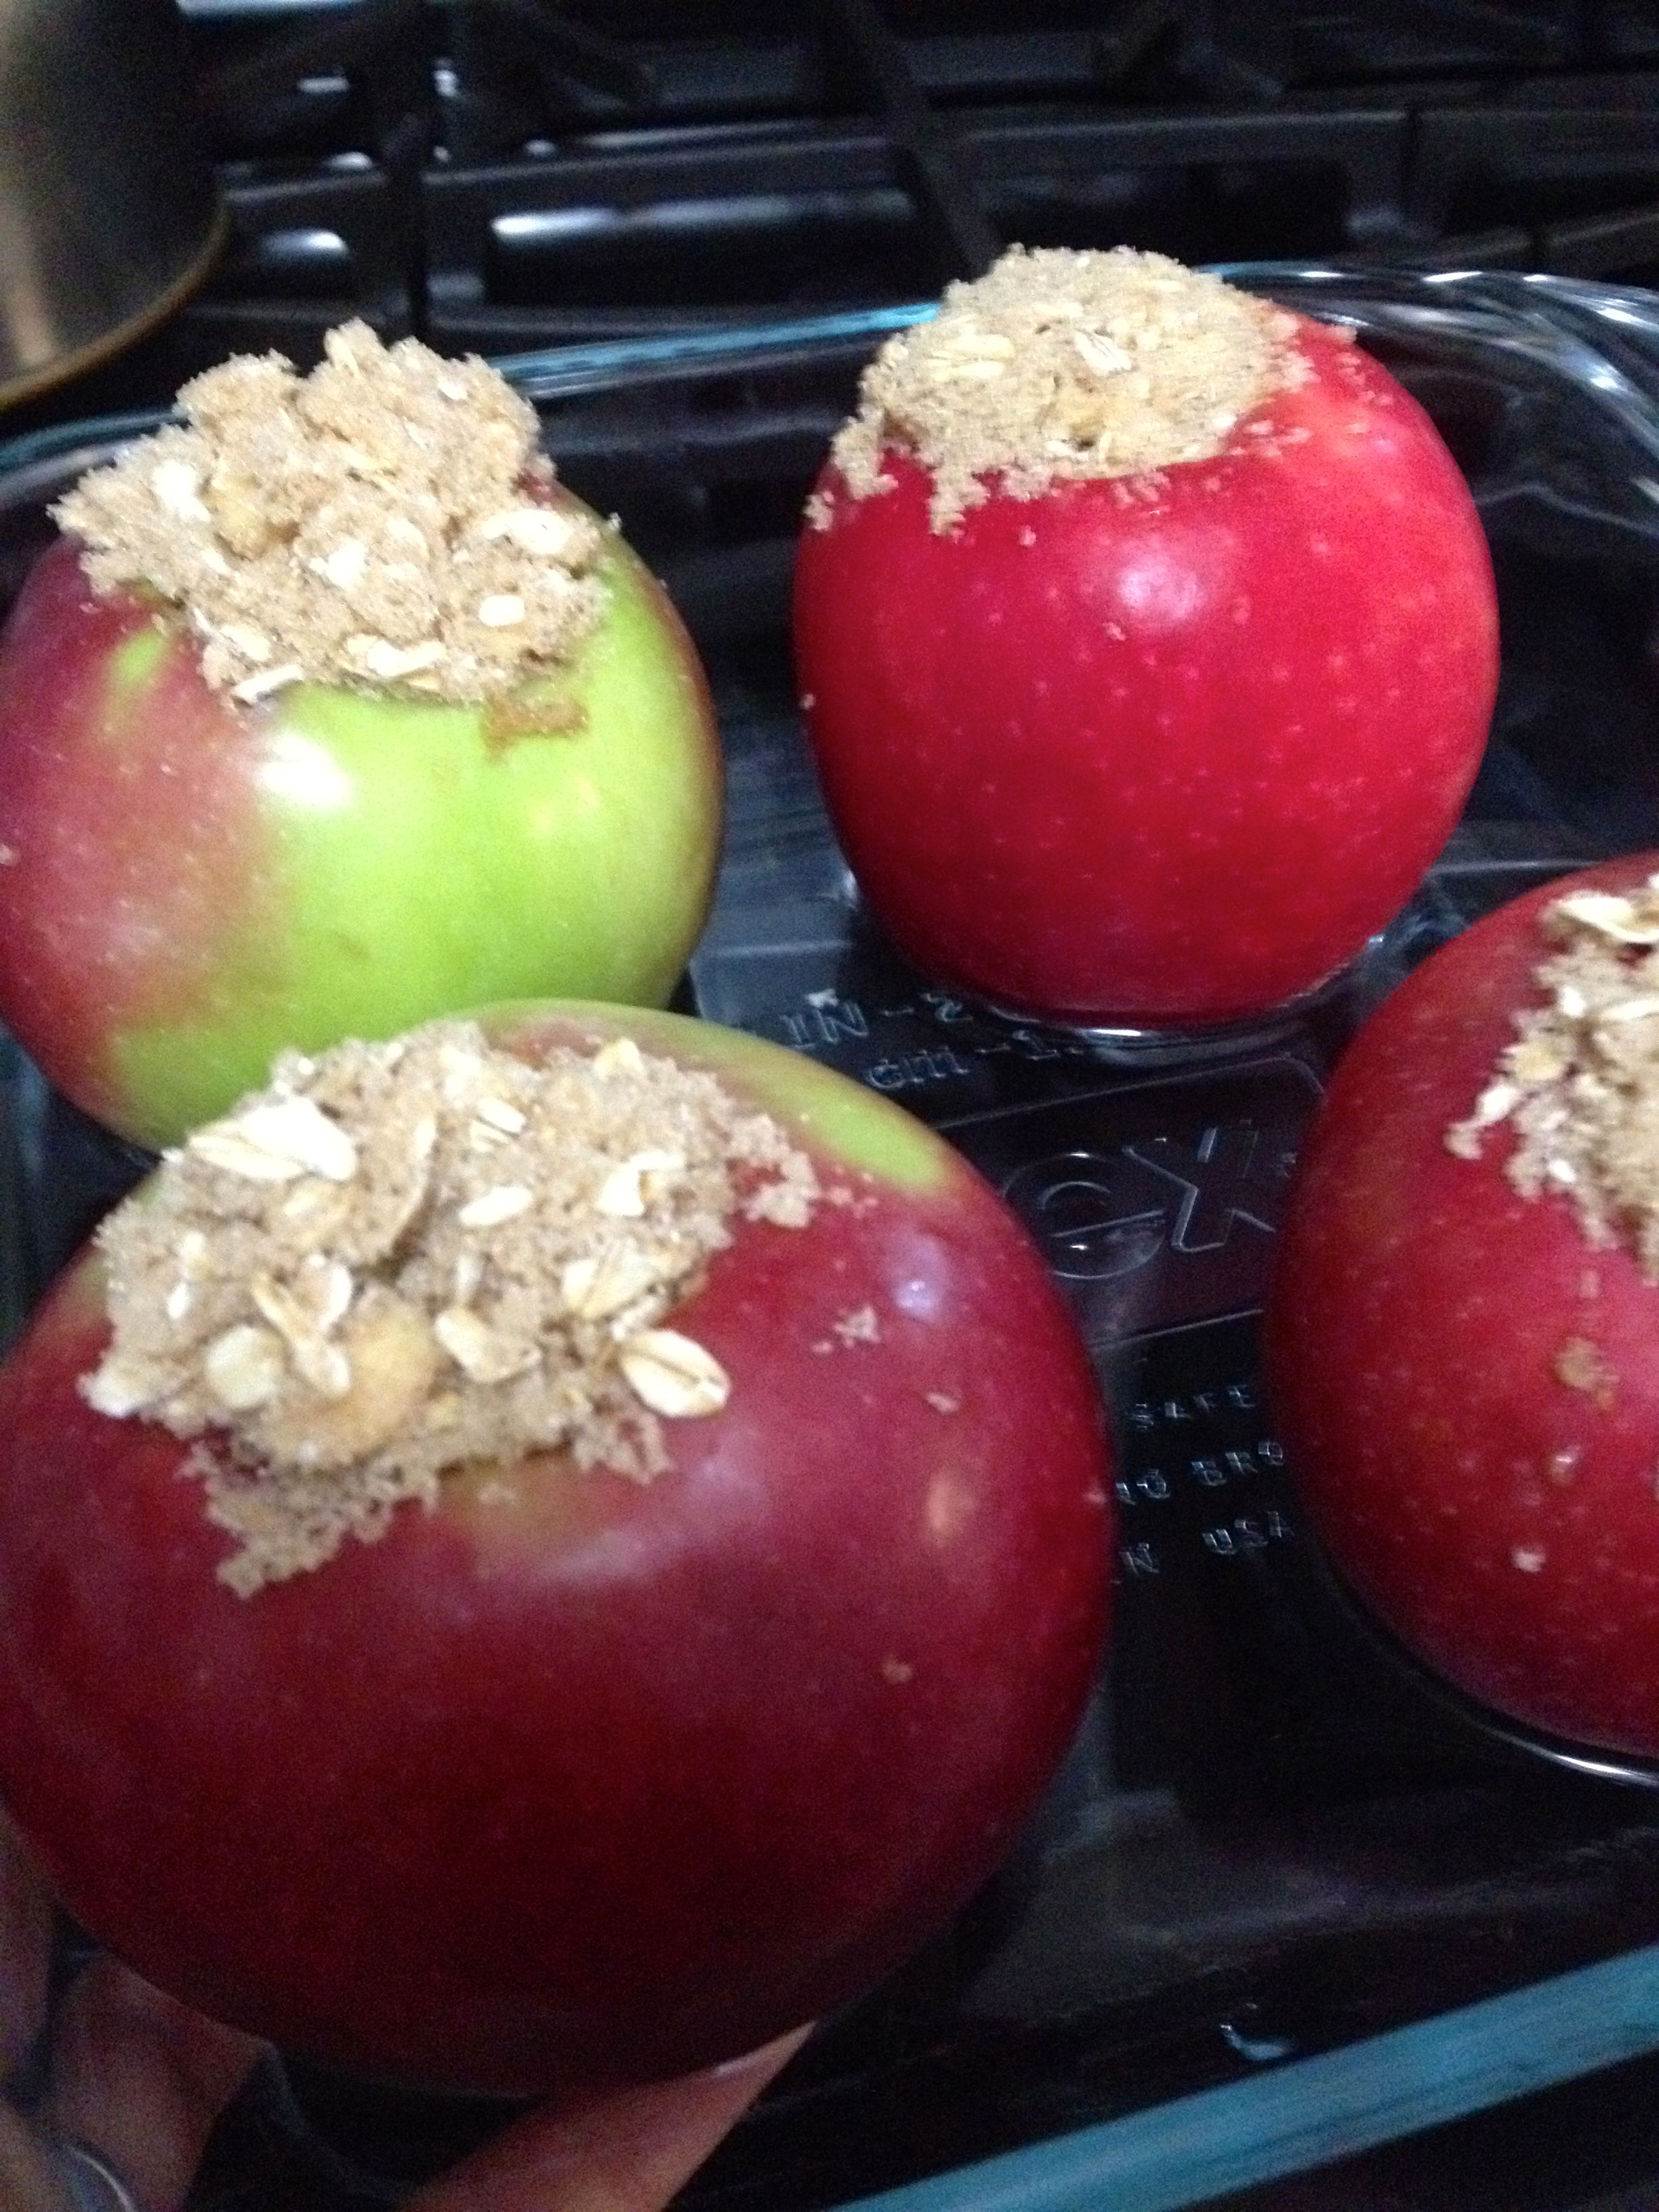
Bake the apples in a 375ºF oven for about 45 minutes, until the filling is a beautiful dark brown and the apples are starting to split. The apples’ color will have paled into a more pink color, and the skins will be wrinkled.
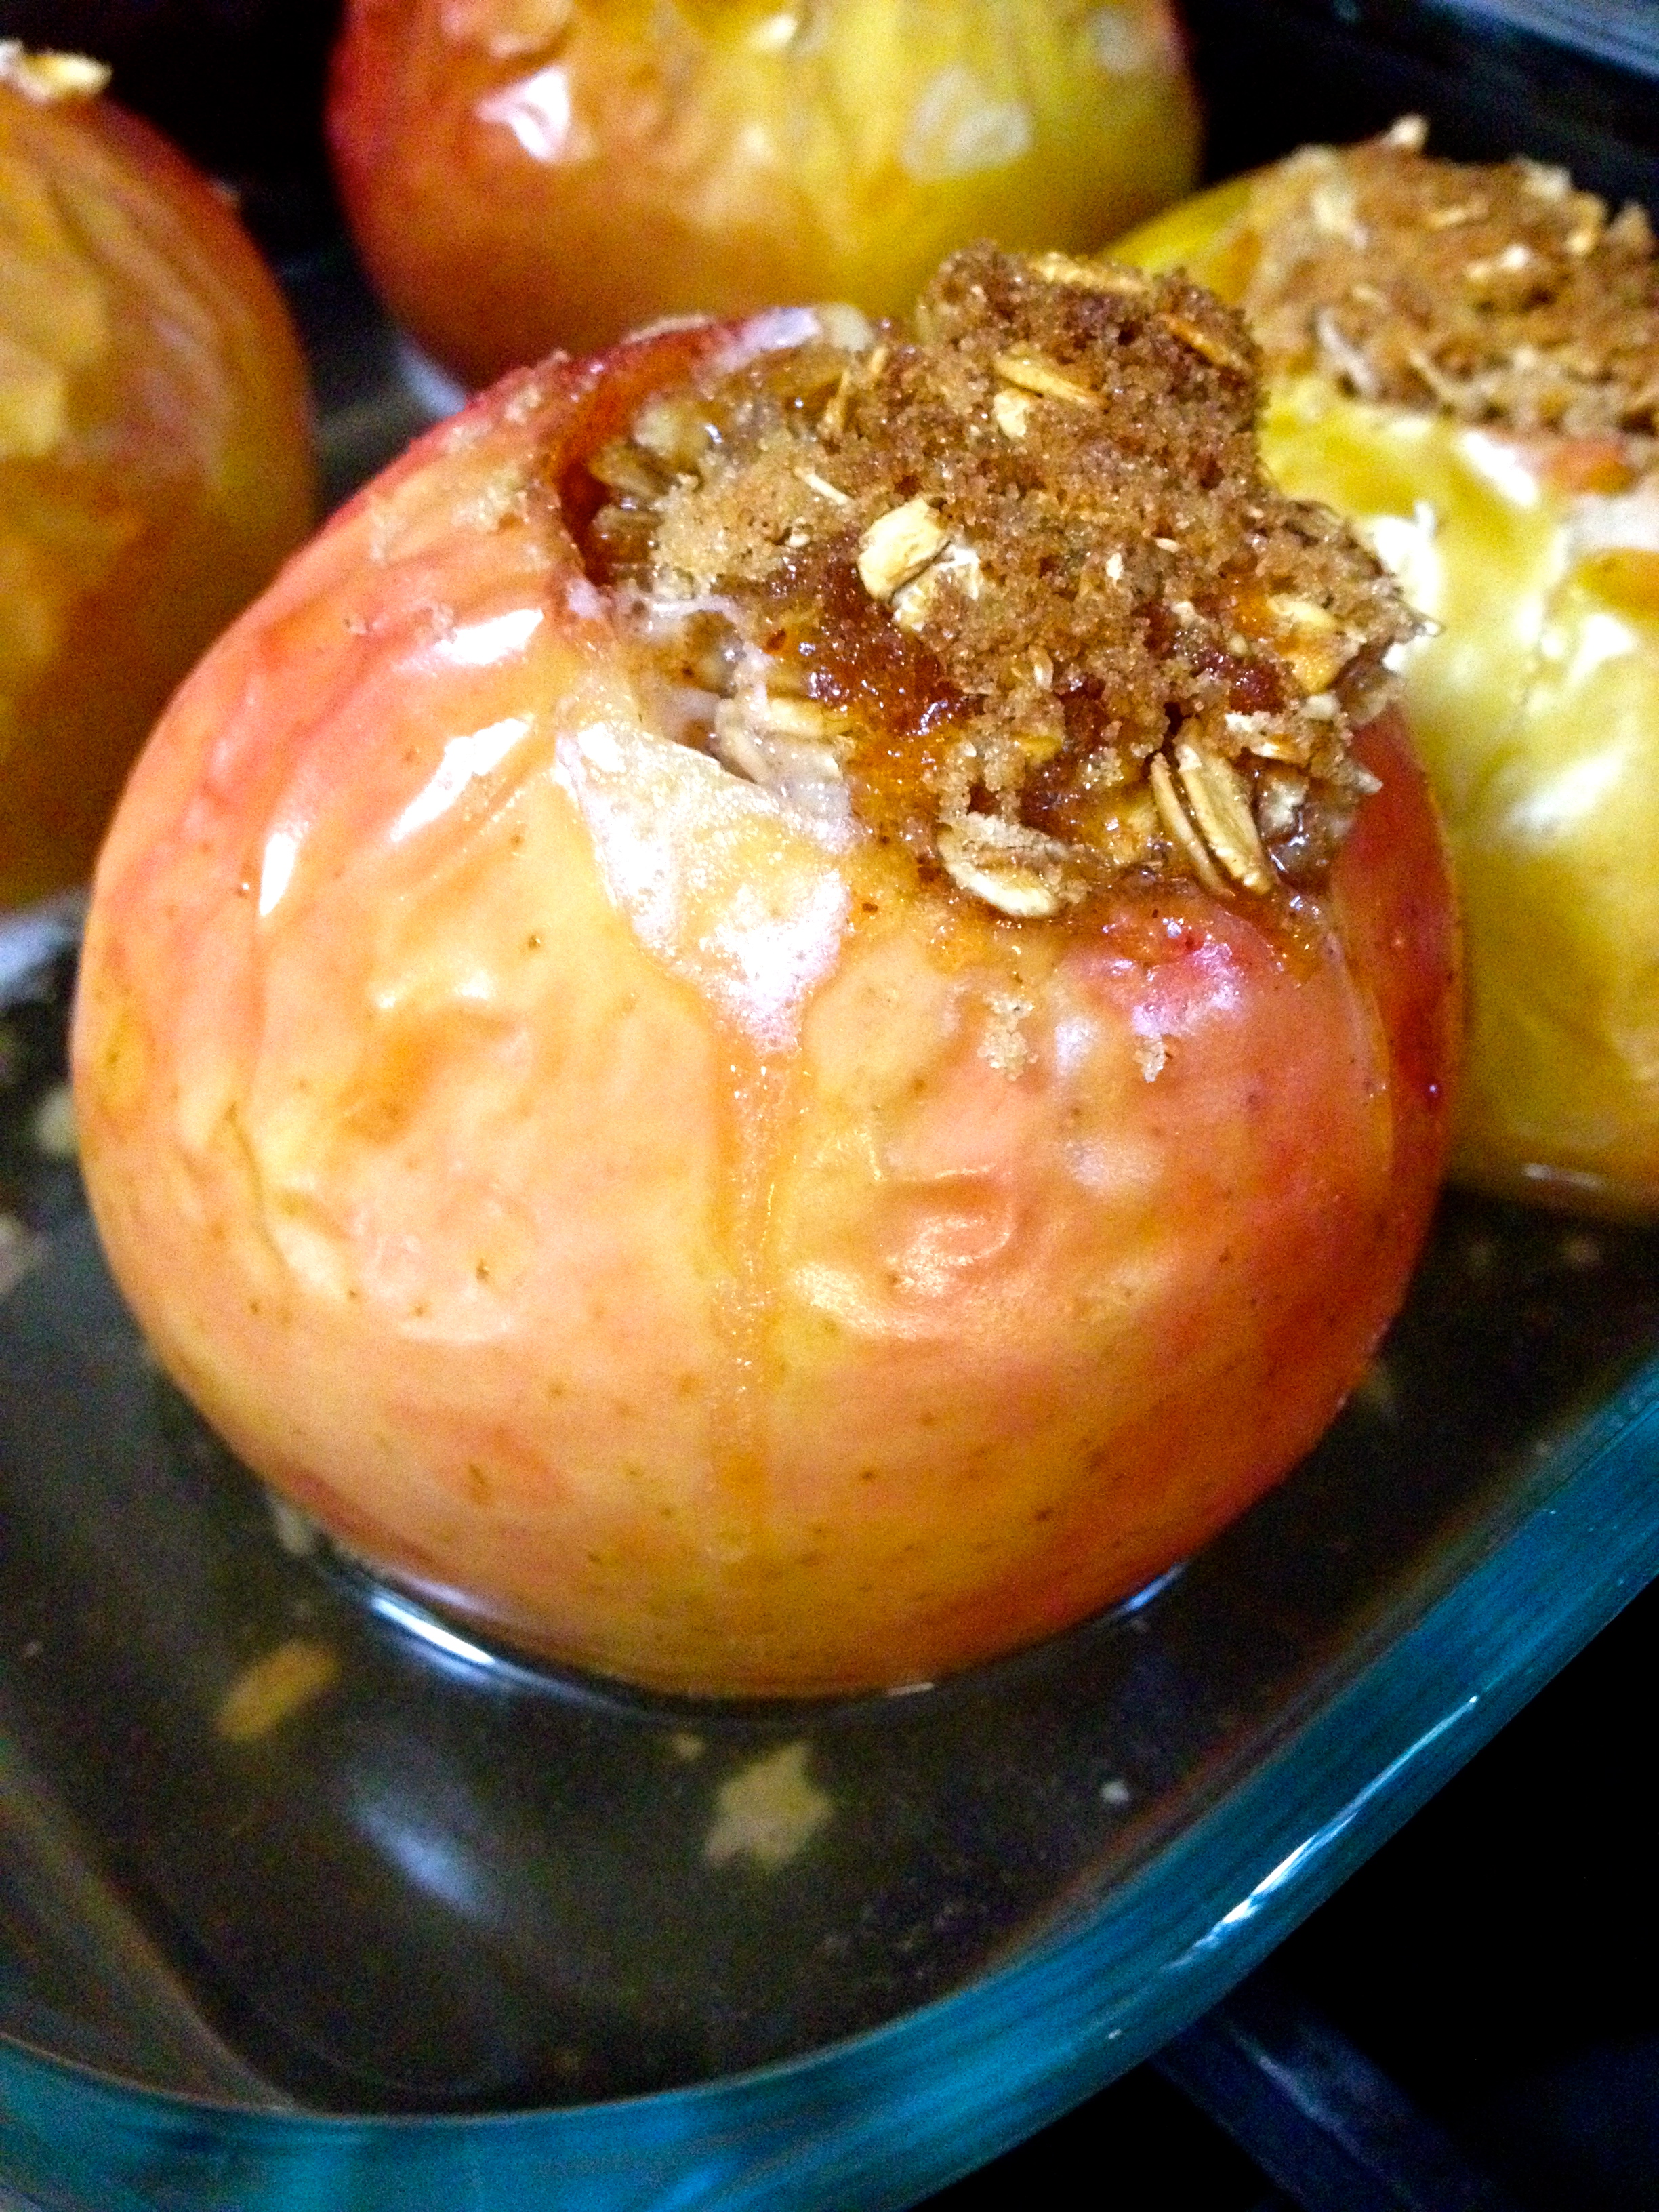
And now, dig in! These are absolutely delicious with vanilla ice cream (what isn’t?), or by themselves. This recipe just screams “autumn” to me, and I love it! I certainly hope you’ll give it a try. And just so you can see what a Northeast fall looks like, and why I’m so crazy about it, here are a few pictures from our excursion to the farm for apple picking!


As you can see, I’ve got it pretty good living in the Northeast! No fall season is prettier than in my area. I hope that this recipe gives a little of that autumn joy to you, and makes your day brighter. Happy baking!
A Taste of Rome
Hello friends! I hope your last few weeks of summer (sorry to remind you!) are going well! All of my friends are going back to school now, but luckily, one of my friends is still here! We took advantage of our extra time at home to bake some delicious desserts- from authentic Italian recipes! My friend spent a semester abroad in Rome, and came home with a cookbook created by her Italian program director. This cookbook is definitely one of a kind, because the translation to English is a bit rough- some of the recipes call for a “knob” of butter, and others don’t tell you what temperature or time to cook the dish for. We decided to just go for it and see what happened, and the results were divine, to say the least.
Our creation didn’t have an official name from the cookbook, so we’ll call it a Raspberry Jam Tart. We also made a Peach Cinnamon Tart, but I’ll get to that later! Here’s how to make it.
Ingredients/Materials:
- 2 eggs
- 2 cups flour
- 1/3 cup softened margarine
- 3/4 cup granulated sugar
- 1 tsp. baking powder
- 1/2 cup jam of any flavor (we used raspberry to start)
- 10″ pie plate, buttered and floured
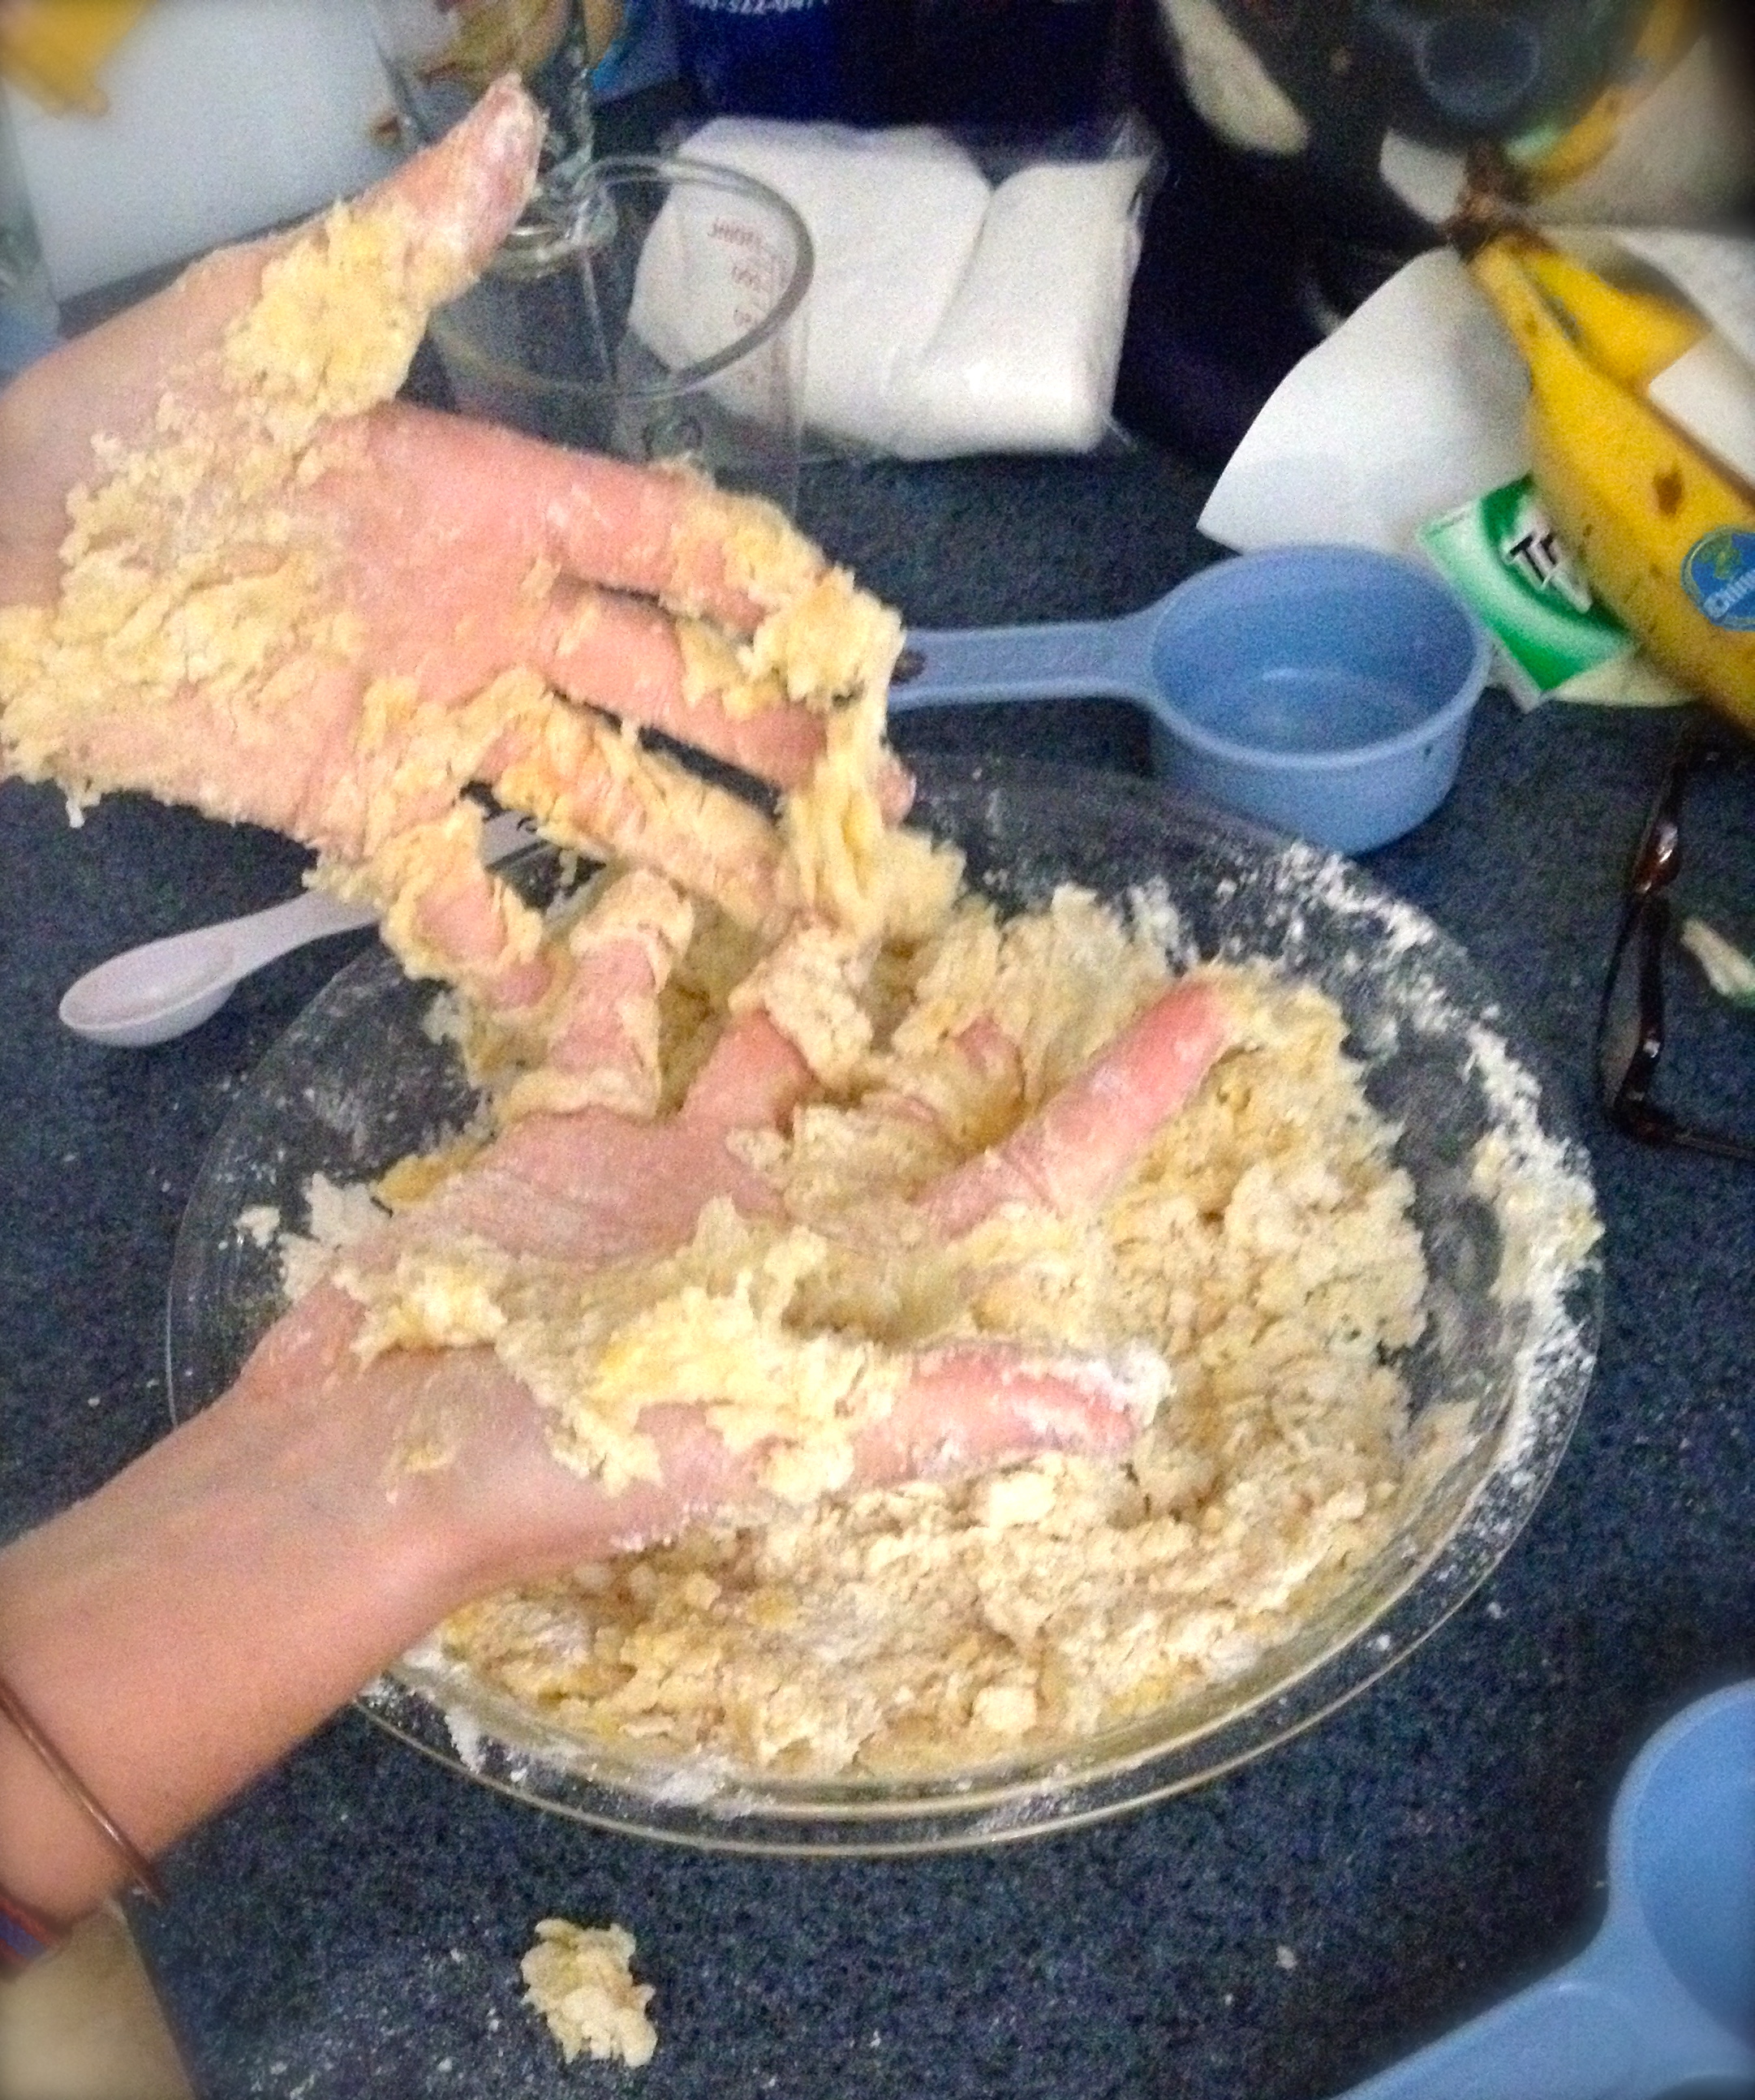
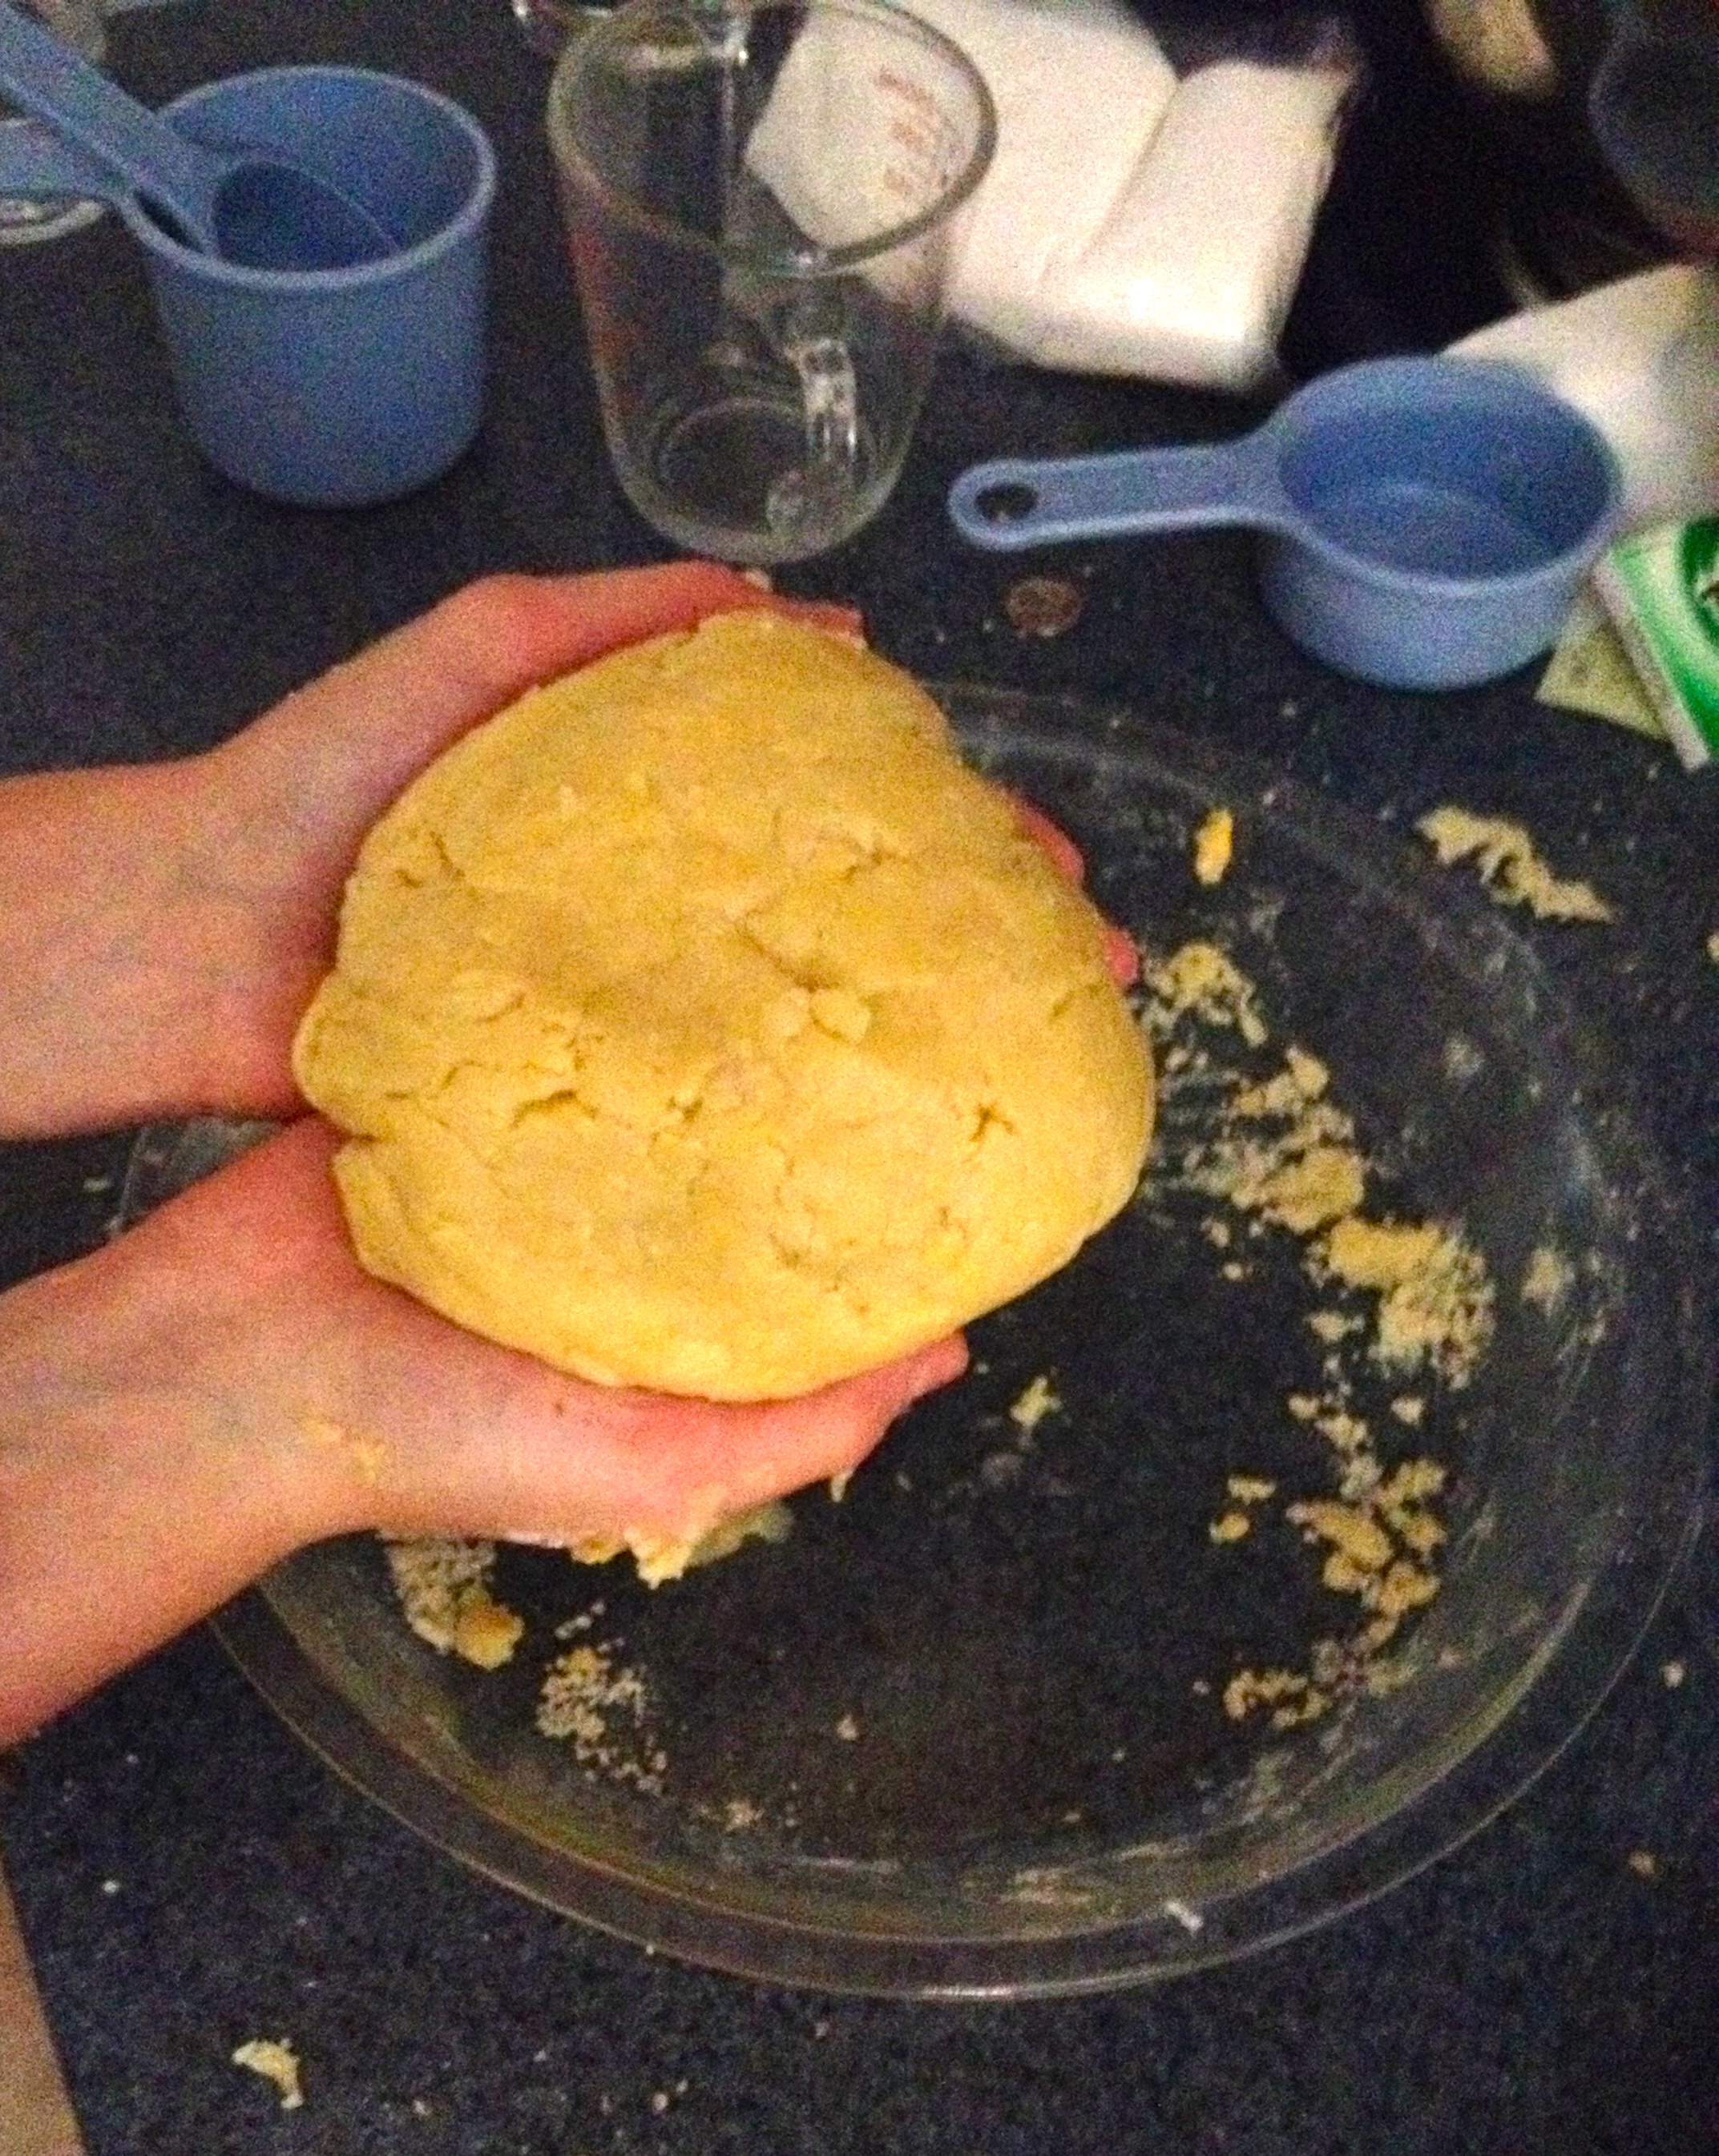
In a pie plate or on a large flat surface, pour the flour out and make a well in the middle of it. Put the eggs, margarine, sugar, and baking powder into the well. It might spill out a bit, but that’s just fine! Mix those ingredients with your hands, kneading the mixture into a dough. It may get a little messy, but that’s all part of the fun!
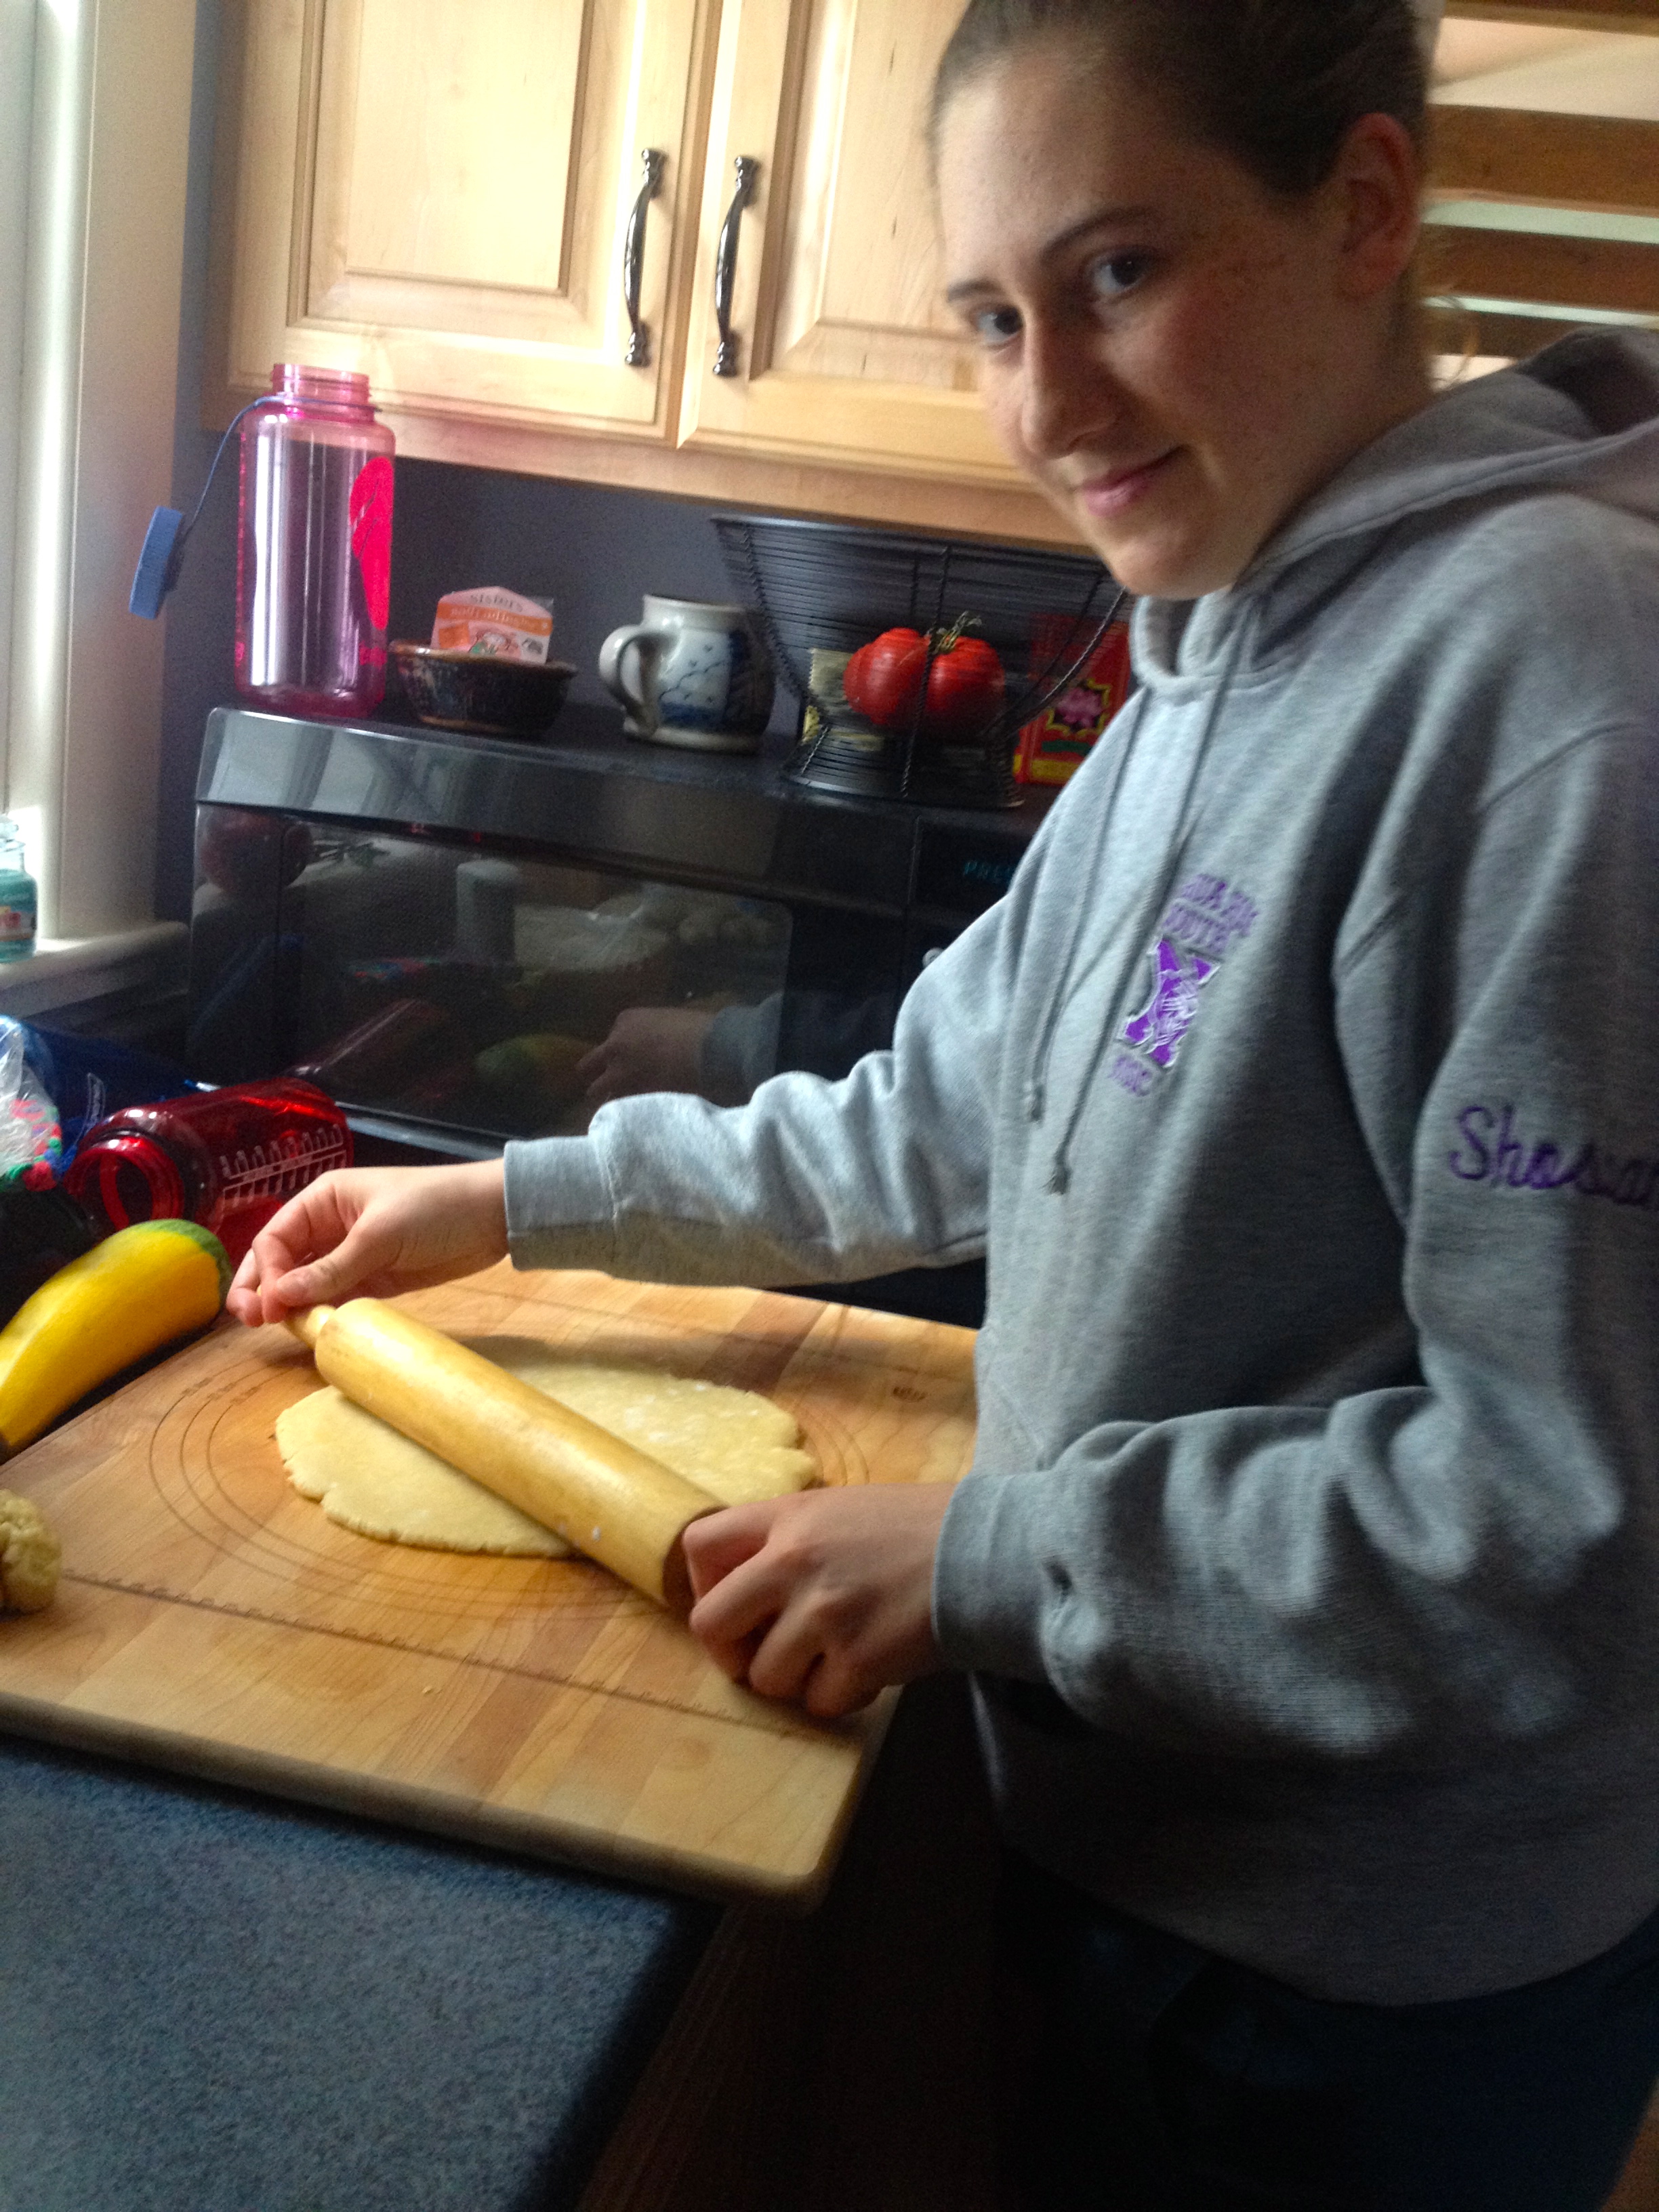
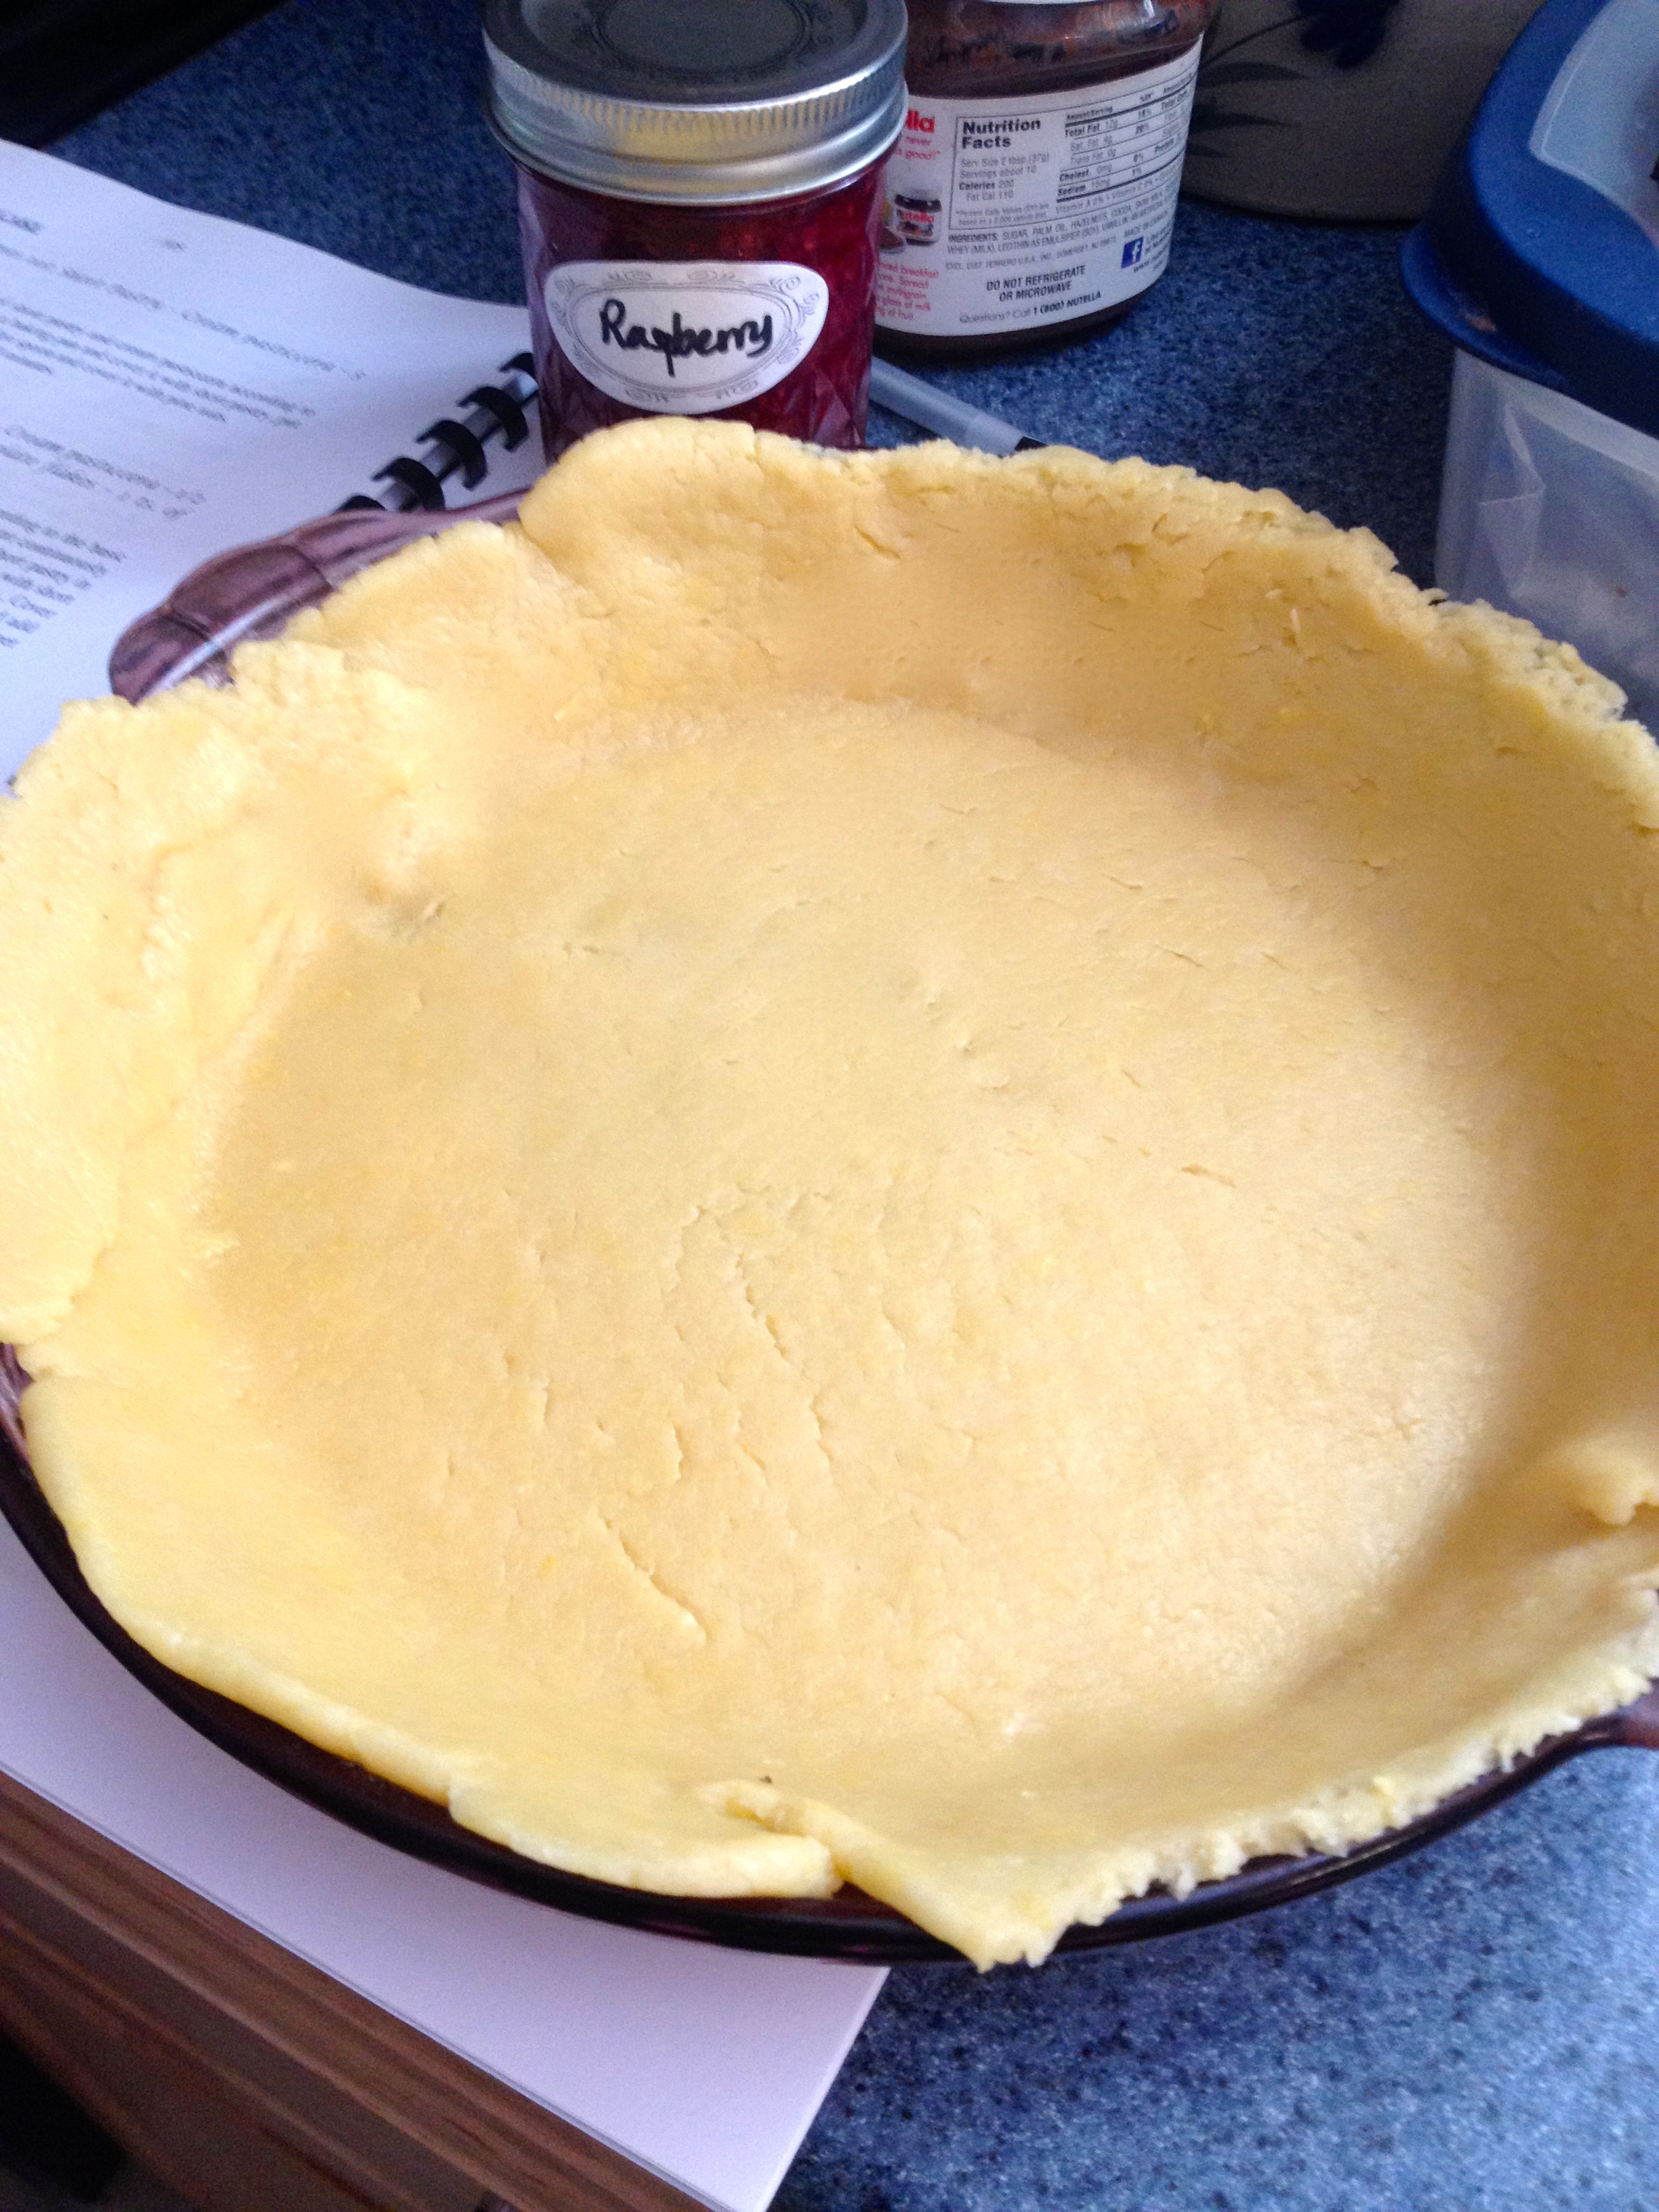
When the dough has formed, take 1/3 of the dough and set it aside. Roll out the other 2/3 to 1/8″ thickness, and until it fits in a 10″ pie plate. (Tip: to get the rolled dough into your pie plate without it breaking, roll it up over your rolling pin and then unroll it into the pie pan.)
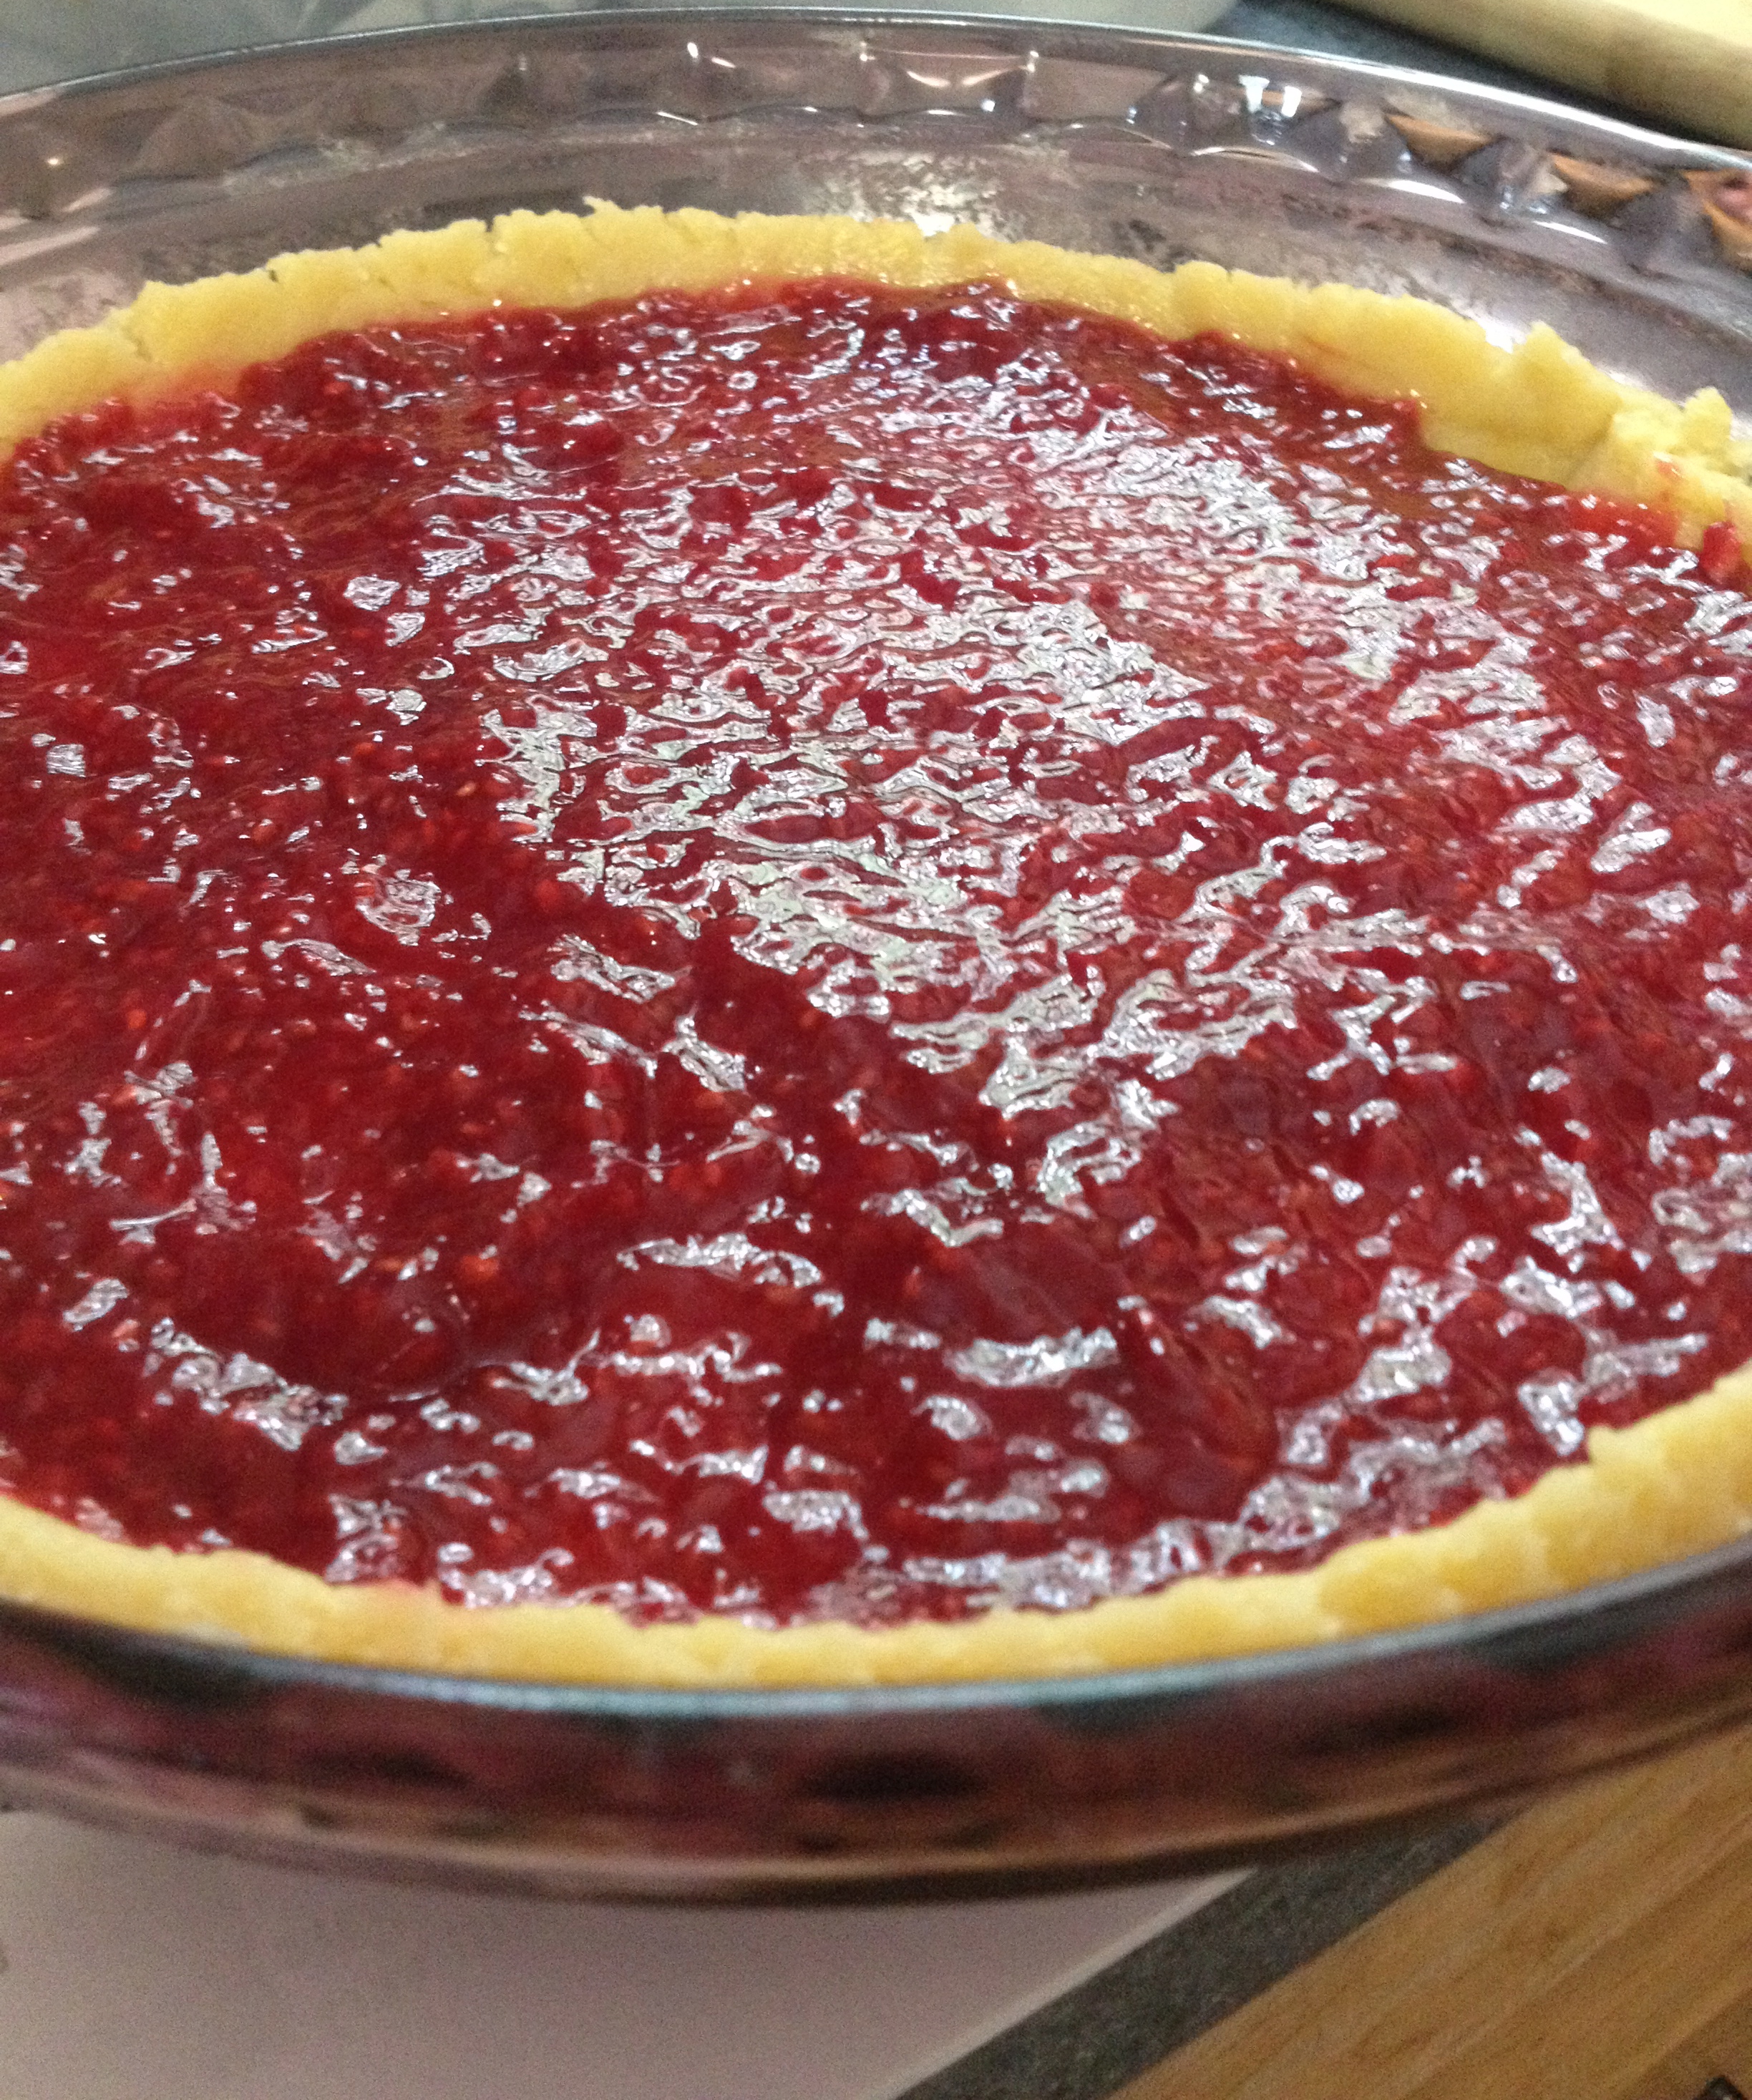
Next, spoon the jam into the bottom of the tart dough, just until it covers the bottom of the pie plate. We had the privilege of using my mom’s homemade raspberry jam (and later her homemade peach cinnamon jam), but any other jam will work just as well. Cut the excess dough from the sides, so that there’s a very small edge of dough above the jam. This excess dough can be put with the other 1/3 of the dough that you set aside.
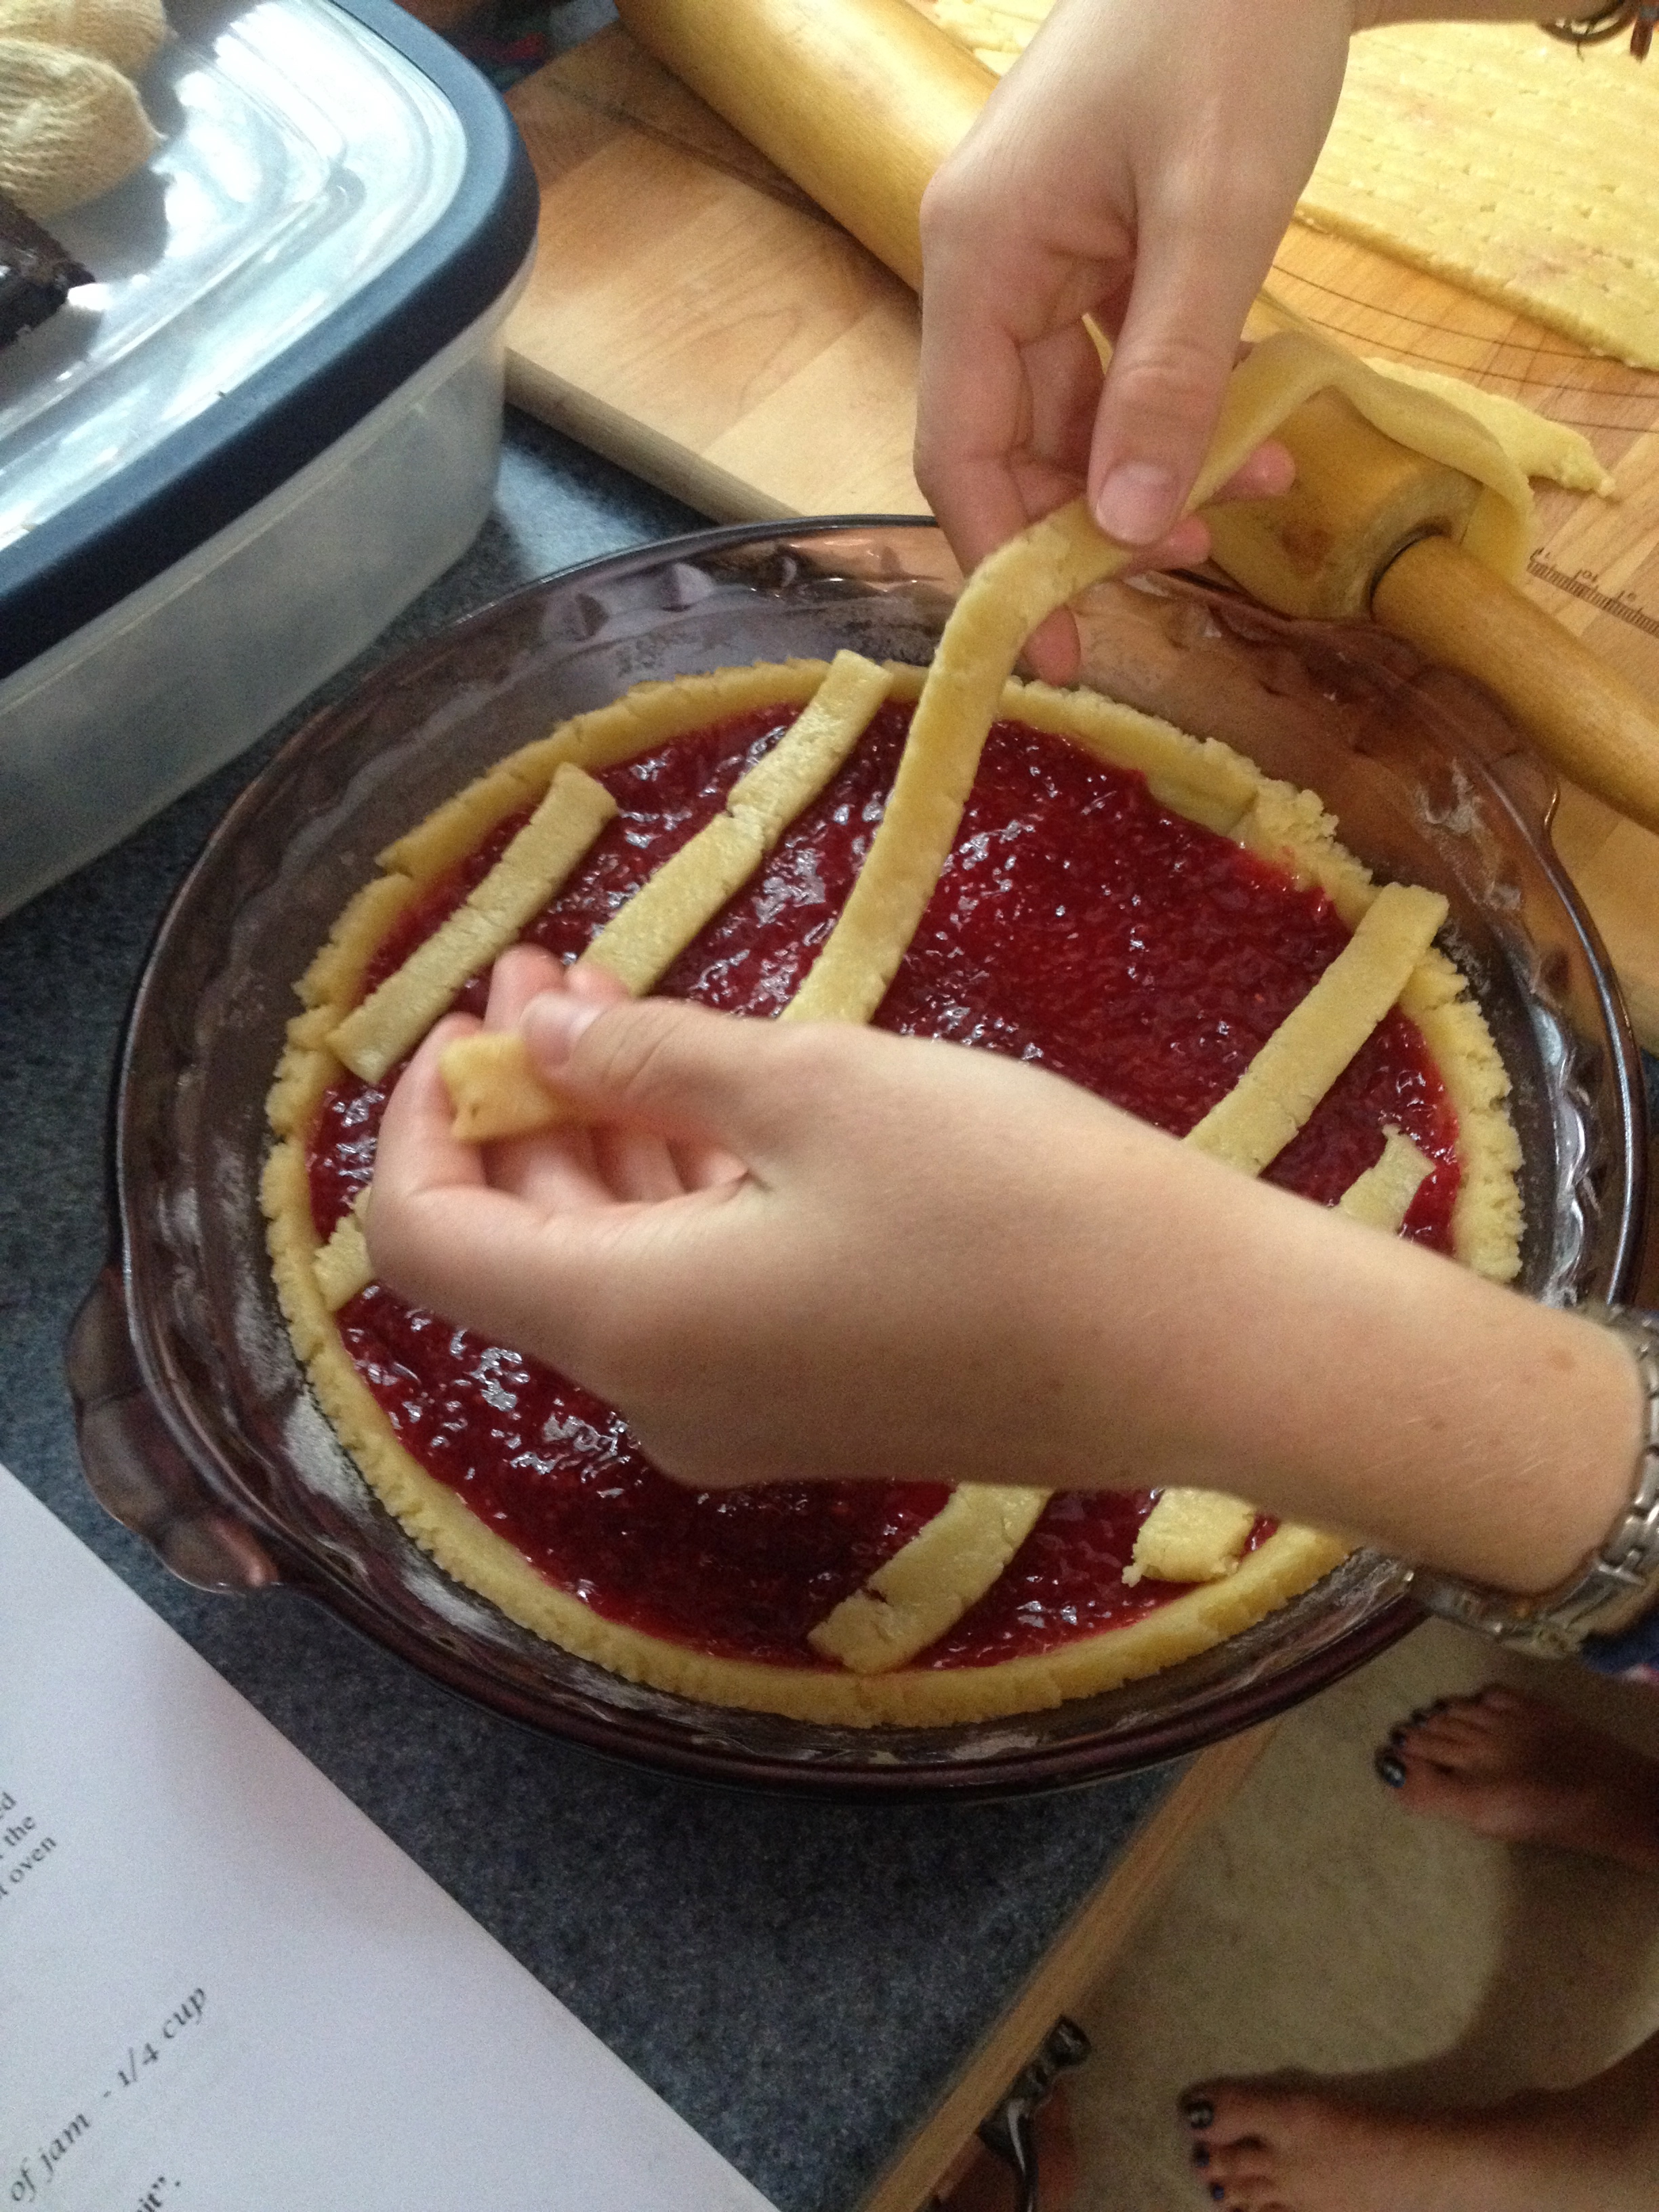
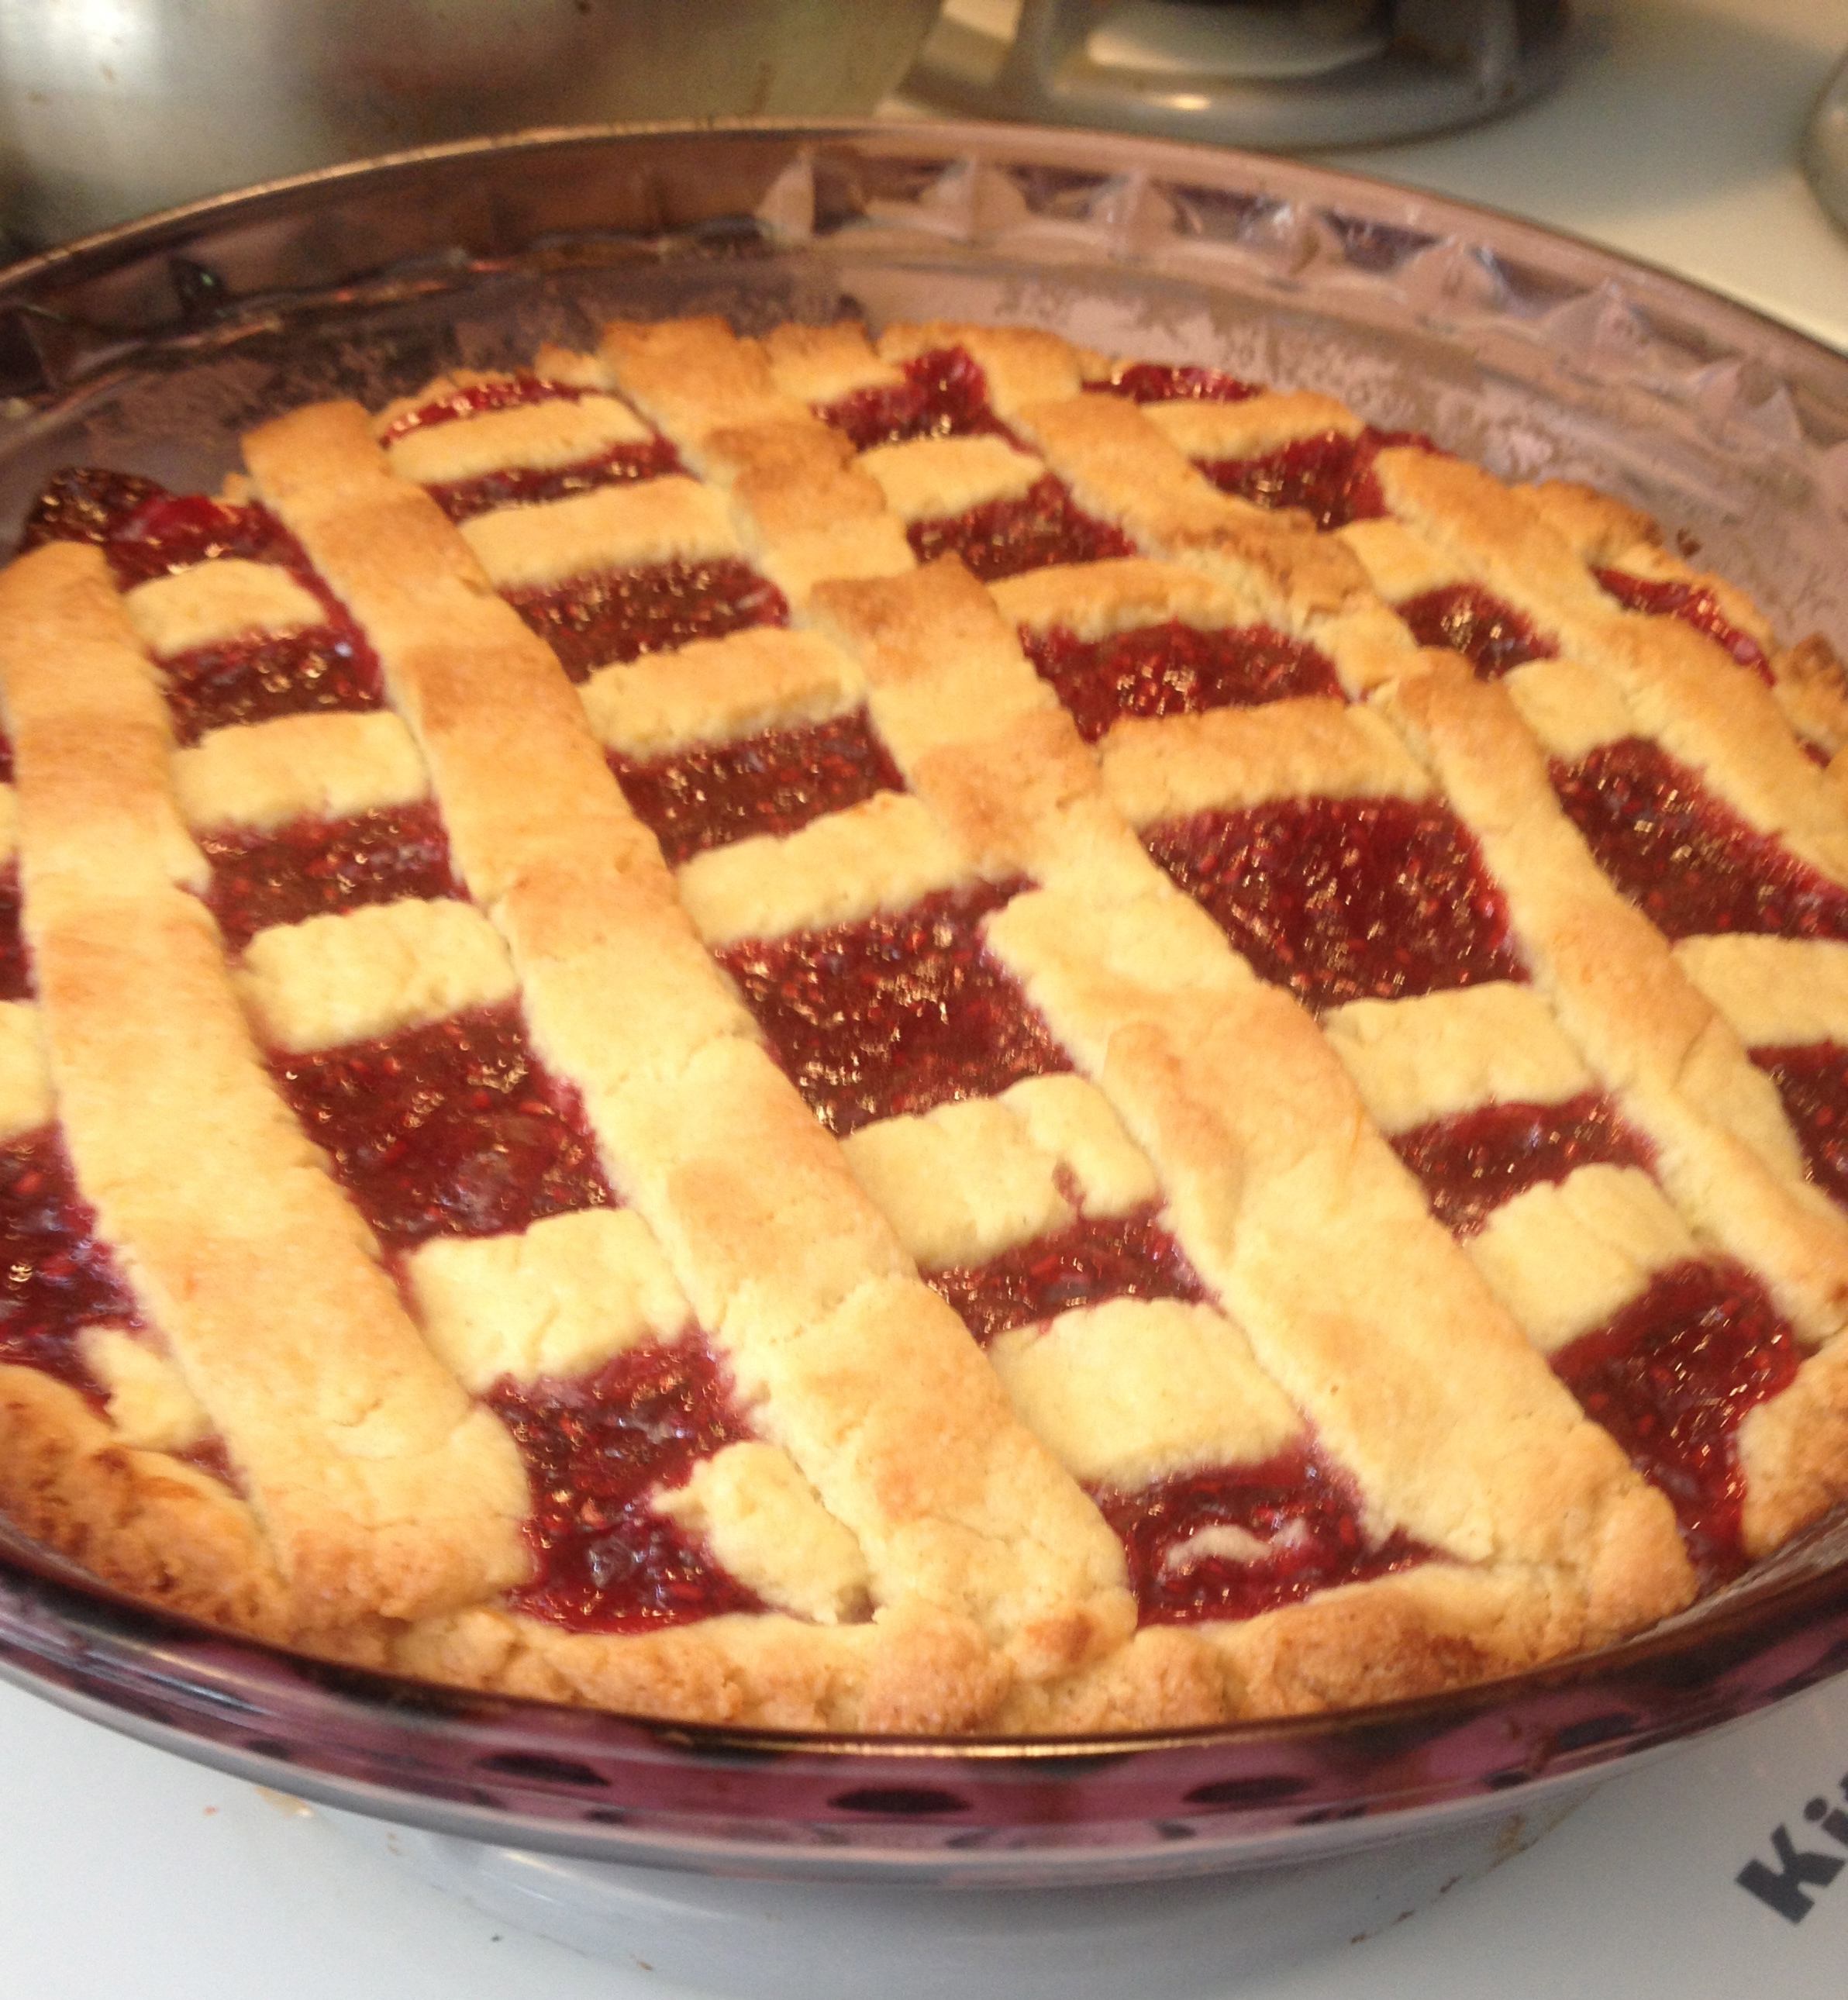
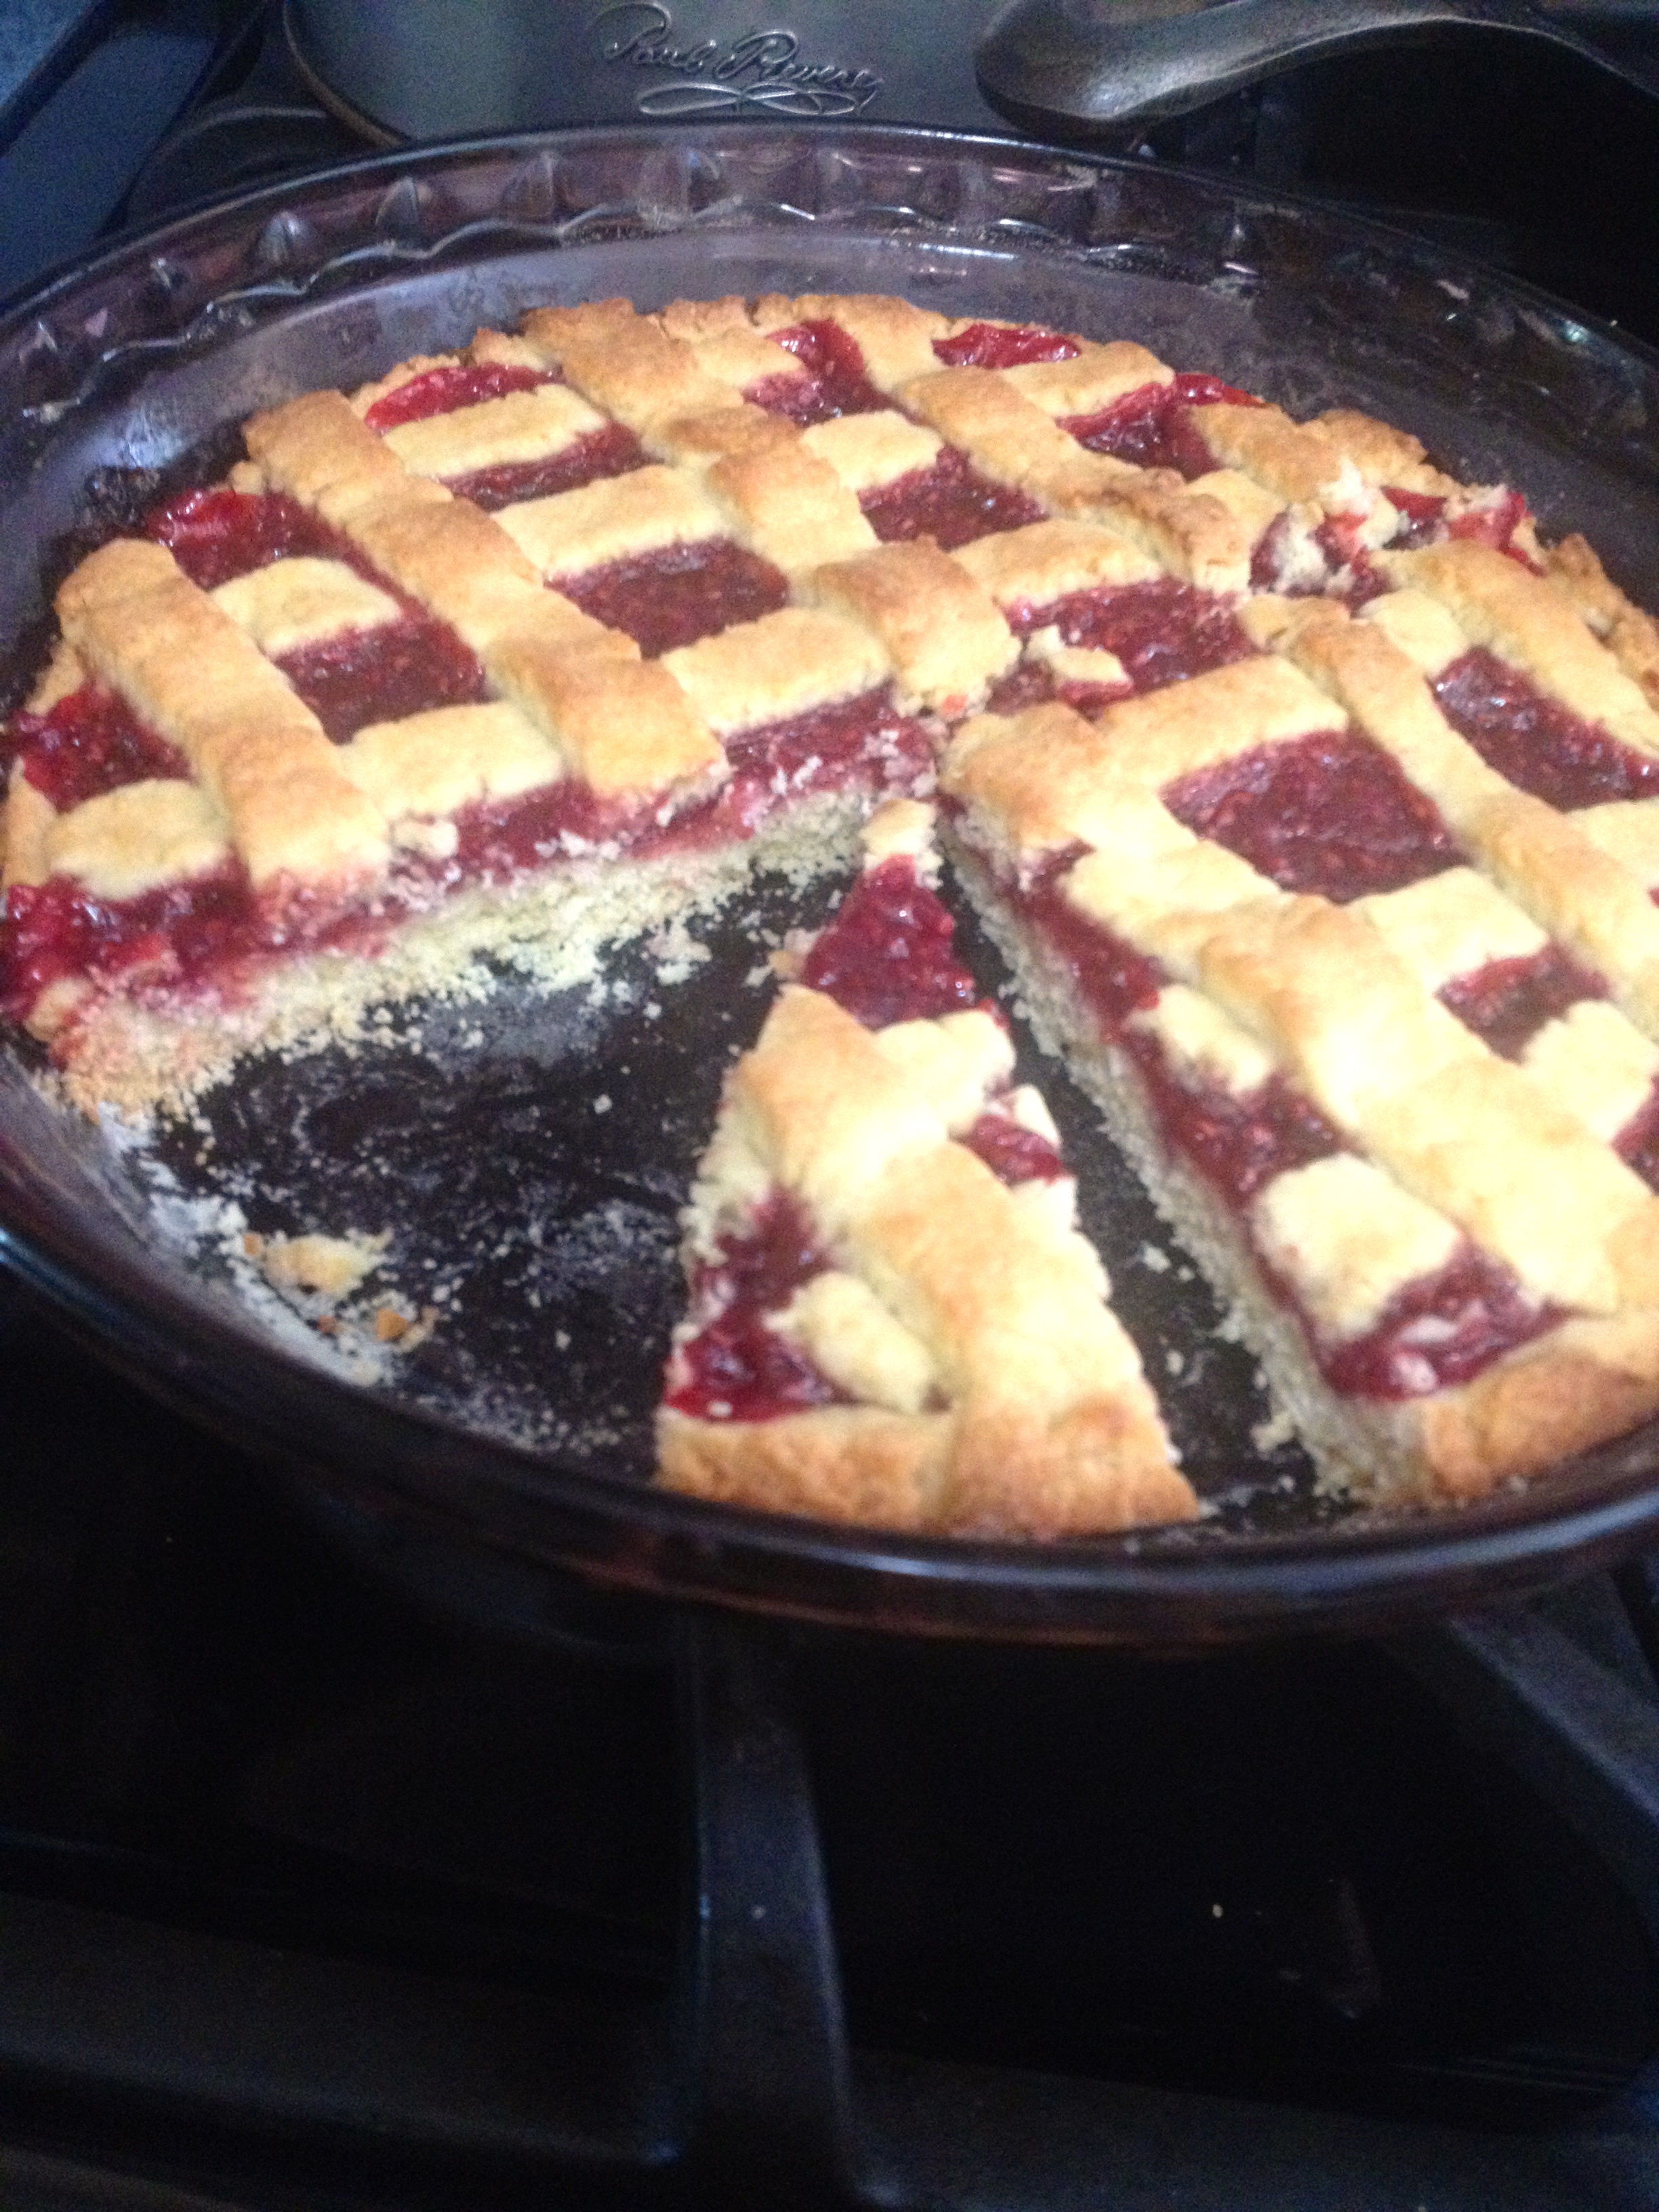
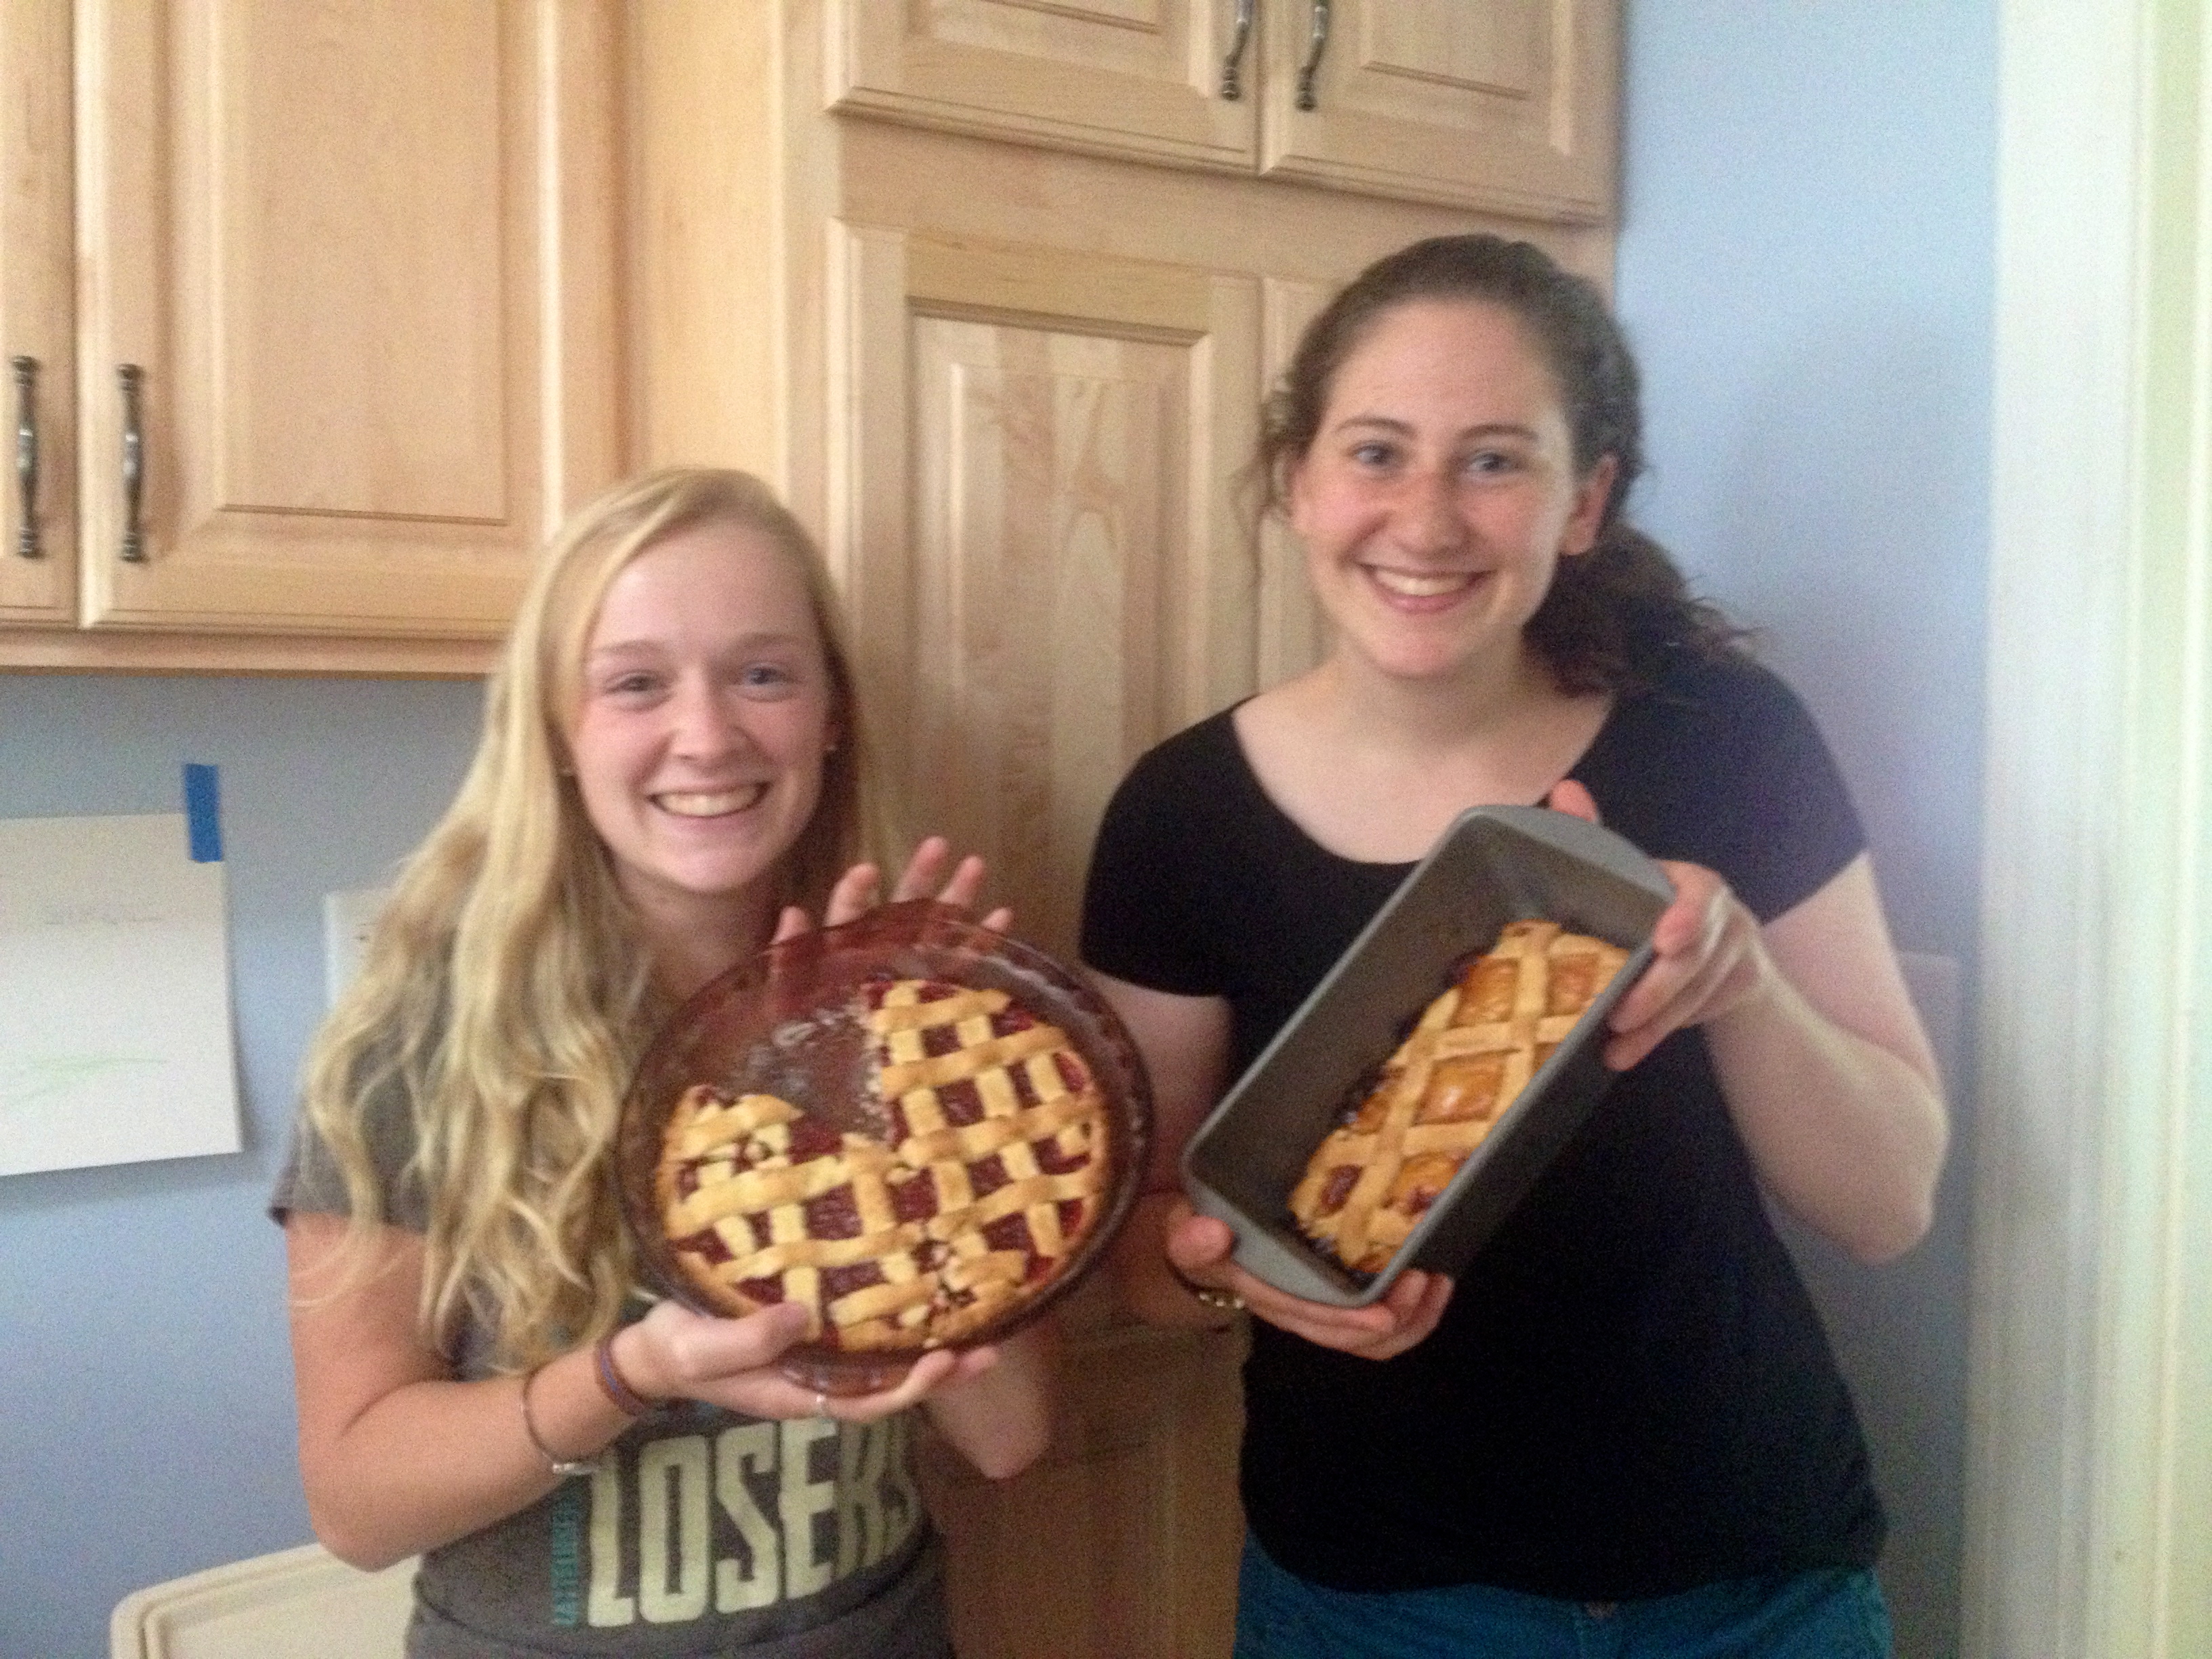
Roll out the other 1/3 of the dough and cut it into 1/4″ strips. Lay some of them horizontally along the pie plate, and some of them vertically, so that you have a lattice design on the tart. (Hint: we didn’t bother doing the fancy weaving for a real lattice, but it looks exactly the same when it comes out of the oven!)
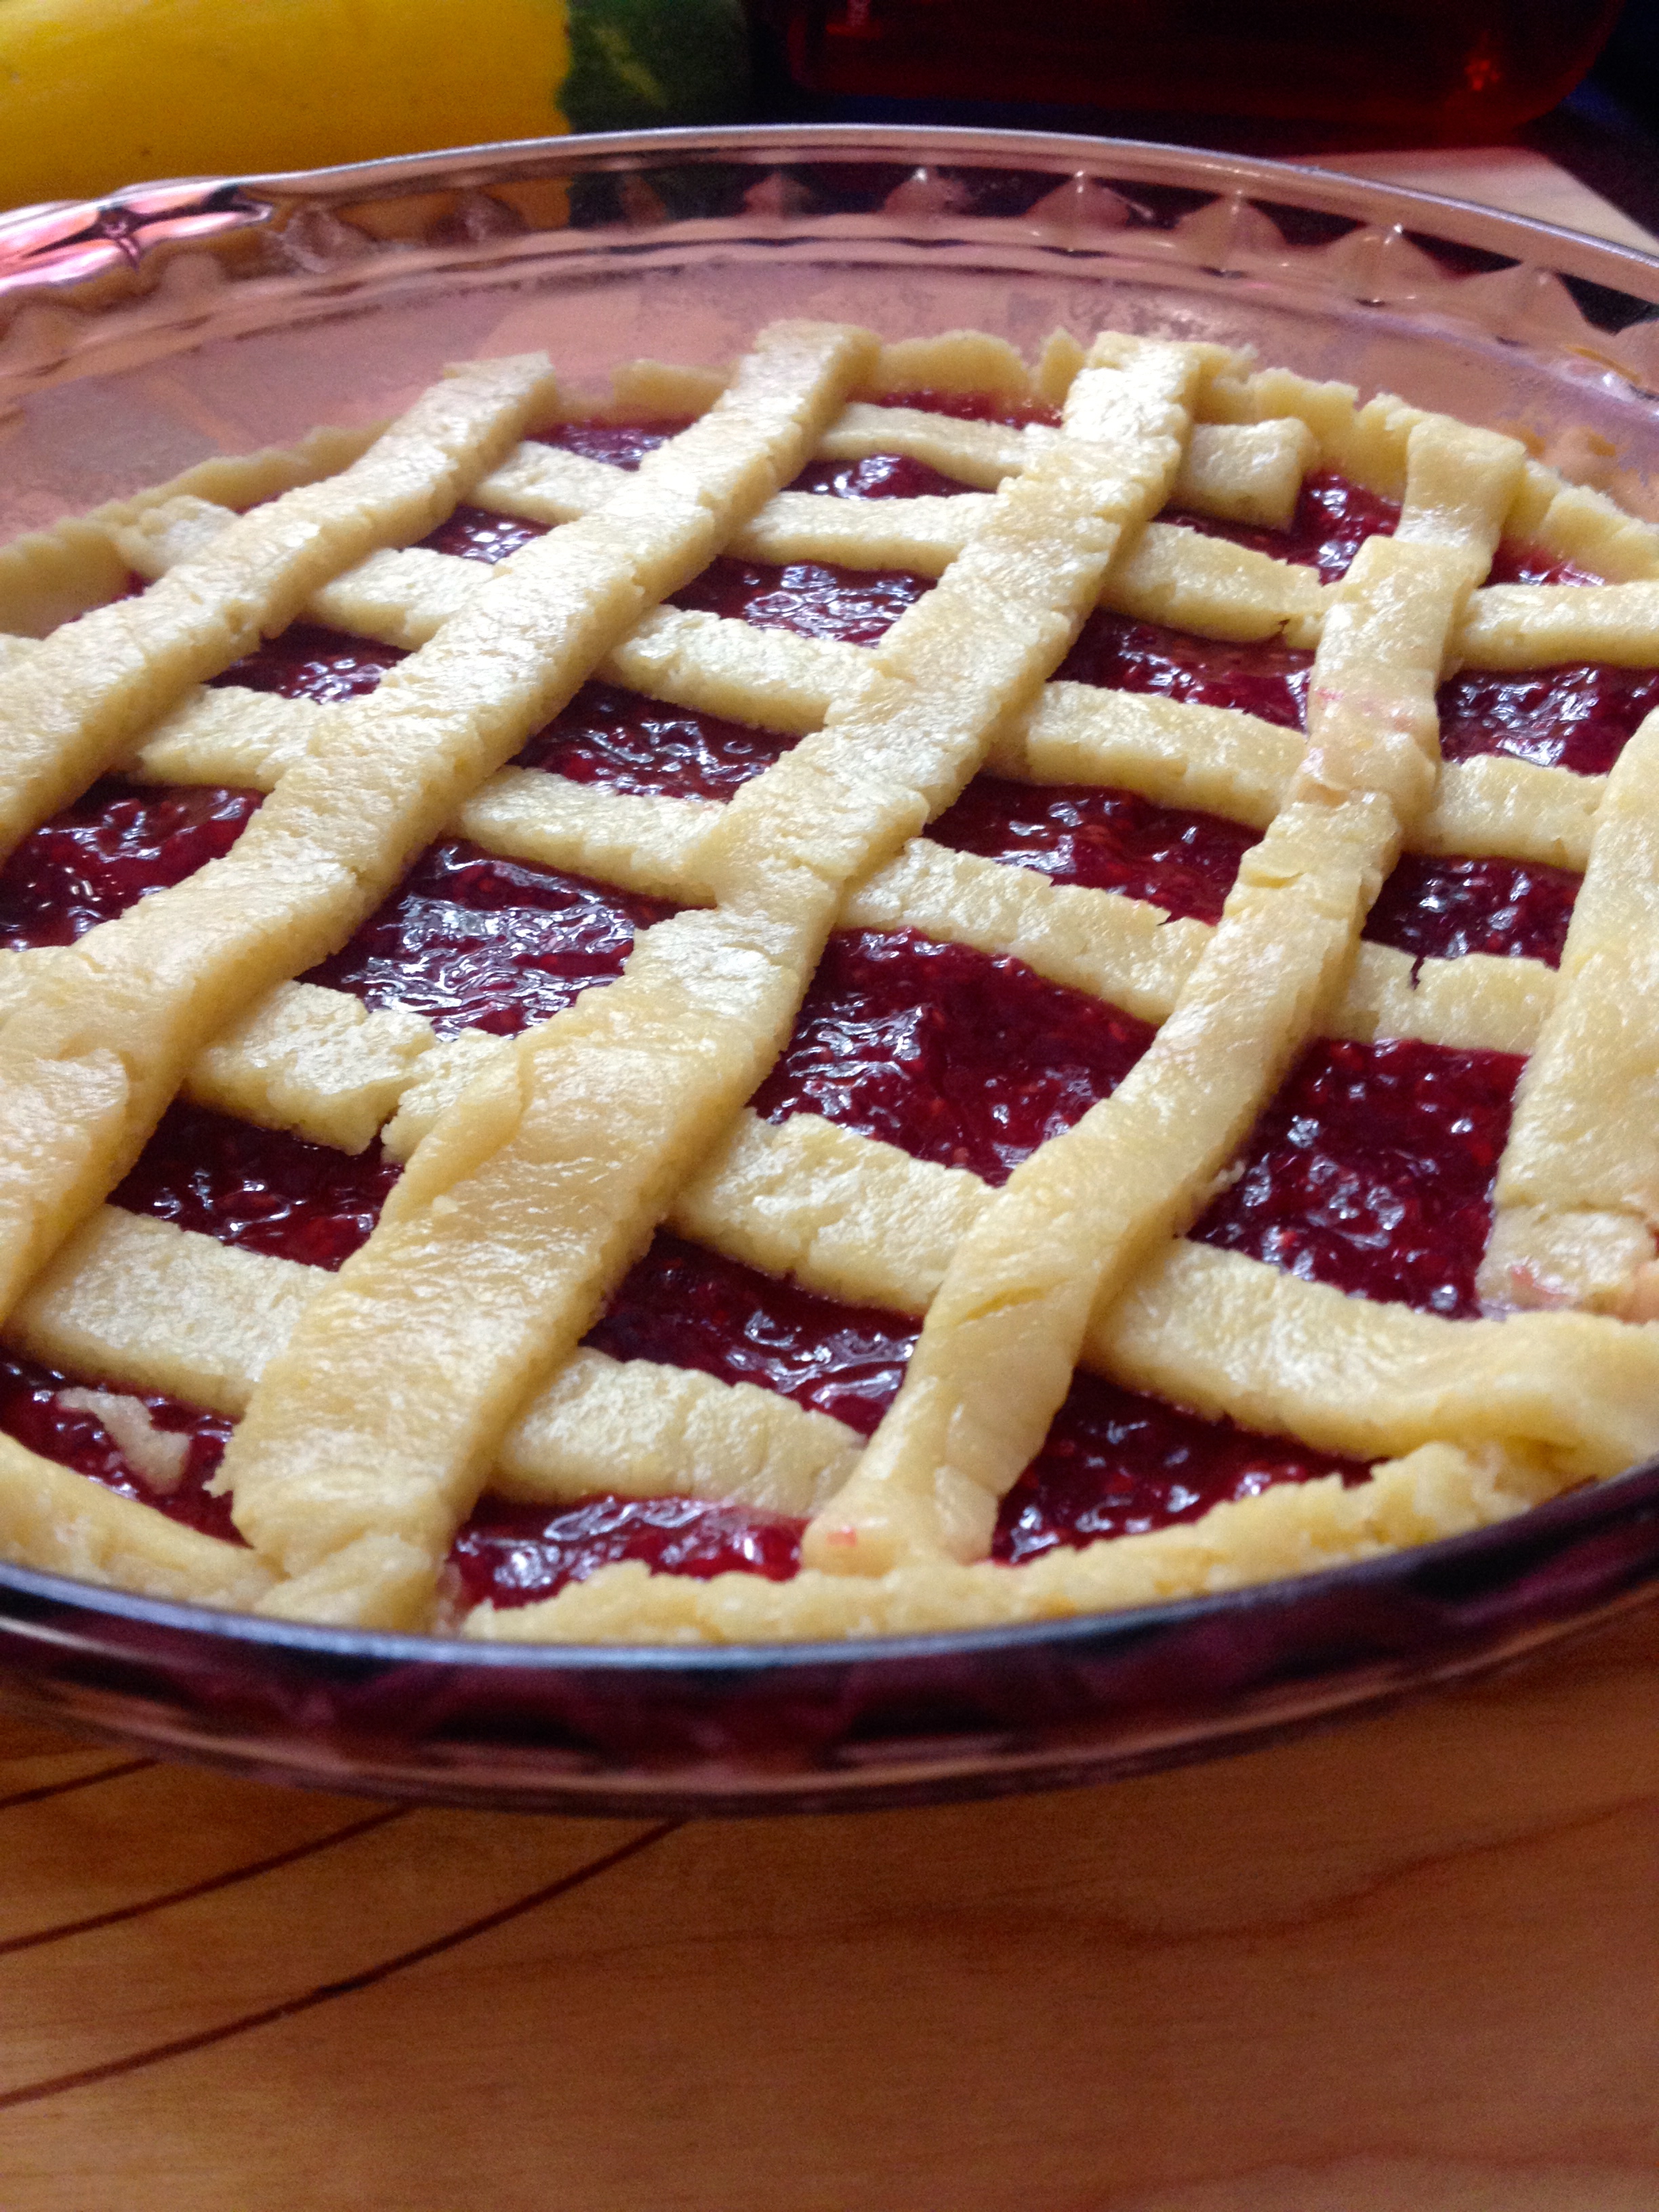
Put the tart in the oven at 400ºF for 23 minutes, or until the crust is golden brown. I know 23 minutes is a strange amount of time, but trust me on this one. When it comes out of the oven, let it cool a bit and then dig in! This tart is absolutely gorgeous, and just as yummy as it looks!
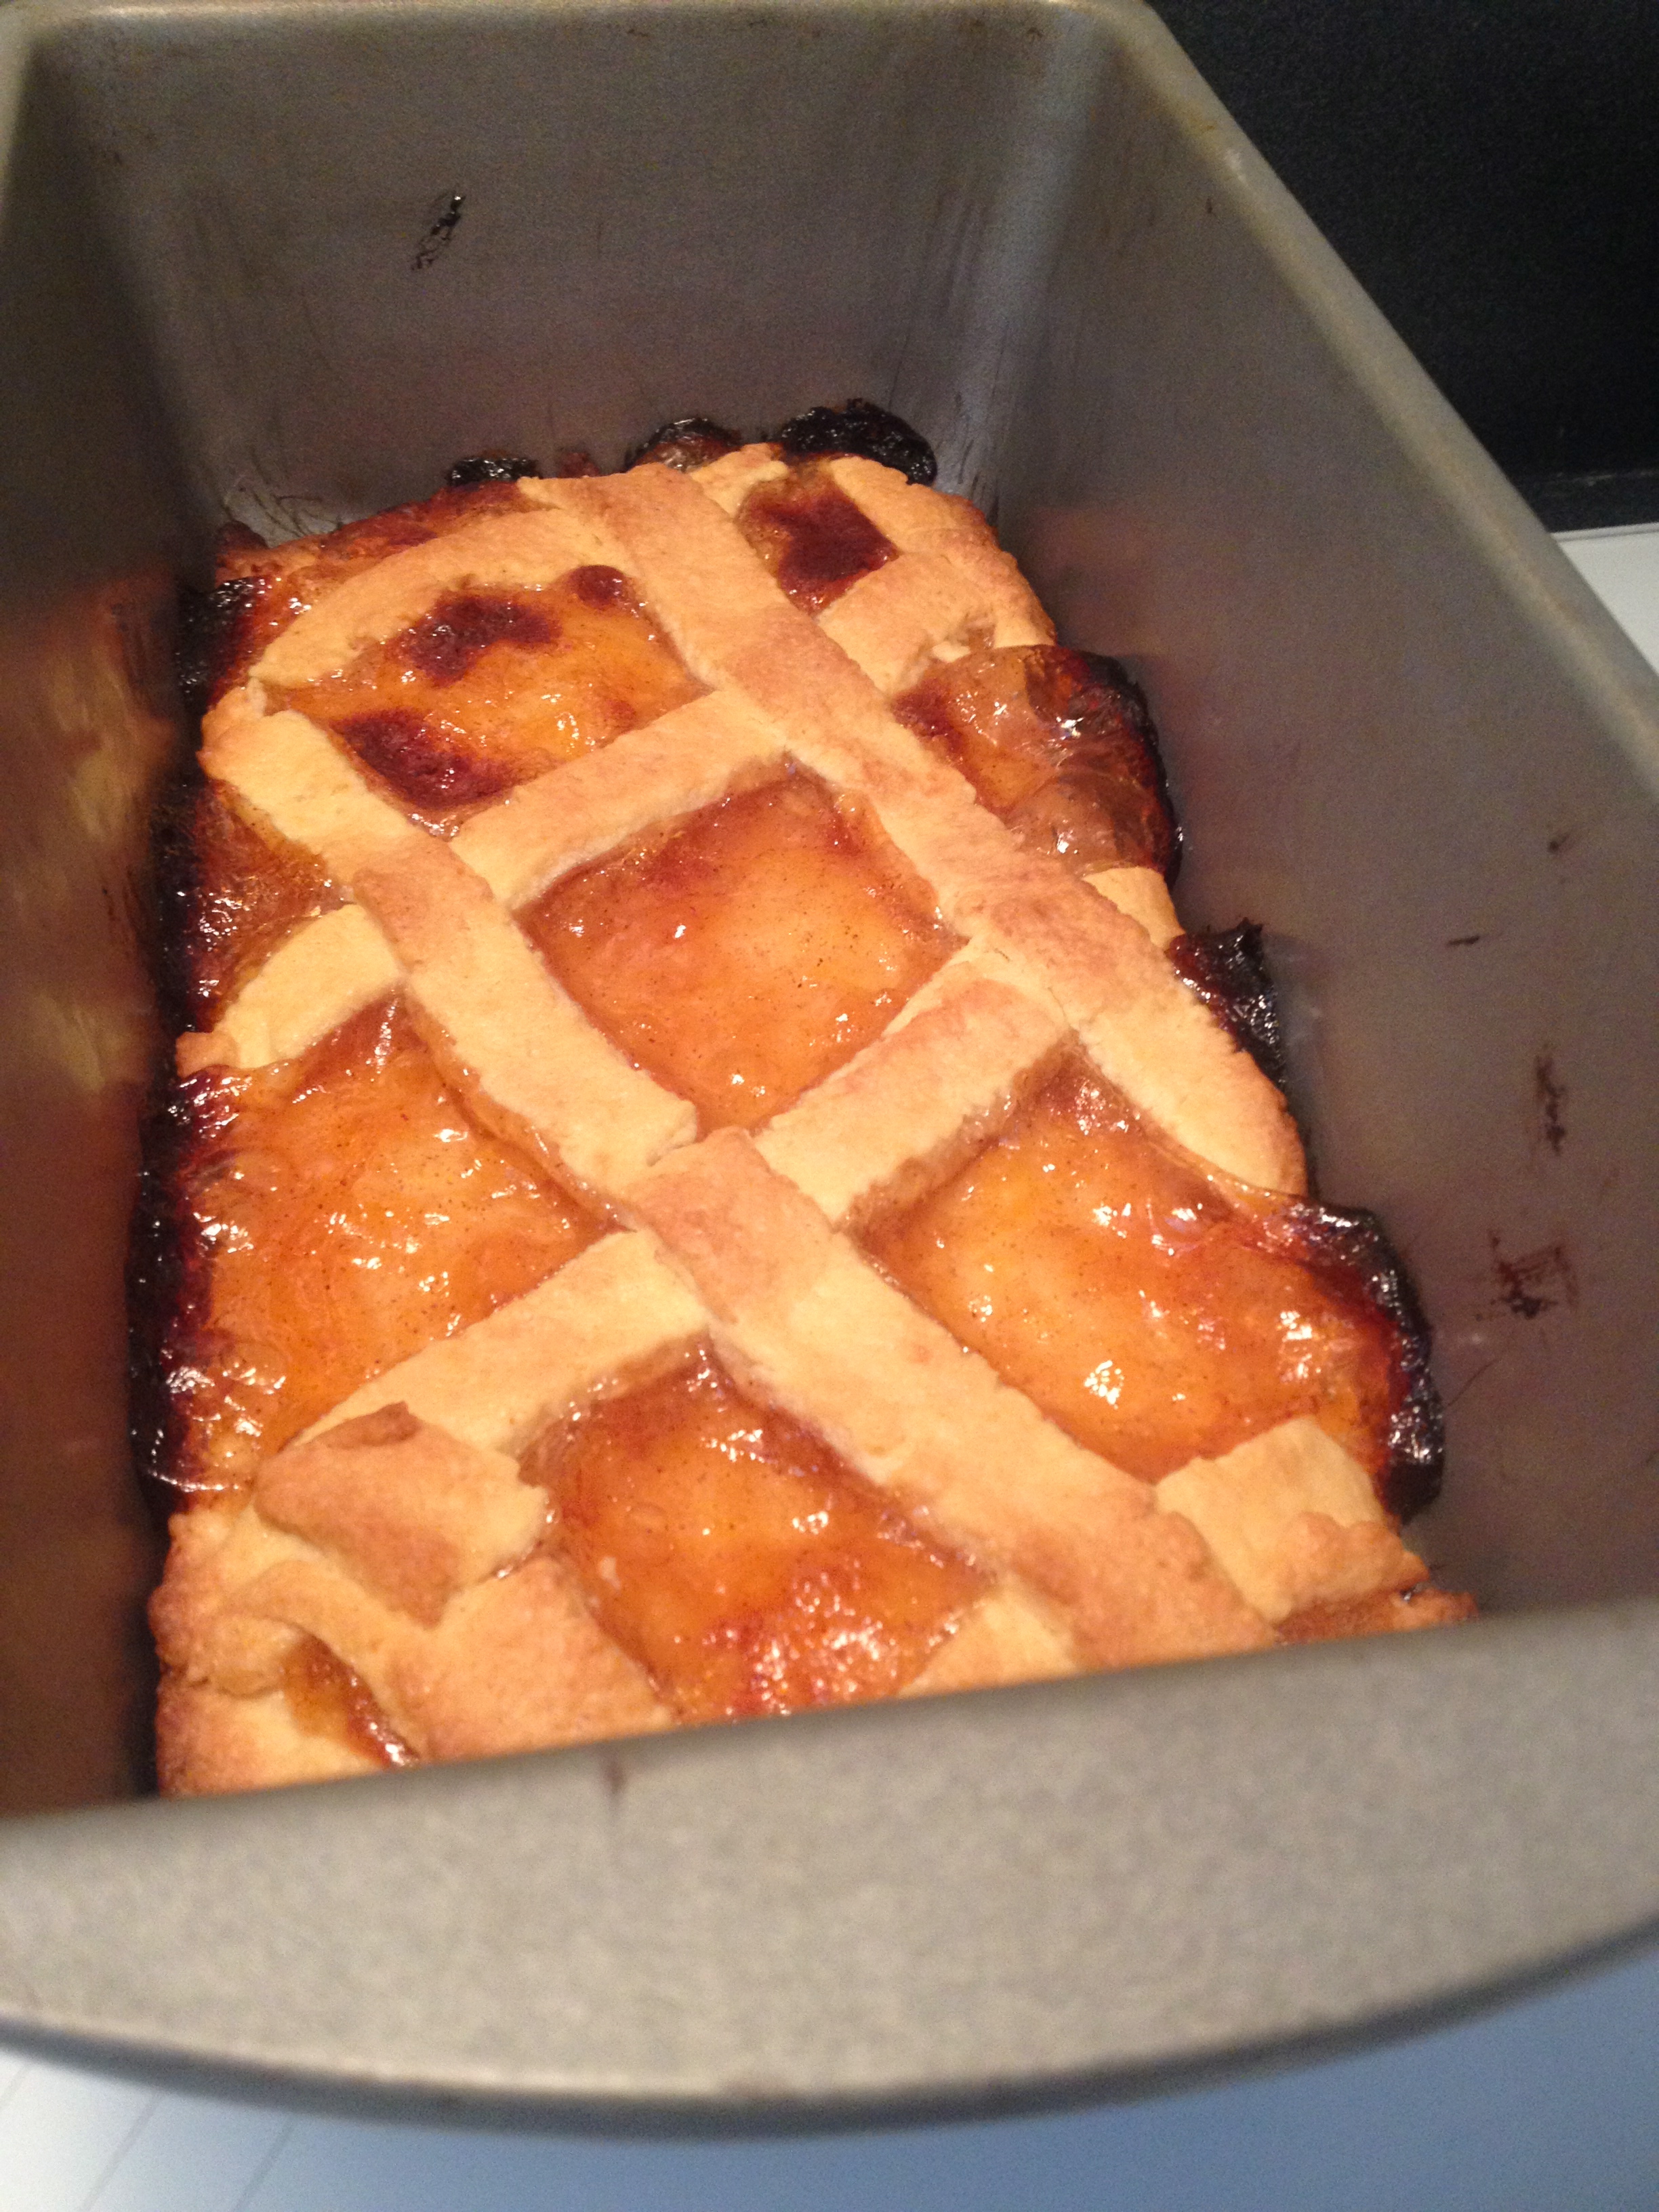
My friend and I had leftover dough, so we made a Cinnamon Peach Tart. It’s the exact same method, except we used a buttered 9×5″ baking pan and my mom’s peach cinnamon jam. It honestly tasted like a heavenly peach cobbler.
It was such a pleasure to bake with my friend, and to try my hand at some amazing Italian desserts! Believe me, the tarts are already eaten, and we’ll be baking plenty more desserts before school starts again. I hope you love this recipe as much as I did, and as the Italians would say, Ciao!
That Food in SoCal, Though…
Hey everyone! I’m back from my vacation in California! I was there for one jam-packed fun-filled week that was perfect for a foodie, and I’d love to share some of my experiences and creations with you!
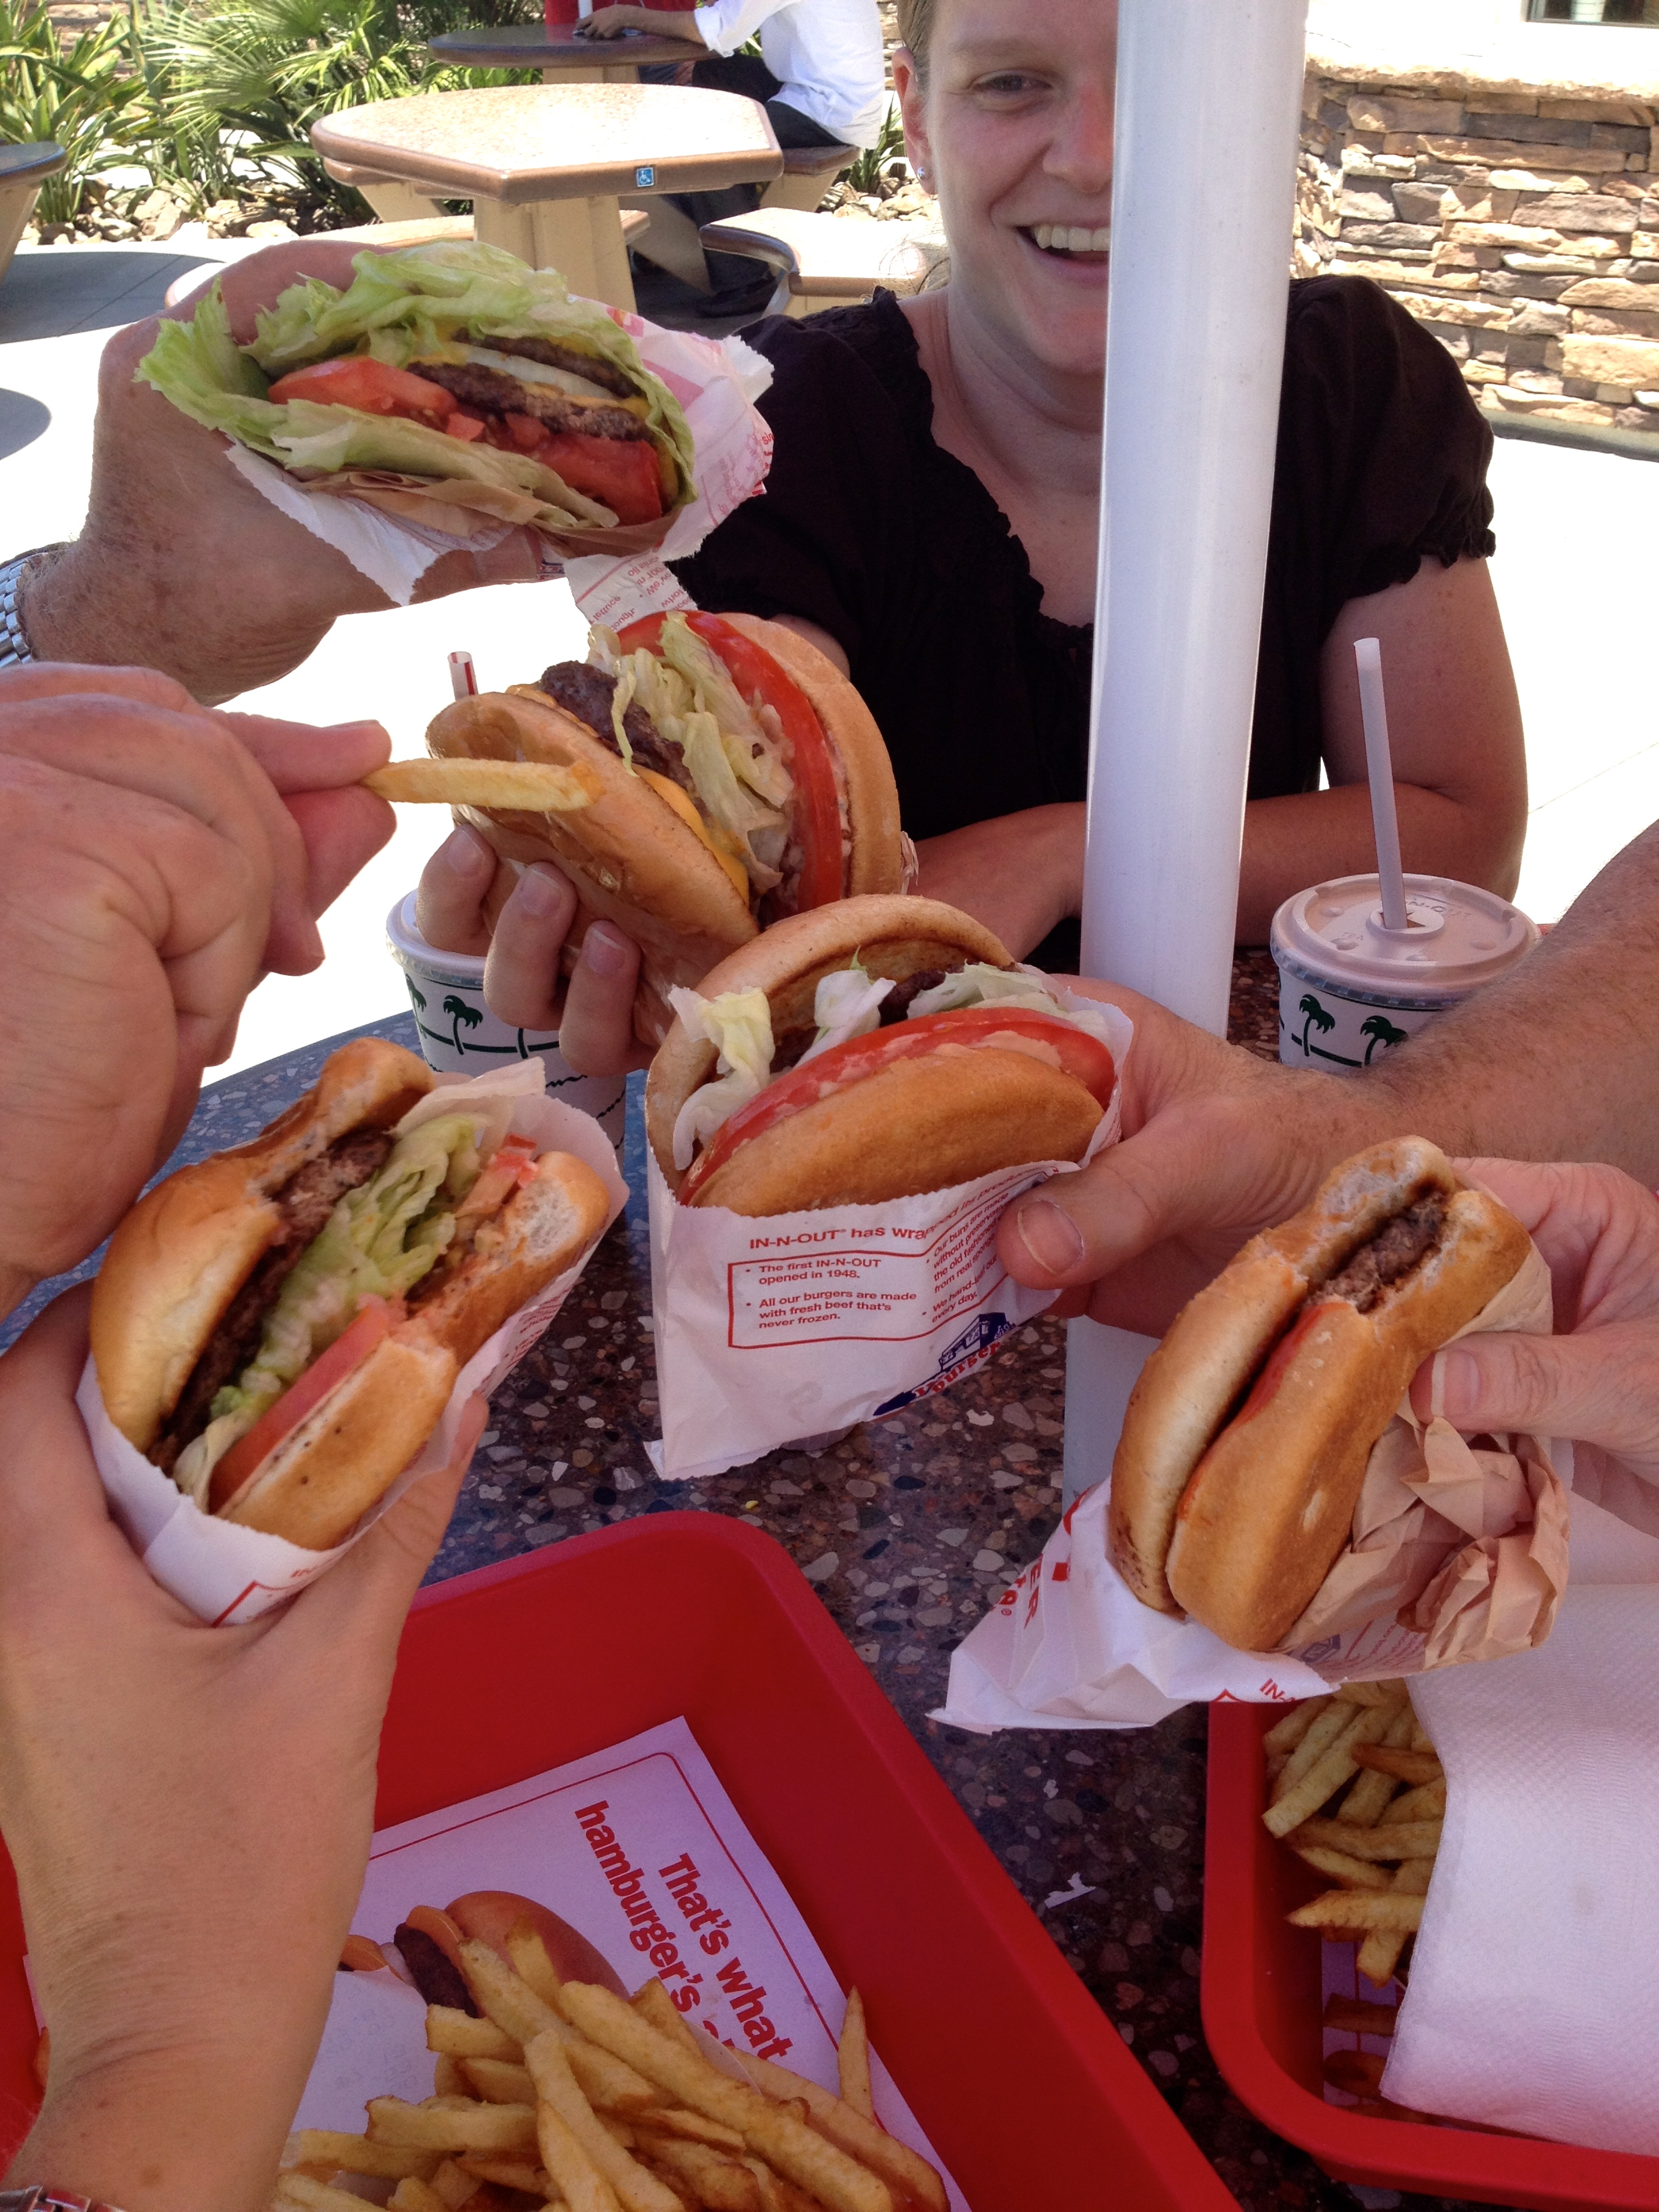
First on the list is a California must-have for all people. No excuses. It’s In-N-Out burger. Simple little burger joint? Anything but! Literally everyone I know who has visited California or lives in California loves In-N-Out. Maybe it’s the burgers, maybe it’s the animal-style fries, maybe it’s the shakes. Whatever it is, they’re doing it right. Their burgers are juicy, the buns are toasted, the toppings are fresh, the fries are crispy and perfectly salted, and the shakes are thick and creamy. PLUS they can wrap your burger in lettuce instead of a bun if you want. This place rocks!

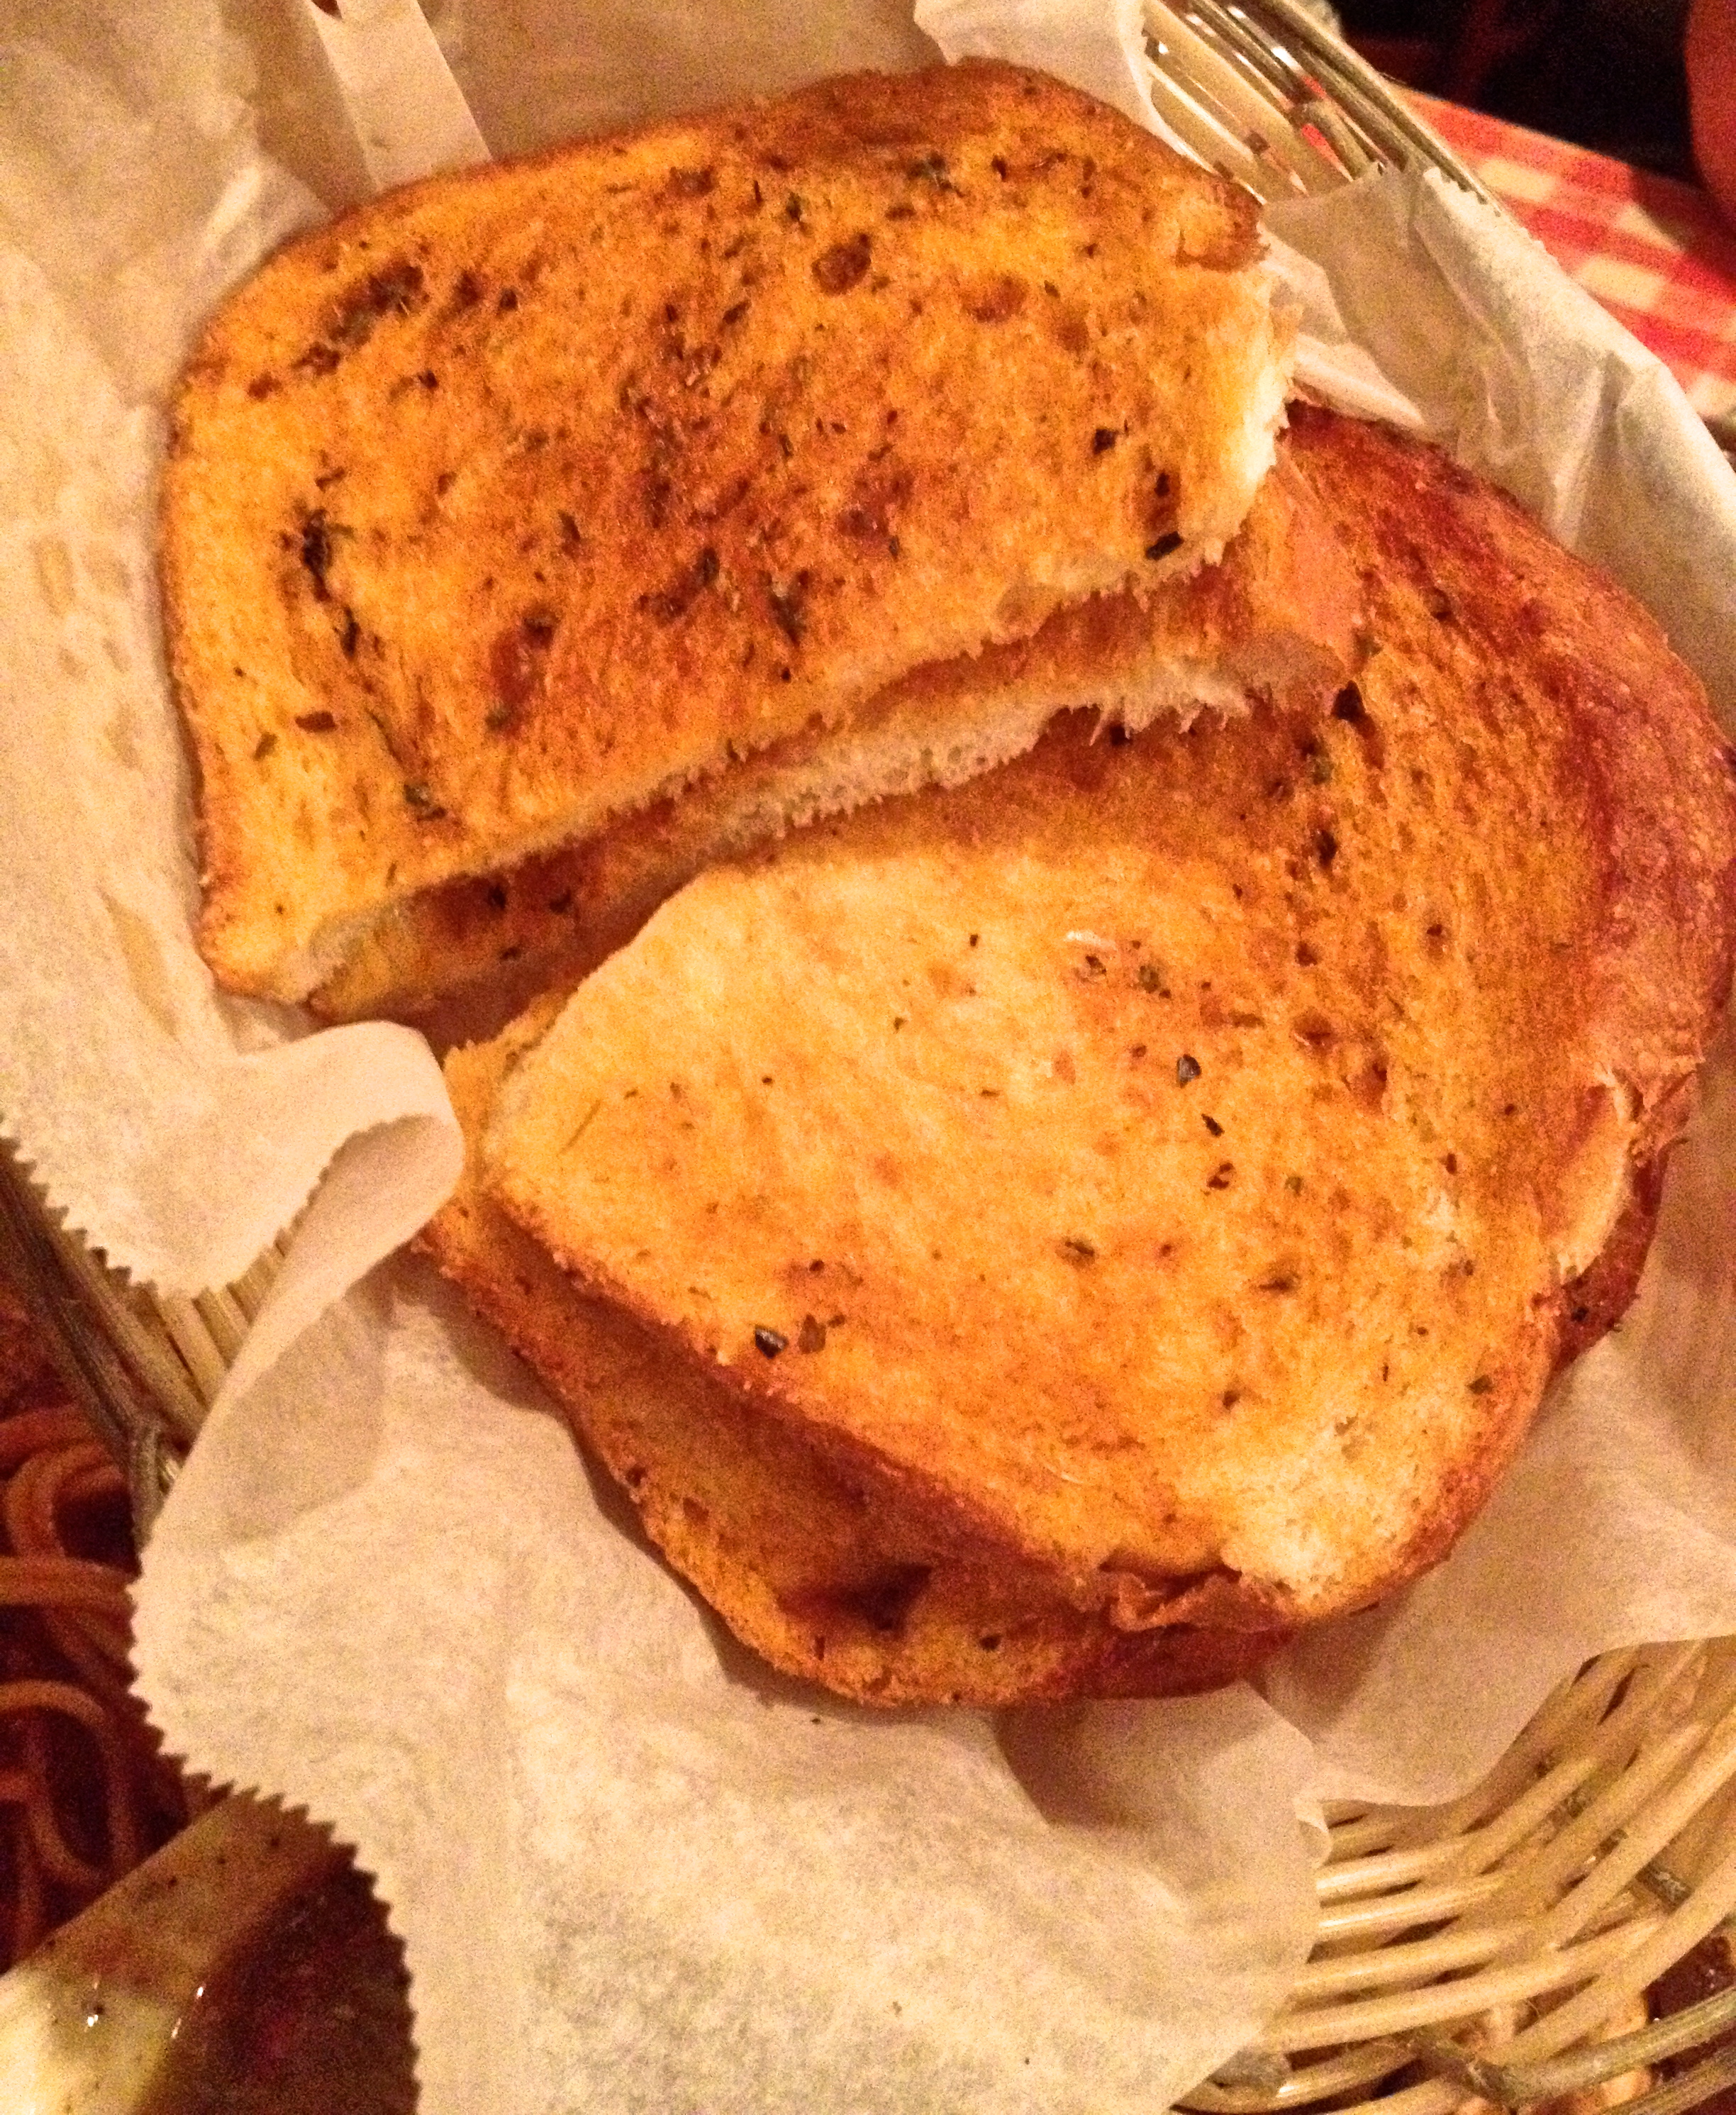
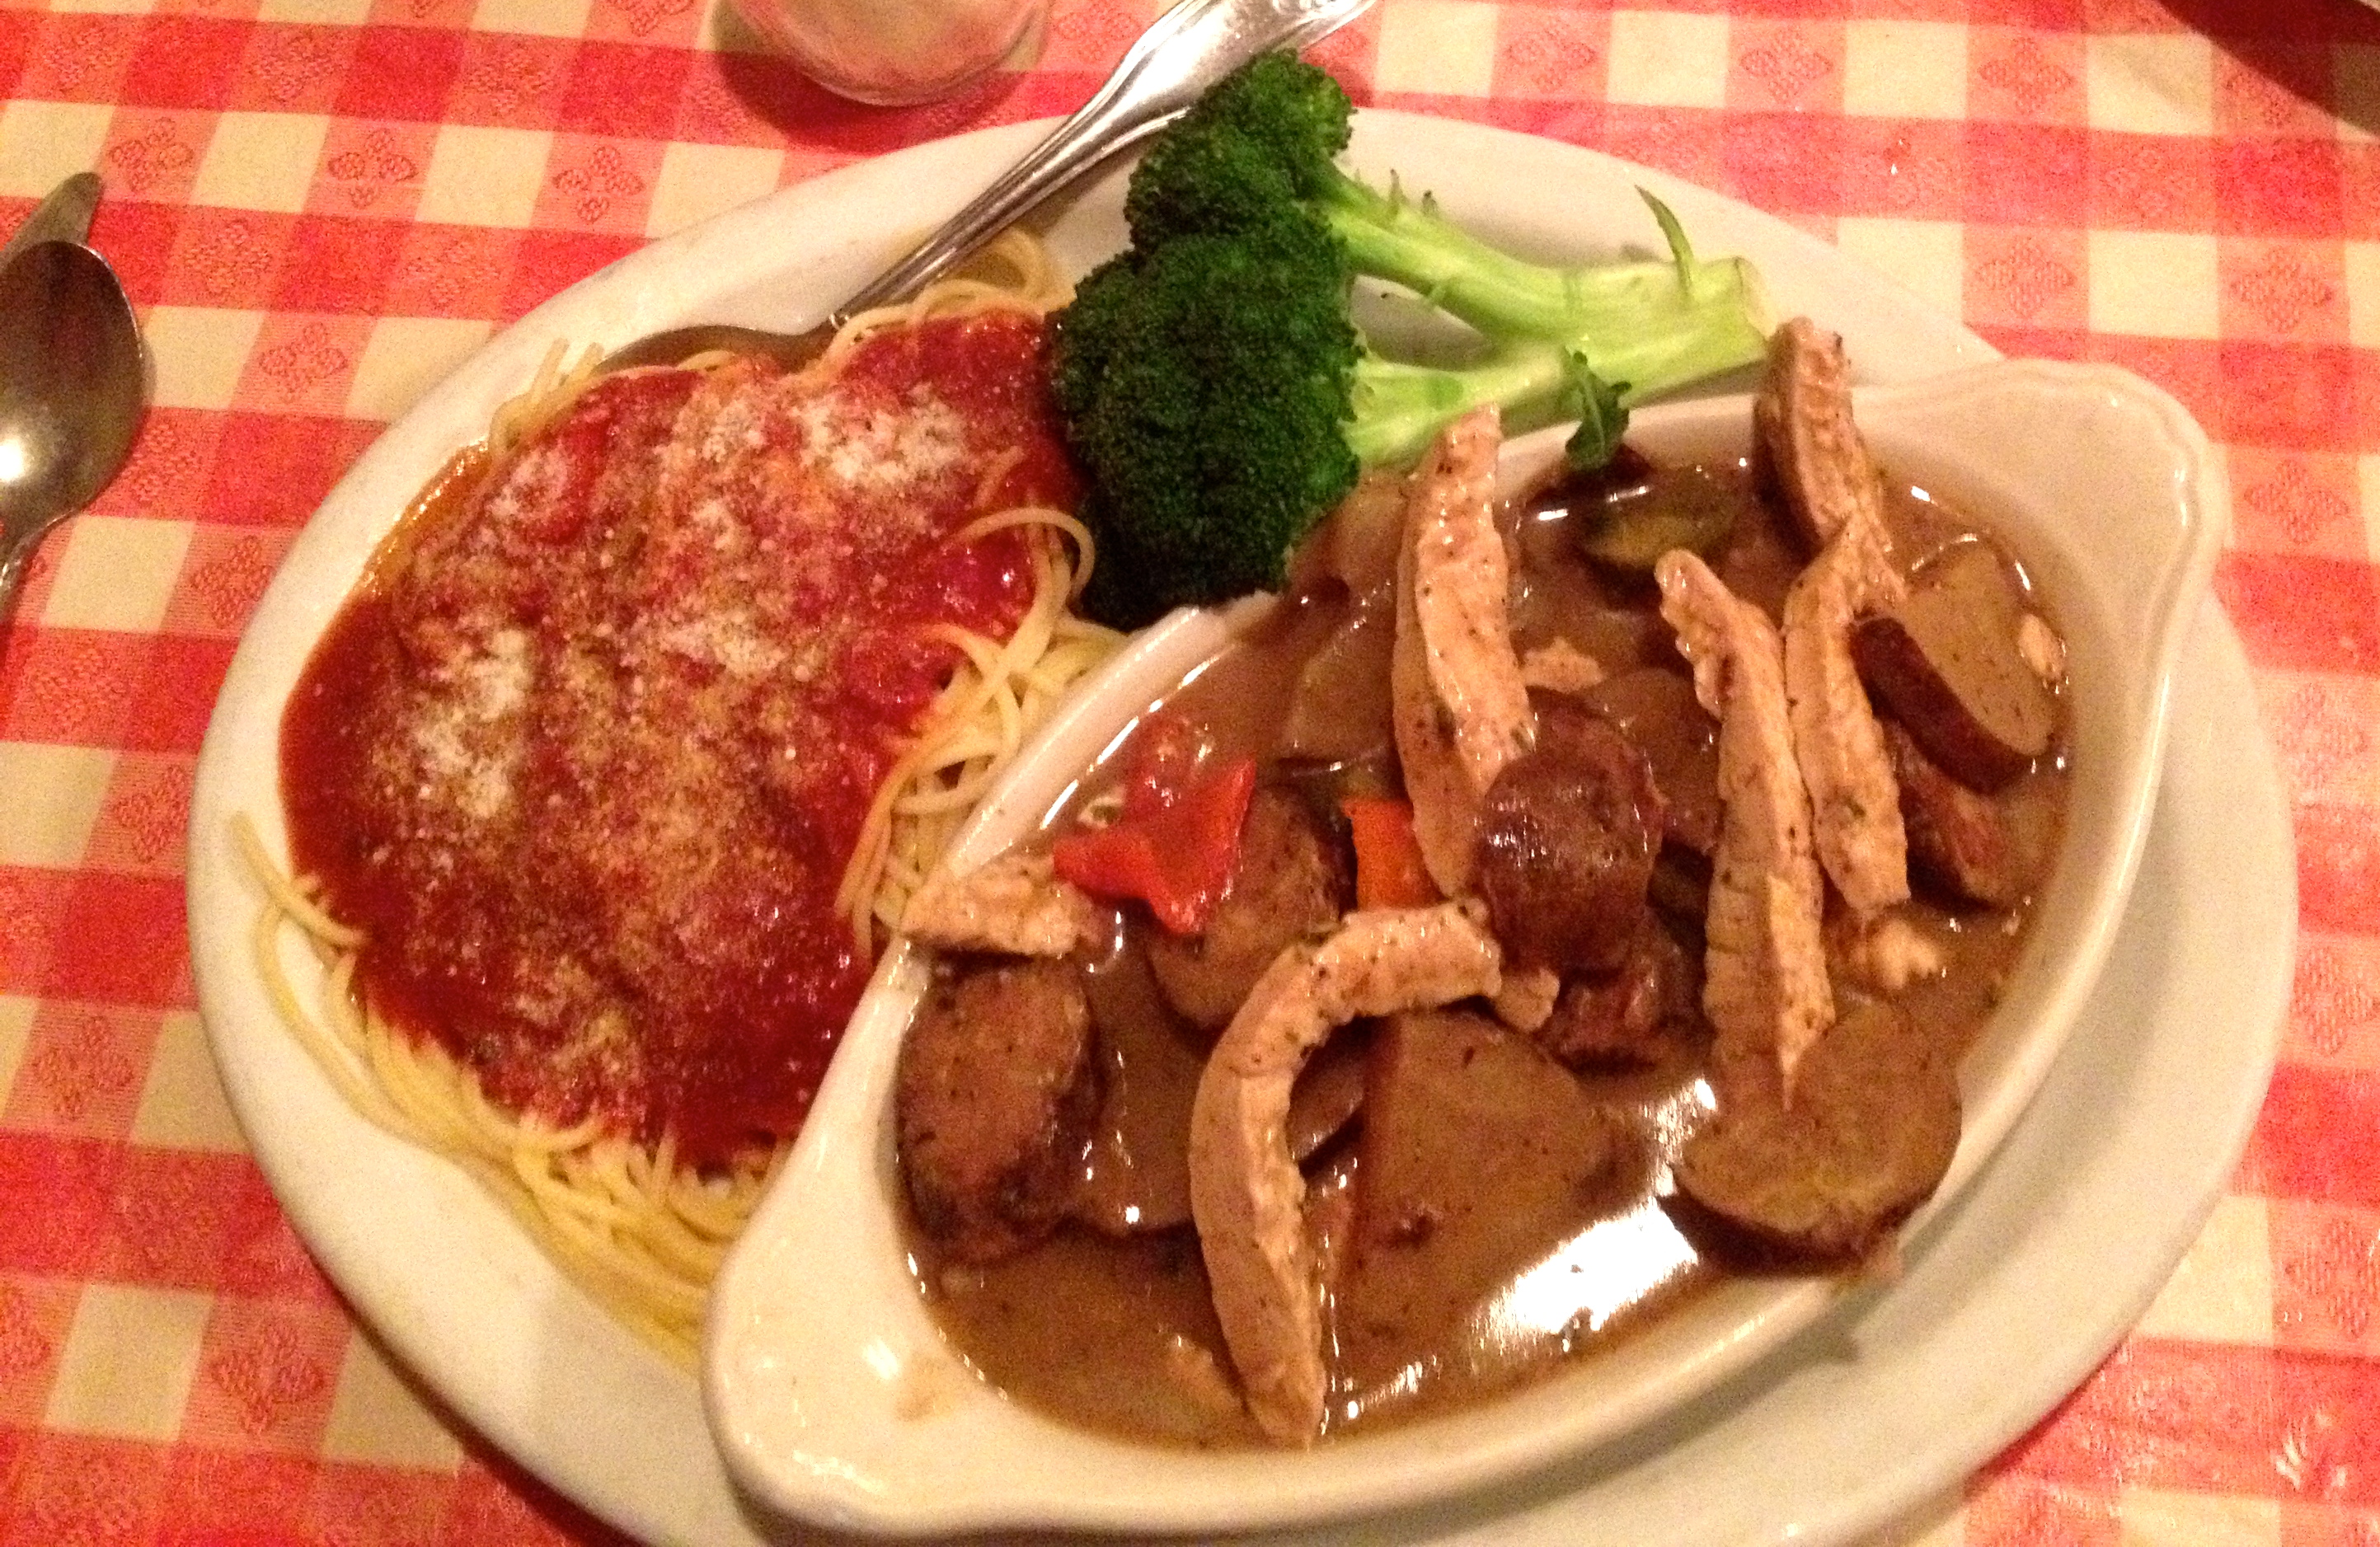
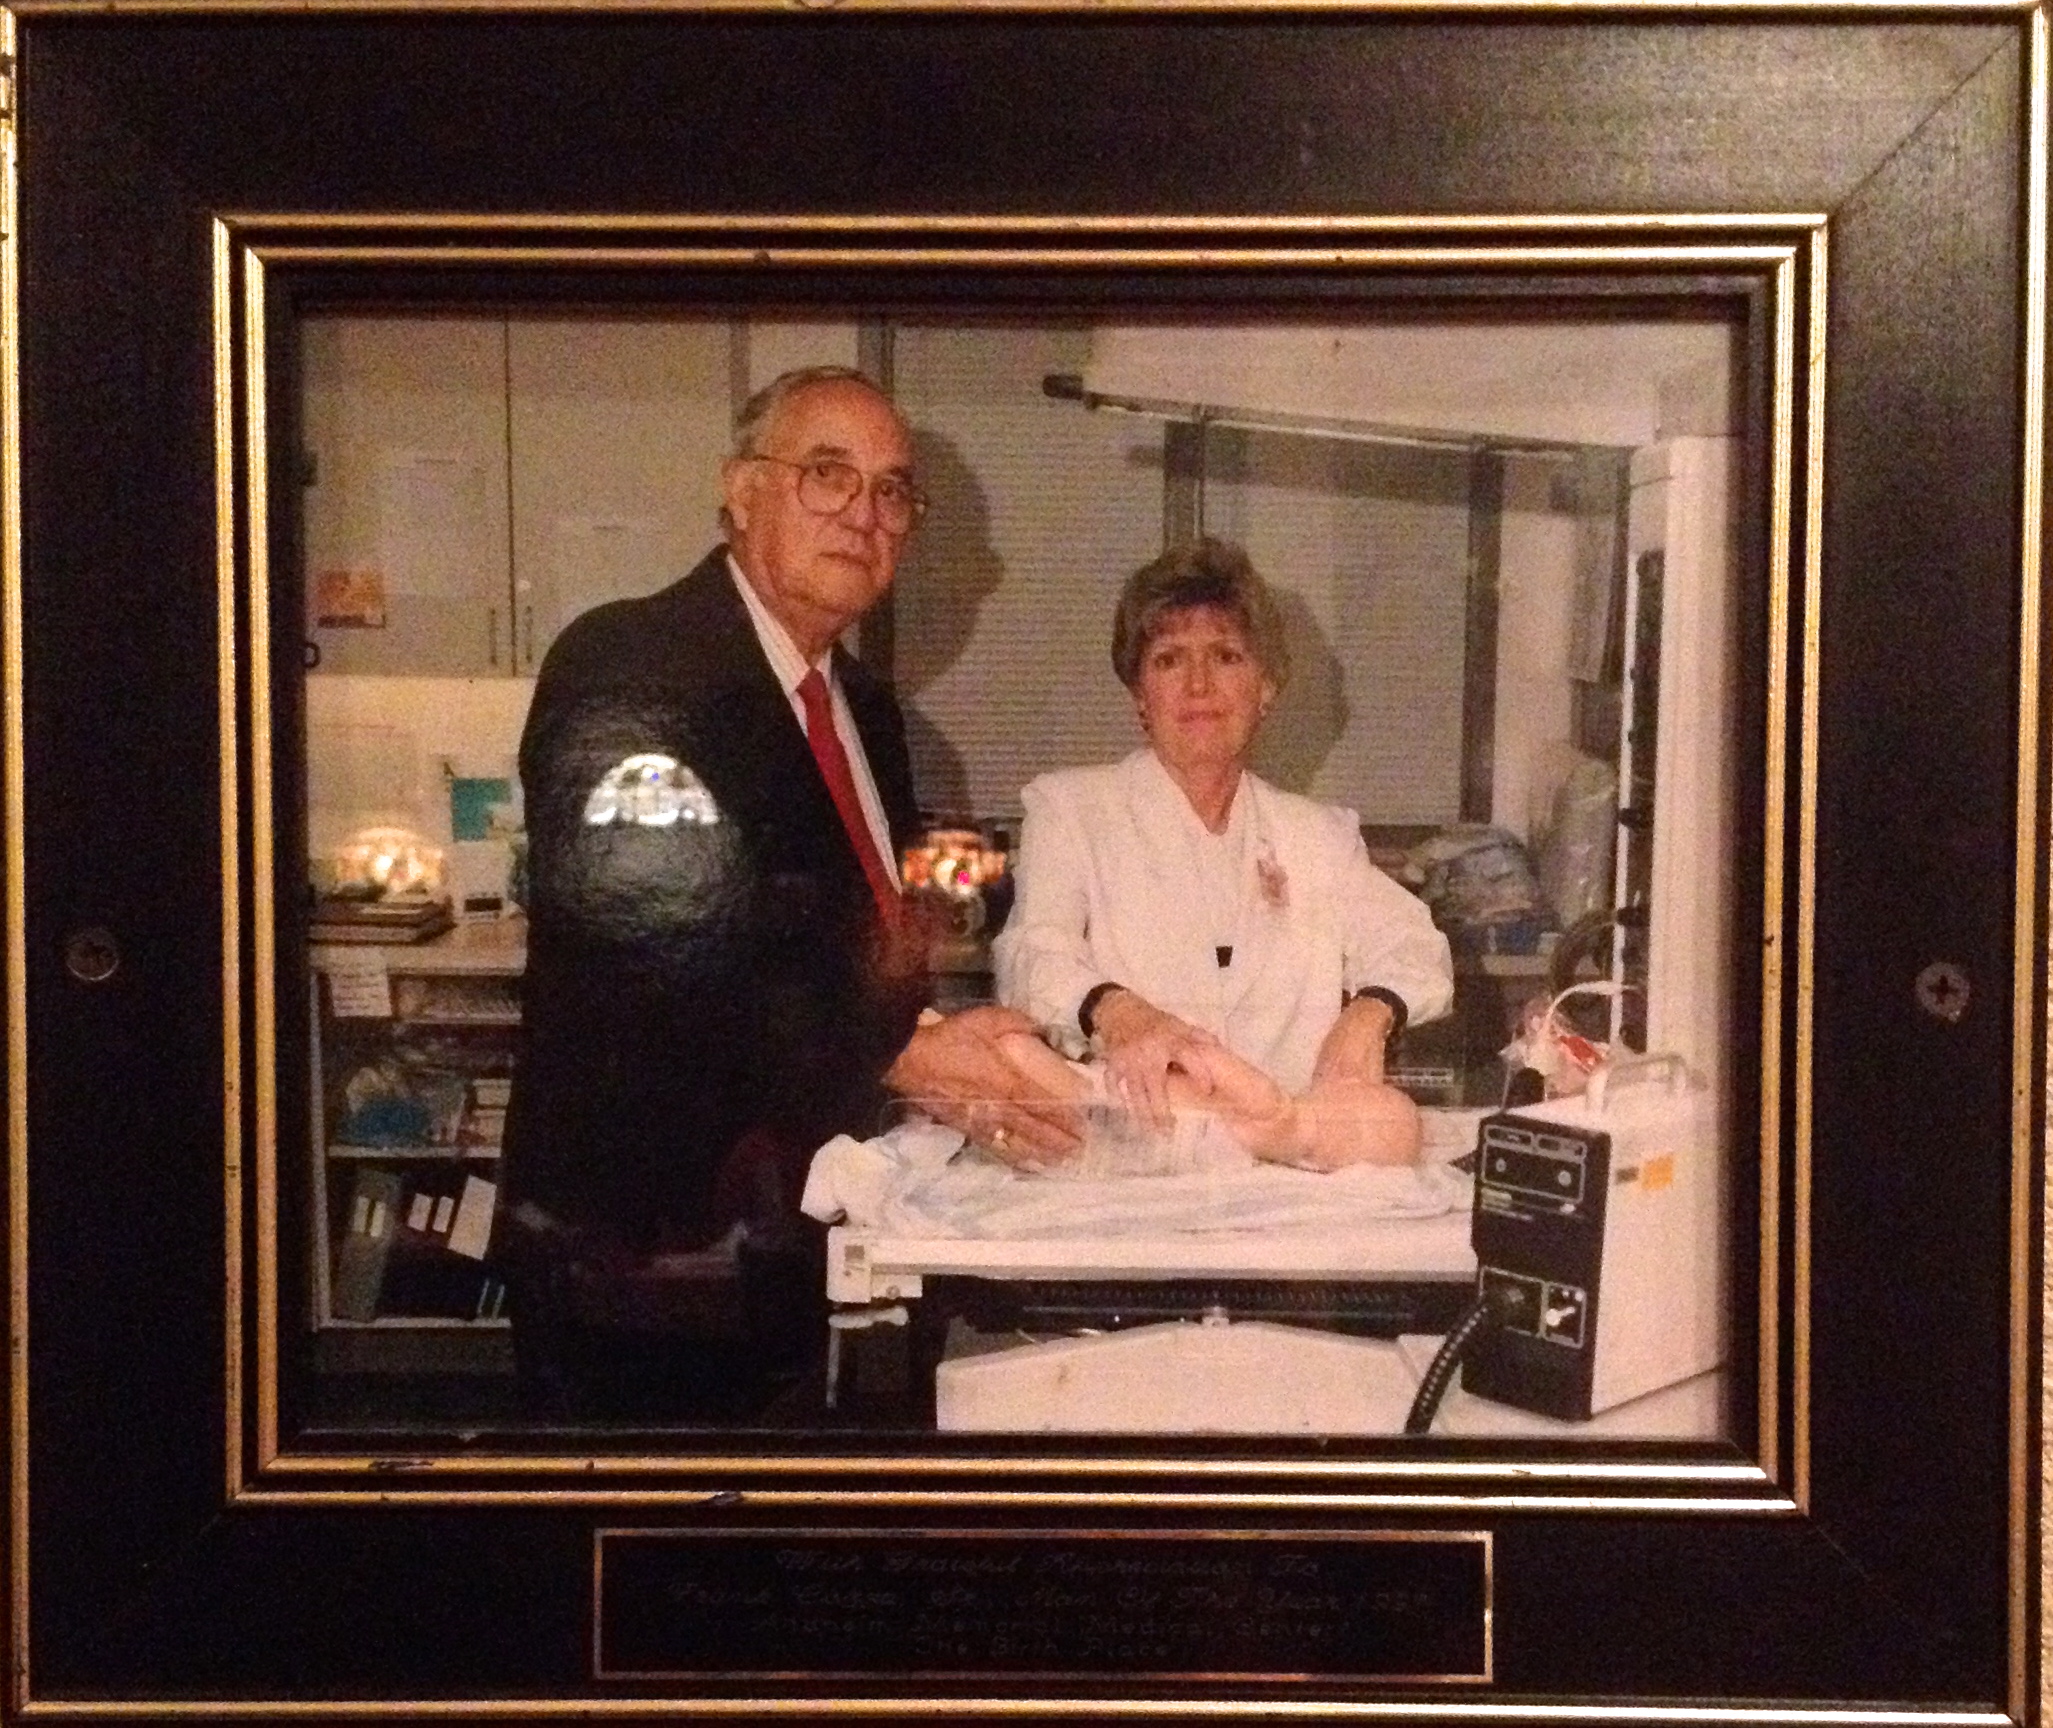
Then, we went to a little restaurant called Mama Cozza’s. Let’s just say Guy Fieri from the Food Network visited twice for his show Diners, Drive-ins, and Dives and loved it both times. Yeah, it’s that good. And I got to meet the original owner! To start you off, they give you little crunchy breadsticks and a veggie platter, and then they bring out your (probably huge) meal. Mine came with soup and a salad, just in case I was feeling peckish after my whole meal and a side of pasta. Then, they finish you off with a shot of anisette, which is a licorice flavored liqueur.
Story time: I’m a wimp when it comes to spicy food, and Guy Fieri is not. And when I saw the menu items he had recommended, I forgot that they’d probably be spicy. So of course I ordered the spiciest thing on the menu- sausage, potatoes, and chicken in a jalapeño sausage gravy. Delicious, but I could only take about 4 bites. And then when I tried to eat the leftovers, the spice had, let’s say, matured. My lips were on FIRE! However, it was worth it. The food is absolutely delicious, and their bread is to die for! Below are pictures of Guy Fieri’s visit, the bread, my dish, and the original owner and his wife with their newborn son (the current owner).

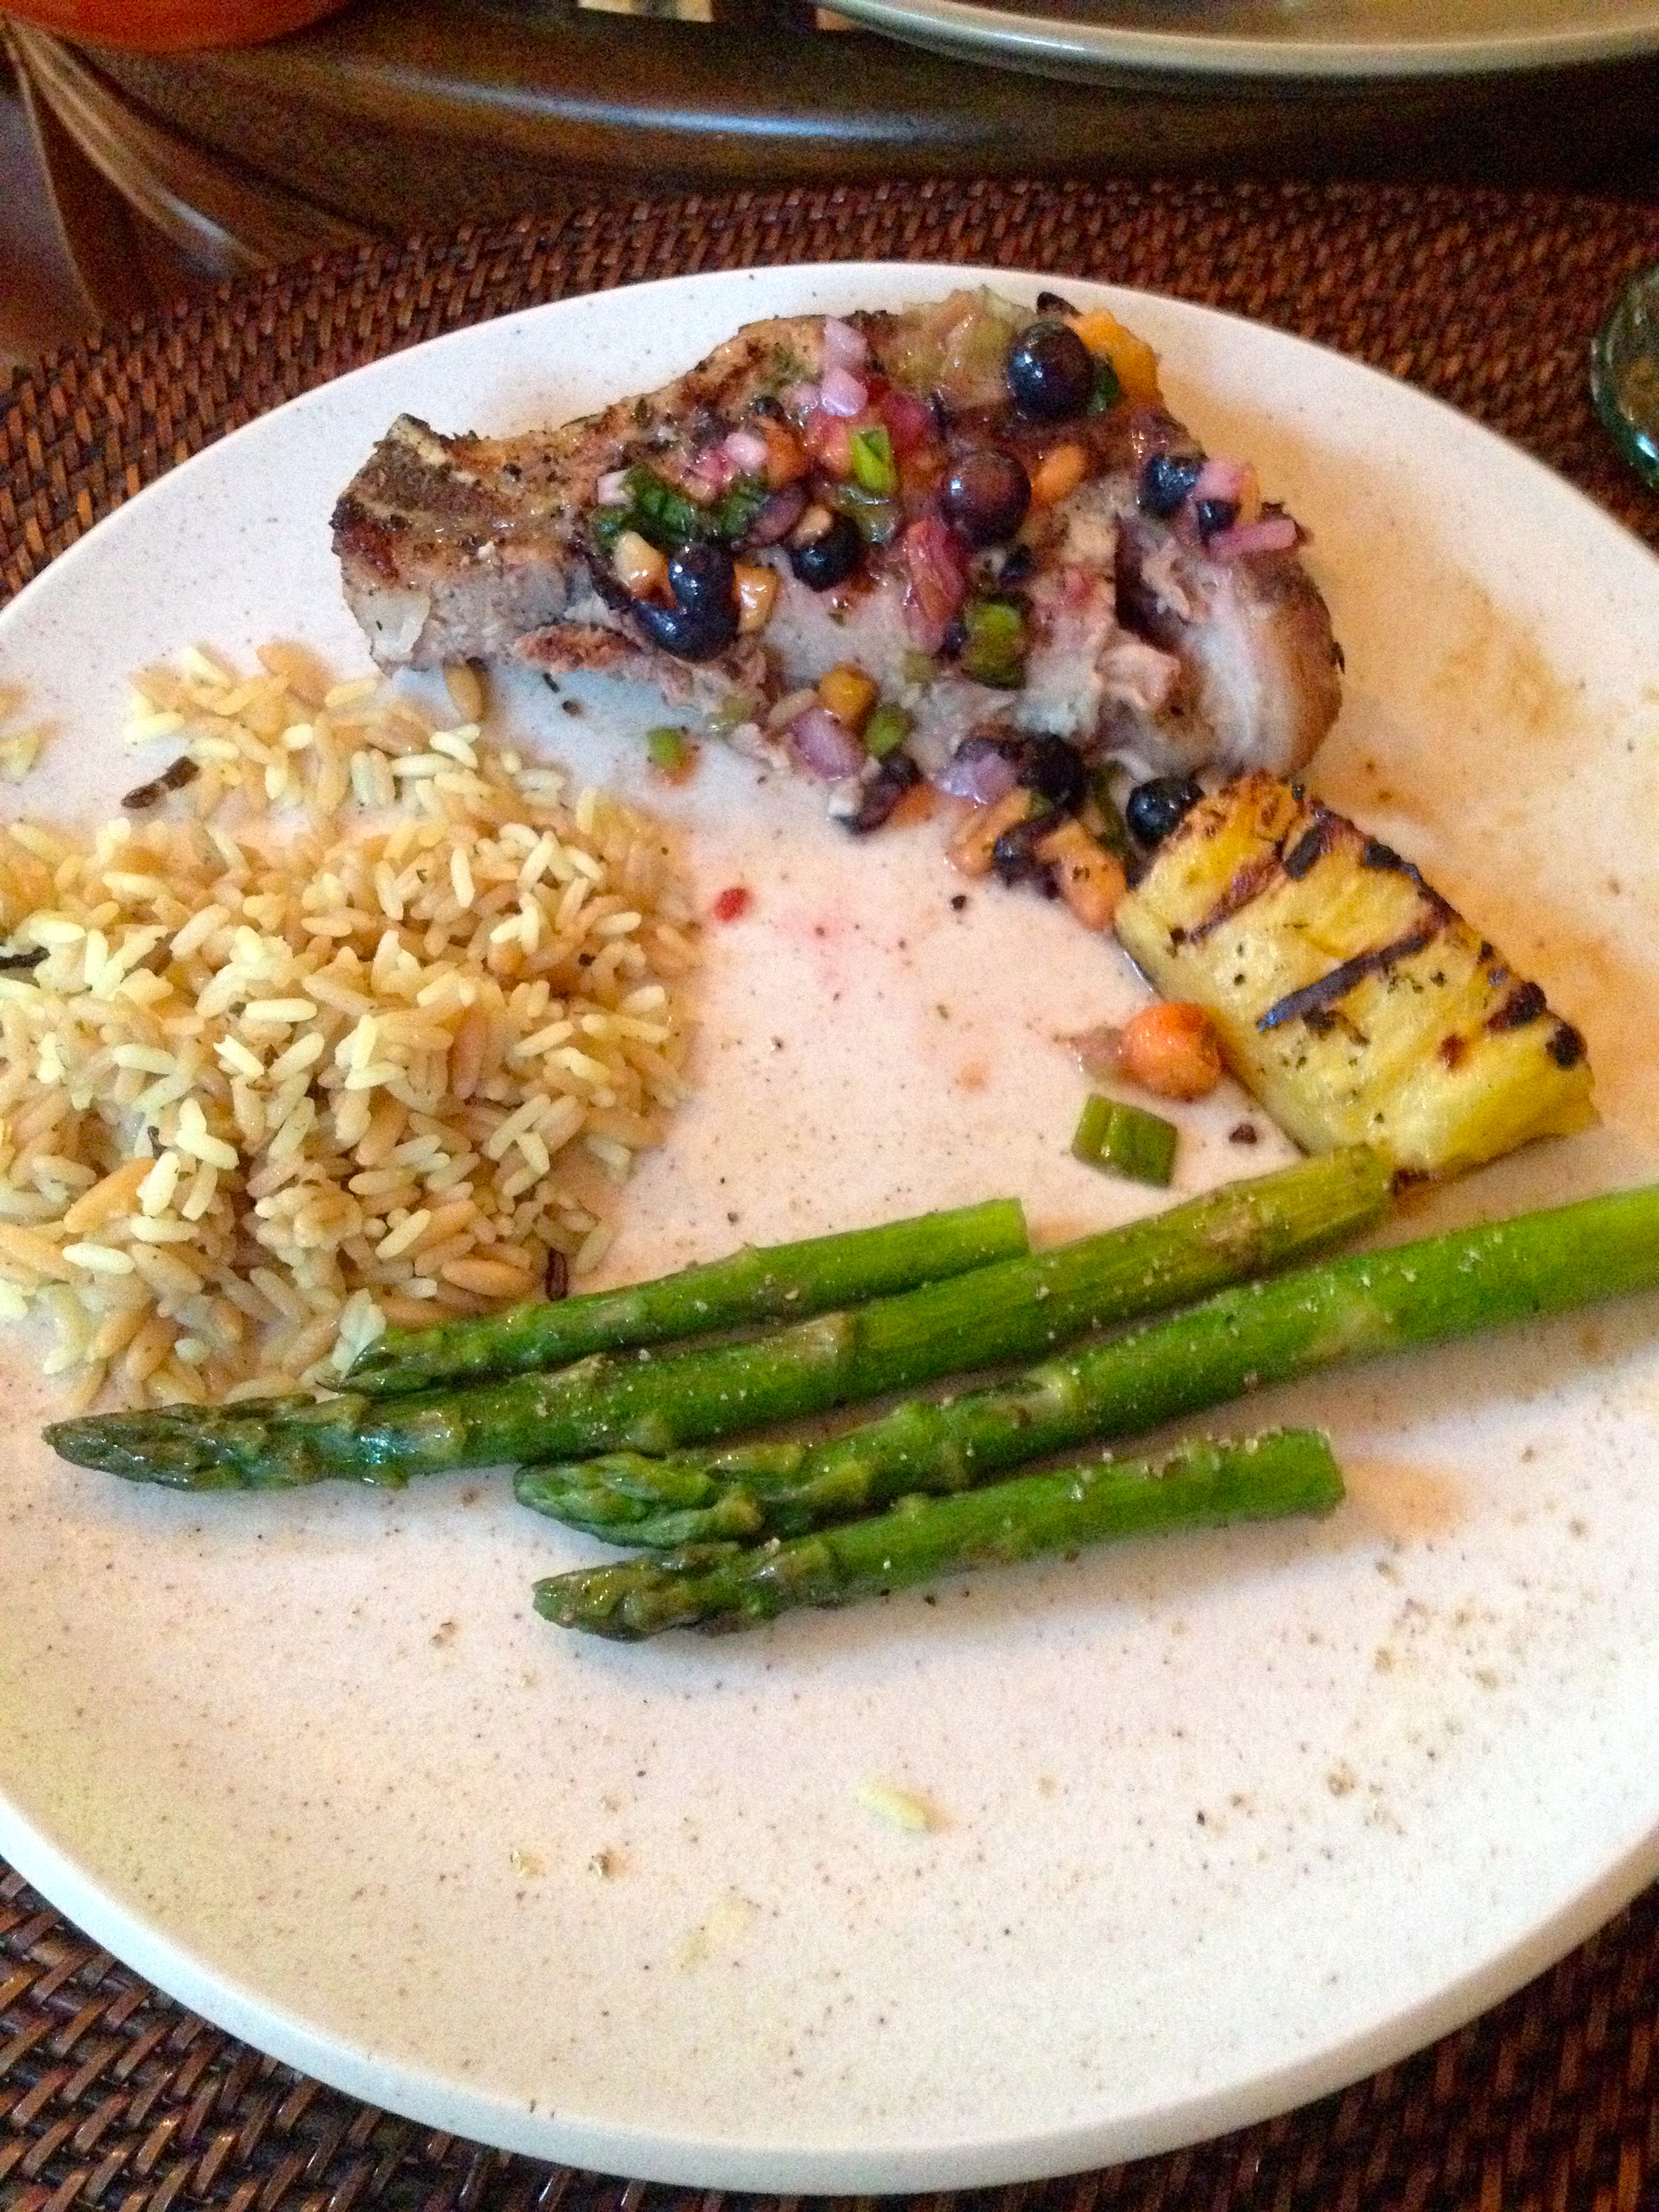
Now came my time in the kitchen. My aunt, who I was with, is a great cook and loves trying new recipes. This one was a pork chop with a blueberry-peach salsa. For sides, we made wild rice pilaf, grilled pineapple, and roasted asparagus. YUM!
If I remember correctly, the salsa had blueberries, peaches, lime juice, basil, shallots, scallions, and olive oil. It was delicious just by itself! But then put over the tender pork chops, it was incredible.
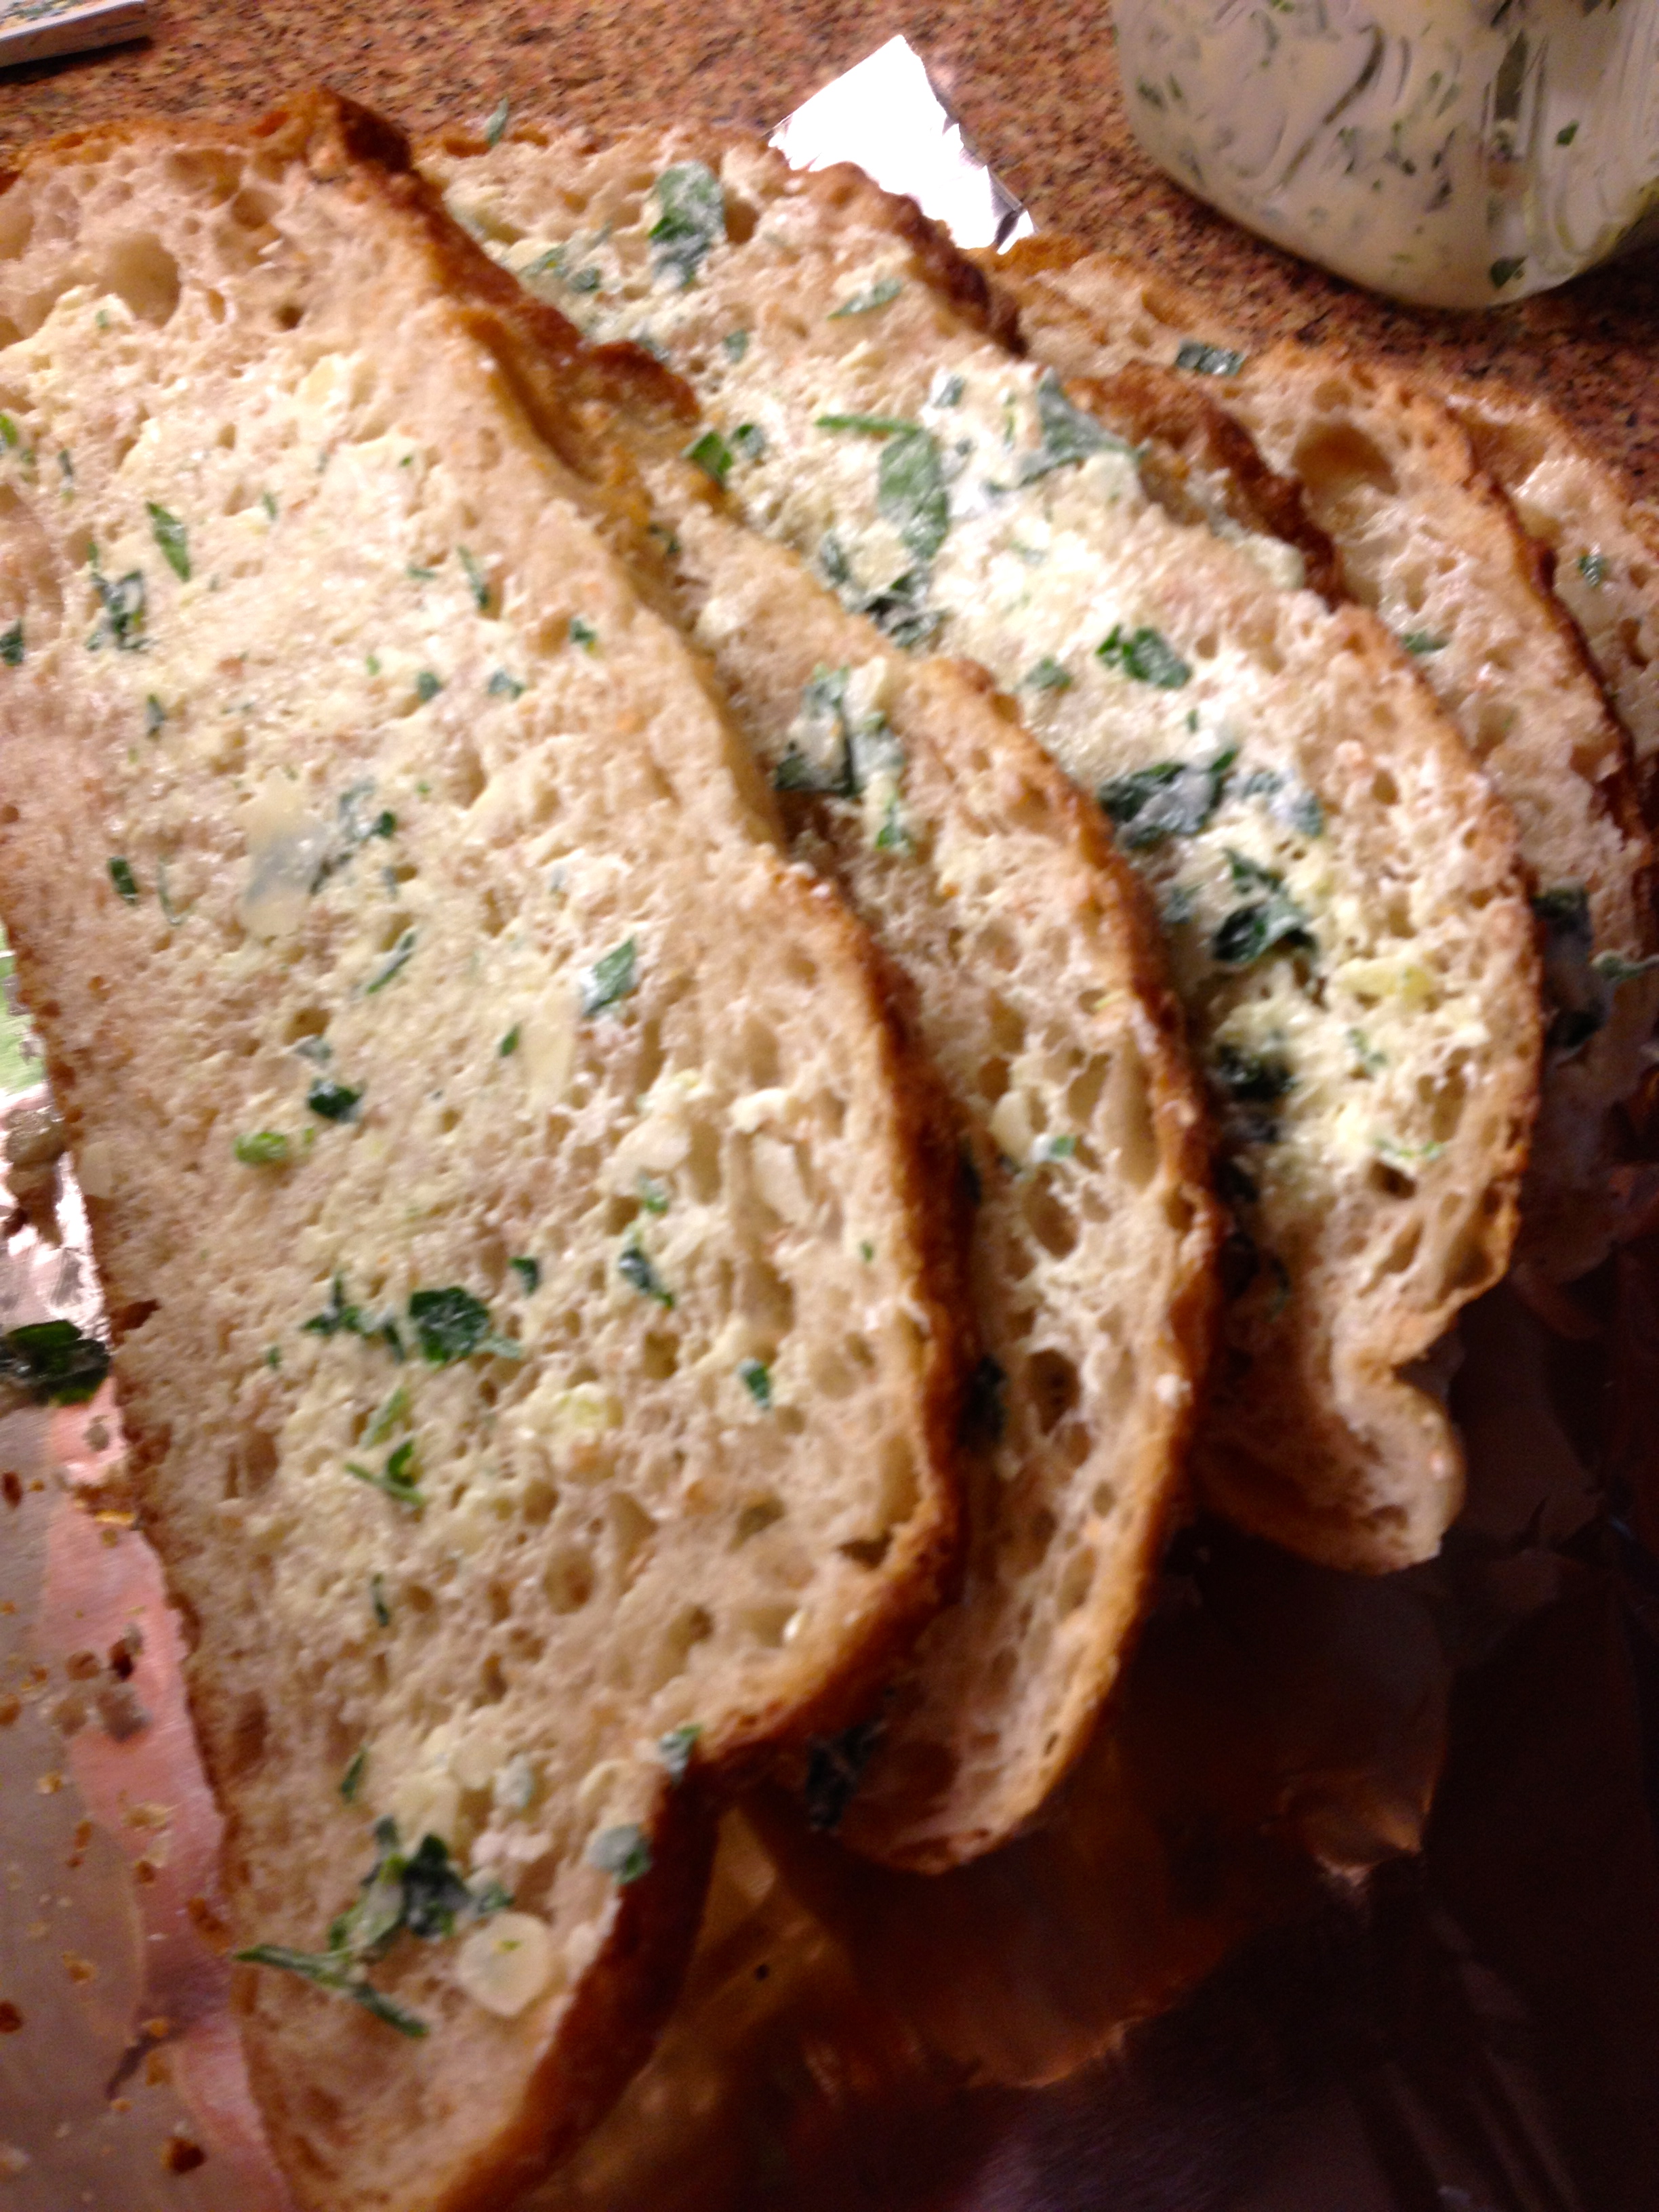
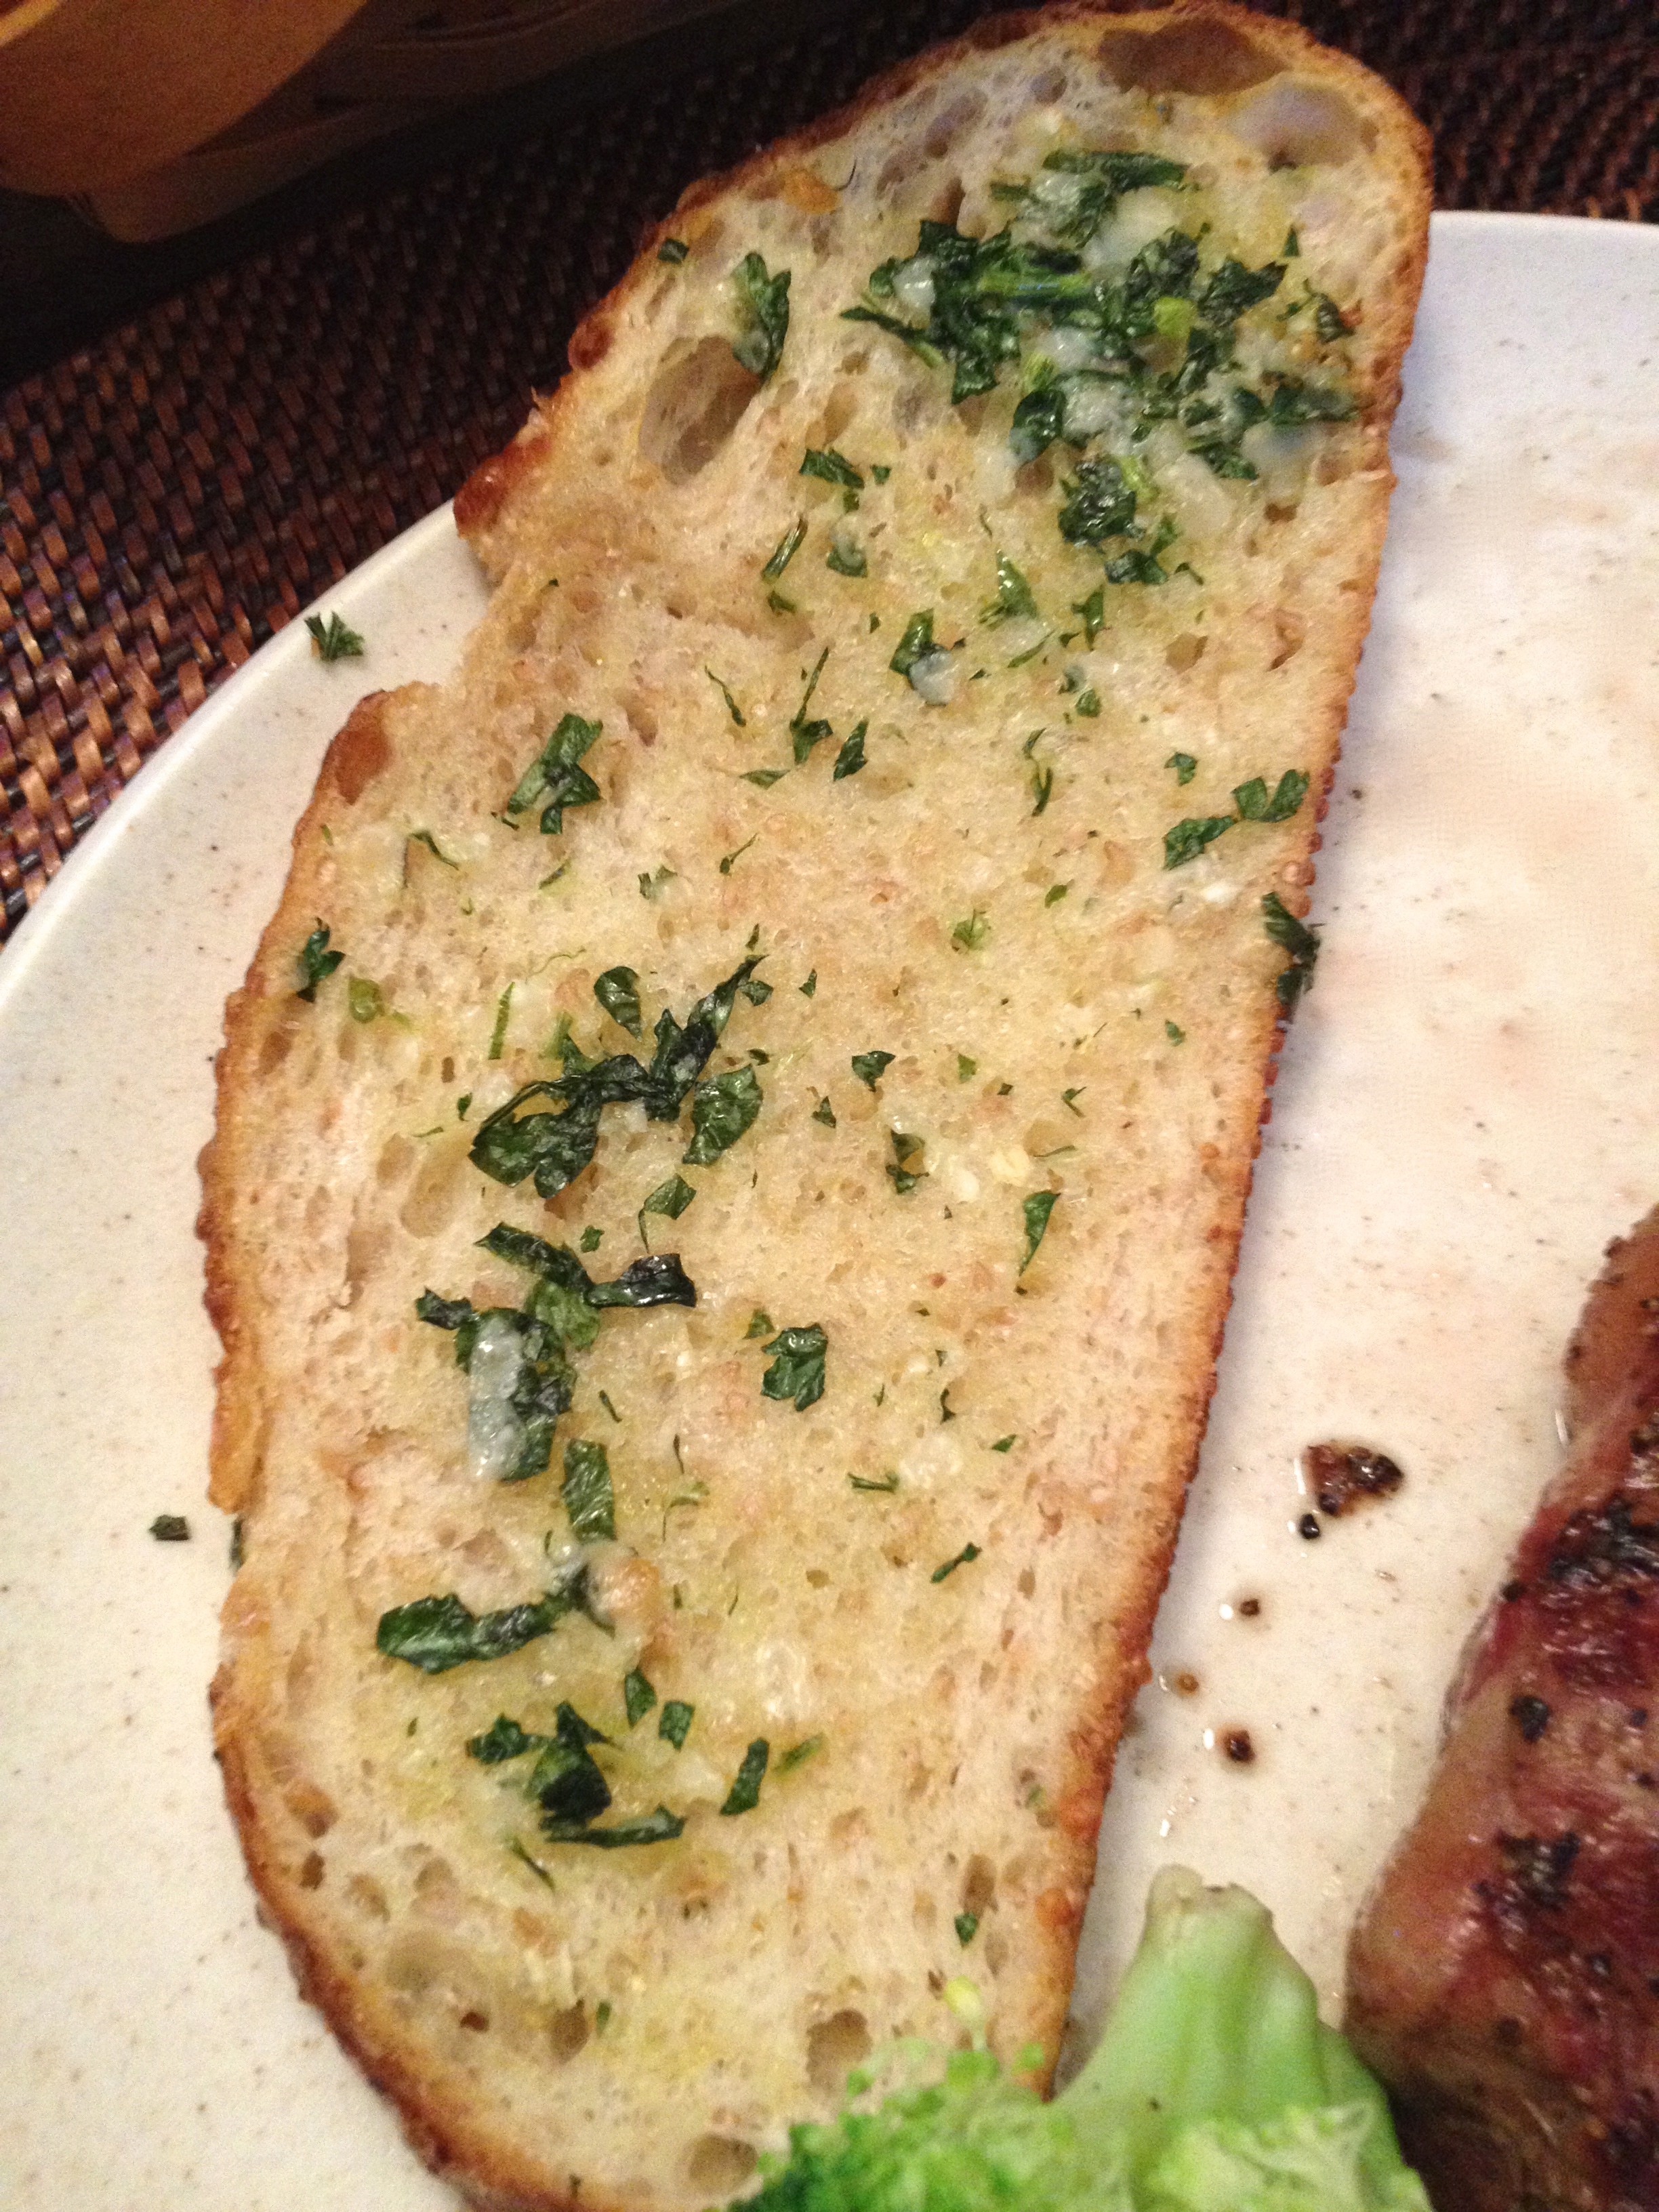
Our next dish was grilled rib-eye steak with Montreal seasoning, garlic Parmesan bread, and steamed broccoli. The bread was my personal creation, so I’ll share the recipe with you!
Ingredients:
- Sourdough wheat bread, sliced (Or just plain sourdough bread)
- 1 stick softened butter or margarine
- 3 cloves fresh minced garlic
- Parmesan cheese to taste
- 4 Tbsp minced fresh flat-leaf parsley (my aunt had this in her garden, so I used it, but it’s not entirely necessary if you don’t have it)
Mix the butter, garlic, Parmesan, and parsley together in a small mixing bowl. Spread the butter mixture in a thin layer on both sides of every slice of bread. Then, right before dinner, set your oven to broil and put the slices of bread on a cookie sheet. Put the cookie sheet right under the broiler, and just let the bread toast until it’s golden brown and crunchy.
This bread has a terrific savory flavor, and goes great with any dinner. We had it with our lasagna the next night, and it was just as good as with the steak!
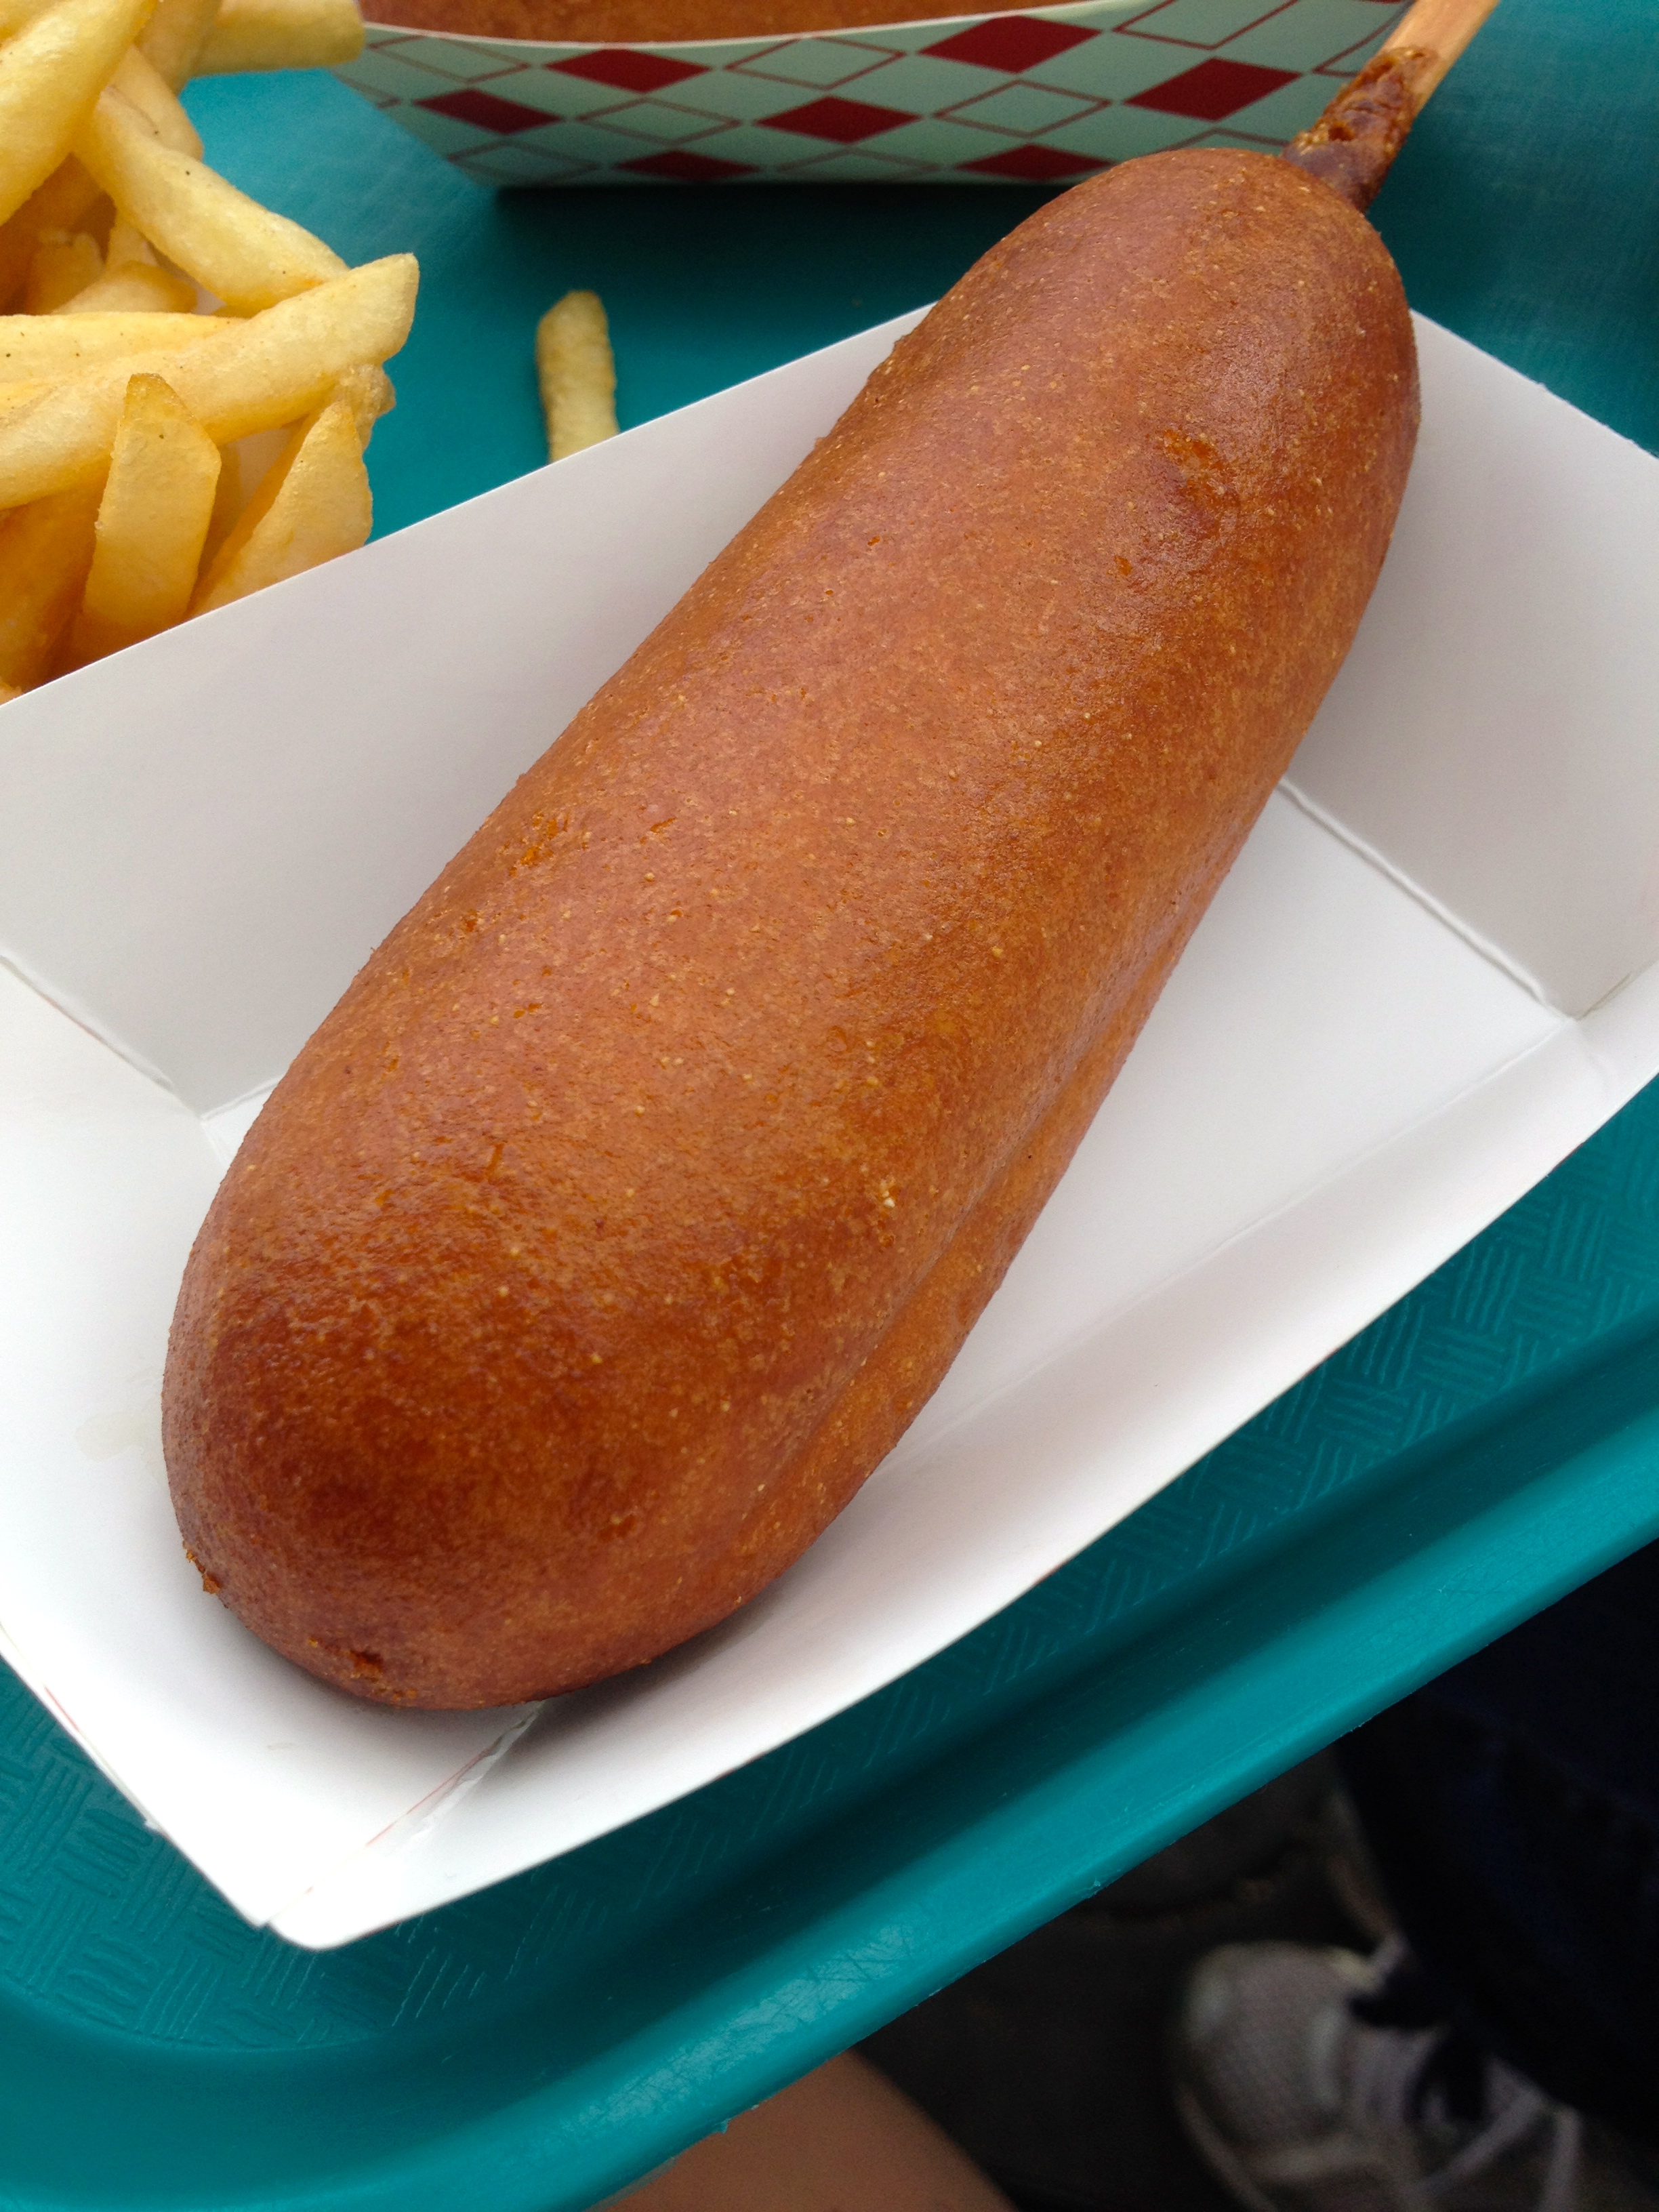
The final stop was at Catalina Island, where I got a good old fashioned corn dog. While this isn’t anything of culinary genius, I just love a good corn dog!
Our food along this trip obviously wasn’t the main part of our vacation (although it was a fantastic part!). What really mattered was that we all were together and enjoyed each other’s company, and got to do a ton of fun things together! I hope you all get to have as much fun with your families as I did with mine.

The Red, White, and Blue Goods
Hi friends! I’m hoping everyone’s Fourth of July weekend was absolutely enjoyable. I know mine was! I spent mine with friends and family and went to the Boston Pops and Fireworks Spectacular, as well as a Boston Red Sox game! I also did a bit of baking, with a patriotic theme to it.
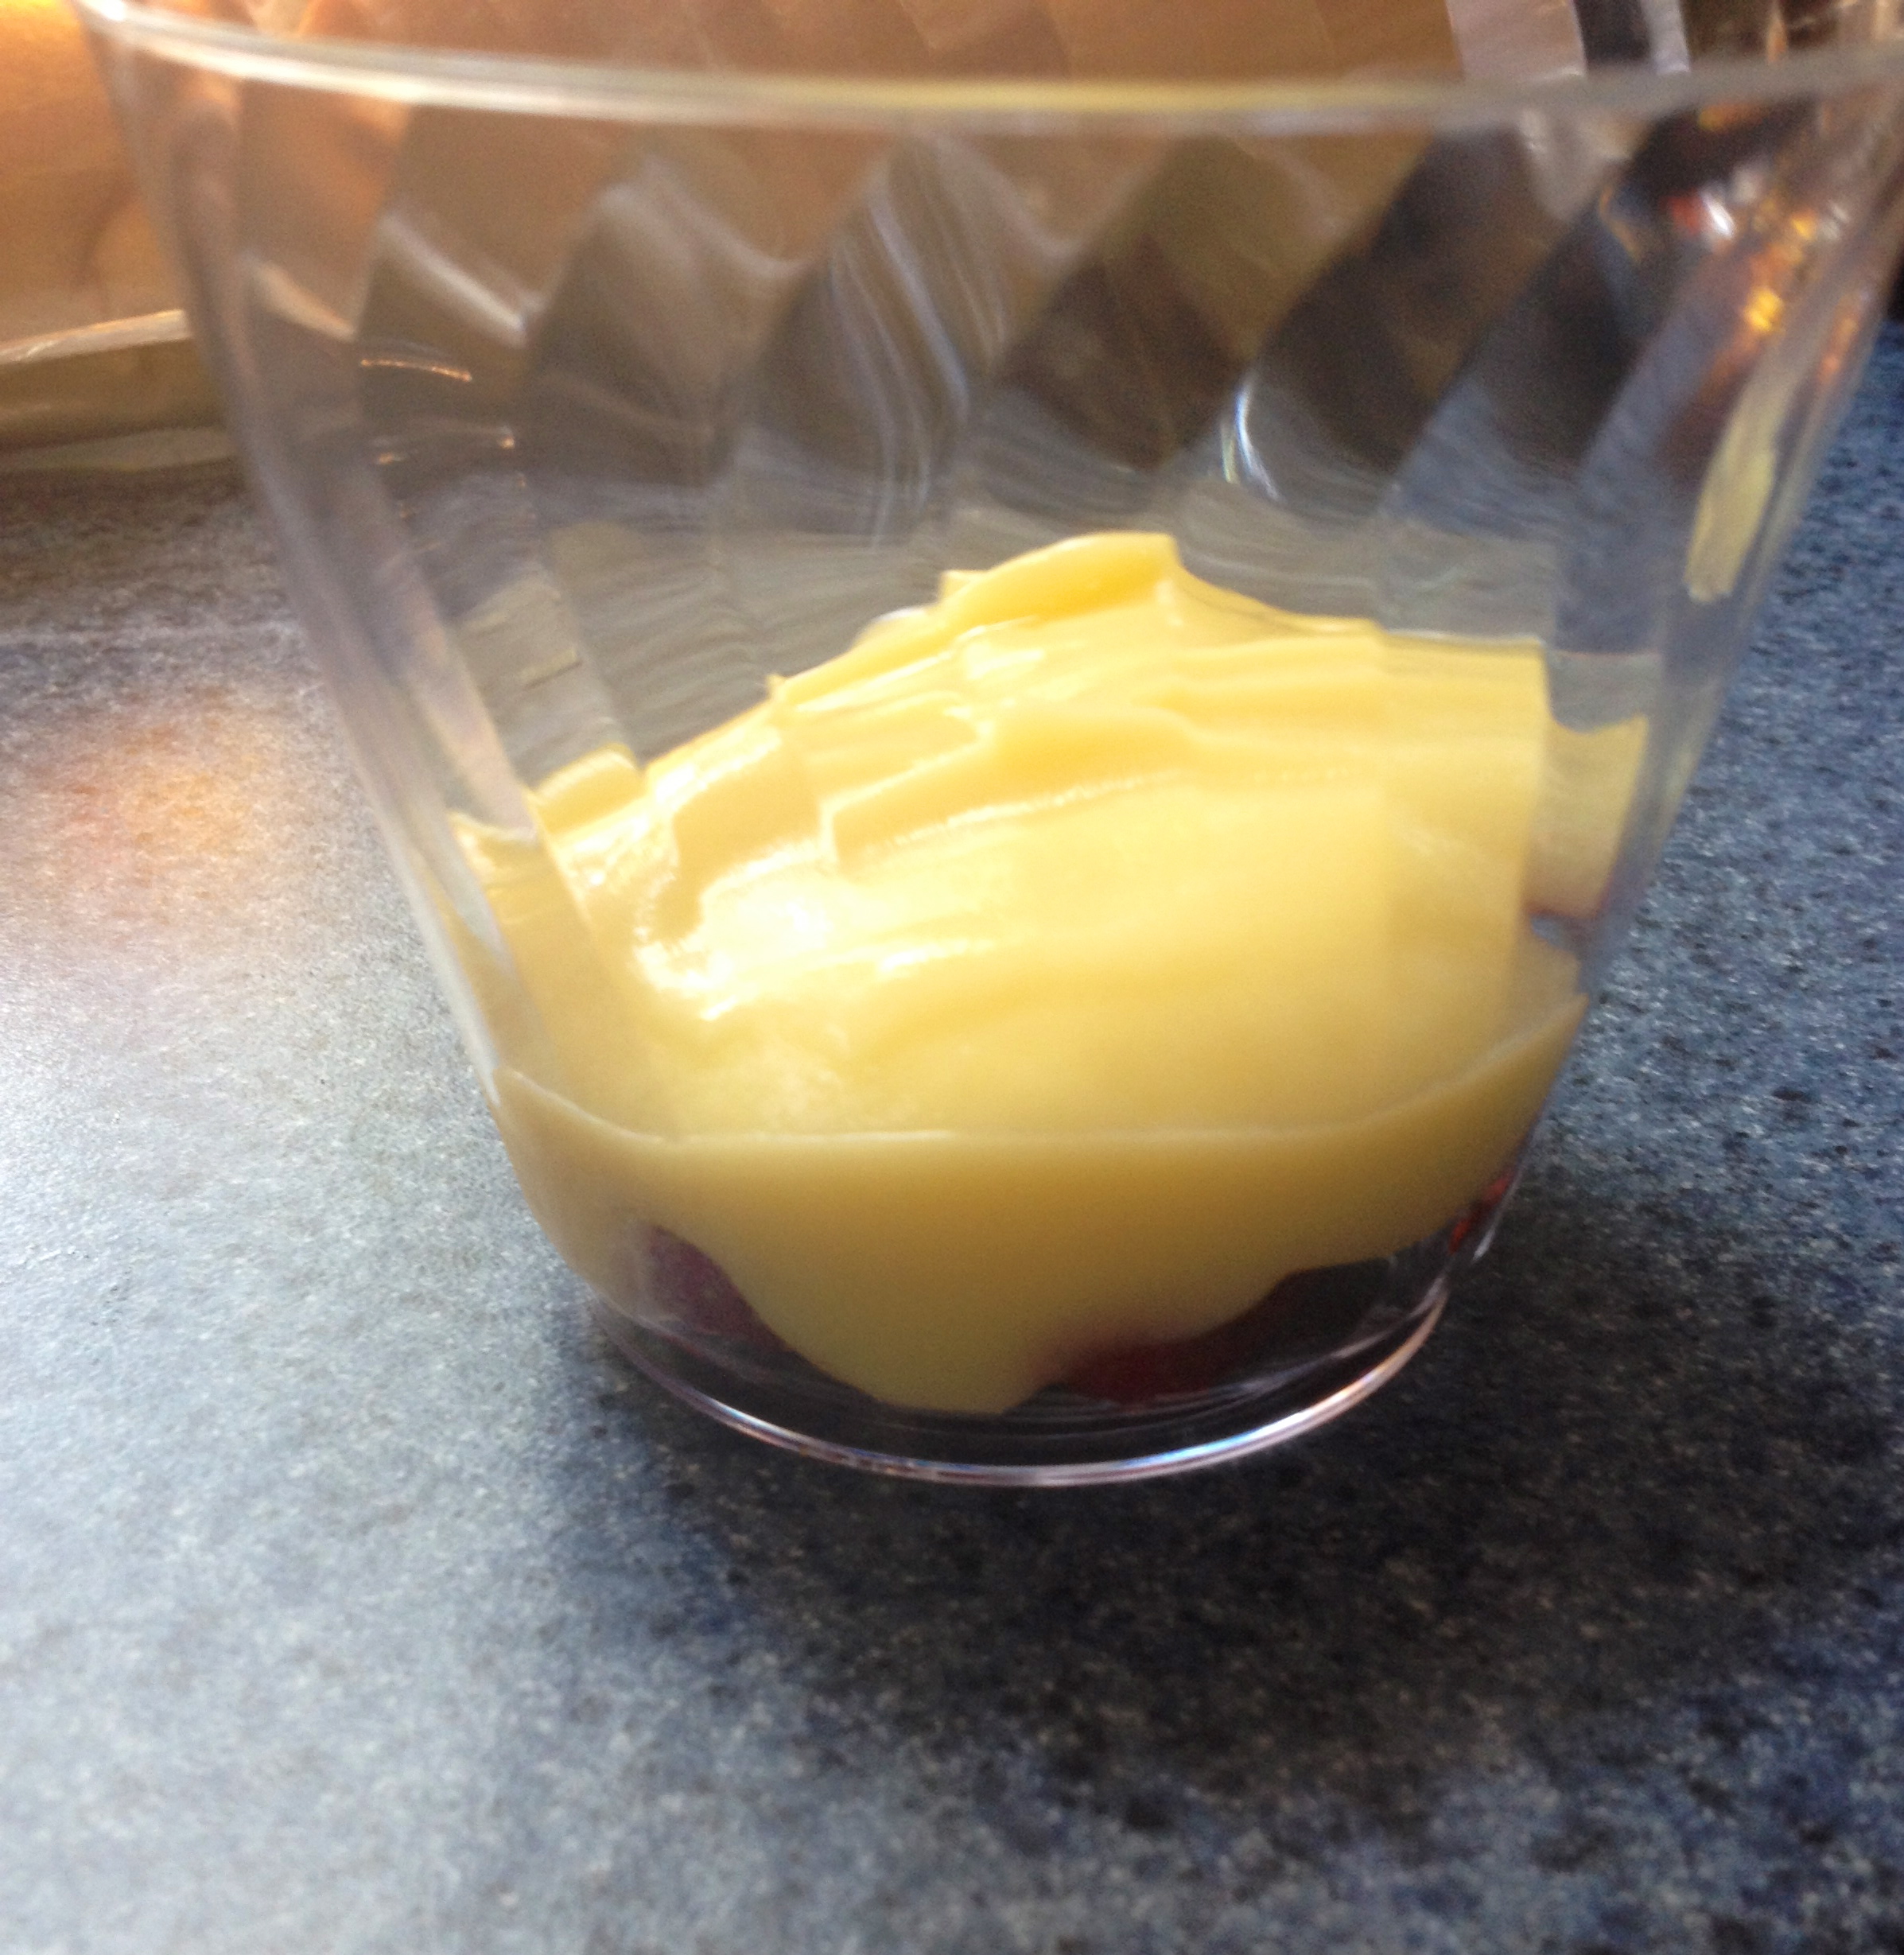
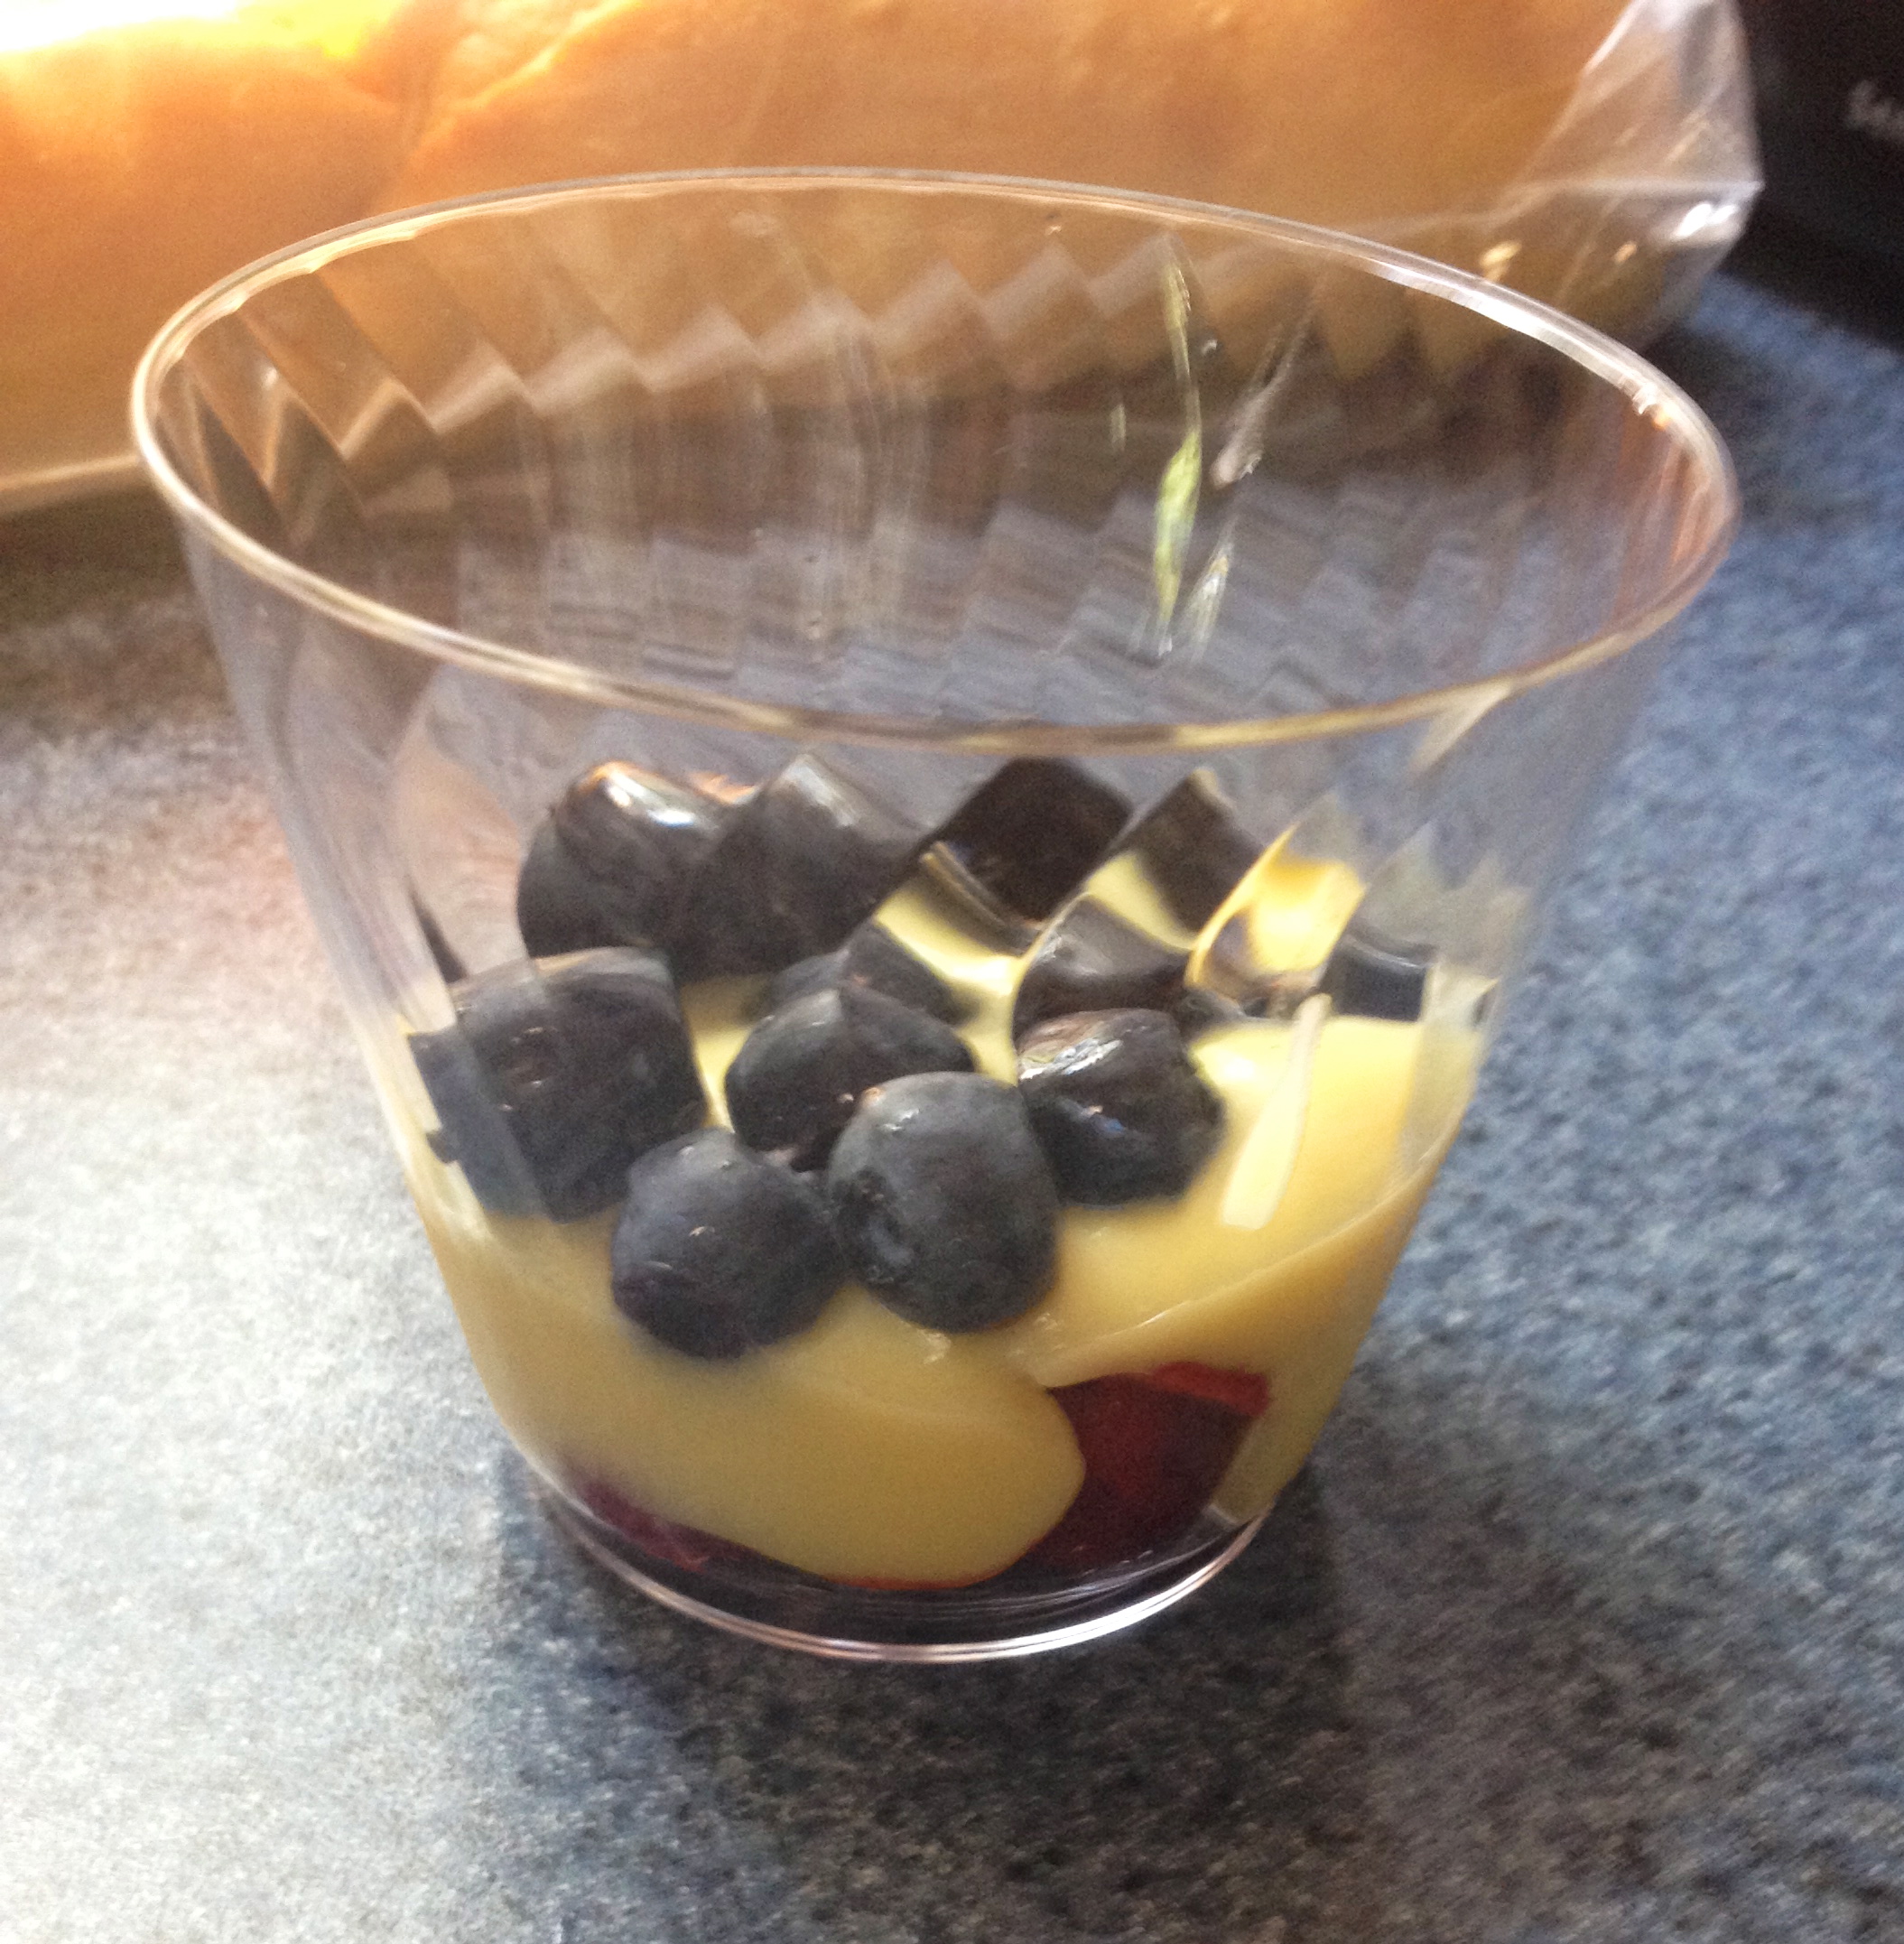
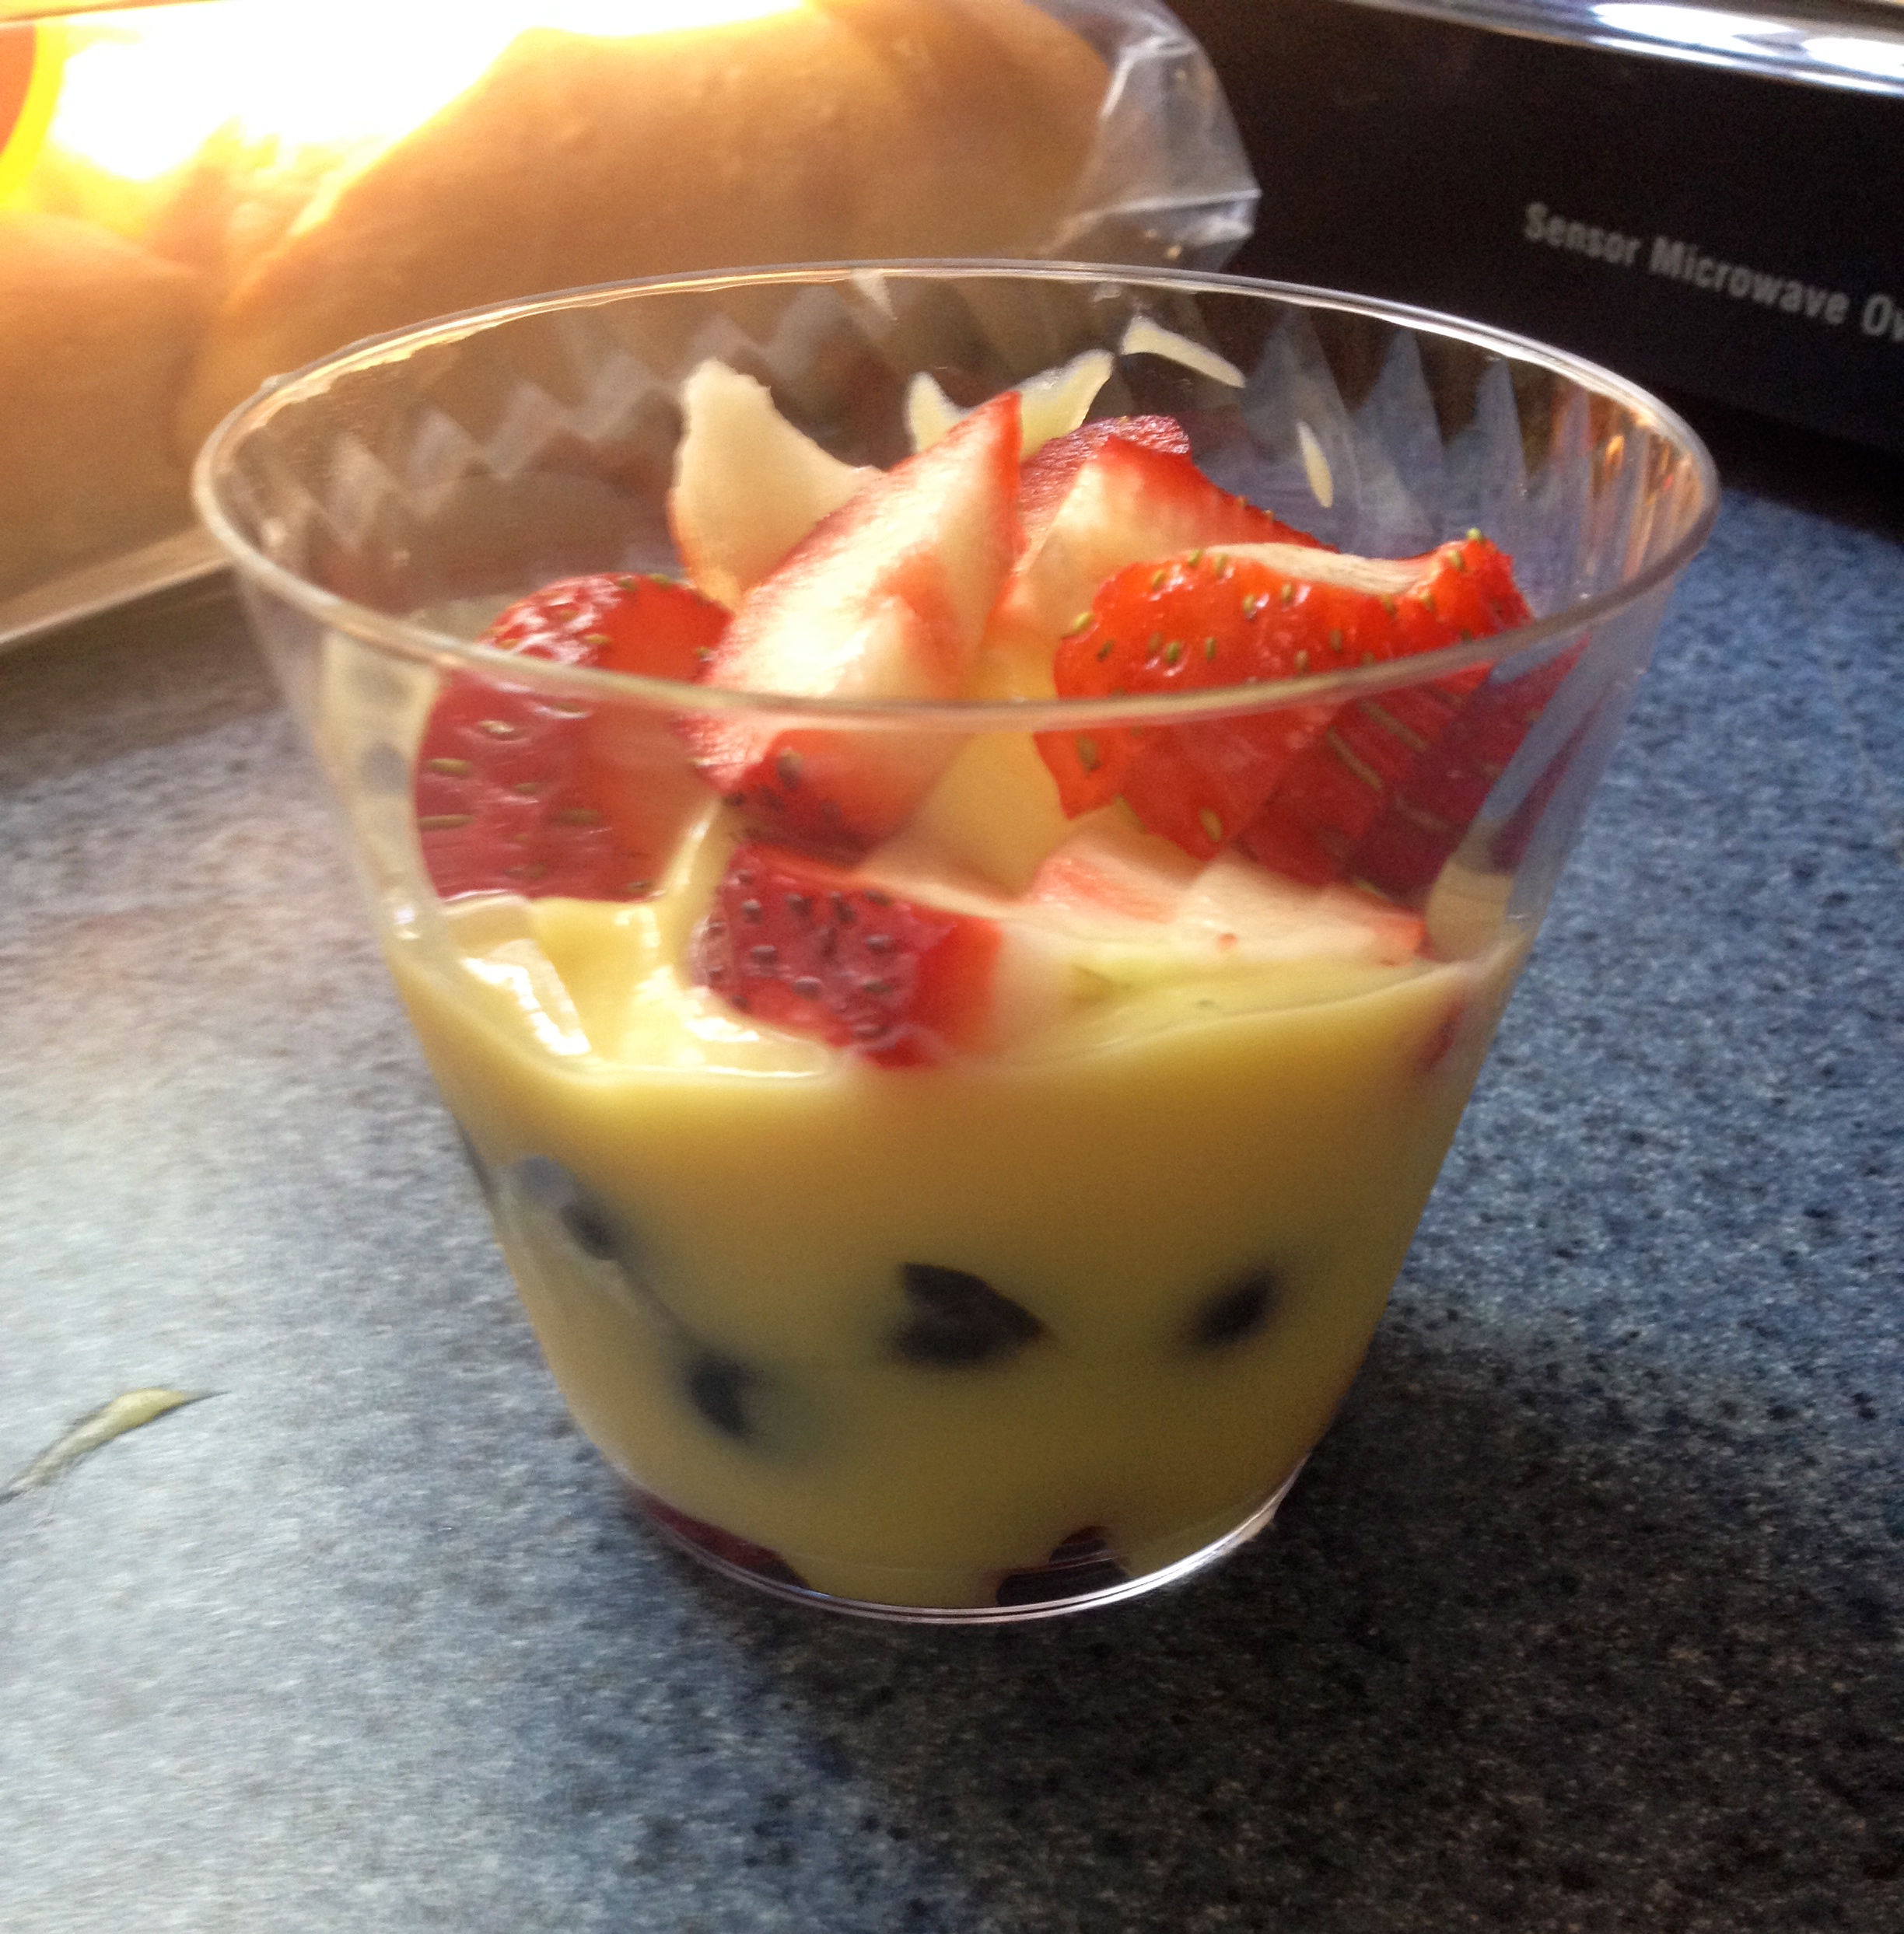
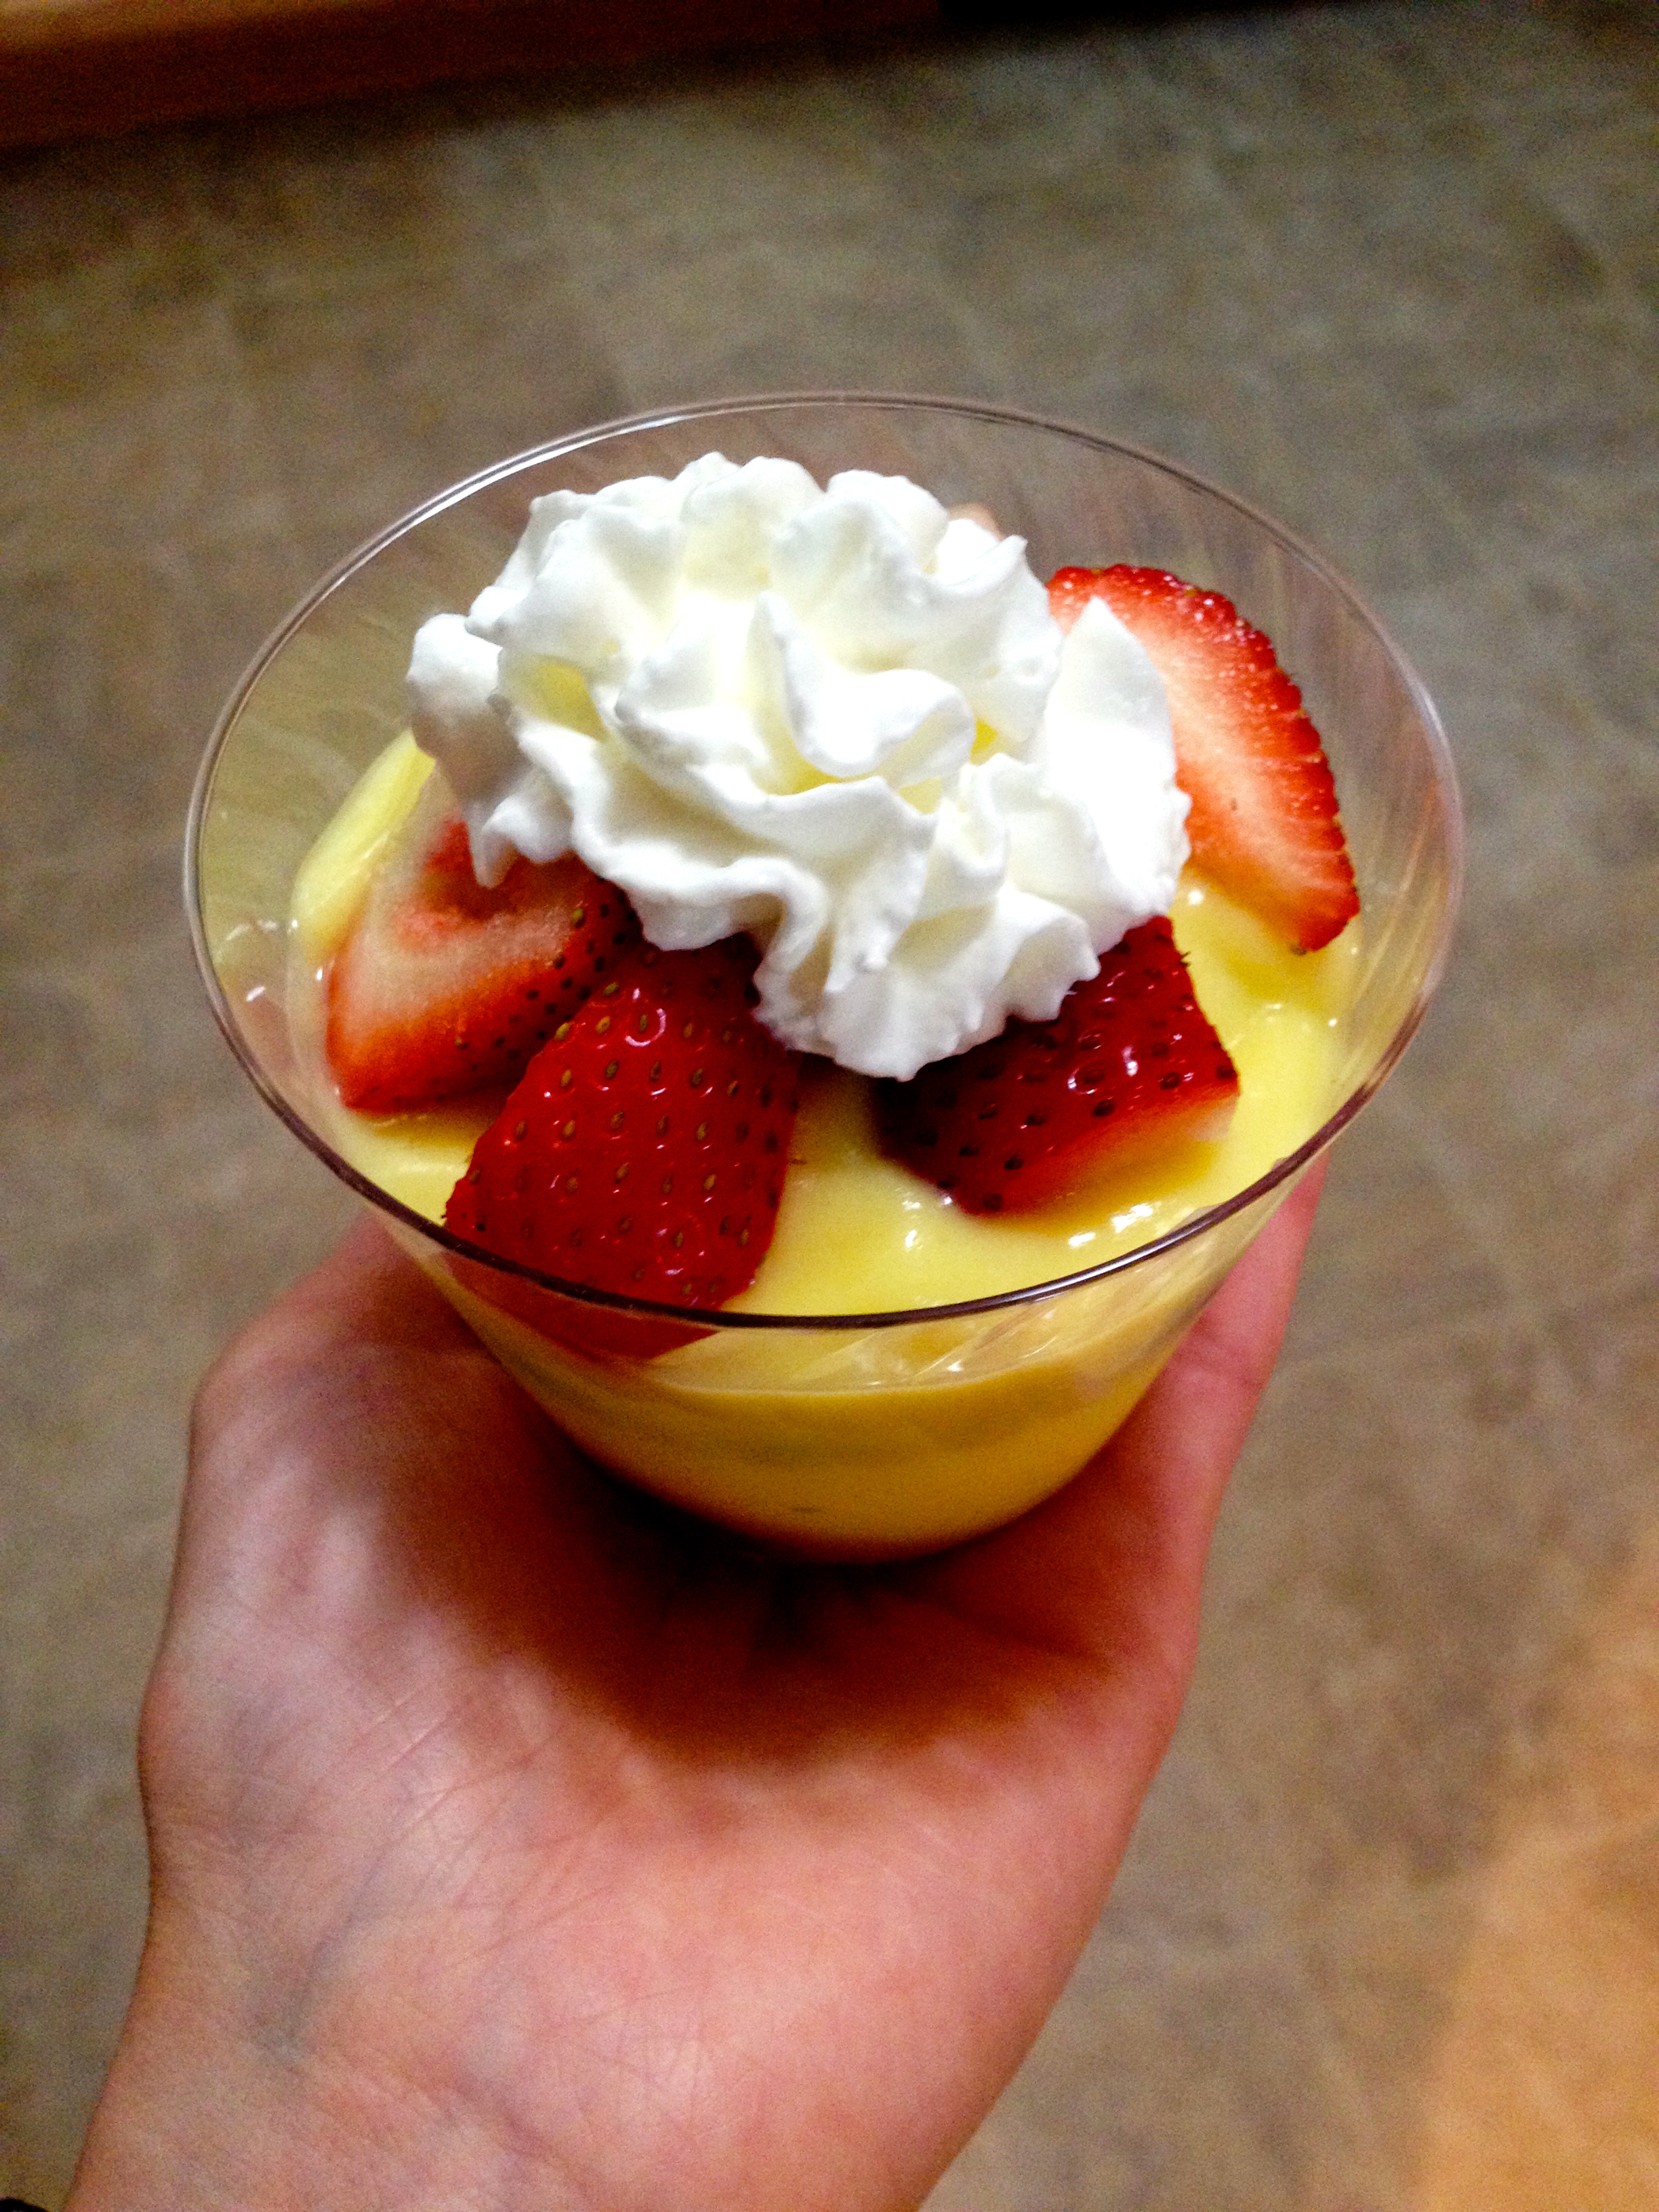
First off, I made a “red, white, and blue parfait” for a dessert when our friends came for dinner. Here’s how it works:
Ingredients:
- 1 box instant vanilla pudding (I used the box that makes 6, 1/2 cup servings)
- 1 quart strawberries, cut up
- 1 pint blueberries
- Whipped cream (optional)
Put a layer of chopped strawberries in the bottom of a parfait cup (or in my case, a plastic Chinet tumbler!). Put a dollop of pudding over that, and then a layer of blueberries on the pudding. Put a last layer of pudding over the blueberries, and then add a few chopped strawberries for garnish. Top with whipped cream right before serving.
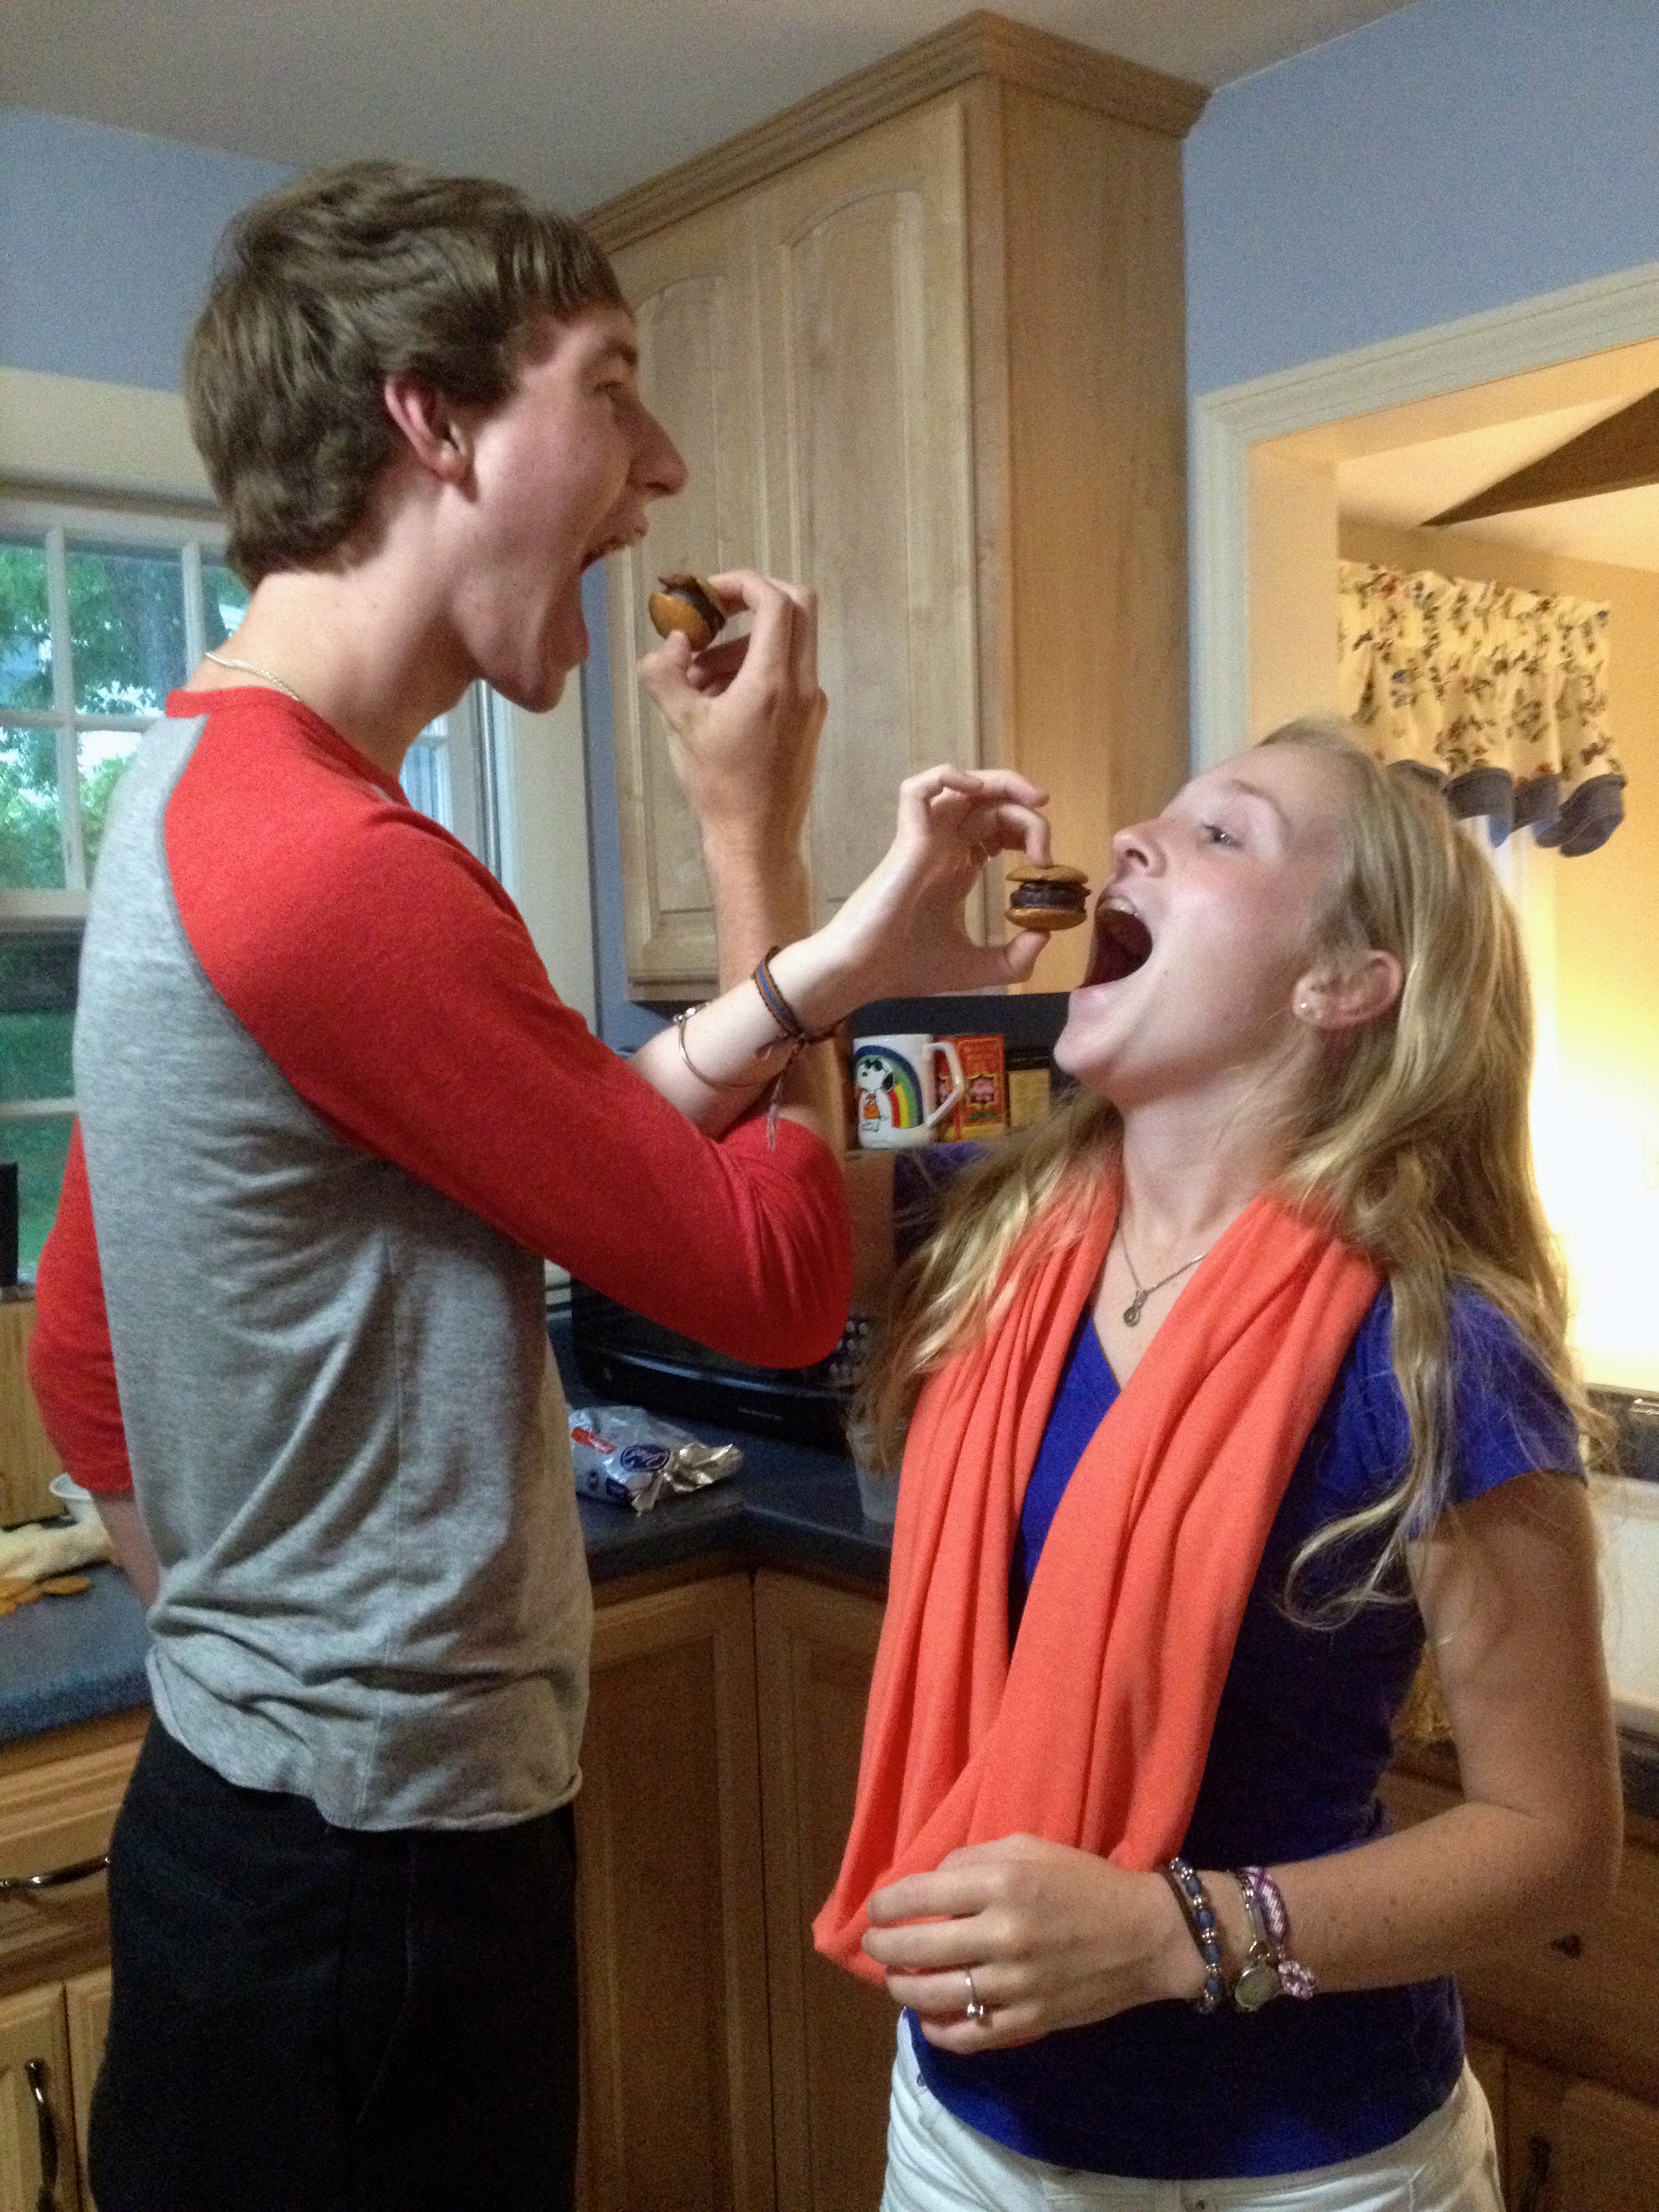
My other creation was inspired by the All-American summer food: hamburgers! It’s a super simple sweet take on the best cookout food around.
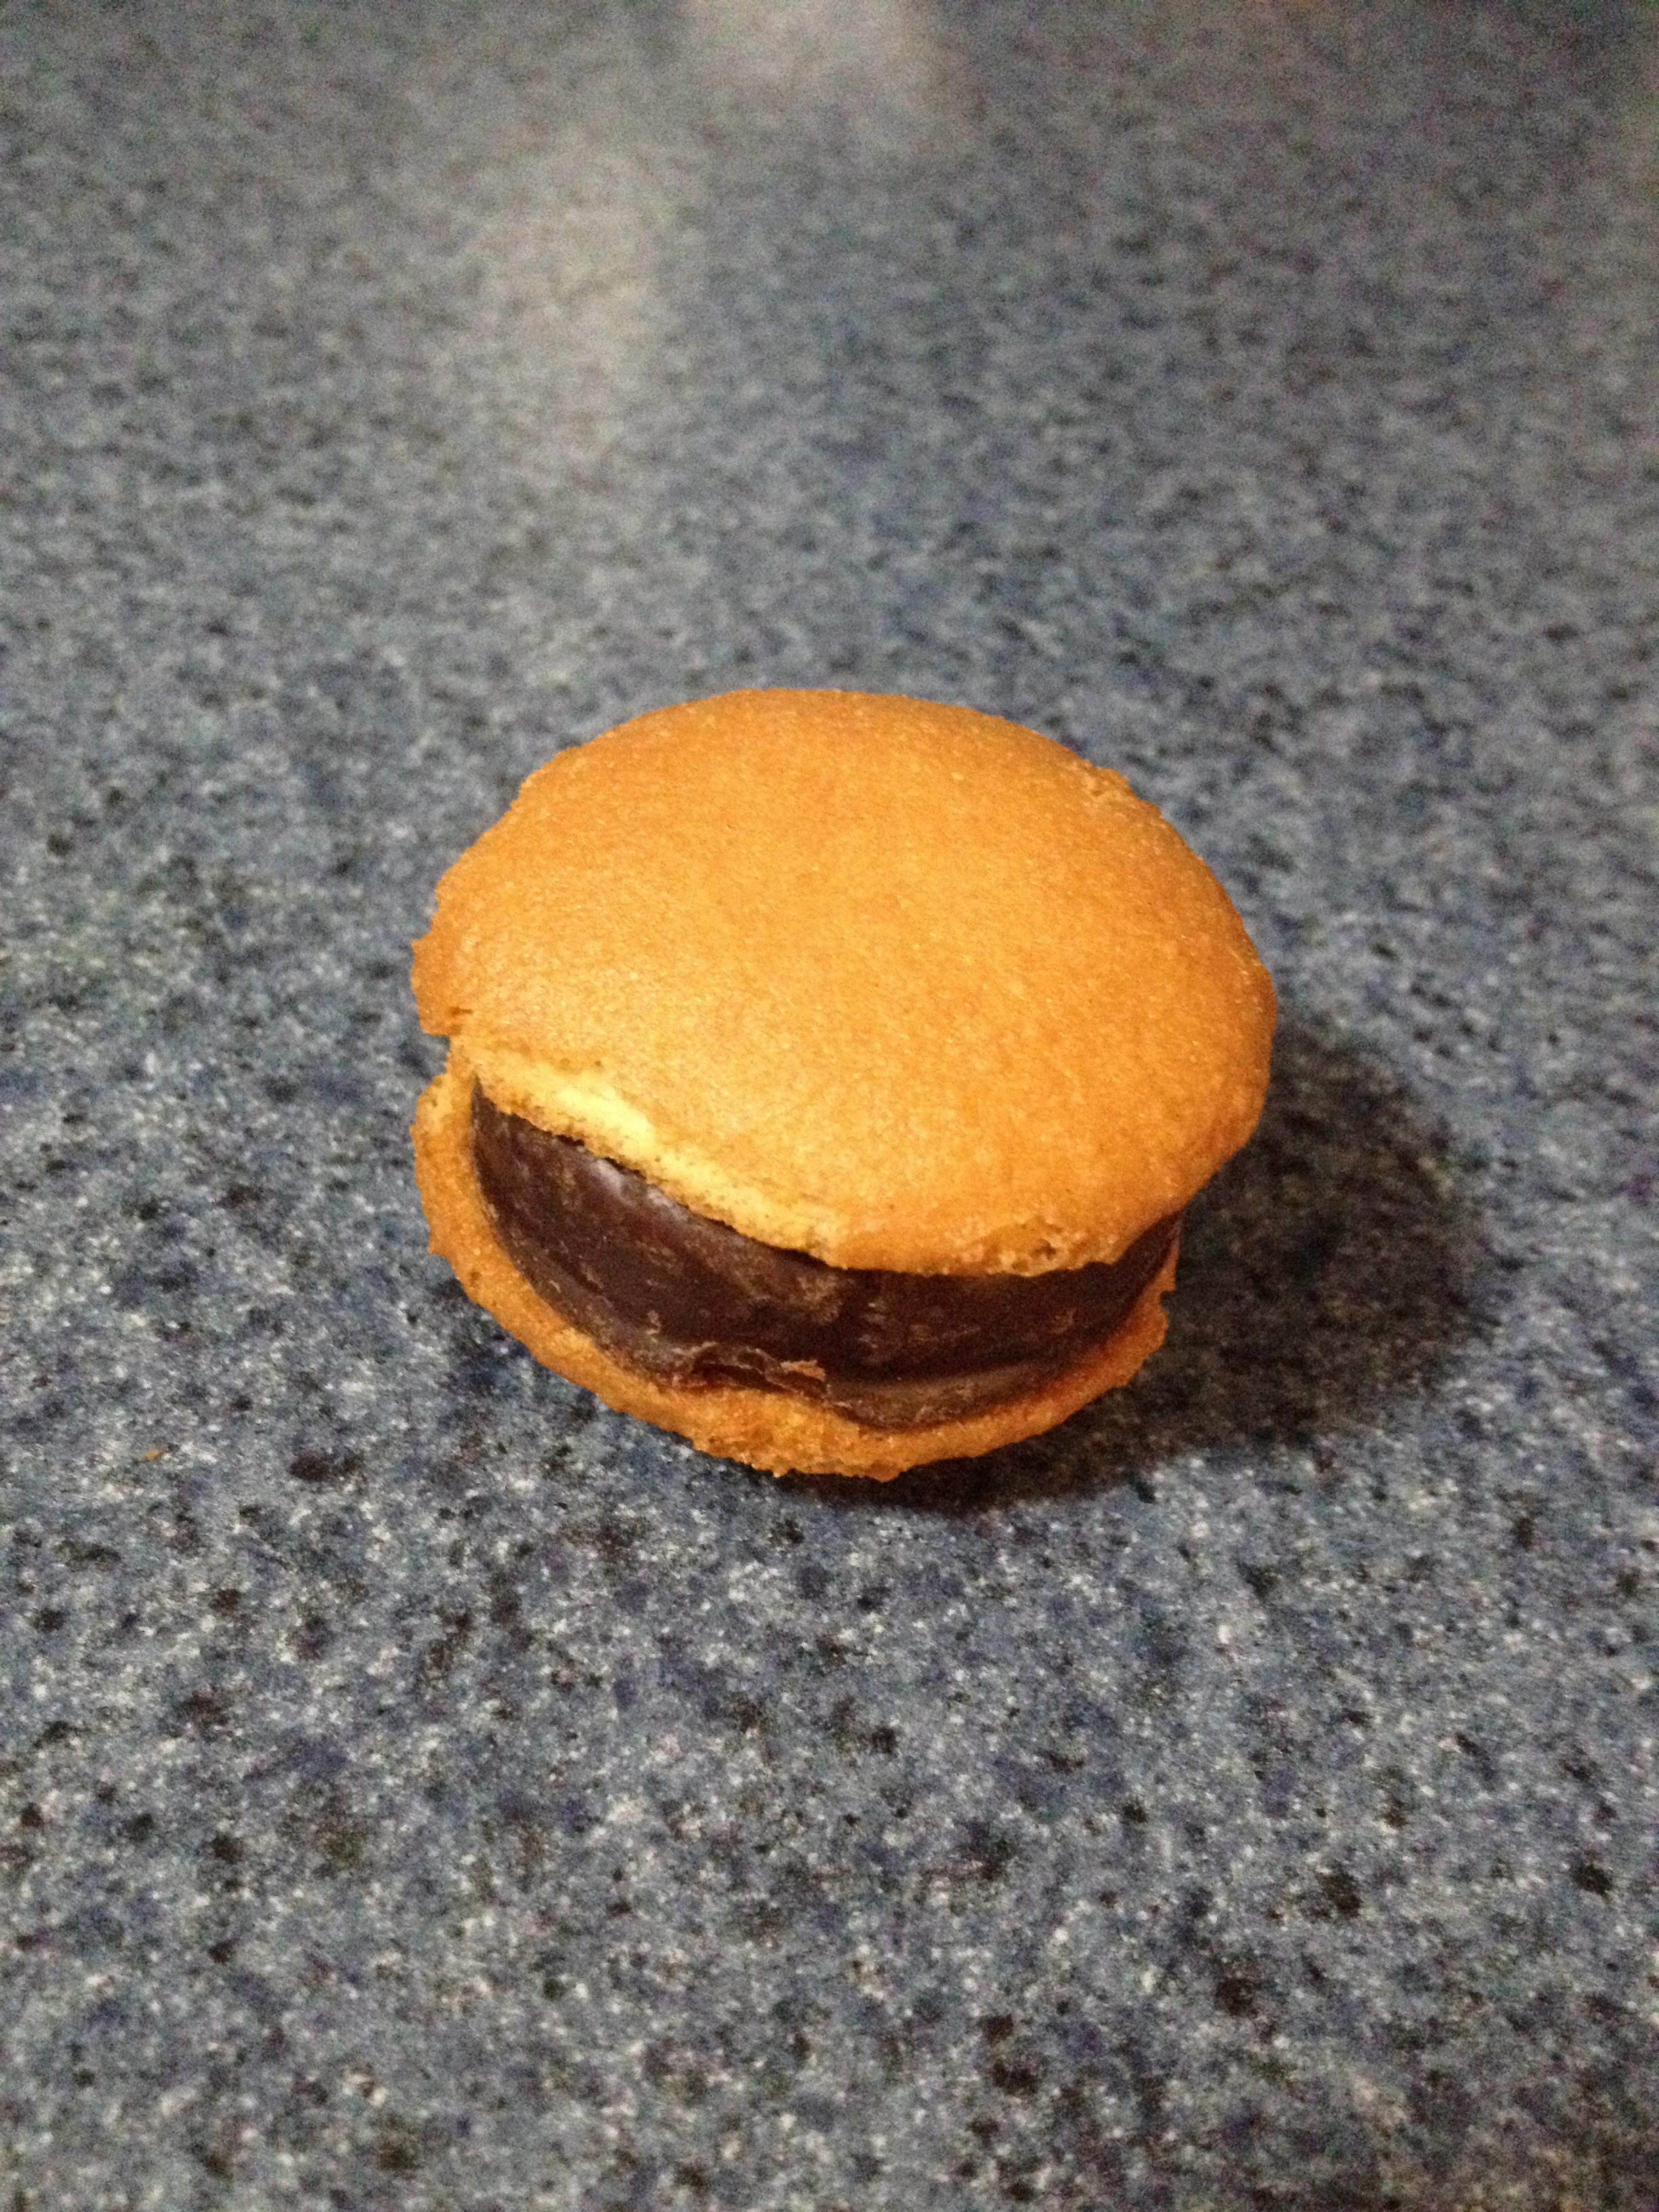
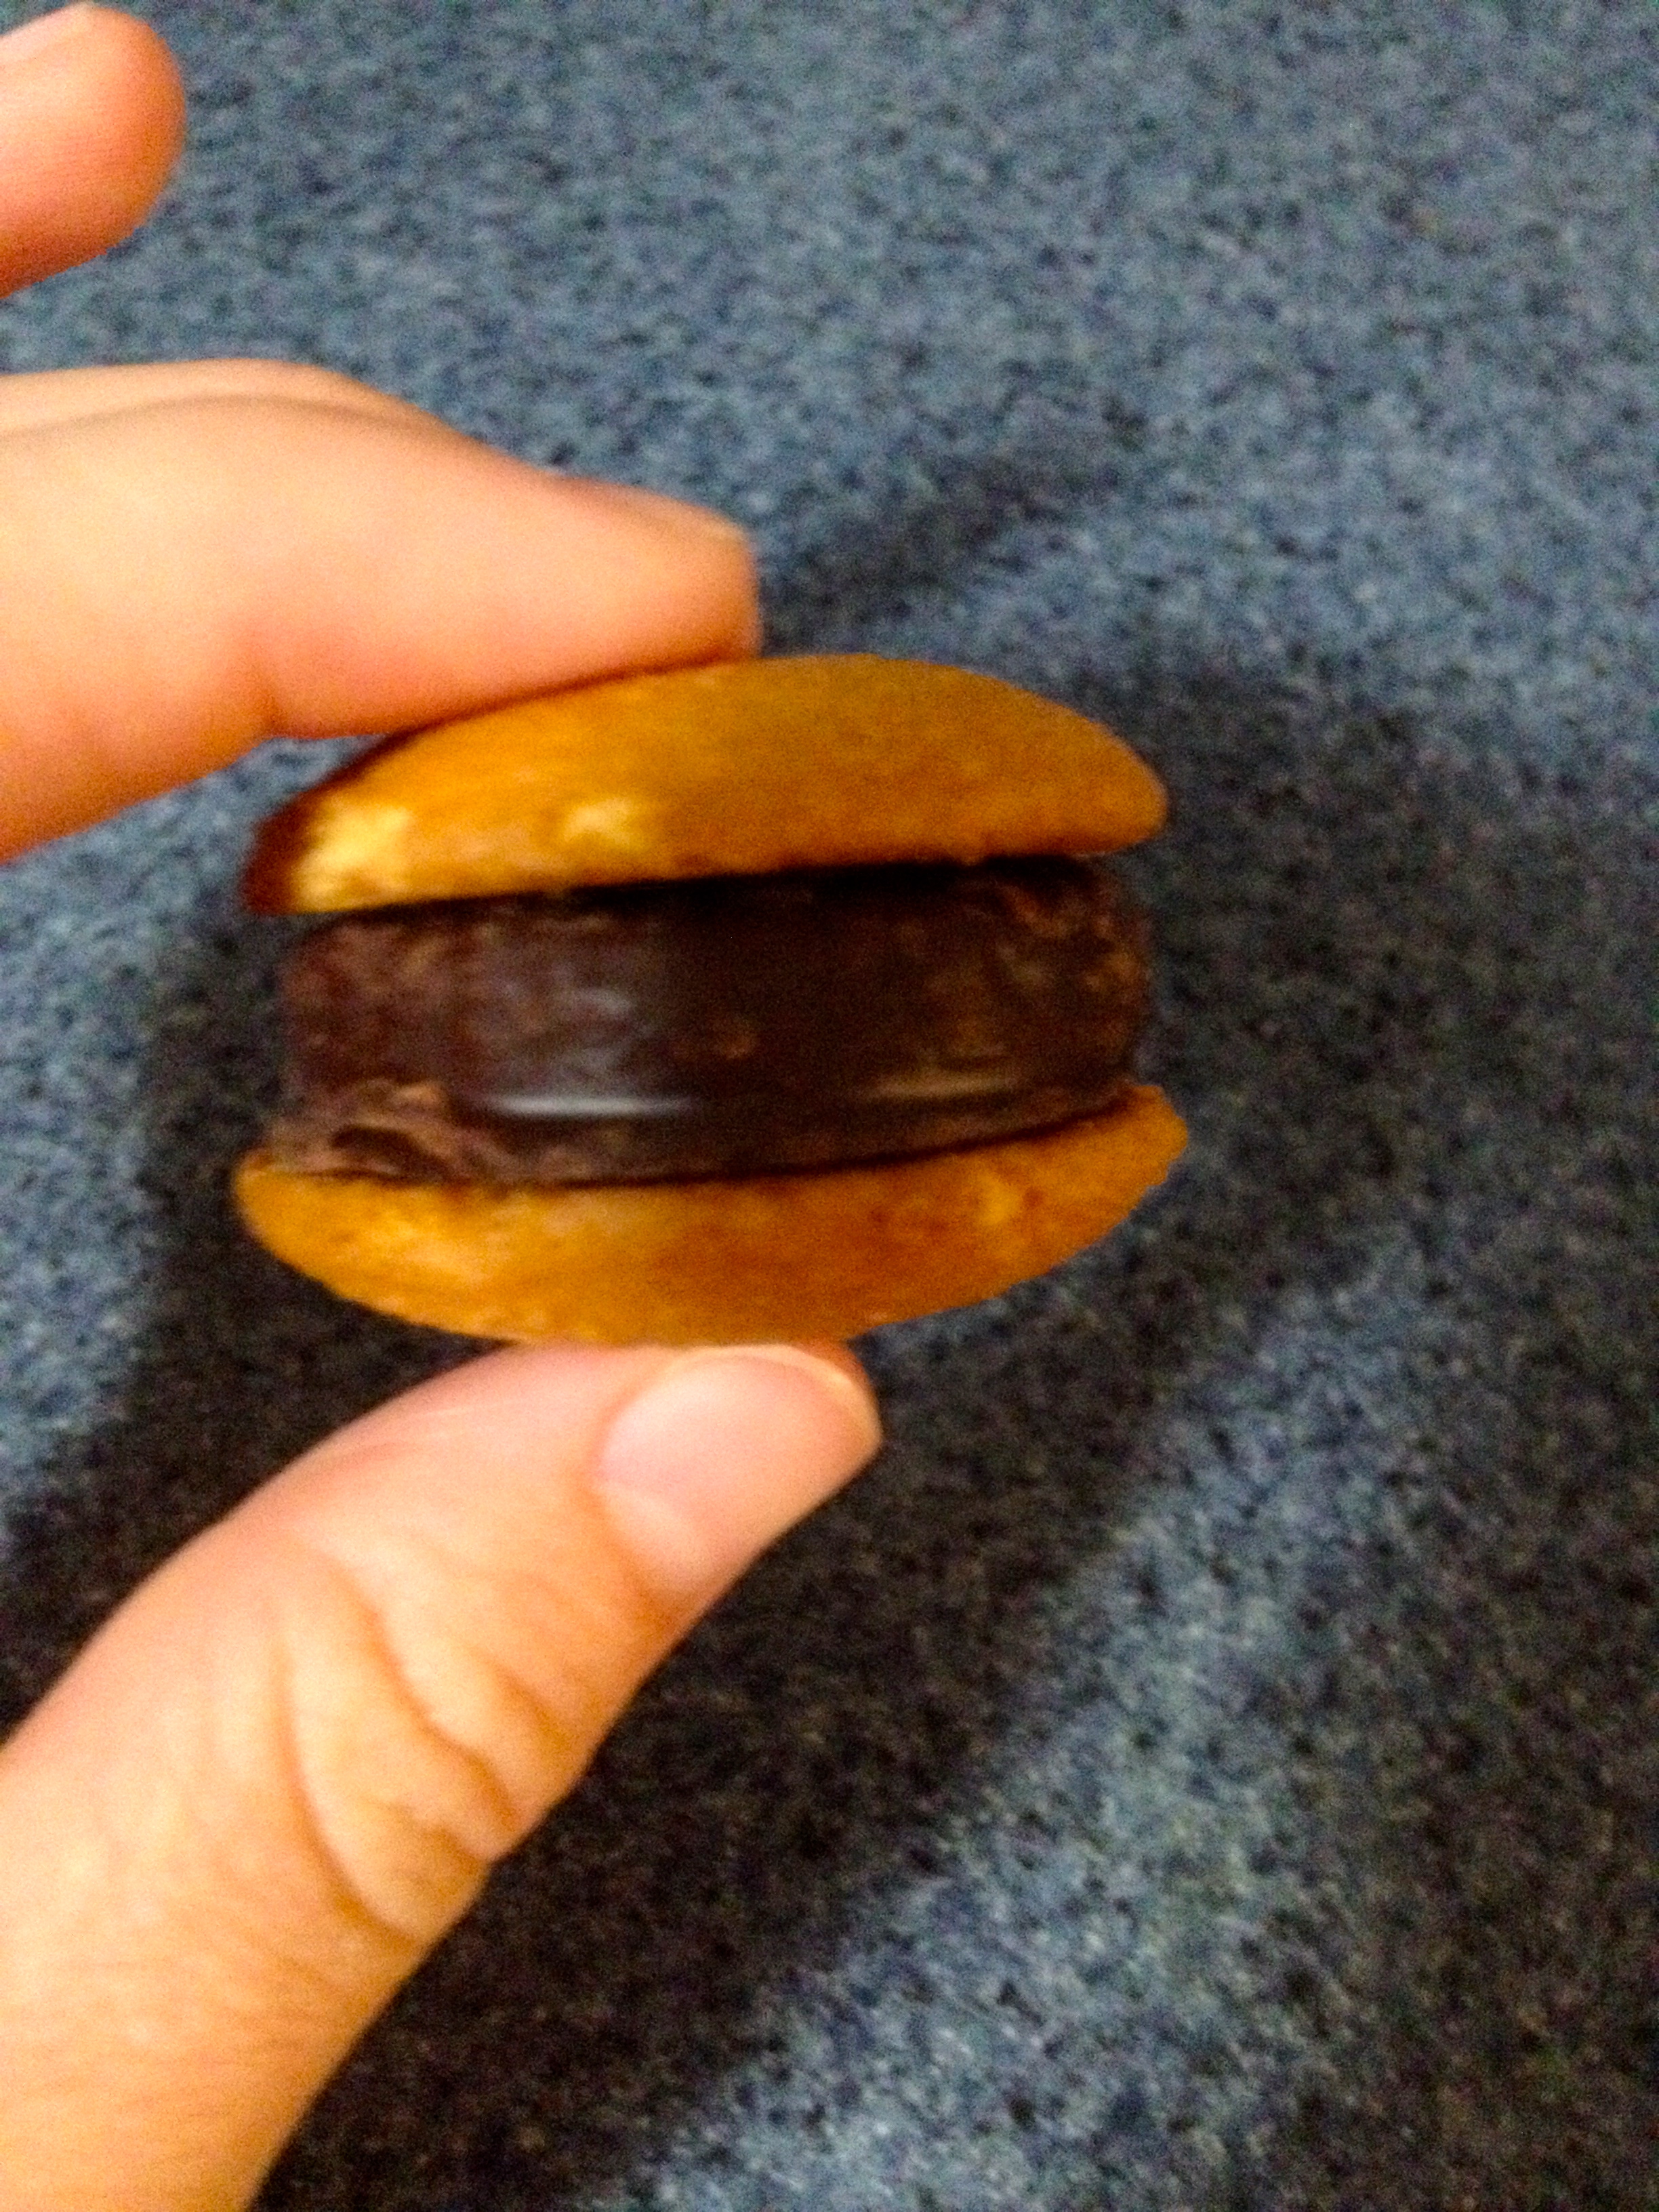
Ingredients:
- Reduced-fat Nilla wafers
- York Peppermint Patties
All you do is take two Nilla wafers, and put a Peppermint Patty between the cookies to make a cookie sandwich. The resemblance to a burger is uncanny.
Confession: I tried making these little sandwiches with bacon on top, just to see if bacon really goes with anything. Let me tell you, it doesn’t. My adventurous boyfriend and I gave it a try, and while it didn’t really gross us out, you couldn’t even taste the bacon, and it gave the sandwiches a weird flavor.
Here we are trying it with bacon:
I guess it turns out bacon doesn’t quite go with everything. It just goes with everything but these little burgers!
These sweet treats are so easy and yummy! Definitely give them a try, because they’re so simple that they only take about a minute each to make.
And for your viewing pleasure, here are some pictures of the Boston fireworks:


I hope you all enjoyed your Fourth as much as I did, and I hope you continue to enjoy your summers! Just remember, it doesn’t need to be a holiday weekend for you to spend time with friends and family. Make it as often as possible!
Peanut Butter, the Natural Way!
So how many people like PB&J’s? Actually, I really don’t. But my roommate is a peanut butter fanatic! Recently I went to the Mennonite Relief Sale in Pennsylvania, where there was a stand selling homemade peanut butter, and I bought some for her to try. It was delicious! I figured I would try my hand at it, and came up with this recipe. It’s seriously the easiest thing ever, and takes a grand total of 5 minutes. It’s also gluten-free, dairy-free, low-sodium, and FULL of omega-6 fatty acids, as well as super inexpensive (like $1.99 for the whole recipe kind of inexpensive).
Ingredients:
- Peanuts- I’ve left this open-ended, because they can be roasted or raw, flavored or not, salted or unsalted, and it all ends up tasting great. I used a 12 oz. bag of unshelled, roasted, unsalted peanuts.
- ~1 tsp oil, unflavored or with a complementing flavor. I used vegetable oil, but you can use coconut, peanut, sunflower, etc.
- ~1 tsp honey, to taste
- 1/4 cup sugar, more or less to taste
- 1/3-1/2 tsp salt, to taste
First, if you bought unshelled peanuts, you’ll have to shell them by cracking open the skins and pulling out the peanuts. This part can be slightly tedious, but I turned on Frozen while I was doing it and that made any potential frustration go away!
One shelling technique that I’ve read is from Food Network Chef Alton Brown: get out a salad spinner and rub the peanuts between your hands over the spinner until the shells come loose and break. Once all the shells and peanuts are separated, close the spinner and just spin it until all the shell fragments are on the outside and the peanuts are still on the inside!
When you’re shelling the peanuts, it’s ok if the little red skins stay on the peanuts, but I took most of them off. If you bought raw peanuts and want to roast them, you can roast them in the shell at 350ºF for 30 minutes, and then shell them.

Then, after the peanuts are shelled and ready to go, put them in a food processor or blender (preferably food processor, though) and grind them up. At first they’ll turn into peanut dust, and then get clumpy (this is after about 2 minutes of processing). At this point, you can add the oil to loosen it up a bit, as well as any other flavorings such as honey, cayenne, cinnamon, black pepper, etc.
Keep grinding the peanuts for a couple minutes, until they become loose and look like peanut butter. Add in the sugar and salt and give it one final spin for just a few seconds to combine everything.
Now you’re ready to eat it or store it! Just a heads-up: the peanut butter will be warm, so don’t be surprised by that! It can be a bit disconcerting if you’re used to room temperature peanut butter. It’s also a little looser than store-bought peanut butter, but you can make it thicker by not processing it as much and leaving it chunkier. Also, if you still like whole peanut fragments in your peanut butter, you can reserve some peanuts for the very end and stir them in by hand.
Maybe this is the peanut butter that will make me enjoy PB&J’s! This peanut butter can be used in any recipe, from peanut butter cookies to a Thai peanut sauce. You can also jazz it up however you want by adding different spices and oils. And finally, you can make it using other nuts or adding cocoa powder to it (can you say homemade Nutella?!). The sky is the limit here, so be creative and enjoy!
Homage to the Kingochowdah
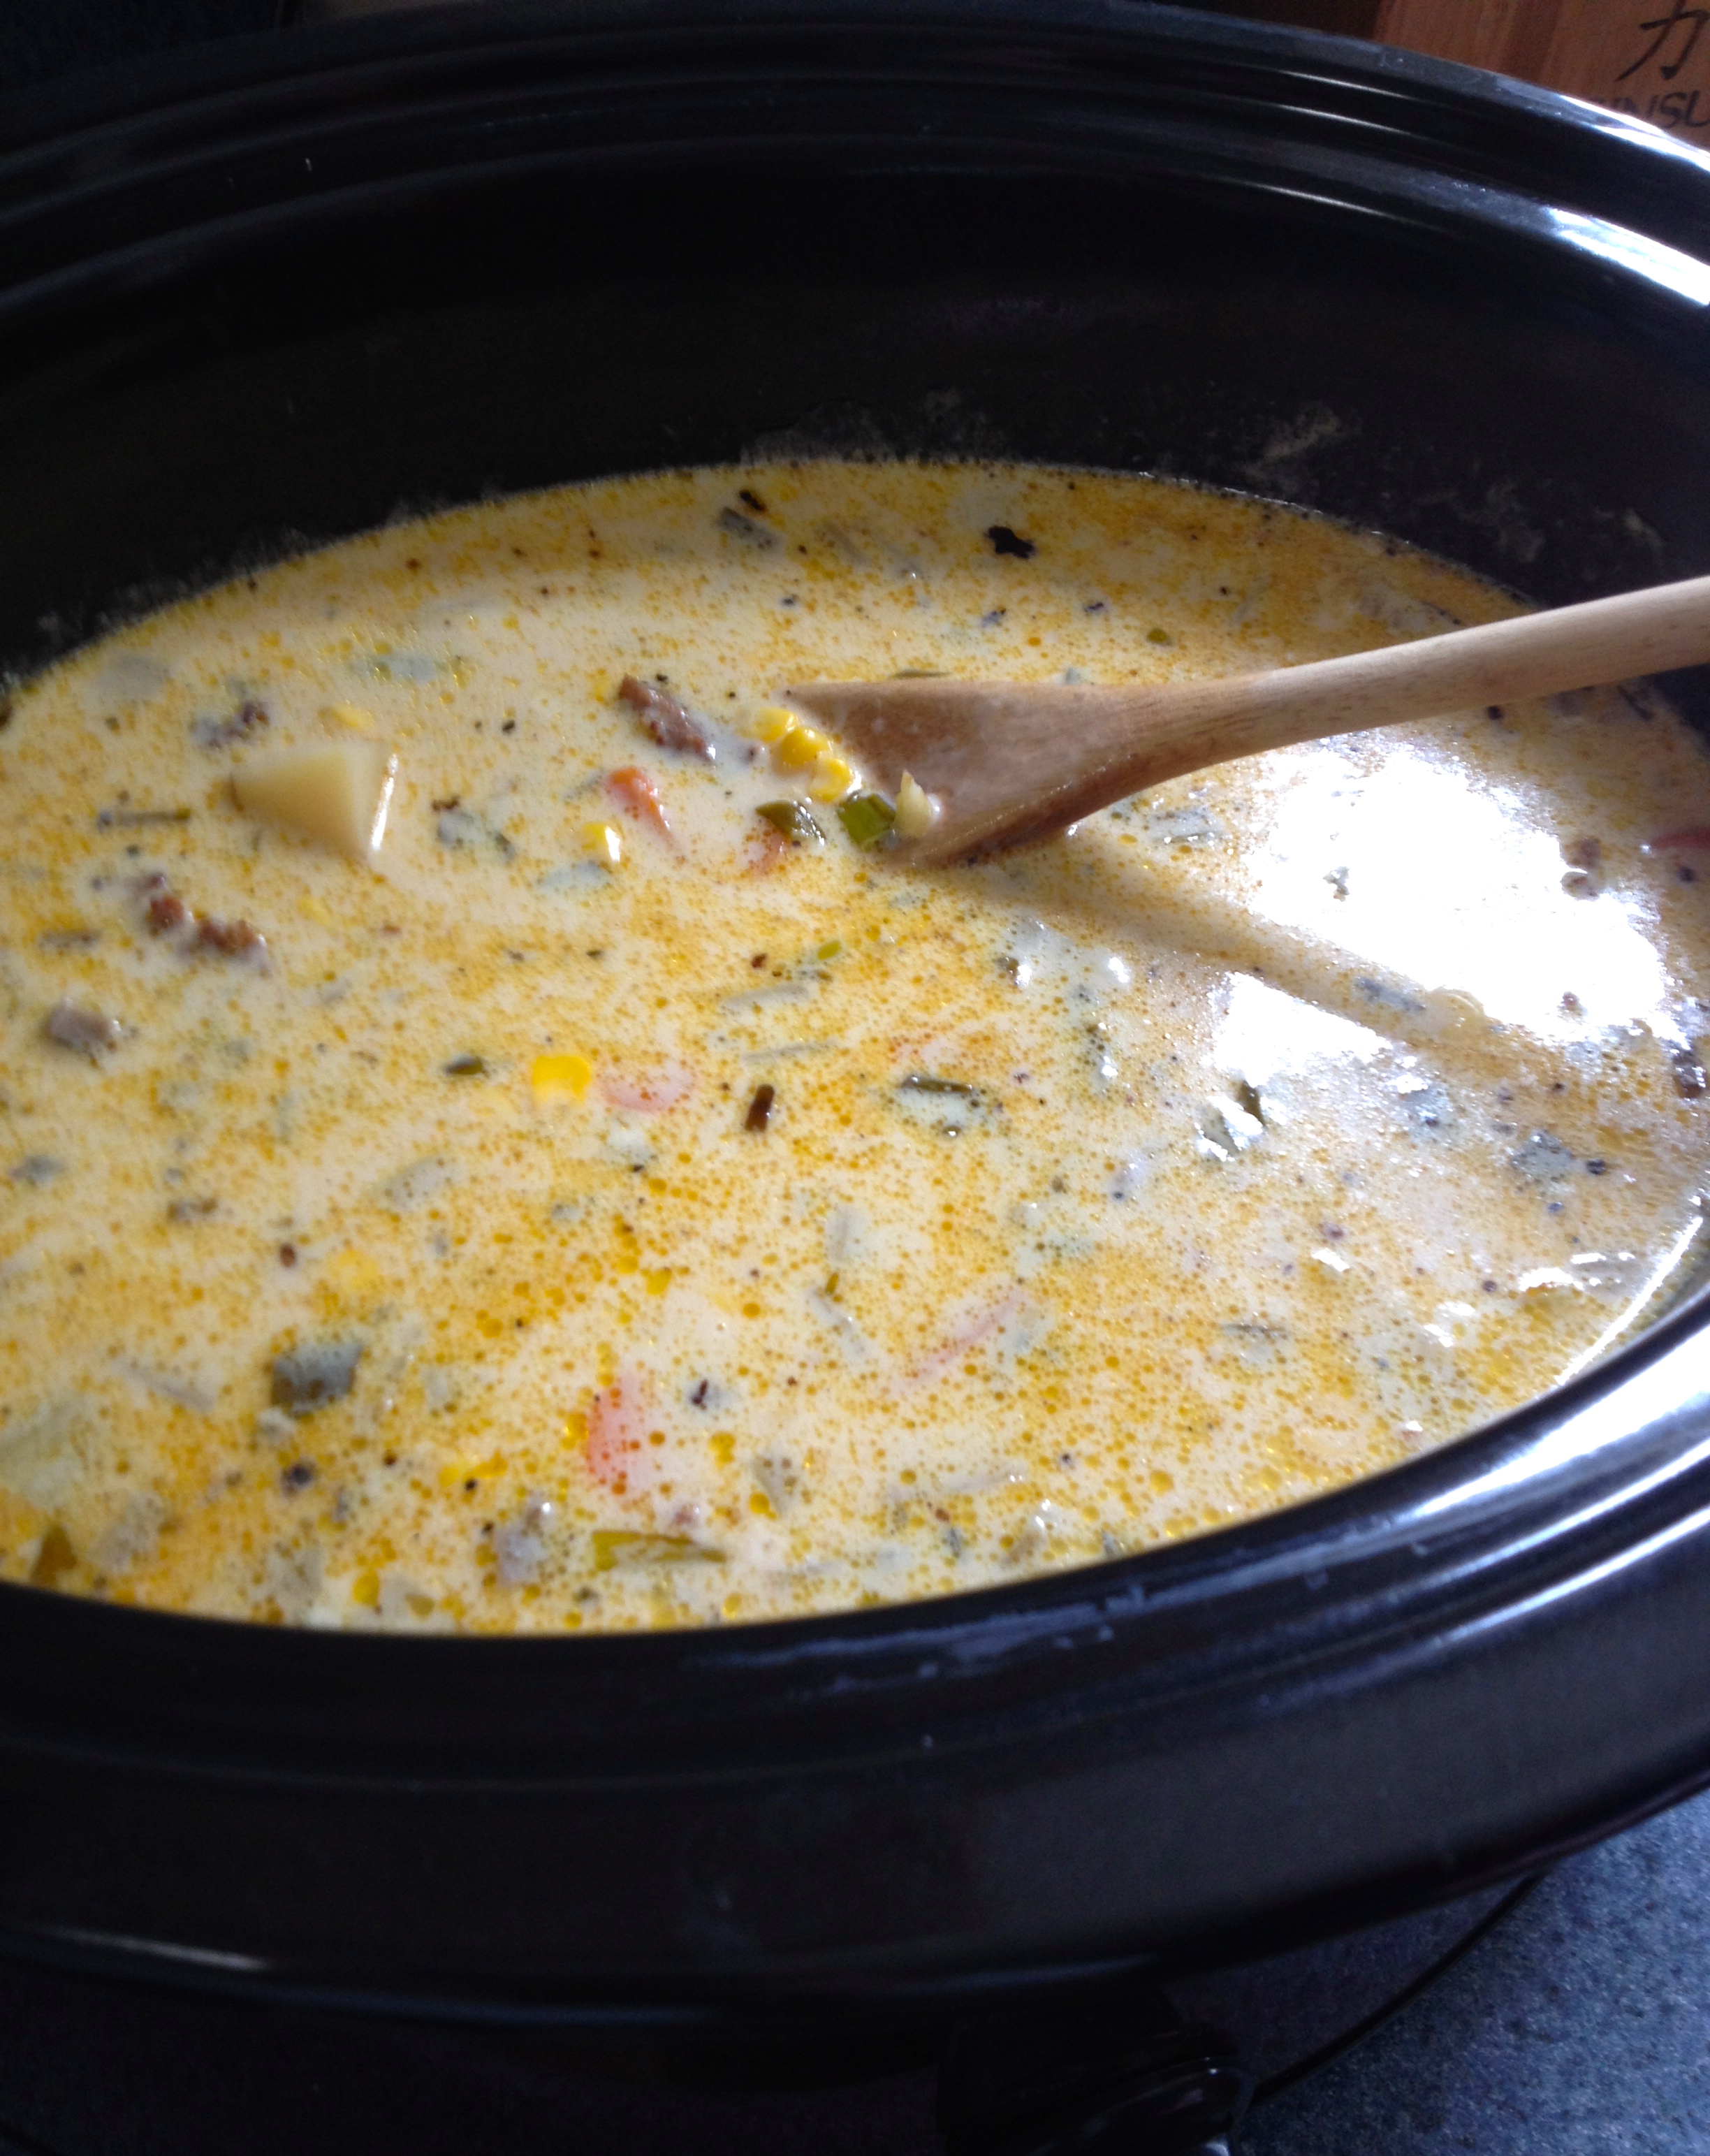
I’m back again! Today’s post is a tribute to my friend’s late husband. He was a fabulous cook, and the self-proclaimed “Kingochowdah”. He used to cook for numerous church events, and his food always was superb. I decided, in his honor, to make his award-winning “Potato, Corn, Sausage and Cheese Chowder”. It’s absolutely delicious, and I was actually able to make it have slightly (but seriously, only slightly) fewer calories. Here’s his recipe:
Potato, Corn, Sausage and Cheese Chowder
- 2-3 cups unpeeled and diced potatoes (red or white)
- ~1 cup sliced carrots
- ~1 cup sliced celery
- 2 medium finely diced onions (I used scallions because of an onion intolerance, and it still tasted great!)
- ~4 cloves minced garlic
- ~1 tsp olive oil (his recipe says “a little” but this is about how much I used)
- 1 cup diced red bell pepper (optional)
- 1 cup diced green pepper (optional)
- ~1 cup sliced mushrooms (optional)
- 1-2 cups corn (if frozen, thaw first)
- 15 oz. creamed corn (I omitted this to save on sodium and calories)
- 2 cans chicken broth (I used low-sodium)
- 1 lb cooked sliced sausage
- 1 tbsp fresh chopped basil
- 1 tbsp fresh chopped parsley
- 1 tbsp salt (I didn’t use that much salt, maybe more like 2 tsp)
- 1 tsp black pepper
- 1-2 tbsp Worcestershire sauce
- 1 tbsp Dijon mustard
- 2-3 cups grated cheddar cheese
- 12 oz. evaporated milk
Sautee the carrots, celery, scallions, and garlic together in the olive oil until they are wilted but not browned. To do this, you’ll need to cook the carrots and celery for a few minutes before adding the garlic and onions, because they’re much harder veggies. Then, cook the sausage if needed. Add all the ingredients except the cheese and evaporated milk into a large crock pot.

Cook it on low for 7-9 hours, or on high for 4 hours. Then, add the cheese and evaporated milk and cook further until the cheese is melted.
Then, ladle and enjoy!
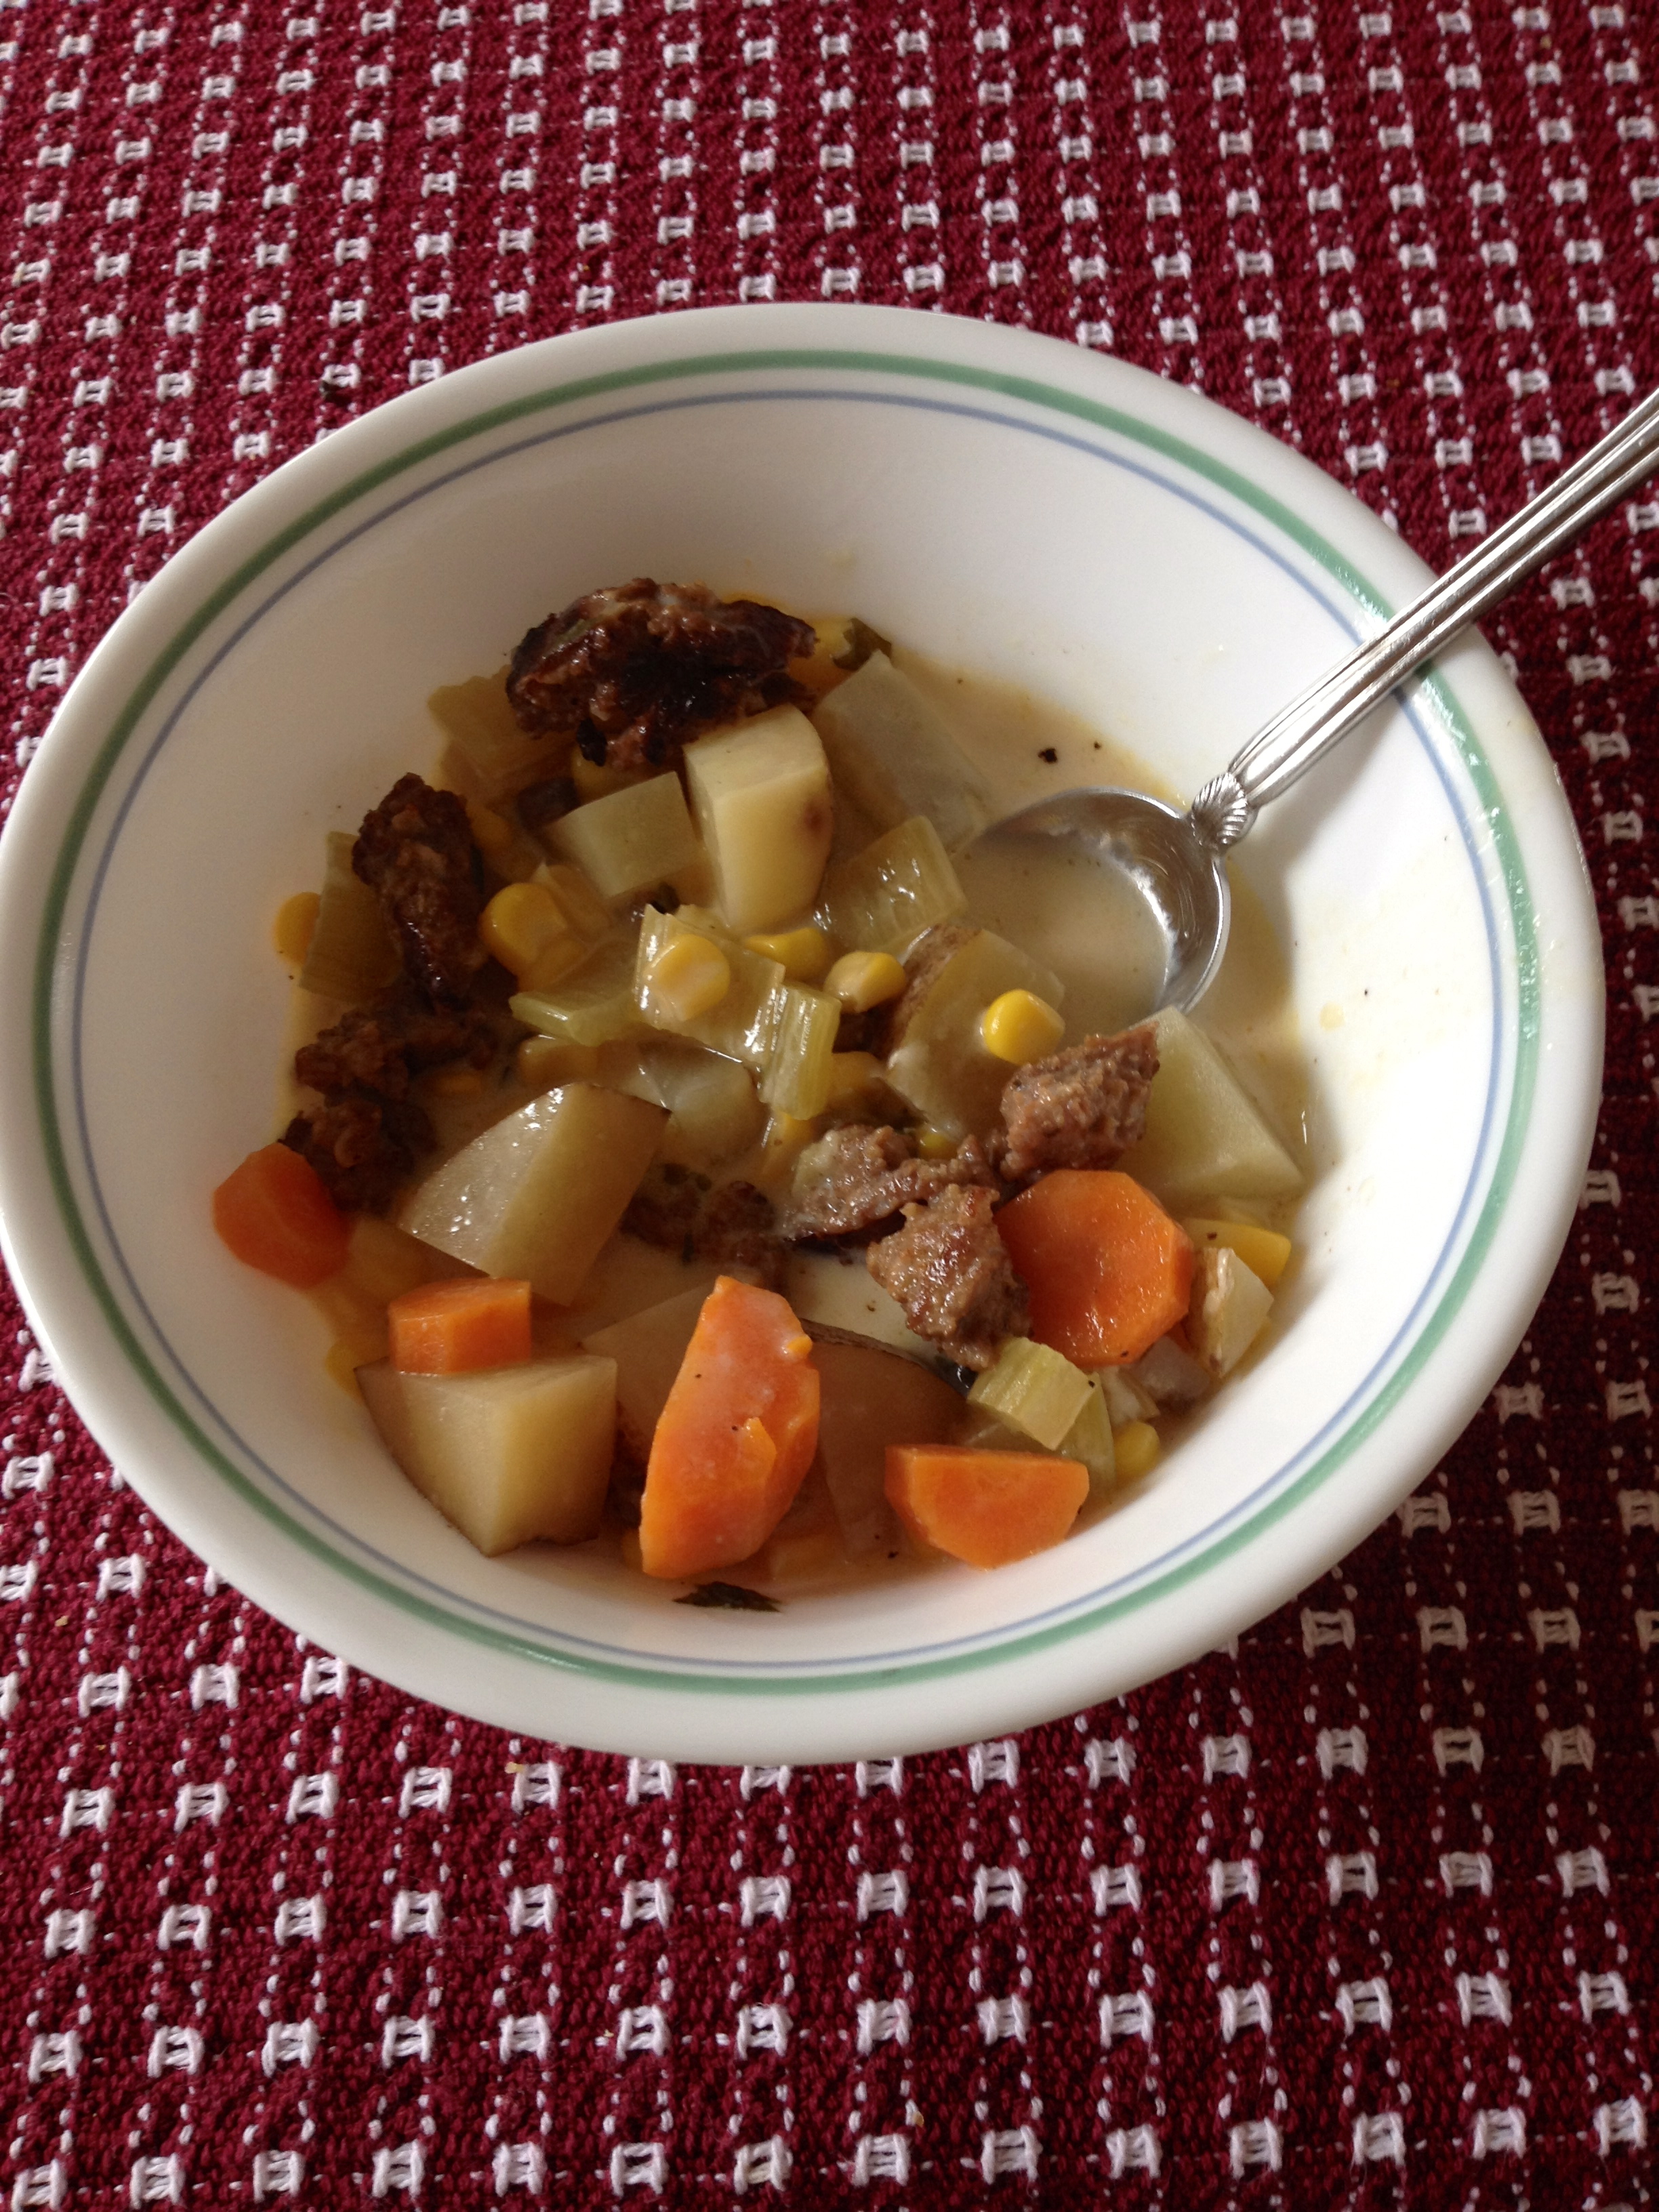
The way I made this chowder, it’s lower sodium and has fewer calories. It’s also less thick than the original recipe because I didn’t add the creamed corn. That didn’t make it any less delicious, though! I promise you’ll love it.
The Kingochowdah was dedicated to community and making sure everyone was well-fed. He is well-deserving of his culinary accolades, and certainly left a delicious legacy behind! For more of his recipes, feel free to visit www.kingochowdah.com and order his cookbook. You won’t be disappointed! Happy eating!
O-o-o-oklahoma!
Occasionally, my wanderings take me to Oklahoma to visit my boyfriend at college. This past winter break, I went out to visit him and came back with quite a few new food experiences (and some old favorites, too!). Although I must admit I did no baking on this trip, I wanted to share some of the foods I tried and loved.
First, let me preface this by saying my boyfriend’s aunt is a foodie like me, and deserves credit because she was the one who showed me all sorts of new foods this winter. What would I do without her?
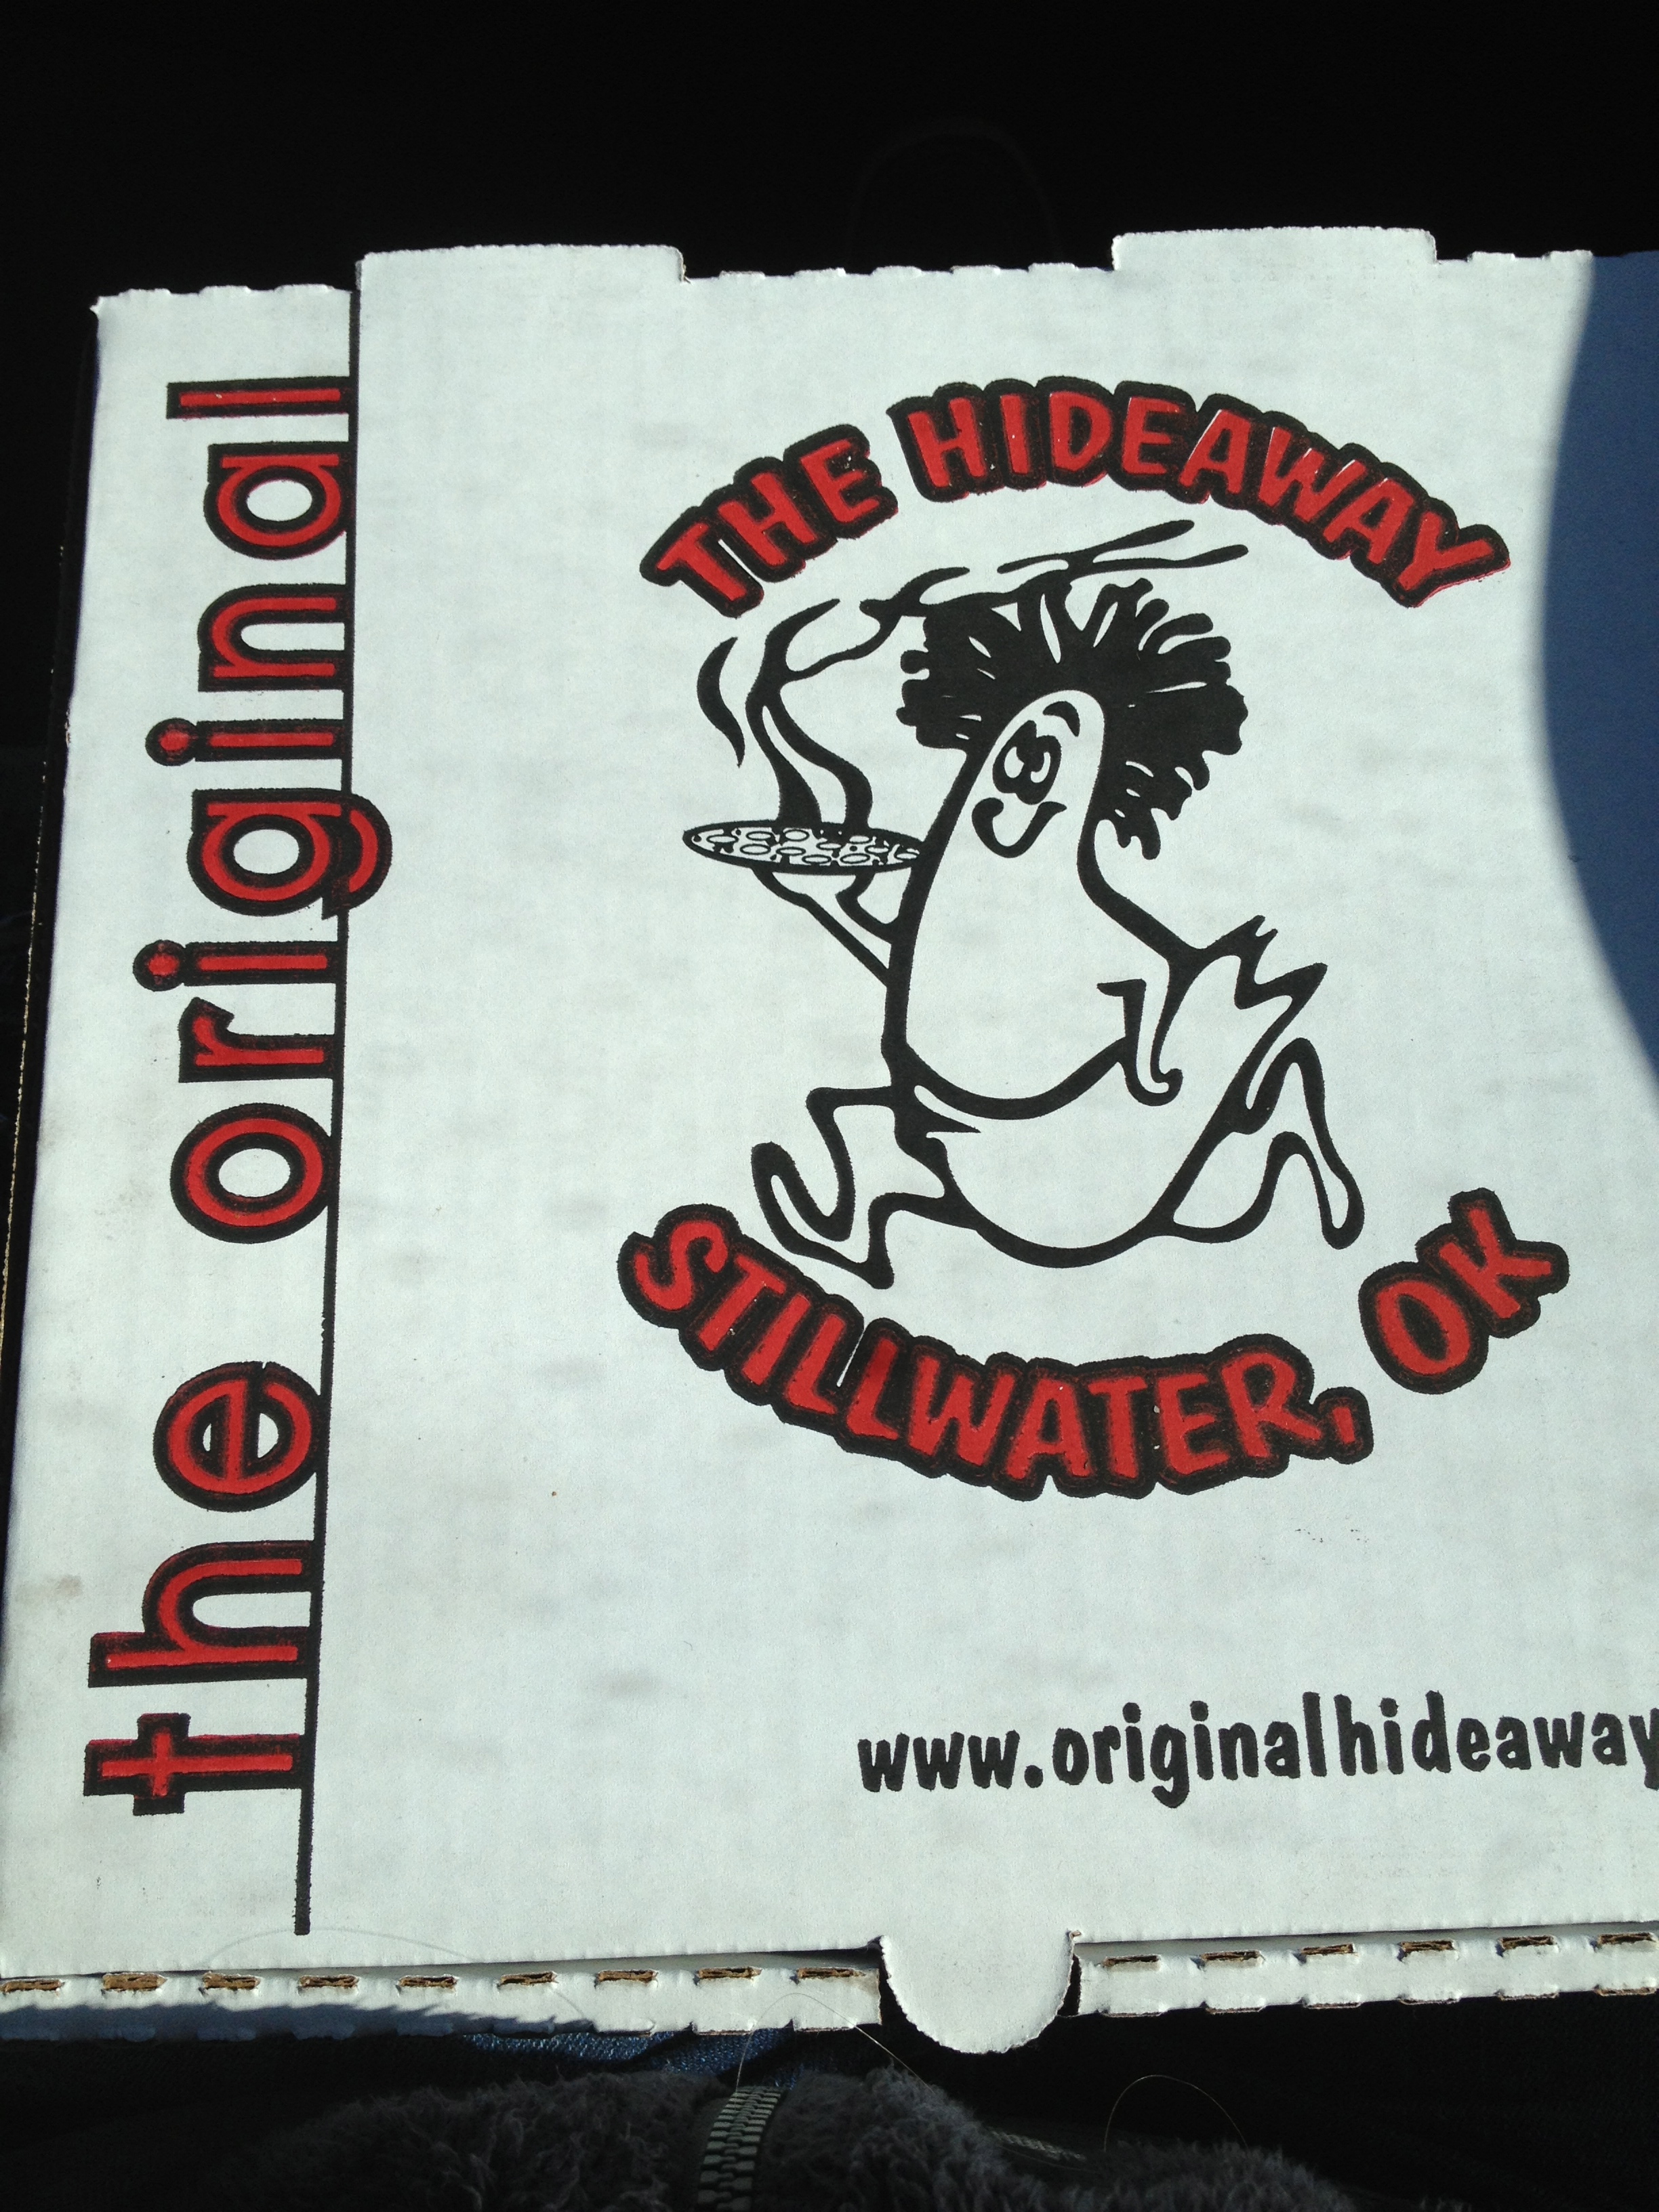
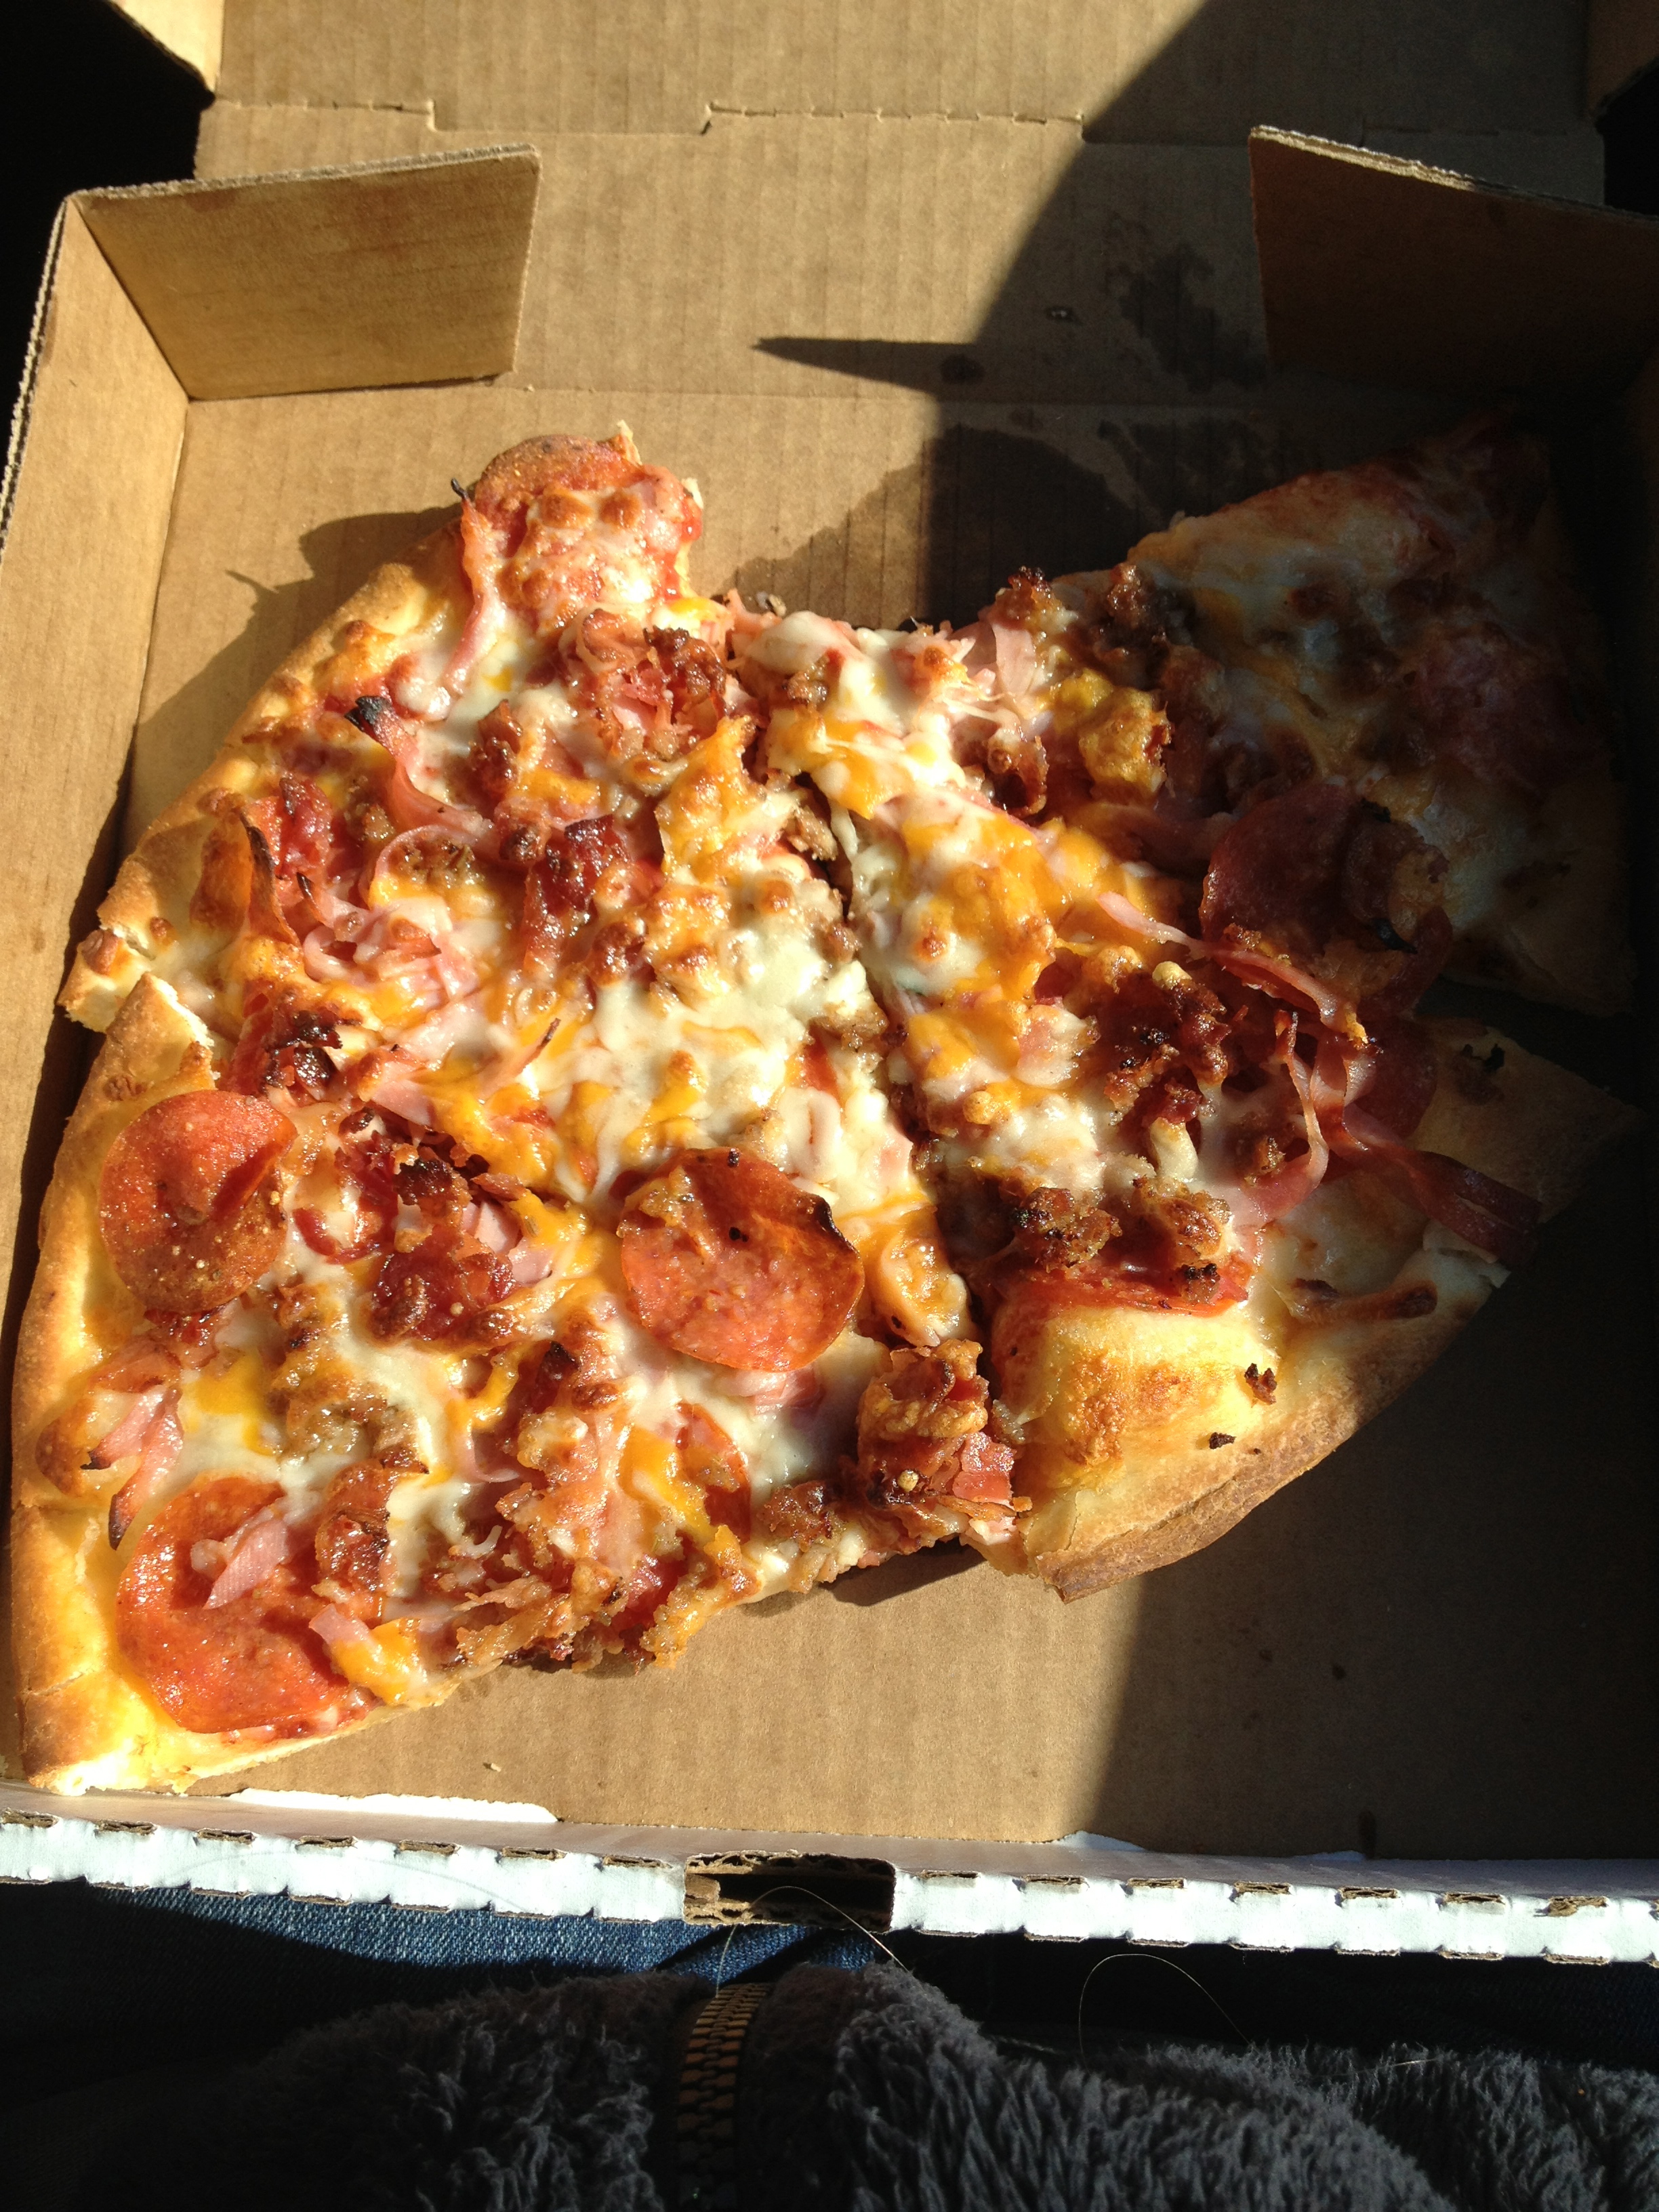
To start the list, let’s talk about The Hideaway. This in itself is a good enough reason to buy a ticket to Oklahoma. Their pizza is so good. Normally I’m not a fan of anything but cheese pizza, but when you go to Hideaway, it’s meat lovers, hands down. The crust was perfectly crisp and chewy at the same time, the cheese isn’t overpowering, and they put a lot of the meats under the cheese, so they’re not falling off when you’re eating! Here’s a picture of the “Big Country”, aka the meat lovers pizza. Seriously, their pizza is to die for.
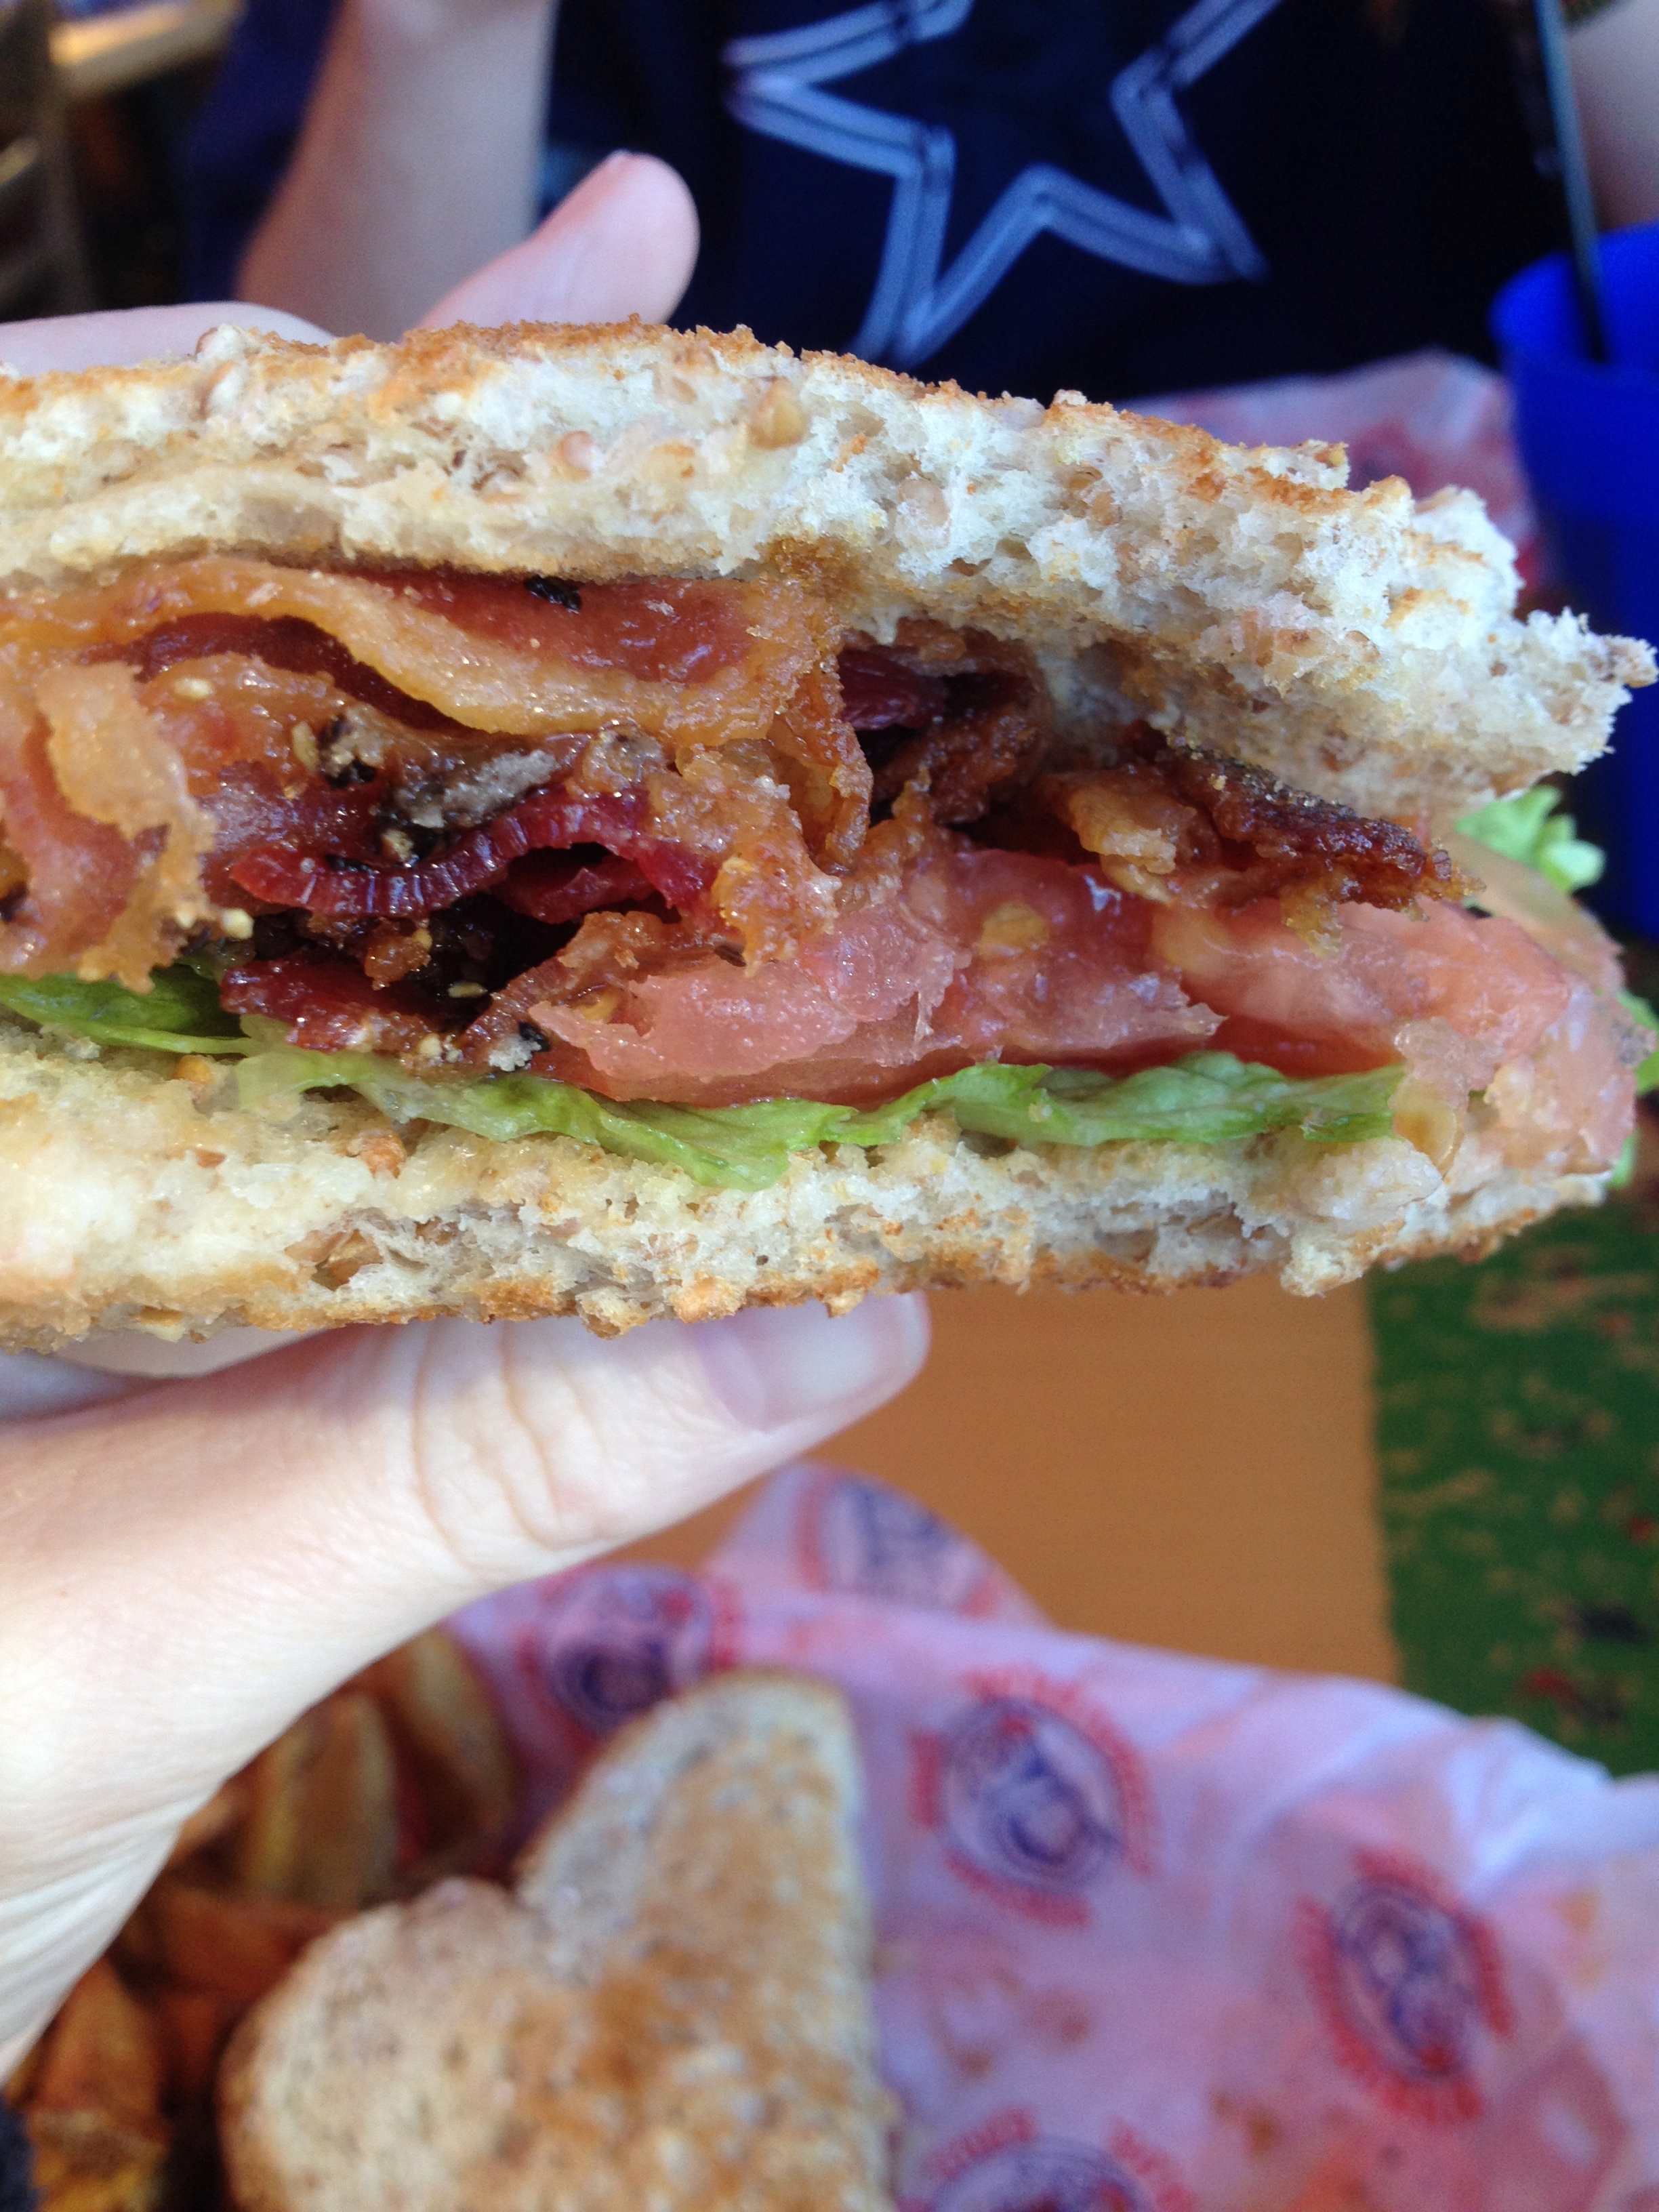
Next on the list is a huge hit in Stillwater, Oklahoma: Eskimo Joe’s. This place has everything you can think of for a fun place to eat. It has great food, great waitstaff, TV’s everywhere for the big games, and fantastic merchandise. They have their own store attached to the restaurant! But before I get into that, I’ll talk about one thing in particular: sweet pepper bacon. I’ll say that again… sweet. pepper. bacon.
They put that heavenly stuff on top of just about anything, including cheese fries, cheeseburgers, and BLT’s. I personally had the BLT, and loved every bite. The bacon is so unexpected to my taste buds, because where I come from, bacon is smoky and salty and that’s it. This bacon is sugary and molasses-y, a little spicy from the pepper, and gave me a completely new perspective on the world of bacon. Who knew?
And you can’t forget about the Joe’s merchandise! With every drink you buy, you get a Joe’s cup to take home with you (a perfect opportunity to order sweet tea, which I tried and now love!). This isn’t an ordinary to-go cup. These cups come in all different colors, some change colors, some are sparkly, and I actually have one that glows in the dark. Joe’s isn’t just a restaurant, it’s an attraction. And it rocks.
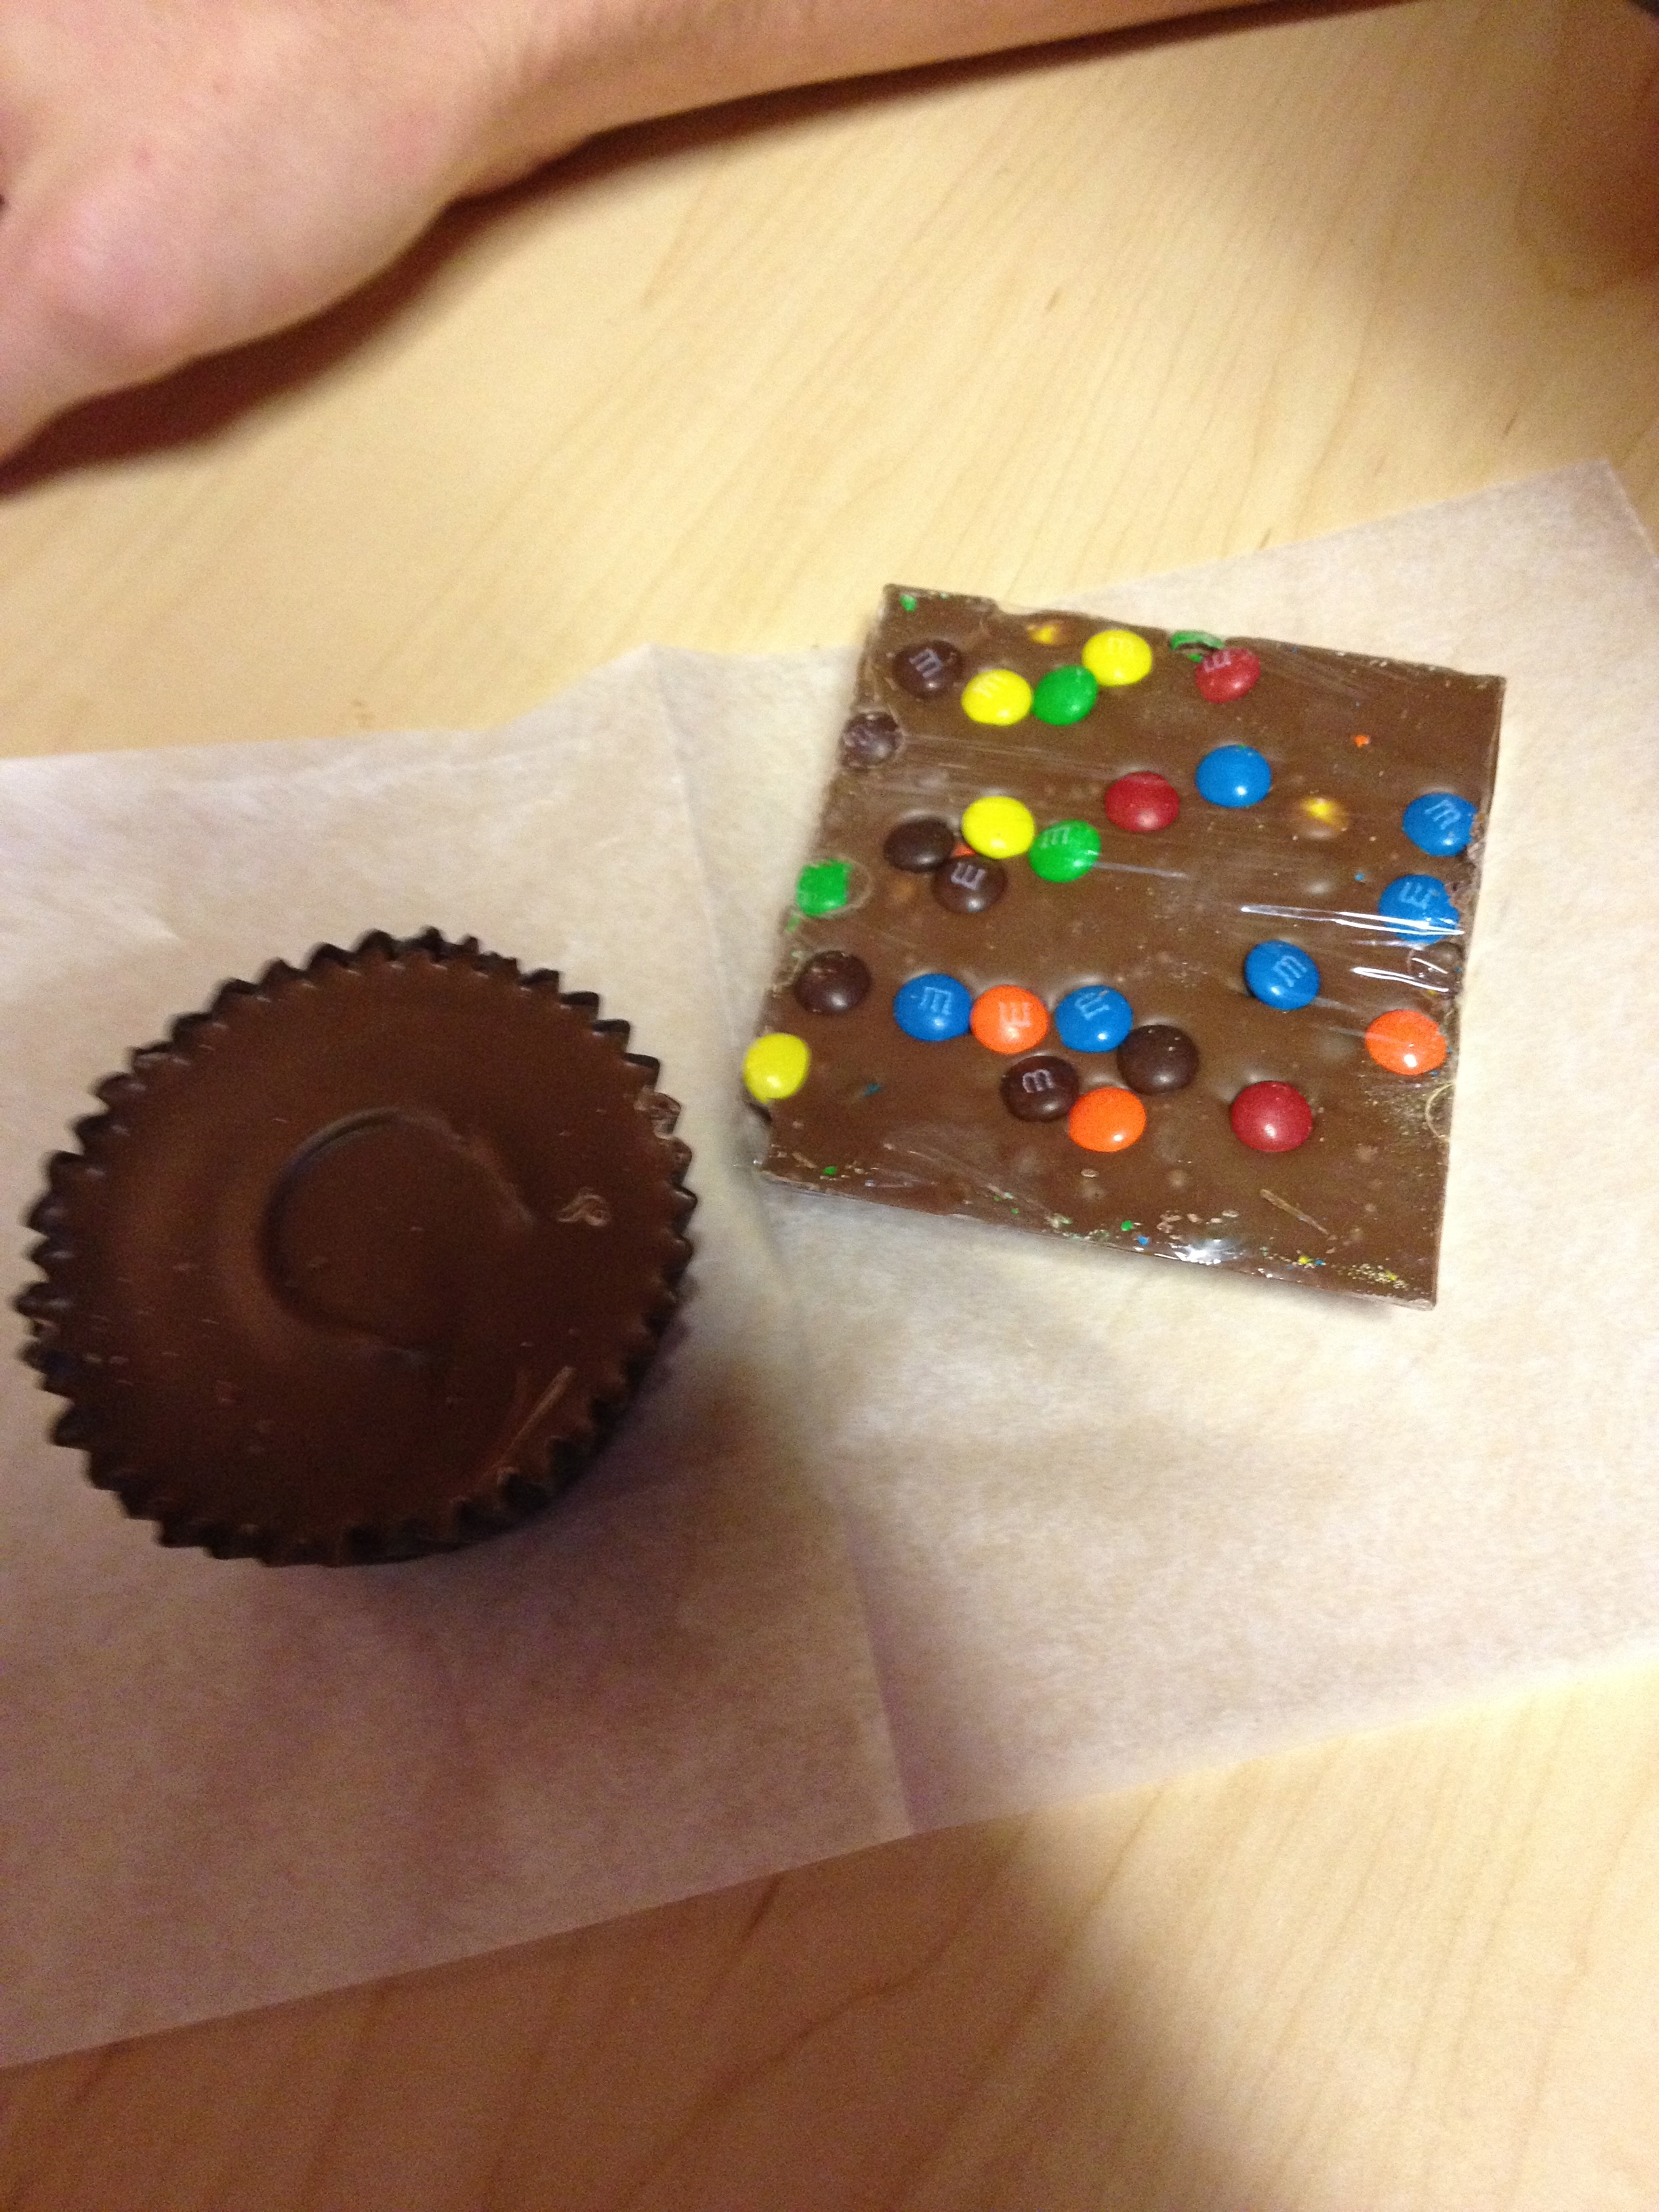
Next stop, Rocky Mountain Chocolate Factory. This could be considered an ordinary chocolate shop if it weren’t for the fact that you can sit there and watch them make the chocolate fresh behind the counter for you! They even have chocolate covered wine bottles for weddings. I’m telling you, this place is awesome. I’ve been there a couple of times now, and tried a lot of chocolates, and my favorite is still the M&M bark. Their homemade peanut butter cups are a close second, though. Or their Mint Oreo bark. Or their Chocolate Caramel Pretzel bark. Or really any chocolate.
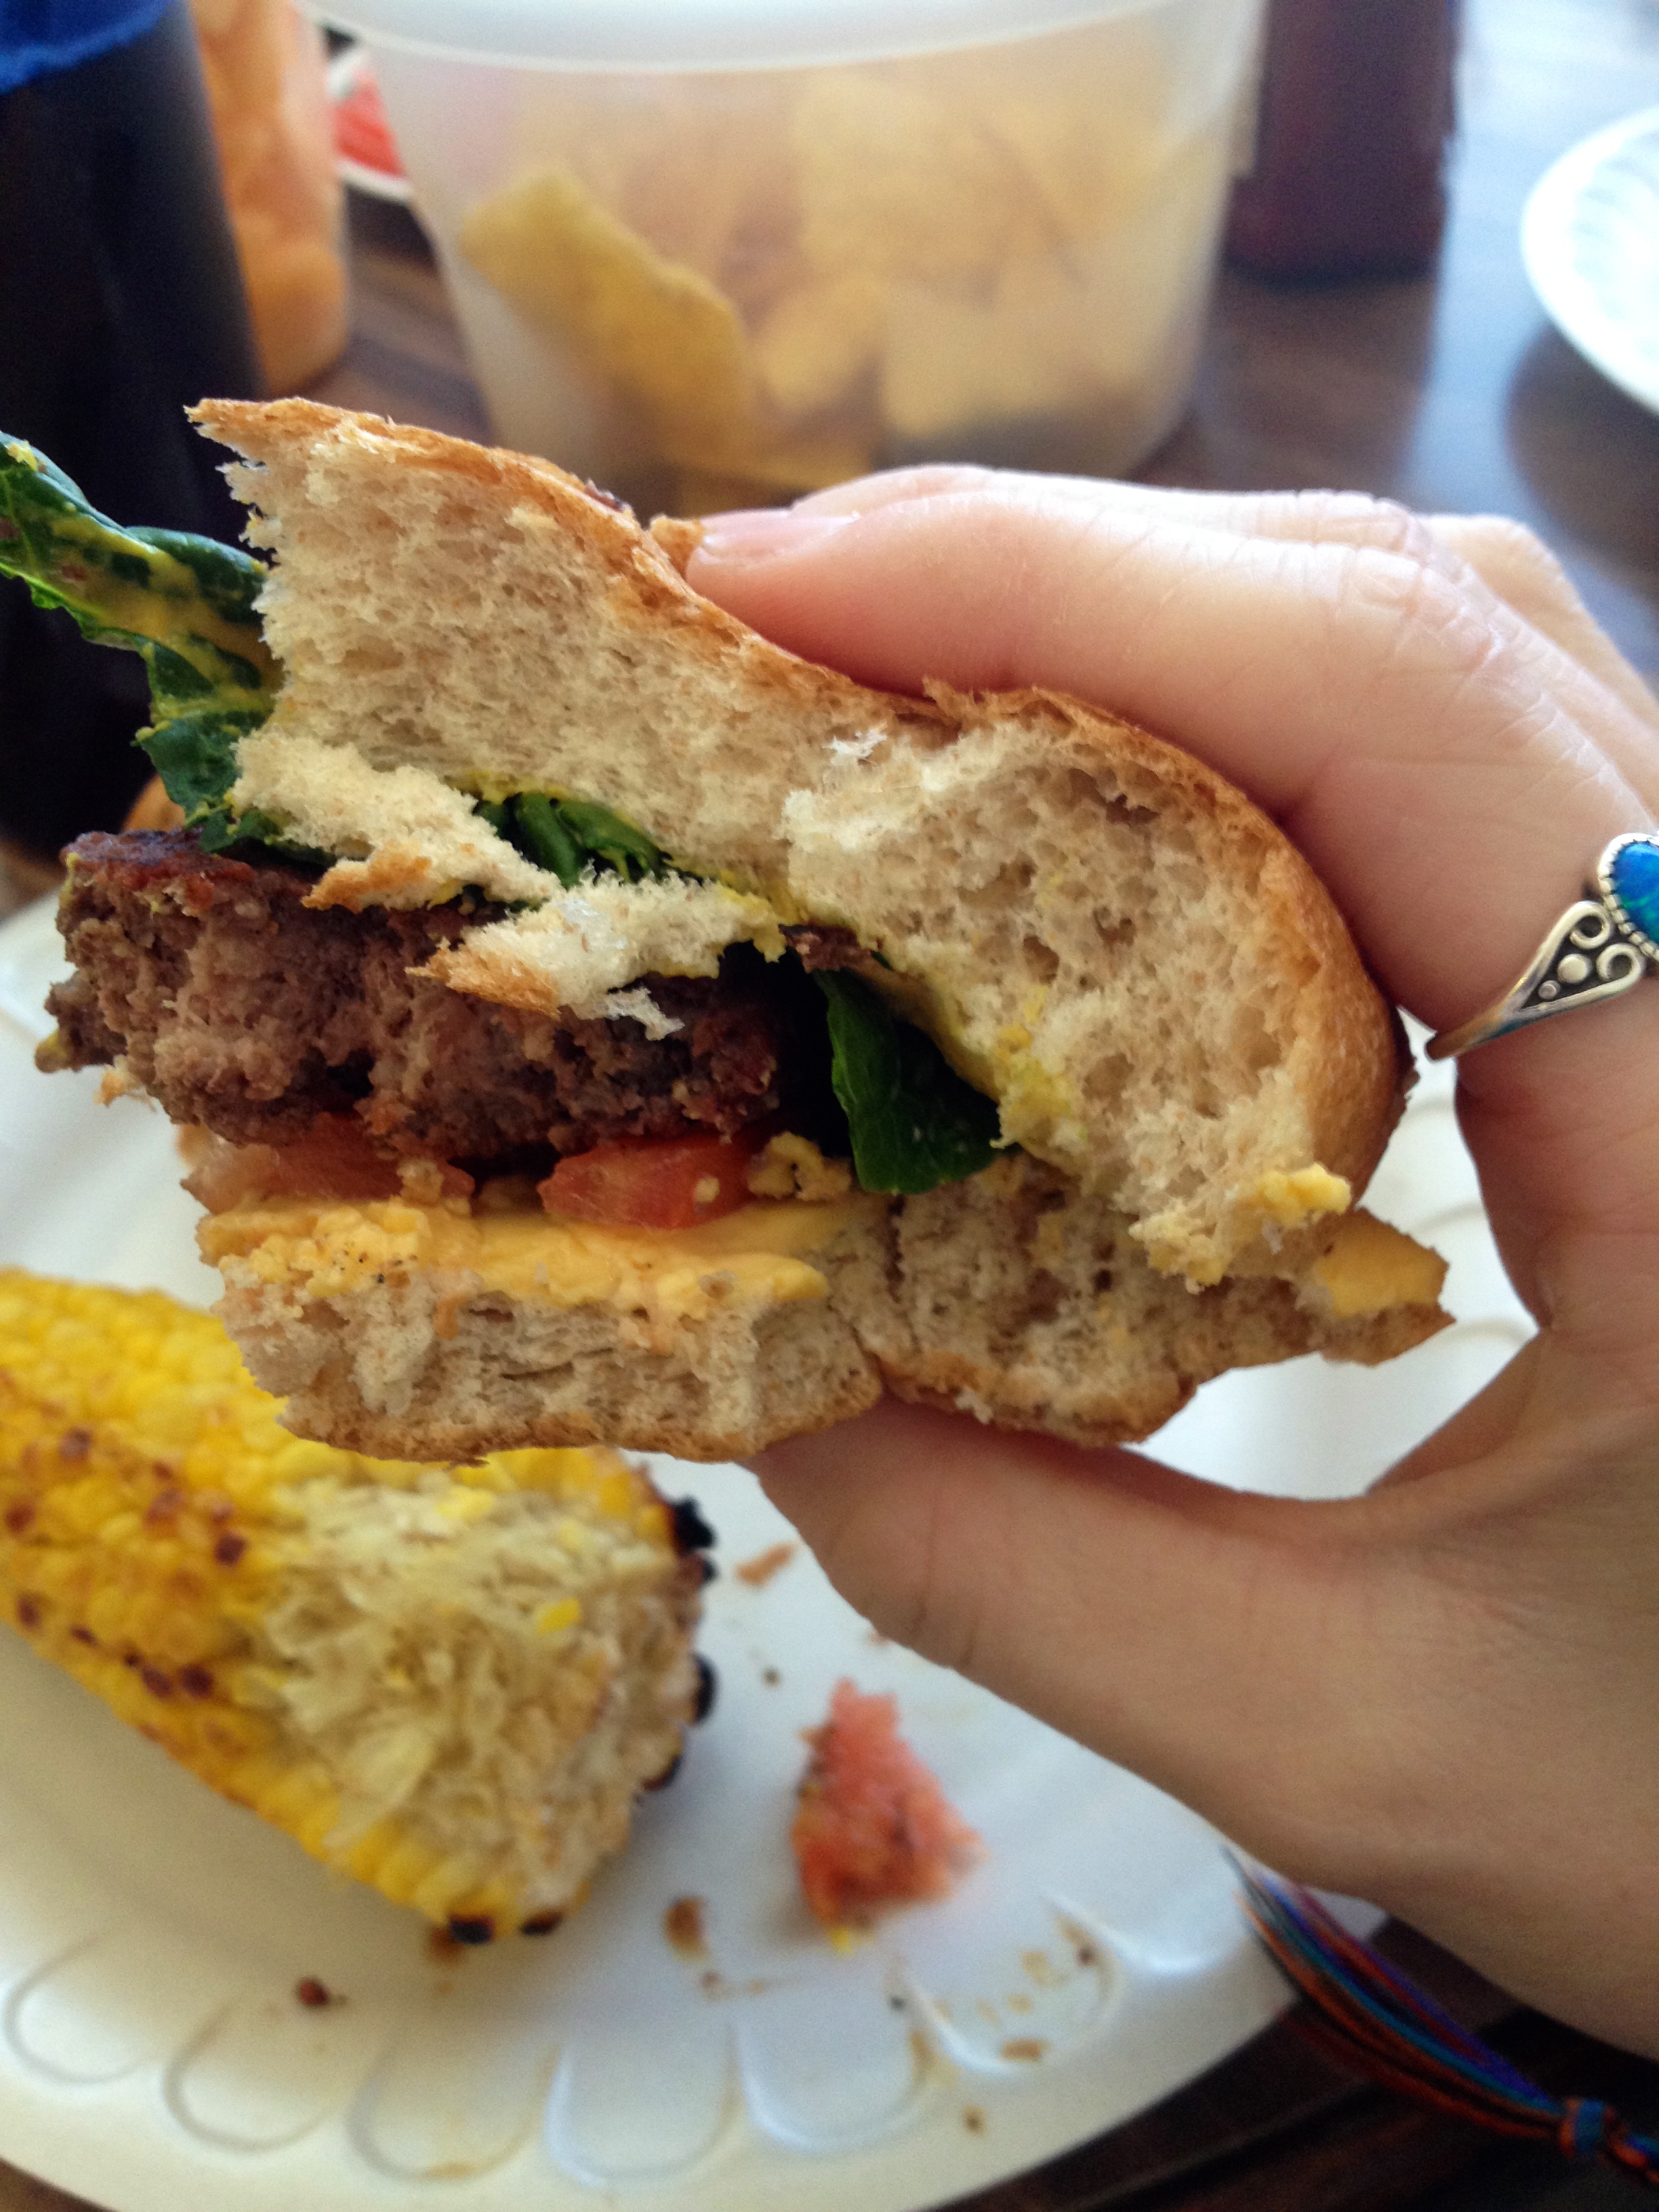
And finally, a little something that we made on our own! My boyfriend’s aunt took me to Whole Foods (where I tried the salad bar and ate tons of veggies I had never heard of), and a more local grocery store called Sprouts. During our explorations, we came across bison burger patties. We definitely don’t have those in our grocery stores up where I’m from, so we got some and grilled them. They were so incredibly tender and juicy and flavorful! After I had one, though, I was so full I could hardly move!
It’s always so much fun to go to Oklahoma and visit everyone. They’re welcoming and warm, and feel like family. And of course, when your boyfriend’s aunt loves food too, there’s always a few food adventures together! I can’t wait for my next trip out there, and to see what my next Joe’s cup is!