Bakewell Tart
Hi all! British Baking Show recipe number two coming at you now! If you read my last post about the Millionaire Shortbreads, you probably understand by now that you should just go watch the show, but just in case- go watch it, it’s worth it!
This recipe was actually a surprise to me. I really don’t enjoy many almond flavored things, so when my sister suggested that we make a Bakewell Tart (traditionally almond and raspberry flavored) I agreed for the fun of making it, totally anticipating not liking it. So, when I dipped my finger in the batter, I was very pleasantly surprised that the almond flavor was much more natural and sweet than a usual almond extract-flavored dessert would be. It ended up being a light and sweet treat that I legitimately enjoyed, much to my sister’s satisfaction. Side note: we used a food scale because everything was in grams and we wanted to have fun with a food scale. I’ve included the approximate conversions for easier baking without a scale! Here’s the recipe:
Pastry Ingredients:
- 280g all purpose flour (1 1/4 cups)
- 1 large egg, beaten
- 1 large egg yolk
- 165g unsalted butter (3/4 cup)
- 65g caster/superfine sugar (1/4 cup plus 2 tbsp)
- pinch salt
- 30g ground almonds (2 tbsp)
Filling Ingredients:
- 300g ground almonds (1 1/4 cup plus 2 tbsp)
- 130g caster sugar (a little more than 1/2 cup)
- 6 eggs, beaten
- 2 splashes almond extract
- 6 tbsp raspberry jam (the recipe called for 3 but we decided it would be better with more)
- 2 tbsp flaked almonds
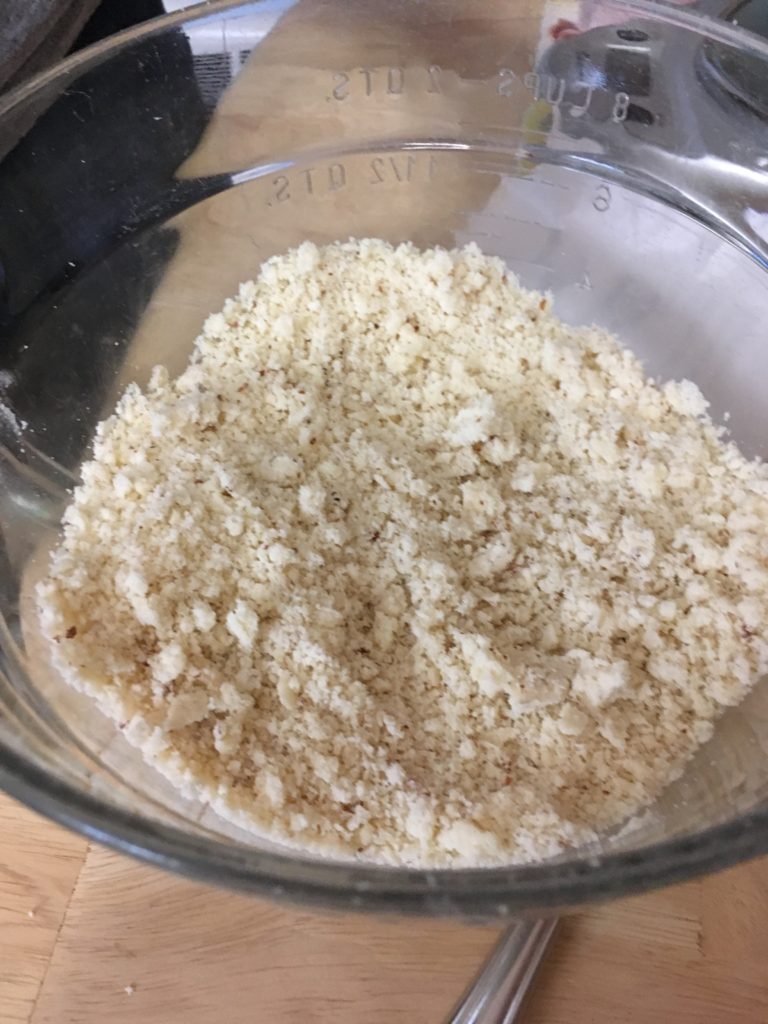
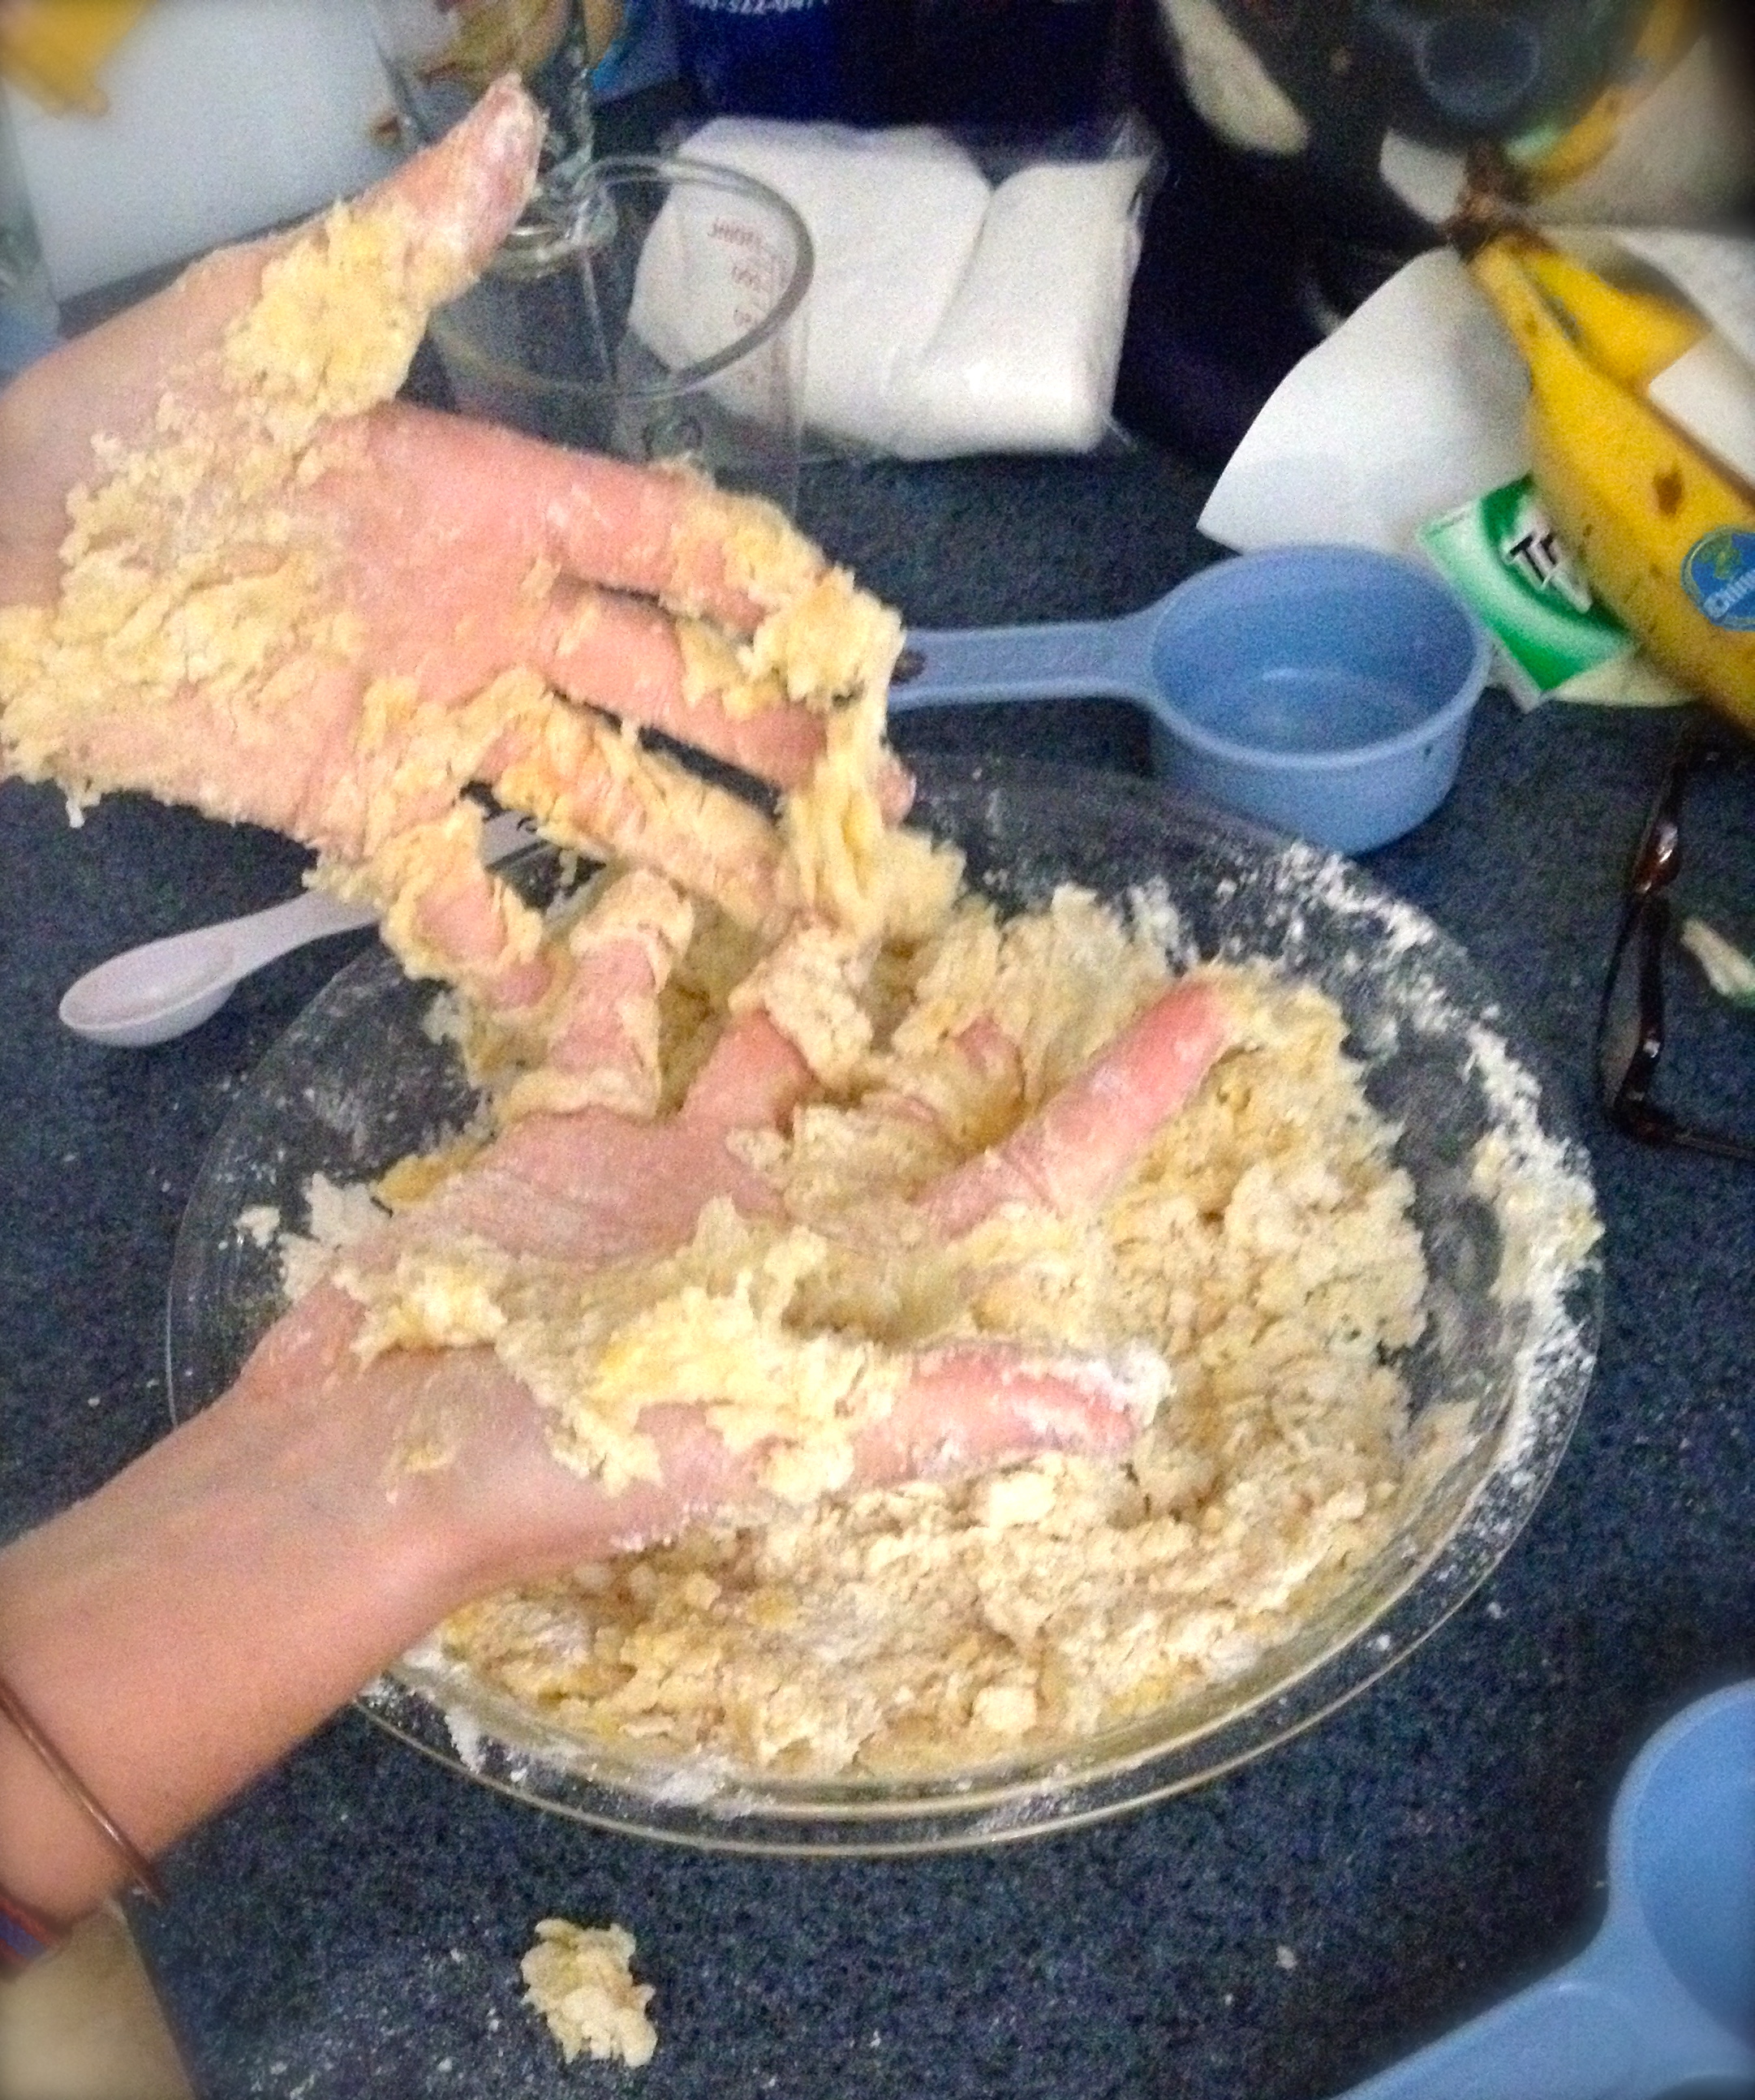
Pastry: In a large bowl, rub together flour, salt, sugar, butter, and ground almonds with your fingers until they come together to look like breadcrumbs.
Add the egg and egg yolk one at a time and mix until a smooth dough is formed.
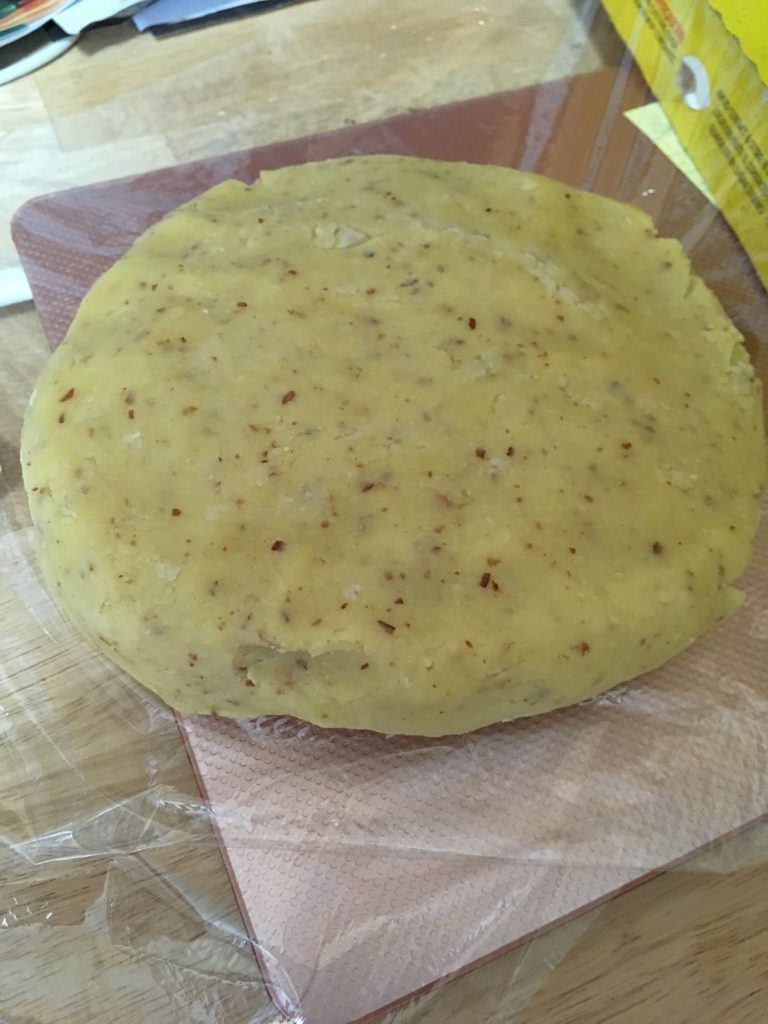
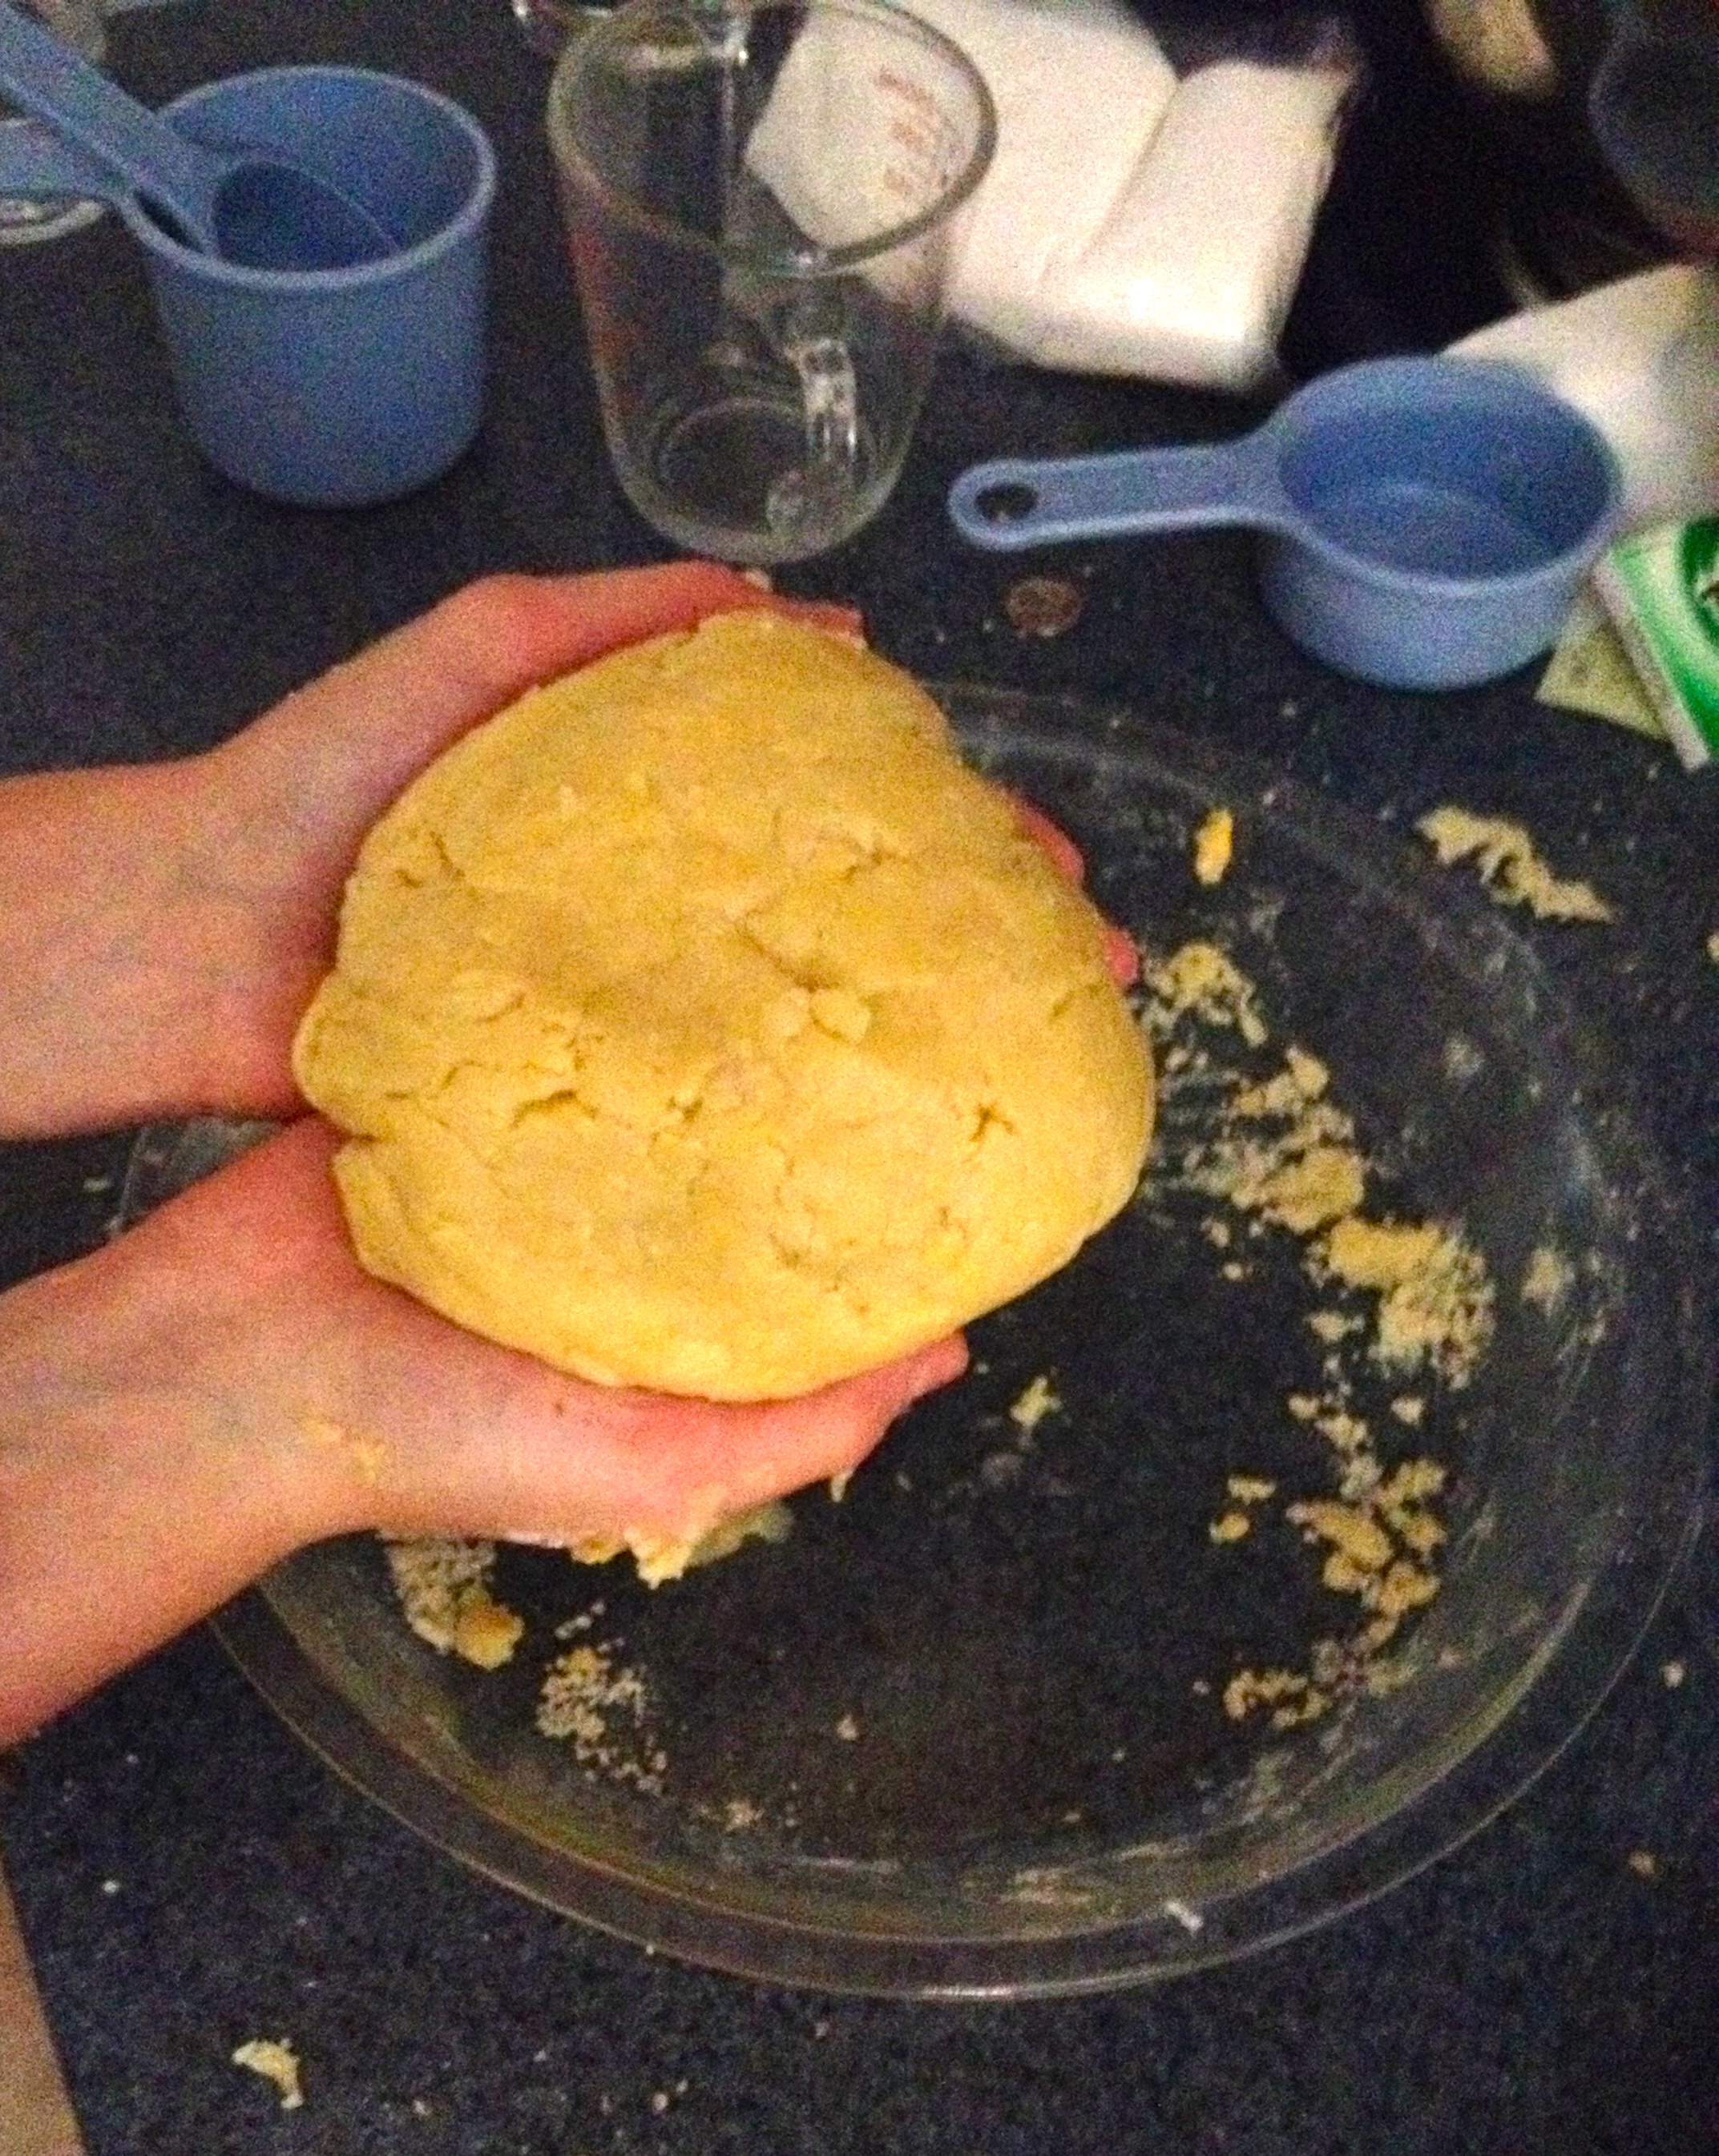
Wrap the dough in plastic wrap and refrigerate for 30 minutes. Meanwhile, preheat the oven to 350F and grease and flour a 9″ loose-bottomed tart tin.
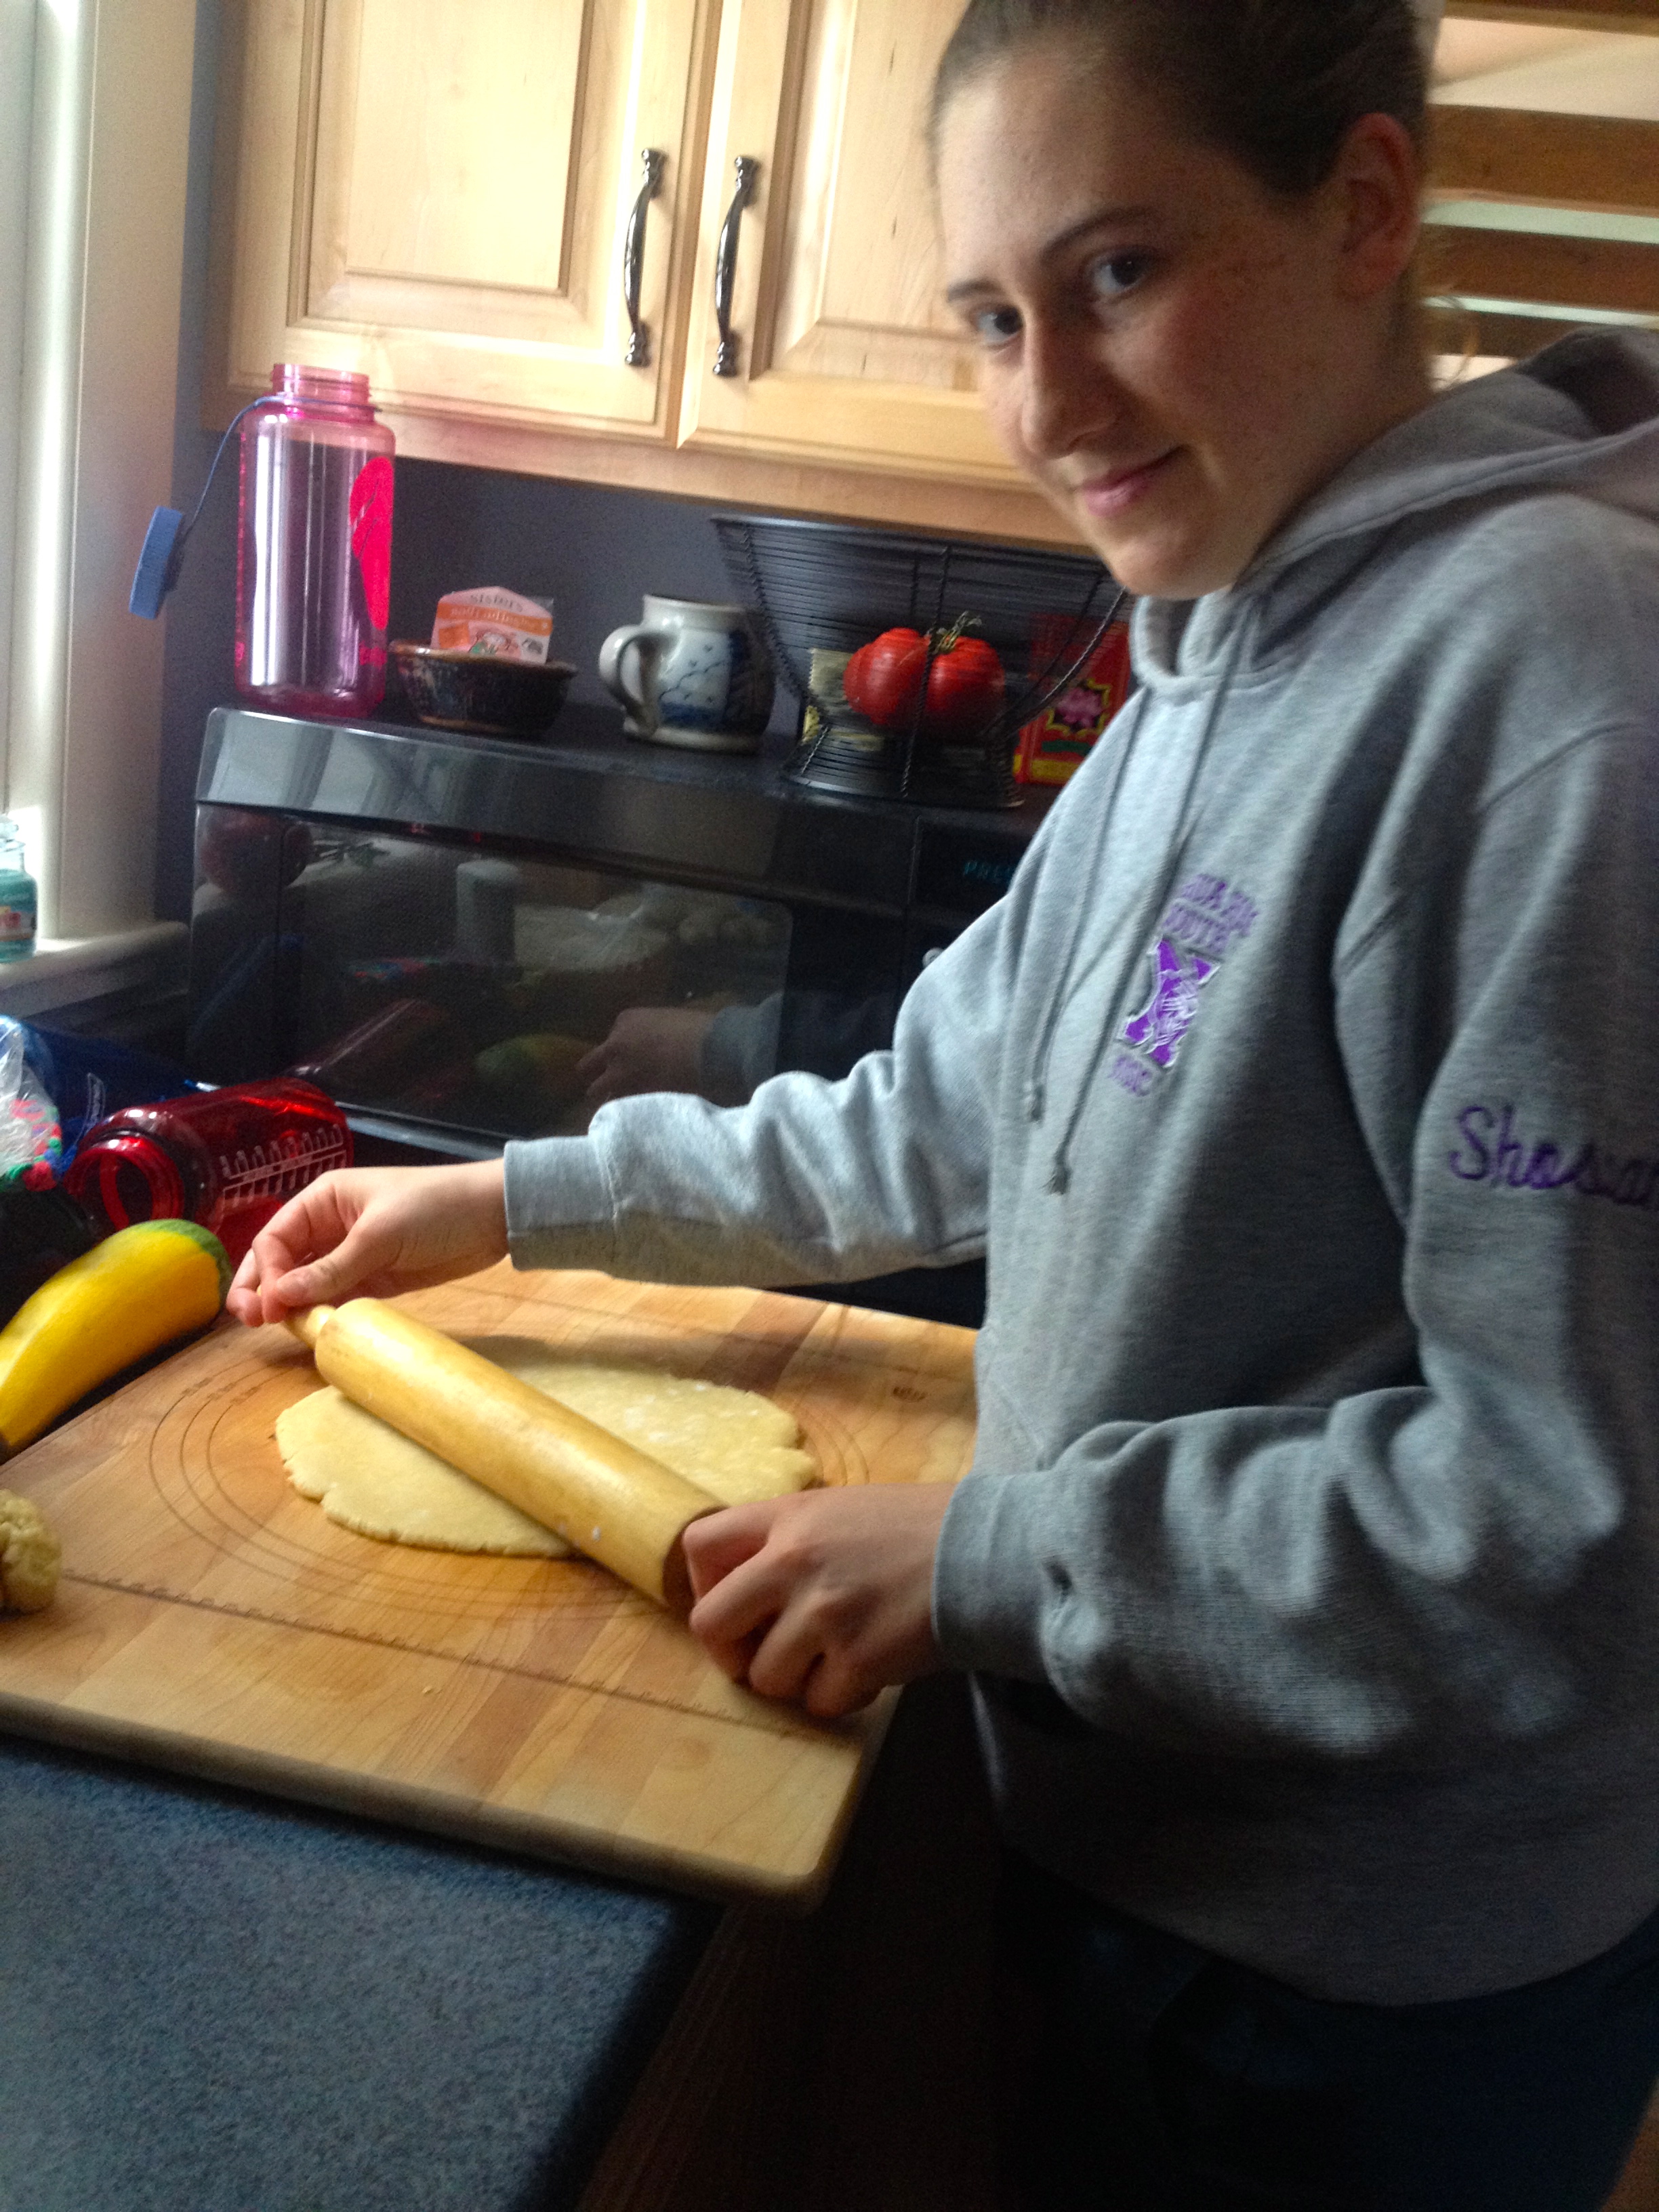
Unwrap the cold pastry and roll onto a floured surface. The dough is crumbly so don’t be discouraged if it’s hard to work with at first!
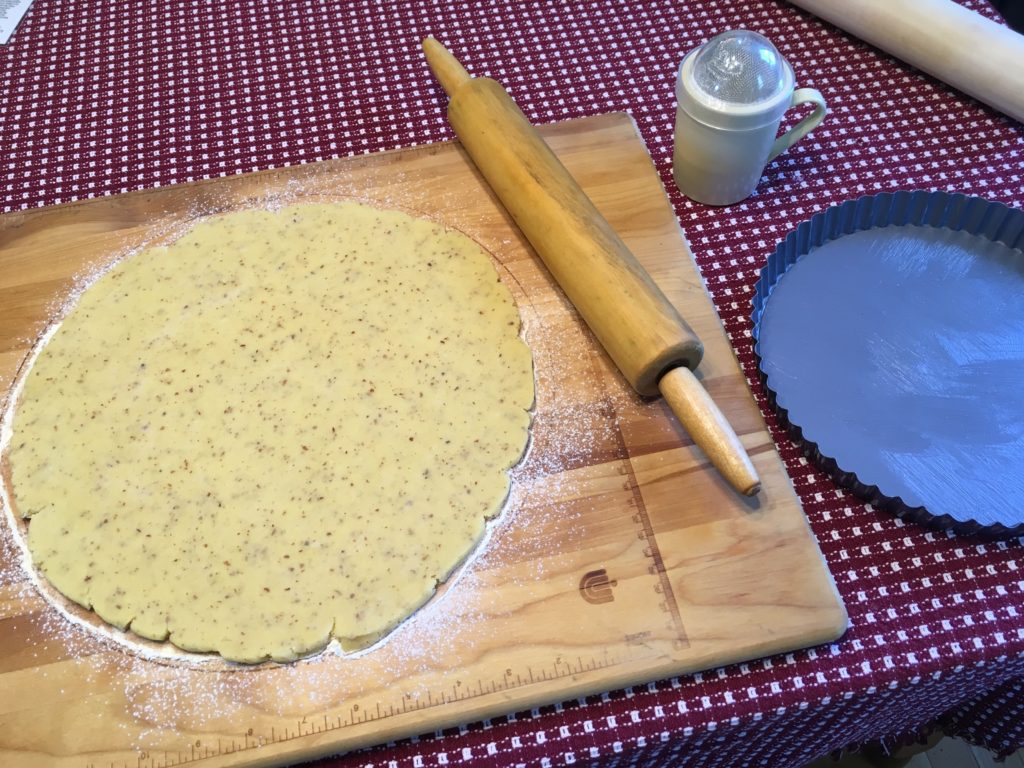
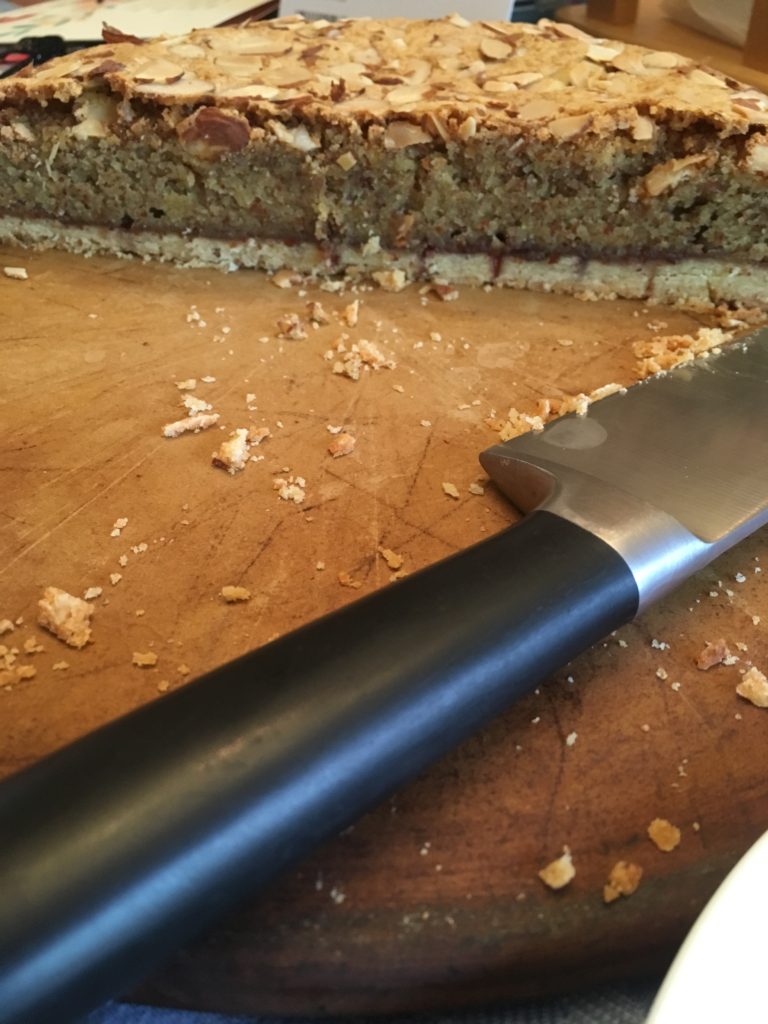
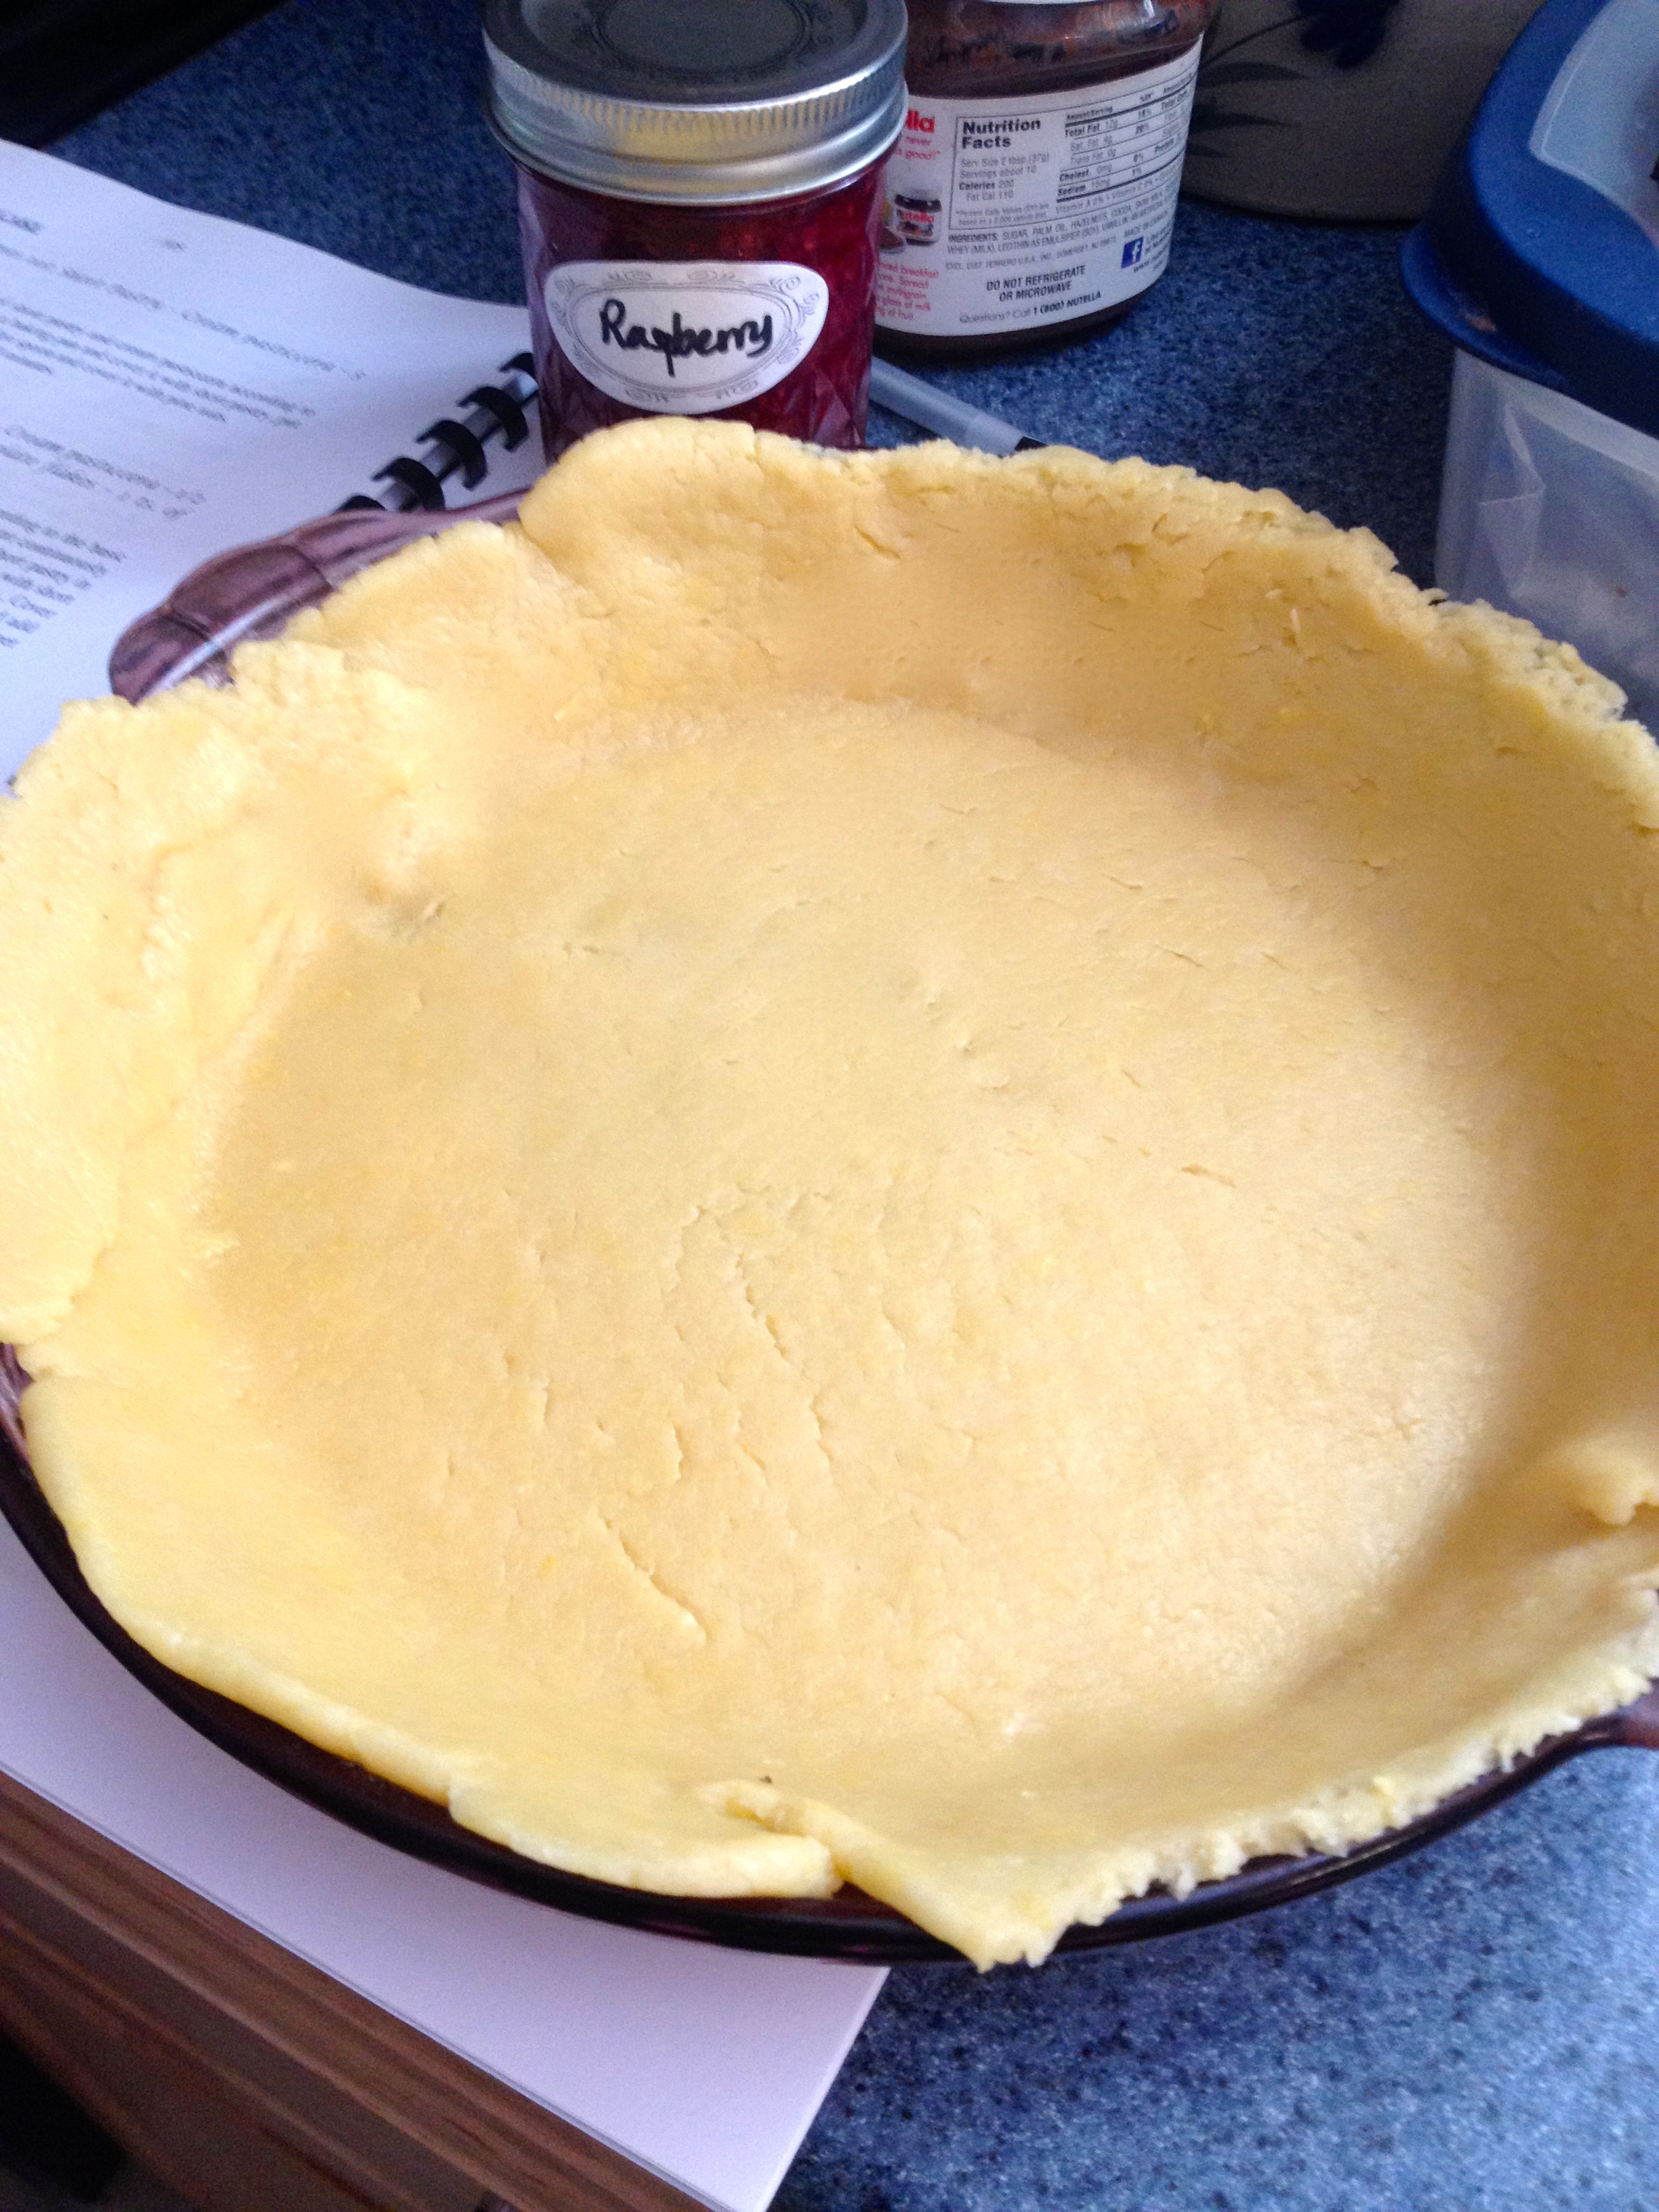
Line the tart tin with the pastry and trim off any excess from the sides. Prick the base with a fork and place parchment over the pastry. Put baking beans/uncooked rice over the parchment to “blind” bake the pastry (aka pre-cook it) for 15 minutes.

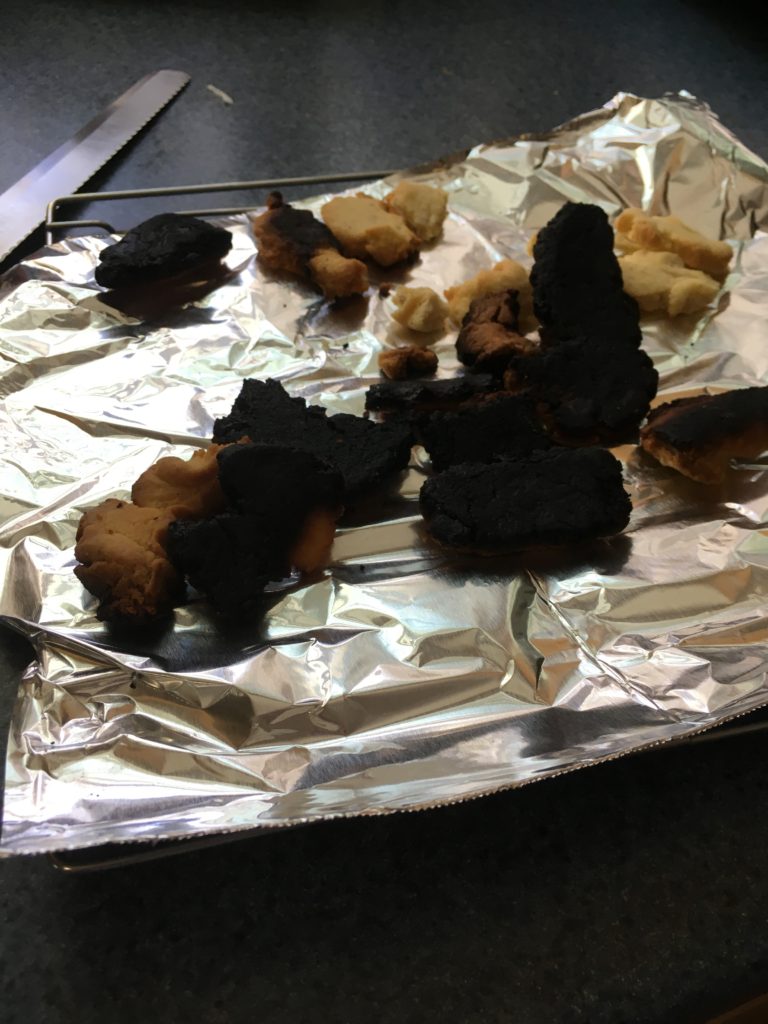
Side note: you definitely want to trim off excess pastry. We didn’t because we thought trimming it afterward would give us a cleaner edge. Turns out the pastry falls off the sides anyway and burns on your oven floor, leading to multiple smoke detectors going off. Whoops.
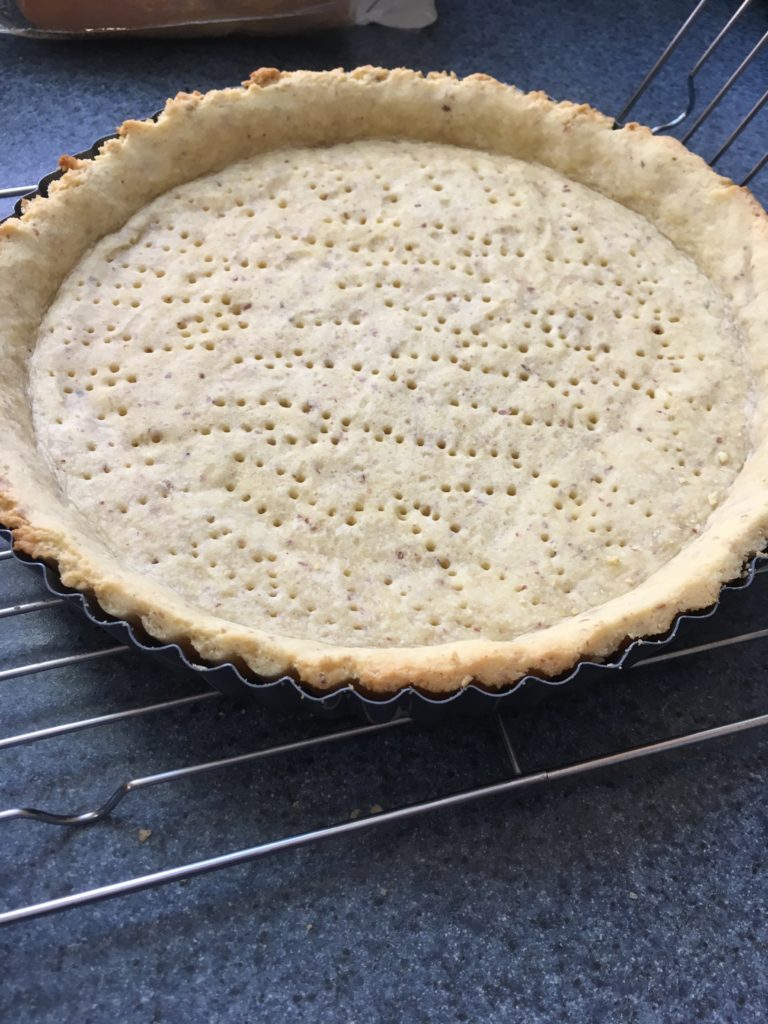
Reduce the oven temperature to 330F. While the pastry cools, mix the ground almonds and caster sugar together until well combined. Add the beaten eggs and almond extract and mix well.
When the pastry is cool, spread an even layer of raspberry jam over the base.
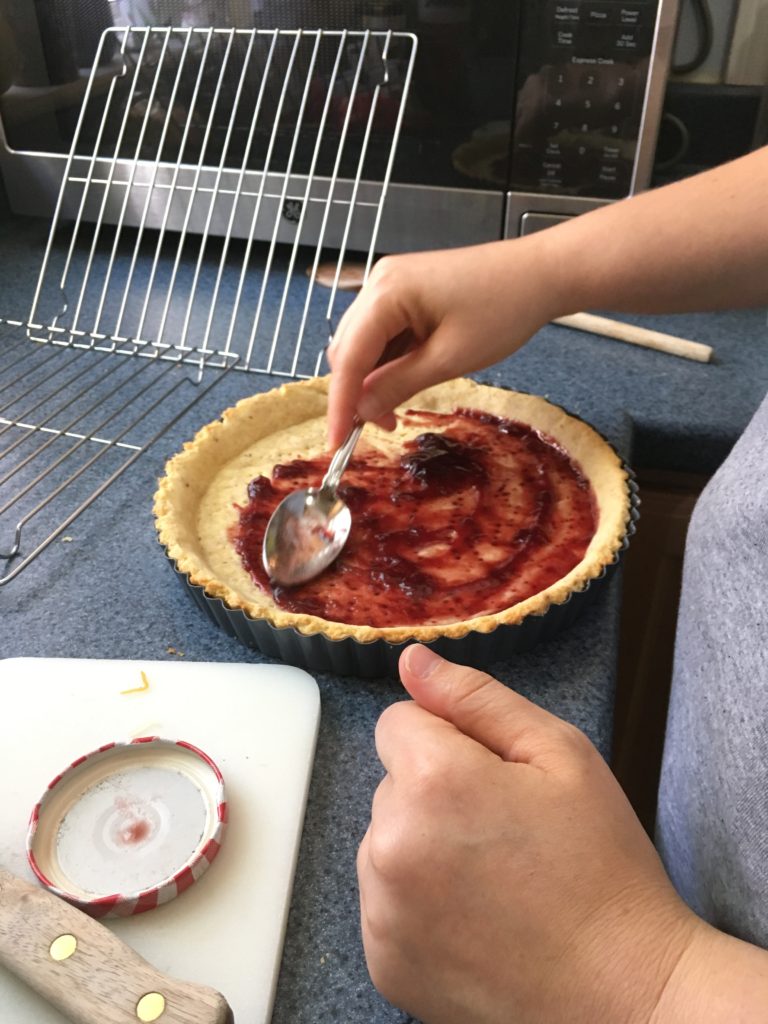
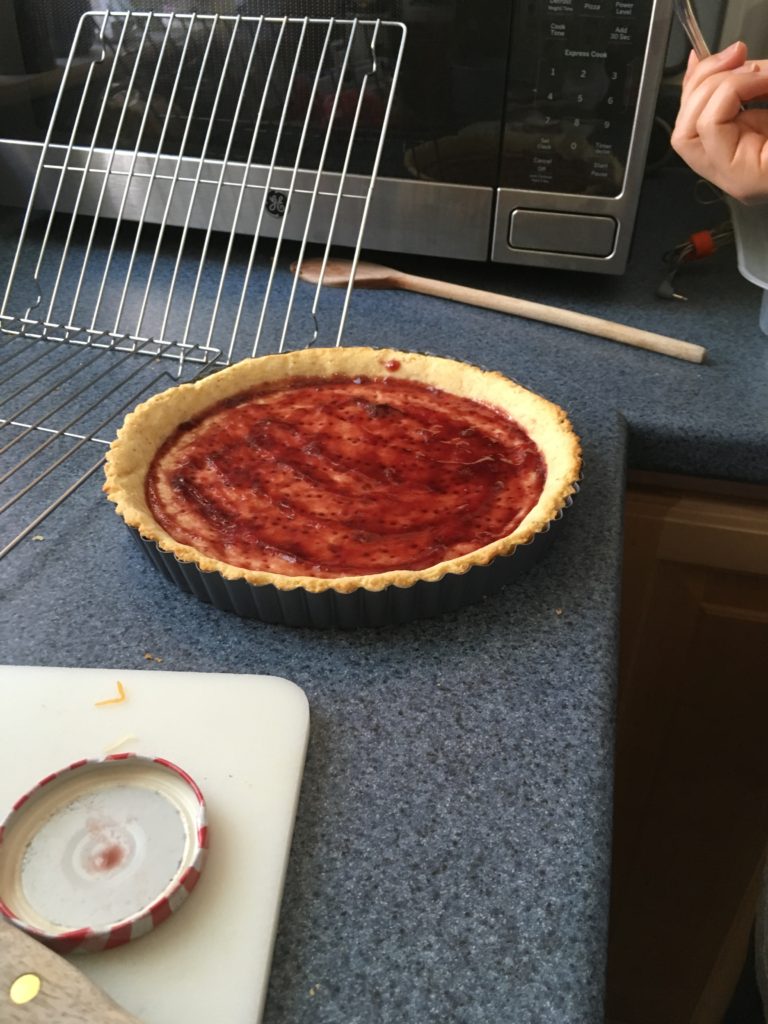
Pour the filling over the raspberry jam and fill the remainder of the pastry.
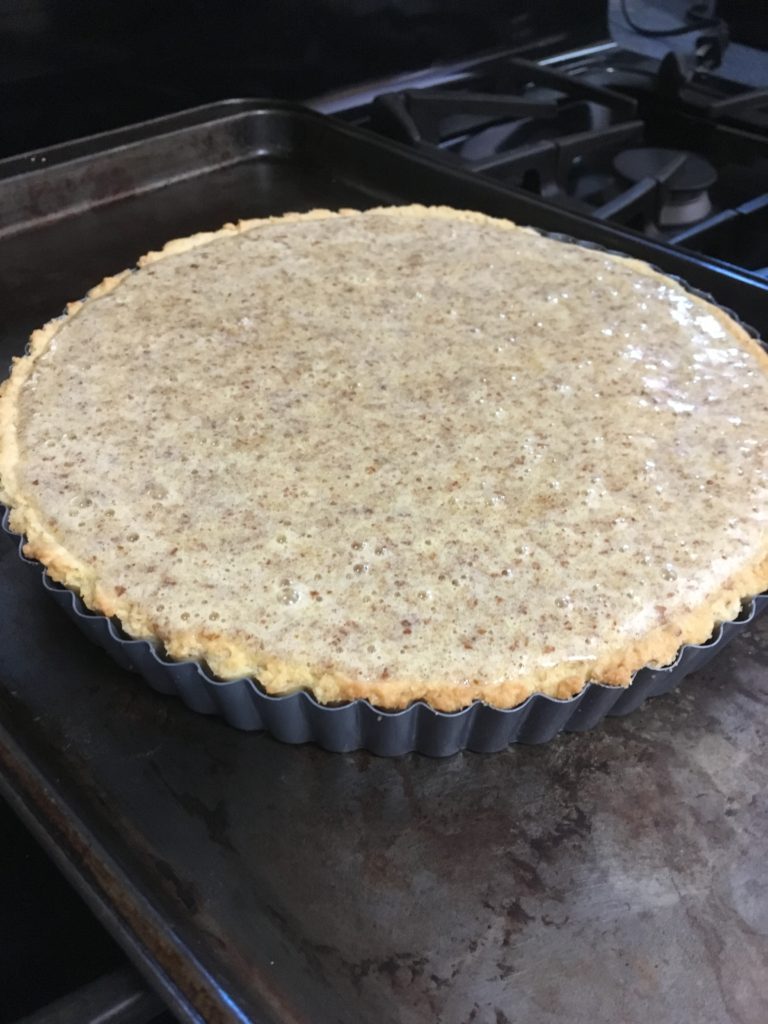
Top with flaked almonds and bake 25-30 minutes or until the filling is baked through (a toothpick inserted in the middle should come out clean) and golden brown.
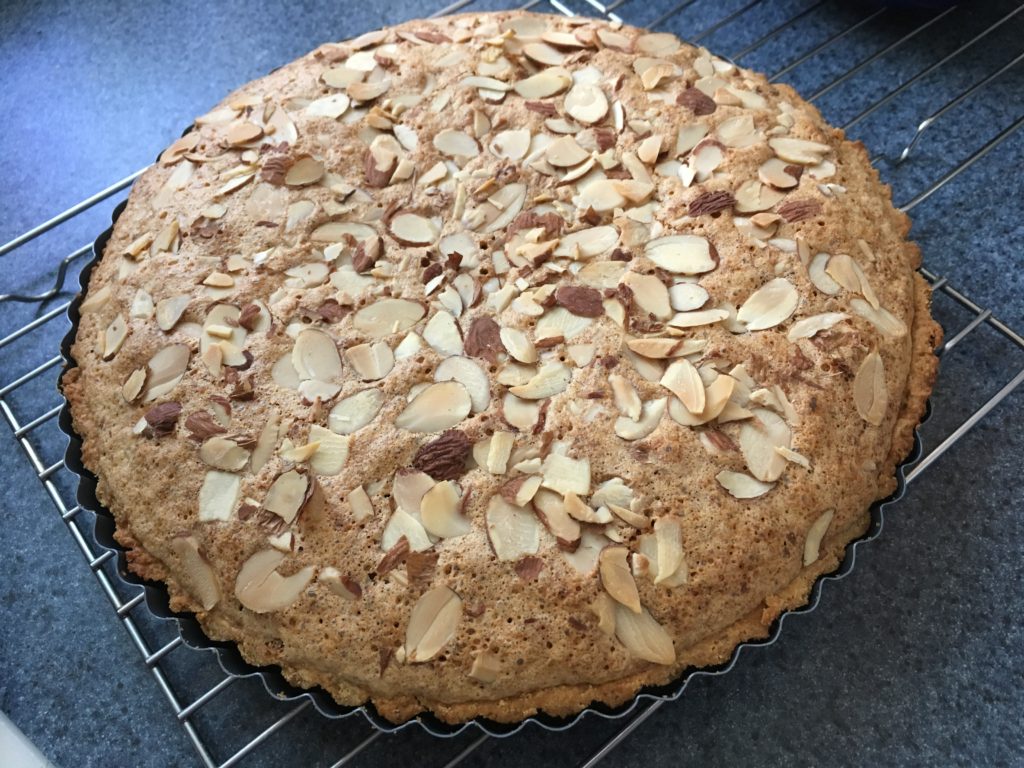
And now go ahead and dig in! Happy baking!
Friendsgiving
Hello, all! Happy Thanksgiving week! We have officially entered holiday season, which is the best time of year to get some baking in, and a time that is full of friends and family. I was lucky enough to herald in the holiday season with a few of my closest friends for our first “Friendsgiving”. We all contributed to the meal, and my job was (of course) the dessert. I made pumpkin pie, but not the traditional way. In my family, we call this recipe “PNG Pumpkin Pie” because it’s the recipe my Mom used when we lived in Papua New Guinea. It’s less sweet and firmer than traditional pumpkin pie, and I much prefer it to regular pumpkin pie. I decided to take it up a notch by roasting my own pumpkin instead of using canned pumpkin. Here’s the recipe:
Pie Filling Ingredients:
- 15 oz pureed pumpkin (you can use canned pumpkin)
- 3 eggs, beaten
- 1 1/2 cup evaporated milk
- 1 1/2 tsp ground cinnamon
- 1/2 tsp salt
- 3/4 cup sugar
Pie Crust Ingredients:
- 1 1/3 cup all-purpose flour
- 1/2 tsp salt
- 1/2 cup shortening
- 3 Tbsp water
Let’s start with how to roast the pumpkin. Like I mentioned above, it’s not necessary to roast your own pumpkin, but I think it’s a great way to use up your sugar pumpkins that you used for fall decorations!
First, preheat the oven to 350ºF. Line a baking sheet with foil, and place your pumpkin (a small sugar pumpkin) on the foil. Pierce the top of the pumpkin around the stem about eight times so that while the pumpkin is roasting, the steam can leave the pumpkin instead of building up and exploding the pumpkin.
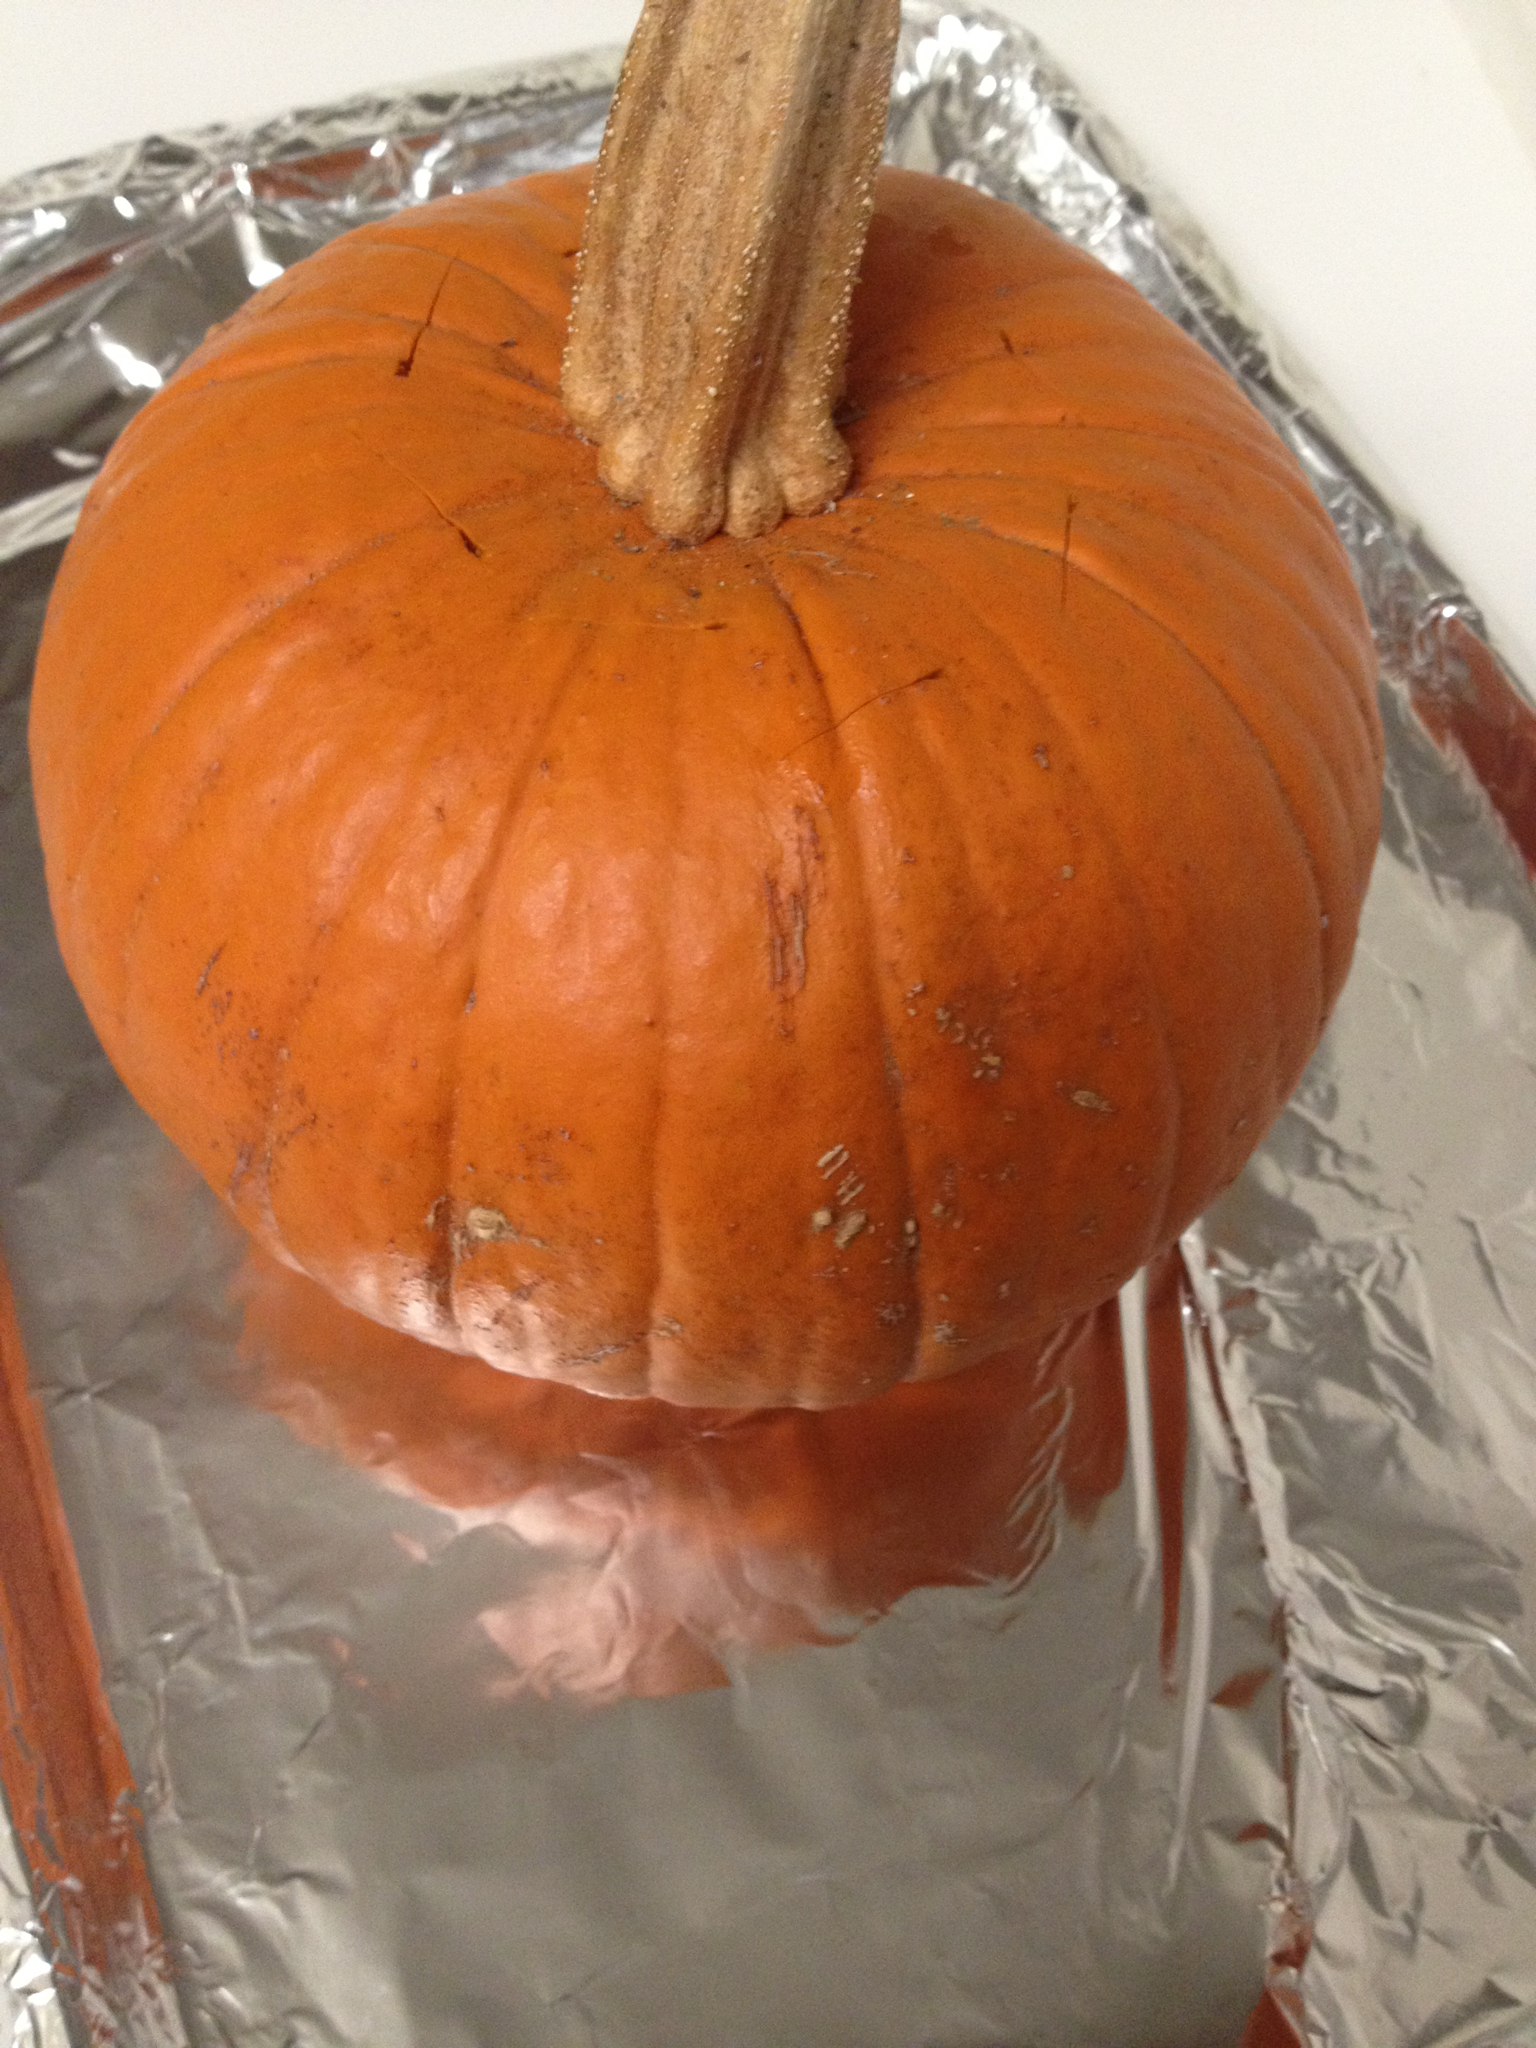
Roast the pumpkin at 350ºF for 2 hours until the pumpkin is brown and slumped. The skin will separate from the flesh of the pumpkin. Let it cool so that you can peel off the skin without burning your fingers.

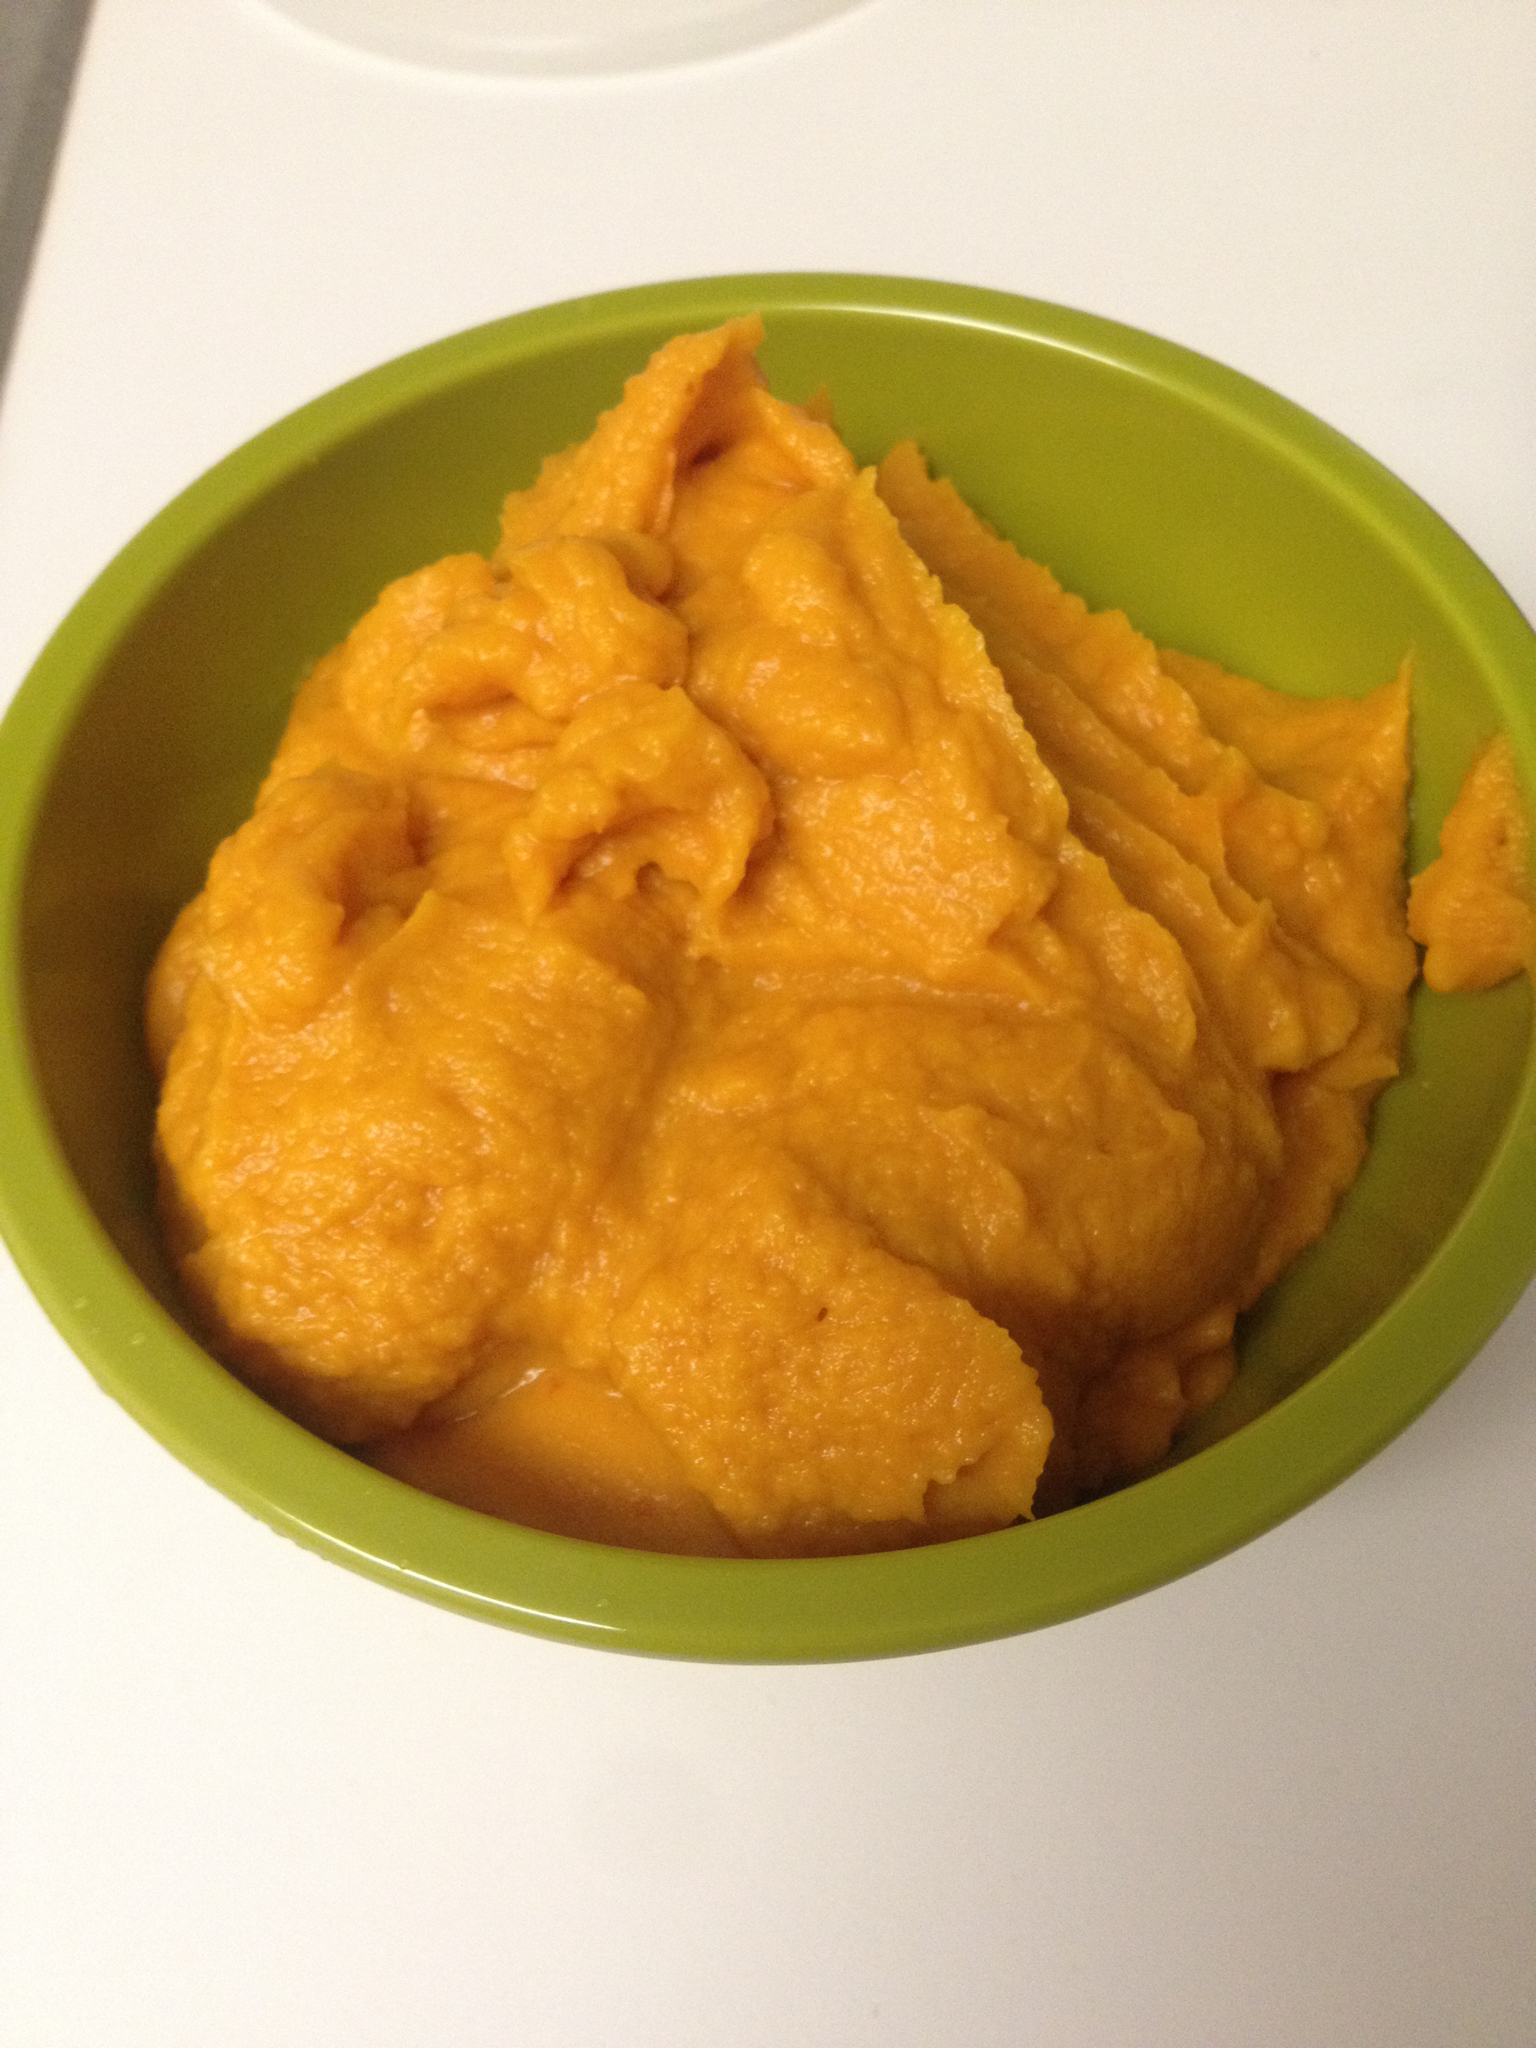
Next, peel off the skin, cut the flesh open, and scoop out the seeds and membranes. Put the flesh of the pumpkin in a food processor and puree it for about 2 minutes, or until it’s smooth. It will look something like this:
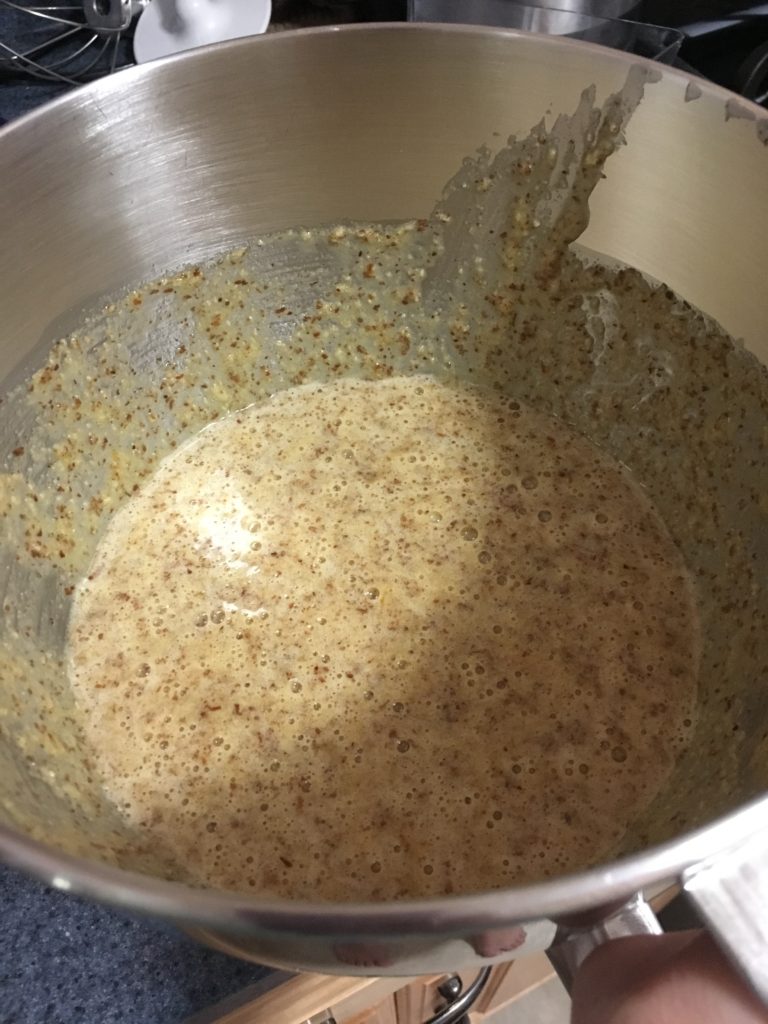
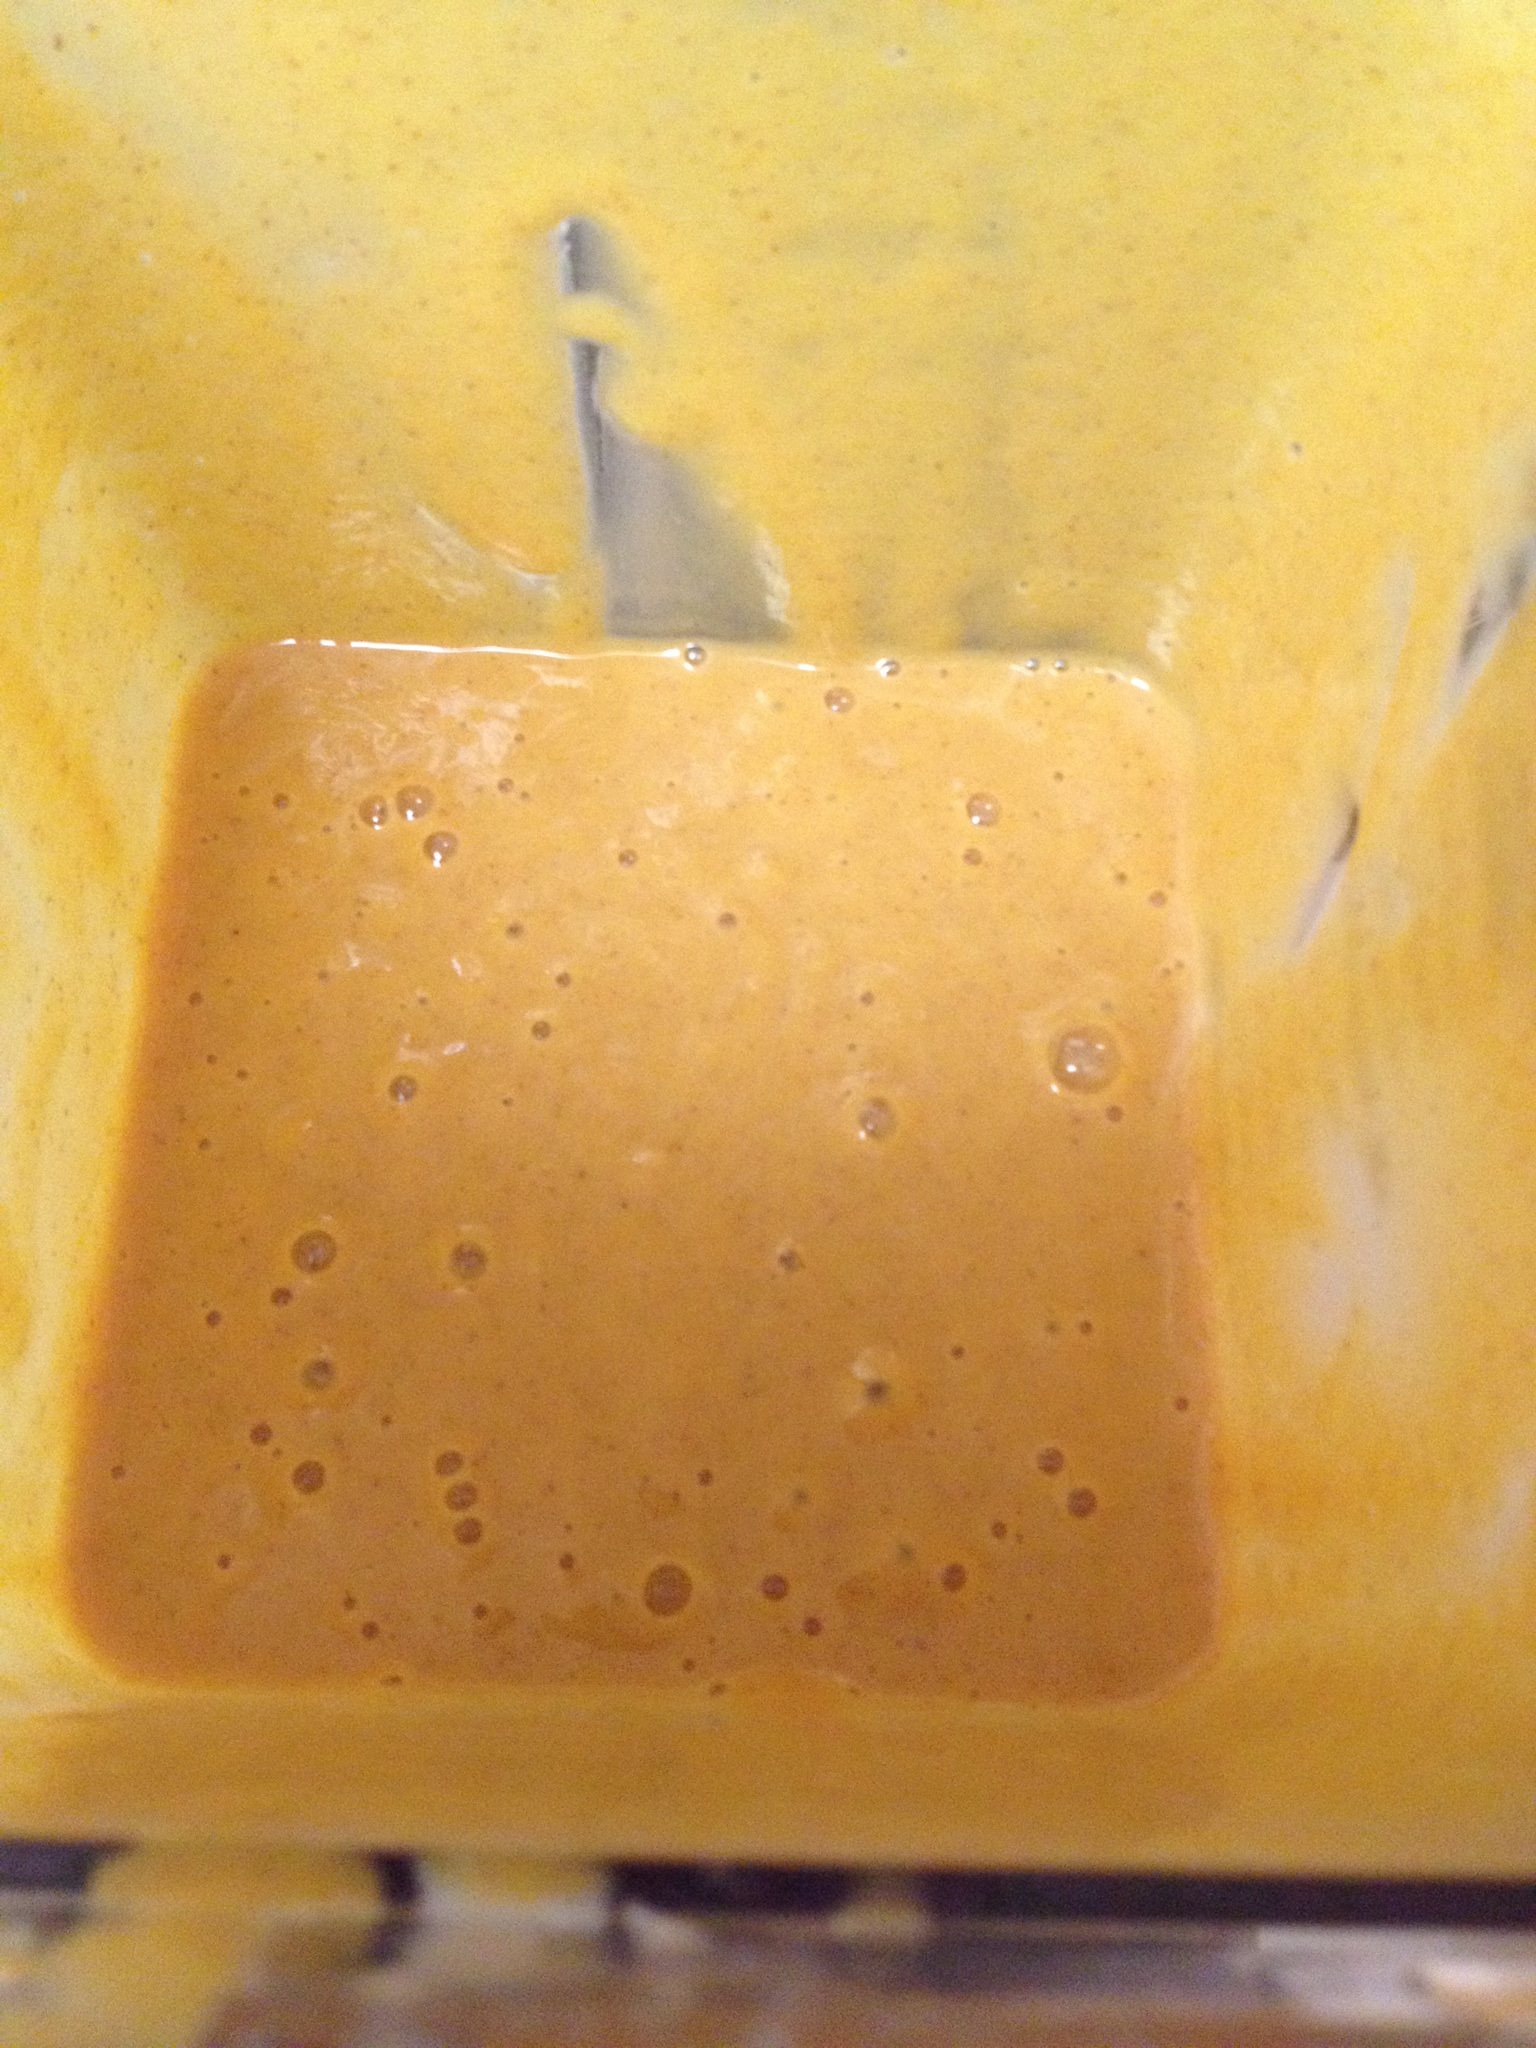
Now that you’ve roasted your pumpkin, it’s time to make the filling for the pie. In a blender, combine your pumpkin puree, evaporated milk, cinnamon, salt, eggs, and sugar. Blend it together until it’s completely mixed. It’ll look like this:
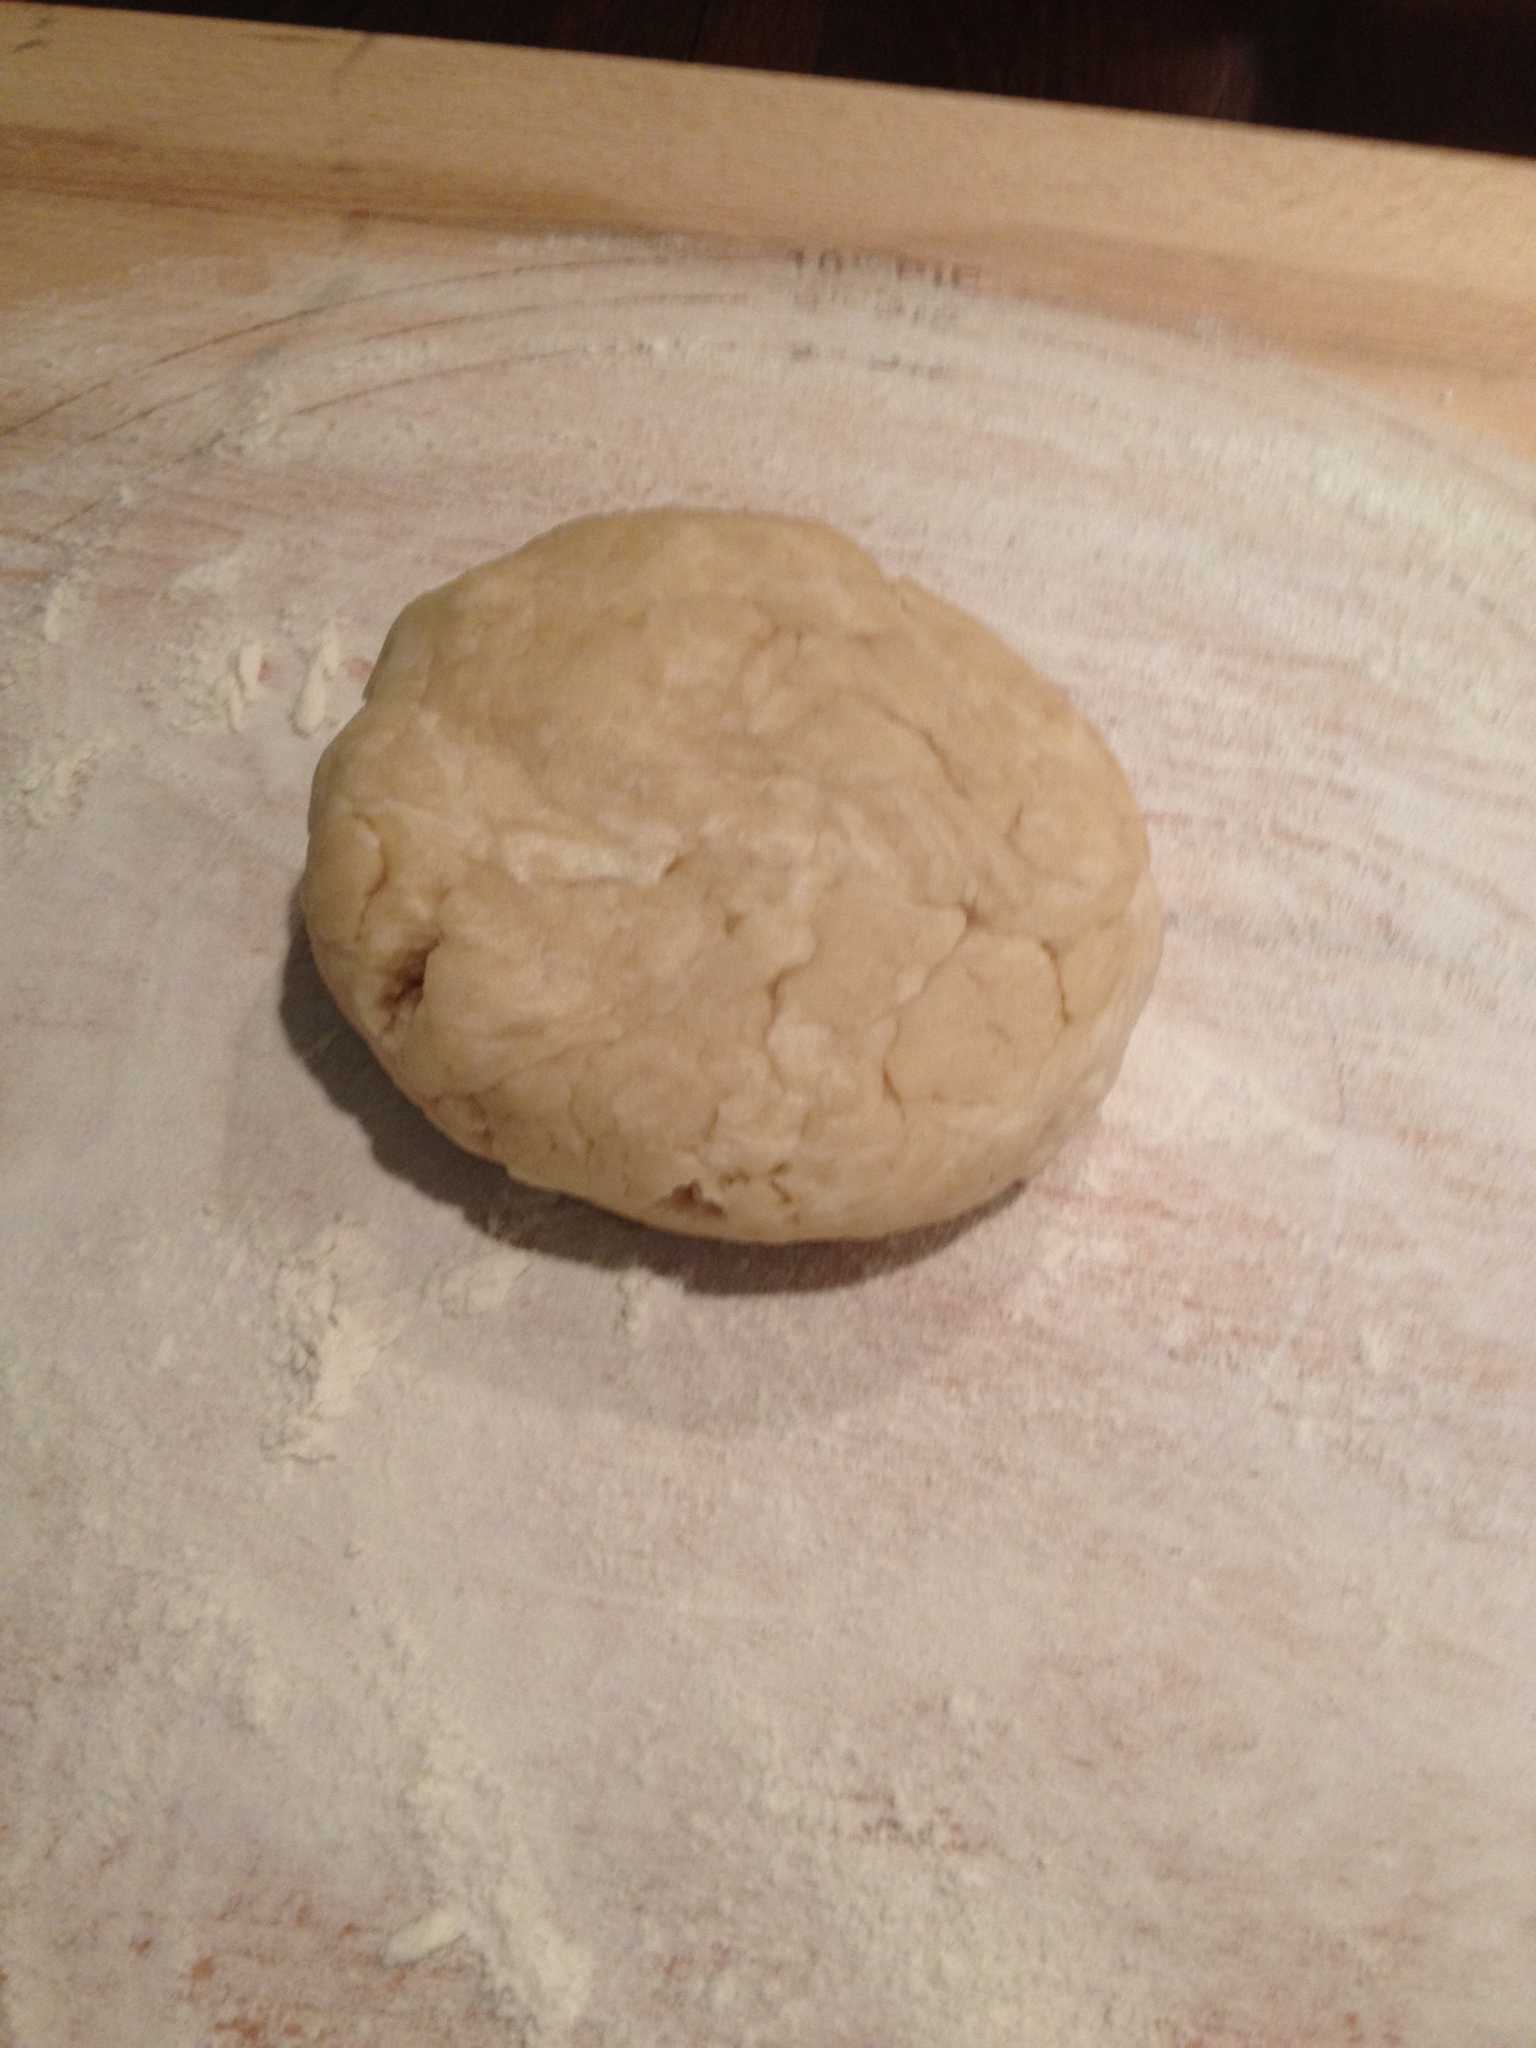
Okay, now set that aside. Now it’s time to make the crust. In a separate bowl, combine the flour and salt. Cut in the shortening until you have pea-sized chunks (or something like that).

Add the water, one tablespoon at a time. Mix the dough after each addition. By the time you’ve added all the water and have kneaded the dough a bit, it will hold together like this:
Now, using a floured surface and a floured rolling pin, roll the dough out until it’s about 10″ across to fit your 9″ pie pan. Here’s a tip: to transfer your pie dough to your pie pan, roll the crust up loosely around your rolling pin and then unroll the crust from the rolling pin over the pie pan. Fold the edges of the crust over and flute them so that you have a pretty edge around your pie pan.
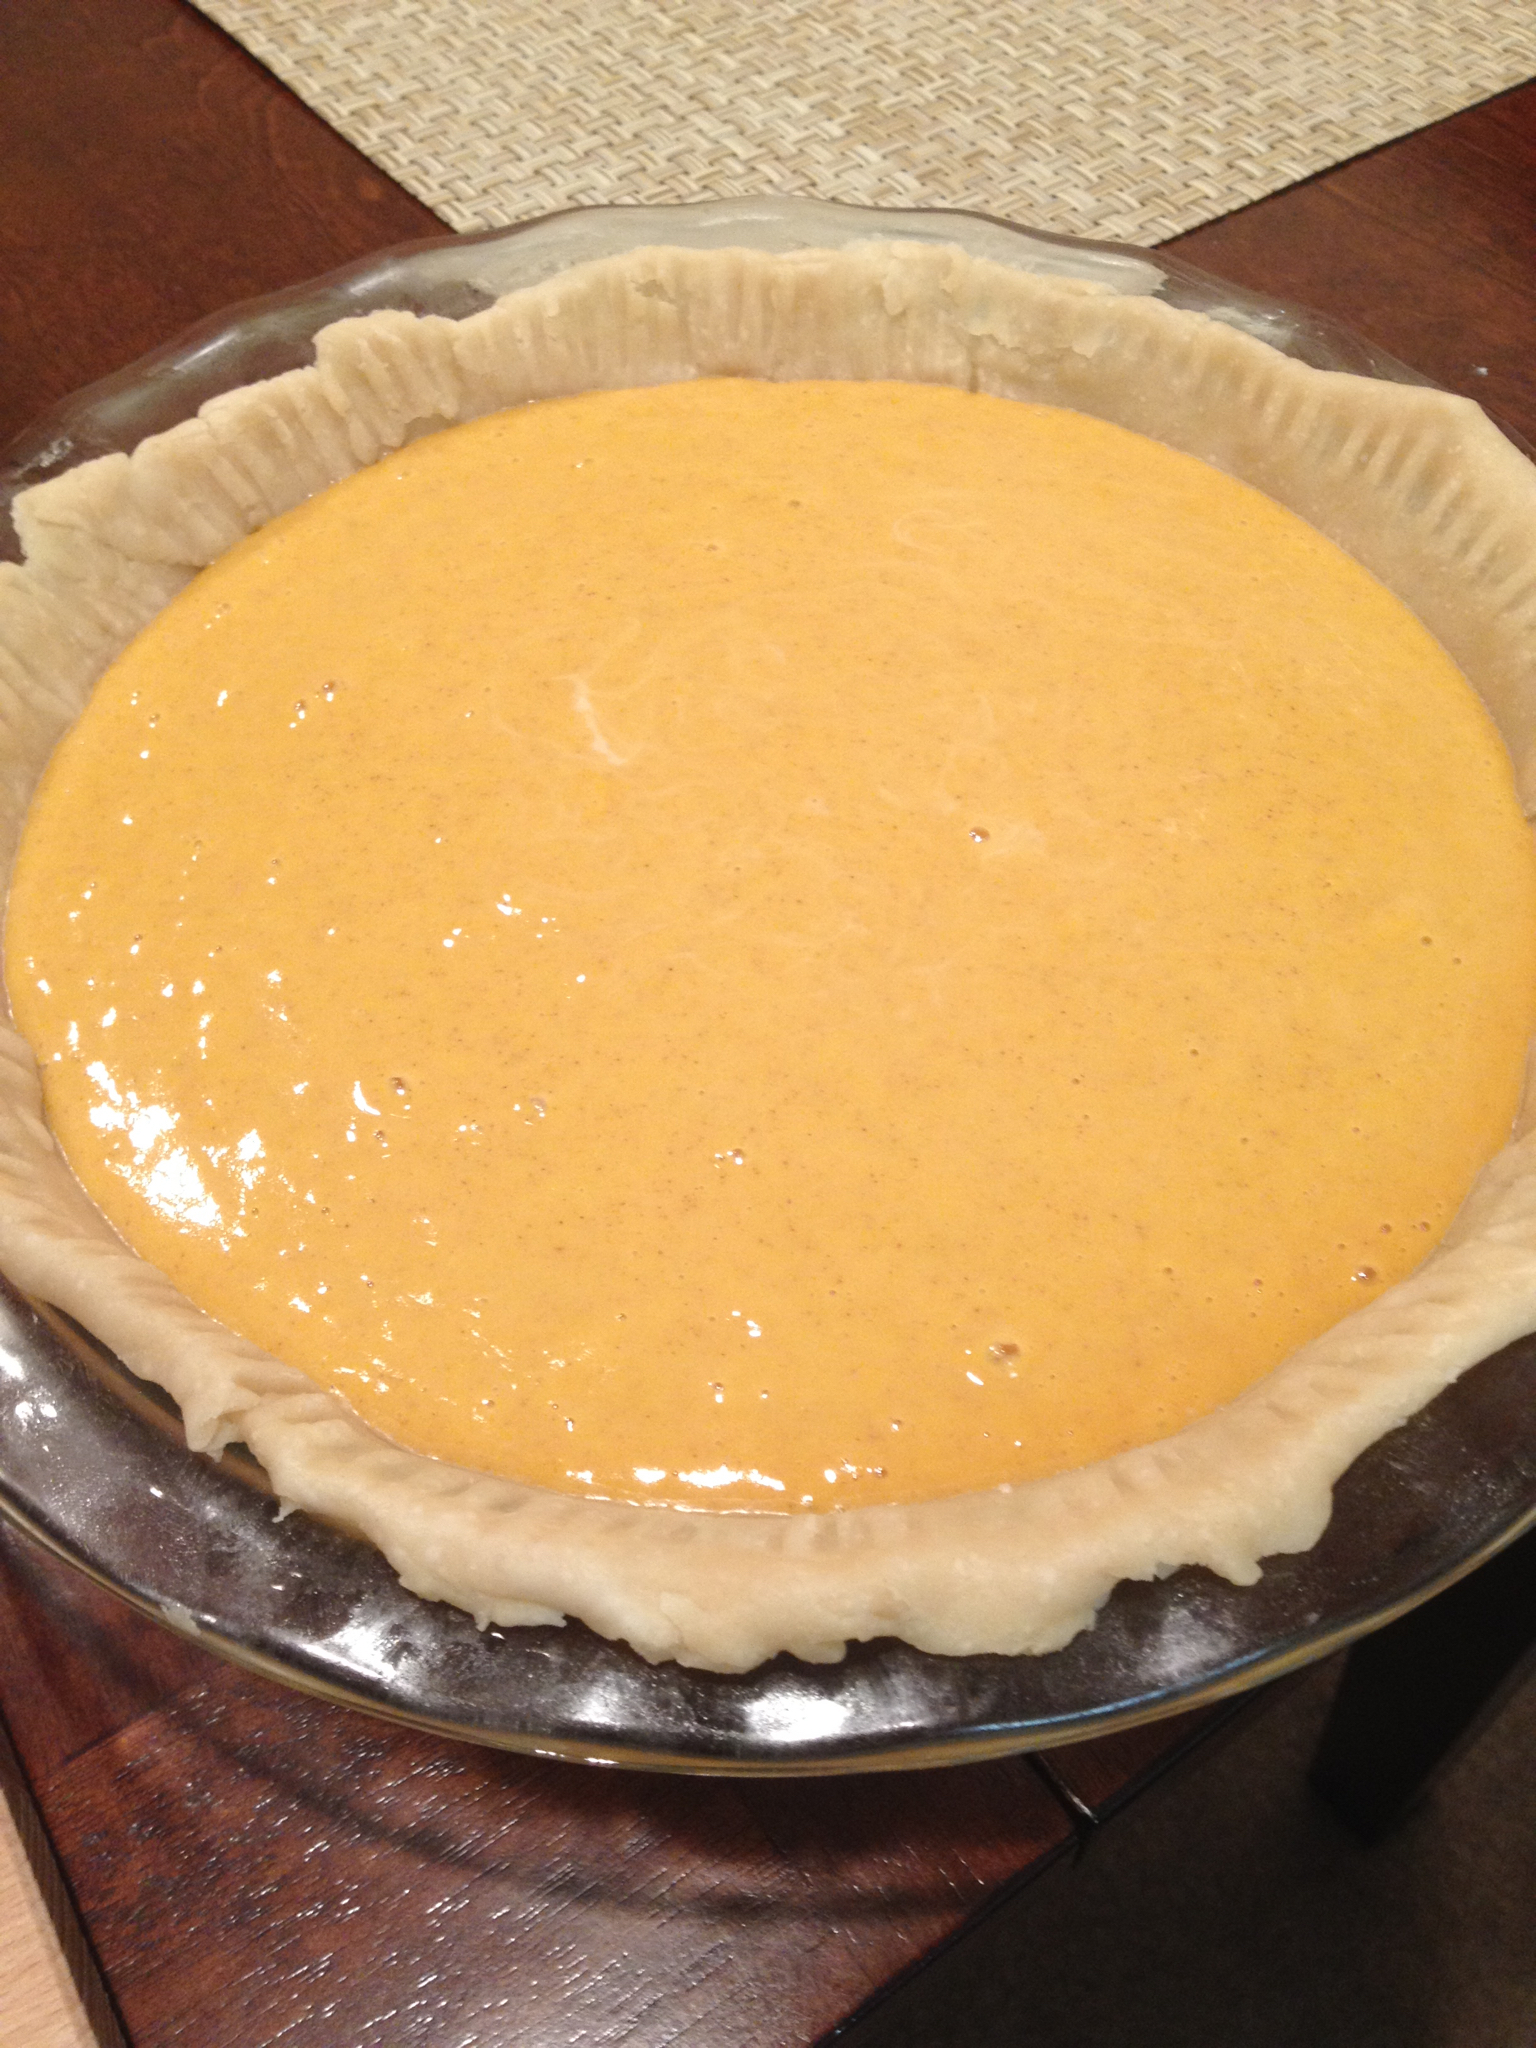
When you have your crust done and in the pie pan, pour the filling into the unbaked crust.
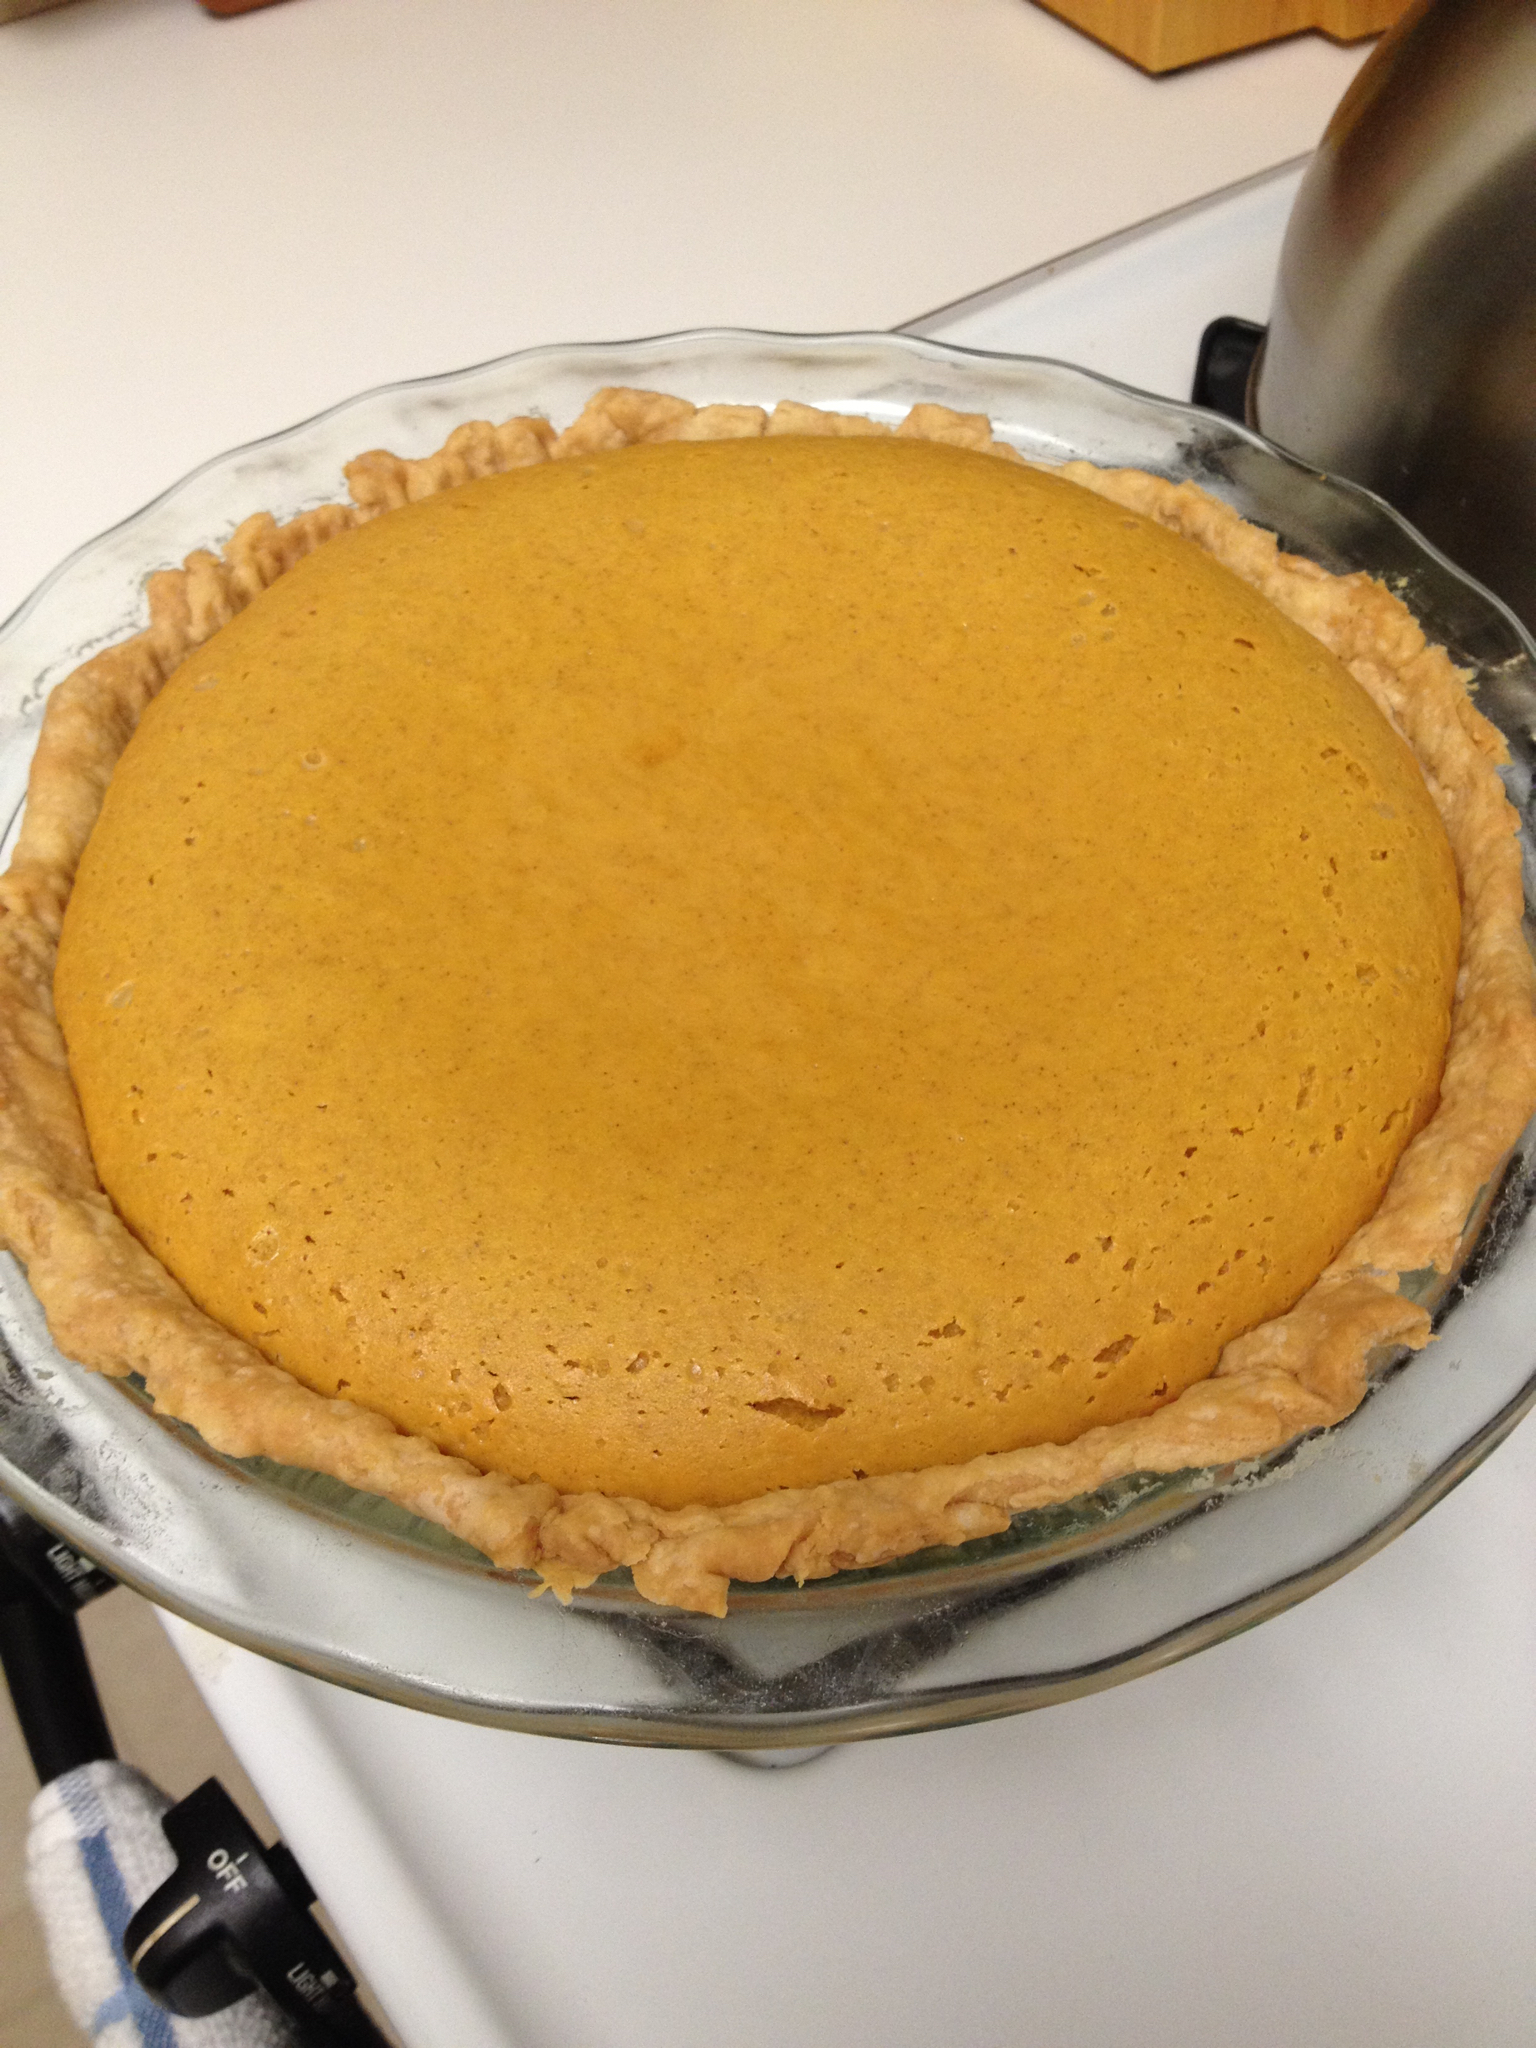
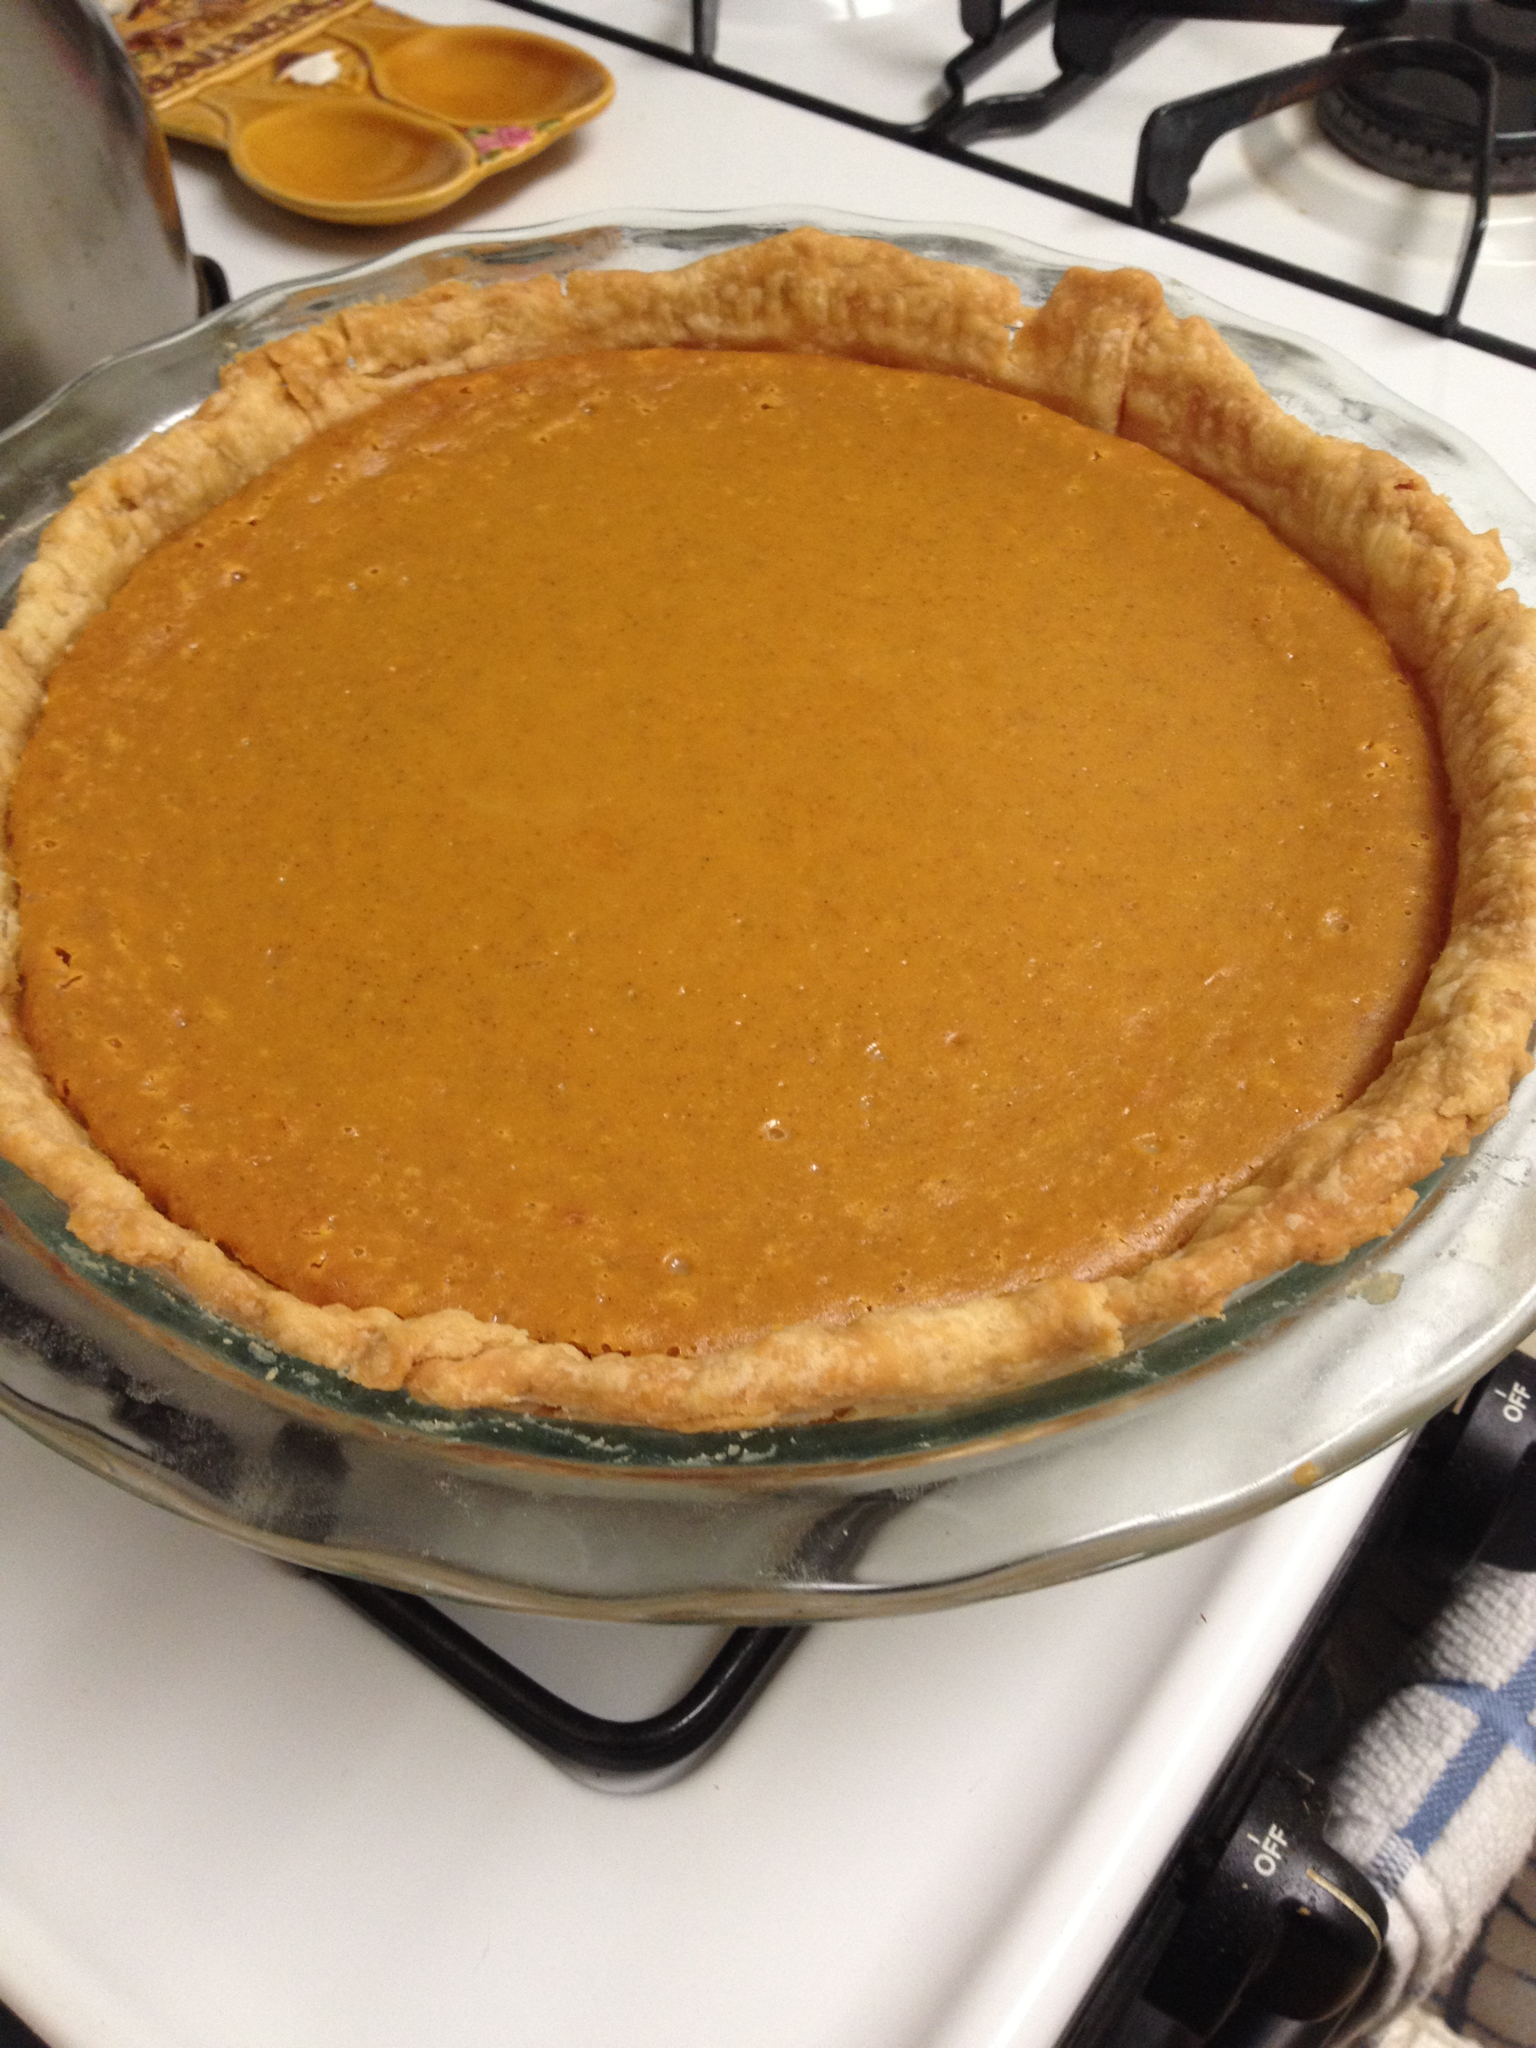
Bake the pie at 350ºF for one hour, or until a knife comes out clean when inserted in the center. When you first take it out of the oven, the filling will be puffed up. As it cools, the filling will deflate a bit (the cooled pie is shown in the picture on the right).
And there you have it! Let the pie cool and then dig in!
A Taste of Rome
Hello friends! I hope your last few weeks of summer (sorry to remind you!) are going well! All of my friends are going back to school now, but luckily, one of my friends is still here! We took advantage of our extra time at home to bake some delicious desserts- from authentic Italian recipes! My friend spent a semester abroad in Rome, and came home with a cookbook created by her Italian program director. This cookbook is definitely one of a kind, because the translation to English is a bit rough- some of the recipes call for a “knob” of butter, and others don’t tell you what temperature or time to cook the dish for. We decided to just go for it and see what happened, and the results were divine, to say the least.
Our creation didn’t have an official name from the cookbook, so we’ll call it a Raspberry Jam Tart. We also made a Peach Cinnamon Tart, but I’ll get to that later! Here’s how to make it.
Ingredients/Materials:
- 2 eggs
- 2 cups flour
- 1/3 cup softened margarine
- 3/4 cup granulated sugar
- 1 tsp. baking powder
- 1/2 cup jam of any flavor (we used raspberry to start)
- 10″ pie plate, buttered and floured
In a pie plate or on a large flat surface, pour the flour out and make a well in the middle of it. Put the eggs, margarine, sugar, and baking powder into the well. It might spill out a bit, but that’s just fine! Mix those ingredients with your hands, kneading the mixture into a dough. It may get a little messy, but that’s all part of the fun!
When the dough has formed, take 1/3 of the dough and set it aside. Roll out the other 2/3 to 1/8″ thickness, and until it fits in a 10″ pie plate. (Tip: to get the rolled dough into your pie plate without it breaking, roll it up over your rolling pin and then unroll it into the pie pan.)
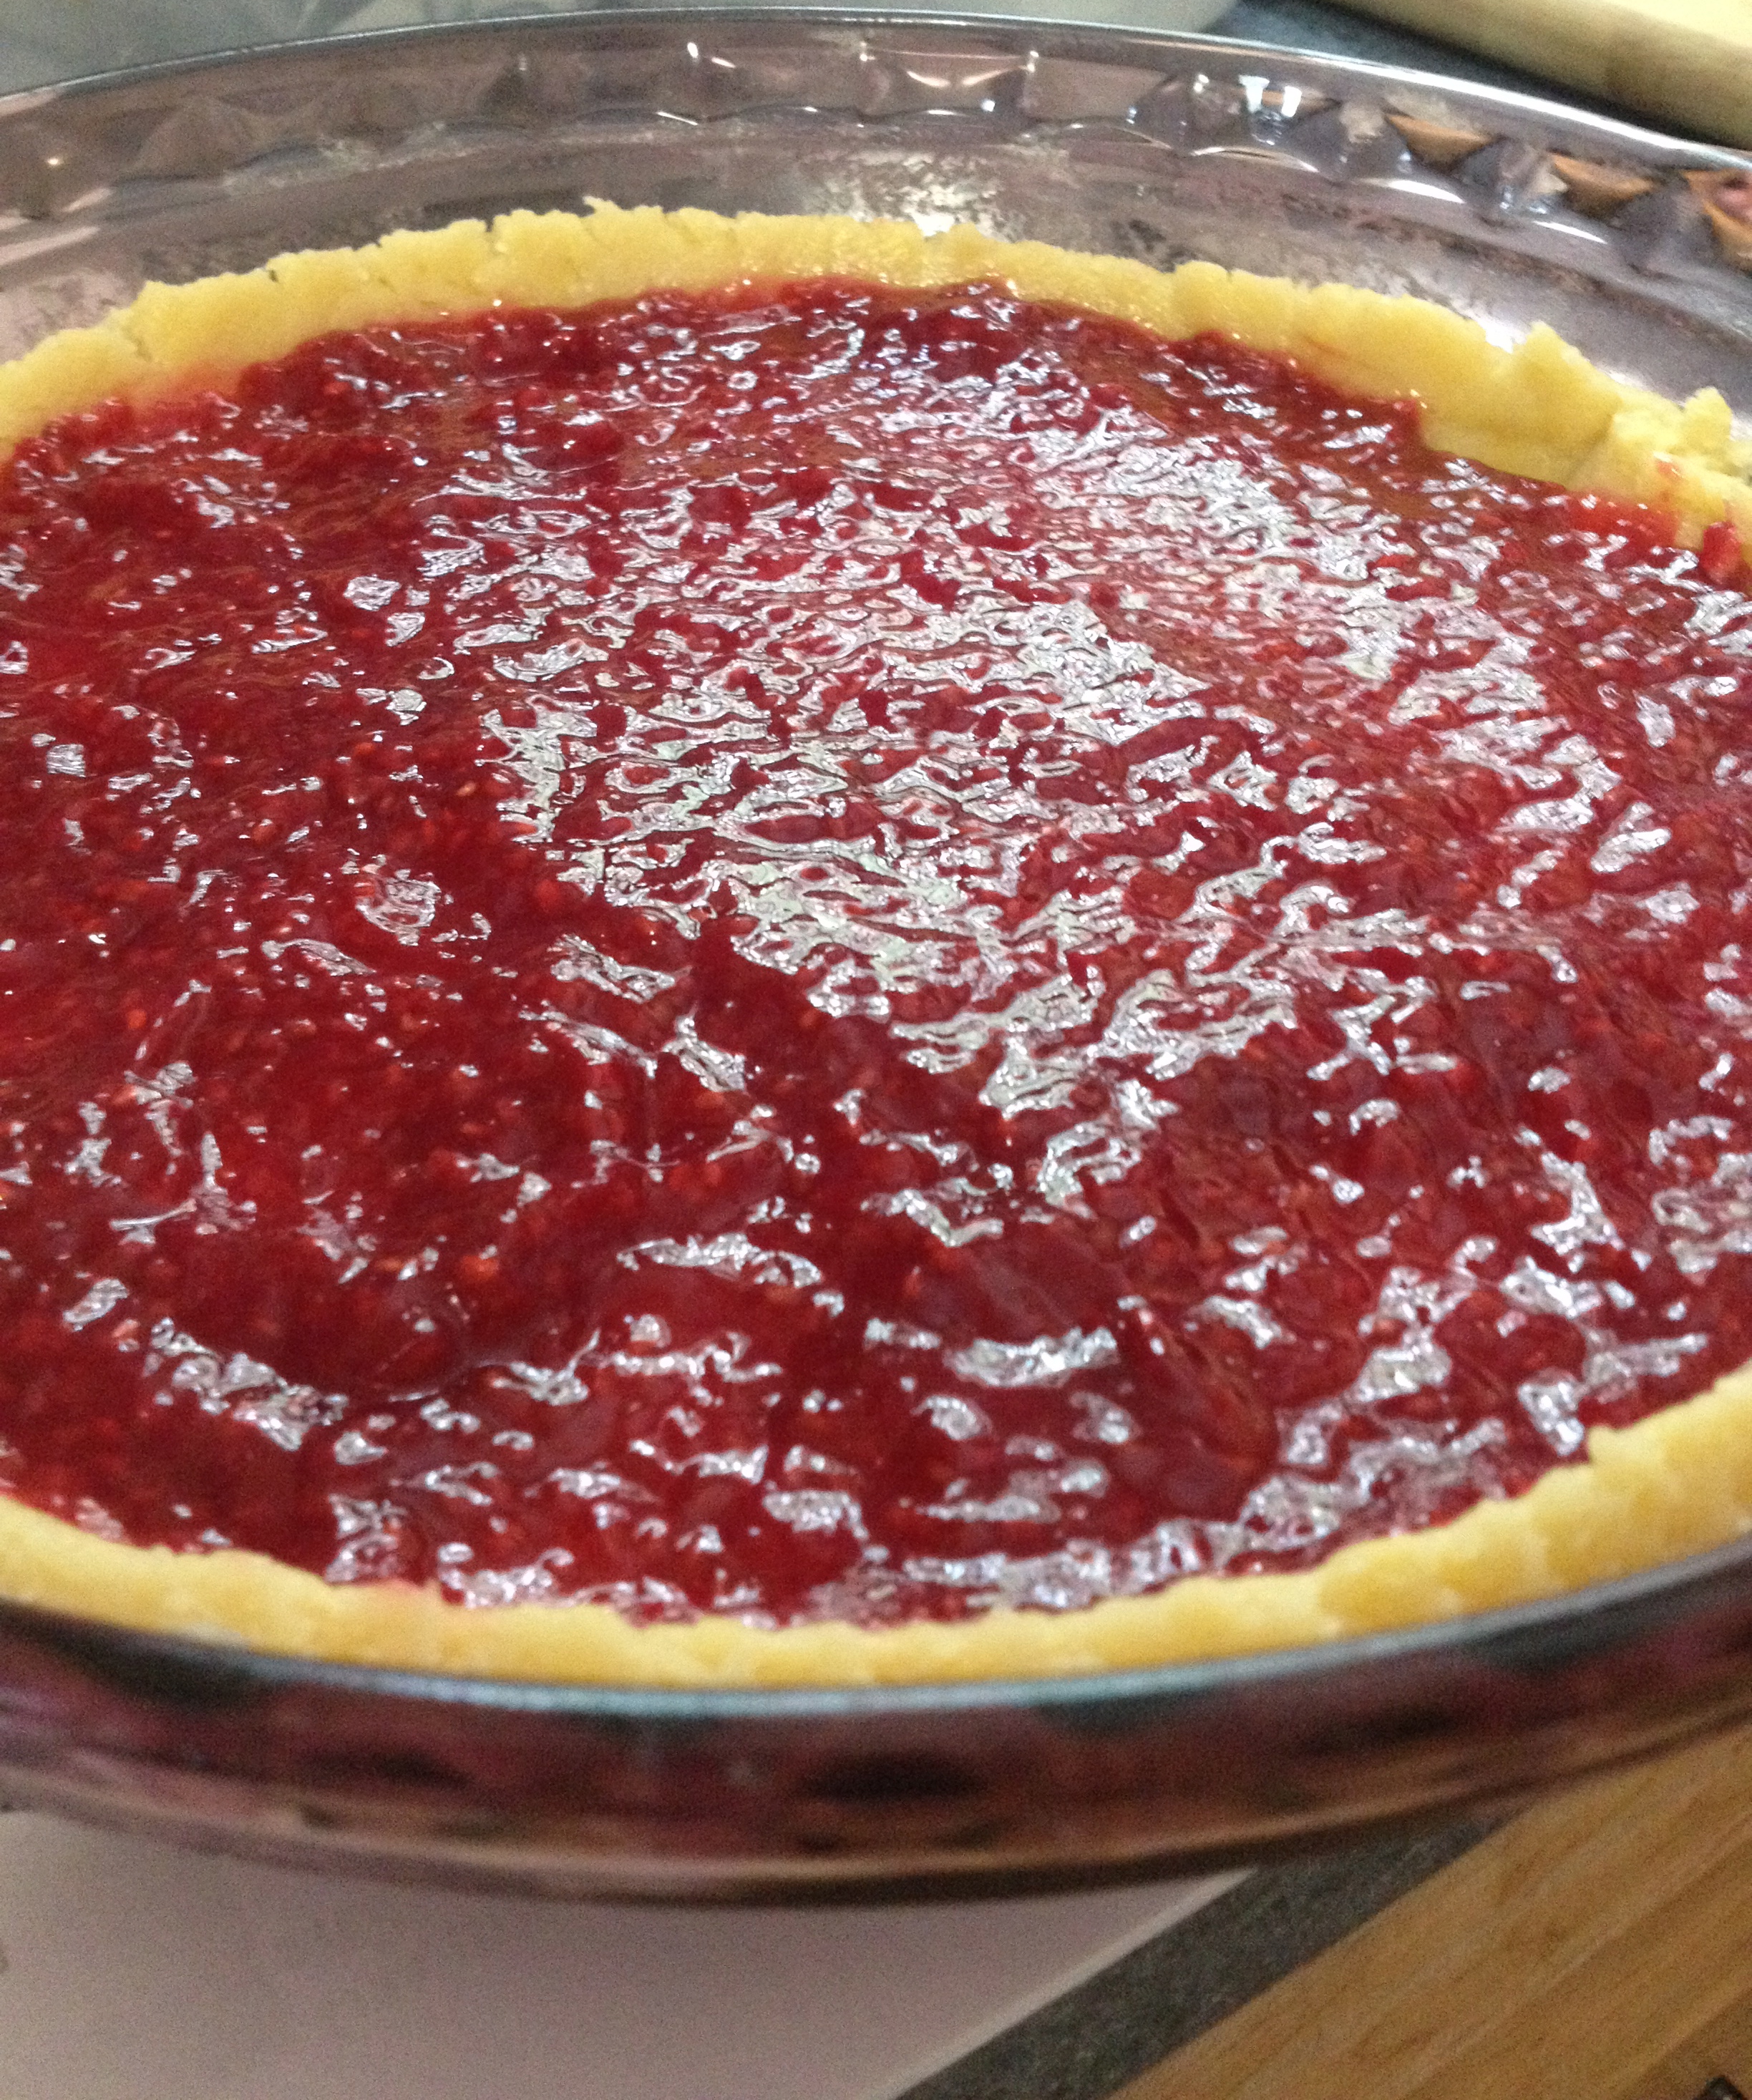
Next, spoon the jam into the bottom of the tart dough, just until it covers the bottom of the pie plate. We had the privilege of using my mom’s homemade raspberry jam (and later her homemade peach cinnamon jam), but any other jam will work just as well. Cut the excess dough from the sides, so that there’s a very small edge of dough above the jam. This excess dough can be put with the other 1/3 of the dough that you set aside.
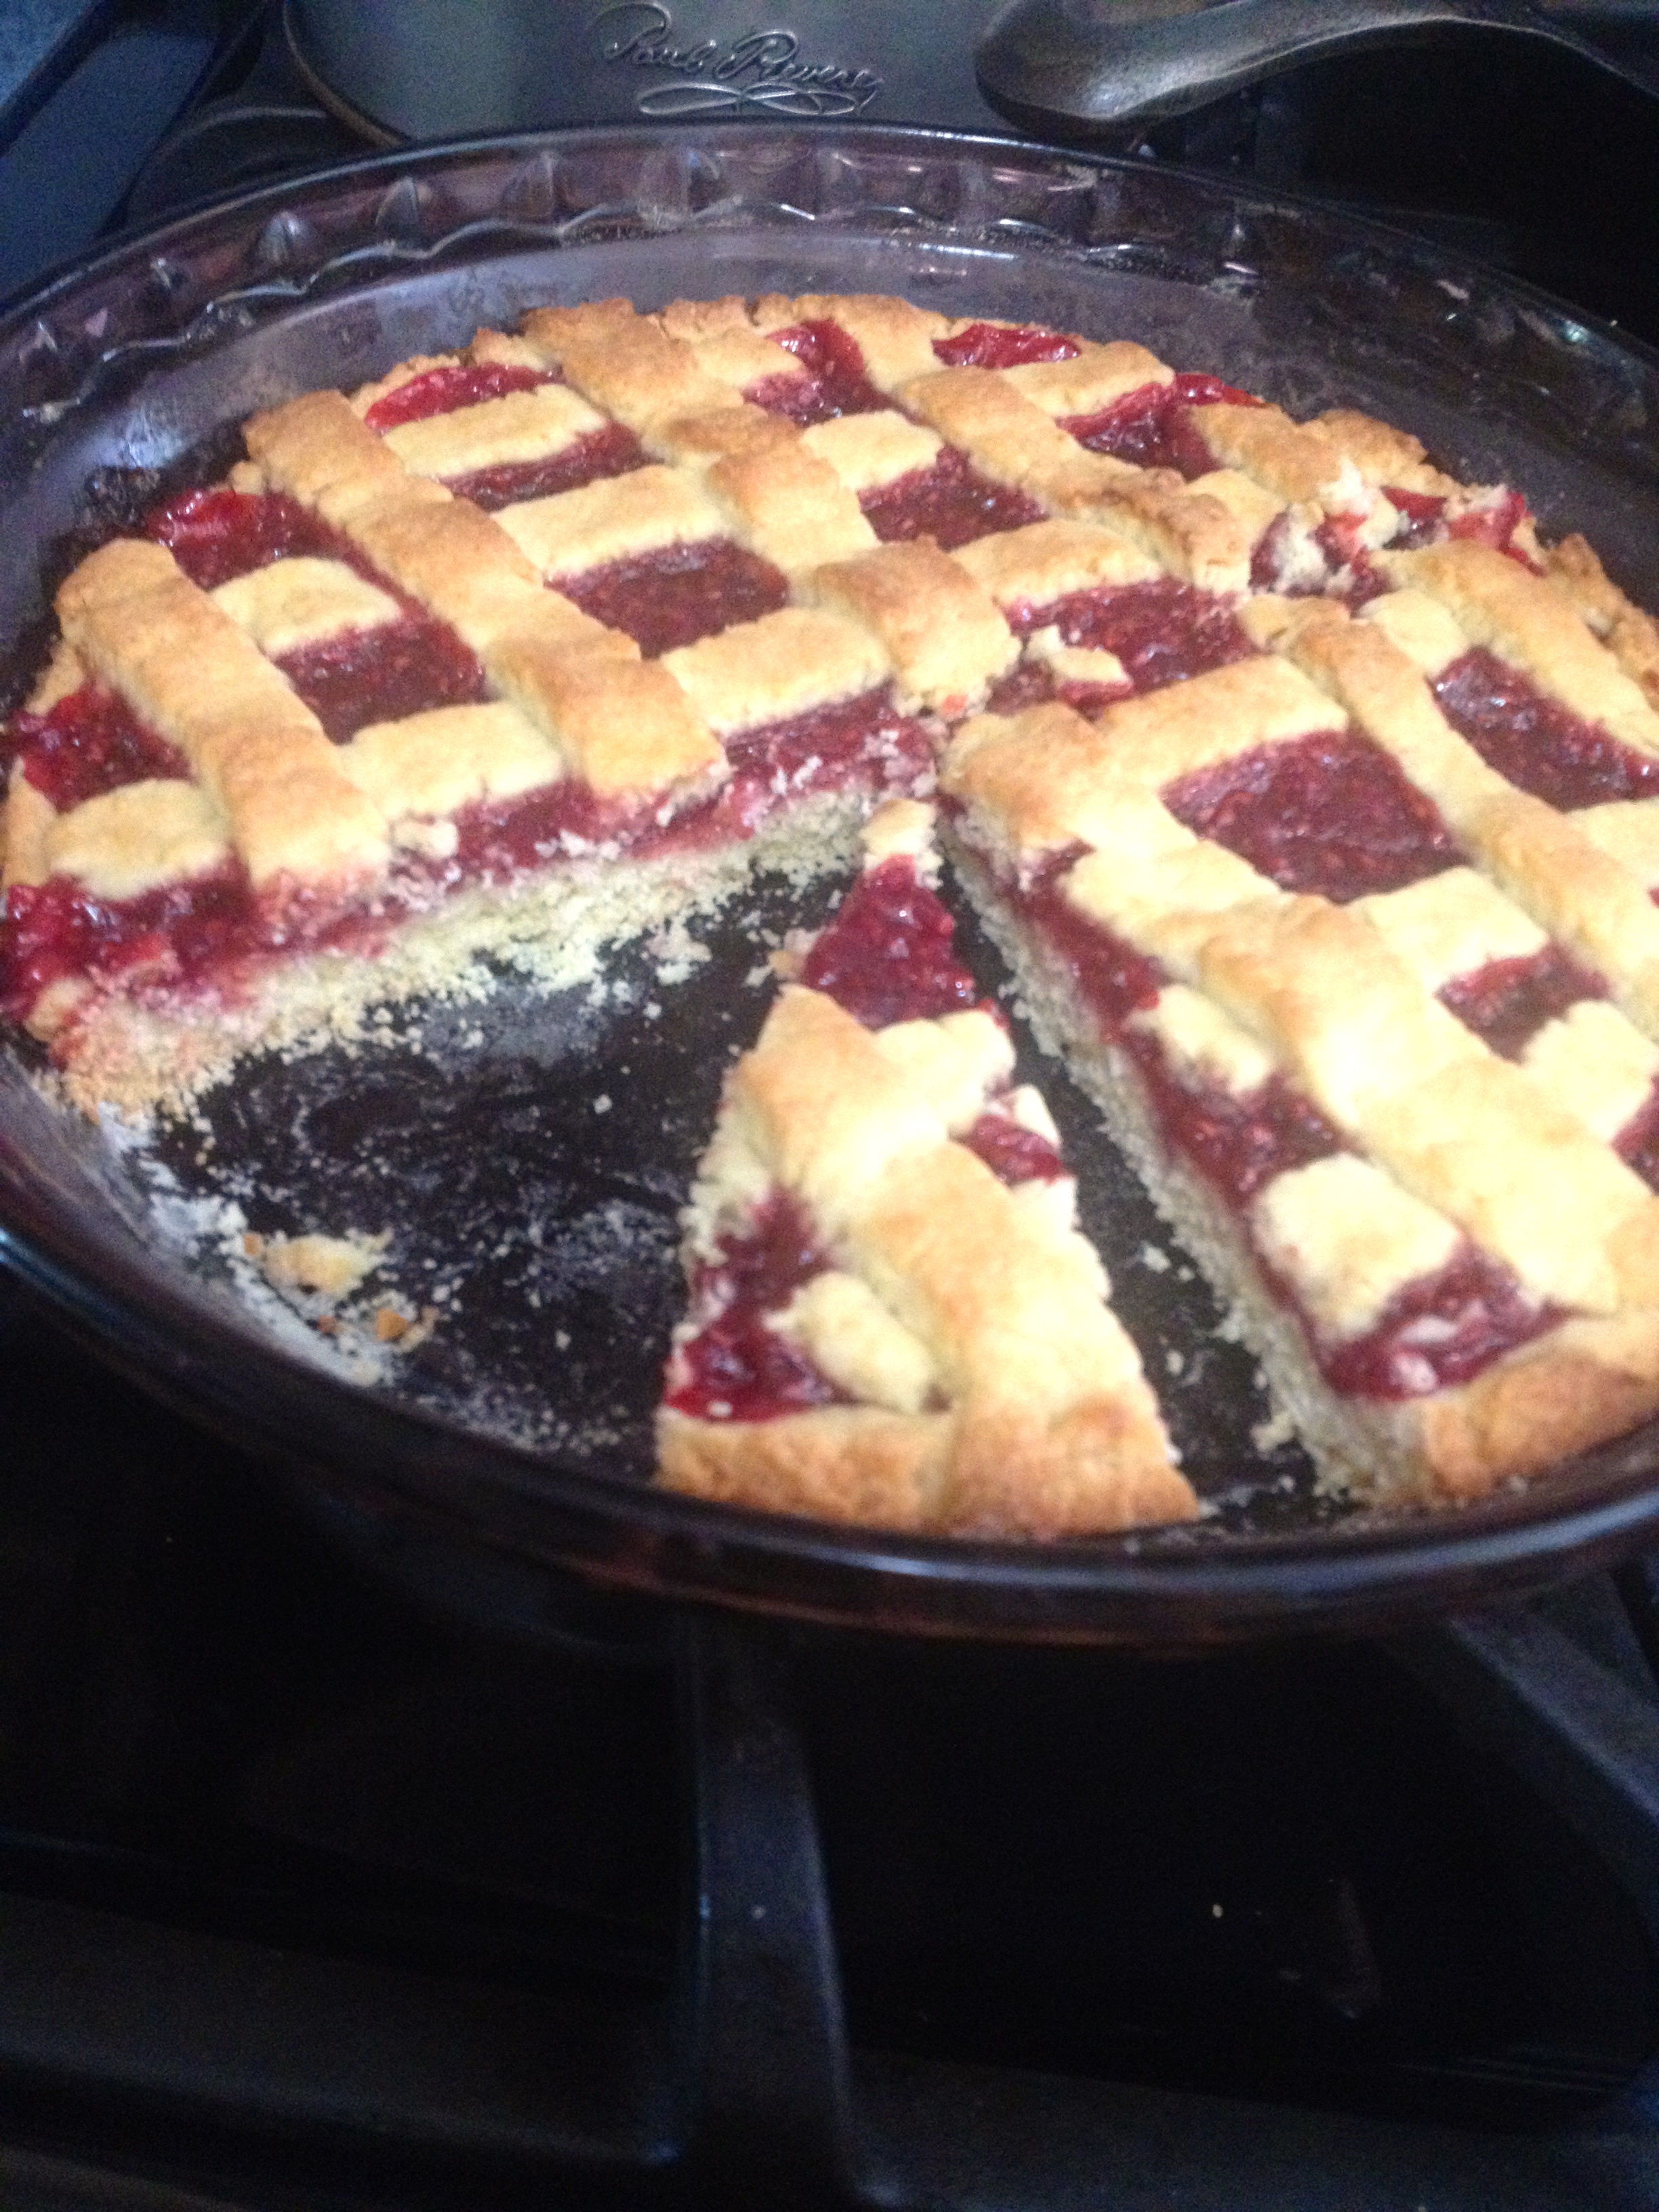
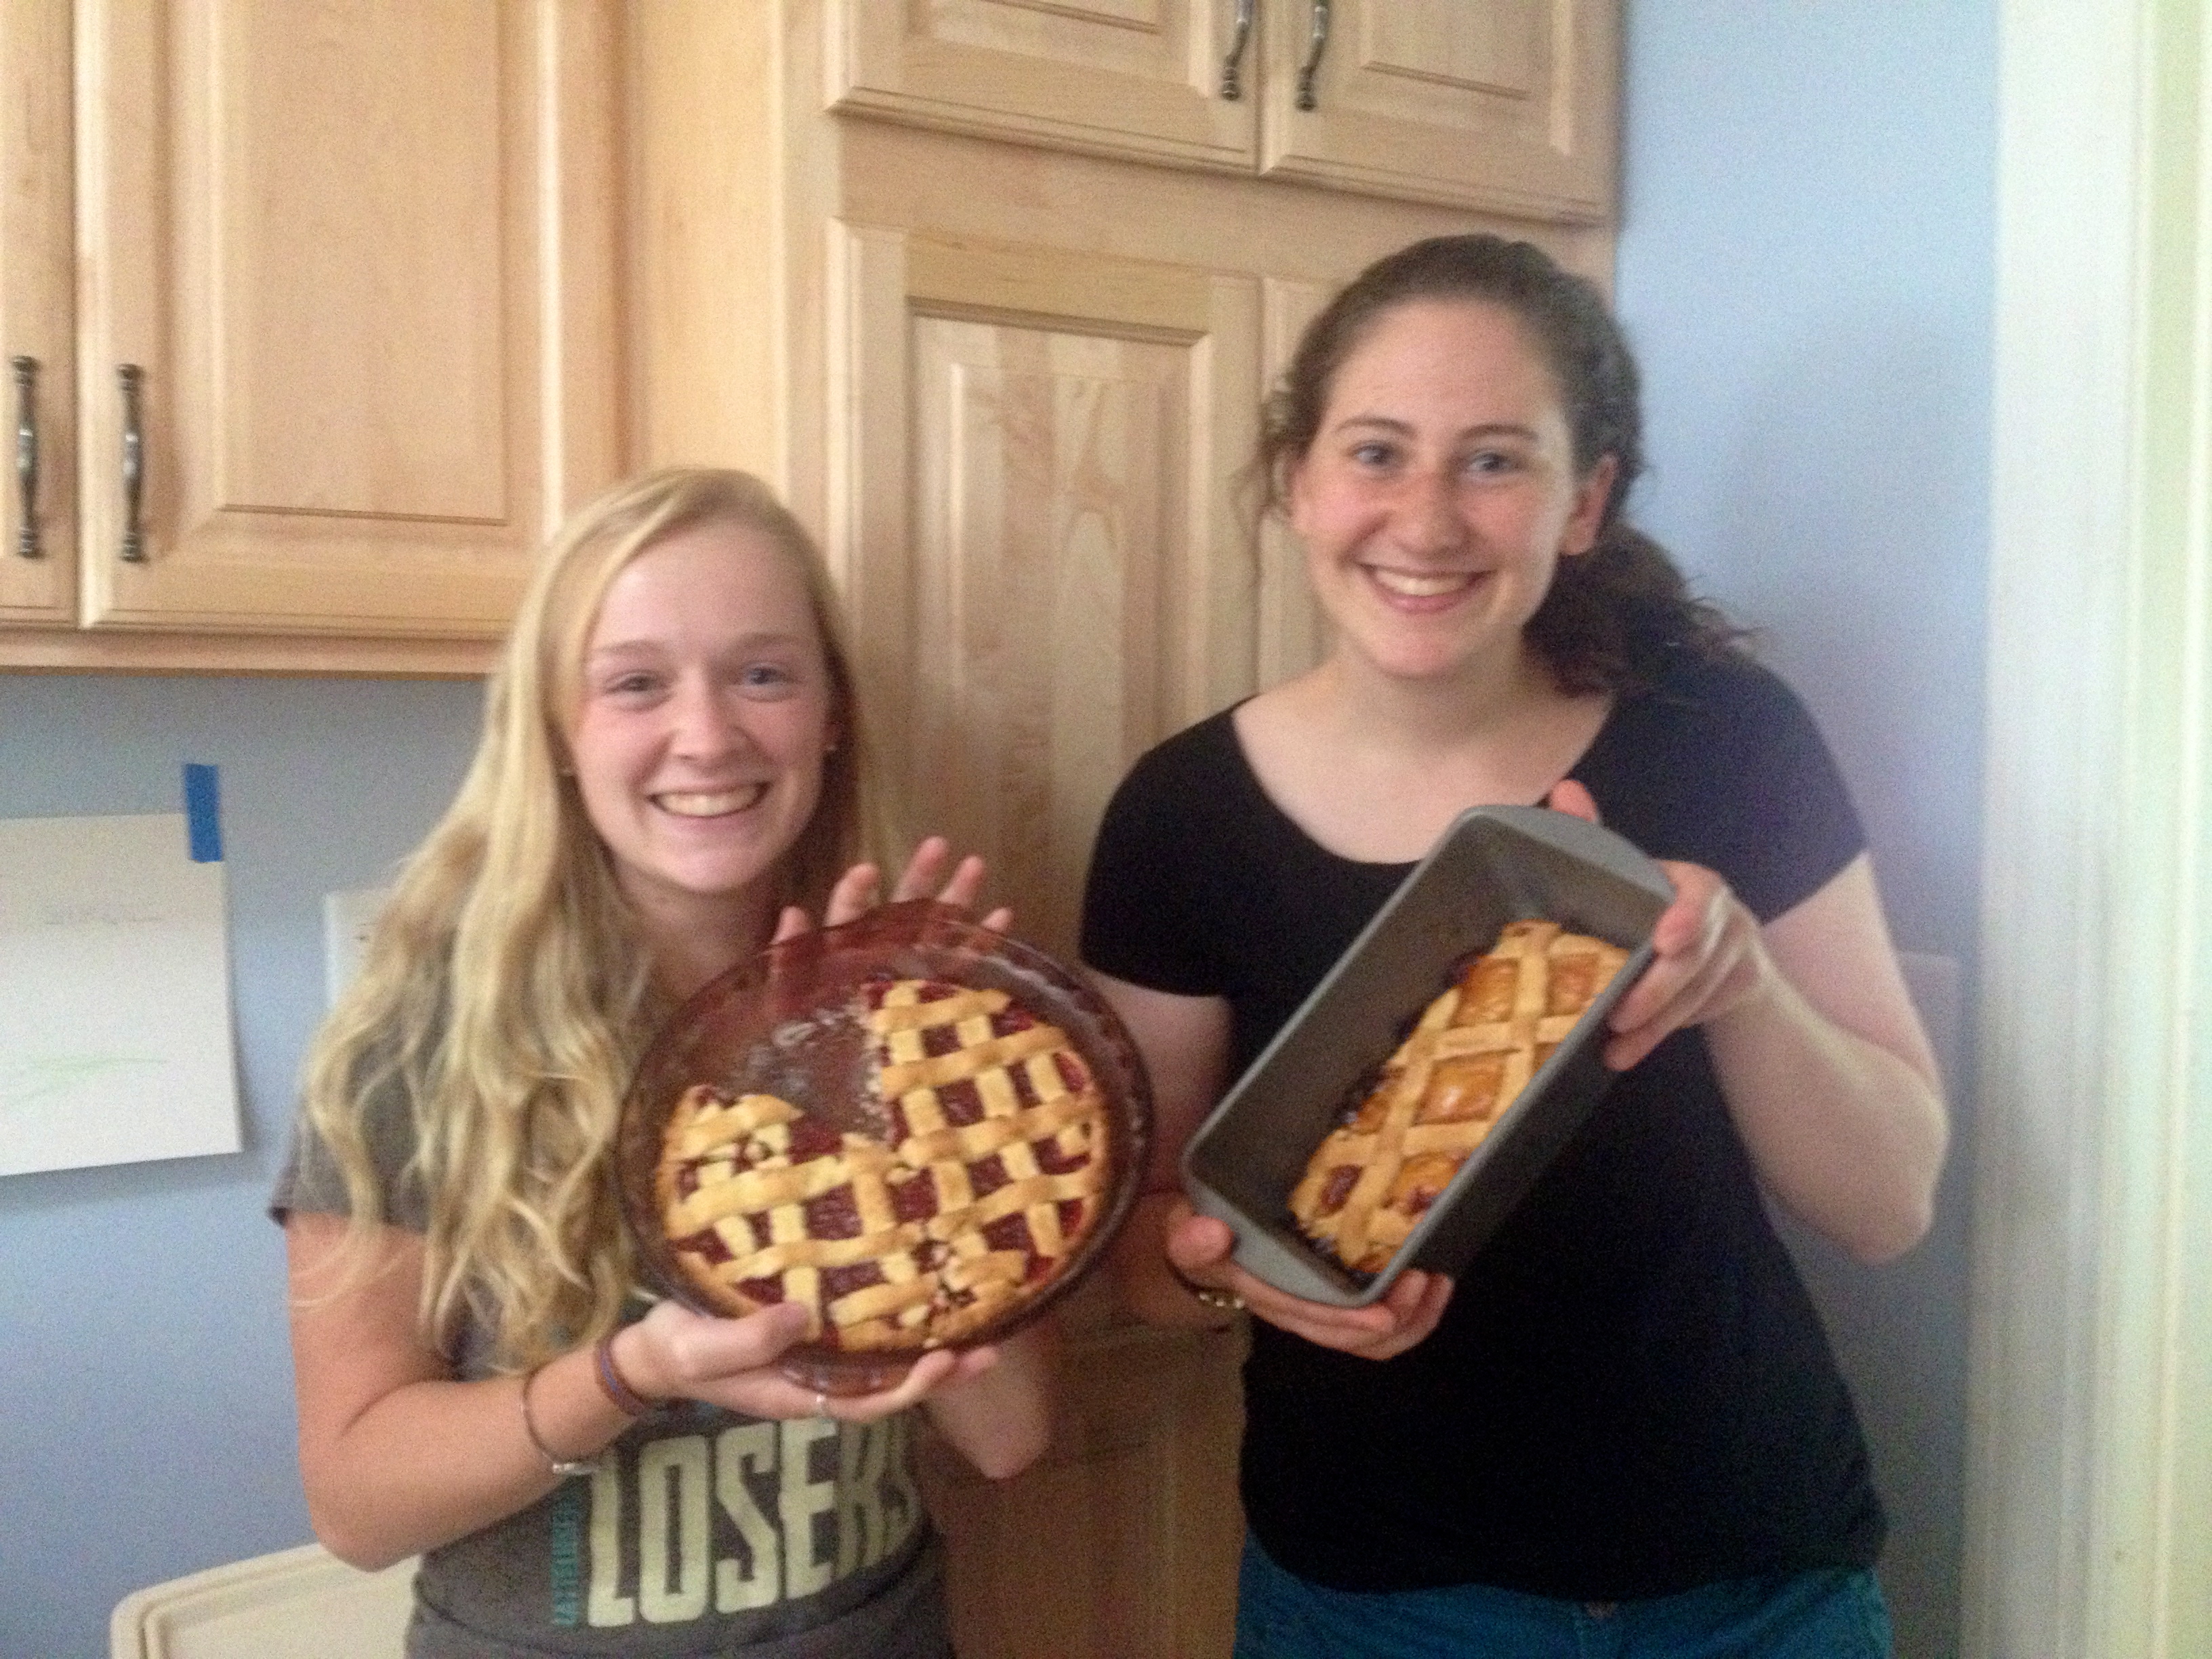
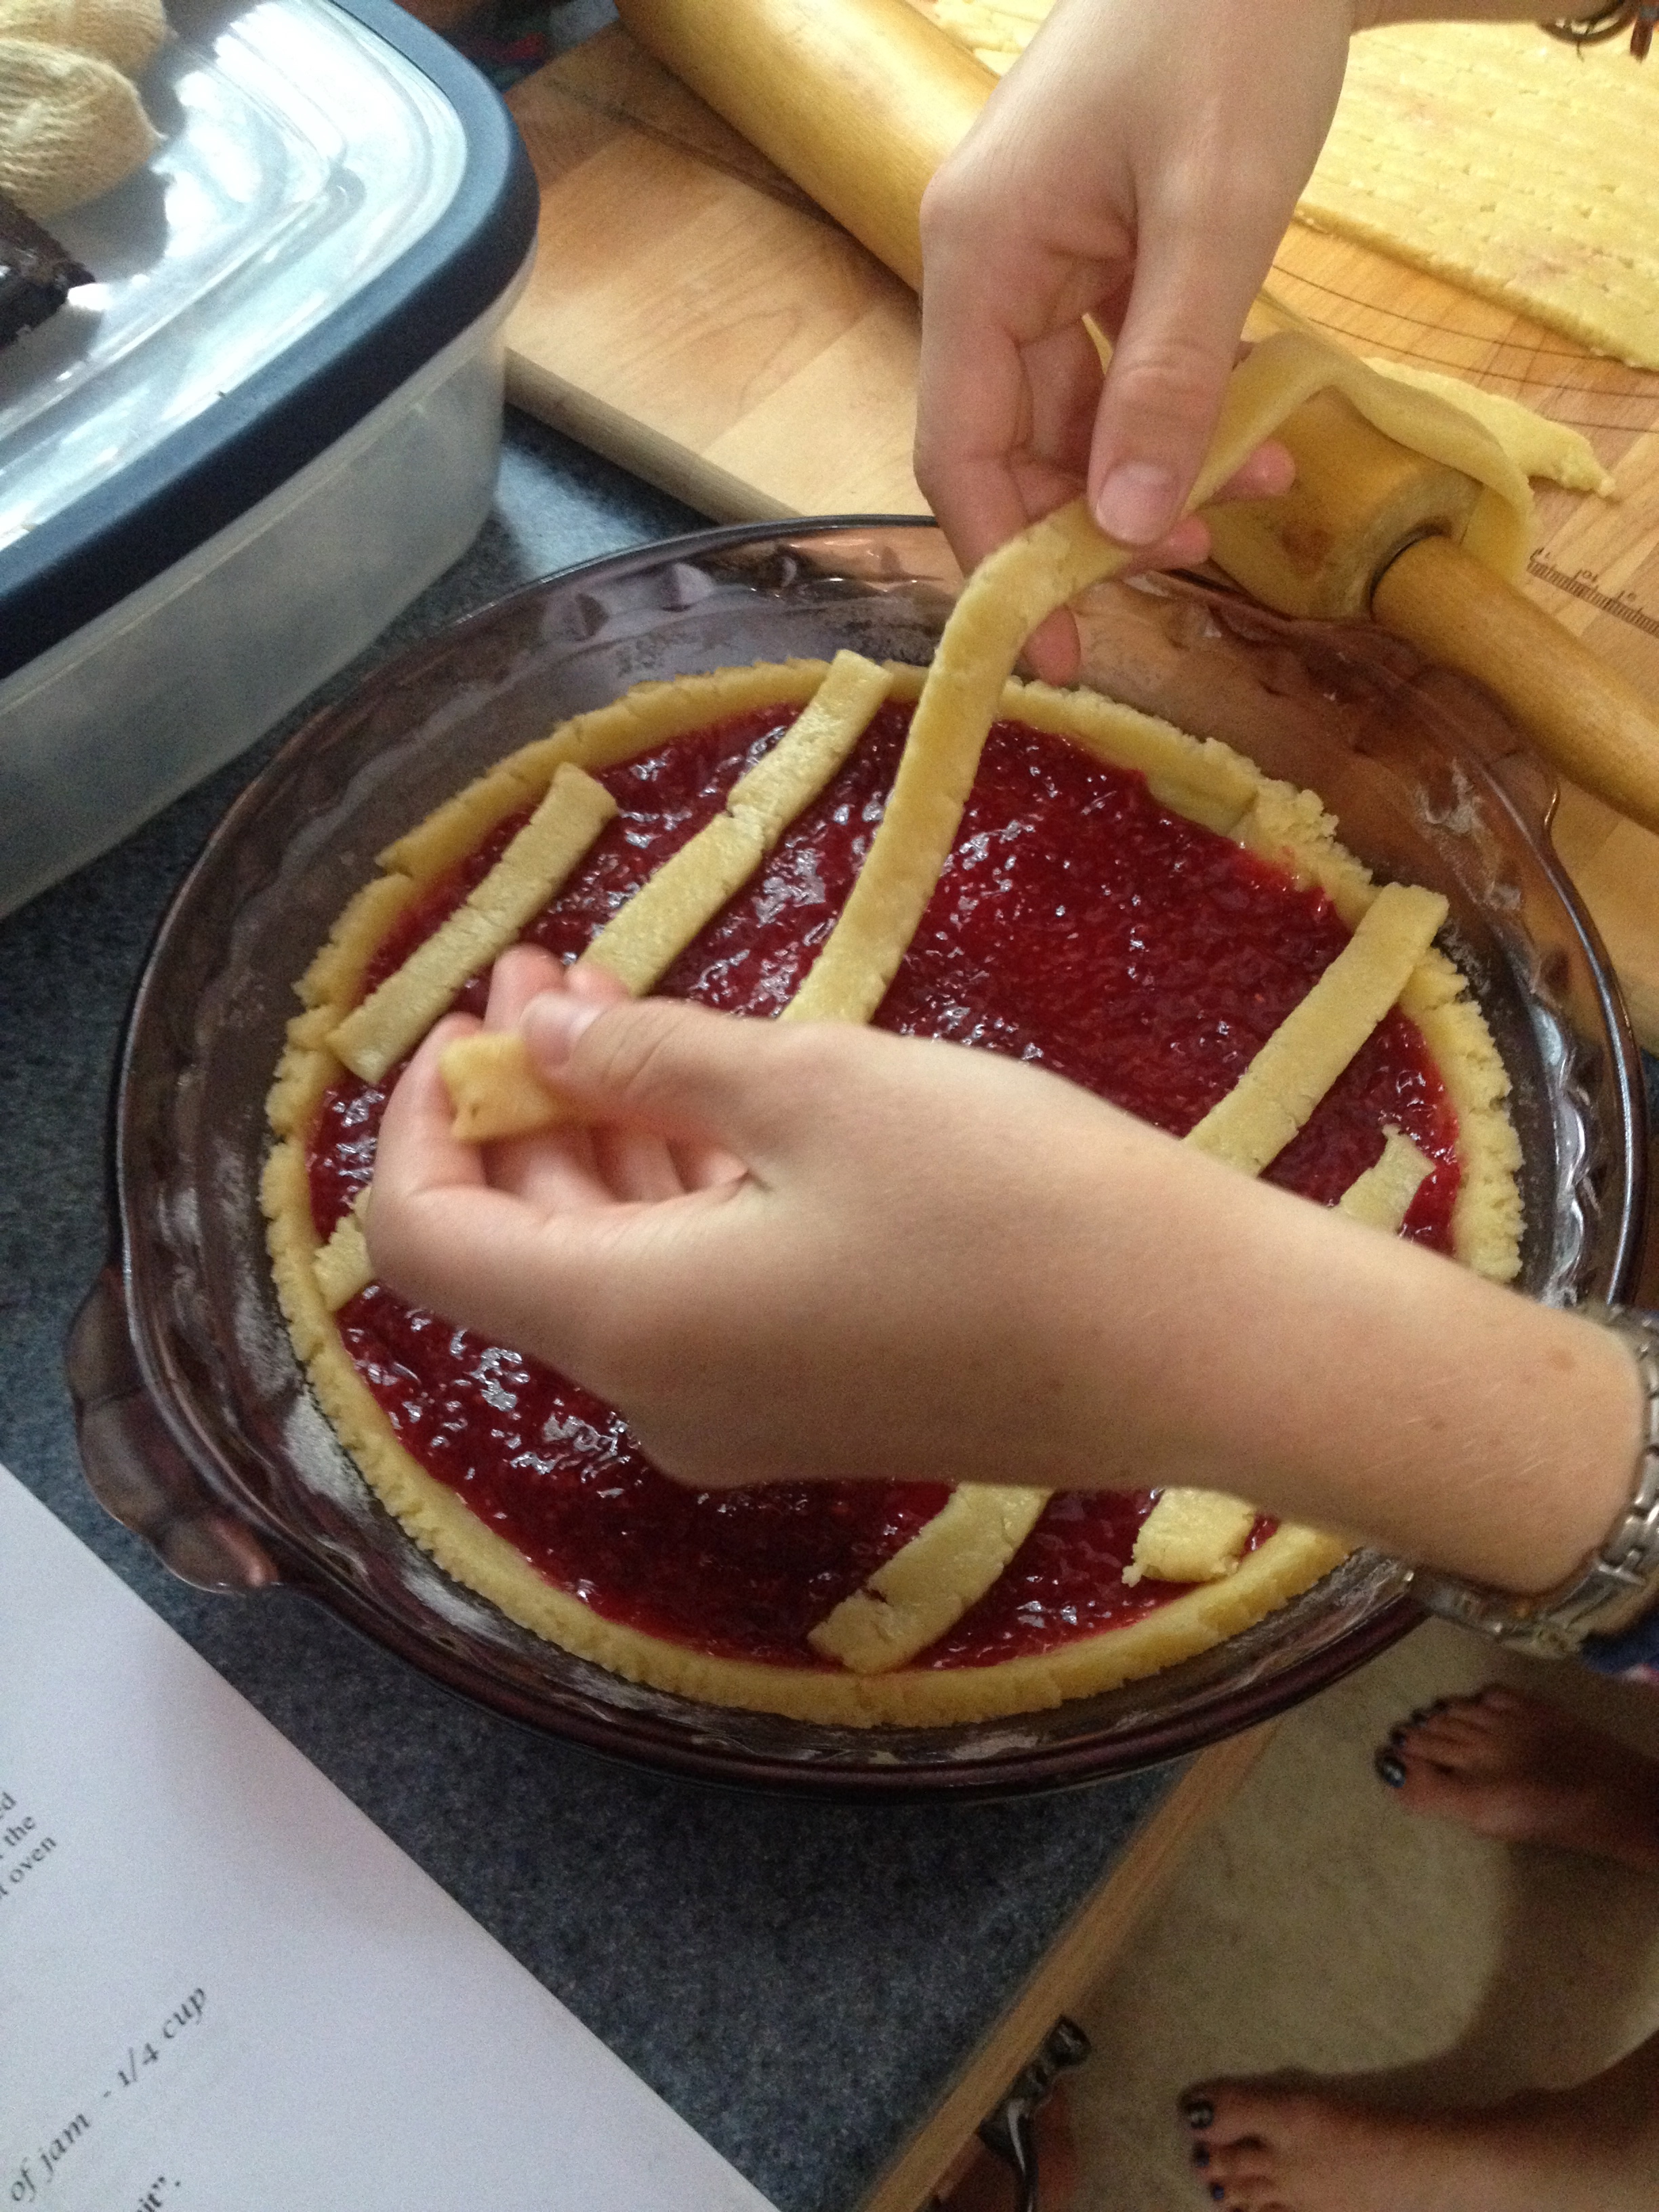
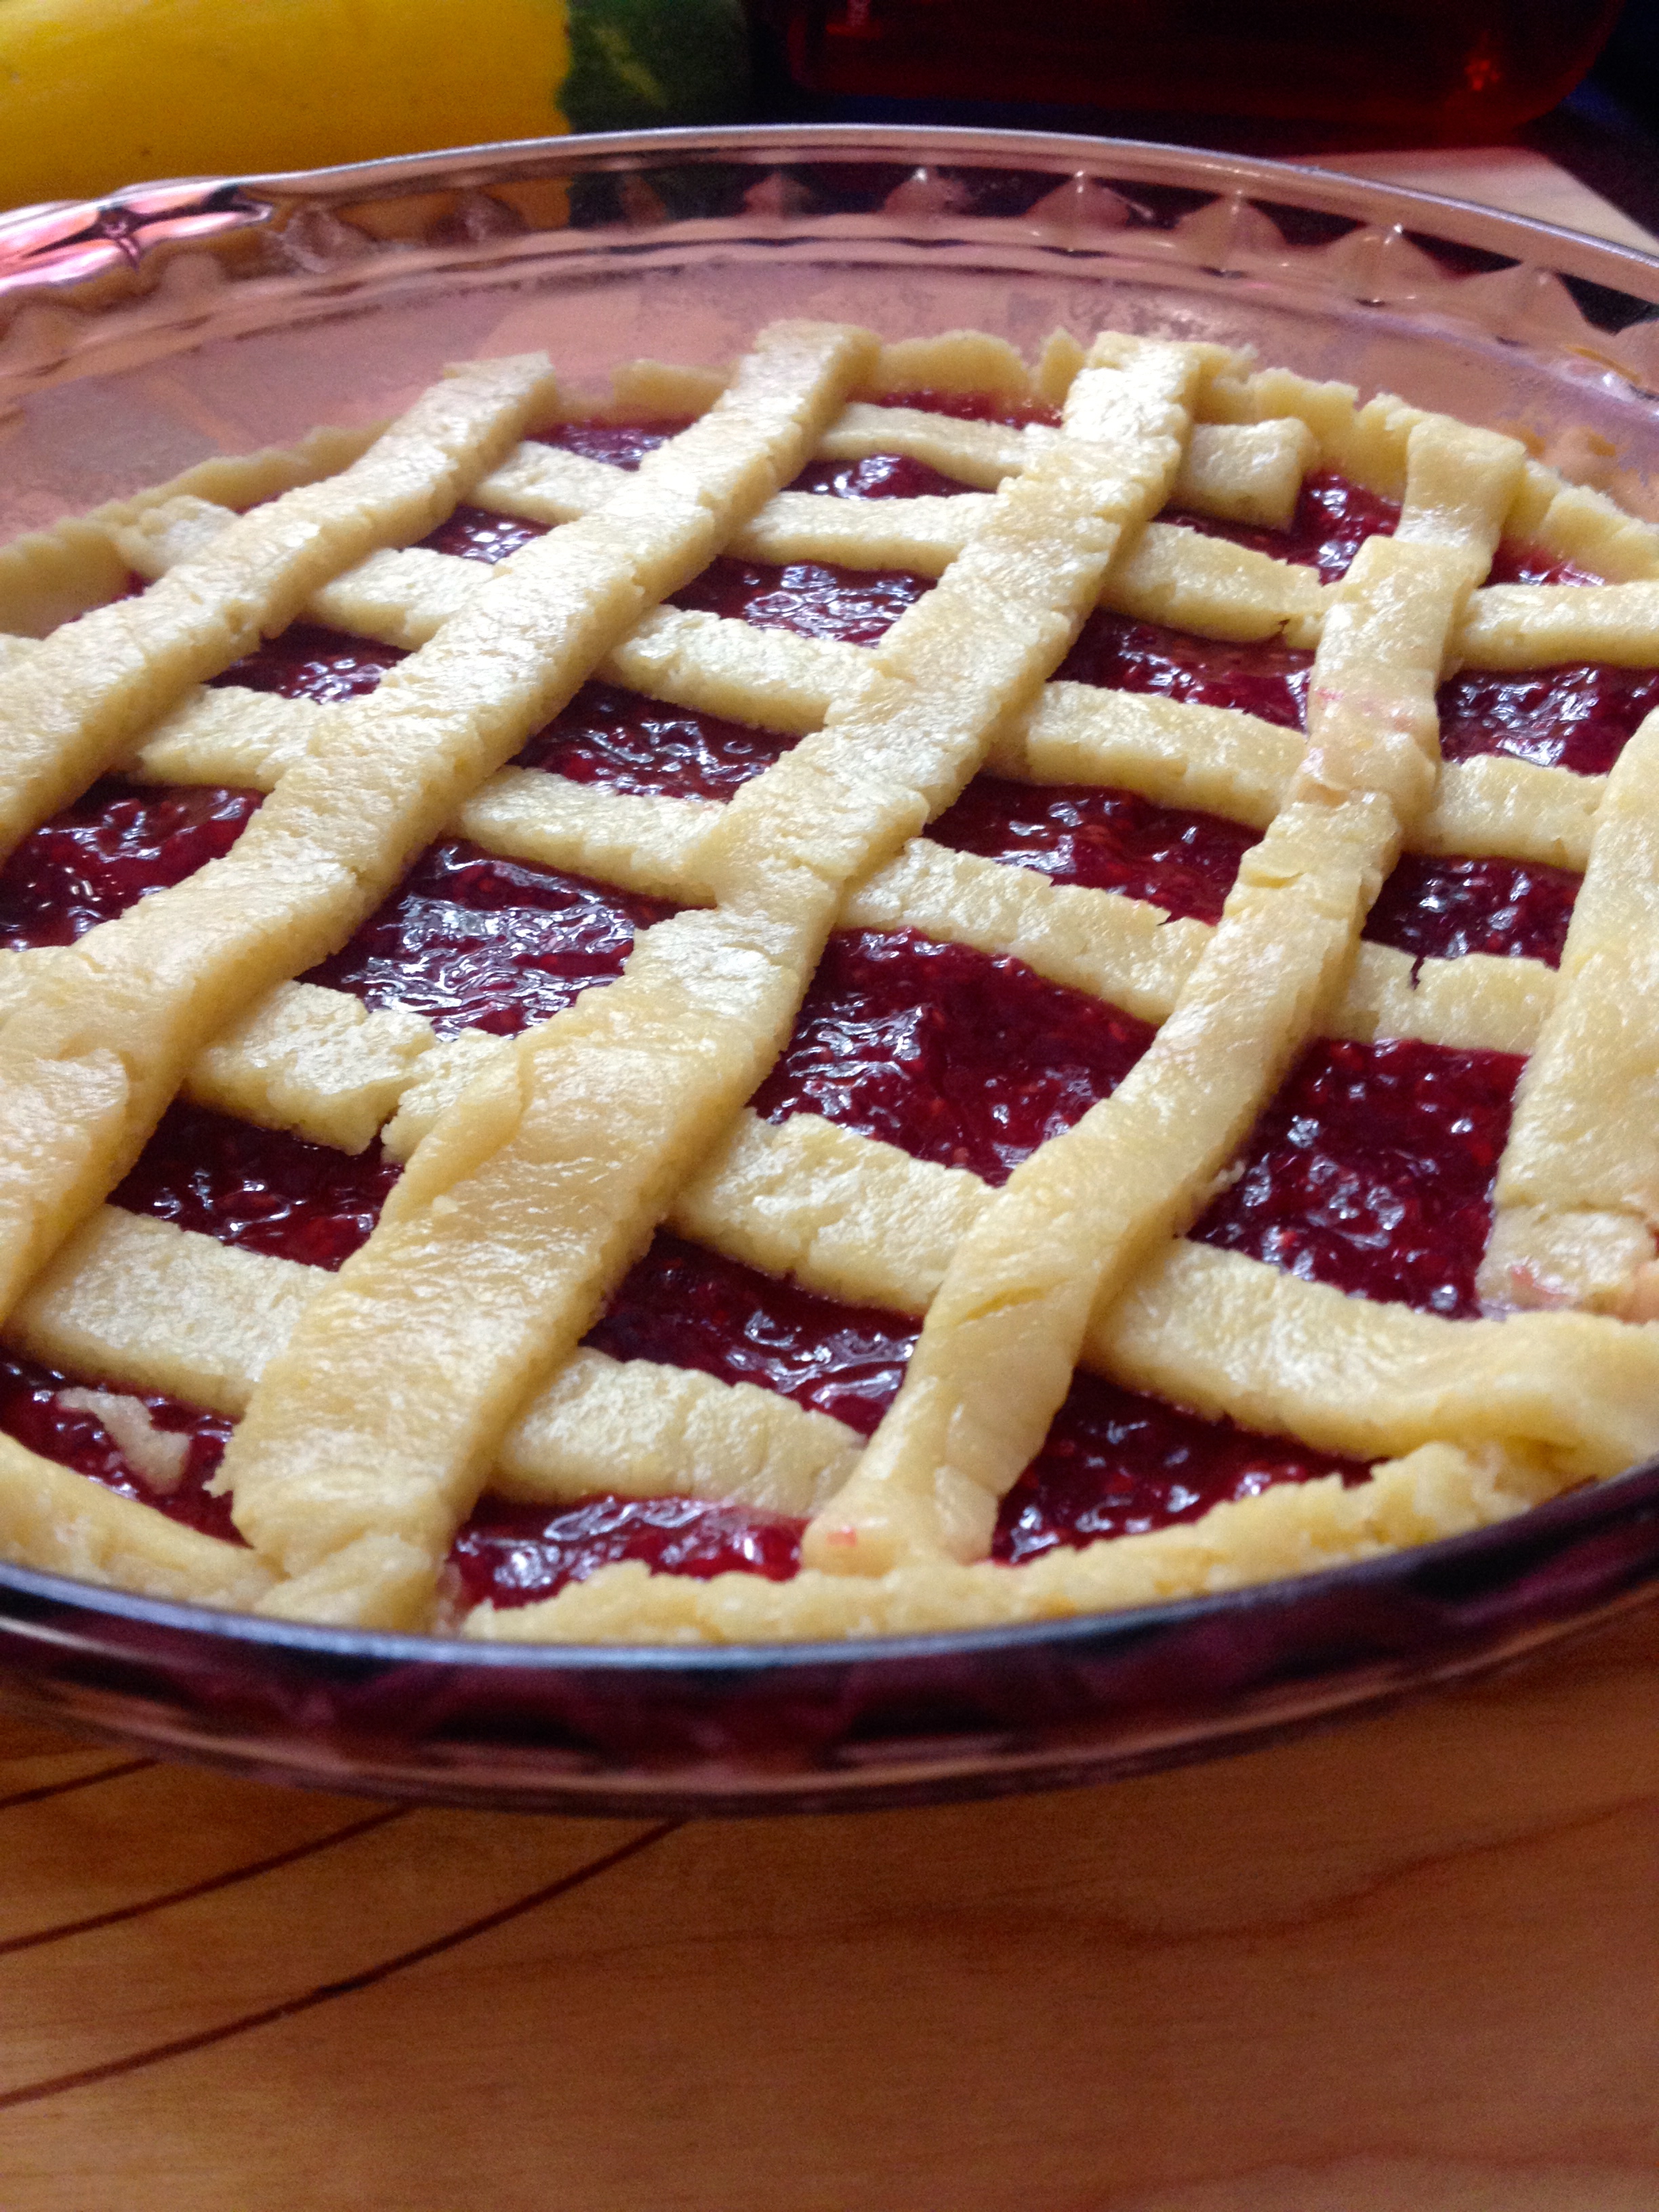
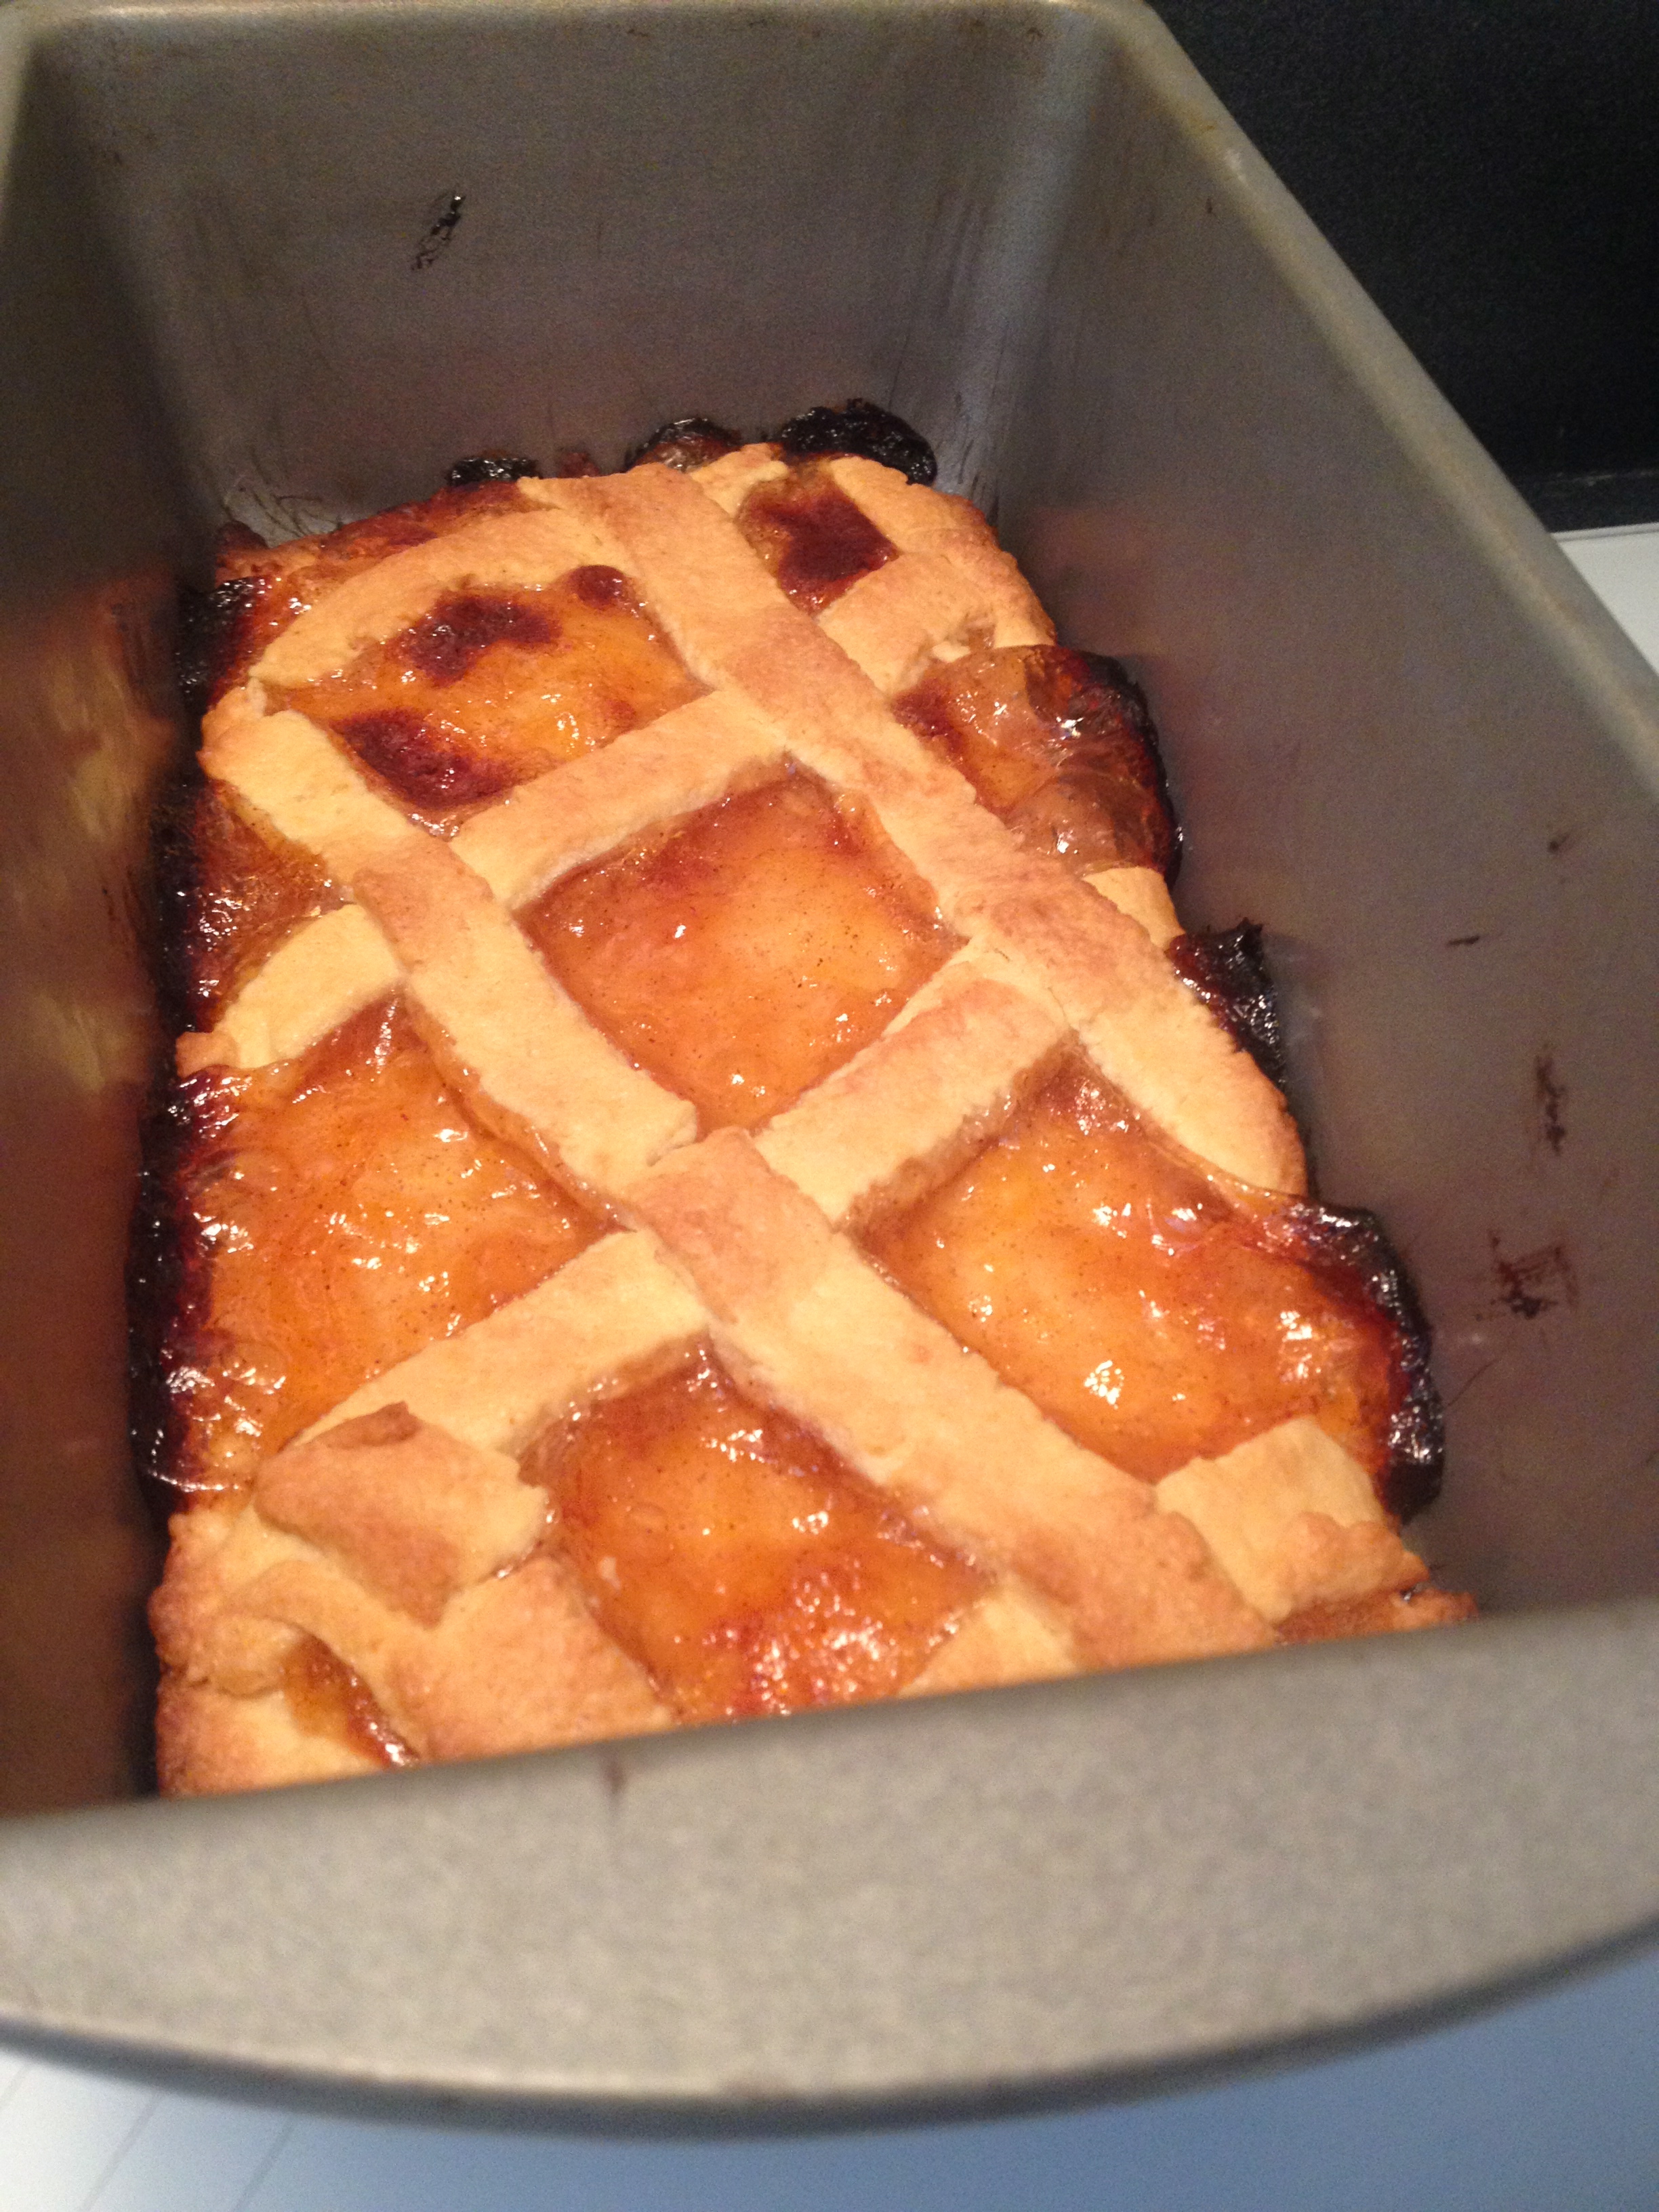
Roll out the other 1/3 of the dough and cut it into 1/4″ strips. Lay some of them horizontally along the pie plate, and some of them vertically, so that you have a lattice design on the tart. (Hint: we didn’t bother doing the fancy weaving for a real lattice, but it looks exactly the same when it comes out of the oven!)
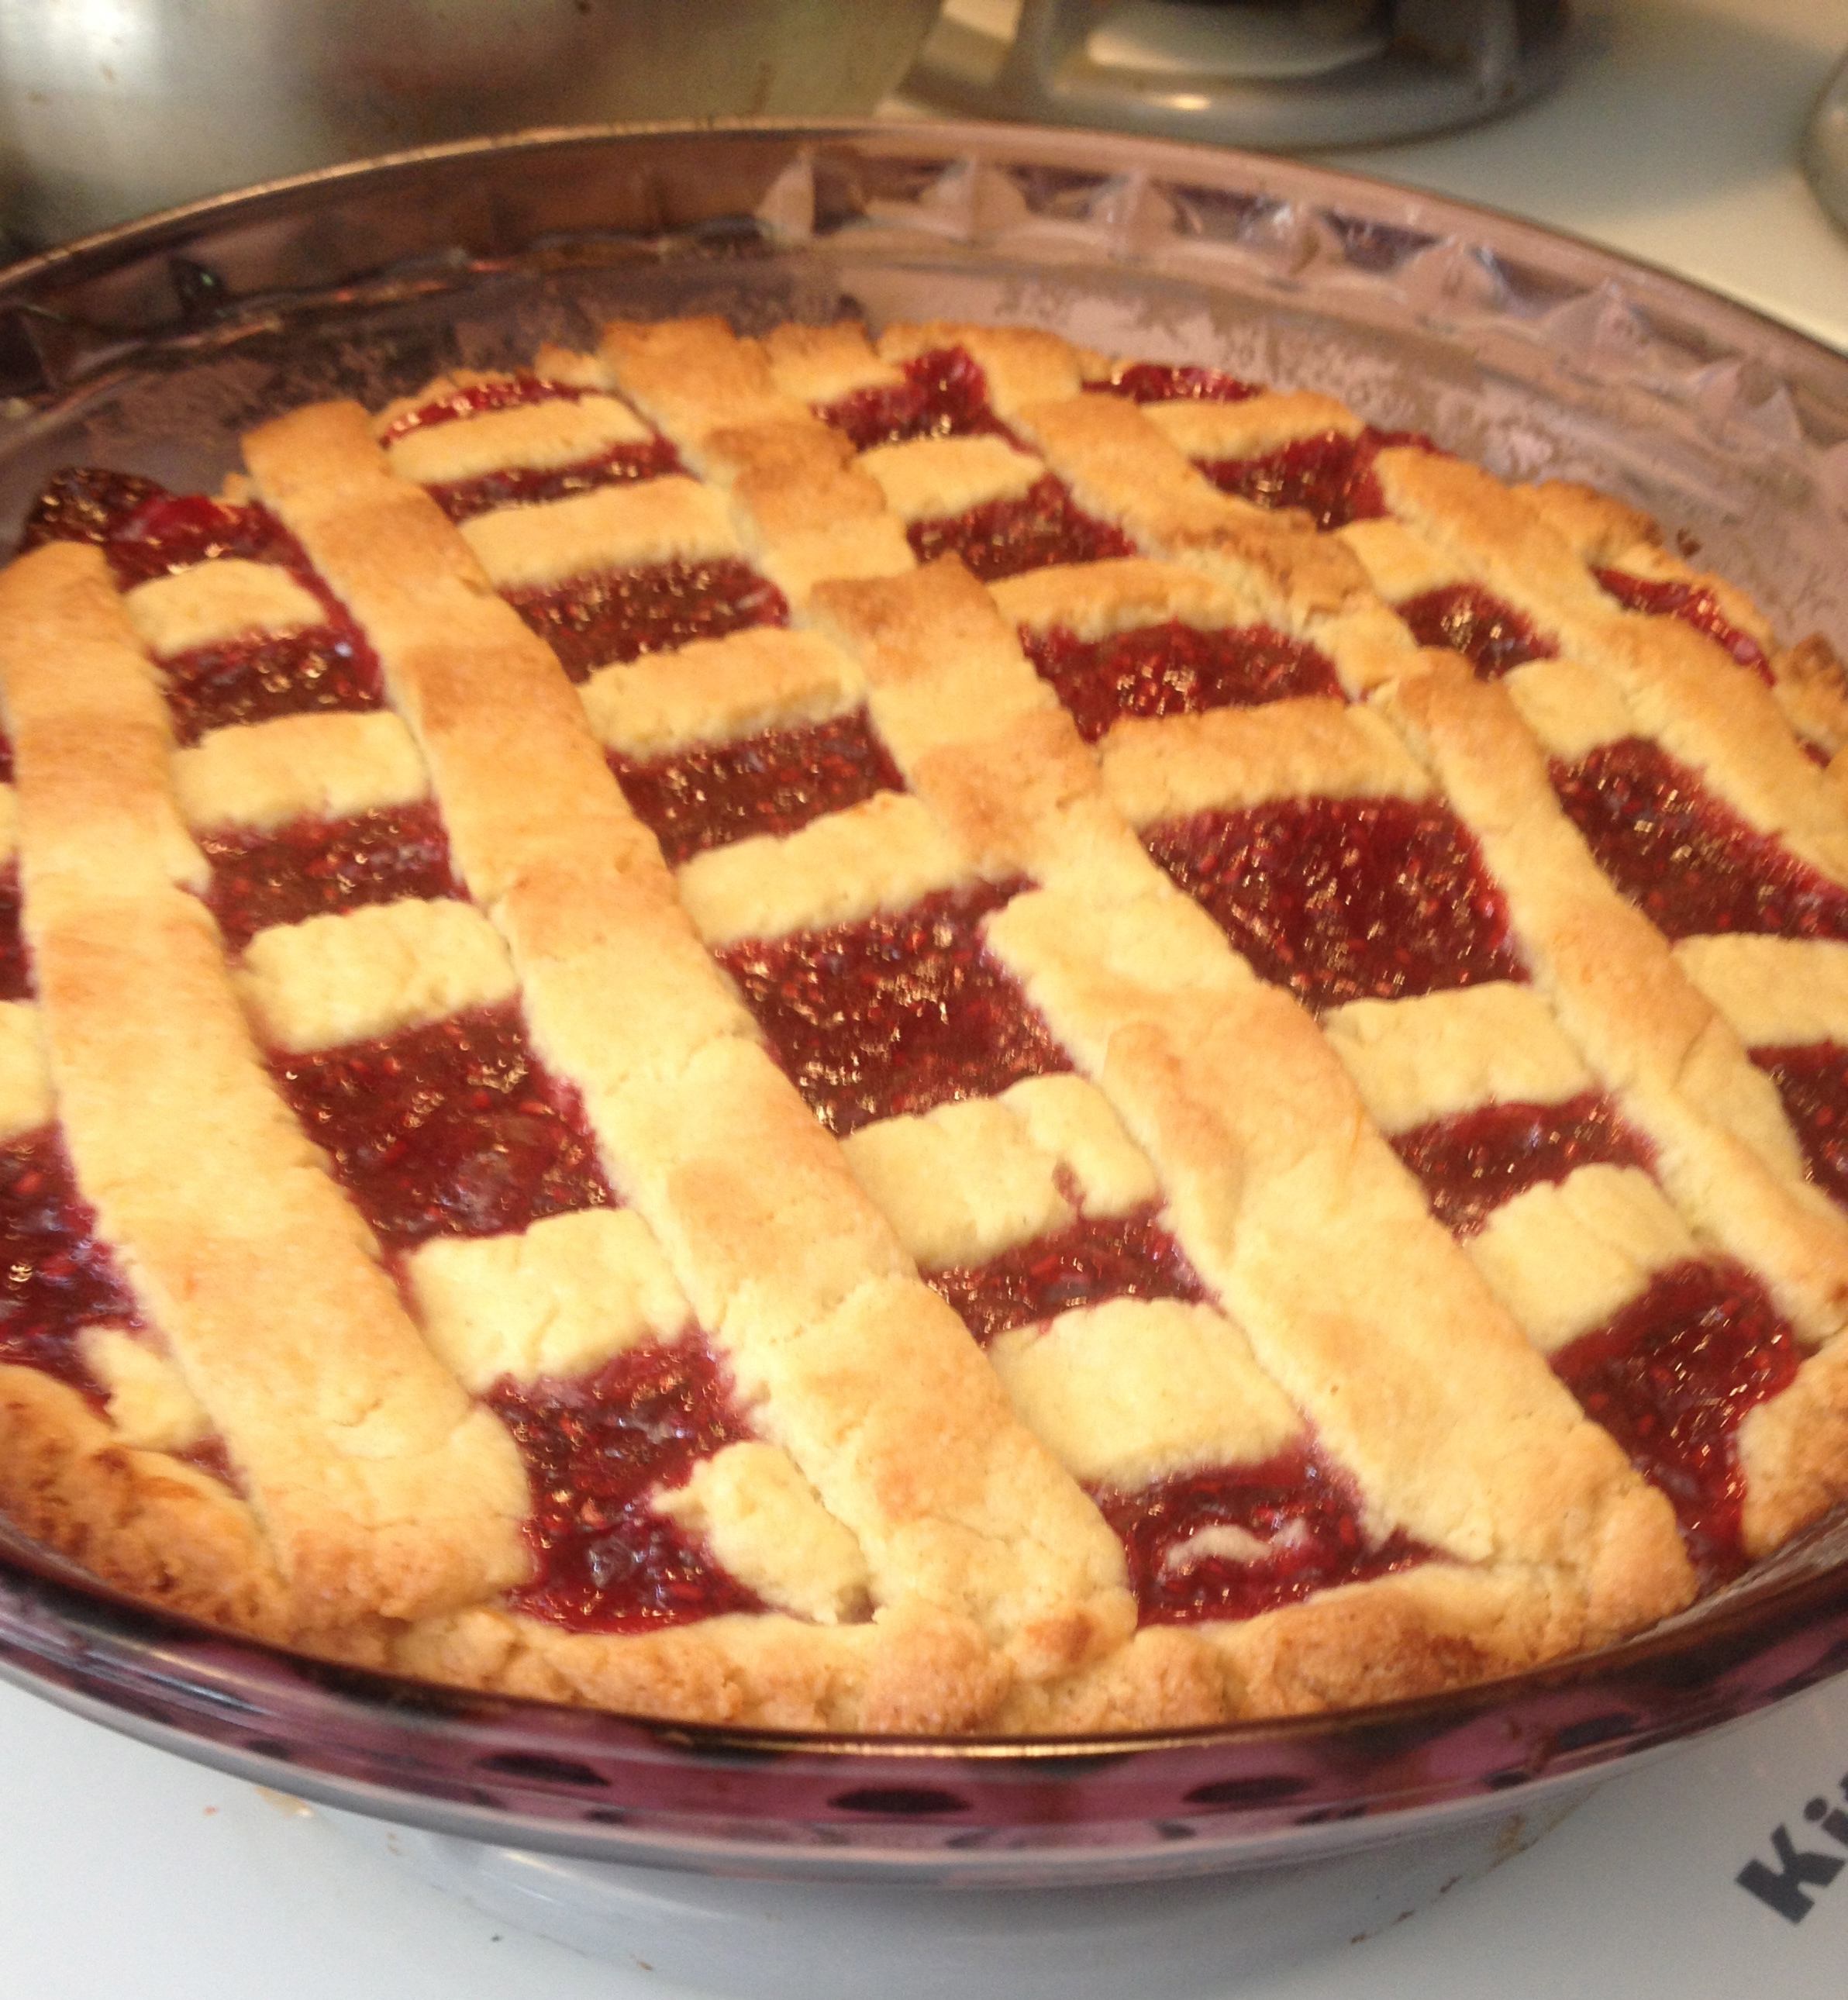
Put the tart in the oven at 400ºF for 23 minutes, or until the crust is golden brown. I know 23 minutes is a strange amount of time, but trust me on this one. When it comes out of the oven, let it cool a bit and then dig in! This tart is absolutely gorgeous, and just as yummy as it looks!
My friend and I had leftover dough, so we made a Cinnamon Peach Tart. It’s the exact same method, except we used a buttered 9×5″ baking pan and my mom’s peach cinnamon jam. It honestly tasted like a heavenly peach cobbler.
It was such a pleasure to bake with my friend, and to try my hand at some amazing Italian desserts! Believe me, the tarts are already eaten, and we’ll be baking plenty more desserts before school starts again. I hope you love this recipe as much as I did, and as the Italians would say, Ciao!