Monthly Archives: May 2014

Game Days and Gardens

Well, it seems that Spring has finally arrived! That’s pretty indicative of the fact that football tailgating parties are out of season, but I figure, it’s Game Day somewhere! Today’s post will be a mix of a few yummy tailgating recipes, and then a healthier, fresher twist on one recipe that uses yummy veggies from spring and summer harvests!

The first recipe on the list for Game Day parties is for honey mustard chicken wings.

Ingredients:

  • 3 lbs chicken wings (the little drumettes work well for this recipe)
  • Salt and pepper to taste
  • 1 tbsp butter or margarine
  • 1/4 cup dijon mustard
  • 1/4 cup honey (you can also just buy honey Dijon mustard instead of mixing them yourself, and that tastes great! Just use 1/2 cup.)

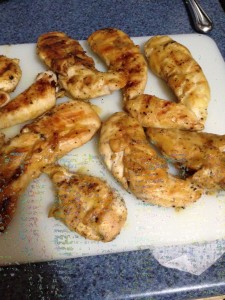
Preheat the oven to 400ºF. Line a baking sheet with foil and place a wire rack on top of it (if you’re planning on using a cooling rack for this, make sure the rack is oven-safe first!). Salt and pepper the wings liberally and then line them up on the wire rack. Bake them until they’re golden brown, around 45 minutes. You can also grill the wings.

While they’re baking, melt the butter in a saucepan and whisk in the honey and mustard. When the wings come out of the oven (or off the grill), brush the sauce onto them until they’re evenly coated. Then, put them back in the oven/grill for around 10 minutes, and they’re ready to be enjoyed! If you’re grilling the wings, make sure you still have some sort of pan under the wings, or else the sauce will drip into the coals and could cause flare-ups or spitting.

You can also use boneless chicken strips, if you don’t feel like getting sauce on you from the wings!

IMG_0784

Next up, the recipe is twice-baked potatoes.

Ingredients:

  • Large golden potatoes (or any potato that you’d like to bake); one potato makes two servings, so plan accordingly if your guests will want one or two servings.
  • Salt and pepper to taste
  • Whatever toppings you’d like; I used broccoli and cheese for our party, but you can also use bacon, sour cream, chives, chicken, etc.

Bake the potatoes either in the oven at 400ºF for around an hour and 15 minutes, or in the microwave on high heat for about 10 minutes. When baking the potatoes, make sure you poke numerous holes in them with a fork first, so that they don’t explode. You can also grill them, wrapped in foil, and take them off the grill when they’re fork tender.

When the potatoes are baked, cut them in half length-wise (they’re screaming hot, so be careful!). Then, scoop out about 2/3 of the soft insides and put the insides into a bowl. Mash them with whatever toppings you want and a little milk or sour cream, and then pile the mixture back into the potato skin. It won’t fit perfectly because there are more ingredients, so just pile them high! Put them back in the oven for around 10-15 minutes until they’re heated through and all the cheese is melted. If you’re using a grill, just put them on until everything is hot and melty, about 10 minutes. Enjoy!

The final party recipe is for a simple fruit dip. It’s short and sweet, but adds a great touch to any fruit salad or fruit platter!

Ingredients:

  • 1 cup vanilla Greek yogurt
  • 2 tbsp brown sugar, more or less to taste

Mix these all up, and adjust the brown sugar amount or add a dash of vanilla extract in to taste, and you’re good to go! You can pour it over fruit slices or have it in a bowl for dipping. It stores very well in the fridge, too.

Now for the healthier twist on the honey mustard chicken: stir-fry!

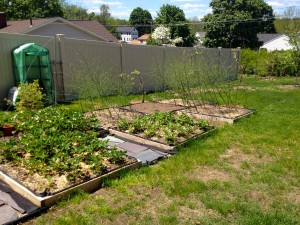
My dad is super big on gardening, and has transformed our yard into a mini produce market. We have all sorts of vegetable plants and fruit trees, and love taking advantage of the fresh produce. It’s so good for you, and really makes a difference in the taste!

IMG_1111

IMG_1109


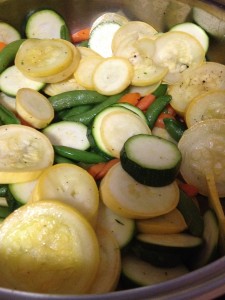
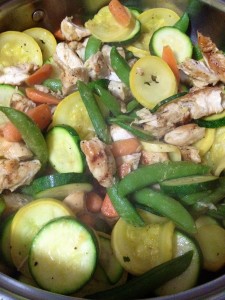
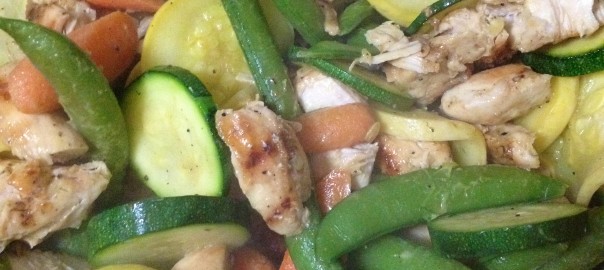
Today’s recipe includes honey mustard chicken, sugar snap peas, summer squash, carrots, and zucchini, all from our garden (well, not the chicken). You can either use leftover chicken from the chicken wings and pull it from the bones, or buy boneless strips, grill them, and coat them in sauce. You don’t have to put them back on the grill, because you’ll be sautéing the chicken with veggies and you want the sauce to get on the veggies!

This recipe is really simple: just chop the vegetables and either pull the chicken from the bones or quickly grill it. Then, put a little olive oil into a sauté pan and let it heat. Put the carrots in first and let them soften a bit, then the peas, then the squash and zucchini.

Tip: when cooking vegetables in a pan, always put the hardest ones in first, because if you put them all in together, the softer vegetables will be burned mush by the time the harder ones are done.

When the vegetables are soft, add the chicken and heat it, mixing everything around so that the sauce gets on the other vegetables. When the chicken is hot, turn off the heat and serve the stir-fry!

IMG_0785 IMG_0786


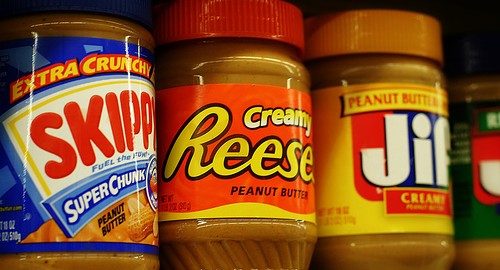
A few variations on this stir-fry recipe could be with balsamic vinaigrette and dried cranberries, or a Thai version using the peanut butter from my previous post and scallions. Does that sound yummy, or what?

Game Day parties are a great way to bring people together to enjoy some great community, as well as some rockin’ food. And gardens, well, the benefits are endless! Fresh food, great taste, and a chance for the whole family to get their hands dirty together. I hope these recipes give you some great ideas and tips for your next party or summer dinner!
Peanut Butter, the Natural Way!

So how many people like PB&J’s? Actually, I really don’t. But my roommate is a peanut butter fanatic! Recently I went to the Mennonite Relief Sale in Pennsylvania,  where there was a stand selling homemade peanut butter, and I bought some for her to try. It was delicious! I figured I would try my hand at it, and came up with this recipe. It’s seriously the easiest thing ever, and takes a grand total of 5 minutes. It’s also gluten-free, dairy-free, low-sodium, and FULL of omega-6 fatty acids, as well as super inexpensive (like $1.99 for the whole recipe kind of inexpensive).

Ingredients:

  • Peanuts- I’ve left this open-ended, because they can be roasted or raw, flavored or not, salted or unsalted, and it all ends up tasting great. I used a 12 oz. bag of unshelled, roasted, unsalted peanuts.
  • ~1 tsp oil, unflavored or with a complementing flavor. I used vegetable oil, but you can use coconut, peanut, sunflower, etc.
  • ~1 tsp honey, to taste
  • 1/4 cup sugar, more or less to taste
  • 1/3-1/2 tsp salt, to taste

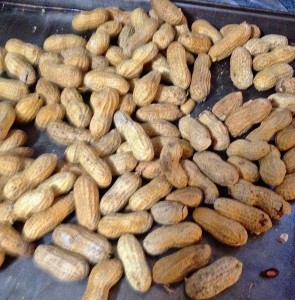
First, if you bought unshelled peanuts, you’ll have to shell them by cracking open the skins and pulling out the peanuts. This part can be slightly tedious, but I turned on Frozen while I was doing it and that made any potential frustration go away!

One shelling technique that I’ve read is from Food Network Chef Alton Brown: get out a salad spinner and rub the peanuts between your hands over the spinner until the shells come loose and break. Once all the shells and peanuts are separated, close the spinner and just spin it until all the shell fragments are on the outside and the peanuts are still on the inside!

When you’re shelling the peanuts, it’s ok if the little red skins stay on the peanuts, but I took most of them off. If you bought raw peanuts and want to roast them, you can roast them in the shell at 350ºF for 30 minutes, and then shell them.

IMG_1069

Then, after the peanuts are shelled and ready to go, put them in a food processor or blender (preferably food processor, though) and grind them up. At first they’ll turn into peanut dust, and then get clumpy (this is after about 2 minutes of processing). At this point, you can add the oil to loosen it up a bit, as well as any other flavorings such as honey, cayenne, cinnamon, black pepper, etc.

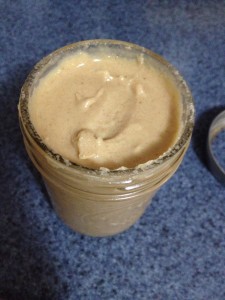
Keep grinding the peanuts for a couple minutes, until they become loose and look like peanut butter. Add in the sugar and salt and give it one final spin for just a few seconds to combine everything.

Now you’re ready to eat it or store it! Just a heads-up: the peanut butter will be warm, so don’t be surprised by that! It can be a bit disconcerting if you’re used to room temperature peanut butter. It’s also a little looser than store-bought peanut butter, but you can make it thicker by not processing it as much and leaving it chunkier. Also, if you still like whole peanut fragments in your peanut butter, you can reserve some peanuts for the very end and stir them in by hand.

IMG_1070


Maybe this is the peanut butter that will make me enjoy PB&J’s! This peanut butter can be used in any recipe, from peanut butter cookies to a Thai peanut sauce. You can also jazz it up however you want by adding different spices and oils. And finally, you can make it using other nuts or adding cocoa powder to it (can you say homemade Nutella?!). The sky is the limit here, so be creative and enjoy!

Homage to the Kingochowdah

I’m back again! Today’s post is a tribute to my friend’s late husband. He was a fabulous cook, and the self-proclaimed “Kingochowdah”. He used to cook for numerous church events, and his food always was superb. I decided, in his honor, to make his award-winning “Potato, Corn, Sausage and Cheese Chowder”. It’s absolutely delicious, and I was actually able to make it have slightly (but seriously, only slightly) fewer calories. Here’s his recipe:

Potato, Corn, Sausage and Cheese Chowder

  • 2-3 cups unpeeled and diced potatoes (red or white)
  • ~1 cup sliced carrots
  • ~1 cup sliced celery
  • 2 medium finely diced onions (I used scallions because of an onion intolerance, and it still tasted great!)
  • ~4 cloves minced garlic
  • ~1 tsp olive oil (his recipe says “a little” but this is about how much I used)
  • 1 cup diced red bell pepper (optional)
  • 1 cup diced green pepper (optional)
  • ~1 cup sliced mushrooms (optional)
  • 1-2 cups corn (if frozen, thaw first)
  • 15 oz. creamed corn (I omitted this to save on sodium and calories)
  • 2 cans chicken broth (I used low-sodium)
  • 1 lb cooked sliced sausage
  • 1 tbsp fresh chopped basil
  • 1 tbsp fresh chopped parsley
  • 1 tbsp salt (I didn’t use that much salt, maybe more like 2 tsp)
  • 1 tsp black pepper
  • 1-2 tbsp Worcestershire sauce
  • 1 tbsp Dijon mustard
  • 2-3 cups grated cheddar cheese
  • 12 oz. evaporated milk

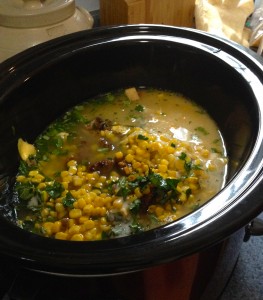
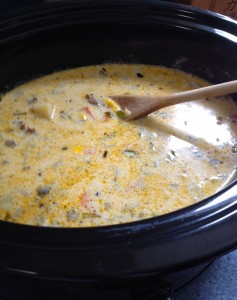
Sautee the carrots, celery, scallions, and garlic together in the olive oil until they are wilted but not browned. To do this, you’ll need to cook the carrots and celery for a few minutes before adding the garlic and onions, because they’re much harder veggies. Then, cook the sausage if needed. Add all the ingredients except the cheese and evaporated milk into a large crock pot.

IMG_1049


Cook it on low for 7-9 hours, or on high for 4 hours. Then, add the cheese and evaporated milk and cook further until the cheese is melted.

IMG_1050

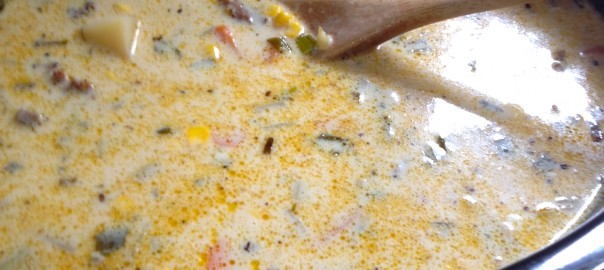
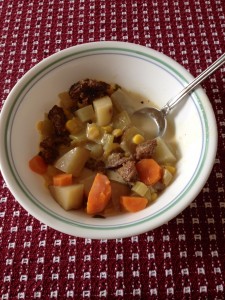
Then, ladle and enjoy!

IMG_1051


The way I made this chowder, it’s lower sodium and has fewer calories. It’s also less thick than the original recipe because I didn’t add the creamed corn. That didn’t make it any less delicious, though! I promise you’ll love it.

The Kingochowdah was dedicated to community and making sure everyone was well-fed. He is well-deserving of his culinary accolades, and certainly left a delicious legacy behind! For more of his recipes, feel free to visit www.kingochowdah.com and order his cookbook. You won’t be disappointed! Happy eating!