Hello, all! It feels like forever since my last post- life gets busy at the end of a semester! This post will be fairly short, because I should be working on a project as I type! In the spirit of having no time and needing to eat on the go, I thought I would post some of my favorite sandwich recipes. They’re healthy, delicious, and easy to eat anywhere! In fact, you can prepare some of the ingredients over the weekend, and then have sandwich ingredients on hand all week!
Here are the sandwiches of the day:
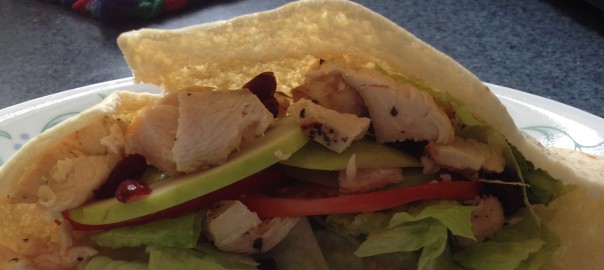
Grilled basil chicken salad with shredded cheese, apple slices, dried cranberries, and shredded lettuce in a pita pocket.
1. Grill boneless chicken tenders, sprinkling with salt, pepper, and dried basil on both sides of the chicken. When the chicken is cooked through, remove it from the heat and let it cool fully before touching it again. (Tip- do this before hand and refrigerate it to save time!)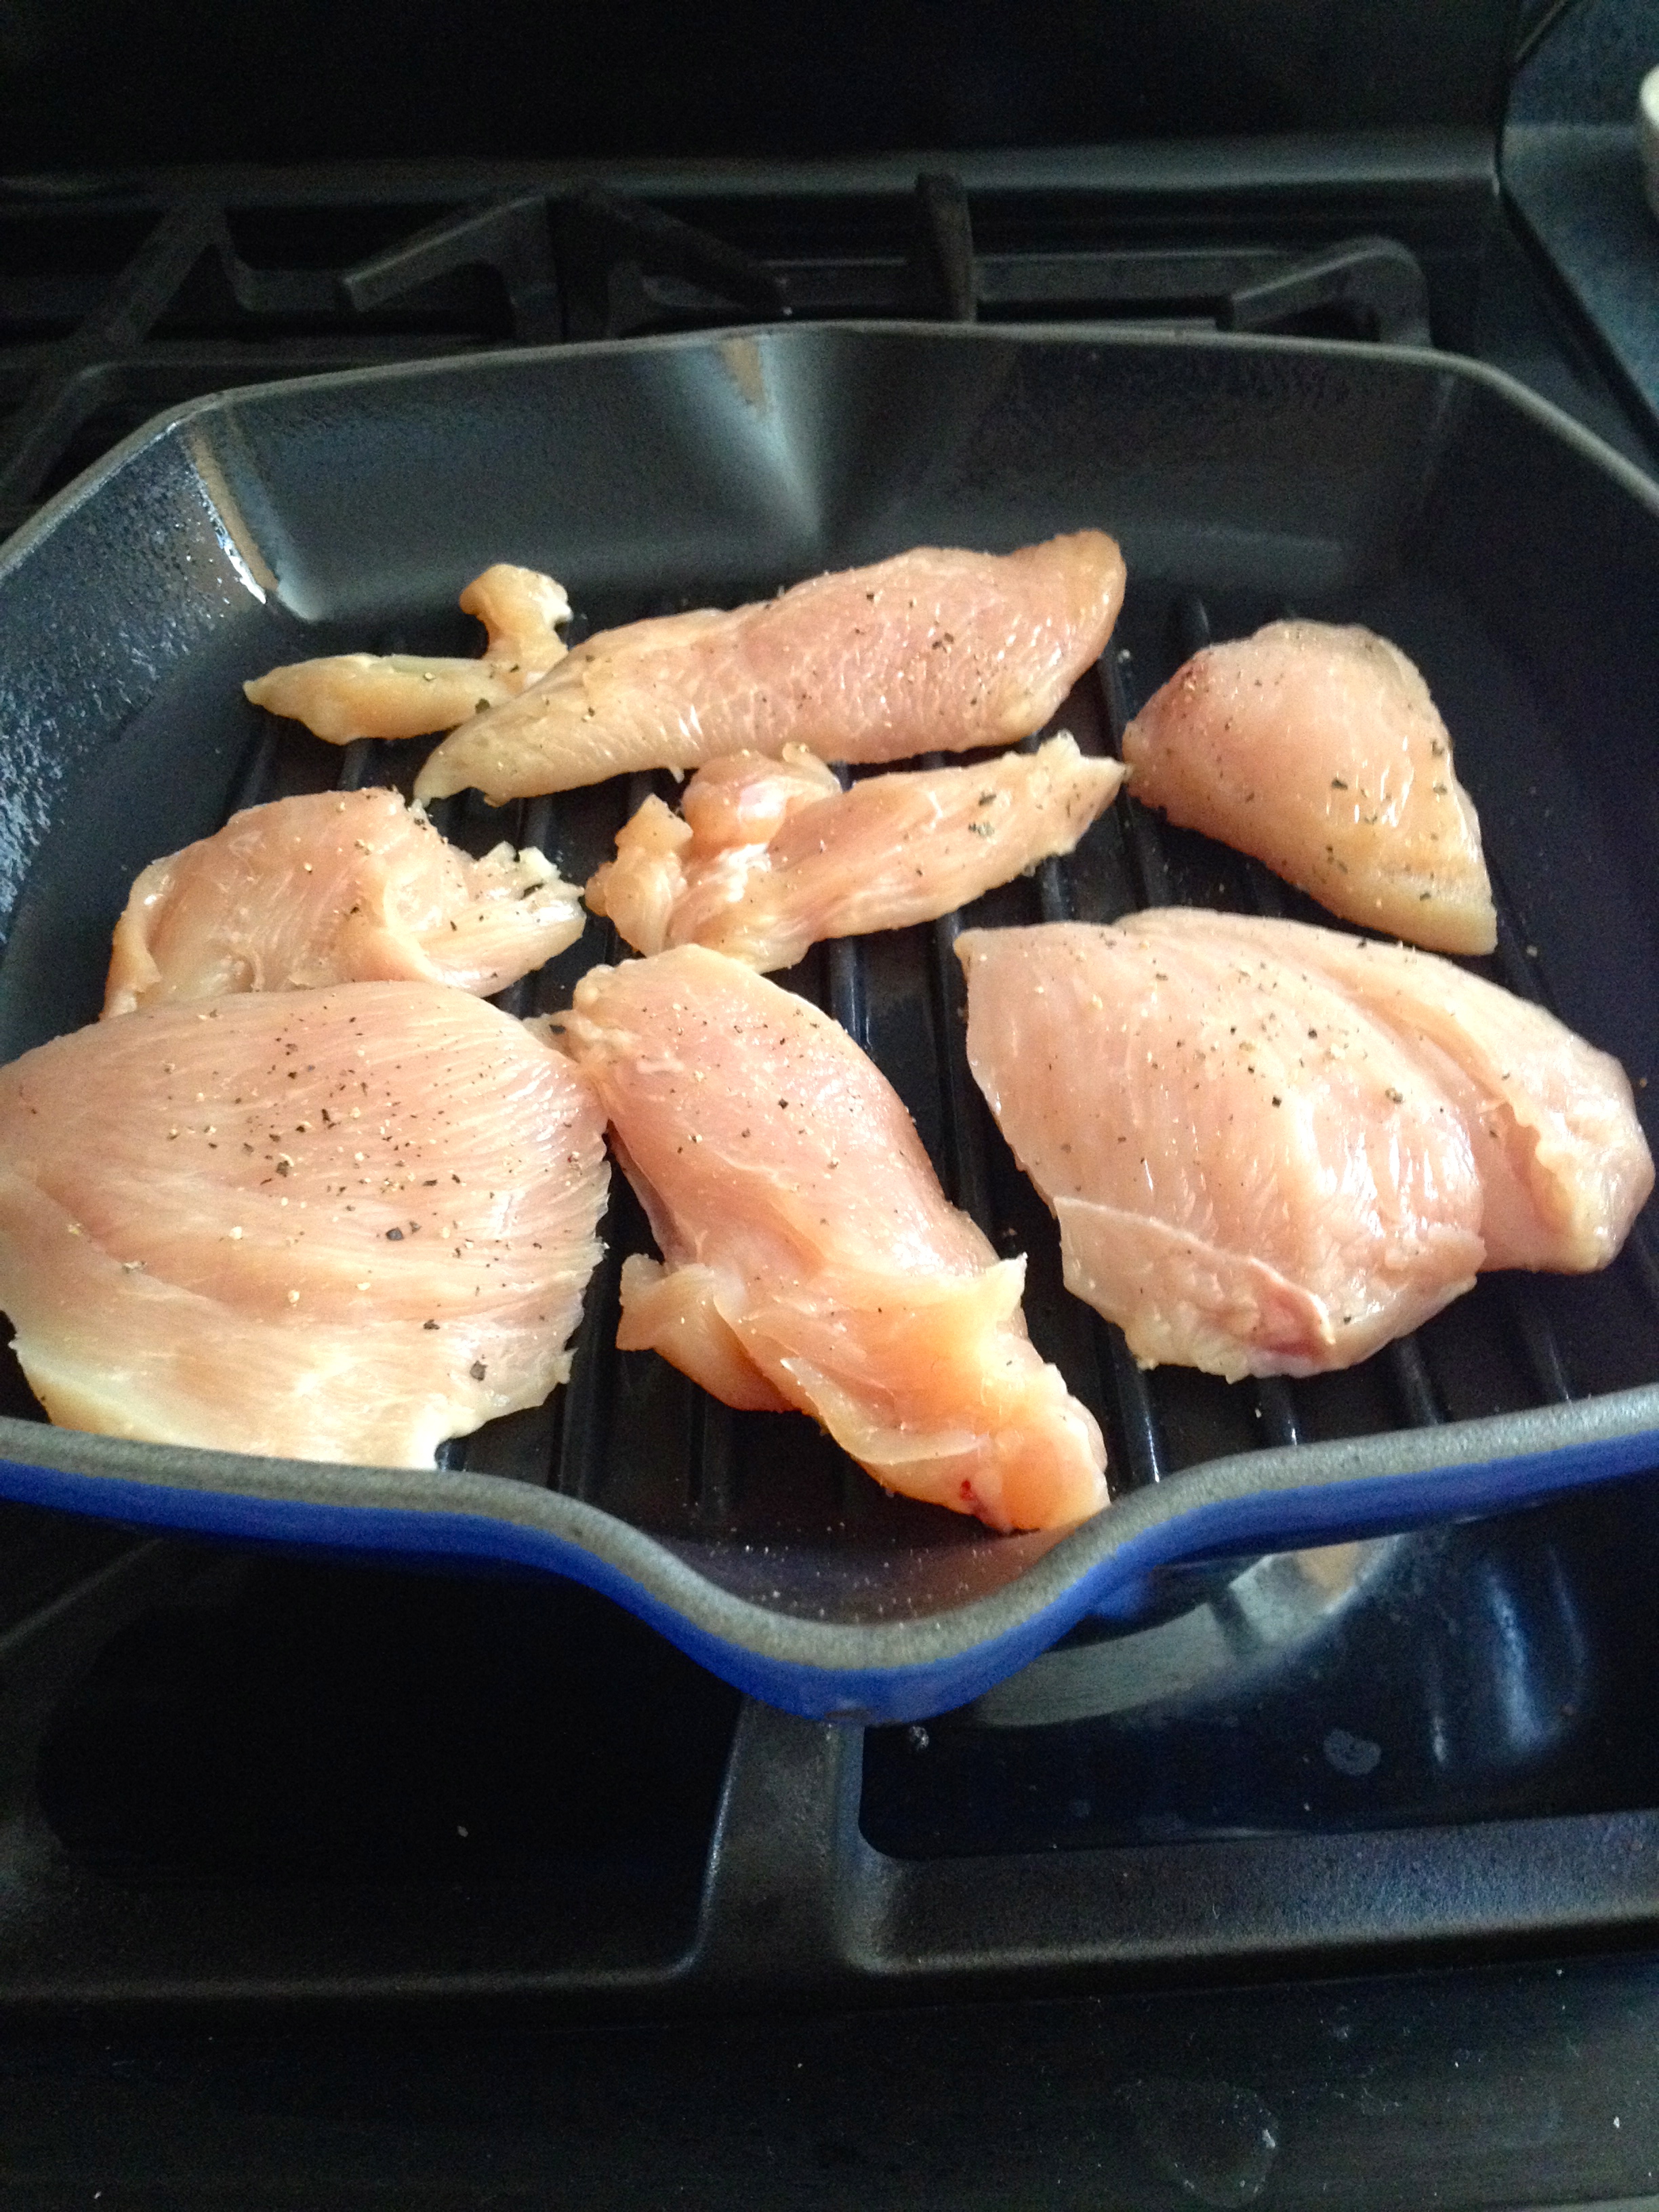
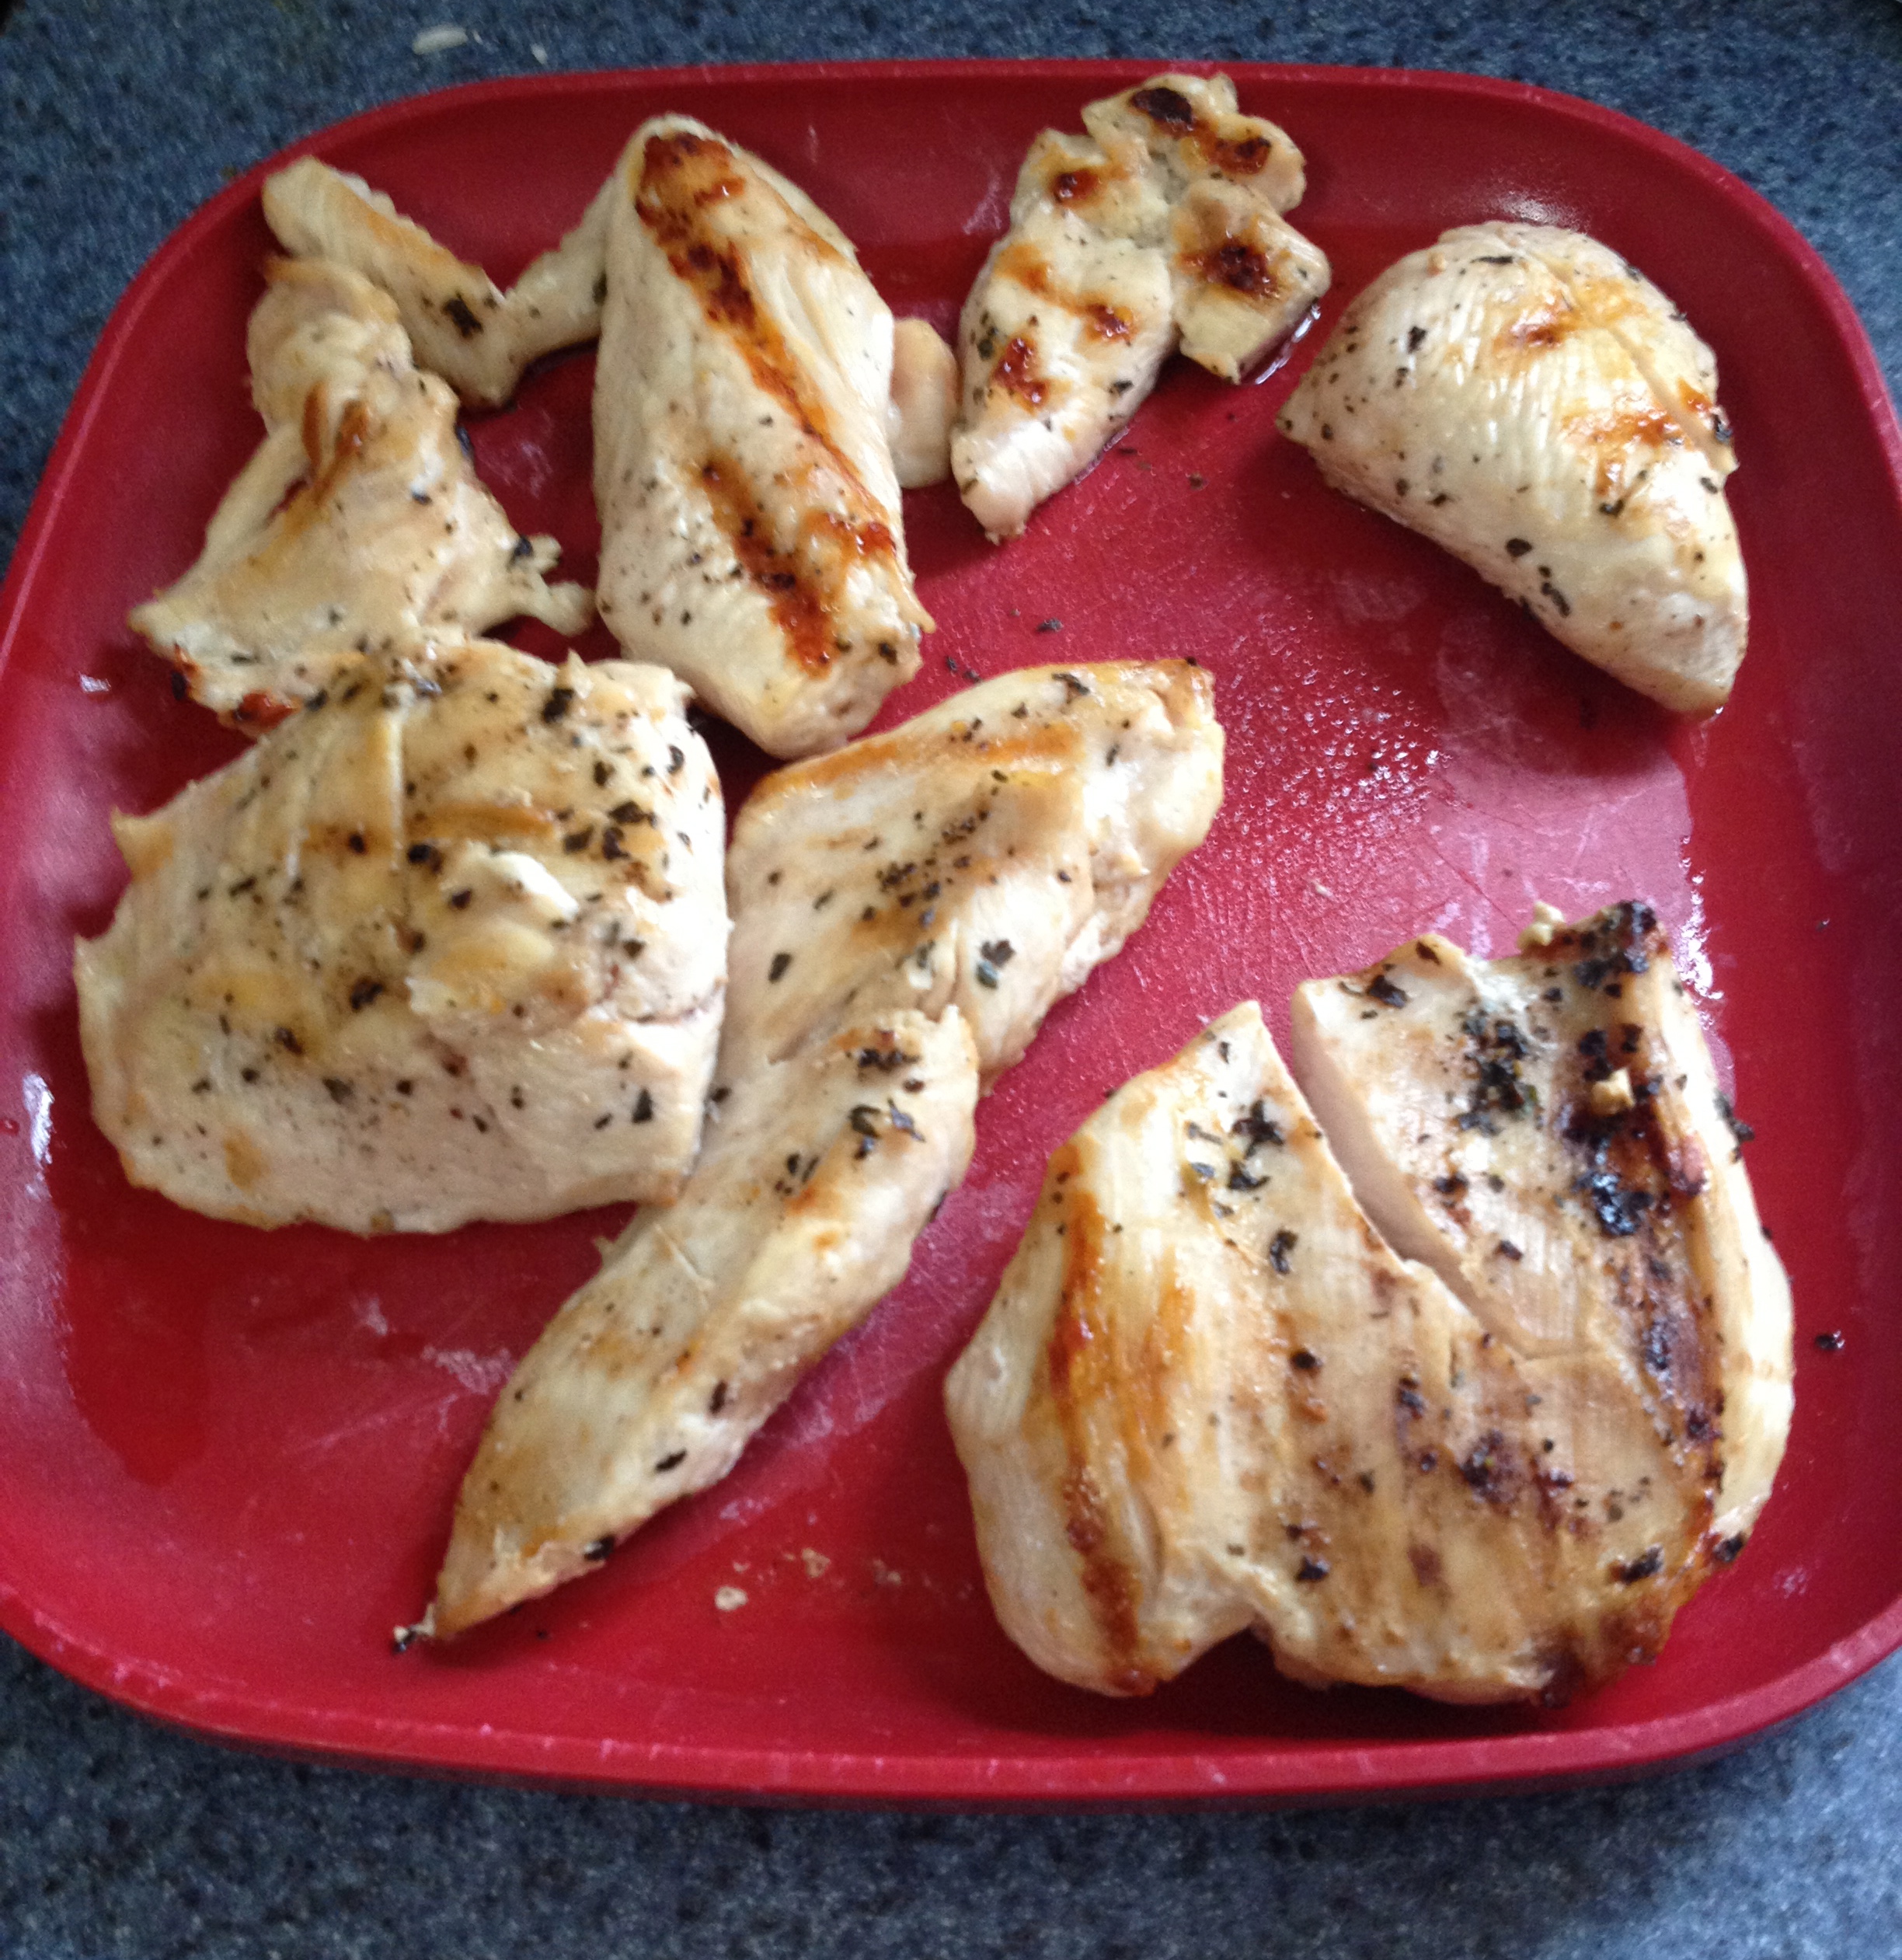
2. When the chicken is fully cooled, cut it into small squares and mix it with a dollop of mayonnaise. Then, add the dried cranberries to the mixture.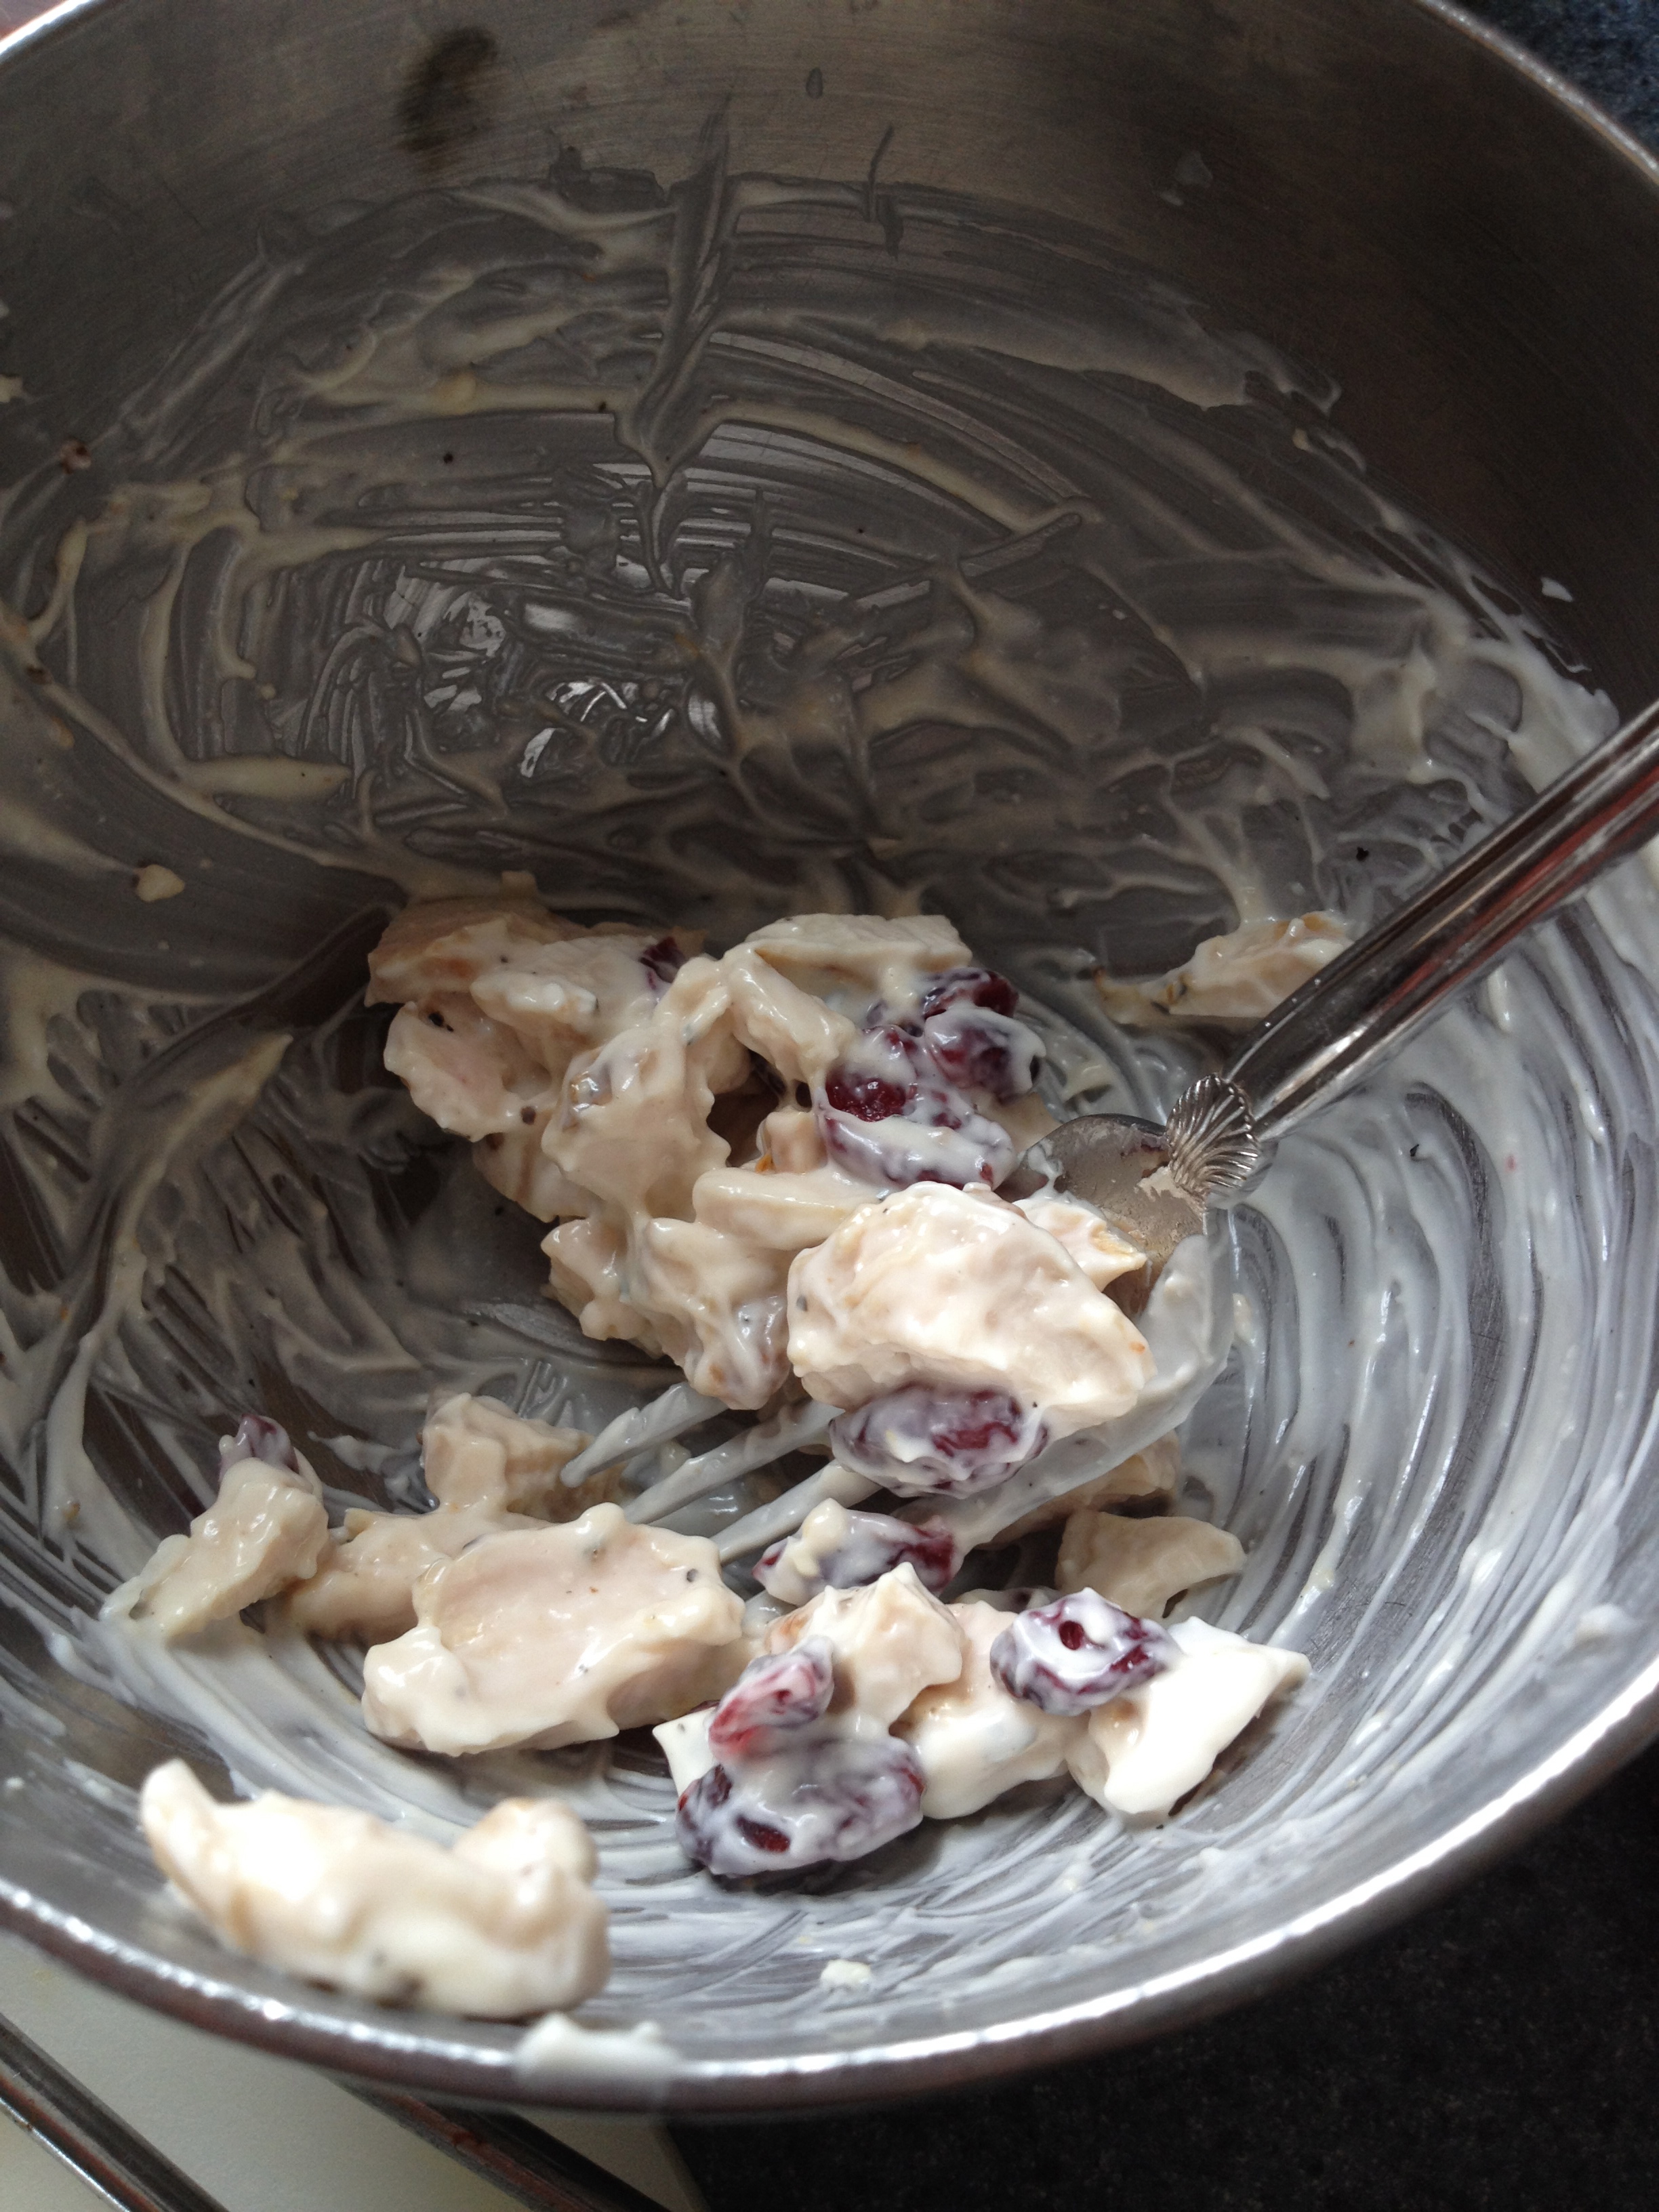
3. Assembly time! Take a half-circle pita pocket and put shredded lettuce and shredded cheese on the bottom of the pita. This will prevent the bottom of the pita from getting soggy, and also adds great crunch. Then, load the chicken salad into the pocket. Finally, thinly slice a green apple and layer the slices on top of the salad for more crunch and tartness. Wrap the sandwich in foil and you’re ready to go!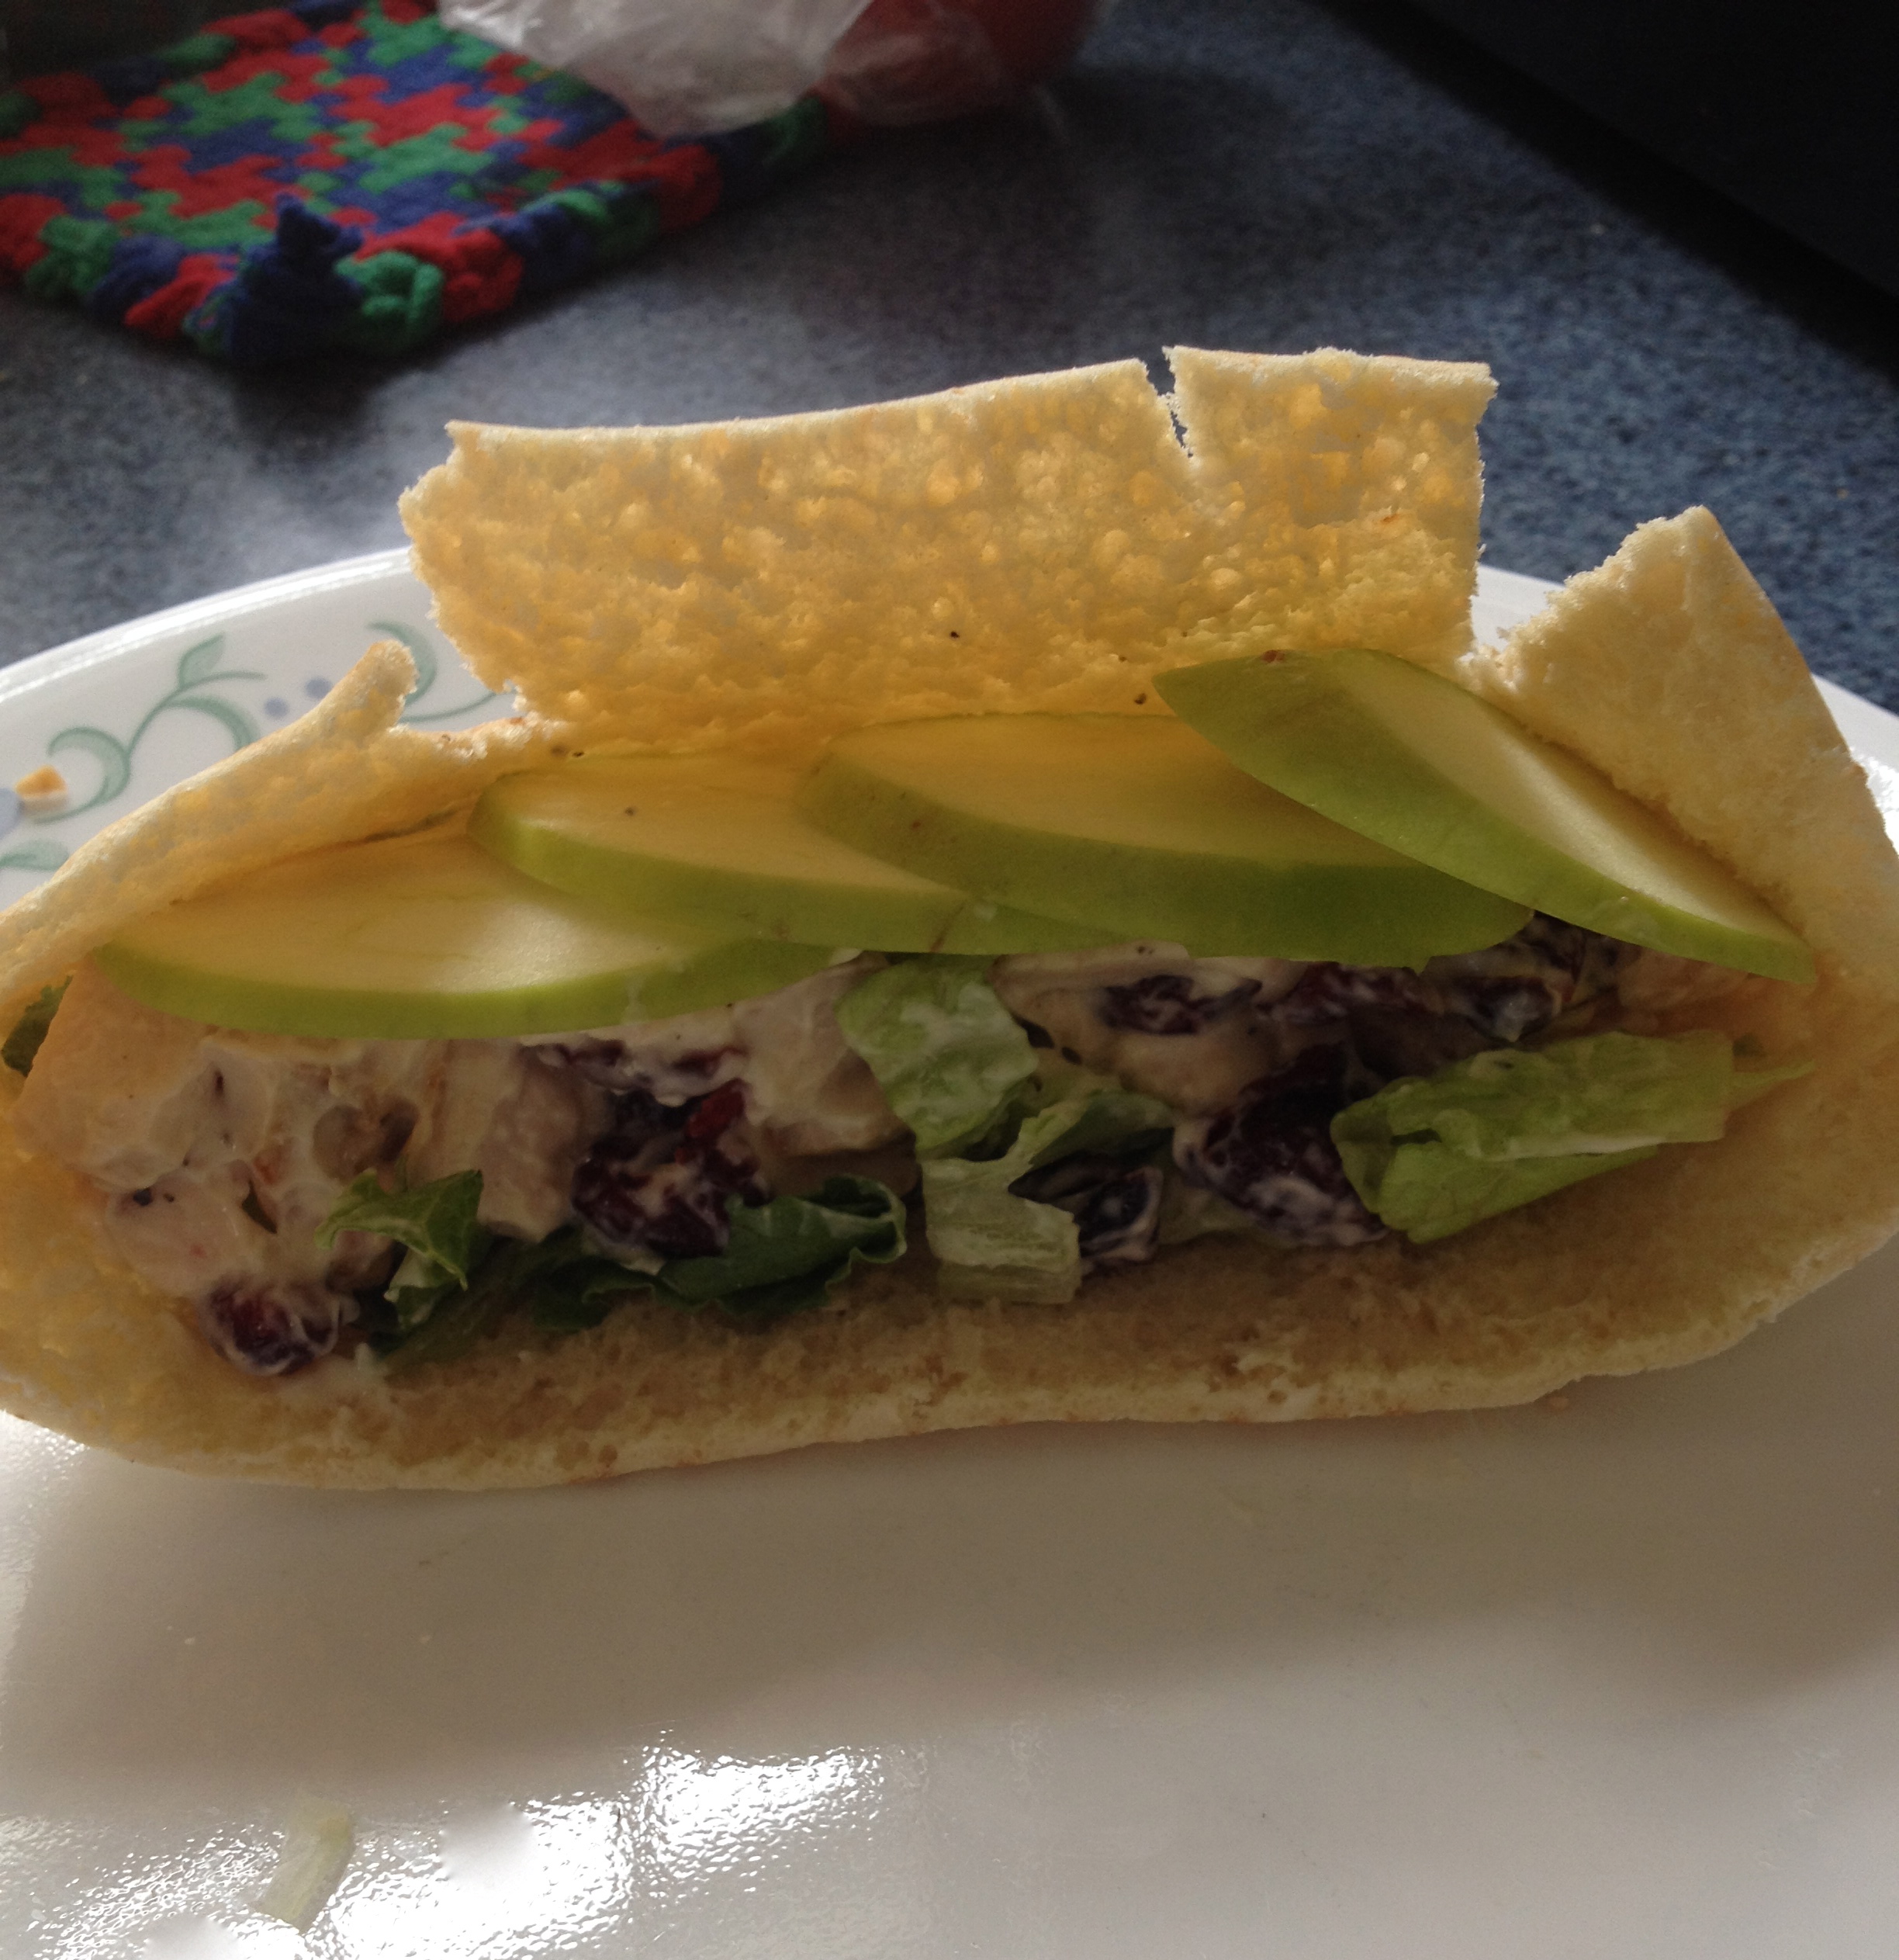
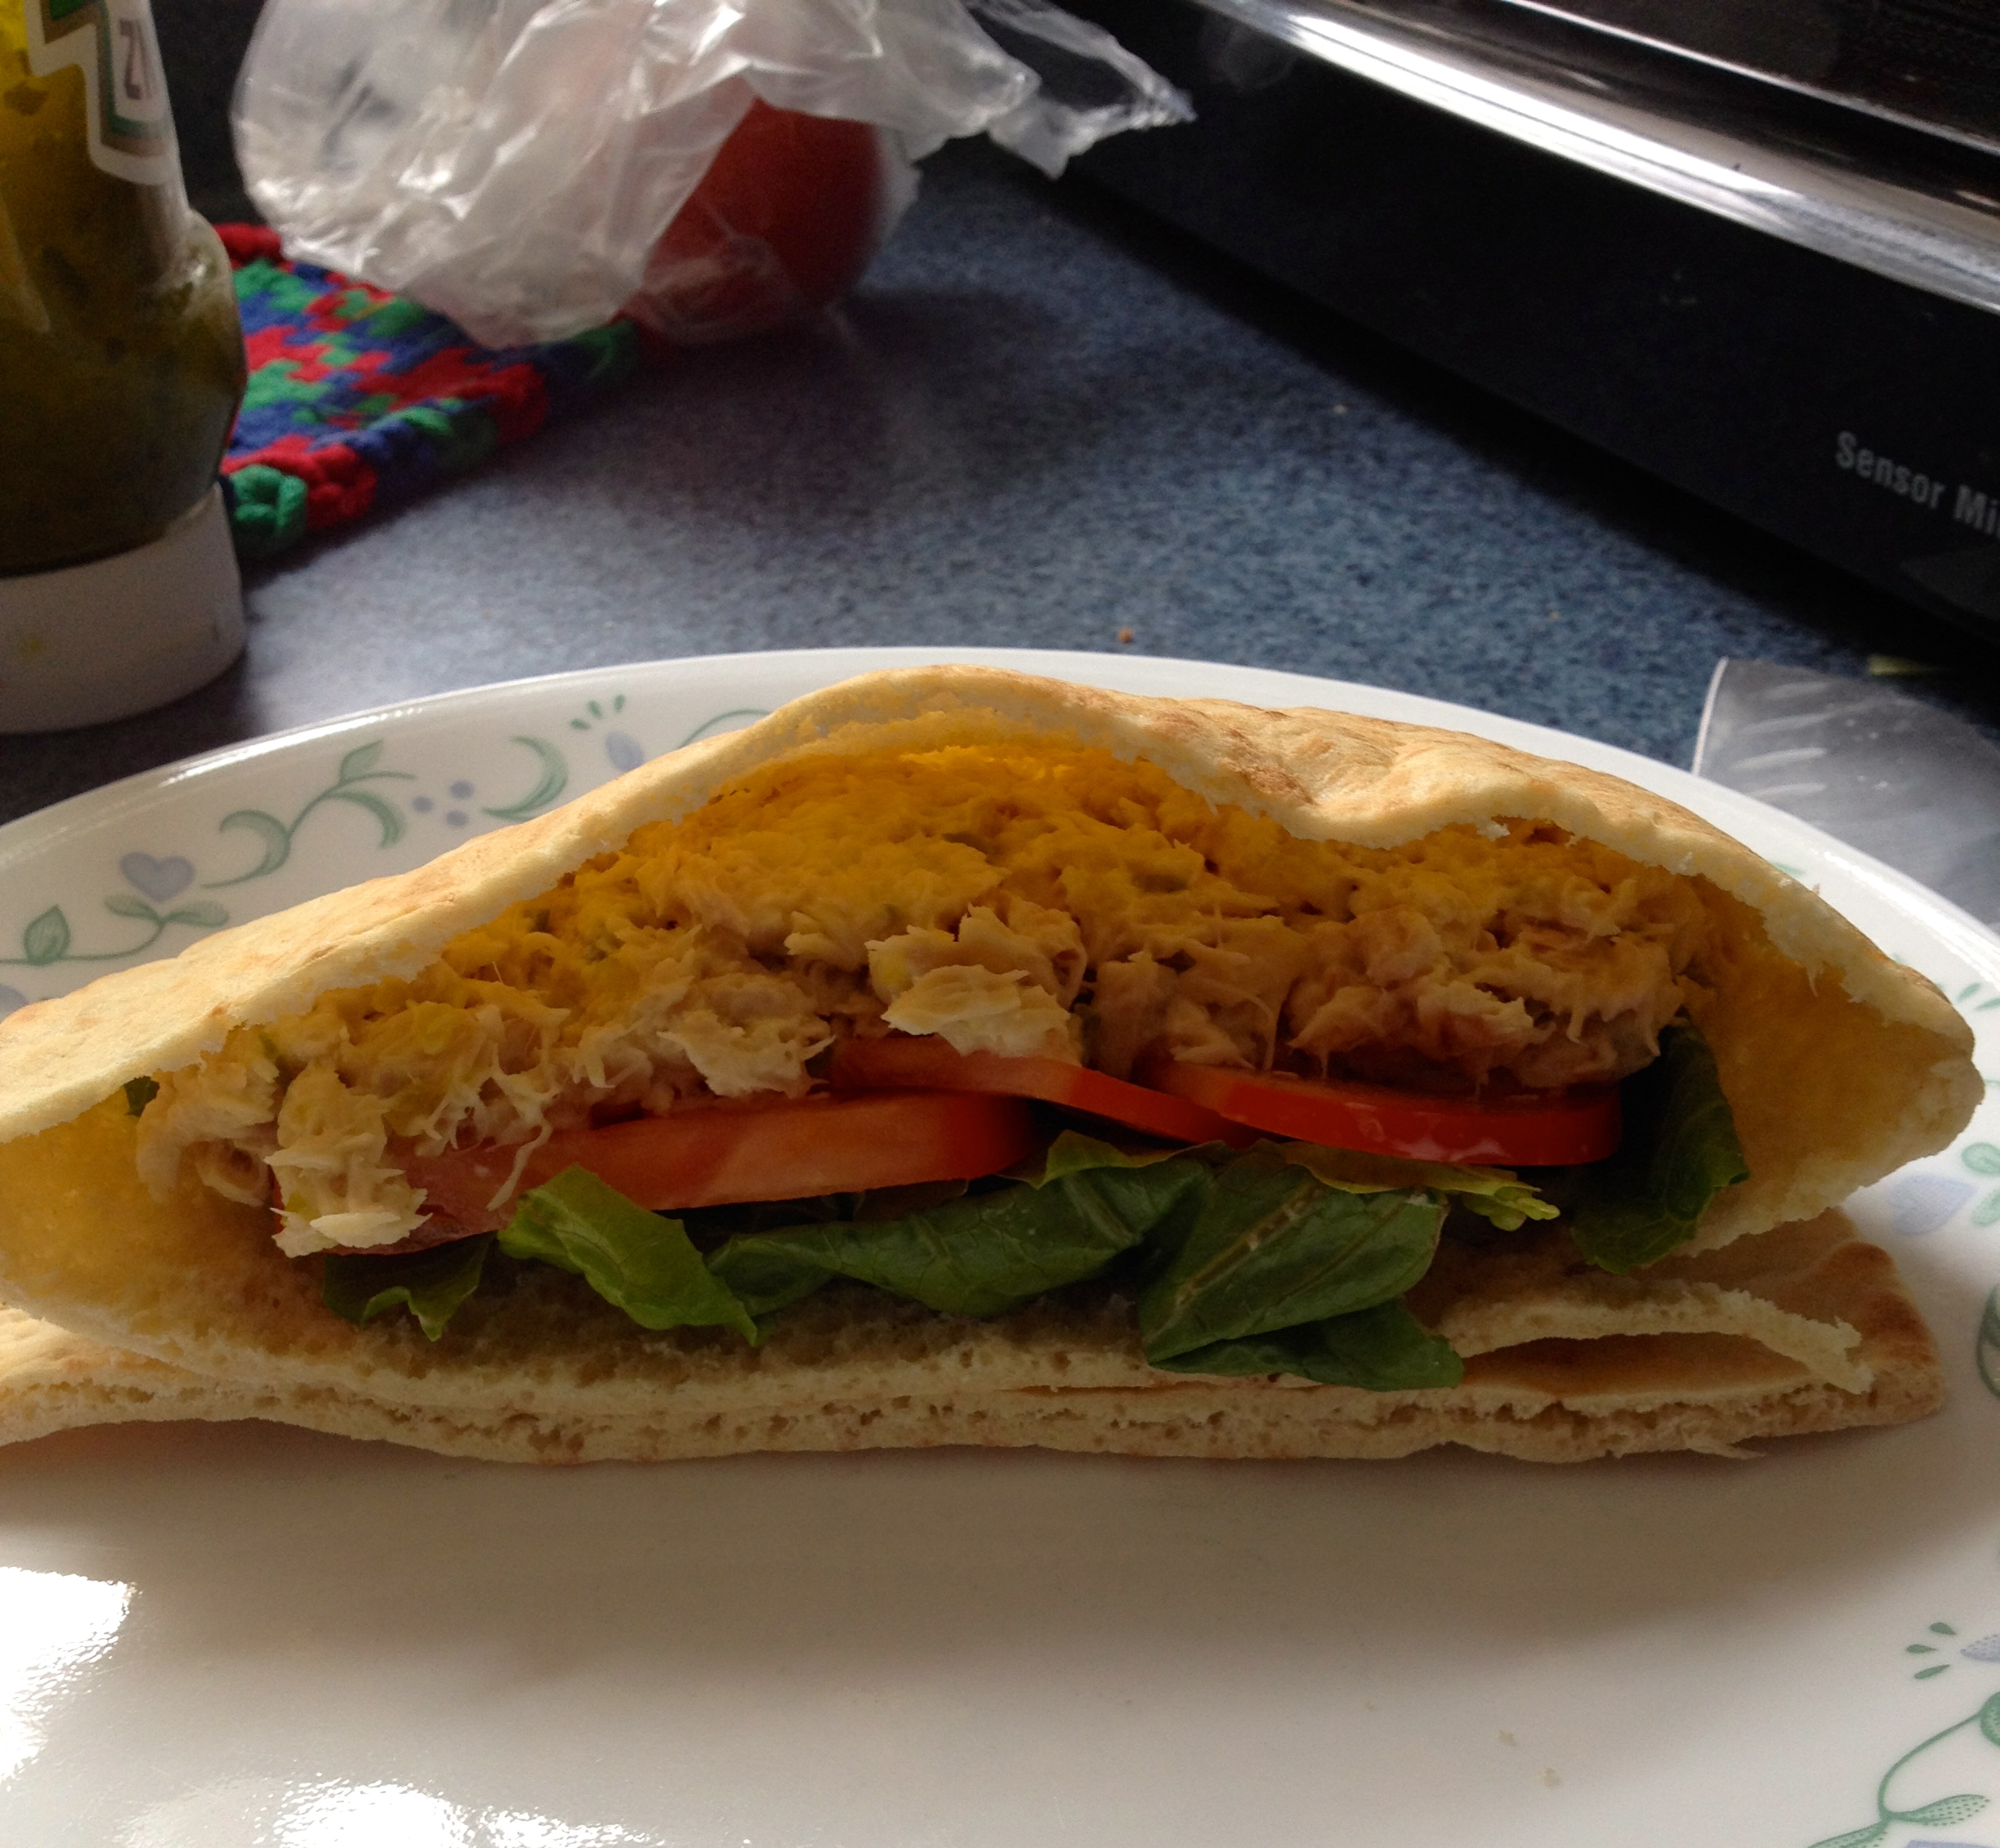
Tuna salad with sliced tomato and lettuce in a pita pocket.
1. Open and drain a can of tuna, and then mix the tuna in a small bowl with a dollop of mayonnaise and a dollop of pickle relish (you can leave the relish out if you don’t like it). 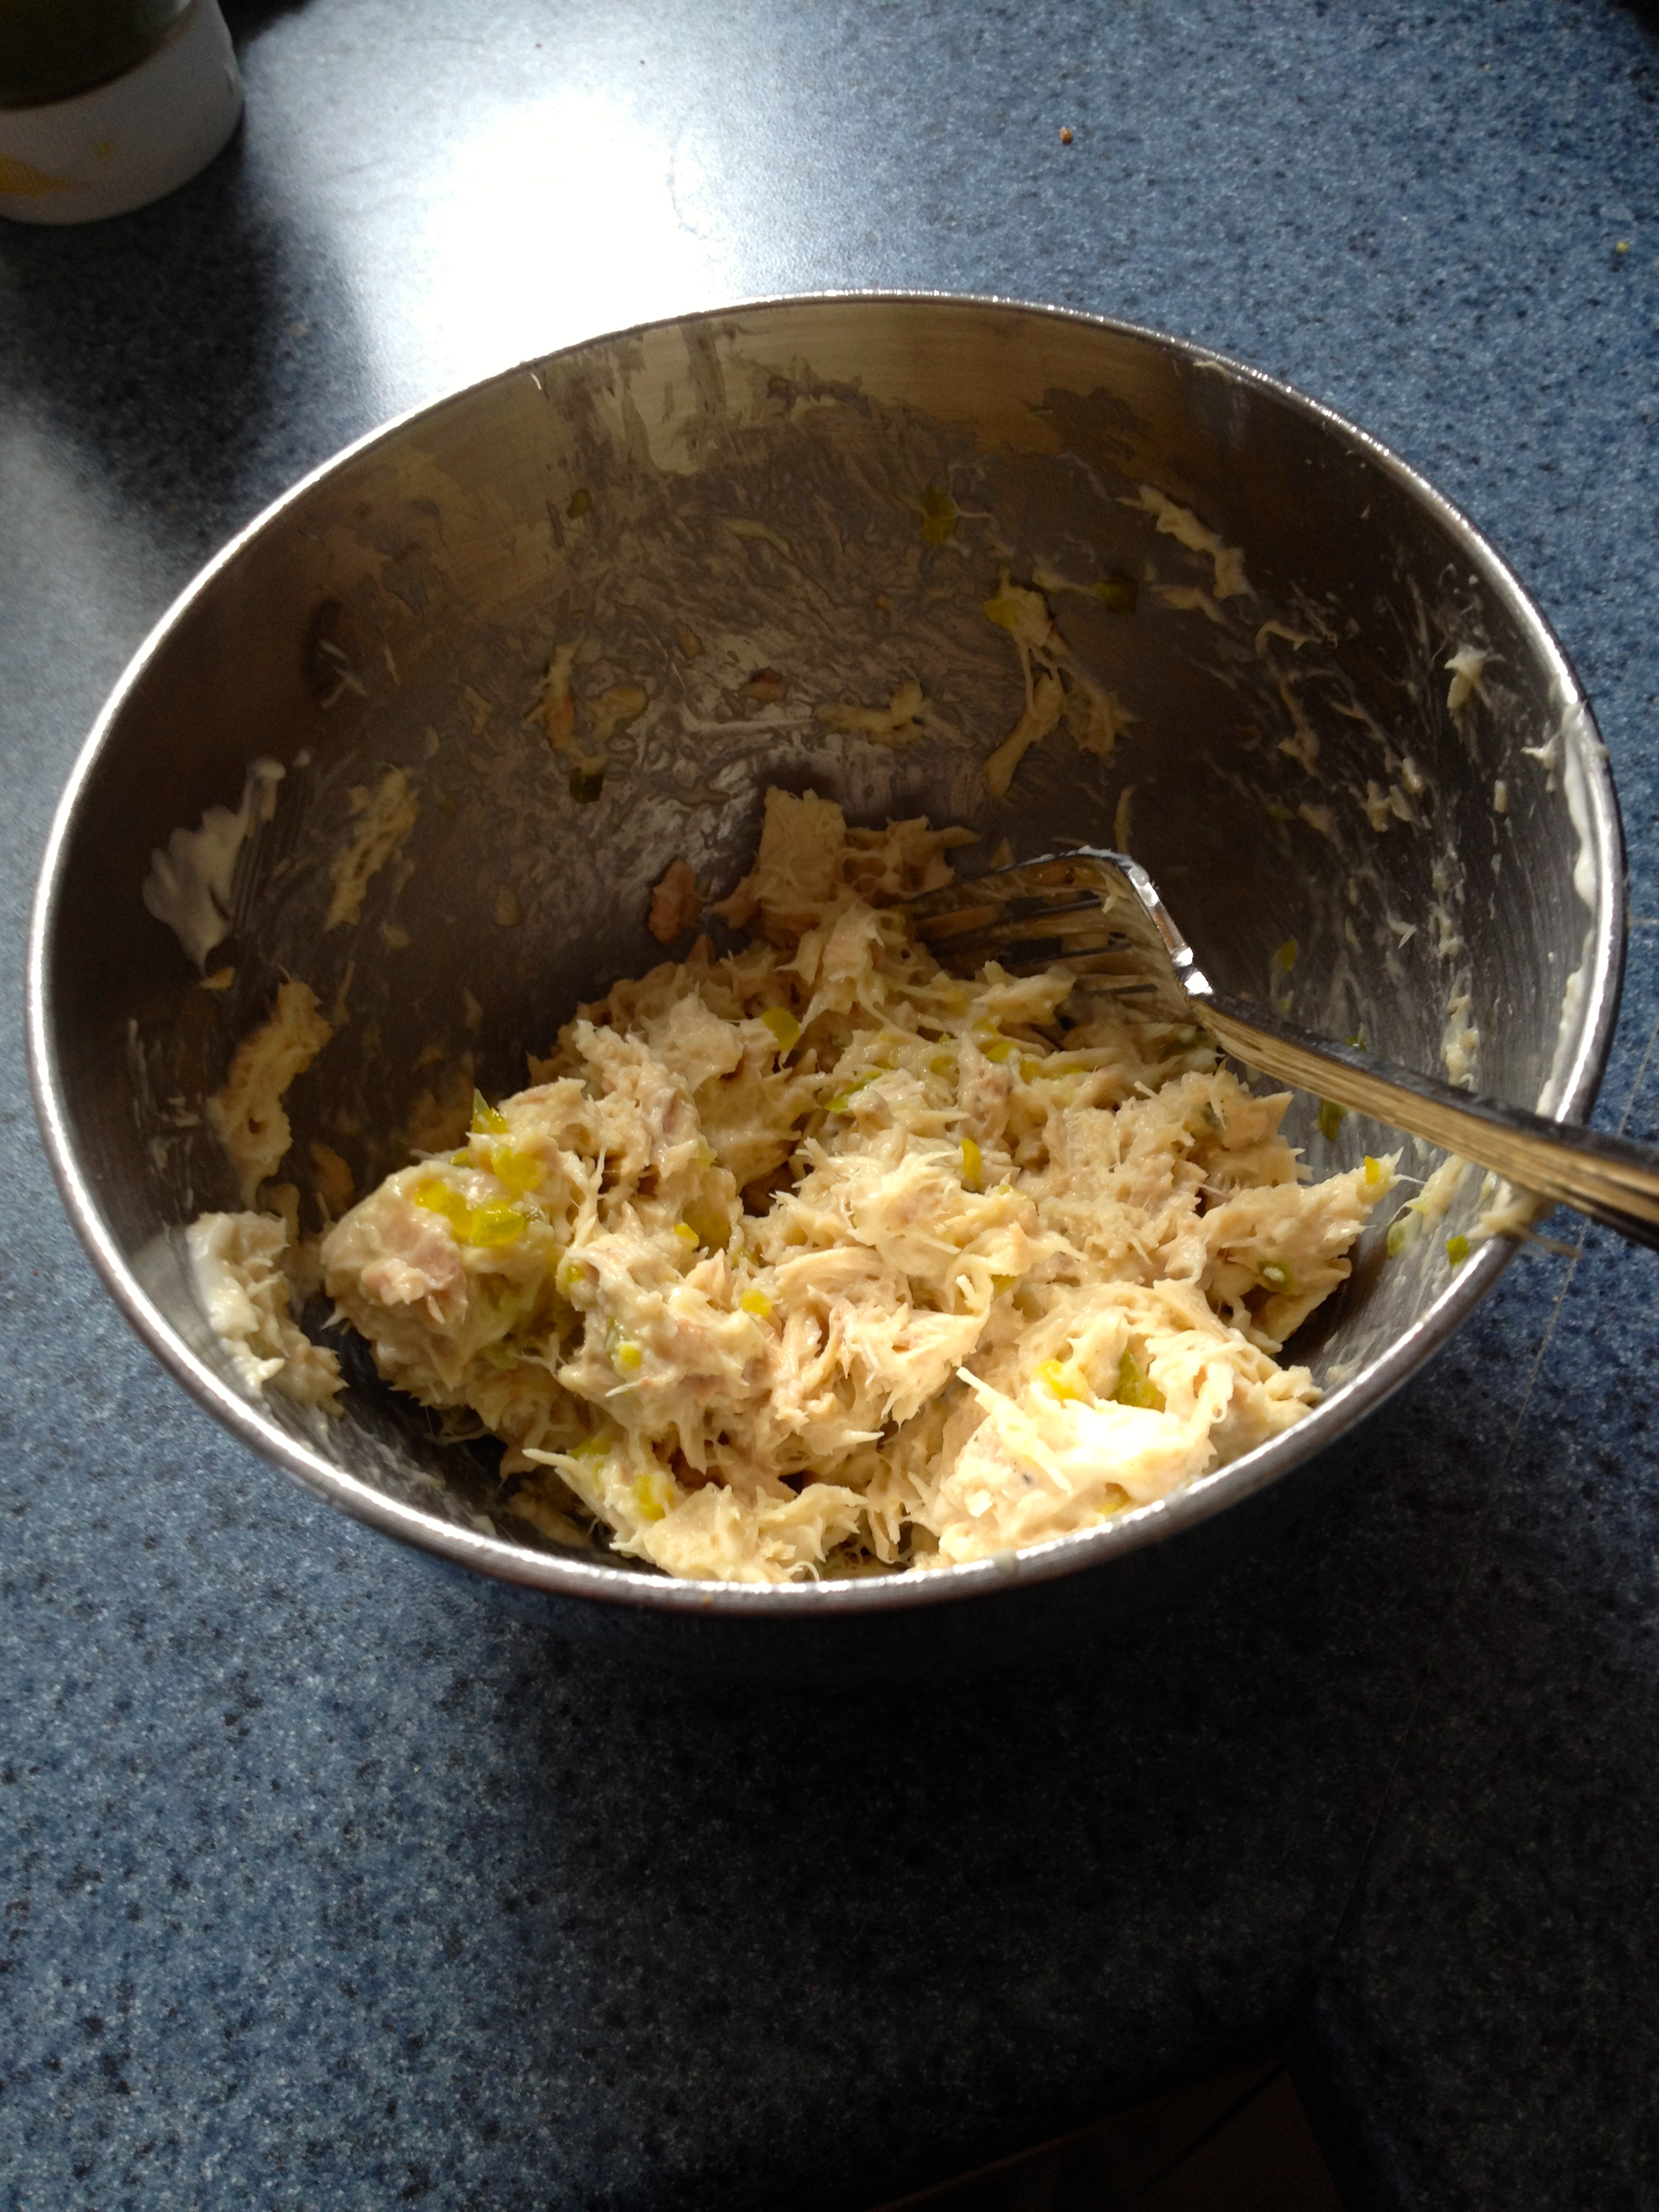
2. Open the pita pocket and put the lettuce leaves on the bottom, to prevent sogginess. (TIP: if you don’t like soggy bread, always put your dry and crunchy ingredients on the bottom of the sandwich. It really does work!) Then, put tomato slices on the lettuce leaves, and then the tuna on top of the tomato. This way, the tomato (the wettest item) is in the middle so there’s the least chance of it leaking all over the bread).
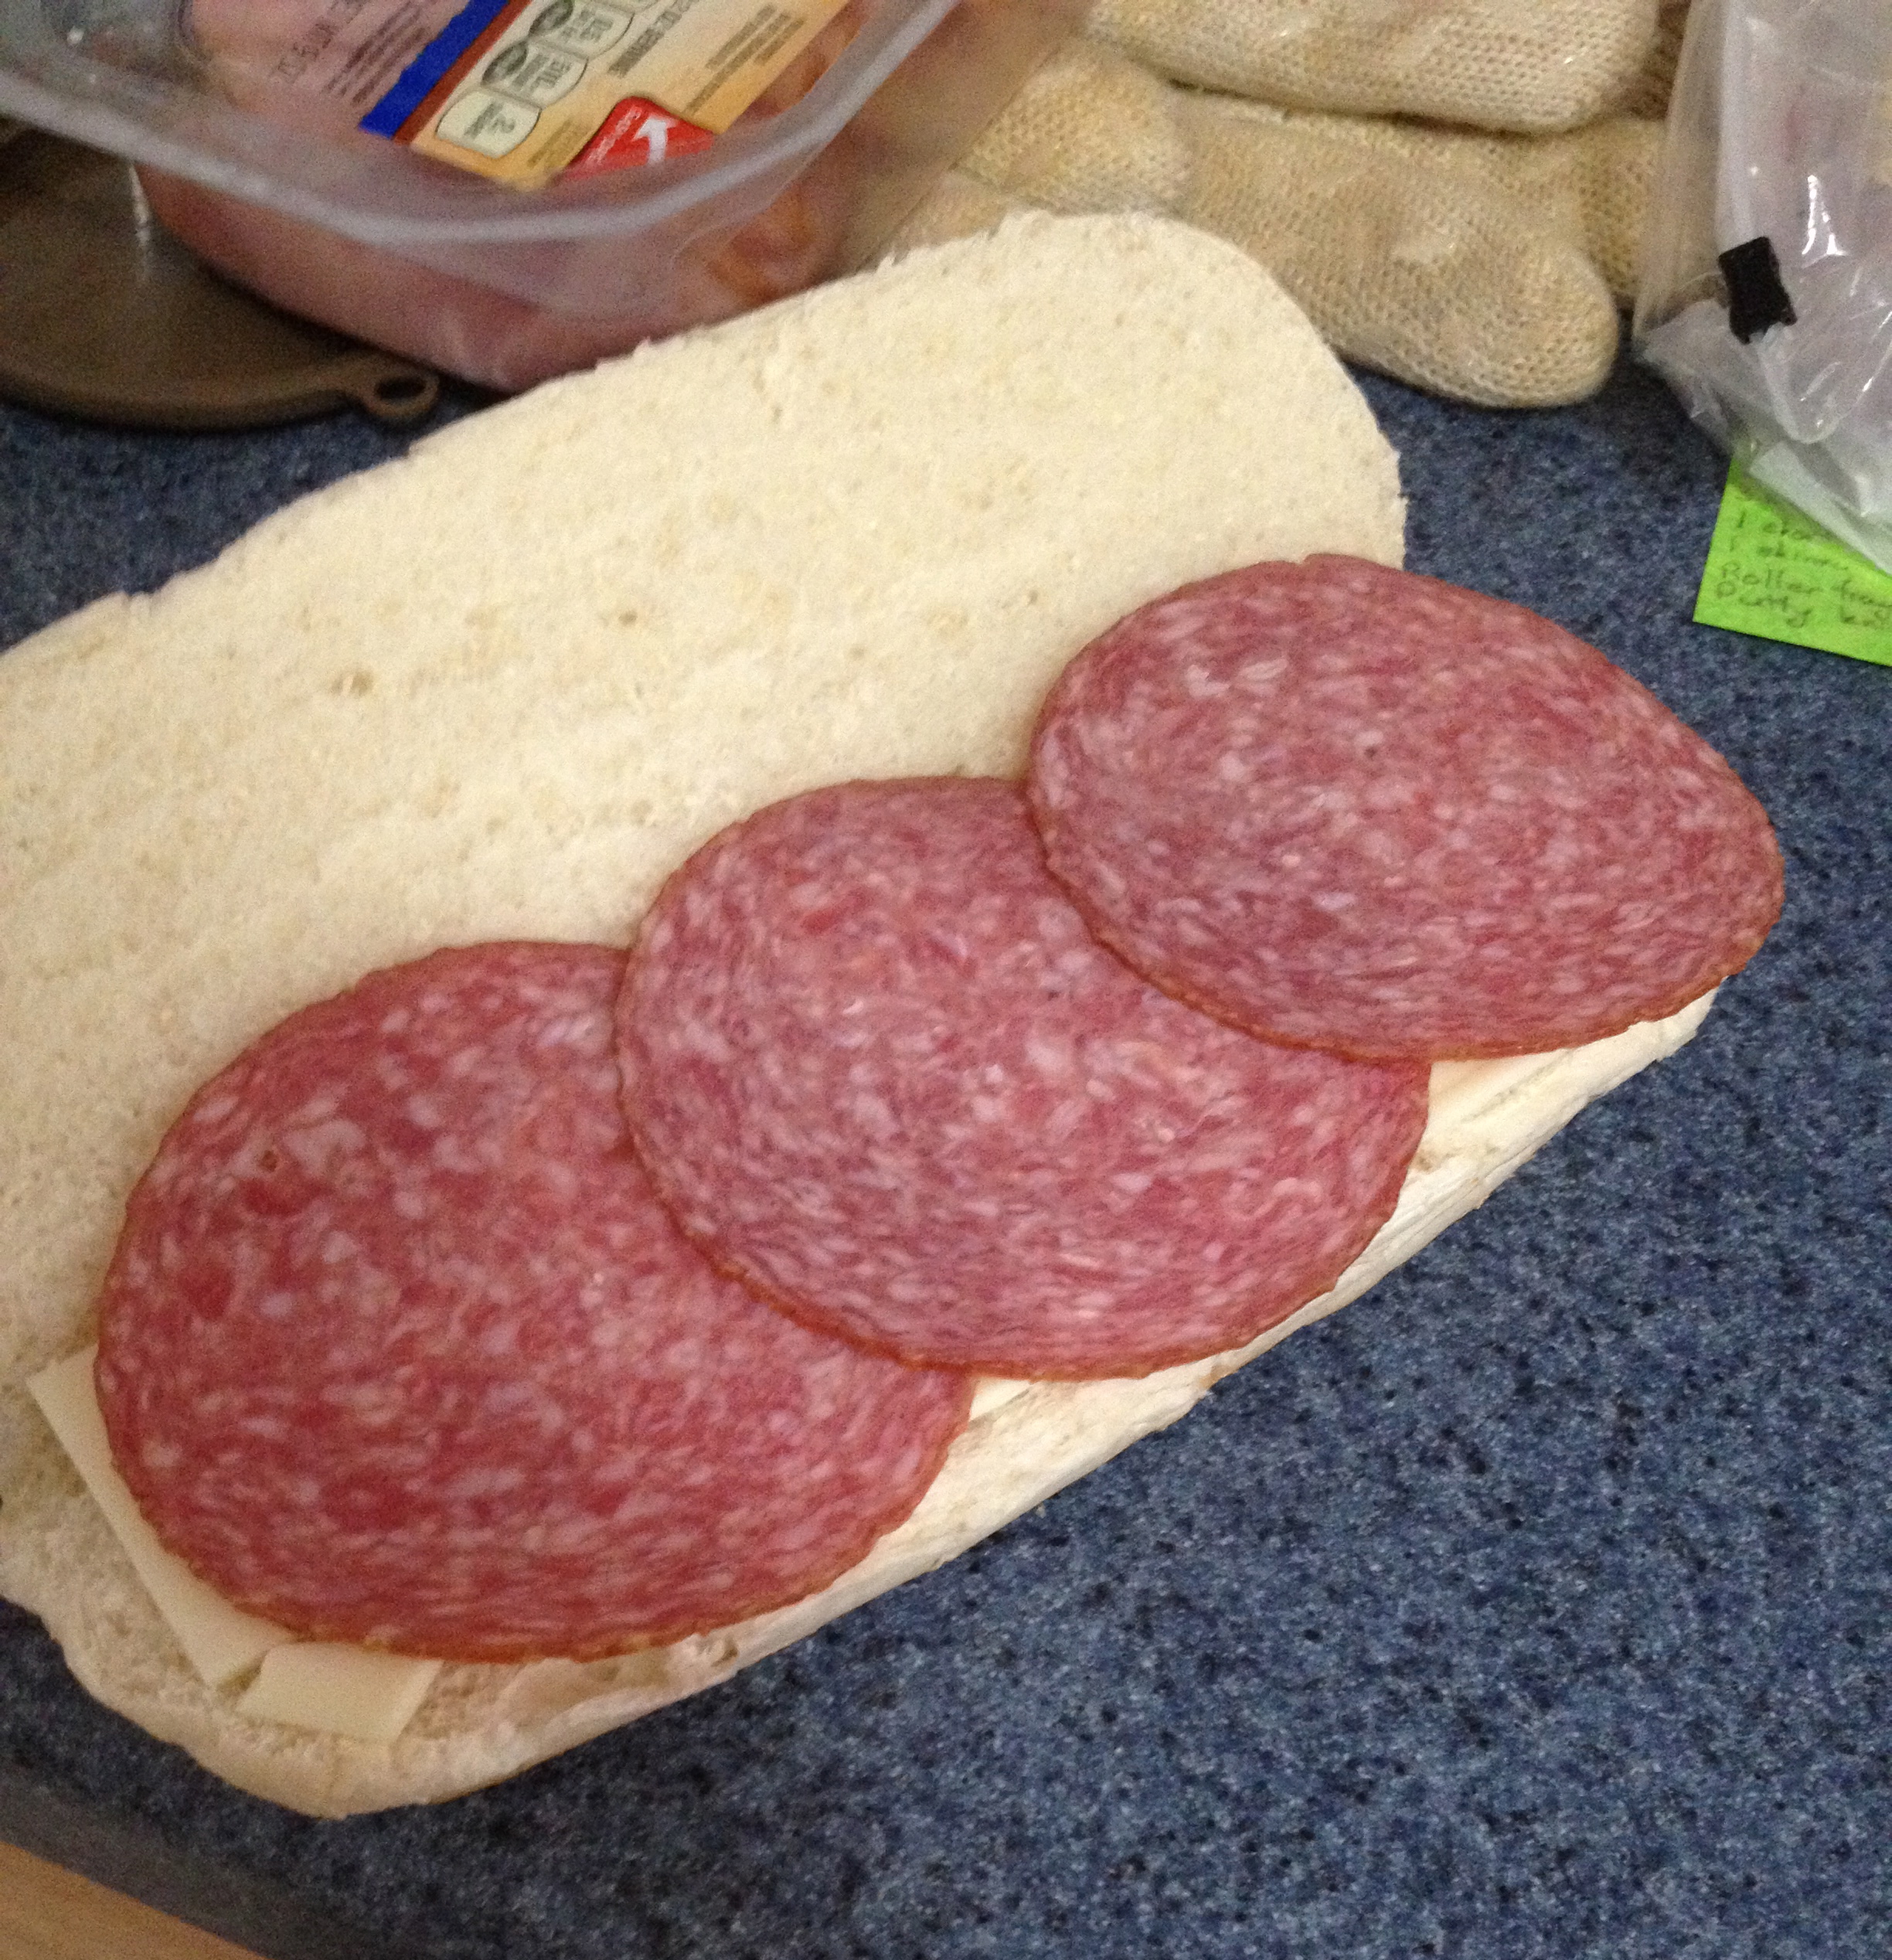
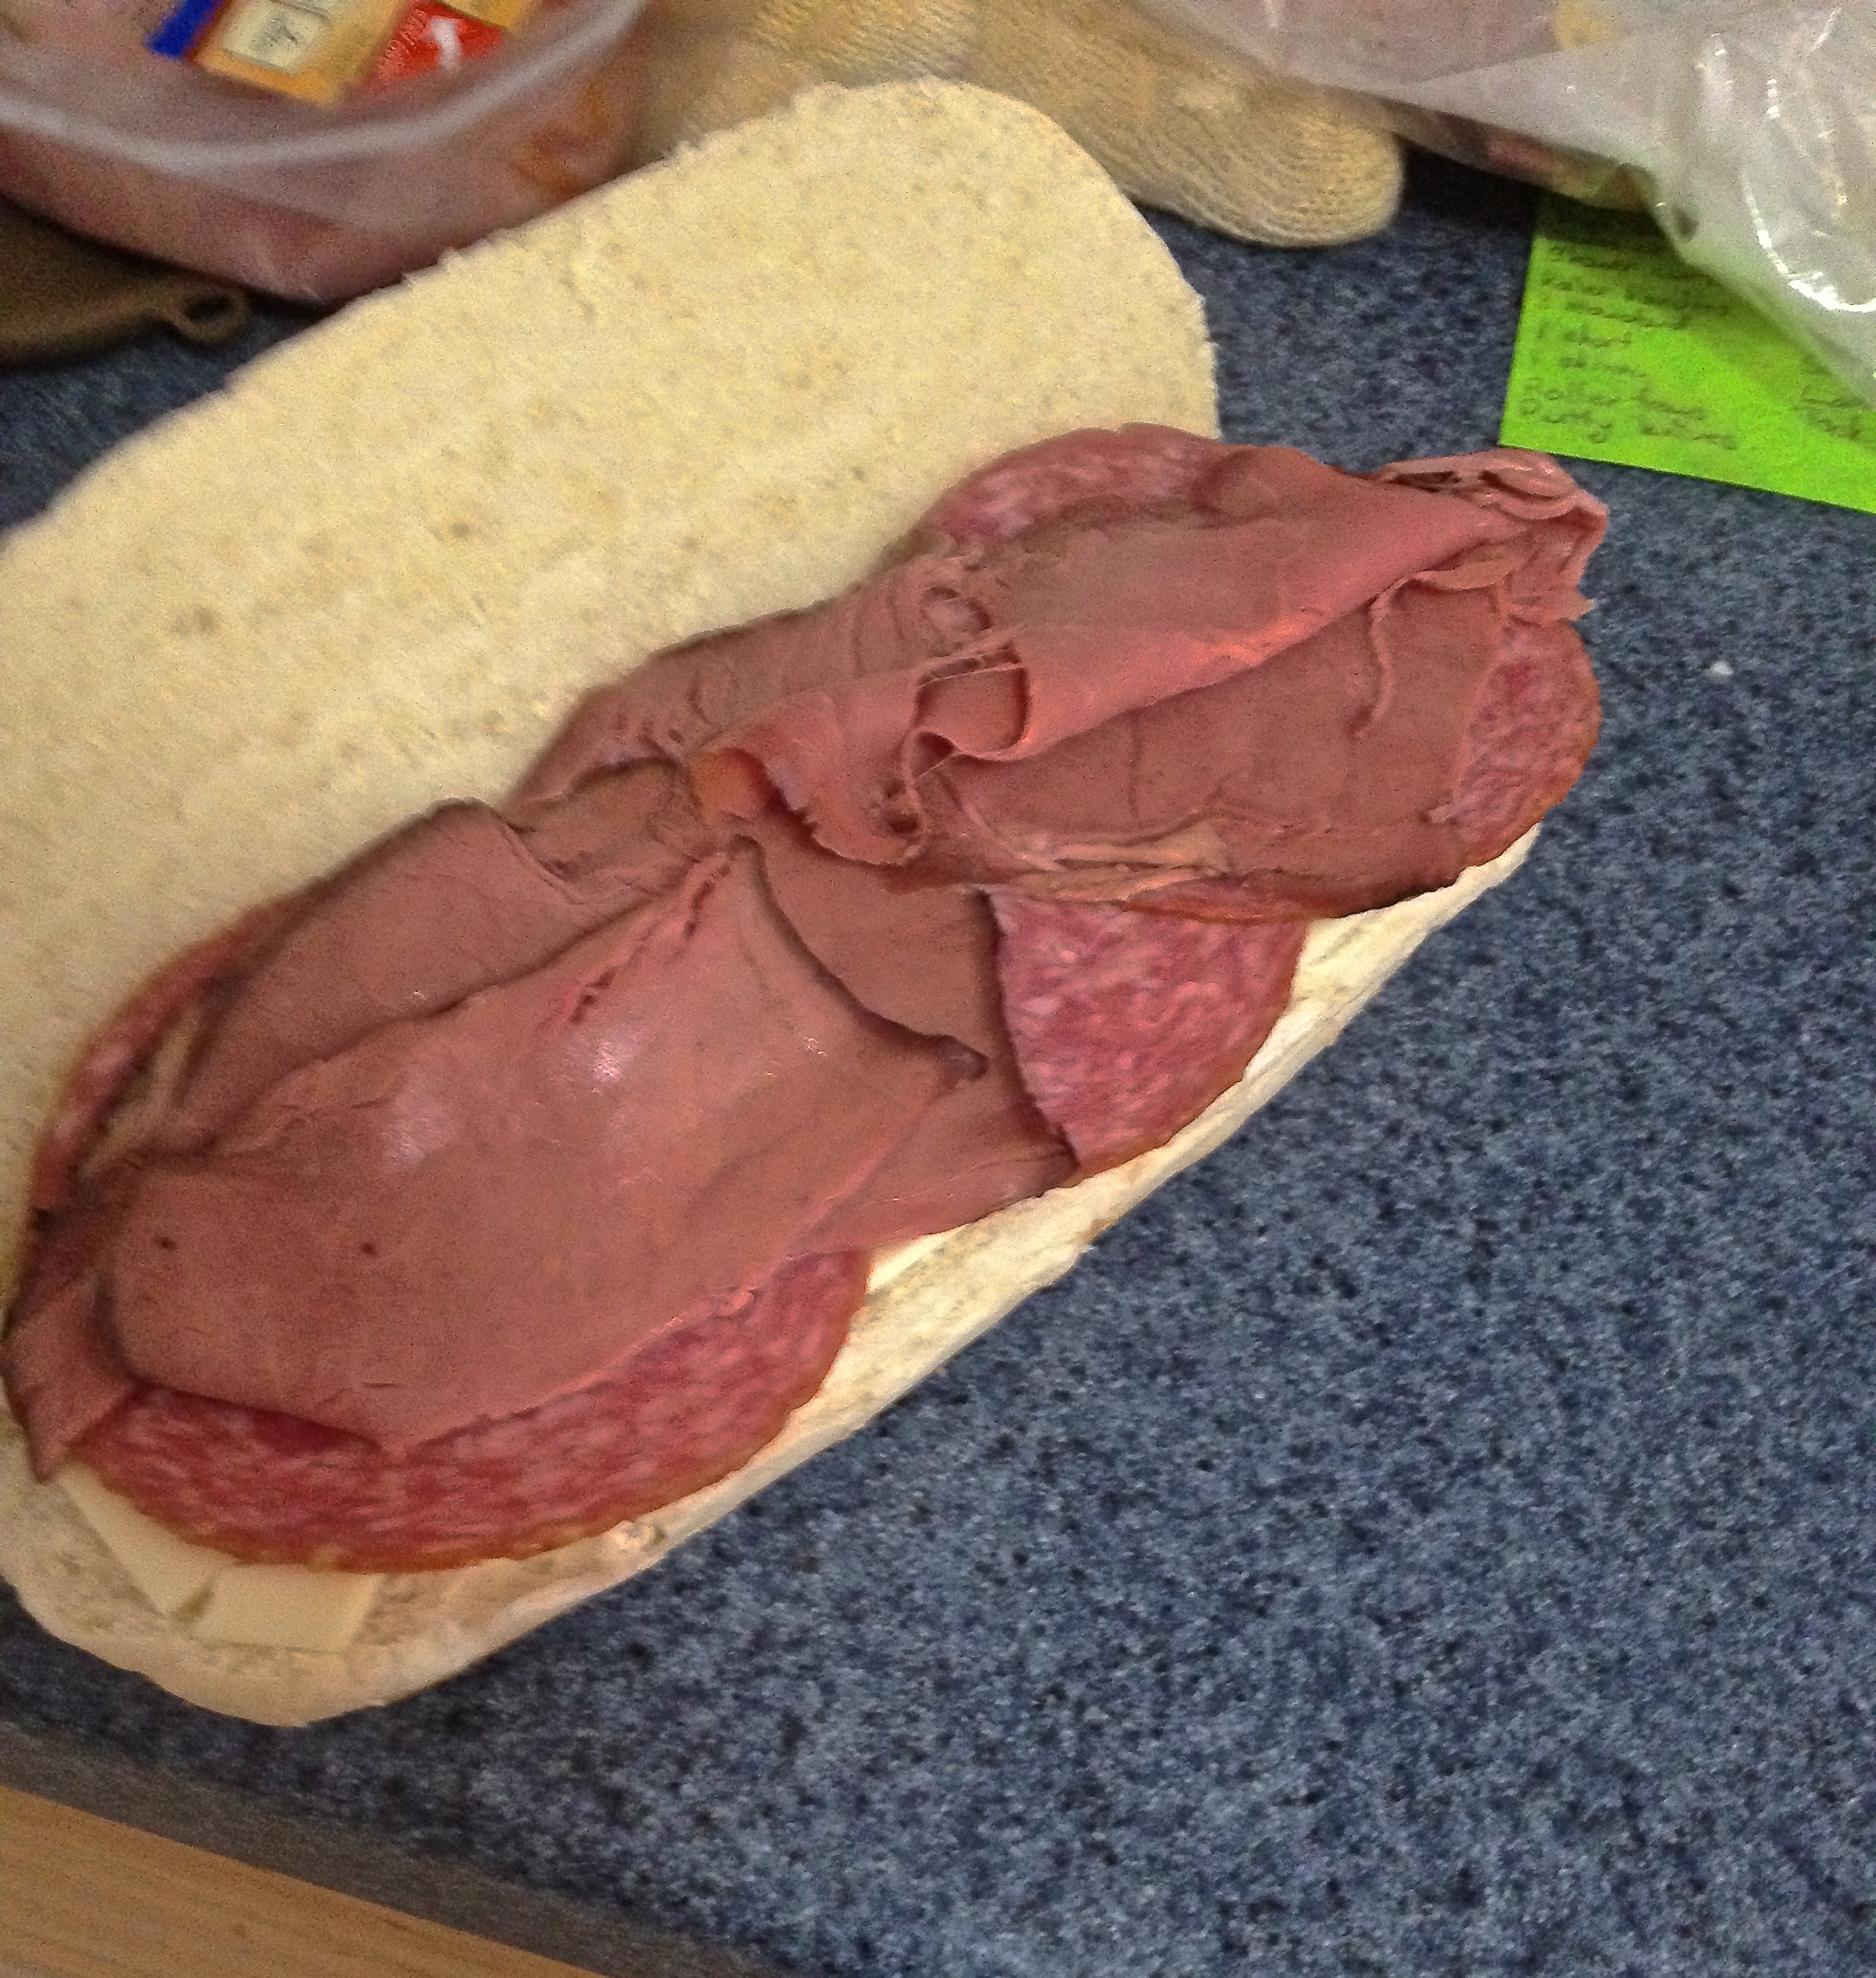
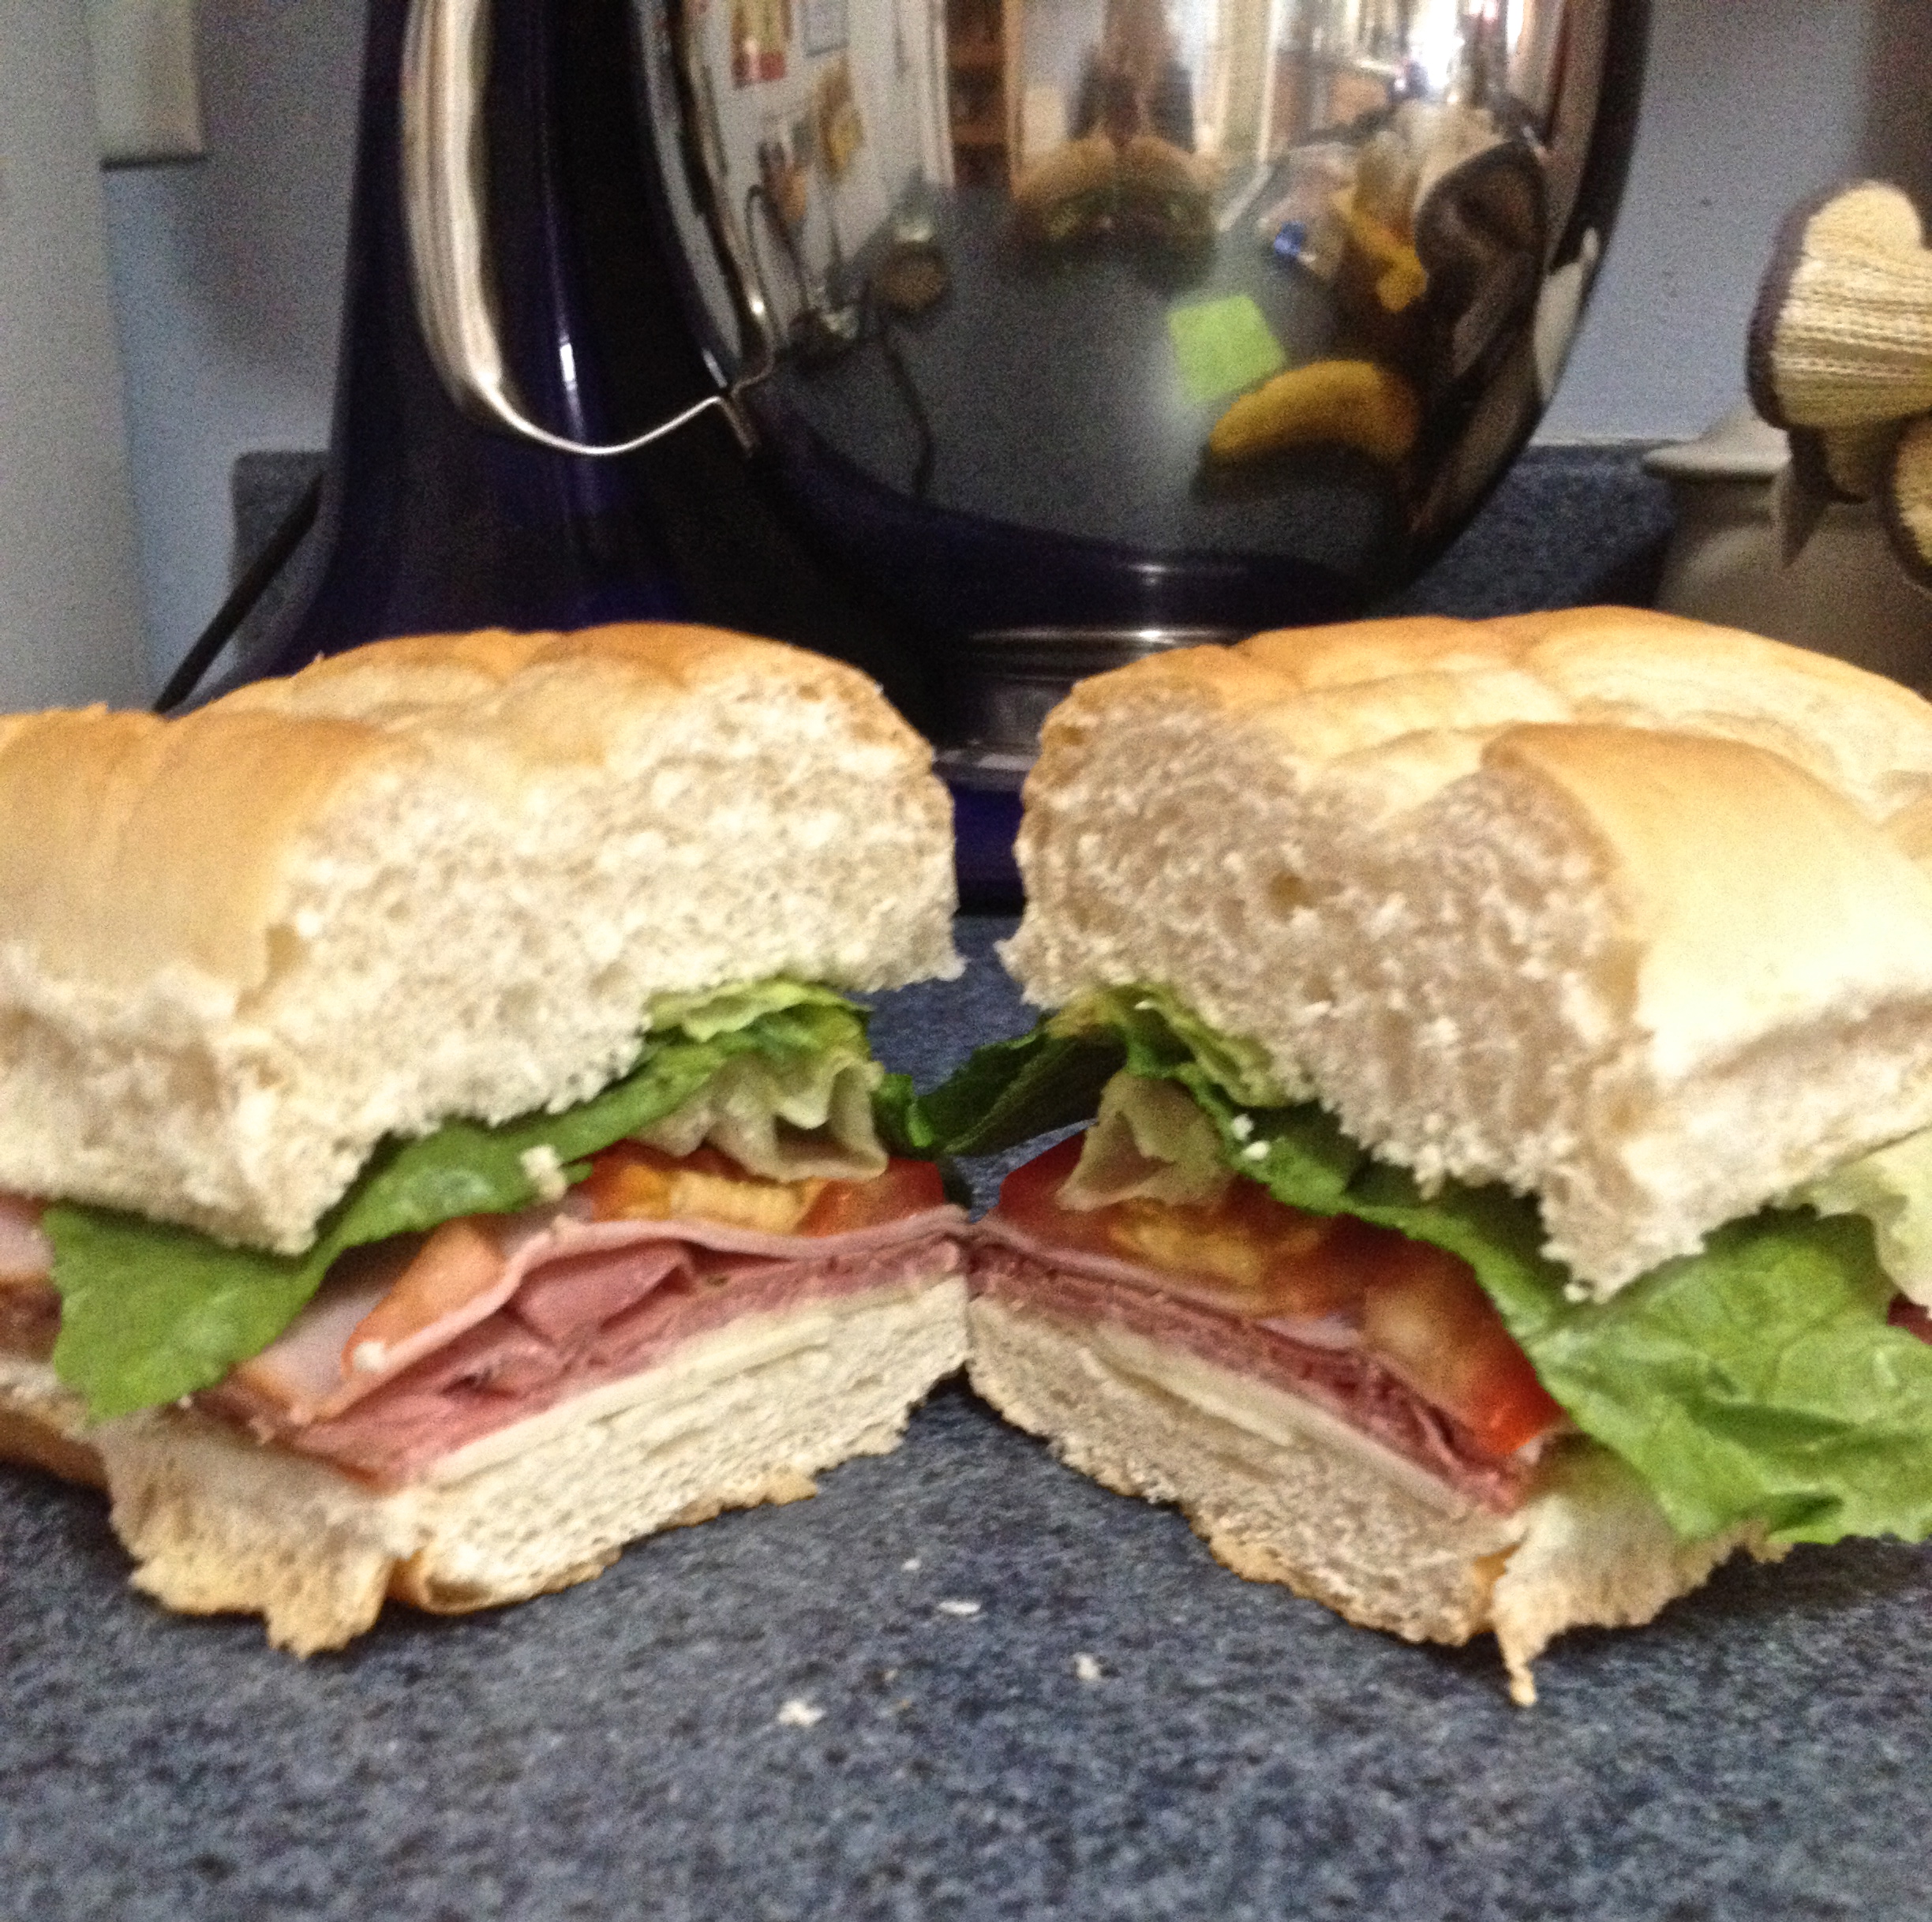
Italian Sub on a Grinder Roll
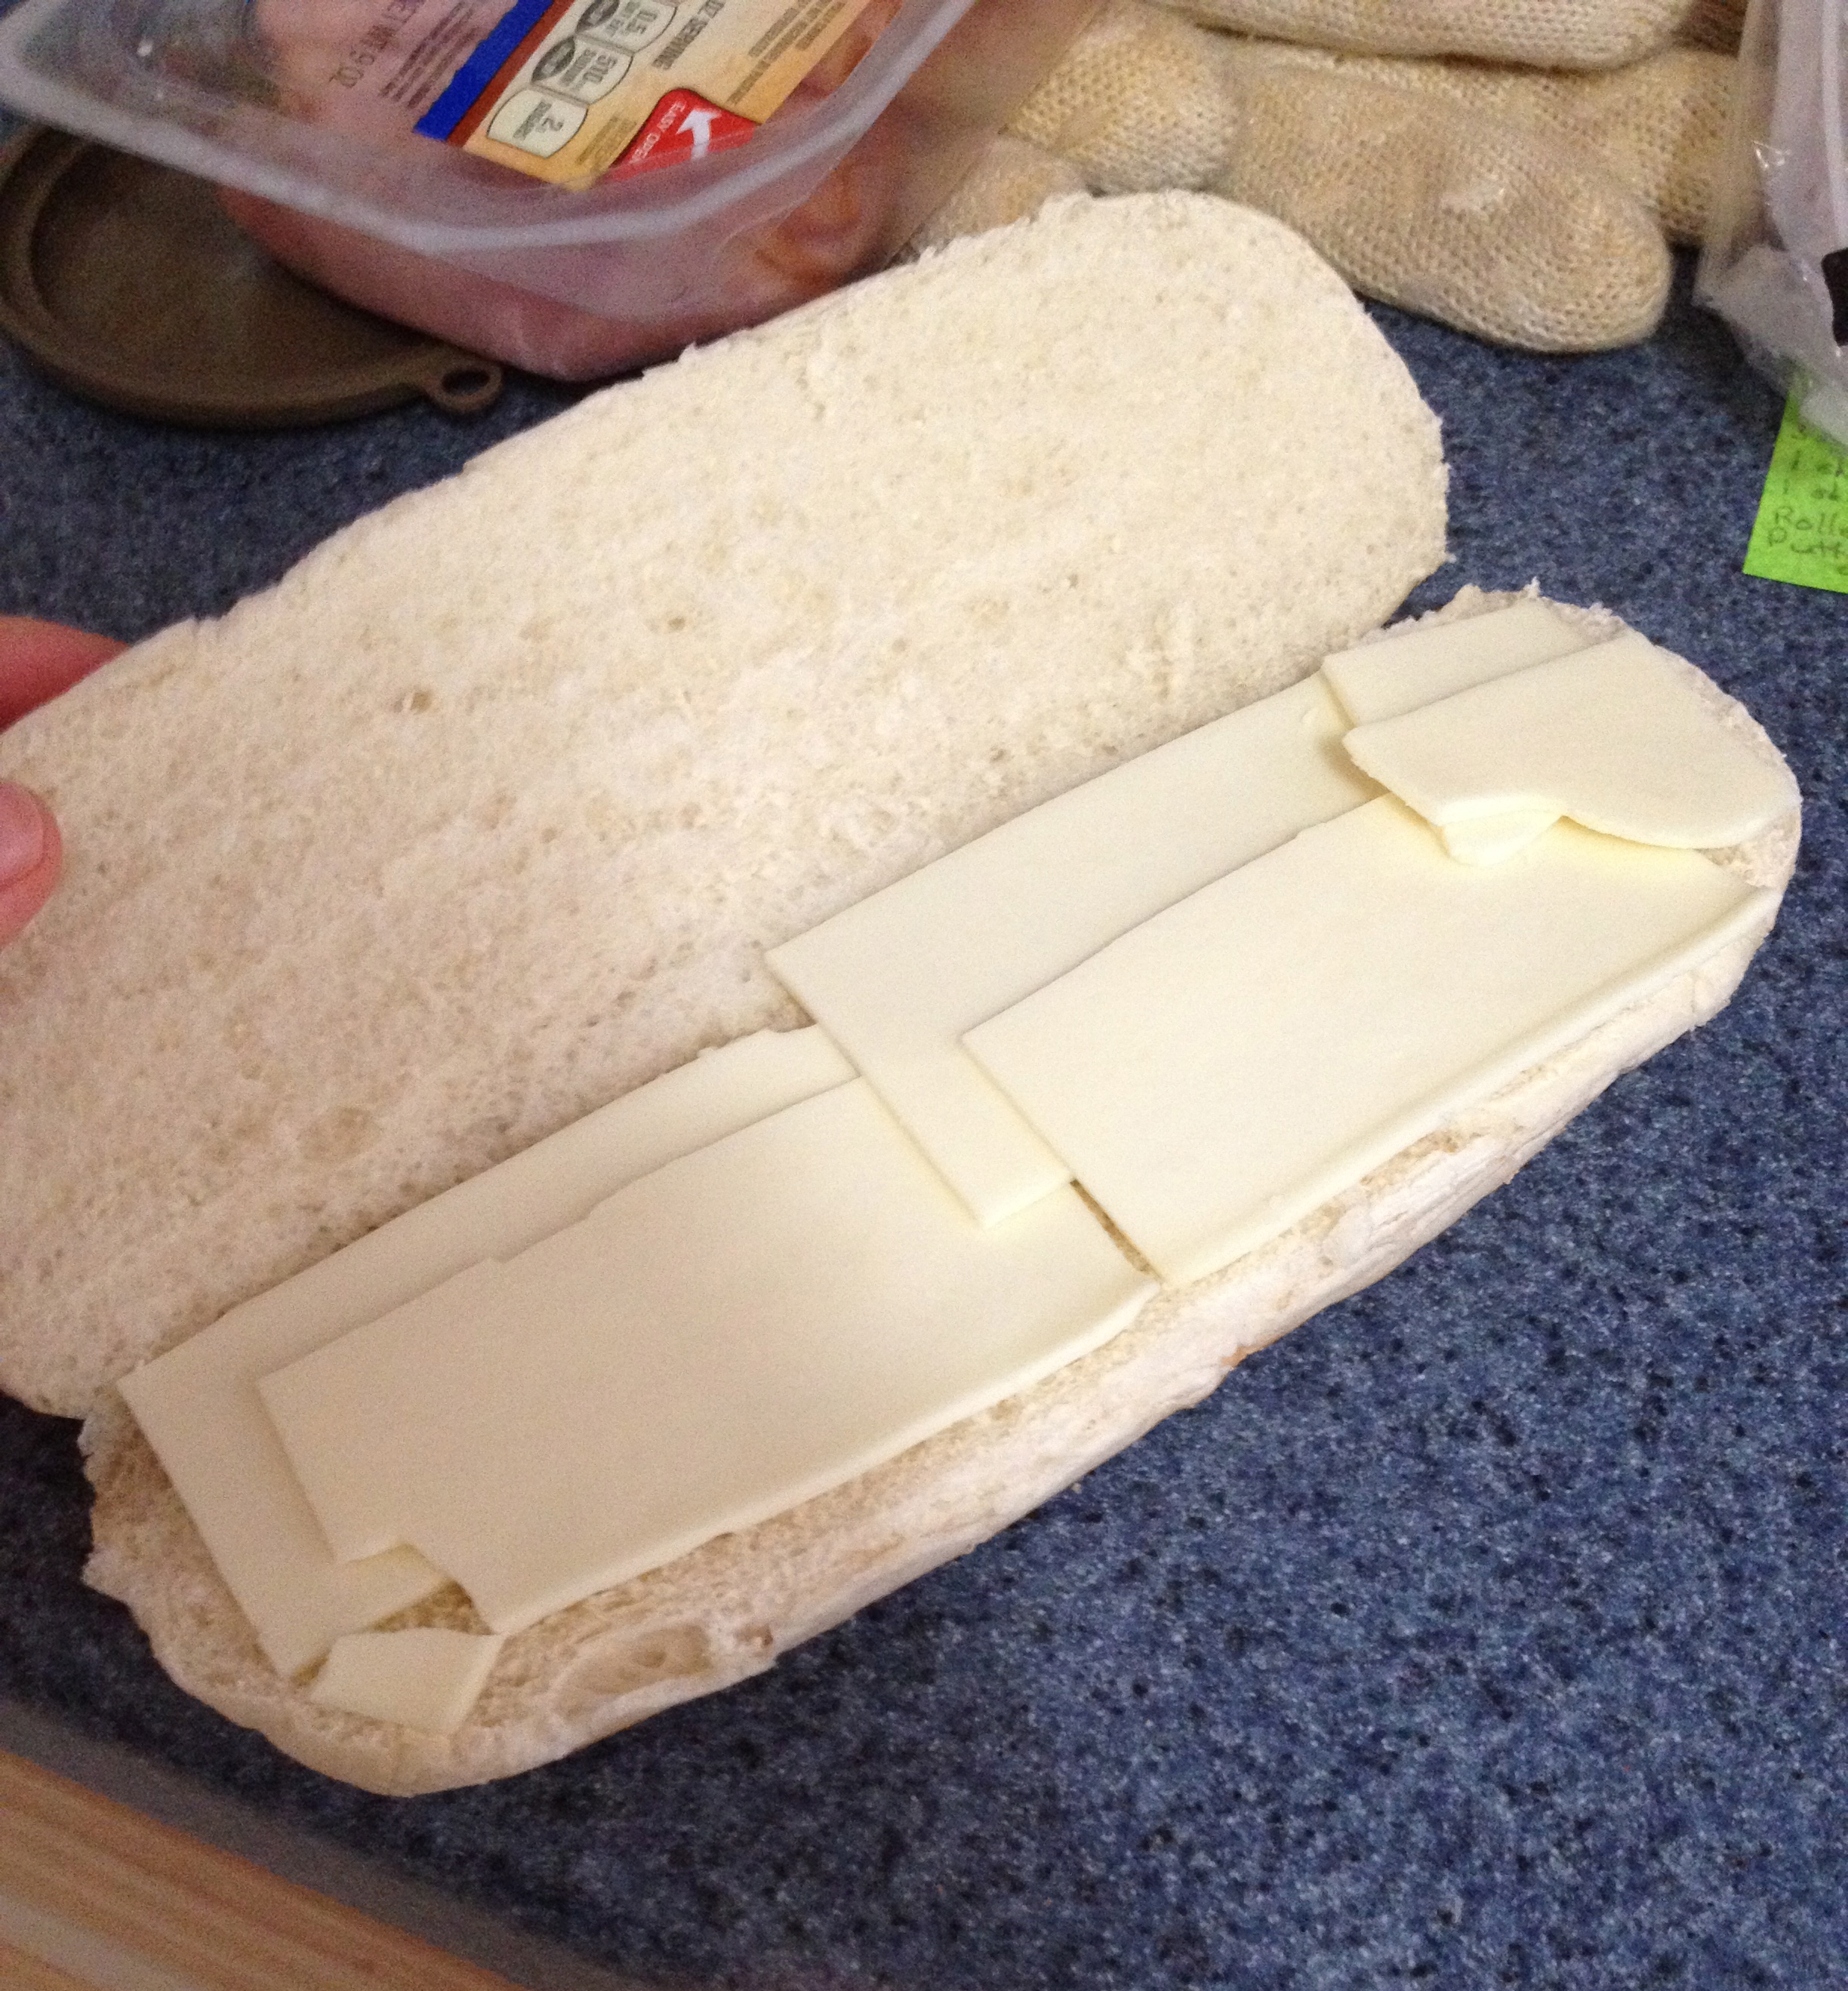
This sandwich really is all about the assembly. The ingredients are simple: roast beef, salami, ham, sliced cheese, lettuce/tomato, and Italian dressing. But in order to make this sandwich last until lunch without getting soggy (can you tell I hate soggy bread?), you have to really think about the layers of the sandwich. Here’s the assembly process:
Cut the roll in half length-wise. Then, on the bottom piece of bread, layer American cheese all the way across. Then, the salami. Next comes the ham, and then the roast beef. Now comes the tomato- once again, it goes in the middle to prevent soggy bread! And then the lettuce goes over the tomato. Since an Italian sub includes Italian dressing, put that in a little separate container and either pour it on the sandwich right before eating, or dip the sandwich into it as you’re eating. Here’s the assembly process in pictures:
You can obviously make your own variations on these sandwiches, too. For example, you can use canola mayo or low-fat mayo, and you can just use plain grilled chicken or tuna instead of making a salad with it. You can also simplify the ingredients, or add your own zip to them! That’s the beauty of sandwiches- they’re so individualized and can be as easy or complex as you desire!
I hope these recipes help make the eating process a little simpler. Never skip a meal because you’re too busy- eating is WAY too satisfying, and also keeps you going throughout the day! Enjoy!